The breadboard is the bread-and-butter of DIY electronics. Breadboards allow beginners to get acquainted with circuits without the need for soldering, and even seasoned tinkerers use breadboards as starting points for large-scale projects.
If you are taking your first steps in the world of DIY or microcontrollers, you might have received a breadboard in your Arduino starter kit or Raspberry Pi starter kit. Let’s look at what a breadboard actually is, where they came from, and how you can make use of them.
What Is a Breadboard?
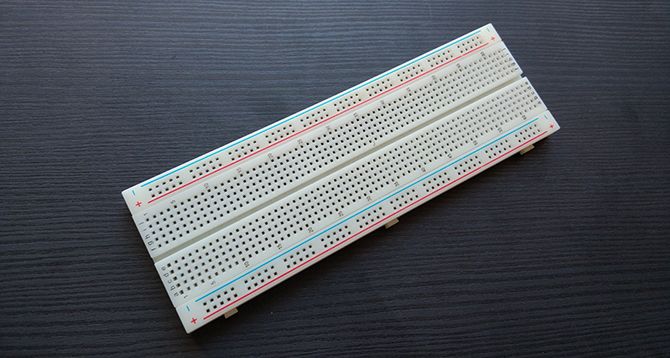
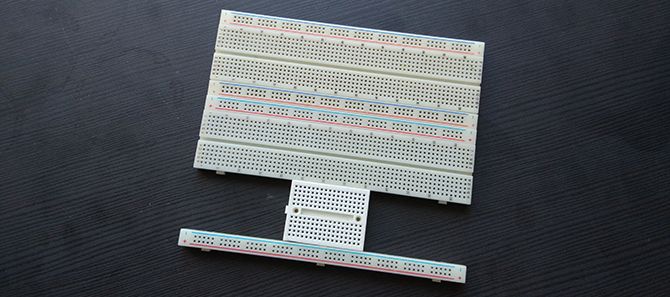
A breadboard is a simple device designed to let you create circuits without the need for soldering. They come in various sizes, and the design can vary, but as a general rule they look something like this:
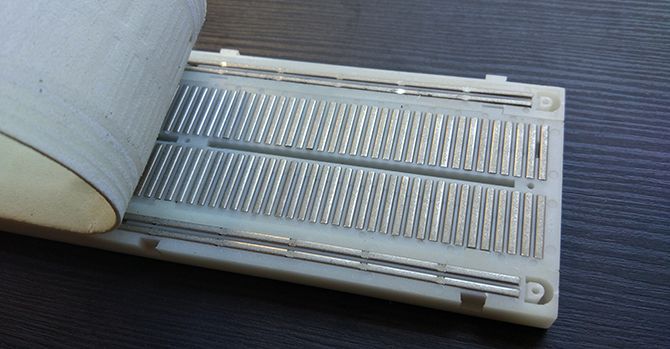
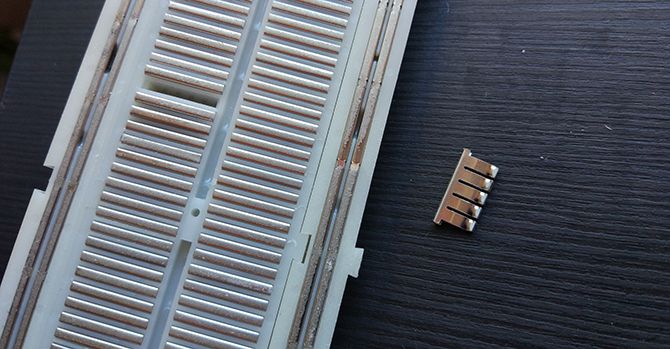
If you’ve never seen one before, you might wonder how to tell which holes do what. It becomes a little easier to understand what’s going on when you see one from the bottom.
Seeing it from this perspective makes it easier to understand what is going on. The two larger pieces of wire down each side are typically used to connect a power source to the board. They are usually referred to as power rails. The other smaller pieces of wire running perpendicular all the way across the board are used for components in your circuit. This diagram will help visualize this pattern from the top.
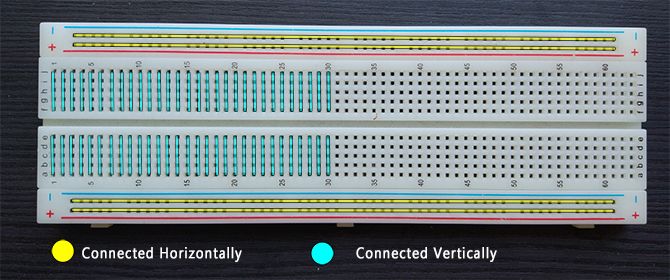
The power rails run horizontally as two rows at the top and bottom. Meanwhile, the vertical columns run inwards as you move down the board.
If you were to pull any one of these metal pieces out, you would see their purpose. They’re designed to grab onto the legs of any components pushed through the breadboard holes. This allows you to test circuits without having to worry about soldering, or making a good contact with the board.
As a general rule, this is how all breadboards operate, though they can come in a variety of sizes. Some breadboards have binding posts to attach to a power supply, but you can get by just fine without them. Also, most breadboards are designed to clip together, in case you need loads of room for a mega-project!
Before we move on, there is one other notable feature of breadboards to know about:
Integrated Circuits (IC) and Dual In-Line Packages (DIP)
See that little gap in the middle of the breadboard? That gap is there for a reason. Integrated Circuits!
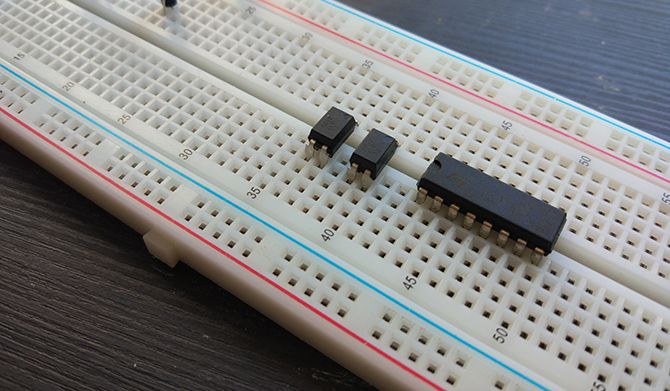
Integrated Circuits (IC) are in almost every electronic device. They run motors, regulate voltage, act as timers, perform logic tasks, and do pretty much anything you need them to.
ICs can have different numbers of pins, sizes, and functions. However, many ICs comply to a standard called Dual In-Line Packages (DIP), meaning they all share a set width. That width is—you guessed it—exactly the right size to fit across the gap in the middle of the breadboard. This makes it much easier to work with ICs without worrying about accidentally connecting the wrong pins together.
How Are Breadboards Used Today?
In recent years, almost all entry-level electronics involve the use of either an Arduino or a Raspberry Pi.
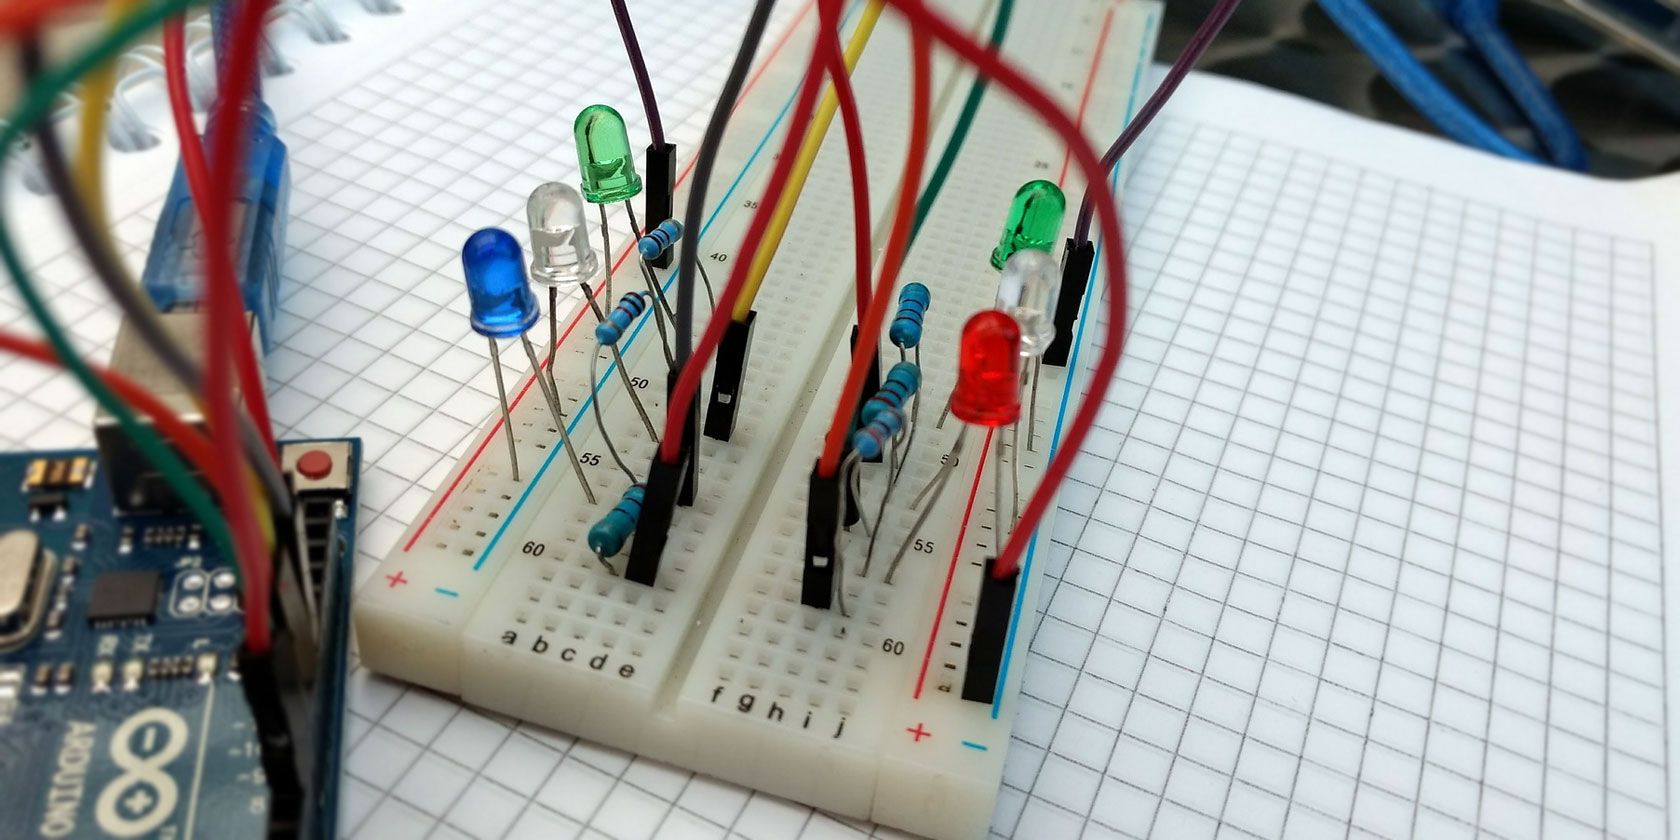
While there are many things you can do with a Raspberry Pi that require no external components, things get interesting when you use microcontrollers with DIY circuits. The Blink sketch for Arduino—typically the first thing beginners do—can be modified to use an actual LED and resistor combo on a breadboard.
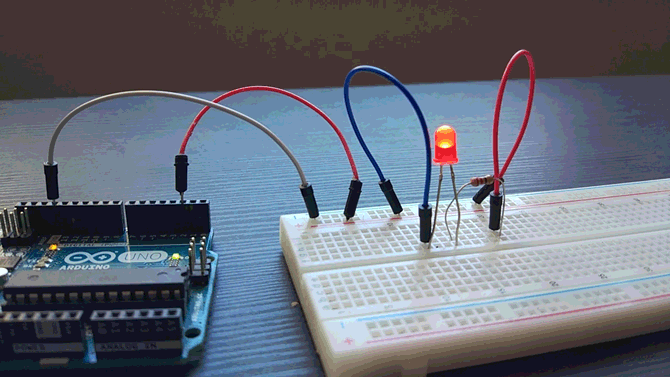
Using what we know already, we can see that the wire from pin 2 of the Arduino goes into the power line, before being bridged to the positive pin of the LED. A resistor goes in line with the negative pin, and the other end of the resistor goes into the ground side of the power line, before returning to the GND pin of the Arduino.
If you want to try this yourself, view the code for the modified blink sketch.
Pin Power
For simple projects like this, the power rails are not always used, but if you need to use multiple components which all require power, you can provide power from the power pins of an Arduino or Raspberry Pi
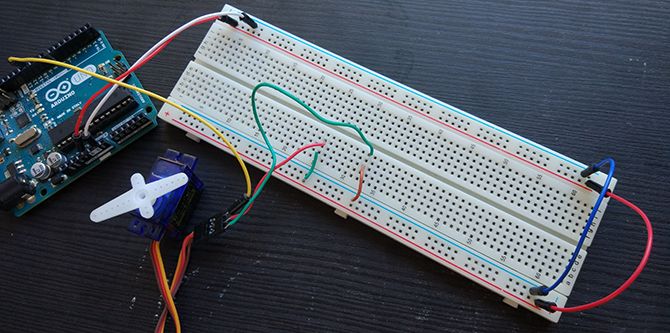
The picture above shows a servo, which requires power as well as instructions from the Arduino. We run cables from the 5v and GND pins of the Arduino to the top set of power rails. We then bridge the gap at the other end to supply power to the bottom power rails, and use small pieces of wire to provide power to the VCC and GND wires of the servo. This bridging technique for the power lines is a good practice to get into, as it’ll ensure your components always have access to power no matter where they are on the breadboard.
For a slightly more in-depth project using Arduino, LEDs and a breadboard check out our Traffic Light Controller beginner tutorial.
You use a breadboard the same way for standalone amateur electronics projects, as you would for Raspberry Pi builds. For an example project using multiple components, simple code, and a practical outcome, take a look at our Raspberry Pi Door Sensor tutorial.
What If You Don’t Have a Breadboard?
If you don’t have a breadboard, it is still possible to create simple circuits, but it’s just a little less convenient.
One method is to use a variation of point-to-point construction, either soldering components directly together, or wrapping wire around each component leg to join them. This method is incredibly fiddly, however, and if you are forced to use this method, it can help to use electrical tape to hold everything in place.
Proto-Board vs. Breadboard
An easier but more permanent method is to use proto-board. These boards are covered in holes with copper rings around them, allowing you to create circuits by soldering components in place and connecting them with wire or more solder. This is a much more permanent solution though, and usually comes later in the process once you know your circuit is going to work without any problems!
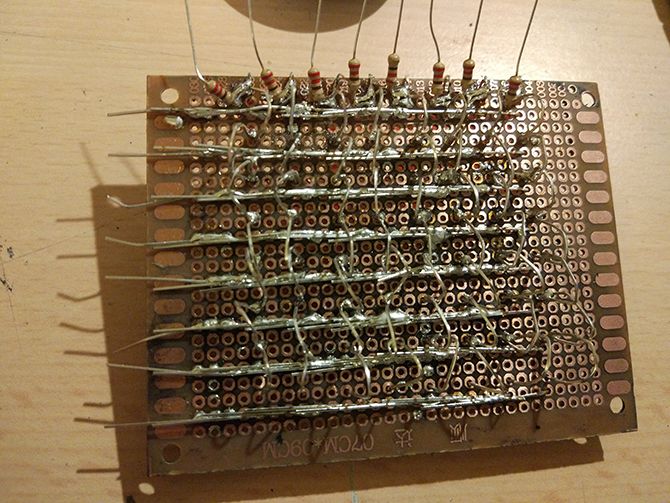
This image is from our Motion Activated Christmas Wreath tutorial and is the perfect example of a project that would require the use of proto-board over a breadboard.
Printed Circuit Boards (PCB)
A final example would be to make your own printed circuit board for a project.
This is a permanent solution, made custom for your circuit. Usually, printed circuit boards are the last step after testing on both breadboard and proto-board. There are many companies which will make PCBs to order, though it is possible to make them yourself at home if you want the full DIY experience.
YouTuber Extralife has a video explaining how the process works:
Take Your First Steps With Arduino or Raspberry Pi
The breadboard is the perfect accessory to learning electronics at any level.
Whether you are taking your first steps with Raspberry Pi beginner projects or Arduino beginner projects, the breadboard is the place to start your tinkering.
Read the full article: What Is a Breadboard and How Does It Work? A Quick Crash Course
Read Full Article
No comments:
Post a Comment