
Windows 10 makes data backups effortless. Amidst many changes to Windows 10 maintenance settings, Microsoft has been stepping up its backup game without dropping tried and tested features. Windows 10 is well prepared for the cloud based storage revolution and still offers everything you need to secure files locally.
We have summarized every native backup, restore, recovery, and repair option we could find on Windows 10. Use our simple tips and never despair over lost data again!
Local Storage Backup
Local storage is the practice of saving your files onto physical locations such as your PC or onto a thumb drive. These are safe and readily accessible methods of saving files which do not require an internet connection.
File History
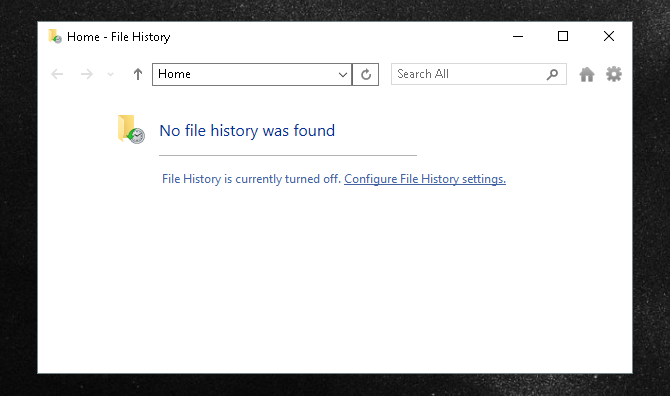
File History is a relatively new method of securely saving files onto a separate pen drive (available for Windows 8 and 10).
To find the File History program, hit the Windows Key, search for file history and click Restore your files with File History. You can also access this program in your Control Panel under Windows Key + X > Control Panel > System and Security > File History.
The difference between File History and a simple file transfer is its ability to schedule backups regularly onto your thumb drive. From the File History window, click on Configure File History settings to get started.
File History automatically finds external storage devices plugged into your computer.

Before turning the File History on, click on the Advanced settings and set your preferred schedule.
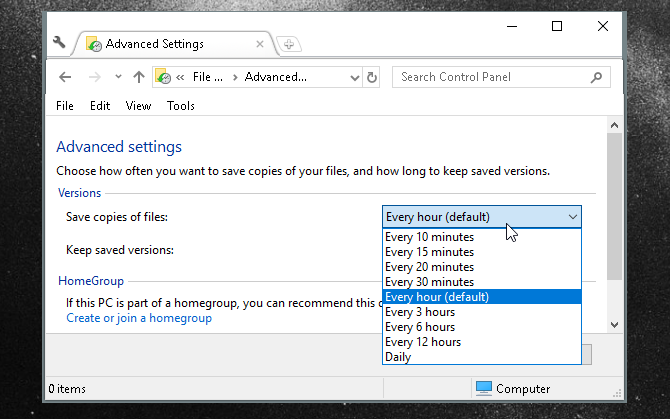
Save your changes and Turn on File History in order to keep your backups safe and documented. By default, File History only copies files from: Libraries, Desktop, Contacts, and Favorites.
System Restore
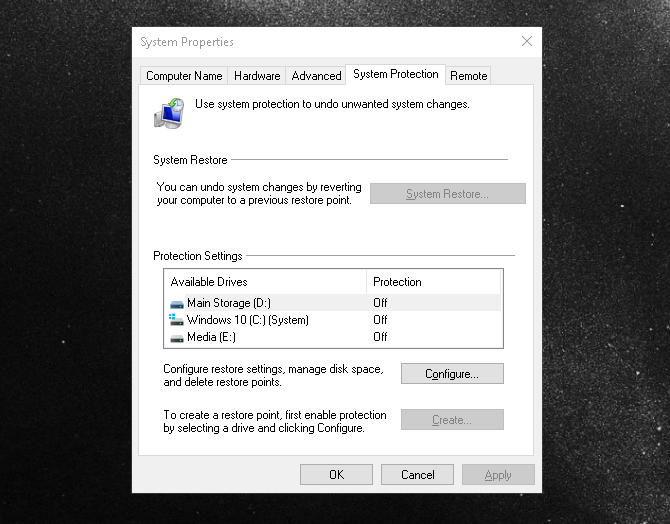
System Restore is a long-time companion of Windows and a convenient method of backing up your system image along with regularly used files.
To find system restore press the Windows key, then search for restore point and click Create a system restore.
As a faithful user of System Restore, I can assure its necessity when experimenting with driver downloads and obscure software. Microsoft writes:
Sometimes, the installation of a program or a driver can cause an unexpected change to your computer or cause Windows to behave unpredictably. Usually, uninstalling the program or driver corrects the problem. If uninstalling doesn’t fix the problem, you can try restoring your computer’s system to an earlier date when everything worked correctly. — Microsoft.com
Simply create a restore point to a point where your Windows machine is working regularly to have a safe state of your PC. To restore to a previous point, open the Create a system restore window and click on the System Restore button to get started. Though this program does not allow the user to access particular documents, System restore is great to save states of your PC in case of an operating system (OS) failure. If you’re interested in a fail-safe method to toy around with your computer’s OS, look into virtual machine software.
Backup and Restore
Backup and Restore, not to be confused with System Restore, is a program originally available in Windows 7, which backs up data files from your system library and any particular file and folder (or all files and folders) present on your hard drive.
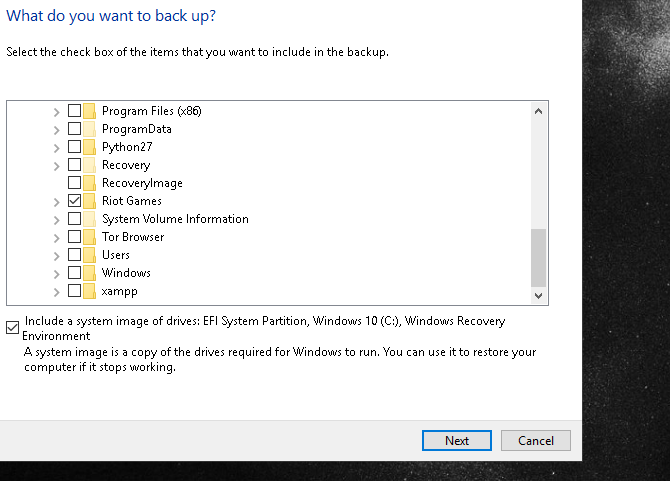
Backup and Restore provides a bit more freedom to back up files than File History, while File History has the added advantage of providing regular logs of your backups. Like File History, Back and Restore also provides regularly scheduled backups. You can even continually backup your whole hard drive to an external or alternative internal hard drive, doing away with the need for third-party backup software.
To launch Backup and Restore, go to Start to search and pick Backup and Restore. Our Backup and Restore guide will show you how to set up your first backup.
Recovery Drive Creator
Windows 10 conveniently offers a program named Recovery Drive Creator, which creates backup system files of your OS. You can then use this recovery drive to install or re-install Windows in case anything tragic happens to the PC.
To access this tool, go to Start (press the Windows key), search for recovery drive, and select Create a recovery drive.

The process is straightforward and saves you the pain of dealing with less reputable third-party USB recovery software. Microsoft thankfully provides a clear, concise and official Wiki article on how to use the program.
System Repair Disc
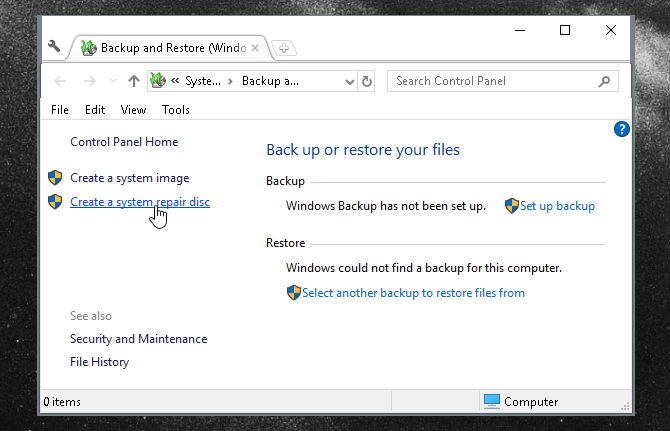
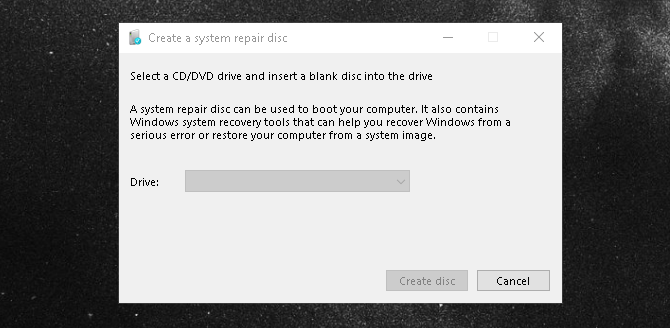
Along with creating a recovery thumb drive, Windows 10 allows you to create a recovery CD to back up your PC. To find this option open Start, search for backup and restore, and pick Backup and Restore (Windows 7). You have the option to Create a system repair disc on the left-hand side of the window. Note that this requires a CD/DVD drive.
Creating a system repair disc—like a Recovery Drive—is a simple and straightforward process. Microsoft has also been kind enough to provide an official article covering the program and its features as well.
Alternatively, you can use these tools to create a Windows rescue disk.
Third-Party Backup Software
Third-party backup software is a tricky subject, considering the wavering quality of their backups. Certain hard drive companies, however, like the folks at Western Digital, provide free software like Acronis True Image WD Edition Software, so be sure to check your hard drive creator’s website to ensure you are using proper backup software for your particular PC.
Acronis True Image WD Edition can clone drives, backup the operating system, applications, settings and all of your data, while also securely wiping any confidential data you no longer need. Acronis True Image WD Edition provides you with all the essential tools you need to recover your computer system should a disaster occur, such as losing data, accidentally deleting critical files or folders, or a complete hard disk crash. If failures occur that block access to information or affect system operation, you will be able to restore the system and the lost data easily. — Support.wdc.com
If you are going to use a third-party software to back up your computer, please be sure to study up on the software before putting your digital life in its hands.
Cloud Storage Backup
Cloud-based storage doesn’t depend on your thumb or hard drive. In fact, it doesn’t depend on you at all; cloud-based storage is an increasingly popular method of backing up both personal and system files (along with a slew of other things), while also keeping those files accessible anywhere there’s an internet connection.
OneDrive
OneDrive is a popular cloud-based storage outlet made by Microsoft, which provides up to 15 GB of free storage if you were lucky enough to sign up and claim it in time, and 5 GB for everyone else.
OneDrive allows users, via the desktop program or the mobile app, to reach files loaded in their account’s repository.
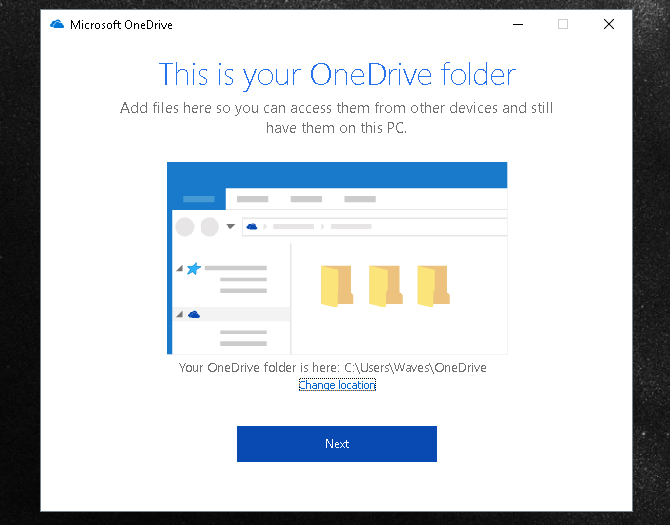
After you download and install OneDrive, the storage system shows up in your File Explorer as a normal USB or external memory storage drive would. Simply sign into your Microsoft Live account and you can enjoy the cloud storage space.
You can even access your files on the go using the mobile OneDrive application available on Android, and iOS. The prices for additional storage plans are compatible with other cloud-based storage companies, such as Dropbox and Amazon Cloud.
Microsoft Azure Backup
Last year, Microsoft announced anyone with a Windows 10 system can seamlessly back up their files in a cloud-based service named Microsoft Azure. Microsoft Azure is a subscription-based online backup system, which promises to keep your files safe and sound as well as secure.
![]()
But don’t be misled into thinking Microsoft Azure is only a backup software; there are many great facets to Microsoft Azure, which makes it an impressive and easy to use cloud-based program.
Microsoft has published official resources explaining how to download, install, and configure Azure Backup to facilitate the process. This goes even further regarding the complete Microsoft Azure program. To learn about how you can use Microsoft Azure as a competent and savvy business resource, head over to the Microsoft Azure YouTube channel.
Honorable Mention: NAS Systems
I wouldn’t be doing my job if I didn’t mention Network Attached Storage (NAS) systems. NAS systems are essentially collections of hard drives, which are accessible via a network connection. Because you actually own these systems, you are more in control of who and what can access your files and information.
Although cloud storage is more widely used for its simplicity and rapid affordability, it may not be the most secure option for your sensitive documents and information.
NAS systems, on the other hand, are fully within the owners’ control.

The price and security of a NAS system makes them great for small businesses or large volumes of information that are better left kept in physical form, as well as allowing more technologically savvy users access to network attached RAID arrays.
In short, NAS machines are personal, scalable, and manageable clouds.
For the average user, however, the benefits of a NAS system above cloud storage for backups are negligible, and cloud-based storage systems are often easier to use and cheaper up front to manage.
Don’t Lose Your Data Again
Backing up is a safeguard often underutilized and underappreciated by the average user. That is until something bad happens and those priceless photos of Coachella 2008 are left faded and forgotten. Don’t allow the experience of reading three year old writing samples of your “Gothic pseudo-fiction” phase to pass you by; never be without your important files and folders again!
Read the full article: The Ultimate Windows 10 Data Backup Guide
Read Full Article
No comments:
Post a Comment