It’s a constant struggle to keep a healthy amount of free space on your computer, especially if you have a small drive.
Windows has always offered tools to free up disk space, but Microsoft has made it even easier to do so in the April 2018 Update for Windows 10. The trusty Disk Cleanup utility is still around, but there’s a new tool you should know how to use. Here’s a quick overview.
How to Save Space With the New Disk Cleanup Tool
Unlike Disk Cleanup, the new space-clearing utility is in the Settings app. Head to Settings > System and click the Storage entry on the left to access it.
Here you’ll see the Storage sense header, which isn’t new. If you enable this, Windows will automatically clean up unnecessary files when you run low on space. We’re interested in the Free up space now link below this, which is a different tool.
After you click it, wait a few moments while Windows scans for files it can remove. You’ll then see a list of categories you can safely remove from your PC with brief descriptions. Another small benefit that this has over Disk Cleanup is that it doesn’t show categories that are empty.
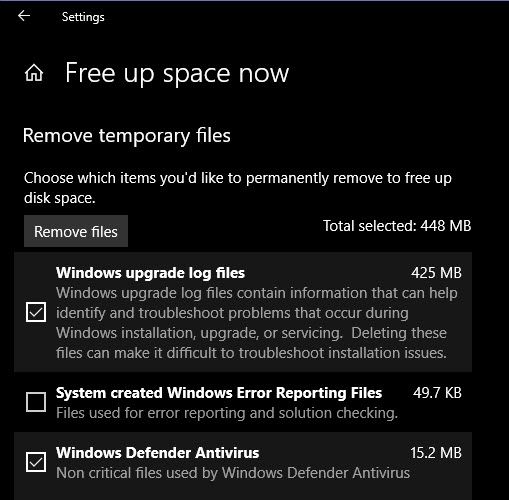
Check all the boxes you want to clean up, confirm how much space you’ll save at the top, then hit the Remove files button.
Most of the items here, like Temporary files and Delivery Optimization Files, are safe to remove. But you should take care not to clean Previous Windows installation(s) or the Recycle Bin until you’re sure you don’t need them.
This previous installation data allows you to revert to a prior version of Windows 10 if you change your mind about the upgrade. Windows removes this automatically after 10 days, so you’re best off keeping it until then in case you run into a problem.
If this didn’t free up enough space for you, check out other Windows folders you can delete to save space.
Read Full Article
No comments:
Post a Comment