If you’ve looked into your boosting your internet speed or getting around blocked content, you’ve probably come across DNS servers, which are used to translate website domain names into IP addresses.
While using your ISP’s default DNS works fine, customizing your DNS has lots of advantages. But digging into your computer settings to change your DNS provider is a hassle, and keeping all those DNS server IP addresses straight isn’t always easy. Thankfully, a small utility can help solve both these issues.
Easily Switching Between Multiple DNS Servers
- Download the free Public DNS Server Tool (the link is in step 1 under Setting up public DNS servers).
- Extract the downloaded ZIP and run the PublicDNS.exe file inside.
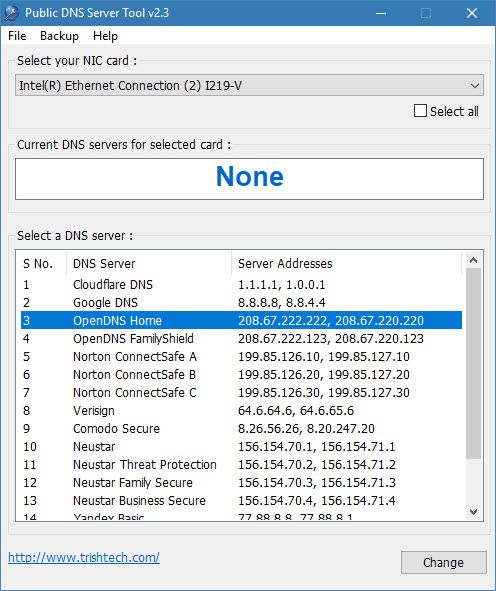
- Confirm administrator access for the app. You’ll see the tool’s main interface once it launches.
- First, you should create a backup of your current DNS settings for easy restoration. Select Backup > Backup from the menu bar and choose a location to save the backup.
- Once that’s done, select your wireless card from the top dropdown menu or choose Select all to apply changes to all of them (if applicable). You might see multiple options if you have both an Ethernet and wireless connection available.
- Next, select the DNS server you’d like to use from the list. This tool currently supports 16 options, including Cloudflare’s new DNS, Google’s Public DNS, OpenDNS, and more.
- With the server you want to use highlighted, click Change.
- You’ve successfully changed your DNS options!
To restore your original settings, just visit Backup > Restore and import your backup file. For further reading, check out why third-party DNS is more secure.
Read Full Article
No comments:
Post a Comment