06 April 2019

5 Free Online Services for Sending Email to a Fax Machine

Send and receiving fax is old school. You might not see many fax machines these days, but they’re still in operation in certain workplaces. Insurance companies, banks, and realtors all use fax machines to quickly and securely exchange important documents.
Nothing else has managed to beat the fax machine at its own game—not even email. How can you send a fax without a fax machine, though? Thanks to online email to fax services, all you need is a PC with an internet connection.
These online fax services are functional, and best of all, they’re free to use. Let’s run through them and see how to send a fax from an email.
1. GotFreeFax

Using GotFreeFax is about as easy as it gets. Just enter your information as the sender, enter your recipient’s information and fax number, and then either upload a PDF, DOC, or JPG file. You can also add text to your fax in the text box provided (with formatting).
The main service is restricted to U.S. and Canadian fax recipients, but if you click the “Send an International Fax” button at the top of the page, you’re given the option to fax documents to various other countries.
No ads or watermarks are added to any free faxes you send. GotFreeFax is one of the few free services that allow this option. The only limitations are that your faxes can’t be more than 3 pages, and you can only send 2 free faxes per day.
For casual users, this free fax service is a good option.
2. FaxZero

FaxZero is, as the name implies, a zero-cost solution to sending fax online. You type the sender and receiver information into the provided form, including the recipient’s fax number. You can either attach a document, type a text message in the provided text box, or do both. The service supports DOC, DOCX, and PDF file formats for sending. It’s one of the fastest and easiest ways to send what is effectively an email to a fax machine.
The free version of this online app will insert an ad onto the cover page, and you’re only allowed a maximum of 3 pages, plus the cover page. With the ad, FaxZero might not be the best option for legal documents. You can send up to 5 free faxes a day, so it’s a good option for most users.
For a $1.99 fee (payable by PayPal) you can send up to 25 pages per document without ads. Like GotFreeFax, clicking “Send an International Fax” at the top of the page allows you to send fax abroad via email.
3. eFax

eFax claims to be the “number one online fax service” for millions of customers. It’s got a strong claim to that title, with a professional website and service that any consumer would be happy to use.
If you came across the eFax website, you wouldn’t think it offered a free service. It’s hidden away, but it’s there, although the downside is that its free service is only to receive faxes, not send them. To be able to send a fax through email, you’ll need to register for a 30-day free trial.
This’ll give you an allowance of 150 pages each of inbound and outbound fax pages. Additional pages will cost you $0.10 a page. You’ll have to provide your credit card details and sign up for a post-trial subscription costing $16.95, which you can cancel before your trial ends without paying anything.
eFax claims to support up to 46 different countries for international faxes, so if you need to send faxes abroad, you can.
You’re able to send a fax through the website, the eFax iOS or Android app, or you can send a fax by email. This is a perfect, inexpensive online fax service for anyone who doesn’t own a fax machine and doesn’t need to send or receive a high volume of faxes.
4. MyFax

MyFax is an interesting service with a slightly different setup than the other email-to-fax free services mentioned here. The free service acts as an advertisement to encourage users to sign up for its premium service with no fax-send limits and a dedicated fax number. The free service is pretty good for users who need to send one or two faxes in an emergency.
You can only send two faxes in a 24-hour period with MyFax’s free service. It isn’t clear how many pages you can send per fax, or whether there will be an ad cover page, so it’s probably safe to assume that there will be until you give it a test run.
You can only send to U.S. or Canadian fax numbers using this free service.
If you’re just looking for a quick way to send an email to fax, just fill out the form, type your message and attach a document. Then click “Send Fax”—it doesn’t get much easier than that.
5. FAX.PLUS

There’s not just one “number one rated fax service” here—there’s two! The second so-called top service is from FAX.PLUS, a rather professional looking outfit which claims to have corporate users ranging from Uber to Harvard University.
It’s clear that this service is targeting commercial users first, but it’s the free service we’re interested in. You get 10 free pages to send, with additional pages costing you $0.20 per page. The free service is solely for sending faxes via their website or using their email to fax service, and you aren’t able to receive faxes without upgrading.
Special mentions do go to their more advanced, premium packages. How many online fax services include slack integration, electronic signatures, and unlimited cloud storage? You can get some, or all, of these features from $4.99 to $49.99 a month.
You can send a wider range of documents using FAX.PLUS, including DOCX, XLSX, PDF, and various image file formats. You’re able to send to international fax numbers but FAX.PLUS may use more of your page allowance, depending on the destination. To send a fax, just type in the fax number, attach your document, add a message, and then click send.
One word of warning, however—you will need to verify your account by providing your cell number first before you can use the service.
Send Free Faxes Online by Email With Ease
Fax machines might be rare these days, but if you need to send important faxes on occasion, these online fax services can help you do it without hunting down some old-school tech. You’re only limited by page numbers, destination countries, and how often you want to send faxes during a 24-hour or monthly period. You might also have to accept watermarks or ads on any documents you send.
But do explore better (and faster) options like cloud printing and cloud sharing too.
You’re not limited to these free fax services, though. If you’d prefer, you can send faxes using your Android smartphone for free. These are great in a pinch.
Image Credit: kurhan/Shutterstock
Read the full article: 5 Free Online Services for Sending Email to a Fax Machine
Read Full Article
Your Amazon Order Never Arrived? Here’s What You Should Do
Amazon is one of the largest retailers in the world. However, despite its size, the company still occasionally gets things wrong. Amazon is afflicted by all the same issues that its competitors face; damaged goods, incorrect items being sent out, and occasionally, packages not delivered
If you bought something but the Amazon package never arrived, what can you do? Which dispute channels are available to you? Keep reading to find out what you should do.
You Ordered an Item, But It Hasn’t Shipped Yet
A Google search for Amazon delivery problems will reveal a lot of people complaining about this. What happens if you placed an order, but several days, weeks, or even months have passed, and the seller still hasn’t shipped it?
Well, don’t panic. Amazon will not charge your credit card until the order has been confirmed. Until that point, you can still cancel the order by going to Accounts and Lists > Your Account > Your Orders and selecting Cancel Order.
Amazon Item Shows as Delivered, But It Never Arrived

Amazon issues guidelines for precisely this type of situation. Some of them might seem obvious, but they’re still essential to tick off:
- Check the shipping address was correct on your order.
- Look for a notice of attempted delivery.
- Check the vicinity of the delivery location.
- Check with your neighbors.
- Do you have Amazon Locker?
- Look in your letterbox; some deliveries use multiple carriers, including the regular postal service.
- Wait 36 hours. Sometimes packages may show as delivered while still in transit.
If 36 hours have passed and there is still no sign of your delivery, you need to contact Amazon directly. Log in to Amazon and go to Help > Browse Help Topics > Need More Help > Contact Us.
You should see all your recent orders on the screen. Click on the order you’re having problems with, and scroll down the page. In the dropdown menu next to Select an issue, choose Where’s My Stuff. Then, in the menu next to Select issue details, choose Tracking shows delivered but item not received.
The site will give you the choice of reaching out via email, phone, or live chat. Amazon will investigate the case and ultimately issue a refund.
It’s Safer to Buy “Fulfilled by Amazon” Items

The Amazon website features items sold by both Amazon itself and by third-party retailers. When using a third-party retailer, you might notice a Fulfilled by Amazon message on the product you’re buying.
The message implies that even though the product is being sold by a third-party retailer, it is being sent to your house from an Amazon Fulfillment Center. As a buyer, it means you’ll be able to track a package’s progress through your Amazon account portal, and Amazon is responsible for customer service and product returns.
If you buy from a third-party seller whose items are not fulfilled by Amazon, you are protected by the company’s A-to-Z Guarantee Protection.
What Is Amazon’s A-to-Z Guarantee Protection?

Let’s assume you’ve bought an item from a third-party seller who doesn’t have the Fulfilled by Amazon protection.
It means you won’t be able to use your Amazon account portal to track a parcel using an Echo or anything else. A rogue seller could charge your card and tell you they have shipped the item without actually putting anything in the post.
Luckily, you still have some methods of recourse open to you. It comes in the shape of Amazon’s A-to-Z Guarantee Protection.
The A-to-Z Guarantee mandates that any item purchased from an Amazon seller via the Amazon website is eligible for compensation of up to $2,500.
To make an A-to-Z claim, you first need to contact the seller through your Amazon account, then give the seller 48 hours to respond. If the seller doesn’t give you a satisfactory response, you can file a claim. You just need to meet one of the following five conditions:
- You did not receive the item within either 30 days or three days past the estimated delivery date
- Your article was damaged, defective, or materially different from the one you ordered
- You returned an item to Amazon but did not receive a refund
- You need to return an item internationally, but the seller does not provide either a U.S. address or an international shipping label
- The seller miscalculated customs and/or shipping charges, and you had to pay those fees upon delivery
You must make A-to-Z claims within 90 days of the estimated delivery date. To make a claim, go to Accounts and Lists > Your Account > Your Orders. Find the order you want to make a claim against and click on File/View Claim. In the first box, explain why you’re making a claim. In the second box, choose Request refund through A-to-Z Guarantee.
Missing Packages Shipped With Amazon Prime
If you’re an Amazon Prime member and an item on your Amazon order never arrived, the processes we’ve already discussed still apply. You should work through them.
However, Amazon Prime members also get some additional sweeteners to ease the pain of a non-delivery. If the item either arrives outside of the time-frame Amazon gives you at the time of purchase or never turns up at your door, you might be eligible for a free one-month subscription to Amazon Prime, which is added as a free month to the end of your existing Amazon Prime subscription’s expiry date.
Some users have reported Amazon has even given them discount vouchers, Amazon Prime discounts, and other perks. Amazon appears to issue these benefits on an ad-hoc basis.
Amazon Prime Pantry purchasers may have different experiences. Check our linked article for more details on that program.
How to Avoid Fake Sellers on Amazon
The problem of fake sellers on Amazon is becoming more widespread.
Fraud is worryingly easy to pull off. A criminal opens a new Amazon seller account and selects popular items to sell. If they use Amazon’s seller’s platform, it only takes a few seconds. Typically, they’ll list items for less money than other retailers are selling them for.
When they receive orders, the person immediately says the item is en route to the courier. Doing so releases the funds to their account. By giving an estimated delivery date of four weeks, the merchant can beat Amazon’s two-week payment cycle and disappear before buyers start complaining and Amazon closes the account.
Luckily, it’s quite easy to avoid fake sellers: just check the feedback score. To do so, click on the seller’s name in the upper right-hand corner of a listing page. You will see their profile page.
On the profile page, you can see the person’s lifetime feedback rating, as well as their score over the last three, six, and 12 months.
As you can see from the image below, this cheese seller seems very trustworthy. Only four percent of their reviews are negative from a total of more than 18,500.

Hey Amazon, Where’s My Stuff? Forget It!
We’ve shown you the three primary methods for resolving delivery issues for items you bought off Amazon and explained how spotting fake sellers is straightforward if you know where to look. Make sure you let us know about any of your horror stories in the comments below.
And remember, if you’re fed up with Amazon, there are plenty of Amazon shopping alternatives available. It might even be time to use eBay instead. Check out our Amazon vs. eBay comparison for more information.
Read the full article: Your Amazon Order Never Arrived? Here’s What You Should Do
Read Full Article
VSCO sues PicsArt over photo filters that were allegedly reverse-engineered
Photo editing app-maker VSCO has filed a lawsuit against competitor PicsArt.
The suit focuses on 19 PicsArt filters that were supposedly “reverse engineered from VSCO’s filters,” with VSCO alleging it’s become a legal issue involving false advertising and violations of the app’s terms of service.
“VSCO has invested significant time and resources in developing its presets [a.k.a. filters], which represent valuable intellectual property of VSCO,” the company writes.
In a statement, PicsArt denied the suit’s claims:
VSCO is not a direct competitor, but they clearly feel threatened by PicsArt. VSCO’s claims are meritless. It’s disappointing that they have made these false claims against us. PicsArt will vigorously defend itself against these baseless claims and all options are under consideration.
Specifically, VSCO says that at least 17 PicsArt employees created VSCO accounts — probably not an uncommon competitive practice, but the suit claims they used those accounts to reverse engineer the filters, thus violating the terms in which users “agree not to sell, license, rent, modify, distribute, copy, reproduce, transmit, publicly display, publicly perform, publish, adapt, edit or create derivative works from any VSCO Content.”
In addition, the suit accuses PicsArt of engaging in false advertising by describing the filters in its PicsArt Gold subscription as “exclusive” and “only for [PicsArt] Gold users.”
Why is VSCO so sure that the PicsArt filters were based on its own? The suit says:
VSCO’s color scientists have determined that at least nineteen presets published by PicsArt are effectively identical to VSCO presets that are only available through a VSCO account. Specifically, VSCO determined that those PicsArt filters have a Mean Color Difference (“MCD”) of less than two CIEDE2000 units (in some cases, far less than two units) compared to their VSCO counterparts. An MCD of less than two CIEDE2000 units between filters is imperceptible to the human eye and cannot have been achieved by coincidence or visual or manual approximation. On information and belief, PicsArt could have only achieved this degree of similarity between its filters and those of VSCO by using its employees’ VSCO user accounts to access the VSCO app and reverse engineer VSCO’s presets.
The suit goes on to claim that VSCO’s lawyers sent PicsArt a letter in February demanding that the company identify and remove any filters that were reverse engineered or copied from VSCO. The letter also demanded “an accounting of all profits and revenues generated from such filters” and that PicsArt identify any employees who had created VSCO accounts.
In VSCO’s telling, PicsArt then responded that it was “in the process of replacing certain underperforming filters and modifying others,” including the 19 filters in question, but it only removed 17 — and supposedly two of the new filters “were similarly reverse engineered from VSCO’s proprietary presets.” The suit also says PicsArt has failed to provide the information that VSCO demanded.
VSCO does not appear to be suing for a specific monetary value, but the suit asks for “disgorgement of any proceeds obtained from PicsArt’s use of VSCO filters,” as well as injunctive relief, compensatory damages and “the costs of corrective advertising.”
You can read the full complaint below.
VSCO Complaint by on Scribd
Read Full Article
On balance, the cloud has been a huge boon to startups
Today’s startups have a distinct advantage when it comes to launching a company because of the public cloud. You don’t have to build infrastructure or worry about what happens when you scale too quickly. The cloud vendors take care of all that for you.
But last month when Pinterest announced its IPO, the company’s cloud spend raised eyebrows. You see, the company is spending $750 million a year on cloud services, more specifically to AWS. When your business is primarily focused on photos and video, and needs to scale at a regular basis, that bill is going to be high.
That price tag prompted Erica Joy, a Microsoft engineer to publish this Tweet and start a little internal debate here at TechCrunch. Startups, after all, have a dog in this fight, and it’s worth exploring if the cloud is helping feed the startup ecosystem, or sending your bills soaring as they have with Pinterest.
For starters, it’s worth pointing out that Ms. Joy works for Microsoft, which just happens to be a primary competitor of Amazon’s in the cloud business. Regardless of her personal feelings on the matter, I’m sure Microsoft would be more than happy to take over that $750 million bill from Amazon. It’s a nice chunk of business, but all that aside, do startups benefit from having access to cloud vendors?
Read Full Article
05 April 2019
Snap is channeling Asia’s messaging giants with its move into gaming
Snap is taking a leaf out of the Asian messaging app playbook as its social messaging service enters a new era.
The company unveiled a series of new strategies that are aimed at breathing fresh life into the service which has been ruthlessly cloned by Facebook across Instagram, WhatsApp, and even its primary social network. The result? Snap has consistently lost users since going public in 2017. It managed to stop the rot with a flat Q4, but resting on its laurels isn’t going to bring the good times back.
Snap has taken a three-pronged approach: extending its stories feature (and ads) into third-party apps and building out its camera play with an AR platform, but it is the launch of social games that is the most intriguing. The other moves are logical and they fall in line with existing Snap strategies, but games is an entirely new category for the company.
It isn’t hard to see where Snap found inspiration for social games — Asian messaging companies have long twinned games and chat — but the U.S. company is applying its own twist to the genre.
Read Full Article
How to Create Textures in Photoshop CC
Adobe Photoshop CC has many tools that can help you design a better image. One of which is the Filter Gallery, where you can create textures to your heart’s content.
We’ve all seen textures before—ranging from digital snake scales to tree bark—but how do you create textures using Photoshop?
In this article we’ll show you how to create a texture in Photoshop CC. And then explain how to apply that texture to another image.
Step 1: Set Up Your Document

As always, the first thing you need to do is set up your file. There are no specific dimensions required for this tutorial, but an easy template is Default Photoshop Size, 300 pixels/inch.
Make sure that under Color Mode you select RGB Color. This is because some filters don’t work when you are in CMYK (Cyan, Magenta, Yellow, Key).
Step 2: Add a Base Color

Next, you’ll want to add a base color to your image to give the Filter Gallery something to work with. If you leave it blank and apply a texture, nothing will happen.
When I create a texture I like to add a black and white gradient. Working with black and white means you don’t have to worry about how the colors will react when you apply that texture to another image.
For example: If I create a texture that is yellow, but I apply that yellow texture to a blue-tinted image, it will make the picture look green. I don’t want that.
To apply a gradient, go to your left-hand toolbar and click the Gradient tool. Click and drag the cursor across the page, then release.
For those of you looking for a more in-depth explanation on this step, you can read our tutorial detailing how to create a custom gradient in Photoshop.
Step 3: Open the Filter Gallery

After you apply your gradient, go to Filter > Filter Gallery. There is where you will create the texture.

Once you’re in the Filter Gallery you will be faced with a workspace like the one you can see above.
In the center you will see the image you are working on. Towards the right you will see a bunch of folders.
If you expand these folders, you will see a selection of rectangular icons with a name beneath each one. These are your “filters”.
Photoshop groups filters based on the type of effect they produce. You can explore each group by clicking on the little white arrow next to the folders.
Step 4: Apply a Filter

For this tutorial we’re going to create one of the most commonly recognized textures: the Halftone Pattern.
You see the halftone used most often in comics, and the name comes from a printing technique that uses a continuous row of dots.
To find the Halftone Pattern, go to Sketch > Halftone Pattern inside the Filter Gallery. This will automatically apply a halftone to your image, but as you can see it doesn’t add much without customizing it.
Let’s fix that.
Step 5: Adjust the Filter

Let’s say you want to make this halftone texture “bigger”. To do this, go to the Size bar on the right-hand side of the Filter Gallery, seen here in red.
By sliding the arrow along the Size bar, you can make the halftone dots look larger.
This is better than what we had before, but the dots still look blurry. This is because the contrast between the black and white is too low.

To turn up the contrast, go to the right-hand side of the Filter Gallery and click on the Contrast bar. Drag the arrow to the right. This increases the contrast between the black and white in your image.
Once that’s done, you’ve finished creating a texture at its most basic. But what if you want to add a twist?
The steps to creating a “unique” texture will vary from preset to preset, but if you want to create a unique halftone pattern then you must look at Pattern Type.
Step 6: Change the Pattern Type

To change the Pattern Type on a halftone, go to the Pattern Type dropdown menu. Instead of using the Dot pattern, choose Line.
This gives you a streaked texture. I kind of like that effect in my own image, and I want to leave it as-is.
If you decide you’re done creating your texture, click OK. This will take you out of the Filter Gallery and back to the main workspace. You now have a texture you can apply to other images.
To save your texture, go File > Save As.
Step 7: Apply Your Texture to a New Image

Let’s say you want to apply that texture to another file.
To do this, make sure you have both files open in Photoshop; the texture, and the image you will be applying the texture to. In the image you’ll see that I have both files open in my workspace through the red box above.
The bold white text tells me which file I currently have active. The greyed out text on the other tab tells me that the file is open, but not active.

Next, make sure your texture file is active.
Select your Move tool, located in the top left-hand corner of your toolbar.
Move your tool over your image, then click and hold. Drag your move tool over to the file tab for your image, seen here in red:

When you do that, Photoshop will automatically drag and drop the texture into your image. It also puts the texture on top of the image in a new layer.
Now that your texture has been added, go to the Layers panels in the bottom right-hand corner of your workspace. Go to your blending mode dropdown menu and select a “style” to apply to this texture.
Each style will create a different effect, depending on how the two layers interact with one another.
For this tutorial I went with a Soft Light, which allows a wide range of dark and light tones to show through.

This is just one way of applying a texture onto an image. But what if you don’t want to apply your texture to a separate image? What if you want to create a texture and add color on top of it?
You Can Also Add Color Directly to Your Texture

First, make sure your texture file is active. In your Layers panel, add a new layer on top of your texture.
After you create your new layer, add some color to it. You can add a gradient or a solid color using the Gradient or Paint Bucket tools, whichever you prefer.

Next, go to the blending mode dropdown menu. Once again, choose the style that you want to apply to your layer.
For this part of the tutorial I went with Subtract, because it allows the black to show through.
And there you have it, your file is done! Navigate to File > Save As to save your texture.
Create Your Own Textures in Photoshop CC
Photoshop is an amazing tool that lets you try out all sorts of visual tricks. And once you explore the Filter Gallery you’ll be able to create your own textures and much more besides.
And if you’re curious about other things you can design using Photoshop, we have a tutorial on how to create custom brushes in Photoshop.
Read the full article: How to Create Textures in Photoshop CC
Read Full Article
10 of the Best Plex Web Shows to Watch Right Now

In 2018, Plex launched Web Shows. This brand new feature was intended to replace the old Plex plugin system, which had become confusing and littered with content that no longer worked.
When Plex first launched Web Shows, only a handful were available. However, with the passage of time, more have been added to the library, and now there are dozens of shows to choose from.
Here are the best Plex Web Shows worth watching and how to access them.
How to Add Plex Web Shows
Before we dive into the list, a quick note on how to add Plex Web Shows to your library.
You need to add the shows from your Plex Media Server app or the web app; you cannot add new Web Shows from the Plex Media Player app.
So, open the Plex Media Server or login into Plex online, then go to Online Content > Web Shows in the left-hand panel. To add a show, click on the associated thumbnail and select Add to My Shows.
You can access the list of My Shows on any Plex app, including the Media Player.
Note: You do not need a Plex Pass to watch Web Shows.
1. Pitchfork
Pitchfork has long been a well-recognized name in the music industry. The publication started life as a magazine, but now has a widely-read website and a video-based offshoot called Pitchfork.tv.
The site’s focus is primarily on new music, though the video content is slightly more diverse. You’ll be able to enjoy music films, documentaries, live concerts and festivals, and even some mini-series.
There are currently more than 280 episodes and counting.
2. The New Yorker

The New Yorker is another well-known media name. Founded way back in 1925, the magazine covers politics, foreign affairs, business, technology, pop culture, and the arts.
In terms of the Plex Web Show, recent episode titles include “The Origins of Podcasting,” “The Gender Politics of the Red Carpet,” and “Barbie by the Numbers”.
The release schedule for new episodes is a bit erratic, but you can expect about six new releases every month.
3. Movie Mistakes
If you want something a little more light-hearted, check out the Movie Mistakes show. As the name suggests, the 350+ episodes are littered with fails, bloopers, gaffes, and other on-set funnies.
Each new episode typically focuses on a specific movie. Recent films that have received coverage include I, Robot and The Terminator.
4. Thinknoodles

Gaming fans should subscribe to the Thinknoodles. It’s a family-friendly Plex Web Show in which the host records himself playing video games while offering live commentary on events.
The types of games played in the show are diverse. Titles include everything from random indie titles to mainstream popular content such as Minecraft and Pokémon.
There are more than 2,000 Thinknoodles episodes for you to dig into.
5. SportsPulse
Sports lovers should add SportsPulse to their list of shows. Produced by the USA Today team, it offers an insight into the latest goings-on around the American sporting landscape. European sports fans will probably find the show significantly less entertaining.
SportsPulse only began airing in 2019. However, it’s also one of the Plex Web Shows with the most frequent release schedules; you can expect a new episode almost every day.
6. Vanity Fair

Vanity Fair is another well-known print magazine. It has its origins back in 1913, but today produces six editions for the U.S., U.K., Mexico, Spain, France, and Italy.
The magazine has recently made a gamble on pivoting to video content, and its Plex Web Show offers the best of what’s been recorded.
Like the print version, topics are broad. They cover arts, entertainment, business, media, politics, and world affairs.
There’s a new episode every day.
7. TechCrunch
If you’re looking for a curated tech news coverage, beyond our own output, you won’t go far wrong by watching the TechCrunch show.
As is becoming a running theme, the release dates are often erratic. Sometimes you might have to wait two weeks between episodes; on other occasions, there are two episodes released in a single day.
Typically, each show takes one of the day’s biggest news stories and discusses, dissects, and analyses it. More than 100 TechCrunch episodes are currently available through Plex.
8. Hollyscoop
Do you wake up every morning dying to find out about the latest news from the Kardashian household?
If so, it may be time to reconsider your life choices, but in the meantime, the Hollyscoop Web Show will fill that void. There’s a never-ending stream of short 5- to 10-minute clips. Typically, two or three new clips are released every day.
With recent episode titles like “Cardi B Admits to Drugging and Robbing Men During Stripper Days on IG Live” and “Justin Bieber Fans Blame Hailey for Mental Breakdown, and She Fights Back,” you know what you’re letting yourself in for.
9. Humankind

If the latest celebrity happenings isn’t for you, try subscribing to Humankind instead.
This show is at the complete opposite end of the scale. You’ll be able to tune in to marvelous stories about human kindness, sacrifice, and triumphs. And all without a celebrity in sight.
You can expect new videos to drop every week.
10. Cold Fusion
Cold Fusion is one of the best Plex Web Shows if you want to listen to fascinating insights on companies, technologies, and the wider world that surrounds us.
It’s one of the more well-established shows; more than 250 episodes are already available on Plex. Recent content includes a look at what the dark web is and how it works, a comparison of Apple and Huawei, and a countdown of six tech CEOs who got things very wrong.
A new episode is available every week.
Discover Even More Plex Content
Plex Web Shows are just one way you can enjoy content on Plex. There are lots of other things you can do to turn the app into the ideal entertainment hub.
To learn more about the possibilities, check out our articles listing the best unofficial Plex channels and detailing how to record live TV with Plex DVR.
Read the full article: 10 of the Best Plex Web Shows to Watch Right Now
Read Full Article
5 C Programming Tips You Must Learn to Get Started

If you’ve heard of programming, you’ve heard of C. It’s one of the oldest coding languages around. Some fear it, and others love it.
C has a reputation for being hard for beginners. There are many good reasons to learn the language, but there are a few essential tips to bear in mind while starting out.
What Is the C Programming Language?
To understand what the C programming language is, it is worth learning what coding is before continuing!
C is a low-level procedural programming language. C is much closer to the actual machine code your computer runs on. This makes it incredibly fast, but challenging to use, and capable of breaking your system if you are not careful!
Why Learn to Program in C?
If C is so complicated and dangerous, why learn it?
Well, C is everywhere.
- Almost every computer operating system is written in C.
- Most smartphones and tablets have a C based operating system.
- Almost every microcontroller, whether it runs the display on your microwave door or the internal telemetry in a car, is programmed in C.
- C++, Objective C, and C# all are built directly on top of C, and Python was written in it.
- A good knowledge of C looks great on any programmer’s resume.
Some people think learning C before any other programming language results in a better understanding of programming as a whole.
Learning C is also learning about how your computer works. C programmers can have a deeper understanding of the way code affects systems, and find learning other programming languages easier as a result.
1. Learn the Basic Variable Types
Data comes in different types. It is important to know what type of data you are working with, as they can be easy to confuse. An example is knowing that the number 5 can be an integer (as in the number 5), as well as a character (the written character 5).
int number = 5;
Now there is no confusion, the variable number is assigned the integer value 5. C needs to be told what types to expect in order to work the way you want it to.
Data types and how they are assigned to variables is an essential part of your C course, and it’s important to understand.
Knowing how to give data the correct type is an important skill in all programming, but it is essential in C.
2. Learn the Operators
If C is the first language you are learning, you will likely be learning operators for the first time. Operators are symbols that tell the compiler to carry out a task. Perhaps the simplest example is the + operator.
answer = number + anotherNumber;
No prizes for guessing that this code adds together two integer variables. Not all operators are this simple though.
C uses many operators for arithmetic, assignment, and logic among others. Knowing what each of these operators do will help you pick up core programming concepts quicker.
3. Use the Standard Libraries
C may be low level, but it does have a set of libraries to help with creating programs. Mathematical operations, locale-specific data (like currency symbols), and various variable types and macros are all defined in libraries.
You can use these libraries by including them into your code. Take this example:
#include <stdio.h>
int main()
{
  printf("Hello, World!");
  return 0;
}
In C, the simple act of outputting to the console requires the inclusion of the stdio.h (standard input/output) header file.
There are 15 standard libraries for programming in C, and following a guide to what they all do will help you with your learning.
4. C Is Unforgiving
C will do precisely what you tell it, and instead of complaining when something doesn’t make sense it will still try to keep working. This can not only break your program but cause problems to your entire system!
While this sounds dramatic, it usually isn’t. You aren’t going to break your computer. You might end up with some weird bugs though. Take this example:

This piece of code prints questions to the console, before scanning what the user inputs and storing them as integers. The program is designed to add them together and subtract them before printing the answers back to the user.
You might already see that there is a problem here. The output certainly makes no sense!

Since we never actually subtract the values, the subtracted variable has a nonsense value given to it on initialization. Other programming languages might warn you that you never gave the subtracted variable a value. Not C.
This example is easy to debug visually, but some code is thousands of lines long and incredibly complex, and C won’t help you find what is wrong. Instead, C gives you a stupid answer and no way to find out why. Or is there?
5. Debugging Is Your Best Friend
Since C code can contain unwanted behavior, it can cause errors which are difficult to track down, with no apparent reason. To stop yourself from completely losing your mind you should get comfortable with debugging your code.
A debugger like GDB can help with this. Here, GDB is running on the faulty script from above.

Usually, a program runs until it finishes, or it crashes. Debuggers allow you to break down your code line by line. Here, break points are set up at lines 10 and 13 where we suspect the issue could be.
Then, the program is run as normal. The numbers are entered, then the program pauses after line 10. The debugger is asked to print the value of subtracted, which shows as a value of 37. This makes sense, we haven’t told subtracted a value yet, so it has a random value.
Then, the debugger continues. We repeat the process after line 13, and print subtracted only to find out that the value hasn’t changed.

It turns out we forgot to do the calculation at all, instead opting to leave a suspiciously empty line of code. Thank you debugging!
GDB is a C coder’s best friend, and the earlier you learn to use it, the happier you will be!
What You C Is What You Get
The C language is a life long learning experience, and there are things we haven’t even touched on in this article like pointers and memory allocation.
While C has got a tough reputation you can learn by doing, so get hands-on and start with your own C programming beginner project.
Image Credit: sjenner13/Depositphotos
Read the full article: 5 C Programming Tips You Must Learn to Get Started
Read Full Article
5 Reasons to Use Google Photos Over iCloud Photos

If you own an iPhone or iPad, should you be using Google Photos or iCloud Photos to store and manage your photos?
Some people advocate using iCloud Photos over Google Photos, but we think Google Photos is superior to iCloud Photos in several ways.
If you’re wondering which photo app to use on an iPhone or an iPad, keep reading. Here are the main reasons to choose Google Photos over iCloud Photos on iOS.
1. Google Photos Is Cheaper
My phone: *iCloud Storage Is Full*
Me: *Deletes 2k photos*
My phone: pic.twitter.com/toaET9KckC— Em ? (@emilyvillegas47) March 22, 2019
The most significant reason to use Google Photos over iCloud Photos is the cost of the two services.
As iOS and macOS users will be acutely aware, Apple only provides its users with 5GB of free space. Photos that you upload from your mobile device and desktop/laptop count against that limit.
When you also include things like Time Machine backups, shared files, and other cloud-based data, you can hit the limit in no time.
And extra storage space doesn’t come cheap. 50GB costs $0.99/month, 200GB costs $2.99/month, and 2TB is $9.99/month. If you’re planning to use the app for your entire photo library, you’ll almost certainly need the top plan.
2. Google Photos Offers More Free Storage
Google offers all users 15GB of free space. Better yet, if you are happy to accept a reduced resolution (up to a maximum of 16 megapixels), you can store an unlimited number of photos without using any of your 15GB allowance.
If you think that will lead to a loss in quality on photos you take using your iPhone, you’re wrong. Even the latest iPhone X and iPhone XS only have 12-megapixel rear-facing cameras. You’re only going to lose quality if you want to back up photos to your Mac that you’ve taken using a professional grade camera.
Furthermore, Google Photos can automatically resize the photos as you upload them, so you’re never going to hit your limit unexpectedly.
To give you a reference point, 16 megapixels is good enough to print a 24 x 16 inches photograph without any loss in quality.
3. Google Photos Offers Cross-Platform Support
Few people restrict themselves to using a single operating system. And even if you only own Apple equipment, you’re almost certainly going to come into contact with other platforms at work, school, or in the homes of family and friends.
Google Photos will let you access your images on all those platforms. There are mobile apps for Android and iOS, there’s a web app, and you can even sideload the app on devices like Android TV, the Amazon Fire TV Stick, and smart TVs. There’s also a desktop app so you can back up your photos from Windows or macOS.
Apple’s iCloud Photos isn’t quite so universal. Yes, it comes pre-installed on all iOS devices, and there’s a Windows app and a web app, but Android users are out of luck. As are people who want to access their photos on other smart devices they have around their home.
Bottom Line: If you think there’s ever a chance that you might abandon iOS and become an Android user, Google Photos is a smarter choice.
4. Google Photos Boasts Better Search Options
Sending 100s of your fav photos to a friend is a breeze with Google Photos. It just works, even if your friend doesn't have the app. https://t.co/8JQXb9qegJ pic.twitter.com/8UfmC6FonF
— Google Photos (@googlephotos) April 19, 2018
Google operates the most sophisticated search engine in the world, so it should come as no surprise to learn that the AI that underpins Google Photos are equally powerful and impressive.
Every time you upload a new image to Google Photos, the app will scan the photo and establish who or what is in it.
As a result, you can type phrases such as “my dog”, “Barcelona”, or “the beach with John Doe,” and Google Photos will be able to find all the images that match the criteria in a flash.
Apple doesn’t have anything to rival this feature. If you want to find an image in your iCloud Photos library, you’ll need to search by date or find it manually. As you can appreciate, it’s a lot less slick and a lot more time consuming.
You can add your own tags to Apple Photos for easy searching, but most of us don’t have the time to do that for every photo they take while on the go.
Note: Here are more details on the search tools hidden within Google Photos.
5. Google Photos Helps You Share Your Collection

Sharing on iCloud Photos is far from bad. In fact, in some ways, it is superior to Google Photos. For example, if you want to share a photo via email, with iCloud Photos, the recipient will get copies of the image file; Google Photos just directs you back to the web app.
However, when it comes to sharing your entire library, Google Photos is better than iCloud Photos thanks to its Partner Accounts.
A Partner Account gives you a way to share your entire photo library with another user. Similarly, another user can share their library with you, then the two sets of photos can be integrated together in the app’s main view.
If you don’t want to give someone access to your entire library, you can get more specific too. This includes only sharing photos of a particular person (such as your child), or only showing photos older than a specific date (if you’re in a new relationship, for example).
Apple does have a Family Sharing feature which includes a shared family photo album, but you will need to manually add each photo for other people to be able to see it.
Does iCloud Photos Offer Any Unique Benefits?
Before we finish, here are a few words in defense of iCloud Photos, because the app does have some benefits that Google Photos cannot match:
- Editing: iCloud Photos offers more extensive editing tools than Google Photos
- Metadata: Unlike iCloud Photos, any photo you later download from Google Photos will not include the image’s original metadata.
You Can Use Both iCloud Photos and Google Photos
Photos are some of the most precious files you own, containing memories that are impossible to replicate if they are lost.
As such, it might be prudent to use both Google Photos AND iCloud Photos. Doing so means you get to take advantage of the best parts of both apps, including iCloud Photos’ seamless integration across other Apple products and Google Photos’ generous storage limits.
If you would like to learn more about how Google Photos compares with the competition, make sure to check out our articles pitching iCloud Photos vs. Google Photos vs. Dropbox and Amazon Photos vs. Google Photos.
Read the full article: 5 Reasons to Use Google Photos Over iCloud Photos
Read Full Article
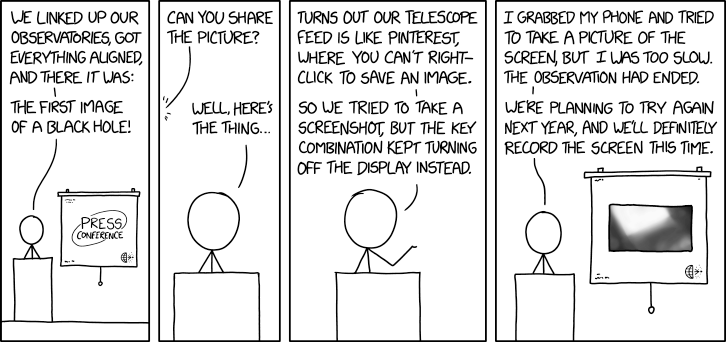
The Google Assistant on Android gets more visual responses
About half a year ago, Google gave the Assistant on phones a major visual refresh. Today, the company is following up with a couple of small but welcome tweaks that’ll see the Assistant on Android provide more and better visual responses that are more aligned with what users already expect to see from other Google services.
That means when you ask for events now, for example, the response will look exactly like what you’d see if you tried the same query from your mobile browser. Until now, Google showed a somewhat pared-down version in the Assistant.
[gallery ids="1808356,1808354,1808357,1808355"]
Also — and this is going to be a bit of a controversial change — when the Assistant decides that the best answer is simply a list of websites (or when it falls back to those results because it simply doesn’t have any other answer), the Assistant used to show you a couple of boxes in a vertical layout that were not exactly user friendly. Now, the Assistant will simply show the standard Google Search layout.
Seems like a good idea, so why would that be controversial? Together with the search results, Google will also show its usual Search ads. This marks the first time that Google is showing ads in the Assistant experience. To be fair, the Assistant will only show these kinds of results for a very small number of queries, but users will likely worry that Google will bring more ads to the rest of the Assistant.

Google tells me that advertisers can’t target their ads to Assistant users and won’t get any additional information about them.
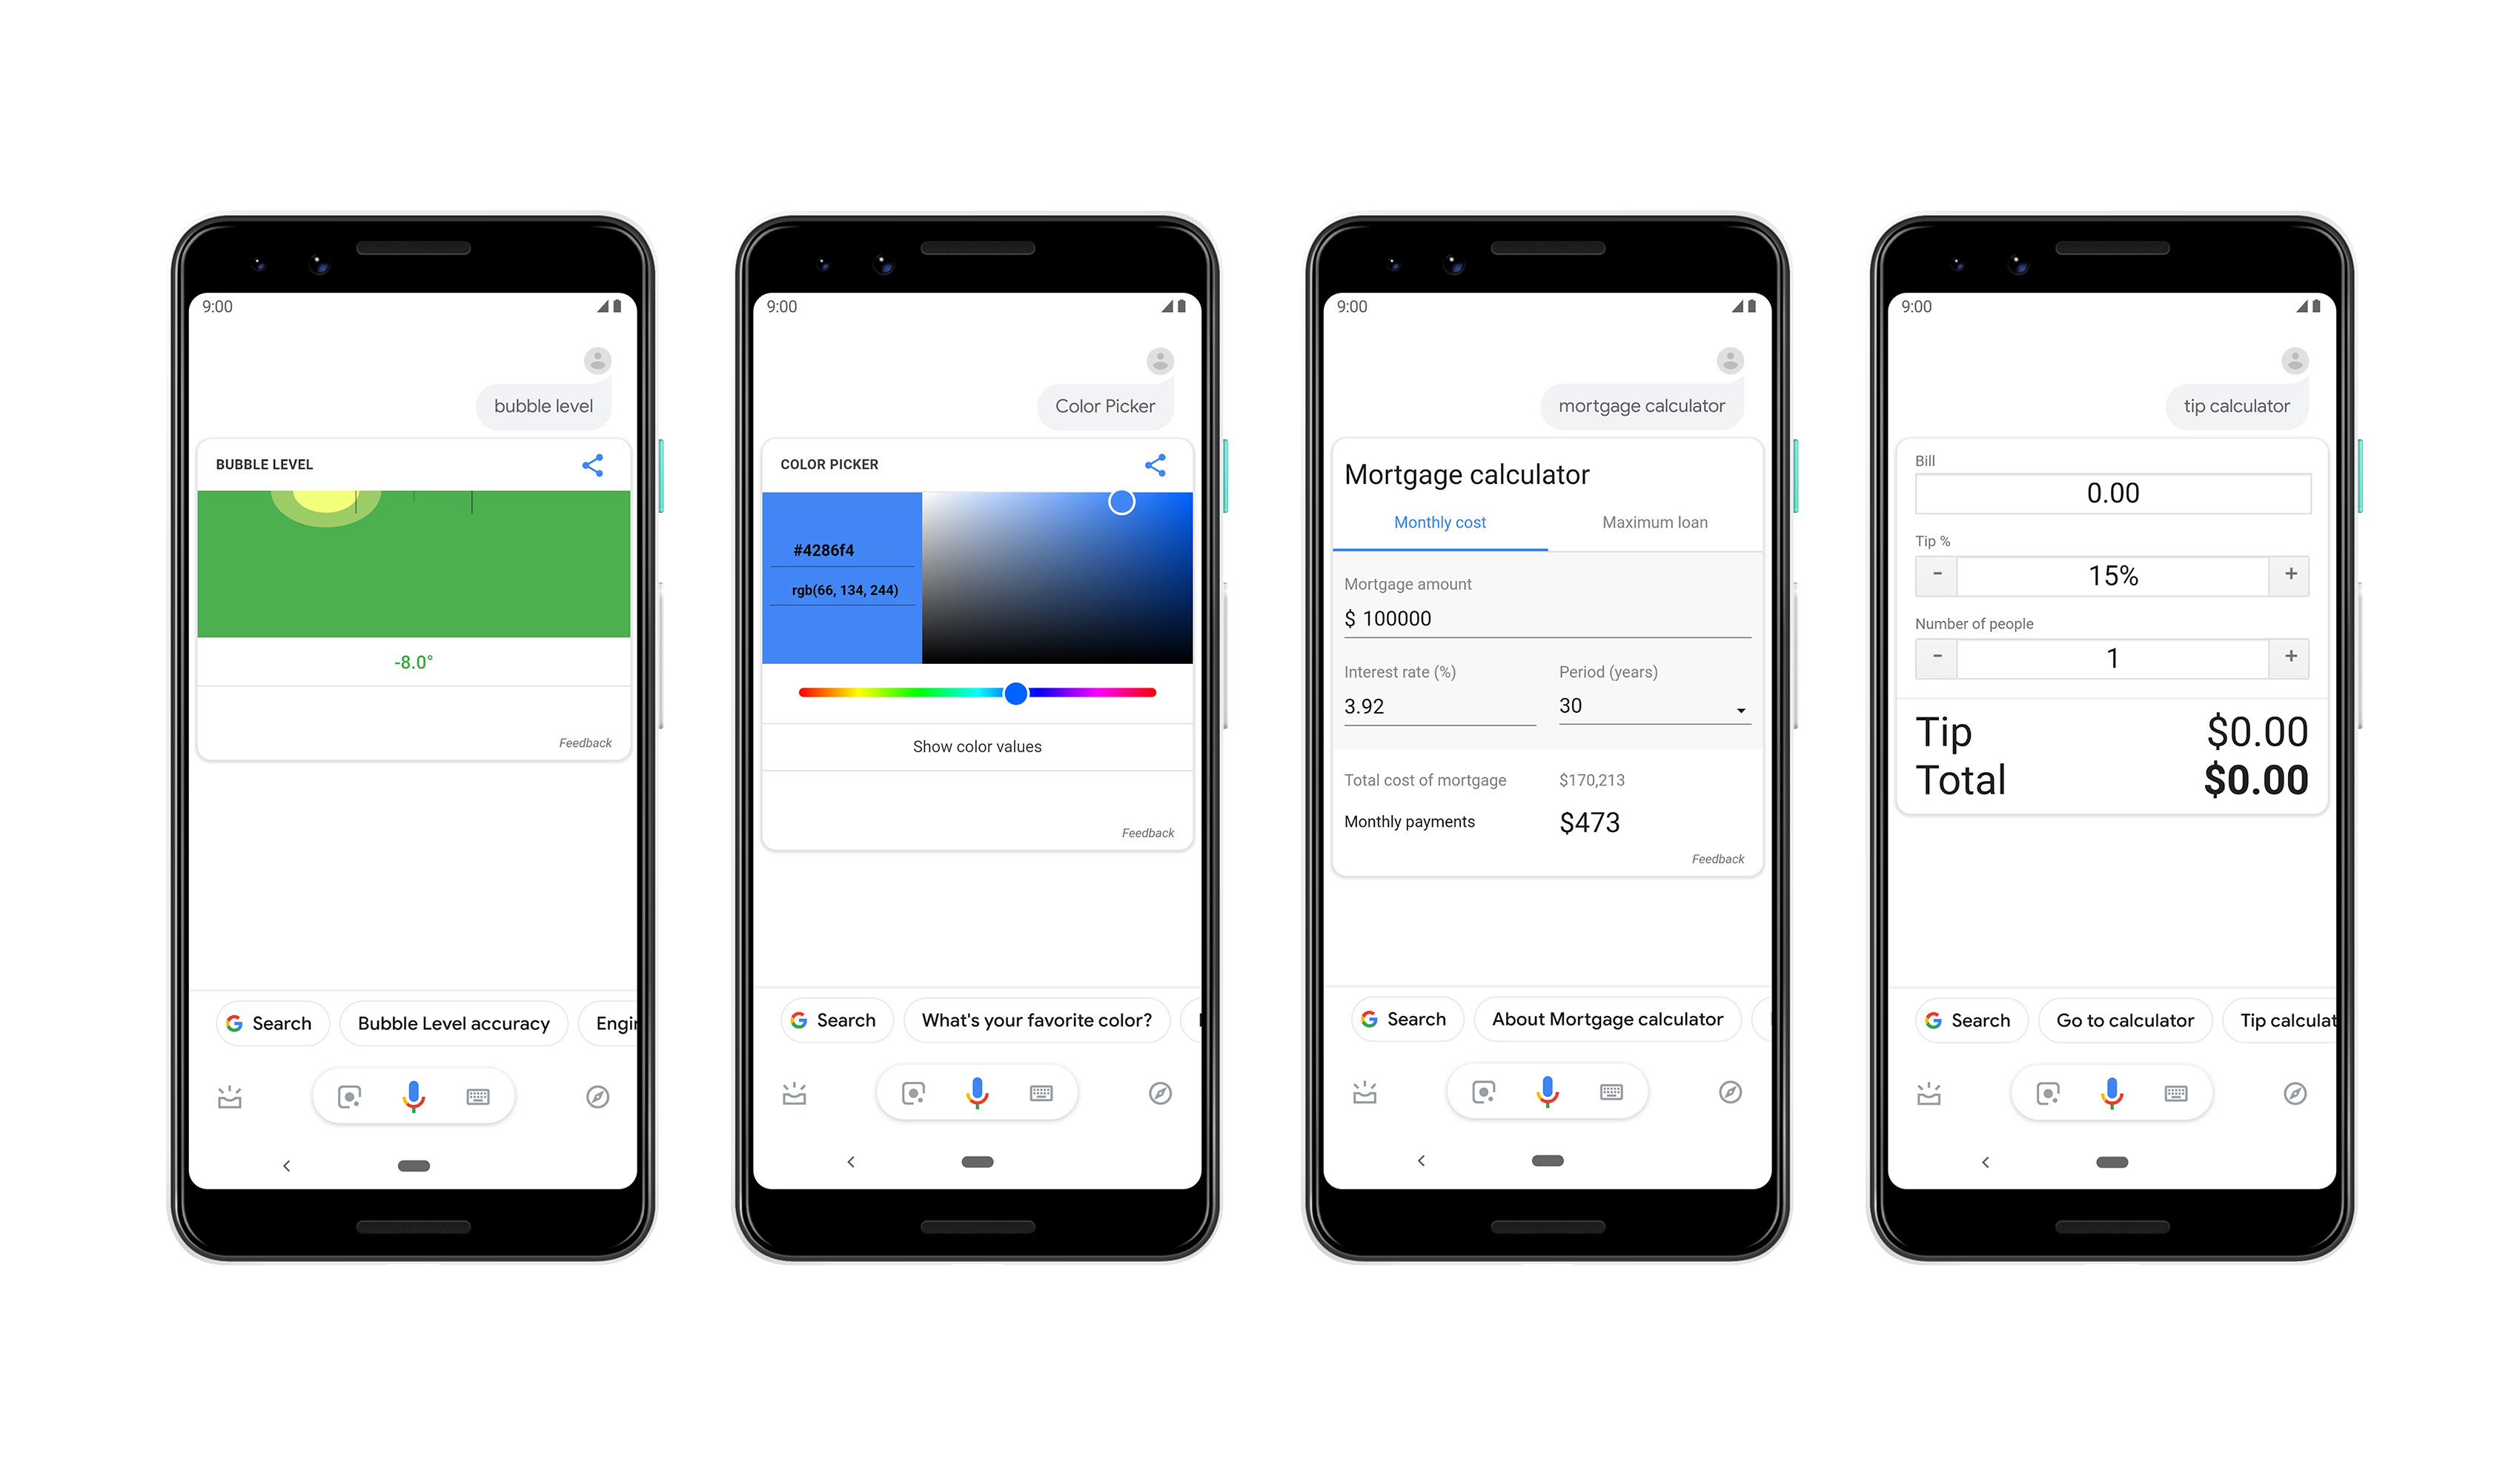
The Assistant will now also show built-in mortgage calculators, color pickers, a tip calculator and a bubble level when you ask for those. Also, when you ask for a stock quote, you’ll now see a full interactive graph, not just the current price of the quote.
These new features are rolling out to Android phones in the U.S. now. As usual, it may take a bit before you see them pop up on your own phone.
Read Full Article
The Google Assistant on Android gets more visual responses
About half a year ago, Google gave the Assistant on phones a major visual refresh. Today, the company is following up with a couple of small but welcome tweaks that’ll see the Assistant on Android provide more and better visual responses that are more aligned with what users already expect to see from other Google services.
That means when you ask for events now, for example, the response will look exactly like what you’d see if you tried the same query from your mobile browser. Until now, Google showed a somewhat pared-down version in the Assistant.
[gallery ids="1808356,1808354,1808357,1808355"]
Also — and this is going to be a bit of a controversial change — when the Assistant decides that the best answer is simply a list of websites (or when it falls back to those results because it simply doesn’t have any other answer), the Assistant used to show you a couple of boxes in a vertical layout that were not exactly user friendly. Now, the Assistant will simply show the standard Google Search layout.
Seems like a good idea, so why would that be controversial? Together with the search results, Google will also show its usual Search ads. This marks the first time that Google is showing ads in the Assistant experience. To be fair, the Assistant will only show these kinds of results for a very small number of queries, but users will likely worry that Google will bring more ads to the rest of the Assistant.
Google tells me that advertisers can’t target their ads to Assistant users and won’t get any additional information about them.
The Assistant will now also show built-in mortgage calculators, color pickers, a tip calculator and a bubble level when you ask for those. Also, when you ask for a stock quote, you’ll now see a full interactive graph, not just the current price of the quote.
These new features are rolling out to Android phones in the U.S. now. As usual, it may take a bit before you see them pop up on your own phone.
Read Full Article