08 May 2020

5 Excellent Video Editors for Kids That Are Easy to Learn


video-editors-kids

If you’re at home with the kids and need something to do, why not start them on the path to becoming Oscar-winning directors? All they need is a bit of footage and a video editing tool, and they can begin creating their first creative masterpiece.

There are a few easy to use video editing tools for kids. Not all specifically target kids who want to edit videos. But the range of tools, ease of use, and approach to video editing means that kids can begin editing their videos without difficulty.

So, here are the best video editors for kids!

1. Windows 10 Photos App Video Editor

windows 10 photos app video editor

Price: Free with Windows 10

Did you know that the Windows 10 Photos app also has a video editor? It is basic, to say the least. But effective for the first few steps into video editing.

The Windows 10 Photos app video editor lets you trim and split your videos. You can add title pages where you see fit, using a range of available fonts and styles. If you want, you can select from several background music options, or add a custom option.

There are also options for 3D effects, such as a confetti cannon or falling autumn leaves. The 3D effects come from Microsoft Paint 3D. You can also add models from Paint 3D into the video, such as a velociraptor or giant oak tree.

As these effects and models are made in Paint 3D, they are very digitized and will stand out in your kid’s video—but that could be exactly what they want to add fun effects to their home videos.

Overall, the Photos app video editor is a great option for kids. The features are so basic that kids will not get stuck on menus or tricky timelines and can stitch together their video creations quickly.

Plus, it’s free and already installed if you’re running Windows 10. The Photos app has a bunch of photo editing tools too, so you don’t have to download other apps.

2. OpenShot

Price: Free

If the Windows Photos app video editor isn’t giving your kids the range of tools they want, look at OpenShot.

OpenShot is an open-source, free video editing tool for Windows 10. It isn’t geared towards kids specifically. However, the easy to use features, relatively intuitive user interface, and a decent array of video editing tools will suit children learning how to edit videos.

It is a step up from the extremely basic Windows 10 Photos app video editor. You can edit video properties, add scene transitions, filters, and various video effects. In that, OpenShot gives kids another level of video editing tools to work with but it won’t be an overwhelming jump.

It’s no wonder that OpenShot also appears on our list of the best free video editing apps for Windows.

3. Movavi

movavi video editor for kids

Price: Free 7-day trial, then $39.95 for a lifetime license.

Movavi is a video editor that your kids will learn in no time at all.

It boils video editing into five easy steps: add video clips, cut and enhance, apply transition fades, insert music, and export. Those five steps let anyone edit a video quickly, producing a polished product with little difficulty.

Kids will enjoy the wider range of animations, transitions, and effects on offer in Movavi. The user interface is similar to many professional video editors too. When they make the transition to a more powerful video editing tool, the layout will remain familiar.

You can also use Movavi to capture live video streams from other sources. For instance, you can select a Skype call as an input, record the video, then edit as you see fit. Alternatively, your kids could live stream their favorite game into Movavi, then edit it ready for upload.

The free version of Movavi comes with several restrictions. The biggest restriction is the massive Movavi watermark that stretches the screen. Purchasing the licensed version removes the watermark and adds several effects, transitions, and extra tools, costing $39.95 for a lifetime license.

4. Filmora9

filmora9 video editor

Price: Free, or $69.99 for a lifetime license.

Filmora9 is an intuitive video editing tool with a focus on producing high-quality videos in a short time. Kids can edit videos quickly using the professional array of video editing tools.

Also, Filmora9 features a YouTube 101 series with walkthroughs from experienced creators, perfect for those older kids looking to get into content creation.

One thing Filmora9 does well is title creation and customization. You can add a completely customized title screen using Filmora9’s integrated options. Even though there are heaps of presets available, your kids will find their work has a unique feel.

Aside from title screens, Filmora9 has an extensive array of transitions and filters, even featuring motion elements. There’s also a choice of royalty-free music.

Like Movavi, Filmora9 is a premium tool. The free version of the app allows you to use all the available tools. However, your exported video will feature a watermark. To remove the Filmora9 watermark, you must upgrade to the Annual Plan, which costs $39.99 per year. Or you could opt for the Lifetime Plan, which is a one-time payment of $69.99.

Filmora9 is a great video editing tool for kids that want a little more power, more editing options, and more control over their video creations.

5. HitFilm Express

Price: Free

The final option for kids is another step up the video editing ladder. Some kids will struggle with HitFilm Express. But your pre-teens and teenagers should learn the ropes with relative ease.

HitFilm Express is a free video editor that comes packed with professional-grade tools and visual effects. The user interface is familiar, using timelines, drag and drop files, and multiple areas to manage video files. Your kids can move the workstation around to suit their workflow too, which is handy.

The list of tools is extensive. Kids can begin with simply cutting and splicing videos together using HitFilm Express. But they can also work their way up to using color corrections, layer masks, image tracking, and even the particle simulator. In fact, the particle simulator is fun at all ages but might need a guiding hand to get started.

There are also options for greenscreen backgrounds, post-processing effects and customization, and heaps of other special effects.

All in all, HitFilm Express is one of the most complete video editing tools for kids—even if it takes them a little while to learn. Still, there is no time better to start learning. After a while, even a professional tool like HitFilm Express will become as easy as the Windows 10 Photos app video editor.

Which Is the Best Video Editor for Kids?

The best kids video editing app depends on your children and their technical capabilities. I tested several of these tools with my kids during the coronavirus lockdown, for a school project.

Given their absolute lack of editing skills before this (bar some stop-motion image editing), the integrated Windows 10 Photos app video editor was a hit for its ease of use. That said, my eldest child felt that the overall package was lacking and wanted more by way of filters, scene transitions, and effects.

The kids found a happy medium with OpenShot, which didn’t increase the complexity of the video editing but did add a significant amount of customization to their creations. Plus, OpenShot is free, which is always a bonus.

A lot of schools now use Chromebooks at home and in the classroom. Check out our list of the best video editors for Chromebooks to practice your creative chops.

Read the full article: 5 Excellent Video Editors for Kids That Are Easy to Learn


Intraday Trading Calls for 11-May-2020

Intraday Trading Calls for 11-May-2020

Please click on the following link to view full post.

https://intradayguruji.blogspot.com/2020/05/intraday-trading-calls-for-11-may-2020.html

Via http://intradayguruji.blogspot.com

Live Intraday Trading on 8-May-2020

Live Intraday Trading on 8-May-2020

Please click on the following link to view full post.

https://intradayguruji.blogspot.com/2020/05/live-intraday-trading-on-8-may-2020.html

Via http://intradayguruji.blogspot.com

5 Excellent Video Editors for Kids That Are Easy to Learn


video-editors-kids

If you’re at home with the kids and need something to do, why not start them on the path to becoming Oscar-winning directors? All they need is a bit of footage and a video editing tool, and they can begin creating their first creative masterpiece.

There are a few easy to use video editing tools for kids. Not all specifically target kids who want to edit videos. But the range of tools, ease of use, and approach to video editing means that kids can begin editing their videos without difficulty.

So, here are the best video editors for kids!

1. Windows 10 Photos App Video Editor

windows 10 photos app video editor

Price: Free with Windows 10

Did you know that the Windows 10 Photos app also has a video editor? It is basic, to say the least. But effective for the first few steps into video editing.

The Windows 10 Photos app video editor lets you trim and split your videos. You can add title pages where you see fit, using a range of available fonts and styles. If you want, you can select from several background music options, or add a custom option.

There are also options for 3D effects, such as a confetti cannon or falling autumn leaves. The 3D effects come from Microsoft Paint 3D. You can also add models from Paint 3D into the video, such as a velociraptor or giant oak tree.

As these effects and models are made in Paint 3D, they are very digitized and will stand out in your kid’s video—but that could be exactly what they want to add fun effects to their home videos.

Overall, the Photos app video editor is a great option for kids. The features are so basic that kids will not get stuck on menus or tricky timelines and can stitch together their video creations quickly.

Plus, it’s free and already installed if you’re running Windows 10. The Photos app has a bunch of photo editing tools too, so you don’t have to download other apps.

2. OpenShot

Price: Free

If the Windows Photos app video editor isn’t giving your kids the range of tools they want, look at OpenShot.

OpenShot is an open-source, free video editing tool for Windows 10. It isn’t geared towards kids specifically. However, the easy to use features, relatively intuitive user interface, and a decent array of video editing tools will suit children learning how to edit videos.

It is a step up from the extremely basic Windows 10 Photos app video editor. You can edit video properties, add scene transitions, filters, and various video effects. In that, OpenShot gives kids another level of video editing tools to work with but it won’t be an overwhelming jump.

It’s no wonder that OpenShot also appears on our list of the best free video editing apps for Windows.

3. Movavi

movavi video editor for kids

Price: Free 7-day trial, then $39.95 for a lifetime license.

Movavi is a video editor that your kids will learn in no time at all.

It boils video editing into five easy steps: add video clips, cut and enhance, apply transition fades, insert music, and export. Those five steps let anyone edit a video quickly, producing a polished product with little difficulty.

Kids will enjoy the wider range of animations, transitions, and effects on offer in Movavi. The user interface is similar to many professional video editors too. When they make the transition to a more powerful video editing tool, the layout will remain familiar.

You can also use Movavi to capture live video streams from other sources. For instance, you can select a Skype call as an input, record the video, then edit as you see fit. Alternatively, your kids could live stream their favorite game into Movavi, then edit it ready for upload.

The free version of Movavi comes with several restrictions. The biggest restriction is the massive Movavi watermark that stretches the screen. Purchasing the licensed version removes the watermark and adds several effects, transitions, and extra tools, costing $39.95 for a lifetime license.

4. Filmora9

filmora9 video editor

Price: Free, or $69.99 for a lifetime license.

Filmora9 is an intuitive video editing tool with a focus on producing high-quality videos in a short time. Kids can edit videos quickly using the professional array of video editing tools.

Also, Filmora9 features a YouTube 101 series with walkthroughs from experienced creators, perfect for those older kids looking to get into content creation.

One thing Filmora9 does well is title creation and customization. You can add a completely customized title screen using Filmora9’s integrated options. Even though there are heaps of presets available, your kids will find their work has a unique feel.

Aside from title screens, Filmora9 has an extensive array of transitions and filters, even featuring motion elements. There’s also a choice of royalty-free music.

Like Movavi, Filmora9 is a premium tool. The free version of the app allows you to use all the available tools. However, your exported video will feature a watermark. To remove the Filmora9 watermark, you must upgrade to the Annual Plan, which costs $39.99 per year. Or you could opt for the Lifetime Plan, which is a one-time payment of $69.99.

Filmora9 is a great video editing tool for kids that want a little more power, more editing options, and more control over their video creations.

5. HitFilm Express

Price: Free

The final option for kids is another step up the video editing ladder. Some kids will struggle with HitFilm Express. But your pre-teens and teenagers should learn the ropes with relative ease.

HitFilm Express is a free video editor that comes packed with professional-grade tools and visual effects. The user interface is familiar, using timelines, drag and drop files, and multiple areas to manage video files. Your kids can move the workstation around to suit their workflow too, which is handy.

The list of tools is extensive. Kids can begin with simply cutting and splicing videos together using HitFilm Express. But they can also work their way up to using color corrections, layer masks, image tracking, and even the particle simulator. In fact, the particle simulator is fun at all ages but might need a guiding hand to get started.

There are also options for greenscreen backgrounds, post-processing effects and customization, and heaps of other special effects.

All in all, HitFilm Express is one of the most complete video editing tools for kids—even if it takes them a little while to learn. Still, there is no time better to start learning. After a while, even a professional tool like HitFilm Express will become as easy as the Windows 10 Photos app video editor.

Which Is the Best Video Editor for Kids?

The best kids video editing app depends on your children and their technical capabilities. I tested several of these tools with my kids during the coronavirus lockdown, for a school project.

Given their absolute lack of editing skills before this (bar some stop-motion image editing), the integrated Windows 10 Photos app video editor was a hit for its ease of use. That said, my eldest child felt that the overall package was lacking and wanted more by way of filters, scene transitions, and effects.

The kids found a happy medium with OpenShot, which didn’t increase the complexity of the video editing but did add a significant amount of customization to their creations. Plus, OpenShot is free, which is always a bonus.

A lot of schools now use Chromebooks at home and in the classroom. Check out our list of the best video editors for Chromebooks to practice your creative chops.

Read the full article: 5 Excellent Video Editors for Kids That Are Easy to Learn

Read Full Article

Xiaomi, Samsung and others begin to resume smartphone production in India


Xiaomi, Vivo, Samsung, Oppo and other smartphone companies have received approval from some state governments in India to partially resume manufacturing and assembling of devices amid the ongoing lockdown in the world’s second largest handset market that completely shut operations at these plants in late March.

The companies said that they have secured permission to kick start their manufacturing operations in the country, though several restrictions such as operating with limited workforce are still in place. (The federal government allowed the resumption of smartphone production earlier this month, but state governments have the final say on whether the local conditions are safe enough to enforce the relaxation.)

New Delhi’s decision comes days after it extended the lockdown by two weeks earlier this month but eased some restrictions to revive economic activity that’s been stalled since the stringent stay-at-home orders were imposed across the nation in late March.

Earlier this week, the government permitted e-commerce firms and ride-hailing services to resume services in green and orange zones, districts that have seen less severe outbreak of the coronavirus, across the country. Green and orange zones account for 82% of India’s 733 districts.

Xiaomi, which launched a range of gadgets in India today including its Snapdragon 865-powered Mi 10 smartphone, said earlier this month that it only had inventory to meet demand for up to three weeks.

Manu Kumar Jain, a VP at Xiaomi who oversees the Chinese firm’s business in India, said today that the company, which has been the top smartphone vendor in the country for more than two years, would restart operations in its contract partner Foxconn’s facility in the state of Andhra Pradesh.

A person familiar with the matter told TechCrunch that Wistron, a contract partner of Apple, has started limited operations for the iPhone-maker in Bangalore.

Vivo, the second largest smartphone vendor in India, said the company will resume production at 30% of their capacity. “We shall begin production with around 3,000 employees,” a Vivo spokesperson said.

Like Vivo, Oppo will also resume production at its Greater Noida facility with around 3,000 employees who would work in rotation, it said. Samsung, which opened the world’s biggest smartphone factory in India in 2018, said it will restart production in that factory.

“On Thursday, the factory started limited operations, which will be scaled up over a period of time. Employee safety and well-being remaining our absolute priority, we have ensured that all hygiene and social distancing measures are maintained at the premises, as per government guidelines,” said a Samsung spokesperson.

The coronavirus outbreak has severely disrupted several businesses. India did not see any handset sale last month, according to research firm Counterpoint. Counterpoint estimated that the smartphone shipments in India will decline by 10% this year, compared to a 8.9% growth in 2019 and 10% growth in 2018.

Every top smartphone maker in India has either established its own manufacturing plant or partnered with contract vendors to produce units locally in recent years to avail the tax benefits that New Delhi offers.


Read Full Article

The 8 Best Google Teamwork Tools for Online Collaboration


google-drive-tools

Google has one of the most enviable company cultures of any business in the world. But what makes Google a truly great place to work is its spirit of collaboration and drive for teamwork. That same culture is reflected in its roster of cloud tools built for team productivity.

Let’s look at several of those Google collaboration tools.

1. Gmail

Gmail is a user-friendly email provider that offers 15 GB of storage space per account. What you might not know is it also allows for collaboration through a delegation option. Delegates can read and send email on your behalf while accessing the account.

To set this up, follow these simple steps:

  1. Click the Settings button (gear icon) and choose
  2. Select the Accounts and Import tab at the top.
  3. Scroll down to Grant access to your account.
  4. Make your selections for the Mark as read and Sender information
  5. Click Add another account, enter the Gmail address for the person you are delegating to, and click Next Step.
  6. Confirm the email address and click Send email to grant access.

You’ll be directed back to your Gmail settings where you’ll see the person’s email address in that section. It will display as Pending until they accept the invitation and will then change to reflect that.

Gmail Grant AccessT o Delegate

Your delegate has seven days to accept your invitation. Once they do, they will see your account listed beneath theirs with the word Delegated. They simply click that to manage your inbox.

Google Switch Account Delegated

Download: Gmail for Android | iOS (Free)

2. Google Calendar

Google Calendar is a great way to visually organize your busy life. The tool also supports sharing. Make some or all of your calendars public, so people can see when you’re free.

Want to share a calendar with just one person? It’s easy!

  1. Click the options button (three dots) to the right of the relevant calendar in the main list and select Settings and Sharing.
  2. On the next page, scroll down to the Share with specific people
  3. Click Add people and then enter the person’s email address.
  4. Choose the Permissions dropdown box and pick the privilege you want to allow. You can also change this afterward in the same section of the settings.
  5. Click Send.

Google Calendar ShareWith Specific People

You can also share your using a link. On the same calendar Settings page, scroll down to Integrate calendar.

You’ll see different URL options for your calendar as a public URL, public URL in iCal format, and secret URL in iCal format.

Google Calendar Integrate Links

Copy the generated URL and send it to colleagues, friends, or other people you know. Be aware, anyone who gets the link can access the calendar.

The sharing capability of Google Calendar is fantastic for planning meetings, study sessions, or other collaborative activities.

Download: Google Calendar for Android | iOS (Free)

3. Google Sheets

Google Sheets is a spreadsheet app you can use with others simultaneously. Advantages like conditional formatting and built-in spreadsheet formulas save time for you and collaborators. You can even see other people make edits in real time.

To share your spreadsheet, follow these steps:

  1. Click the Share button on the upper right.
  2. Add the email addresses of the people you want to access the spreadsheet.
  3. Click the pencil icon and specify whether people can view the sheet, edit it, or comment on it.
  4. Alternatively, you can use the Get a shareable link option and send the link manually. Choose the viewing and editing permissions when doing so and you can group message or email the link to your team.
  5. Click Done when you finish.

Google Sheets Share Options

Want to send a notification to a collaborator in the sheet? Just right-click the cell in your sheet and pick Comment. Then type a plus sign followed by the collaborator to send a notification to their email address.

Google Sheets Comment Mention

Download: Google Sheets for Android | iOS (Free)

4. Google Docs

Google Docs works perfectly for putting your head together with teammates. Use it while writing to-do lists, brainstorming for projects, or anything else that’s better with input from others.

Share a document with people via the same process you use for Google Sheets (above). You can also use the shareable link option in the corner of the sharing box.

Another option you have when sharing Google Docs or Google Sheets are some advanced settings.

  1. Click the Share button on the top right.
  2. In the popup window, click Advanced.
  3. Here you’ll see the link to share, those who have access, and an option to invite more people.
  4. Under Owner settings, you can check the boxes for those additional options. So you can prevent editors from changing access or adding others and disable options for commenters and viewers to download, print, or copy it.

Google Docs Advanced Sharing Options

While looking at the document, pay attention to the colorful, flag-like icons with people’s names. They tell you who’s responsible for making changes.

Download: Google Docs for Android | iOS (Free)

5. Google Slides

Getting ready for a group presentation? Avoid endless phone calls and emails about how to proceed, and collaborate with Google Slides instead. Select an appealing template to save design time and make your words pop with hundreds of font possibilities.

Like Google Docs and Sheets, this collaboration facilitator allows in-the-moment editing by any authorized individual. Simply follow the now-familiar process for granting privileges with the Share button on the upper right of the window.

google slides presentation

Download: Google Slides for Android | iOS (Free)

6. Google Keep

Think of Google Keep as a beautifully basic project management tool. You can depend on it as a place for notes, drawings, lists, pictures, and audio clips.

  1. Start sharing by clicking the Collaborator icon at the bottom of the note.
  2. Enter the person’s name or type in their email address.
  3. Click Save.

Google Keep Note Collaborator Button

When you open Google Keep, you’ll see the last person who edited the note along with when.

Download: Google Keep for Android | iOS | Chrome (Free)

7. Google Hangouts (Chat)

Google Hangouts, to be renamed Google Chat, is a messaging app. Use it to talk to one person at a time through text or up to 150 individuals.

You can also launch a video chat with as many as 10 people. Start a new conversation by clicking the plus sign. Then, add people by name, email address, or phone number. Finally, choose whether you want a message-based conversation, phone call, or video call.

Google Hangouts Main

Let more people join by clicking the person icon and clicking the Invite People icon on the top. Then, follow the same process you initially did when creating the chat.

Download: Google Hangouts for Android | iOS (Free)

8. Google Meet

Google Meet is very similar to Google Hangouts as both offer a video call service. However, Google Meet is intended for professionals and is a paid service, although currently free due to the COVID-19 pandemic. Google Hangouts, on the other hand, is more for consumers.

It can accommodate up to 250 participants per call for G Suite users (see below) and 100 with a personal Google account. Plus, you can check out the live streaming and recording features.

Google Meet Meeting Ready

Starting or joining a meeting with Google Meet is simple. Just head to the website, hit Start a meeting or Enter meeting code, and you’re on your way.

Download: Google Meet for Android | iOS (Free)

Bonus: G Suite

If you’re collaborating for business reasons, checking out for G Suite may be a good idea. G Suite is Google’s packaged solution for organizations of all types. It offers all the tools above, plus several others. Essentially, it lets you access every tool from one location.

The G Suite version of Google Drive has a central administration panel with data loss prevention features. It also boasts a machine-learning-powered search feature that helps people find files faster.

After finishing a two-week free trial, you’ll pay a monthly amount per user based on tier level.

Purchase G Suite: $6 to $25 per month per user based on chosen package after a two-week free trial.

Take Advantage of Google Collaboration Tools

Getting acquainted with these tools is simple. That’s because the process for carrying out certain tasks (such as sharing documents) is identical across apps. And, most even allow you to keep working alone or with others, even without an internet connection.

With so many professional tools available (for free!), there’s no excuse not to be an awesome team. For more, take a look at these additional online collaboration tools.

Read the full article: The 8 Best Google Teamwork Tools for Online Collaboration


Platforms scramble as ‘Plandemic’ conspiracy video spreads misinformation like wildfire


A coronavirus conspiracy video featuring a well-known vaccine conspiracist is spreading like wildfire on social media this week, even as platforms talk tough about misinformation in the midst of the pandemic.

In the professionally-produced video, a solemn interviewer named Mikki Willis interviews Judy Mikovits, a figure best known for her anti-vaccine activism in recent years. The video touches on a number of topics favored among online conspiracists at the moment, filtering most of them through the lens that vaccines are a money-making enterprise that causes medical harm.

The video took off mid-week after first being posted to Vimeo and YouTube on May 4. From those sites, it traveled to Facebook, Instagram and Twitter where it circulated much more widely, racking up millions of views. Finding the video is currently trivial across social platforms, where it’s been reposted widely, sometimes with its title removed or reworded to make it more difficult to detect by AI moderation.

According to Twitter, tweets by Mikovits apparently don’t violate the platform’s rules around COVID-19 misinformation, but it has marked the video’s URL as “unsafe” and blocked the related hashtags “#PlagueOfCorruption and #Plandemicmovie. The company also hasn’t found evidence that her account is being amplified as part of a coordinated campaign.

Over on Facebook, the video indeed runs afoul of the platform’s coronavirus and health misinformation rules—but it’s still very easy to find. For this story, I was able to locate a copy of the full video within seconds and at the time of writing Instagram’s #plandemic hashtag was well-populated with long clips from the video and even suggestions for related hashtags like #coronahoax. Facebook is currently working to stem the video’s spread, but it’s already collected millions of views in a short time.

On YouTube, a search for “Plandemic” mostly pulls up content debunking the video’s many false claims, but plenty of clips from the video itself still make the first wave of search results.

The video itself is a hodgepodge of popular false COVID-10 conspiracies already circulating online, scientifically unsound anti-vaccine talking points and claims of persecution.

Mikovits, who in the video states that she’s not opposed to vaccines, later goes on to make the claim that vaccines have killed millions of people. “The game is to prevent the therapies ‘til everyone is infected and push the vaccines, knowing that the flu vaccines increase the odds… of getting COVID-19,” Mikovits says, conspiratorially. At the same time, she suggests that doctors and health facilities are incentivized to overcount COVID-19 cases for the medicare payouts, an assertion that contradicts the expert consensus that coronavirus cases are likely still being meaningfully undercounted.

In the video, Mikovits accuses Dr. Anthony Fauci of suppressing treatments like hydroxychloroquine—falsely touted by President Trump as a likely cure for the virus. While her claims appear to have landed at the perfect opportunistic moment, her beef with Fauci is actually longstanding. As Buzzfeed reported, in a book she wrote six years ago, Mikovits accused Dr. Fauci of banning her from the NIH’s facilities—an event Fauci himself was not familiar with.

Mikovits also touches on a popular web of conspiracy theories fixated on the idea Bill Gates is somehow implicated in causing the pandemic to profit off the eventual vaccine and makes the unfounded claim that “it’s very clear this virus was manipulated and studied in the laboratory.”

In other interviews, Mikovits has suggested that face masks pose a danger because they can “activate” the virus in the wearer. In the “Plandemic” clip, Mikovits also makes the unscientific claim that beaches should not have been closed due to “healing microbes in the saltwater” and “sequences” in the sand that protect against the coronavirus.

To the uninformed viewer, Mikovits might appear to ably address scientific-sounding topics, but her own scientific credentials are extremely dubious. In 2009, Mikovits authored a study on chronic fatigue syndrome that was retracted by the journal Science two years later when an audit found “evidence of poor quality control” in the experiment and the results could not be replicated in subsequent studies. That event and her subsequent firing from a research institute appear to have kicked off her more recent turn as an anti-vaccine crusader, conspiracist and author.

With “Plandemic,” Mikovits seems to have positioned herself successfully for relevance in the pandemic’s information vacuum—her book sales have even soared on Amazon. Toward the end of the clip, her interviewer even cannily sets up a future outrage cycle at the inevitable crackdown from social media platforms, where the video flouts rules ostensibly banning harmful health conspiracies like the ones it contains.

“It’s other people shutting down other citizens and the big tech platforms follow suit and they shut everything down,” Willis says with steely concern. “There is no dissenting voices allowed any more in this free country.” 

As we’ve reported previously, the coronavirus crisis is fertile ground for conspiracy theories and potentially lethal misinformation— a fact that the “Plandemic” video’s apparent mainstream crossover success demonstrates. Widespread uncertainty and fear is a powerful thing, capable of breathing new life into debunked ideas that would have otherwise kept collecting dust in conspiracist backwaters, where they belong.


Read Full Article

The 8 Best Parental Control Apps for Windows


As the world continues its relentless charge into the digital age, it’s more important than ever to ensure your children are protected from some of the web’s more mature content.

It’s impossible to know just how much of the internet is devoted to adult material, but estimates suggest pornography alone accounts for anywhere from 5–35 percent of all websites. And that’s before you count topics such as gambling, extreme profanity, dating sites, and other associated themes.

Luckily, the number of parental control apps has been growing at an impressive rate over the last few years. Parents now have a wide choice of software to choose from.

But which should you use? Keep reading to learning about some of the parental control software for Windows 10.

1. Windows User Accounts

Family accounts screen on Windows 10

Microsoft beefed up its native parental control offering with the release of Windows 10. It’s now possible to designate a user account as a “Child Account.”

Creating a Child Account lets you manage the account across all services the account is connected to, including Windows, Xbox, and the Microsoft Store.

Before explaining how to create a Child Account, you need to be aware of two important caveats.

First, your own user account on Windows 10 must be linked to a Microsoft Account—you cannot create Child Accounts if your account is a local account.

Second, you need to create the account within your “Family.” More on that shortly.

To create a Child Account, head to Start > Settings > Accounts. In the panel on the left of the window, click Family and Other Users.

Below Your Family, click Add a Family Member. A new window will pop up. Make sure you select Add a Child. If your child already has an email, enter it in the space provided.

If they don’t, click The Person Who I Want to Add Doesn’t Have an Email Address. You can then either create a new email or register the new account against your existing email.

Click through the next couple of screens and you’ll get a confirmation message. The new account will be visible under Your Family.

To manage the account, click Manage Family Settings Online. You have options to block websites, limit their screen time, add money to their account so they can buy content in the app store, and even get weekly reports about what sites your child has been visiting.

If you want something more powerful than the native Windows tool, you have many options to choose from.

2. Qustodio

Qustodio is arguably the best third-party parental control app for Windows 10. It has a free version and a premium version, though the free version is comprehensive enough for most users. The entry-level premium version costs $40 per year.

The free version offers website filters, search result filters, customizable time limits for games and apps, live notifications if your child accesses questionable content, and even a register of what they’ve been doing on the computer.

The biggest drawback: it’s only available on one device.

The premium version adds social media monitoring, location tracking, call tracking and blocking, SMS tracking and blocking, and an expanded dashboard. Depending on the plan you choose, you can manage up to 15 devices.

Using Qustodio is simple: you just need to make an account on the website and install the app on all your devices. You can then manage the individual settings from the web portal.

The software is also available on Mac, Android, iOS, and Kindle, meaning your kids will be protected regardless of which device they are using.

3. OpenDNS

OpenDNS Benefit Matrix

You should also consider OpenDNS. The company offers four plans, two of which—Family Shield and Home—are available for free.

Family Shield is pre-configured to block adult content and provides a set-it-and-forget-about-it solution. The Home package is more customizable, and thus, more complicated to set up for beginners.

Although the two free services can only block sites and nothing more, they will still restrict access to anything concerning proxies, anonymizers, sexuality, or pornography.

Of course, the beauty of using a DNS-based app is it works at a network level—just add the DNS address to your router’s control panel. If network-wide filtering is too extreme, it can still work on a per device basis.

Parental controls are just one of the many security benefits you can enjoy by changing your DNS server. There are a few reasons why third-party DNS servers care more secure.

4. Kaspersky Safe Kids

Like Qustodio, Kaspersky Safe Kids has both a free and a paid tier. To use the free version, you only need to make an account on Kaspersky’s homepage. You can then download and activate the app on Windows, Mac, Android, and iOS devices.

Features of the service include screen limits, time limits for social networks and games, and activity monitoring. For $15, the premium version adds reporting tools, location tracking, and Facebook activity tracking.

Kaspersky Safe Kids premium is included for free if you already have a Kaspersky Total Security plan.

5. Norton Family

Norton Family is a premium parental control app for Windows, Android, and iOS.

Some of the app’s key features include web supervision, time supervision, search supervision, video supervision, weekly and monthly reports on your kids’ activity, and instant lock which allows a parent to lock a child’s device from their own app.

Norton Family also supports access requests. If a child thinks an app or site has been blocked unfairly, they can ask you to whitelist it.

Sadly, if you live in a household with lots of different devices, the software might not be suitable—there is no Mac version.

A plan costs $50 per year.

6. Clean Router

If you’d prefer a network-based solution, check out Clean Router. It replaces your home router and adds monitoring and parental controls to any device on your network.

And you don’t need to worry about locking yourself out of adult content. You can apply device-specific filters, and even choose which time of day you want the filters to apply.

On the downside, as a router, the device does not perform as well as some of the more well-known brands on the market; it is not as fast as equivalent 802.11ac devices.

You also still need to pay a monthly fee. It’s $10 for the basic plan and $15 for the premium plan.

Check out our article if you’d like to learn more about the best routers on the market this year.

7. KidLogger

kidlogger

KidLogger doubles as both parental control software for Windows 10 and a keylogger. It means you can restrict what content your children have access to while also making sure they’re not using the apps you have given them permission to use in an irresponsible way.

If you deploy the app for an extended period of time, it builds up a comprehensive picture of how your kid is using the computer, including their most-used apps and most frequently accessed files.

It also has a cool feature that secretly takes a screenshot of your computer at predetermined intervals before saving them in the cloud, allowing you to see what your child was doing within each app.

Because the app is a keylogger, you will be able to see exactly what your child wrote in messages to friends and on social media. That’s obviously a powerful tool that some parents might feel uncomfortable using. If it is not for you, try one of the more traditional services we have discussed above.

In addition to Windows, the app is available on Mac, iOS, and Android.

8. Spyrix Personal Monitor

Spyrix is a powerful remote monitoring app that doubles as some of the best Windows 10 parental control software.

The list of features is impressive if a little scary. It offers a keylogger, live screen viewing, remote screenshots, microphone surveillance, webcam surveillance, search engine monitoring, URL logging, clipboard control, alerts, analytics, and a lot more.

For one PC, the software costs $60. If you only want to use the keylogger (perhaps to gain an insight into what might be troubling your kid), you can download it for free.

How to Choose the Right Parental Control Software for Windows 10

Before you purchase a premium app, first make sure you are clear about what you want your parental control software to achieve. If you have a young child, something as simple as website blocking might be sufficient. As kids age, the features you need from the app will change.

If you would like to learn more, make sure you check out our list of parental control apps for Chromebook.

Read the full article: The 8 Best Parental Control Apps for Windows


3 Better Ways to Store Your Files Than on the Desktop


cluttered-desktop

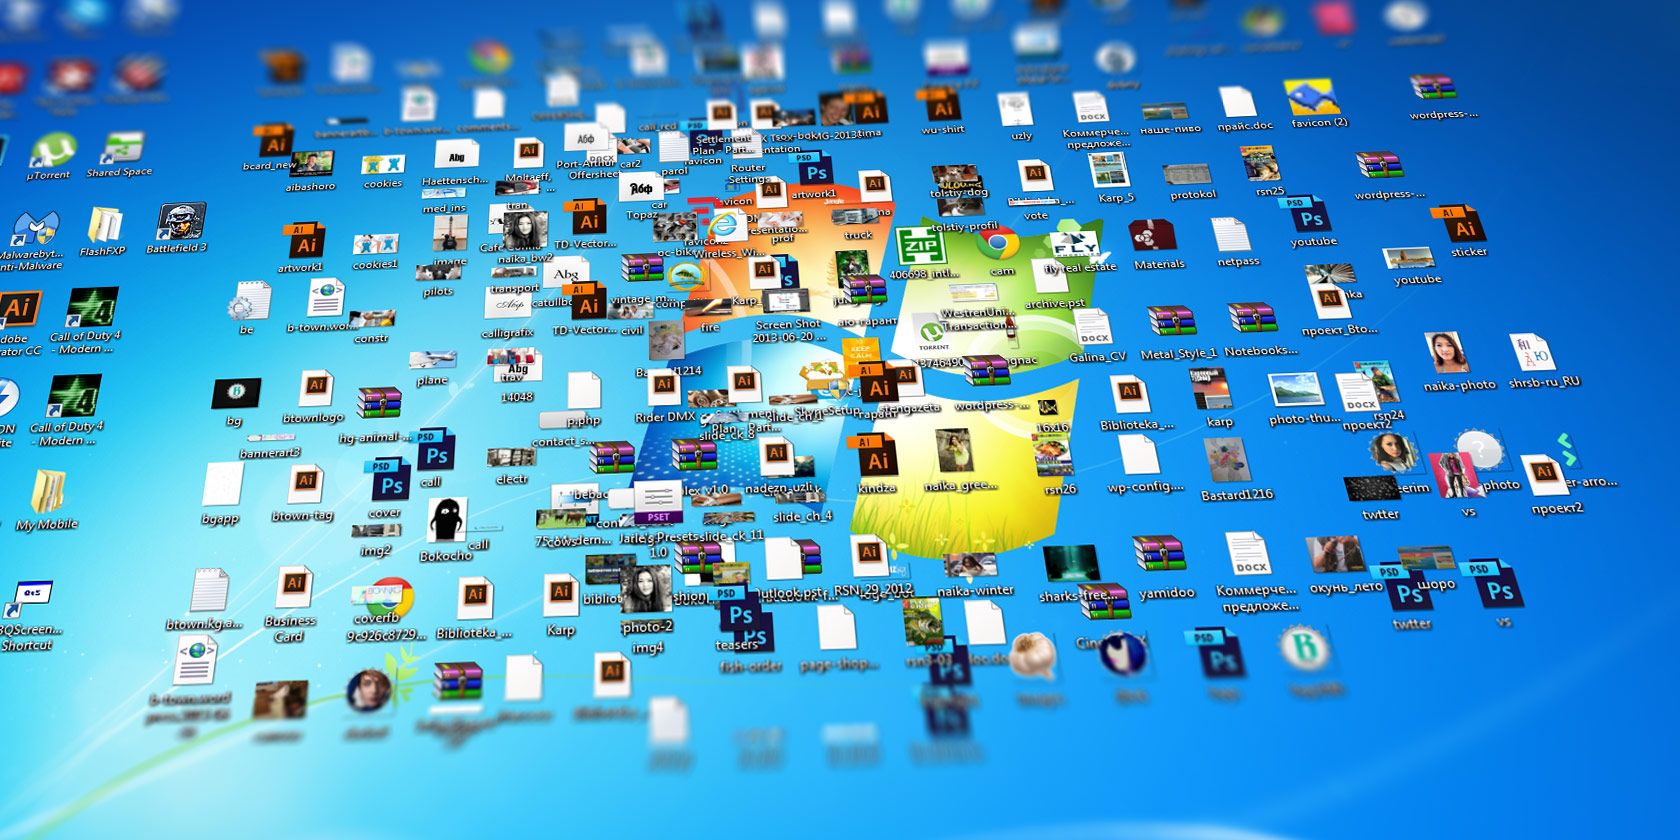
You shouldn’t save files on your desktop. It might seem like a quick and straightforward thing to do, but a cluttered desktop is going to hit your productivity. You soon won’t be able to find what you need or appreciate your desktop wallpaper.

There are many better ways to store your computer files and keep your desktop clean. We’re going to show you where to save files on Windows 10.

The Downsides to Desktop Storage

The urge to save files to the desktop is understandable. It provides immediate access with a single click, which means that it’s tempting to turn the desktop into a de facto headquarters for storage.

While it’s okay to use the desktop temporarily for storage, it’s likely to quickly spiral out of control and become a mess.

Unless you are strict with maintenance, you’ll eventually succumb to these issues:

  • No file backups: Many file backup programs ignore desktop files by default. Of course, a decent backup program will let you include desktop files, but if you forget then you’re at risk of losing important desktop files.
  • Cluttered appearance: A clear and distraction-free workspace leads to better productivity and the same rings true of your computer desktop. If the first thing you see when you login is a messy desktop packed with files, it’s unlikely to give you a positive feeling. Plus, you won’t be able to properly appreciate whatever desktop wallpaper you have set.
  • Difficult to navigate: Files often end up on the desktop for easy access. Perhaps it’s a document you’re working on over the course of several days and you want to find it immediately. However, this quickly mounts up, and you’re left with a desktop that is overflowing with files. It then becomes hard to find what you need, the exact problem you were trying to solve originally.
  • Slow login: This problem mainly impacts network accounts, but having a lot of stuff on your desktop can mean it takes longer to login to your Windows user account. This is because it has to sync everything on the desktop before it can move on to something else.

1. Use Windows Libraries

Windows 10 libraries

Windows 10 comes with things called libraries. Essentially, these libraries group folders together so that you can see all the files in a single place.

By default, your computer will have libraries for Camera Roll, Documents, Music, Pictures, Saved Pictures, and Videos.

These are not the same as the default folders, despite the fact that they have the same names.

To access them, open File Explorer, input Libraries in the navigation bar, and press Enter.

Navigate inside a library and click Properties. Here you can define which folders that library should pull from.

Click Add… to choose a folder and use the Optimize this library for dropdown if the library contains specific types of files.

Libraries are excellent because they don’t require any extra work. Instead of saving on the desktop, simply store your file in a folder of your choosing. It’s far more flexible and organized.

You can take this one step further by using an app to automatically organize your files.

2. Use Windows Folders

Similar to Windows libraries, but more ubiquitous, are folders. There are various reasons why folders exist and one of those is organization.

Simply speaking, the desktop is a folder itself. You can open File Explorer and go to Desktop to see everything you have stored there. You can then browse it like you would any other folder—sort, search, create, and so on.

However, what’s the point? If you’re doing that, you may as well use an actual folder that won’t clutter your desktop.

Windows comes with default folders like Documents and Pictures that are perfect for storing your data. You can quickly create a new folder within these by clicking New folder from the menu at the top, or right click and click New > Folder.

You can create many sub-folders, though there is a limit as the total path can’t be more than 260 characters. Nevertheless, that’s plenty for even the most obsessive organizers.

3. Use Cloud Storage

If you store on the desktop for ease of access, you should consider using a cloud storage provider.

Any good cloud service will also appear as a folder on your computer and automatically sync everything within it to the cloud. This means that your files are not only accessible from multiple devices, but you also have multiple copies of them too.

Many providers also provide revision history, which tracks any change made to a file. If you need to revert to an old version, you can do that with a couple of clicks. That’s not possible if you store on the desktop.

Need Quick Access to Files?

Of course, the desktop does have a purpose. It isn’t great at storing lots of folders and files, but it is good at hosting shortcuts.

Shortcuts mean you don’t have to navigate through File Explorer to find your files. Instead, you double-click the shortcut and are immediately taken there.

Windows 10 new desktop shortcut

Right click on the desktop and click New > Shortcut to activate the wizard. Alternatively, left click and drag a folder or file to the desktop to turn it into a shortcut.

Even if you remove a shortcut, the actual file will still be safe.

Instead of putting the shortcuts on the desktop, you could go one step further. Right click on any shortcut and select either Pin to taskbar or Pin to Start.

Of course, you don’t want to overload your taskbar or Start menu either, but you can use this to pin the most important files and programs that you need regular access to.

Clean Up Your Desktop

While the Windows desktop does have a purpose, it isn’t a warehouse for all your files. Hopefully we’ve demonstrated the better options available to you.

If your desktop is still a bit of a mess and full of junk and shortcuts, take a look at our guide to clean up your Windows desktop.

Read the full article: 3 Better Ways to Store Your Files Than on the Desktop


Google Lens Can Now Copy and Paste Handwritten Notes


Google has added a number of new features to Google Lens. The headline feature lets you copy and paste handwritten notes from your phone to your computer. You can also learn how to pronounce new words and quickly look up new concepts.

What Is Google Lens?

For the uninitiated, Google Lens is a visual search tool that utilizes image recognition technology. You point your phone at something, and Google Lens will identify what it is. The app will then show relevant information related to that thing.

Google Lens has become more capable in the years since its inception. And it can now identify images, text, labels, barcodes, and QR codes. And Google Lens has three new tricks up its sleeve, as outlined in a post on The Keyword.

How to Use Google Lens’ New Features

The first lets you copy and paste handwritten notes. This means you can point your phone at notes on paper, and copy them across to your computer. Saving you from having to write them out again to digitize your handwritten notes.

To copy and paste handwritten notes using Google Lens:

  1. Open Google Lens and sign into Chrome on your computer.
  2. Scroll across to the Text icon and point your phone at the text.
  3. Line your camera up, and press the Text button to take a photo.
  4. Either Select All or select the text you want to copy.
  5. Tap Copy to Computer and select the computer you’re signed into.
  6. You’ll receive a notification informing you that the text has been shared.
  7. You can now paste the copied text from your computer’s clipboard.

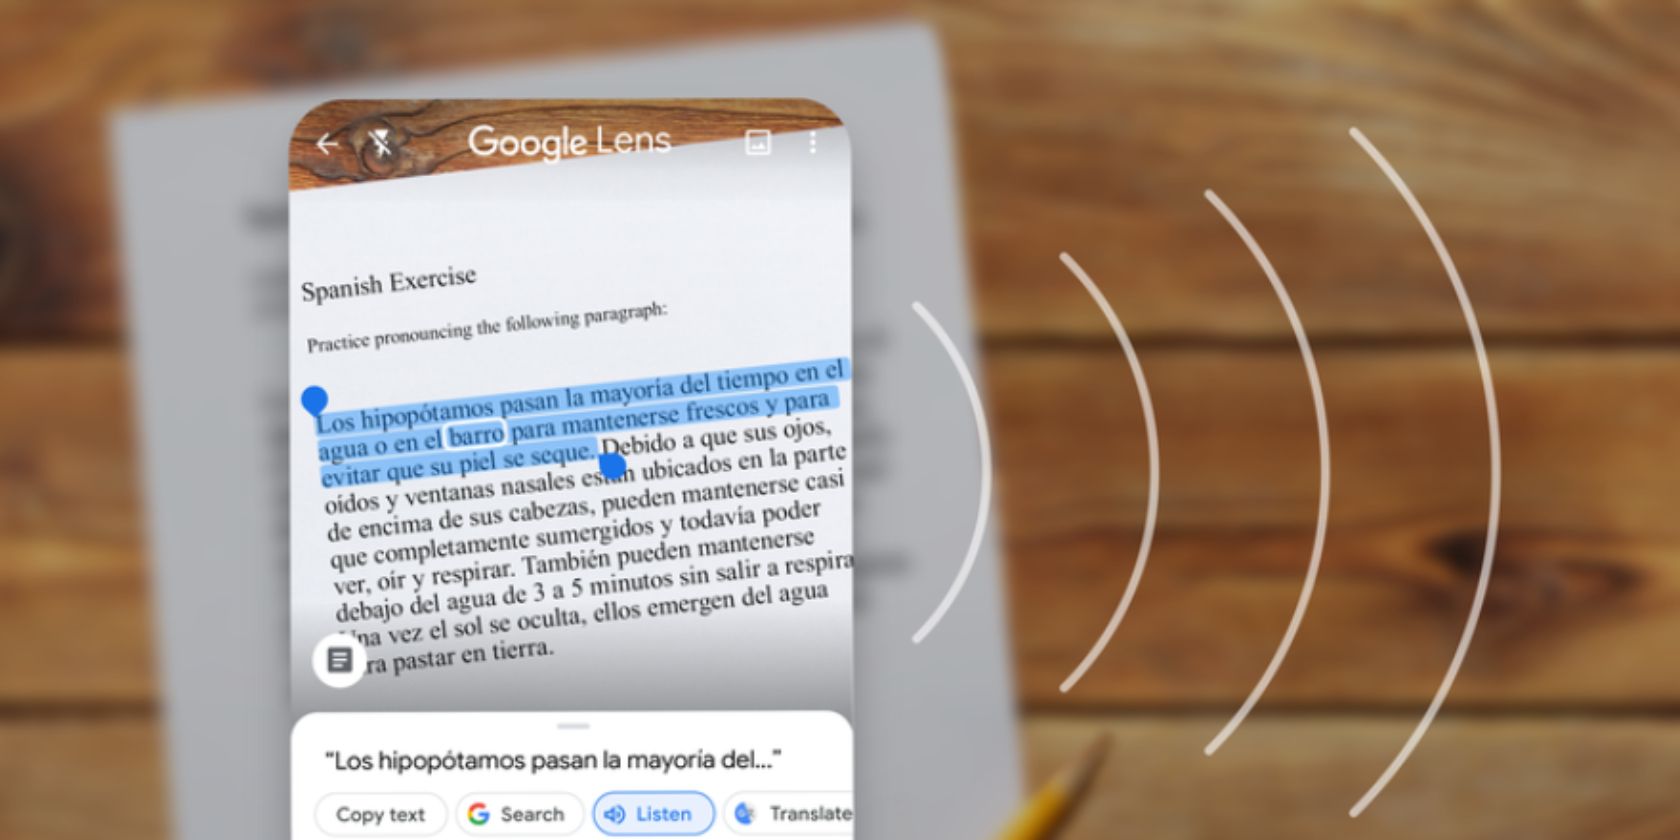
Google Lens also has a new Listen button that lets you listen to words and phrases out loud. Making it easier to learn new words and how to pronounce them. To do this, just capture an image of the word or phrase you want to learn and tap Listen.

Last but not least is Google Lens’ new ability to quickly look up new concepts. So, when you come across a reference to something you want to learn more about, just point the camera at the term and click the Search button to trigger in-line Google Search.

Things You Can Do With Google Lens

These new Google Lens features are rolling out now. Just make sure you have the latest version of Google Lens and Google Chrome installed on your devices. However, the Listen button is initially only available on Android, and “coming soon” to iOS.

If this subject interests you and you want more articles to read, here are some of the interesting things you can do with Google Lens and a list of ways to strip formatting when you copy and paste text. Both of which should prove useful.

Read the full article: Google Lens Can Now Copy and Paste Handwritten Notes


Read Full Article

The 8 Best Parental Control Apps for Windows


As the world continues its relentless charge into the digital age, it’s more important than ever to ensure your children are protected from some of the web’s more mature content.

It’s impossible to know just how much of the internet is devoted to adult material, but estimates suggest pornography alone accounts for anywhere from 5–35 percent of all websites. And that’s before you count topics such as gambling, extreme profanity, dating sites, and other associated themes.

Luckily, the number of parental control apps has been growing at an impressive rate over the last few years. Parents now have a wide choice of software to choose from.

But which should you use? Keep reading to learning about some of the parental control software for Windows 10.

1. Windows User Accounts

Family accounts screen on Windows 10

Microsoft beefed up its native parental control offering with the release of Windows 10. It’s now possible to designate a user account as a “Child Account.”

Creating a Child Account lets you manage the account across all services the account is connected to, including Windows, Xbox, and the Microsoft Store.

Before explaining how to create a Child Account, you need to be aware of two important caveats.

First, your own user account on Windows 10 must be linked to a Microsoft Account—you cannot create Child Accounts if your account is a local account.

Second, you need to create the account within your “Family.” More on that shortly.

To create a Child Account, head to Start > Settings > Accounts. In the panel on the left of the window, click Family and Other Users.

Below Your Family, click Add a Family Member. A new window will pop up. Make sure you select Add a Child. If your child already has an email, enter it in the space provided.

If they don’t, click The Person Who I Want to Add Doesn’t Have an Email Address. You can then either create a new email or register the new account against your existing email.

Click through the next couple of screens and you’ll get a confirmation message. The new account will be visible under Your Family.

To manage the account, click Manage Family Settings Online. You have options to block websites, limit their screen time, add money to their account so they can buy content in the app store, and even get weekly reports about what sites your child has been visiting.

If you want something more powerful than the native Windows tool, you have many options to choose from.

2. Qustodio

Qustodio is arguably the best third-party parental control app for Windows 10. It has a free version and a premium version, though the free version is comprehensive enough for most users. The entry-level premium version costs $40 per year.

The free version offers website filters, search result filters, customizable time limits for games and apps, live notifications if your child accesses questionable content, and even a register of what they’ve been doing on the computer.

The biggest drawback: it’s only available on one device.

The premium version adds social media monitoring, location tracking, call tracking and blocking, SMS tracking and blocking, and an expanded dashboard. Depending on the plan you choose, you can manage up to 15 devices.

Using Qustodio is simple: you just need to make an account on the website and install the app on all your devices. You can then manage the individual settings from the web portal.

The software is also available on Mac, Android, iOS, and Kindle, meaning your kids will be protected regardless of which device they are using.

3. OpenDNS

OpenDNS Benefit Matrix

You should also consider OpenDNS. The company offers four plans, two of which—Family Shield and Home—are available for free.

Family Shield is pre-configured to block adult content and provides a set-it-and-forget-about-it solution. The Home package is more customizable, and thus, more complicated to set up for beginners.

Although the two free services can only block sites and nothing more, they will still restrict access to anything concerning proxies, anonymizers, sexuality, or pornography.

Of course, the beauty of using a DNS-based app is it works at a network level—just add the DNS address to your router’s control panel. If network-wide filtering is too extreme, it can still work on a per device basis.

Parental controls are just one of the many security benefits you can enjoy by changing your DNS server. There are a few reasons why third-party DNS servers care more secure.

4. Kaspersky Safe Kids

Like Qustodio, Kaspersky Safe Kids has both a free and a paid tier. To use the free version, you only need to make an account on Kaspersky’s homepage. You can then download and activate the app on Windows, Mac, Android, and iOS devices.

Features of the service include screen limits, time limits for social networks and games, and activity monitoring. For $15, the premium version adds reporting tools, location tracking, and Facebook activity tracking.

Kaspersky Safe Kids premium is included for free if you already have a Kaspersky Total Security plan.

5. Norton Family

Norton Family is a premium parental control app for Windows, Android, and iOS.

Some of the app’s key features include web supervision, time supervision, search supervision, video supervision, weekly and monthly reports on your kids’ activity, and instant lock which allows a parent to lock a child’s device from their own app.

Norton Family also supports access requests. If a child thinks an app or site has been blocked unfairly, they can ask you to whitelist it.

Sadly, if you live in a household with lots of different devices, the software might not be suitable—there is no Mac version.

A plan costs $50 per year.

6. Clean Router

If you’d prefer a network-based solution, check out Clean Router. It replaces your home router and adds monitoring and parental controls to any device on your network.

And you don’t need to worry about locking yourself out of adult content. You can apply device-specific filters, and even choose which time of day you want the filters to apply.

On the downside, as a router, the device does not perform as well as some of the more well-known brands on the market; it is not as fast as equivalent 802.11ac devices.

You also still need to pay a monthly fee. It’s $10 for the basic plan and $15 for the premium plan.

Check out our article if you’d like to learn more about the best routers on the market this year.

7. KidLogger

kidlogger

KidLogger doubles as both parental control software for Windows 10 and a keylogger. It means you can restrict what content your children have access to while also making sure they’re not using the apps you have given them permission to use in an irresponsible way.

If you deploy the app for an extended period of time, it builds up a comprehensive picture of how your kid is using the computer, including their most-used apps and most frequently accessed files.

It also has a cool feature that secretly takes a screenshot of your computer at predetermined intervals before saving them in the cloud, allowing you to see what your child was doing within each app.

Because the app is a keylogger, you will be able to see exactly what your child wrote in messages to friends and on social media. That’s obviously a powerful tool that some parents might feel uncomfortable using. If it is not for you, try one of the more traditional services we have discussed above.

In addition to Windows, the app is available on Mac, iOS, and Android.

8. Spyrix Personal Monitor

Spyrix is a powerful remote monitoring app that doubles as some of the best Windows 10 parental control software.

The list of features is impressive if a little scary. It offers a keylogger, live screen viewing, remote screenshots, microphone surveillance, webcam surveillance, search engine monitoring, URL logging, clipboard control, alerts, analytics, and a lot more.

For one PC, the software costs $60. If you only want to use the keylogger (perhaps to gain an insight into what might be troubling your kid), you can download it for free.

How to Choose the Right Parental Control Software for Windows 10

Before you purchase a premium app, first make sure you are clear about what you want your parental control software to achieve. If you have a young child, something as simple as website blocking might be sufficient. As kids age, the features you need from the app will change.

If you would like to learn more, make sure you check out our list of parental control apps for Chromebook.

Read the full article: The 8 Best Parental Control Apps for Windows


Read Full Article

3 Better Ways to Store Your Files Than on the Desktop


cluttered-desktop

You shouldn’t save files on your desktop. It might seem like a quick and straightforward thing to do, but a cluttered desktop is going to hit your productivity. You soon won’t be able to find what you need or appreciate your desktop wallpaper.

There are many better ways to store your computer files and keep your desktop clean. We’re going to show you where to save files on Windows 10.

The Downsides to Desktop Storage

The urge to save files to the desktop is understandable. It provides immediate access with a single click, which means that it’s tempting to turn the desktop into a de facto headquarters for storage.

While it’s okay to use the desktop temporarily for storage, it’s likely to quickly spiral out of control and become a mess.

Unless you are strict with maintenance, you’ll eventually succumb to these issues:

  • No file backups: Many file backup programs ignore desktop files by default. Of course, a decent backup program will let you include desktop files, but if you forget then you’re at risk of losing important desktop files.
  • Cluttered appearance: A clear and distraction-free workspace leads to better productivity and the same rings true of your computer desktop. If the first thing you see when you login is a messy desktop packed with files, it’s unlikely to give you a positive feeling. Plus, you won’t be able to properly appreciate whatever desktop wallpaper you have set.
  • Difficult to navigate: Files often end up on the desktop for easy access. Perhaps it’s a document you’re working on over the course of several days and you want to find it immediately. However, this quickly mounts up, and you’re left with a desktop that is overflowing with files. It then becomes hard to find what you need, the exact problem you were trying to solve originally.
  • Slow login: This problem mainly impacts network accounts, but having a lot of stuff on your desktop can mean it takes longer to login to your Windows user account. This is because it has to sync everything on the desktop before it can move on to something else.

1. Use Windows Libraries

Windows 10 libraries

Windows 10 comes with things called libraries. Essentially, these libraries group folders together so that you can see all the files in a single place.

By default, your computer will have libraries for Camera Roll, Documents, Music, Pictures, Saved Pictures, and Videos.

These are not the same as the default folders, despite the fact that they have the same names.

To access them, open File Explorer, input Libraries in the navigation bar, and press Enter.

Navigate inside a library and click Properties. Here you can define which folders that library should pull from.

Click Add… to choose a folder and use the Optimize this library for dropdown if the library contains specific types of files.

Libraries are excellent because they don’t require any extra work. Instead of saving on the desktop, simply store your file in a folder of your choosing. It’s far more flexible and organized.

You can take this one step further by using an app to automatically organize your files.

2. Use Windows Folders

Similar to Windows libraries, but more ubiquitous, are folders. There are various reasons why folders exist and one of those is organization.

Simply speaking, the desktop is a folder itself. You can open File Explorer and go to Desktop to see everything you have stored there. You can then browse it like you would any other folder—sort, search, create, and so on.

However, what’s the point? If you’re doing that, you may as well use an actual folder that won’t clutter your desktop.

Windows comes with default folders like Documents and Pictures that are perfect for storing your data. You can quickly create a new folder within these by clicking New folder from the menu at the top, or right click and click New > Folder.

You can create many sub-folders, though there is a limit as the total path can’t be more than 260 characters. Nevertheless, that’s plenty for even the most obsessive organizers.

3. Use Cloud Storage

If you store on the desktop for ease of access, you should consider using a cloud storage provider.

Any good cloud service will also appear as a folder on your computer and automatically sync everything within it to the cloud. This means that your files are not only accessible from multiple devices, but you also have multiple copies of them too.

Many providers also provide revision history, which tracks any change made to a file. If you need to revert to an old version, you can do that with a couple of clicks. That’s not possible if you store on the desktop.

Need Quick Access to Files?

Of course, the desktop does have a purpose. It isn’t great at storing lots of folders and files, but it is good at hosting shortcuts.

Shortcuts mean you don’t have to navigate through File Explorer to find your files. Instead, you double-click the shortcut and are immediately taken there.

Windows 10 new desktop shortcut

Right click on the desktop and click New > Shortcut to activate the wizard. Alternatively, left click and drag a folder or file to the desktop to turn it into a shortcut.

Even if you remove a shortcut, the actual file will still be safe.

Instead of putting the shortcuts on the desktop, you could go one step further. Right click on any shortcut and select either Pin to taskbar or Pin to Start.

Of course, you don’t want to overload your taskbar or Start menu either, but you can use this to pin the most important files and programs that you need regular access to.

Clean Up Your Desktop

While the Windows desktop does have a purpose, it isn’t a warehouse for all your files. Hopefully we’ve demonstrated the better options available to you.

If your desktop is still a bit of a mess and full of junk and shortcuts, take a look at our guide to clean up your Windows desktop.

Read the full article: 3 Better Ways to Store Your Files Than on the Desktop


Read Full Article

How to Separate Work From Personal Life: 5 Key Digital Habits You Need


work-life-balance

When you freelance or when you work from home, the line between your personal self and professional self tends to blur.

The risk of identity mix-ups and misplaced data is constant. (And the temptation to eat at your desk or play hooky from work is frequent!) One email sent to the wrong address or one ill-advised selfie posted to your social media profile could get you fired.

To reduce the potential for such disasters and for better work-life integration, let’s see how to separate your work and personal life in the digital world.

1. Have Distinct Online Identities

separate-gravatars

Start with your work email. Don’t use this address to sign up for services that aren’t related to your work. Use your personal email address instead.

(If you work freelance, set aside a dedicated inbox for work. To maintain a professional image, it’s ideal to get a custom domain name and an email address to go with it.)

For convenience, you can check all email sent to your work and personal inboxes from the same location with a desktop email client or a webmail service that can handle multiple accounts.

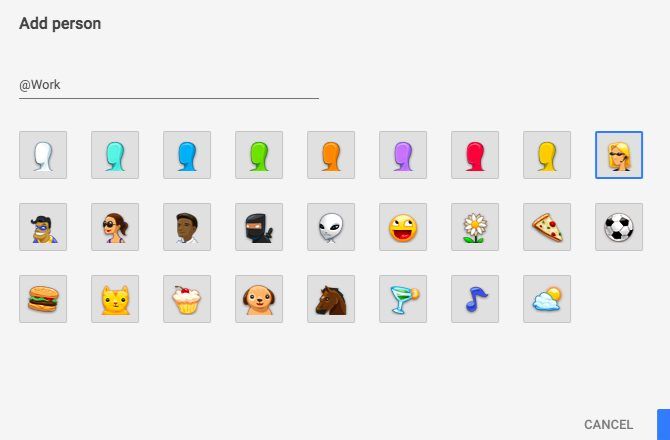
Now for the most important bit: set up different profile pictures for your work and personal email accounts. For best results, use Gravatar to assign an avatar for either email account. Once you do this, whenever you use one of your email addresses online, the corresponding unique profile picture shows up with it.

What’s the benefit of doing this?

You’re always aware if you’re using the appropriate account for whatever online action you’re about to take. This helps when you’re sending a strongly worded email, leaving a comment on a website, or sharing sensitive files.

You might also want to have separate social media accounts for work and personal use. After all, professional networking on social media has certain dos and don’ts that may not apply to the personal sphere.

2. Use Separate Devices

If you limit your work-related tasks and personal ones to distinct devices, you don’t have to worry about any mix-ups of data or identity. You can turn one device into a productivity hub and the second one into an entertainment and admin zone.

You don’t have to go out and buy a new gadget to make this work. Try using your desktop or laptop only for work and your phone only for personal tasks and media consumption. A Chromebook also makes the perfect device for personal use.

It can get tedious to switch between the two devices, but that’s the idea. It’ll ensure that when you work, you work, and when you play, you play.

If procrastination is your nemesis or workaholism is, having a dedicated device for work and a shutdown ritual can help you fight it. This is a great way to ensure work-life balance.

3. Create Separate User Accounts on Desktop

fast-user-switching

If you use the same device for both work and personal activities, it’s ideal to create separate user accounts or profiles for them.

You can use your personal account for day-to-day admin, blogging, watching movies and TV shows, and catching up on newsletters. You can also use it for casual web browsing and as a testing ground for apps.

But when you log into your work account, it’ll be like you have dressed up for work and entered “the zone”. By the way, some people find that actually dressing up helps them be more productive when working from home.

4. Separate Browsers or Browser Profiles

create-chrome-user-profile-mac

Don’t want to switch back and forth between user accounts? Why not switch between browsers instead? You can use a combination of, say, Chrome and Firefox, or Safari and Opera, to split your digital activity.

With this approach, you can keep your work browser lean. All the resource-intense activity in your personal browser will stay limited to it.

You can play around with all kinds of interesting extensions in the personal browser without slowing down your work browser. You also don’t have to worry about mixing up bookmarks or leaving behind your search history in your work account.

If Chrome or Firefox is one of your primary browsers, you can set up different profiles for work and play instead of using separate browsers.

While you can have multiple user profiles in Opera also, the method to set them up is slightly roundabout. You’ll find it in this thread in the Opera forums.

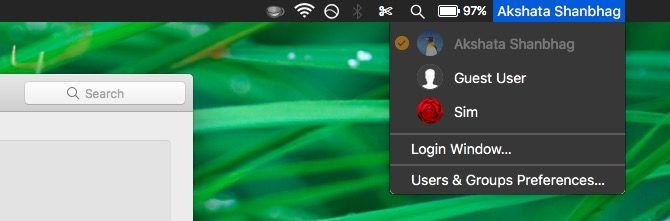
It’s a pity that Safari doesn’t support multiple user profiles. You can’t even add them with an extension due to Apple’s System Integrity Protection (SIP) security feature. But don’t worry, you can quickly switch between user accounts from your Mac’s menu bar.

5. Separate Apps and Tools

google-suite-for-work

Of course, your work might not be limited to a browser. But you can still keep your work-related and personal activities sorted with distinct apps, brands, app suites and their ecosystems.

For example, if you use OneNote for work, you can save non-work stuff to Evernote. Or, if you use iCloud apps or Microsoft apps for your personal data, you can use Google apps for work.

Setting up apps to separate work and personal activities might seem like a lot of effort initially, but once you have everything in place, your workflows are more sorted. And thanks to import/export and cloud backup features in apps, moving your data is not a problem.

Dividing activities with digital and analog tools can also work. For example, you can use Trello, Google Calendar, and Evernote for work. And for personal use, you can go with an actual Kanban board, a paper planner, and a paper Bullet journal. (You don’t have to go to extremes like swapping out personal emails for handwritten letters!)

This last approach is working out pretty well for me. By using my laptop mainly for work, I have been able to reduce screen time to a considerable extent.

Dress Up Your Online Self for Work

In a traditional work setup, your work life is both physically and digitally removed from your personal one. As a freelancer or remote worker, you can get the same physical space by setting up a home office. But you need a digital barrier too, and the onus to create it is once again on you.

Separating work and personal life is the first step toward being a successful telecommuter. And if you do it as a precautionary measure, in all probability, you won’t have to do it as a damage control tactic.

Image Credit: Olivier26/Depositphotos

Read the full article: How to Separate Work From Personal Life: 5 Key Digital Habits You Need


Read Full Article

The Sonos Arc Soundbar Brings Theater-Quality Audio to Your Home


For years, people have set up their homes to replicate the theater experience. That’s often been through immersive televisions, curved screens, smart lighting, or high-quality soundbars.

Sonos, the famed audio manufacturer, has announced its latest smart soundbar, the Sonos Arc, that promises to bring cinema-quality audio to your home. Here’s everything you need to know about the Sonos Arc.

What Is the Sonos Arc?

The Sonos Arc is the latest product in the company’s smart home audio lineup. Like many soundbars on the market, the Arc is an unassuming long, thin speaker designed to fit comfortably underneath your TV. However, Sonos’ devices come equipped with the company’s technology, and that’s their key difference to other equipment.

All Sonos devices connect to your Wi-Fi network and can then interact with each other. This means you could own one of their speakers, place it in your bedroom, and synchronize playback with your other Sonos products by putting them into a Group. This interaction isn’t done on the device, though. Your primary contact with the speaker is through the Sonos controller app, which is available for mobile and desktop.

The app allows you to change audio sources, install firmware updates, schedule alarms, and change the EQ of each speaker individually. If you already own a Sonos product, you’ll be familiar with the controller. However, with the launch of the Arc, the company is also debuting a new Sonos app, which will allow you to customize the experience further.

Sonos Arc Features

Sonos Arc soundbar with Sonos Sub

One of the most notable features of the Arc is the inclusion of Dolby Atmos technology. This surround sound experience is found in many theaters around the world and has been making appearances in home cinema setups since 2017. However, this marks the first time Dobly Atmos can be found in any Sonos product.

The improved audio quality is further bolstered by the new Sonos app, which makes it possible to tweak settings like Speech Enhancement to emphasize voices, and Night Sound to reduce the volume of loud sound effects. Using Sonos’ TruePlay tuning, the Arc creates an acoustic profile of your room and automatically changes settings for the most immersive experience.

The Arc soundbar is undoubtedly aimed at home theater experiences. However, you can continue to use the speaker even once the TV is shut off. Using the Sonos app, you can listen to music, podcasts, audiobooks, and radio using the services integrated with Sonos’ platform. This includes popular apps like Spotify, YouTube Music, Tidal, Pocket Casts, and Audible.

Sonos’ most recent speakers also include support for voice assistants, and the same is true of the Arc. You can interact with Google Assistant and Alexa, and control the soundbar with the Sonos app, your TV remote, and Apple AirPlay 2.

Where Can You Buy the Sonos Arc?

The Sonos Arc will be available from June 10th, 2020, with an expected retail price of $799. You can pre-order the Sonos Arc from the Sonos website, too.

The company also announced the upgraded Sonos Sub, allowing you to add extra bass to your Sonos setup. The Sub, along with a new edition of the Sonos Five speaker, can also be pre-ordered through the Sonos website.

While there’s a lot to like about the Arc, it isn’t the only soundbar available to you. If you’re interested in upgrading your home audio setup, consider one of the best soundbars for audiophiles on a budget.

Read the full article: The Sonos Arc Soundbar Brings Theater-Quality Audio to Your Home


Read Full Article