17 April 2020

Don’t Buy Office 2019! Here’s Why You May Not Need It


shouldnt-buy-office-2016

Microsoft offers two ways to buy Microsoft Office: the Microsoft 365 subscription plan or a one-time purchase. The latest standalone version of Office is Office 2019, which you might be tempted to buy if you want to avoid subscriptions.

However, we strongly recommend against buying Office 2019 (or older versions like Office 2016). Let’s look at why you shouldn’t buy standalone Office 2019 and the best alternatives you could consider instead.

Why Microsoft Office 2019 Isn’t Worth the Cost

The biggest draw for the standalone version of Office 2019 is that it’s a one-time purchase. It makes sense that you’d want to avoid signing up for yet another subscription, especially if you don’t use all the features of Office. If you’re not familiar, have a look at our Office 2019 overview first.

As it turns out, though, buying Office 2019 isn’t the right move for almost everyone. This is because…

1. Microsoft 365 Offers So Much More

When you buy Office 2019, the basic Office apps are all you get. While this might be exactly what you’re looking for, it’s hard to ignore the fact that Microsoft 365 (formerly Office 365) comes with some bonuses that make it a much better value.

Most importantly, Microsoft 365 guarantees you’ll get all updates to Office as they become available. Like Windows 10, Microsoft regularly works on Office to add new features. Office 2019 does include security updates, but when the next major version of Office arrives, you’ll have to pay full price for it again.

Additionally, Microsoft 365 Personal comes with 1TB of OneDrive storage and 60 minutes of Skype credit each month. Even better, Microsoft 365 Family offers these benefits for up to six users individually. Since OneDrive charges $1.99 per month for 100GB of space, the storage alone is a great value.

You also get access to Microsoft support via chat or phone as a Microsoft 365 subscriber.

2. Office 2019 Isn’t Cheap

Microsoft Office Pricing

Home users have three available versions of Office 2019 to choose from. No matter which one you chose, they are licensed for one Windows PC or Mac only:

Don’t forget that OneNote is free for everyone, so you don’t need Office to get it. Instead of these packages, you can also buy individual apps (such as Word or Excel) for $139.99 each. However, this doesn’t make much sense when you can get Home & Student for just $10 more.

Meanwhile, Microsoft 365 includes all these apps in each plan. Microsoft 365 Personal costs $6.99 per month (or $69.99 per year) and lets one person use Office on all their devices. The Microsoft 365 Family plan costs $9.99 per month (or $99.99 per year) and allows up to six total people in your family to use Office across every platform they use.

When purchased yearly, you could pay for six years of Microsoft 365 Personal before you matched the cost of Office Professional 2019. And the Family plan provides much better value if you have multiple people who need Office. Buying standalone Office just isn’t cost-effective.

3. Office 2019 Has Limited Functionality

In the early days of Microsoft 365, standalone versions of Office, such as Office 2016, were simply snapshots of Office 365 at that time. Thus, you could buy Office every few years to avoid the subscription and keep up with the latest developments.

However, this isn’t the case anymore. Microsoft now prevents Office 2019 users from accessing some of the features found in the Microsoft 365 apps. This includes the Researcher panel in Word, the Designer feature in PowerPoint, and real-time collaboration in Excel.

These limitations extend to the mobile apps. Buying Office 2019 doesn’t unlock full access to the Office apps for Android and iOS/iPadOS.

If you have a tablet with a screen larger than 10.1 inches, the mobile Office app only lets you view files. Smaller devices can edit files in Office apps, but are still missing some features. You need a Microsoft 365 subscription to unlock them all.

While you might not use these functions all the time, getting an inferior product for the price you pay is frustrating.

4. Microsoft Won’t Support Office 2019 for Long

Office 2019 Lifecycle

As we’ve discussed, the biggest advantage of buying Office 2019 is that you can use it as long as you want without additional cost. However, Microsoft has changed its support plan with Office 2019 to reduce this period.

Office 2019 will enjoy five years of mainstream support (ending on October 10, 2023), but only two years of extended support after that (ending on October 14, 2025). This is quite a drop from the five years of extended support that previous Office editions offered.

Microsoft is likely doing this to reduce the amount of old software it has to support. However, it means that your purchase has less value, as you’ll need to upgrade sooner to avoid using an unsupported version of Office.

5. What You Have Is Probably Good Enough

If you have Office 2016, Office 2019 isn’t a must-have upgrade. Unless you’re an Office expert, you won’t use most of the new tools anyway. Whether you have Office 2016 or even another office suite (as we’ll discuss below), you can still do what you need to do: create and edit documents, spreadsheets, and presentations.

If that’s all you need to do, why spend money for features you’ll probably never use? You’re better off learning more about Office with online tutorials.

6. There’s No Free Trial

Office 2019 doesn’t come with a free trial. This is strange, as earlier versions came with an evaluation period so you could see if you actually needed the new features or not.

On the other hand, you can try Microsoft 365 Family for a month at no charge. Microsoft’s lack of a similar trial for potential customers of Office 2019 isn’t a make-or-break issue, it’s yet another indication of the lack of value in Office 2019.

The Best Free Alternatives to Office 2019

If you decide to skip Office 2019, you still need a software suite that includes word processing, spreadsheet, and presentation apps. Thankfully, you have some great alternatives that provide these features without costing you anything.

While they might not have every little feature of Office 2019, they’re more than enough for most people.

1. Office Online

Office Online Apps

Did you know that Microsoft offers free online versions of Office apps through the Office Online service? These are stripped-down compared to the desktop offerings, but for drafting a quick paper or spreadsheet, Office Online is plenty good enough.

There’s no offline version, which means it’s not ideal if you often work without an internet connection. However, for casual Office users, it’s a free and simple way to use the service. You just need to sign in with a Microsoft account.

2. Google Docs

Google Docs Explore

Like Office Online, Google Docs is a simplified office suite that’s available in any browser. If you use Google products more than Microsoft’s tools, this option might work better for you. You can use Google Docs offline with a Chrome extension, but it’s more of a last resort feature than something you should rely on.

Want to maximize your productivity with Google Docs? Keep on top of these time-saving Google Docs tips and you’ll make your life much easier.

3. LibreOffice

LibreOffice Toolbar

For a desktop alternative to Microsoft Office, LibreOffice is the best choice. This open source suite comes with tools for word processing, spreadsheets, presentations, diagramming, flowcharts, databases, and advanced math equations.

If you need an offline office suite that’s more powerful than free offline tools, look no further. Once you get used to its interface, you’ll probably never need to use Microsoft Office again.

Office 2019: Not Worth It for Most Cases

Before you buy Office 2019, you should try one of the free alternatives. If they don’t work for you, Office 2019 is only a good choice if you satisfy all of these conditions:

  • You only work on one computer and don’t plan to get another.
  • Nobody else in your family uses Office.
  • You never work on your mobile device.
  • Missing out on features in Office doesn’t bother you.
  • You won’t use OneDrive cloud storage.
  • You’re fine with using Office as it is now until the next major release when you’ll pay for it again.

If you disagree with any of the above, Microsoft 365 represents a better value for you. Otherwise, go ahead and buy Office 2019. If you use it until the end of support, having the upfront price spread out over several years is acceptable.

Next, master using Office with hidden Word features and essential Excel formulas.

Read the full article: Don’t Buy Office 2019! Here’s Why You May Not Need It


Read Full Article

How to Connect Any Phone or Tablet to Your TV Using USB


connect-smartphone-tablet-tv

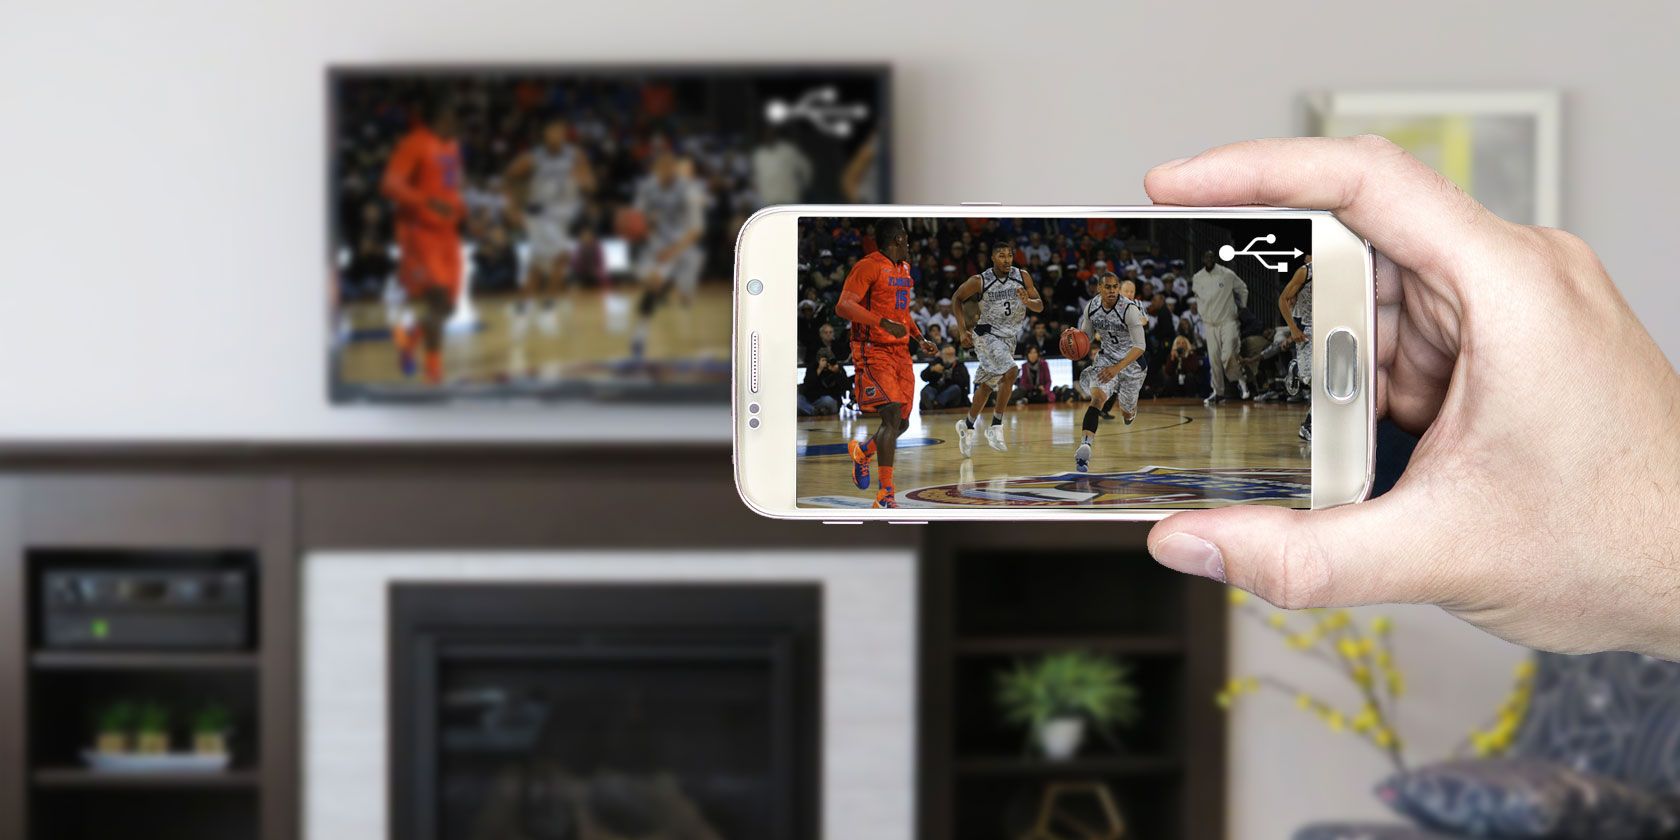
Connecting a phone to your TV isn’t as simple as you might think. Whether you want to enjoy Netflix, share photos, or use it for home working, hooking up a cable between your phone and TV can be tricky.

But it’s not impossible—it’s all a matter of selecting the right cable.

Here’s what you need to know about how to connect an Android or iOS phone or tablet to a TV using a USB cable.

Why Use USB to Connect Phones, Tablets, and TVs?

With the ease and prevalence of casting to mirror a phone screen wirelessly, you might be curious why you should use a USB to TV connection for your phone.

If you hook a phone to your TV with a hardwired connection, you benefit from a low-latency signal. For instance, if you plan to mirror your phone to a television for gaming, you’ll want a USB connection rather than a wireless configuration. This vastly reduces lag.

Plus, for situations where you lack Wi-Fi or have a weak wireless signal, you’ll need a wired connection instead.

To connect your phone or tablet to a TV, you can use one of the following methods:

  • Android:
    • USB-C cable with DisplayPort
    • USB cable with MHL (Mobile High-Definition Link)
    • USB cable with SlimPort
  • iPhone/iPad
    • Lightning cable (iPhone and iPad)

Which option you use depends on your specific device and operating system. Although all methods are similar, the process differs for connecting an iPhone versus an Android device.

Similarly, your connection method varies depending on your needs. Simply viewing photos on a compatible television requires your charging cable and mobile device. But for screen mirroring, you’ll need a USB adapter.

How to Connect Android Phones and Tablets to TVs With USB

You have two options for connecting Android phones and tablets to your TV:

  1. USB-C cable with DisplayPort support
  2. USB cable with MHL
  3. USB cable with Slimport

We’ll look at each below.

1. Connect Your Phone to a HDMI TV Using USB Type-C

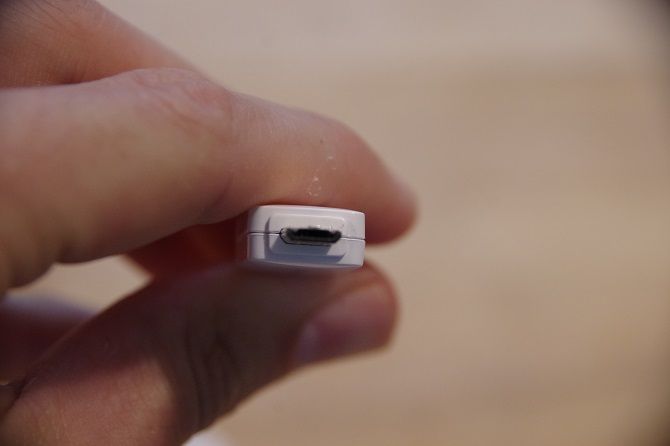
The most recent Android smartphones feature a USB Type-C port. Also known as USB-C, this is a cylinder-shaped input that replaces micro-USB and is used for charging and data transfer.

Including support for the DisplayPort standard, USB-C can be used to mirror your phone or tablet’s display to a TV.

Simply connect the USB-C cable to Android, then connect this to a suitable docking station or USB-C to HDMI adaptor.

USB C HUB Adapter USB C HUB Adapter Buy Now On Amazon $23.99

2. Connecting Phone to TV Using USB With MHL

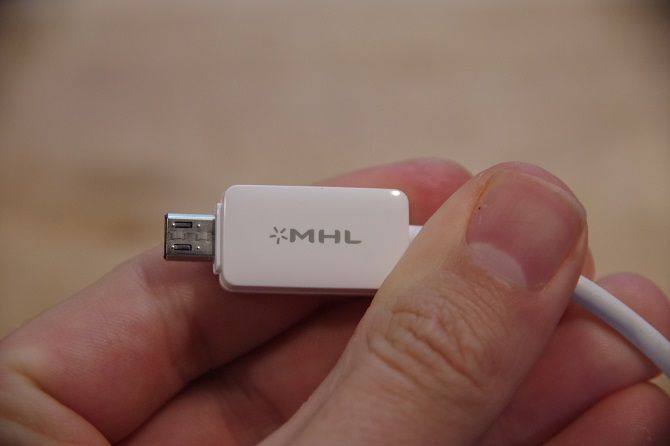
MHL is one of the most common solutions for connecting a phone to a HDMI TV with a micro-USB cable. This technology allows MHL-compatible devices such as smartphones and tablets to connect to televisions and projectors.

You can browse a list of MHL-enabled devices on the official MHL website.

To use Mobile High-Definition Link, you will need

  • MHL-enabled phone
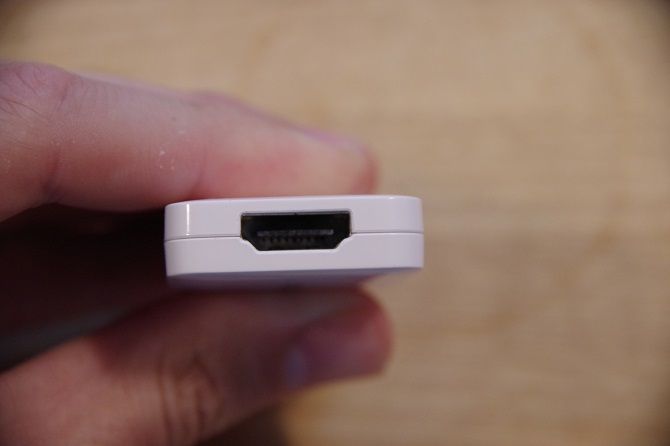
  • USB to HDMI MHL adapter or cable
  • HDMI cable
  • Power cable

Although this is the general setup, the specific cable you’ll need varies. Google MHL cable [your device name] to find a list of compatible cables.

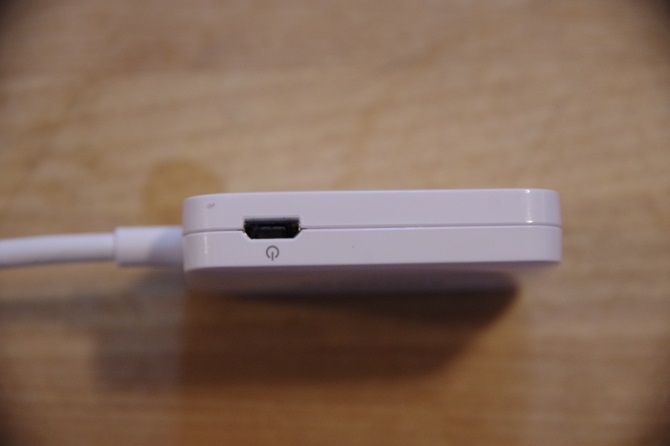
For a USB to TV connection using MHL, first hook up your phone via an MHL adapter. The adapter will require power either from a USB port on the cable or an external source.

Although MHL initially required a power connection, MHL 2.0 makes this non-essential. Still, since MHL does draw power from the mobile device, it’s wise to connect a power cable.

Next, connect your phone to your television with the MHL cable. After that, you should see your phone screen on your TV; it’s plug-and-play.

Overall, Mobile High-Definition Link is one of the best solutions for connecting an Android phone to a TV using a USB cable.

3. Connecting Phone to TV Using USB SlimPort

If you have an older phone, you might connect your phone to a TV with a SlimPort cable. While similar to MHL, SlimPort offers different outputs, but uses the micro-USB connection.

Whereas MHL is limited to HDMI, SlimPort outputs to HDMI, DVI, DisplayPort, and VGA. This makes it better suited to a variety of displays, including older monitors and TVs with no digital inputs.

Unlike MHL, SlimPort does not draw power from mobile devices.

You’ll need the following to connect a phone to your TV using a SlimPort adapter:

Begin by plugging the SlimPort adapter into your phone. Then, attach the SlimPort adapter to your display using the proper cable. You should then be able to view your phone’s screen on a TV. Like MHL, it’s plug-and-play.

Can You Connect an iPhone or iPad to TV With USB?

As iPhones and iPads don’t have USB, you can’t use this as a connection method. But you can connect them to a TV using a cable.

If you own an iPhone 5 or newer, it will have a Lightning connector. To connect your iPhone to a TV you’ll need the Lightning digital AV adapter for HDMI outputs, or the Lightning to VGA adapter if you have a VGA display. Buy the cable that fits your TV.

Older iOS devices with the old 30-pin port instead use the 30-pin VGA adapter.

You can connect an iPad to your TV through the same means. Again, you’ll most likely need a Lightning cable for this. Only the iPad 3 and earlier use a 30-pin cable. All other iPads, including every iPad Mini and iPad Pro, use a Lightning cable.

Once you’ve plugged in your adapter, simply hook up the video output to your display. Then, your phone screen will mirror to the TV. Apple’s official Lightning adapters contain an additional Lightning port for charging while viewing content on a second screen.

USB to TV: Connecting as a Storage Device

While the most common use case for connecting a phone to a TV using USB is for screen mirroring, there’s another option. Instead of screen mirroring, you can also simply view files like pictures on a TV.

However, this will require a compatible monitor, TV, or projector. Most modern displays should accept USB storage.

Of the various USB to TV connection options, this is the easiest. Since it only requires a phone, USB cable, and TV with a USB input, it’s simple to set up. Which specific cable you need depends on your phone.

On an iPhone or iPad, use a Lightning cable (or 30-pin for older devices). Alternately, Android users need a micro-USB or USB-C cable. The USB cable that came with your phone or tablet should work fine.

USB to TV: Connecting to View Photos

Modern Android devices don’t support USB Mass Storage, so your TV won’t view your device as a true external drive.

This assumes that your TV or monitor features a USB input capable of displaying files from a connected storage device.

Simply connect your cable to your phone, then to the TV. With the standard USB end of the cable connected to your display, change the input on your TV to USB.

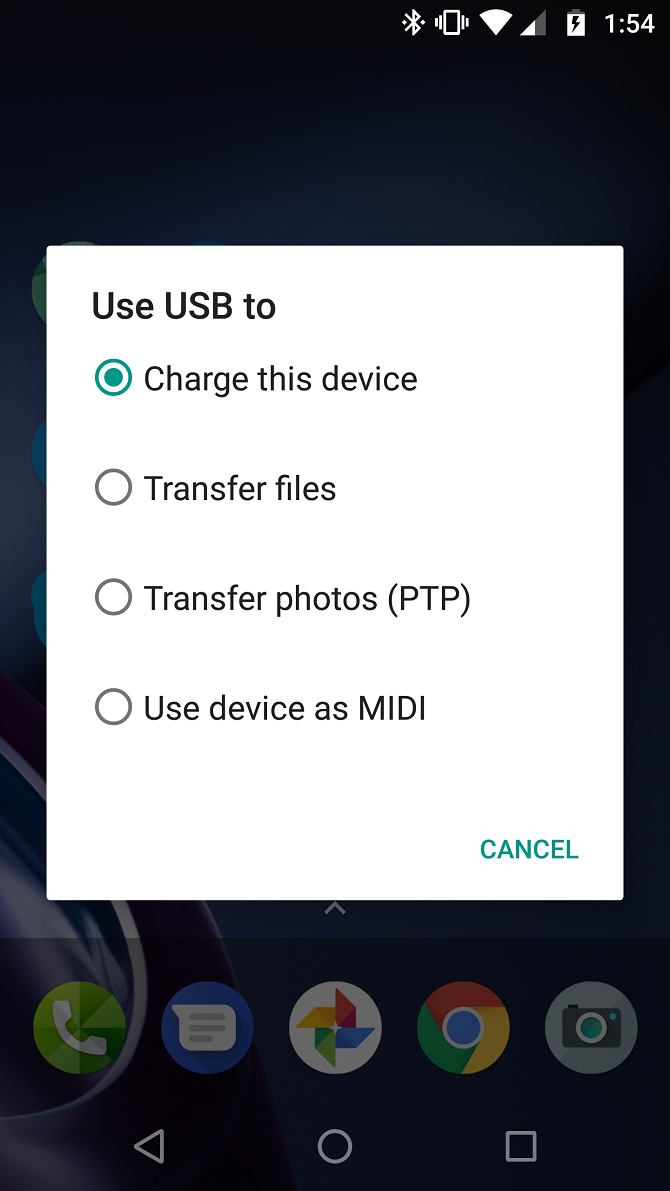
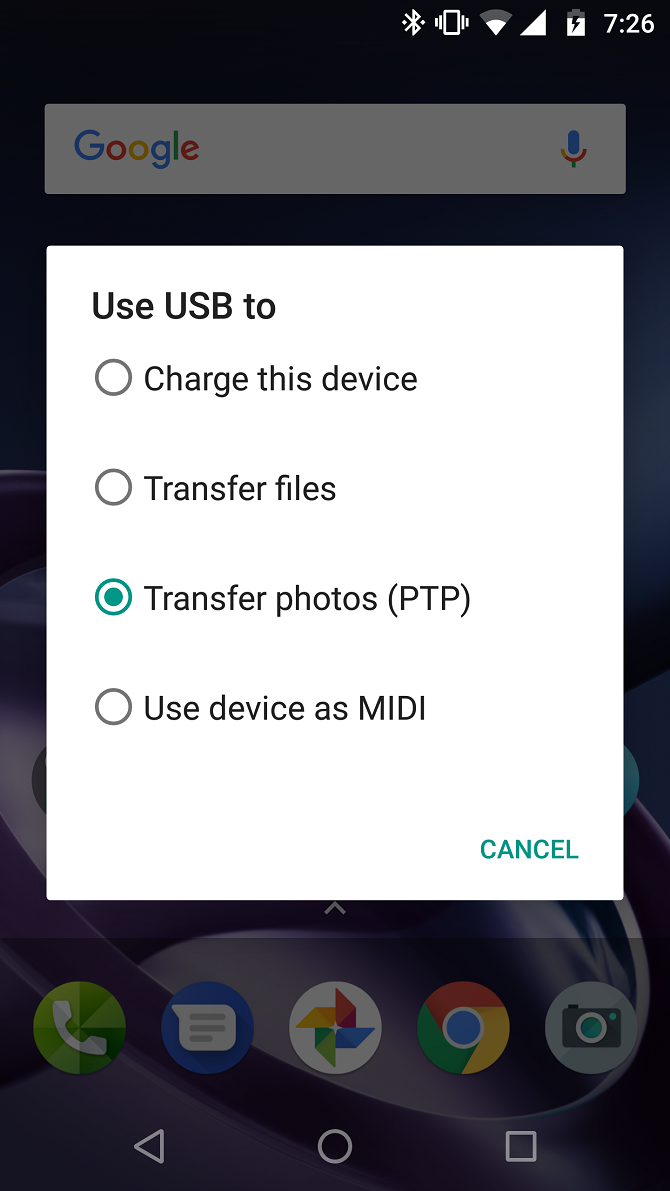
On Android, it’s likely you’ll need to change your USB settings to Transfer files or Transfer photos (PTP). To do this, drag down your notifications from the top of the screen when connected. In the menu, tap the USB is charging this device notification to change it.

Note that this doesn’t work with all TVs. In some cases, the USB ports are purely for firmware updates.

Use Samsung DeX to Connect Your Samsung Phone to a TV

Among the most popular Android devices available, you’ll find Samsung flagship handsets. These feature connectivity with televisions and monitors. For pure screen mirroring, you’ll need a USB-C to HDMI cable.

To connect a Samsung Galaxy S8/S8+/Note 8 and later to your TV, merely hook up a USB-C to HDMI adapter. Plug the USB-C male into the USB-C charging port on your Samsung Galaxy device. Then run the HDMI cable into your TV.

QGeeM USB C to HDMI Adapter QGeeM USB C to HDMI Adapter Buy Now On Amazon $15.99

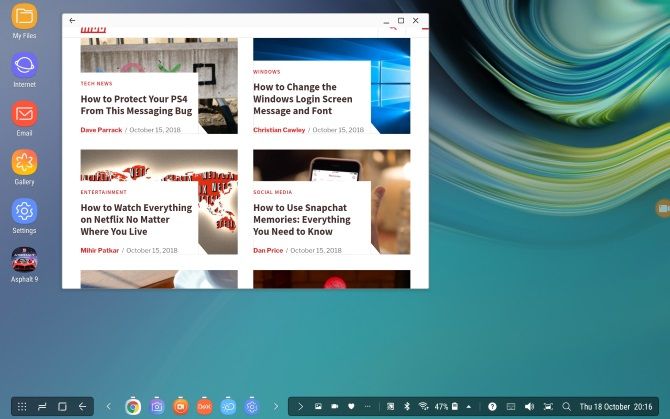
However, Samsung Galaxy S8, S9, and Note 8/9 devices also include DeX. Bridging the gap between mobile and desktop, DeX offers a desktop experience run from your handset. You can run all the same Android apps, however, access your phone’s gallery, and basically get everything on the big screen

Use Samsung DeX to get Android apps on a big display

Since this is proprietary technology, the method for connecting a DeX-enabled Samsung phone to a TV differs from standard hookups.

For the entire Galaxy S8 and Note 8 line up, as well as S9 and S9+, you’ll need a dock to use DeX.

However, the Note 9 doesn’t require a dock. Instead, the Note 9 enters DeX mode with merely a USB-C to HDMI cable. That’s far more useful than a dedicated dock.

If using a dock, you will also need a power cable for powering the dock and charging your device. To find out more, see our guide to using DeX to turn your phone or tablet into a computer.

Connect Phones, Tablets, and TVs With USB: Success!

While a USB to TV connection varies by device, connection type, and display inputs, it’s thankfully simple to set up. However, don’t forget that wireless casting is usually more convenient.

Regardless of whether you’re using an Android, iPhone, or a Samsung device running DeX, there’s a way to connect your phone or tablet to a TV for viewing on a larger screen.

For more, check out our master list of ways to cast your screen.

Read the full article: How to Connect Any Phone or Tablet to Your TV Using USB


Read Full Article

How to Hide Files, Folders, and Drives in Windows 10


hide-files-folders-drives-windows

If you share your computer with others, you may want to hide certain files and folders so that people don’t go nosing into your files. The main reason to hide a folder in Windows 10 is privacy. If you have sensitive data that you don’t want anyone to see, hiding your files and folders is a great and easy option to boost your security.

Here’s how you can hide any file or folder on Windows 10.

1. Hide Individual Files/Folders On Windows 10 Using the Command Line

A simple way to hide a file or folder is to change its attributes using the attrib command on the command line. Unsure about using the Windows 10 Command Prompt? Here are our top tips for getting started with the Command Prompt.

Let’s say you want to hide the Sample.mp4 file in the ToHide folder as shown below.

tohide sample folder

Open the Command Prompt by pressing Windows key + R to open the Run dialog box. Then, type cmd.exe in the Open box and click OK.

At the prompt, type the following command. Replace the path and file name with the path and file name for the file you want to hide.

attrib C:\Users\Lori\Documents\ToHide\Sample.mp4 +s +h

The +s and +h are the attributes you set for the file. The +s attribute is the System file attribute and indicates the file is for use by the operating system and is not normally displayed in a directory listing. The +h is the Hidden file attribute and indicates the file will not be displayed in a directory listing by default.

The attributes in the command are not case sensitive, so you can use either lowercase or uppercase.

When you open the folder in File Explorer that contains the hidden file or folder, it will not be visible. Even going to View > Show/hide and checking the Hidden items box will not show the hidden file or folder.

windows hidden items explorer option

You can also hide a folder using the attrib command in the following way. Again, replace the path and the folder name with your own.

attrib C:\Users\Lori\Documents\ToHide\AnotherFolder +s +h

To unhide a file or folder, use the same attrib command, replacing the “+” with “” in front of the “s” and “h” attributes.

attrib C:\Users\Lori\Documents\ToHide\Sample.mp4 -s -h

To learn more about the attrib command, type attrib /? at the command prompt and press Enter.

2. Hide Windows 10 Folders Using File Explorer

Using File Explorer to hide a folder is like using the attrib command described in the previous section, but it’s less secure. Anyone who knows about showing and hiding hidden files in File Explorer can access your files. But if you’re trying to hide data from other family members who are not as tech-savvy as you are, this can work just fine. Hiding files and folders isn’t the only trick the File Explorer has up its sleeve, either. Check out the best File Explorer tricks and tips to take control of your file management.

You can set the Hidden attribute for the selected files or folder in File Explorer. But, first, you need to make sure files and folders with the Hidden attribute do not show in File Explorer. To do this, go to View tab > Options and select Change folder and search options.

windows explorer change folder and search

On the View tab, select Don’t show hidden files, folders, or drives under Advanced settings and click OK.

windows explorer toggle hidden files

To hide one or more files or folders, select the files or folders, right-click on them, and select Properties.

On the General tab on the Properties dialog box, check the Hidden box in the Attributes section. To prevent the files or folders from appearing in Windows search results, click Advanced.

Then, uncheck the boxes in the File attributes section of the Advanced Attributes dialog box and click OK.

windows advanced file attributes

To unhide the files or folder, go back to the Properties dialog box for the files or folders in question, and uncheck the Hidden box in the Attributes section.

3. Hide Entire Drives on Windows 10 Using the Registry Editor

This method hides an entire drive instead of just selected files or folders on the drive.

Note: This procedure involves changing the registry. Before you begin, I strongly suggest you back up your registry. You should also check out our tips for not accidentally messing up the Windows registry.

If you’re not comfortable using the Windows registry or are unsure as to what the Windows Registry even is, you can find another method for hiding an entire drive in the Hide Entire Drives Using the Disk Management Utility section below.

To begin, open the Registry Editor by pressing Windows key+R to open the Run dialog box. Then, type regedit in the Open box and click OK.

Navigate to the following key in the left pane.

HKEY_LOCAL_MACHINE\Software\Microsoft\Windows\CurrentVersion\Policies\Explorer

Right-click on the Explorer key and go to New > DWORD (32-bit) Value.

windows registry create dword

Name the new value NoDrives and then double-click on it.

On the Edit DWORD (32-bit) Value dialog box, select Decimal as the Base. Then, enter a number that corresponds to the drive or drives, you want to hide. To find out which number to use, see the table below the following image.

windows registry edit dword

Find the letter for the drive you want to hide in the table below. Enter the number associated with that drive letter in the Value data box for the NoDrives value in the registry. In our example, I entered 64 to hide my G: drive.

If you want to hide more than one drive, add the numbers for all the drive letters you want to hide and enter the total in the Value data box.

how to hide files folders drives in windows 10

After you restart your computer, you will not see the drive in File Explorer.

To show the drive again, go back into the Registry Editor and delete the NoDrives value under the HKEY_LOCAL_MACHINE\Software\Microsoft\Windows\CurrentVersion\Policies\Explorer key and restart your computer again.

4. Hide Entire Drives Using the Disk Management Utility

If you’d rather not edit the registry, you can hide an entire drive using the Disk Management utility. This utility shows you all the internal and external drives connected to your computer.

Press Windows key + R to open the Run dialog box. Then, type diskmgmt.msc in the Open box and click OK.

Right-click the drive you want to hide (in the top or bottom section) and select Change Drive Letter and Paths.

windows disk management change drive letter

On the Change Drive Letter and Paths dialog box, select the drive letter, click Remove, and then click OK.

disk management change drive letter

A warning dialog box displays telling you that some programs rely on drive letters and may not work if you remove the drive letter. If you’re sure you want to hide the drive, click Yes to remove the drive letter.

how to hide files folders drives in windows 10

The letter is removed from the drive in the Disk Management Utility.

Once you close and reopen File Explorer, the drive will not be visible and will not be included in Windows search results.

To make the drive visible again, go back into the Disk Management utility and open the Change Drive Letter and Paths dialog box for the hidden drive. Then, click Add.

Make sure Assign the following drive letter is selected (it should be by default). Select the drive letter you want to assign to it from the dropdown list, and click OK.

assign drive letter hidden drive

You must close and reopen File Explorer to see the drive again.

5. Hide Folders in Windows 10 Using Third-Party Software

All the methods mentioned above are not as secure as hiding AND password protecting files and folders. Here are some third-party software options for you to consider.

FileFriend

In FileFriend, use the JPK tab to hide files or folders in a JPEG image and add a password to protect the hidden files. FileFriend also allows you to enter text that you want to hide in the image directly in the program, without having to create a text file to hide in the image (using the JTX tab).

how to hide files folders drives in windows 10

Other features of FileFriend include splitting or joining files and encrypting files and folders.

Download: FileFriend for Windows (Free)

Secret Disk

Secret Disk allows you to create a virtual drive, or repository, that’s invisible and password protected. Another layer of security is added with a PIN that’s required to open the Secret Disk program.

When the repository is visible, it displays with a drive letter in File Explorer. You can copy files and folders to it, and work with it in any program, just like any other drive. Then, you can hide the repository again and it becomes invisible.

how to hide files folders drives in windows 10

Secret Disk does not need to format your hard drive or make any other changes to your system. It also does not encrypt any files or folders. It just limits access to them by hiding, and password-protecting, the repository.

The Basic version of Secret Disk is free. The PRO version will set you back $14.95 for its added features, including the ability to have more than one repository and choosing the drive letter for each repository.

The repository password and the PIN for opening the program are optional in the PRO version, although these are good features to leave enabled. To upgrade, click the handy PRO version button in the program.

Download: Secret Disk for Windows (Free)

Easy File Locker

Easy File Locker is an easy to use freeware utility that allows you to hide and lock files and folders from other people and from programs. The locked files and folders are protected from opening, modifying, deleting, moving, renaming, or copying. All files and subfolders in a locked folder are protected.

Set a password to open the program by going to System > Set Password. You don’t have to set a password, but, if you don’t, anyone will be able to open the program, turn off the protection for your files and folders, and have access to them.

how to hide files folders drives in windows 10

Use the Add File and Add Folder buttons to add files and folders to Easy File Locker. Double-click on a file or folder in the list to change its permissions (Accessible, Writable, Deletable, Visible).

Protect the selected files and folders using the Start Protection button. Make the files and folder visible again by clicking the Stop Protection button.

Download: Easy File Locker for Windows (Free)

My Lockbox

My Lockbox allows you to hide and password-protect almost any folder on your computer.

While you’re installing My Lockbox, you’ll be asked for the location of the folder you want to hide and protect. When the installation is finished, that folder is automatically hidden and locked.

Two icons are added to your desktop. The My Lockbox icon allows you to quickly unlock and open your protected folder. For more options, use the My Lockbox Control Panel icon. Once you enter your password, the following window displays:

how to hide files folders drives in windows 10

Use Set folder to change the folder you want to protect and Remove to permanently unlock the protected folder and remove it from the program. The Open button automatically unlocks and opens the protected folder. Lock and Unlock the folder using the buttons on the left. Click Advanced for more options and other settings.

The freeware version of My Lockbox allows you to hide and protect one folder with an unlimited number of subfolders.

You can upgrade to the Professional edition if you need to protect more than one folder. However, you can put all the files and folders you want to hide and protect into one folder and use the free version if you don’t mind looking at the bright orange ad for My Lockbox PRO.

Download: My Lockbox for Windows (Free)

Windows 10 File Hiding Methods That Didn’t Work

In addition to the methods covered above, I also tried the two methods below and failed to get them to work. For the sake of completeness, you can check them out below. Please leave us a comment in case you had more luck than I did!

Hide Windows 10 Files/Folders in a JPEG Image

I tested the method of hiding files in a JPEG image using the command line and found success when adding a RAR file to a JPEG image using the following command:

copy /b C:\Path\To\File\OriginalImage.jpg + FilesToHide.rar C:\Path\To\File\NewImageWithHiddenFiles.jpg

how to hide files folders drives in windows 10

However, I could not extract the files once they were added to the JPEG image file, even using a variety of file extraction programs, such as 7-Zip, WinRAR, and PeaZip.

Hiding a file or folder in a JPEG image is possible using the free tool FileFriend, which is discussed in the Hide a Folder on Windows Using Third-Party Software section above.

Hide Folders in Windows 10 by Redirecting to the Control Panel

There is another method you can try that attempts to hide a folder by redirecting it to the Control Panel. You basically create two batch files, one that locks the folder and one that unlocks it. When the folder is locked, opening it takes you to the Control Panel.

However, I tested this on Windows 7, 8, and 10 and could not get it to work. The lock batch file successfully renamed the folder. But I could open it and view the contents anyway.

If you want to test it yourself, create a folder called Users or Fonts (or something else related to the Control Panel) and put the files you want to hide into it. Then, create a new text file and copy and paste the following line into it.

Replace Users with the name of your folder. Save this file as lock.bat.

ren Users Users.{21EC2020-3AEA-1069-A2DD-08002B30309D}

Then, create another new text file and copy and paste the following line into it. Again, replace Users with the name of your folder. Save this file as key.bat.

ren Users.{21EC2020-3AEA-1069-A2DD-08002B30309D} Users

Both batch files should be in the same folder as the folder you’re hiding (not in the folder). Double-click the lock.bat file to redirect the folder to the Control Panel, hiding the contents of the folder. To unlock the folder, double-click the key.bat file. You should not leave the key.bat file with the folder you’re hiding. Only copy it there to unlock the folder. Then, remove it.

Please let us know if this works for you in the comments below.

You Can Hide Any File or Folder In Windows 10

Hiding files and folders with no password protection should not lull you into a false sense of security. You should not use these methods (except the third-party tools with password protection) to protect very private and sensitive files and folders.

These methods are ways to make your information not obvious to anyone looking over your shoulder or briefly using your computer while you watch.

Hiding your files and folders in Windows 10 isn’t the only option you have for protection. You can also encrypt files and folders using an encryption tool, like VeraCrypt. Alternatively, you can encrypt your entire drive using Bitlocker.

Read the full article: How to Hide Files, Folders, and Drives in Windows 10


Read Full Article

A Beginner’s Guide to Google Duo and Google Allo


google-allo-duo

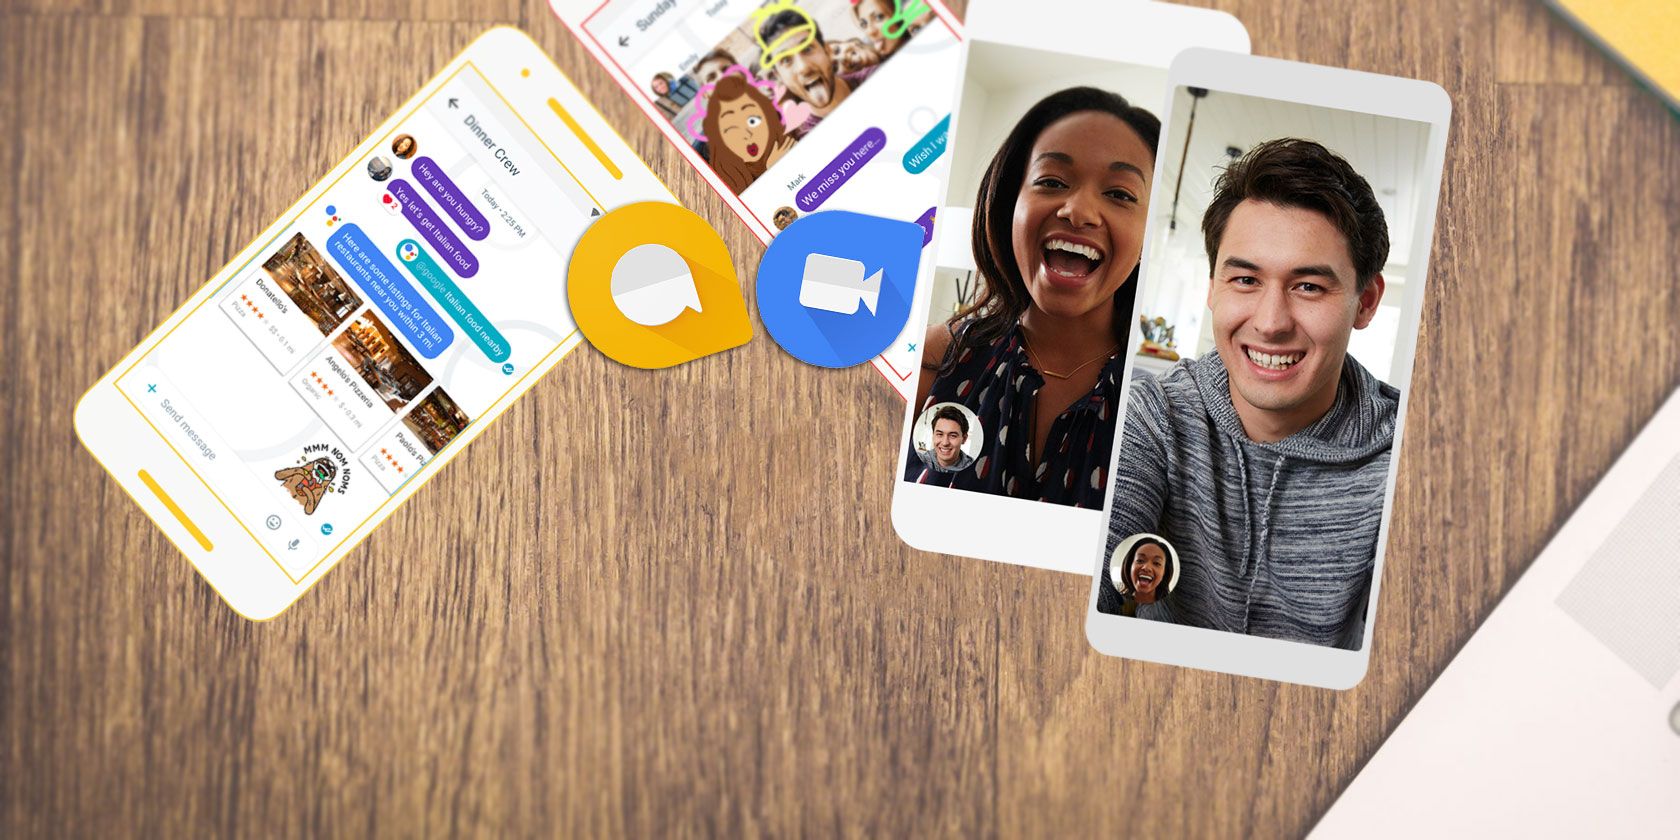
Google has so many apps and services that it’s tough to keep track of them all. While Hangouts was once its premier messaging app, in 2016, the company added two new messaging apps in the form of Google Duo and Google Allo.

Google Allo is no longer with us, illustrating Google’s tendency to kill off apps not long after they launch. However, Google Duo is very much still a thing.

In this article, we explain how to use Google Duo, and detail what Google Allo was before its demise.

What Is Google Duo?

Google Duo is a straightforward video calling app that serves as the closest alternative to FaceTime for Android. While Hangouts supports video calling as well, Google Duo has replaced it as the default video chat app on Android.

Another important difference is that while Hangouts is tied to your Google account, Duo uses your phone number. This makes signing into Duo simple, as you don’t have to know someone’s email address to reach them. If they’re in your contacts and use Duo, that’s all you need to call them.

Duo is available for Android and iOS, as well as a web app, at no cost.

Download: Google Duo for Android | iOS (Free)
Visit: Google Duo for Web (Free)

How Does Google Duo Work?

Using the Google Duo app is simple: just tap on any of your contacts to start a call. You can also make audio-only calls if you’d prefer not to show your face. If you use Google’s Phone, Contacts, or Messages apps on Android, it’s easy to call contacts with Duo using shortcuts in those apps. Plus, you can ask Google Assistant to call someone for you.

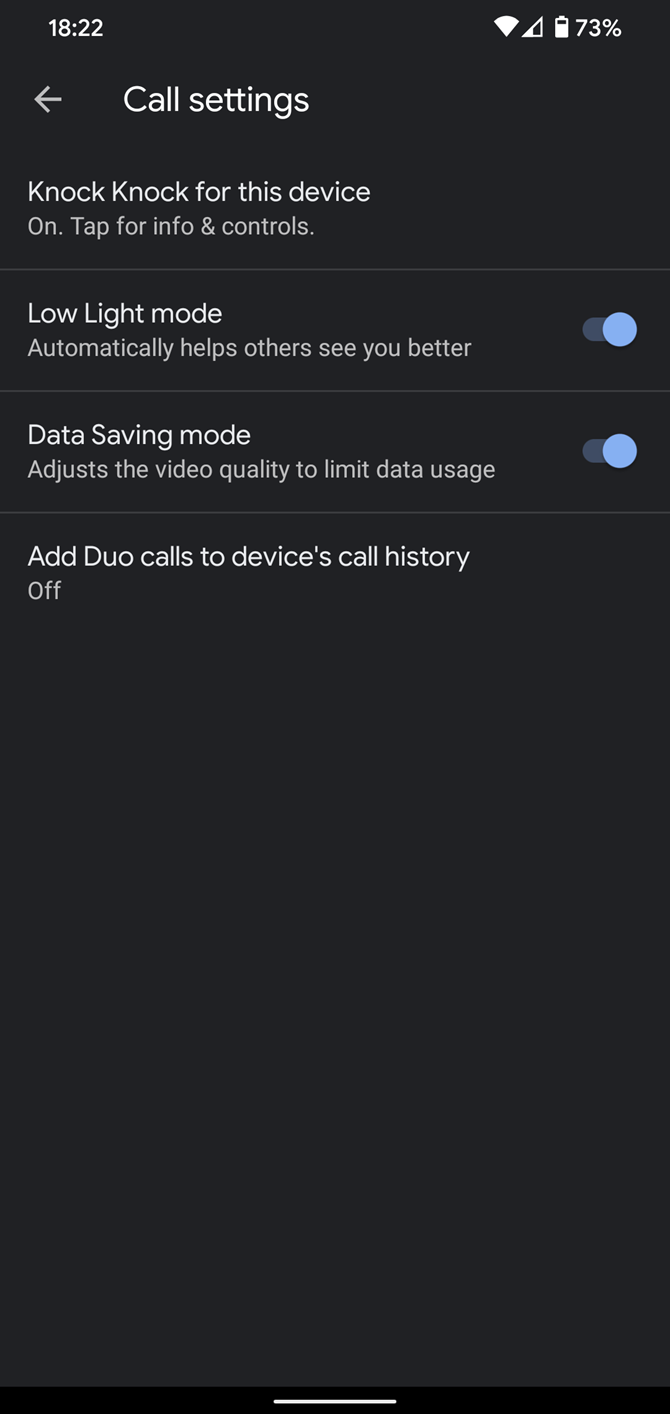
The only real standout feature of Duo is “Knock Knock,” which lets you see a live preview of the person calling you before you accept the call. Google says this is “[t]o make calls feel more like an invitation rather than an interruption” and gives you an idea of what someone is up to before you start talking.

Finally, Google Duo features a low-light mode to help improve call conditions when it’s dark.

That’s really all there is to it; Google didn’t add many frills to Duo. It’s optimized for low-quality networks and switches between Wi-Fi and mobile data automatically, so you shouldn’t experience many interruptions. It also protects calls with end-to-end encryption.

How to Use Google Duo: Getting Started

To begin, download the Google Duo app for Android or iOS, or visit the Google Duo web app. After opening it, you’ll need to provide your phone number, then you’ll receive a verification code via SMS. Grant the app permission to access your contacts, microphone, and camera, then you’re all set to go.

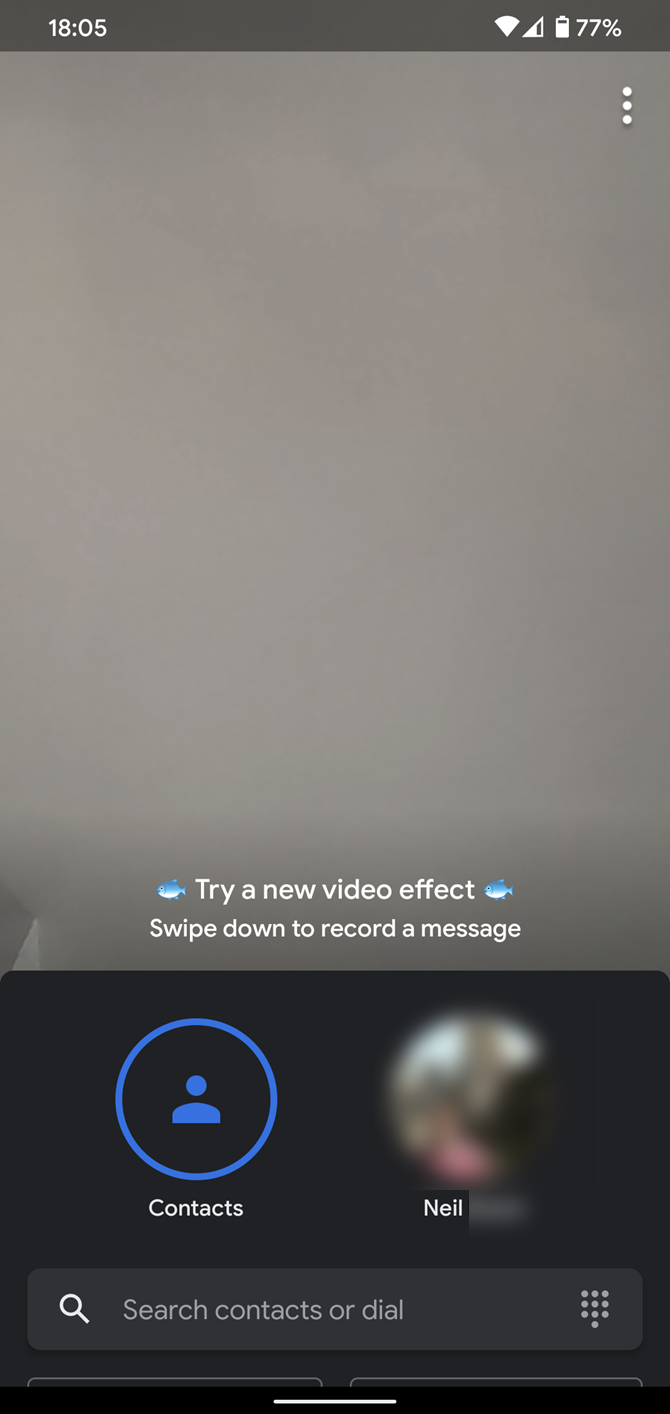
On Duo’s homepage, you’ll see a live preview of your phone’s front camera and suggested contacts. Tap the Search contacts box to find someone you want to call, or dial their number manually with the keypad icon.

If you prefer, you can scroll through the list of your contacts that are on Duo instead. You’ll see who has Duo installed first; tap one to start a call. If you scroll past those who already use Duo, you’ll see an Invite to Duo section where you can send your friends a message asking them to download the app.

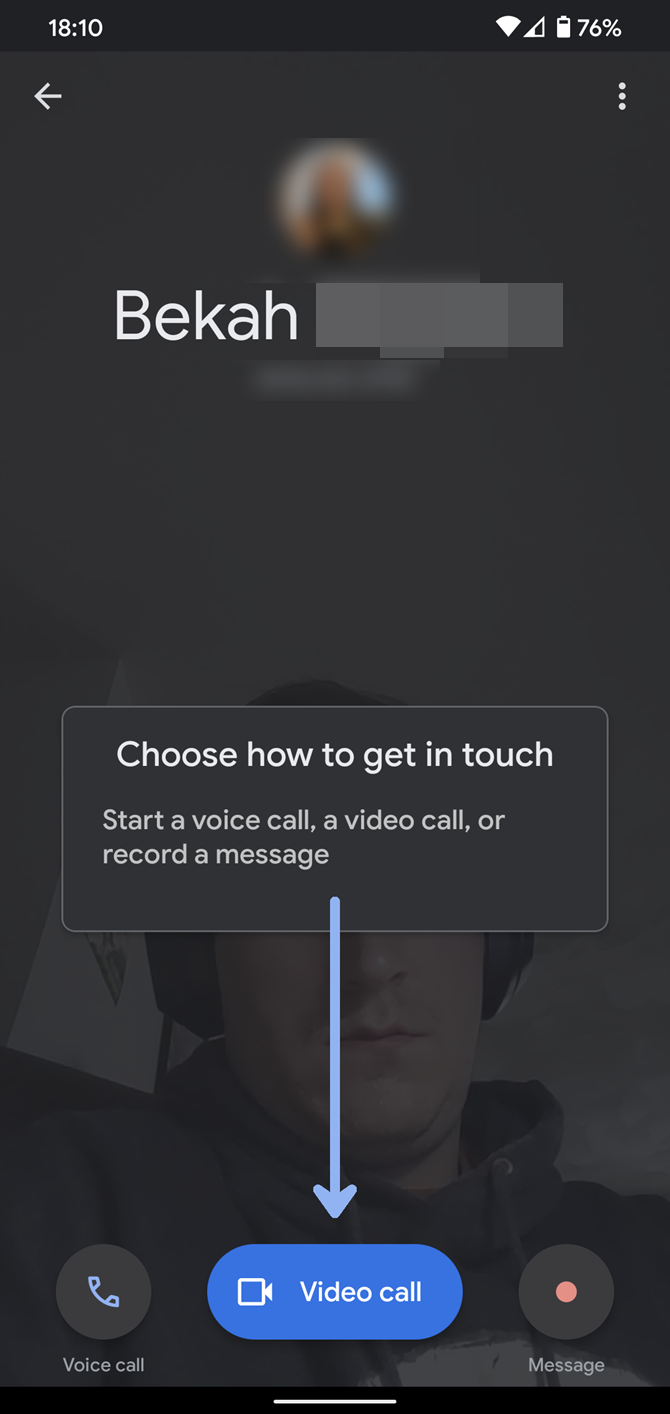
When you tap a contact to start a call, you’ll see three options. Video call is the default and the main feature of Duo. However, you also have the option of a Voice call or Message. This is great if you don’t want to show your face, or just want to record a quick note for the other person. Notes can be video, voice, or text-based.

Once you make a selection, you’ll call them. If they don’t pick up, you’ll have the option to leave a message.

How to Use Duo: Groups and Calling

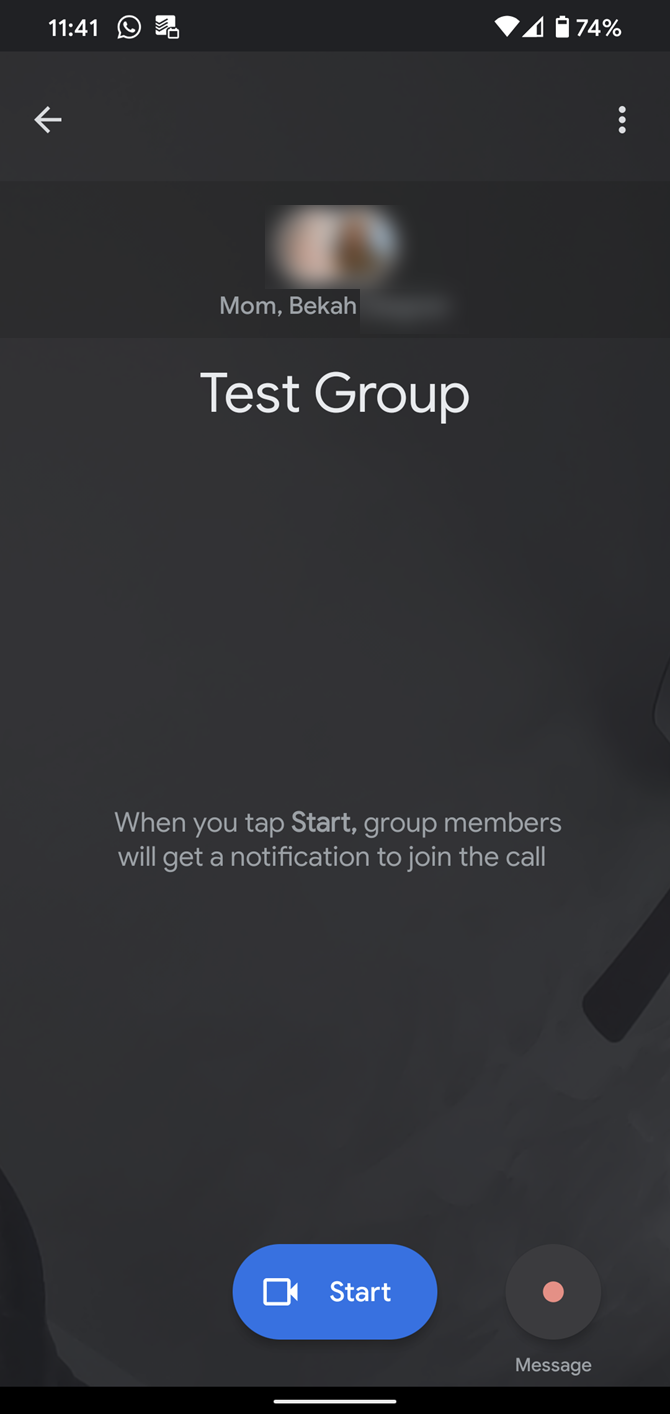
In addition to one-to-one calls, Duo also supports group calling for up to 12 people. To use this, tap Create group above your list of contacts. Add up to 11 people, then you can start a video call with all of them.

When you create the group, Duo asks you to give the group a name to save it. After you do this, you’ll see the group appear in your list of contacts in Duo. This lets you easily start a new group chat with the same people in the future.

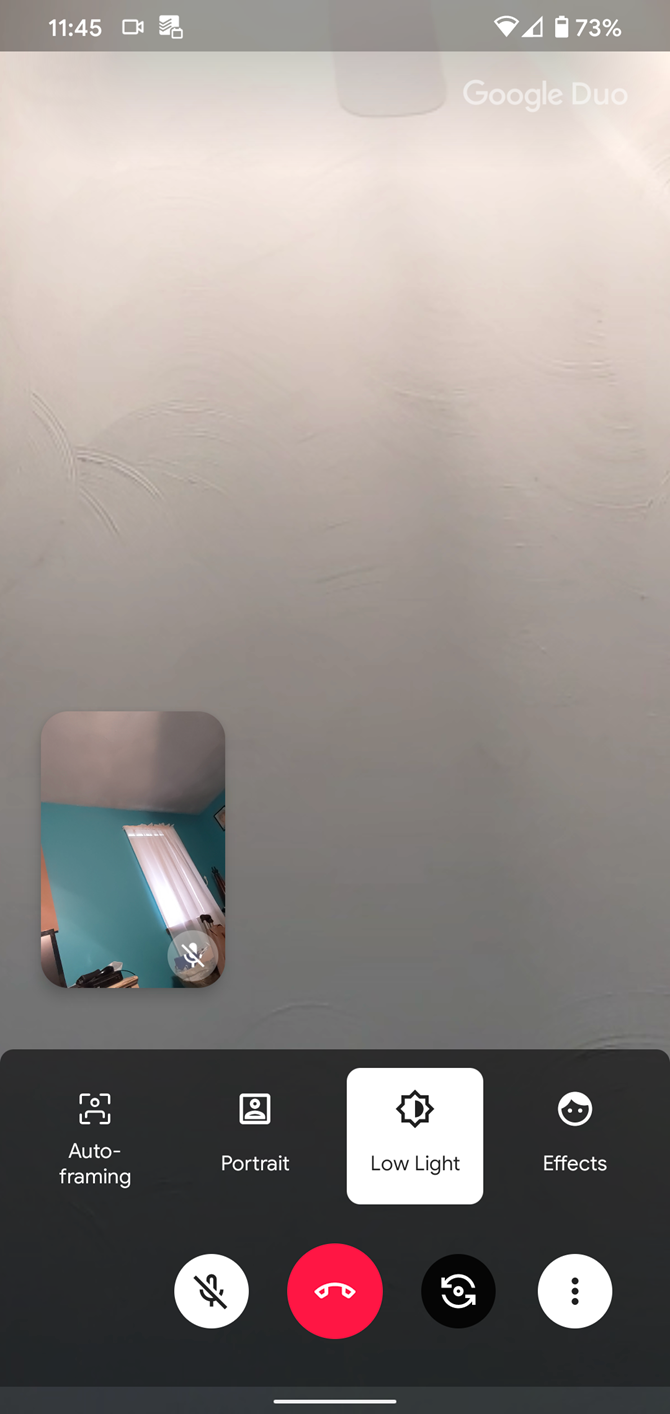
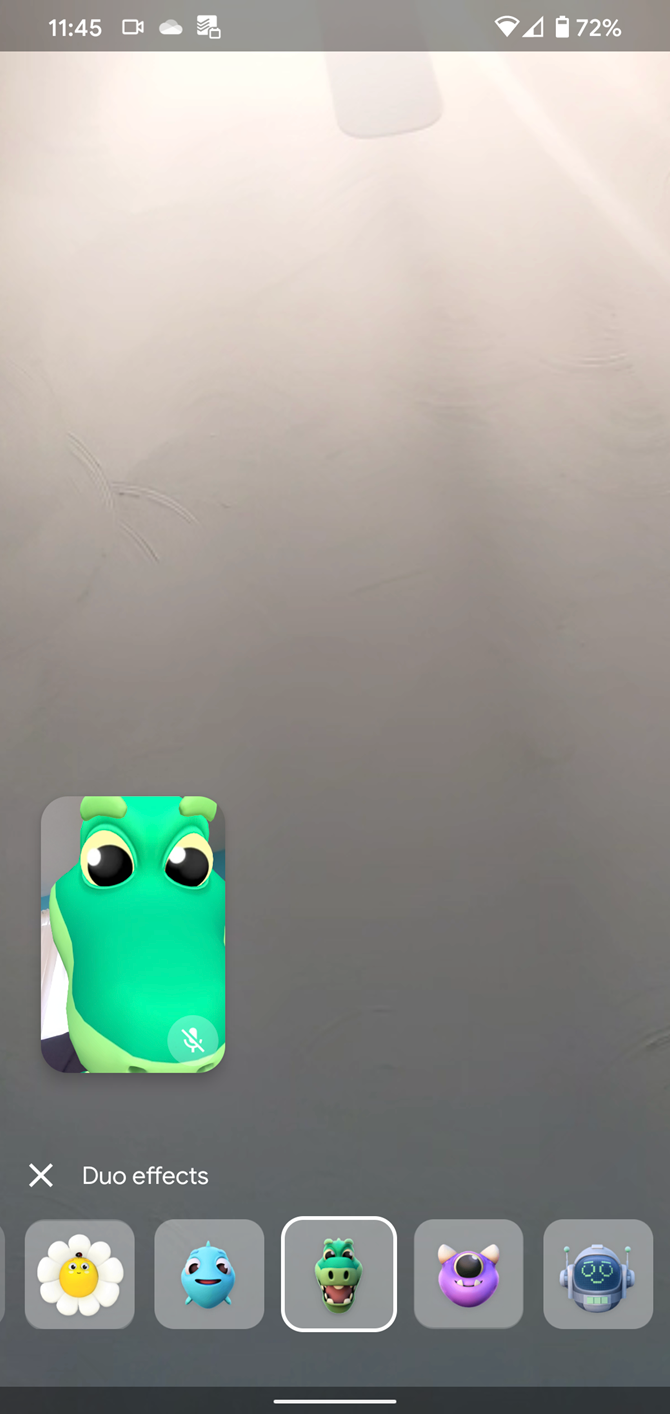
When you receive a Duo call, swipe up to answer it or swipe down to decline. During a call, like most video chat apps, you’ll see a Mute button to mute your own microphone. The Camera button swaps between your front and rear cameras. And you can use the Effects to turn yourself into various animals and creatures.

Duo has a few other neat tricks available during a call, but they’re unfortunately only available on the Pixel 4 at the time of writing. Tap Auto-framing and your camera will attempt to keep you centered in the video. Portrait, like the portrait mode in many camera apps, will blur your background to help you stand out.

Changing Duo Options

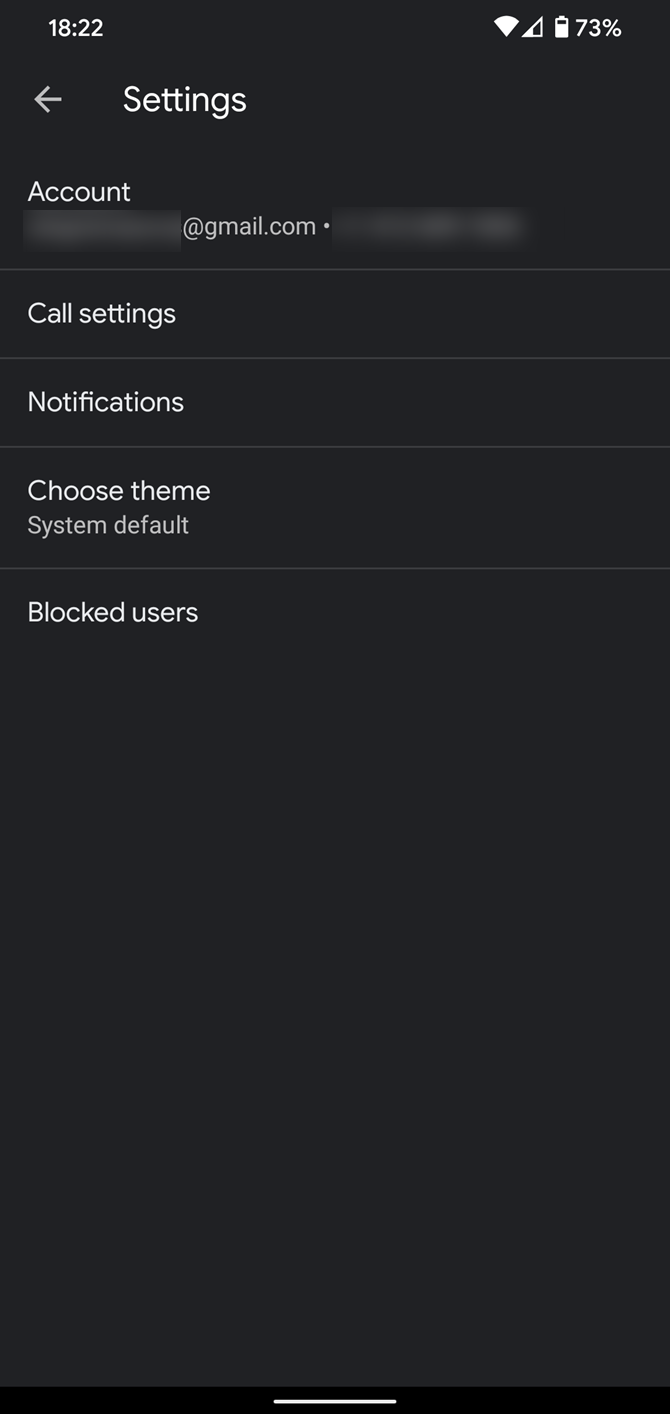
On Duo’s homepage, tap the three-dot Menu button to access a few options. Select Call settings to disable the Knock Knock, Low Light, or Data Saving modes. Tap Blocked users to block numbers from calling you in Duo.

Finally, choose Account and you can remove Duo from your Google account.

What Was Google Allo?

Shortly after Google released Duo in late 2016, the company followed with a smart messaging app called Allo. Unfortunately, in March 2019, the company discontinued Google Allo.

One of the big draws of Allo was the Smart Reply feature. The app learned the way you talk over time, then showed bubbles at the bottom of the screen with suggested responses.

Another standout feature of Allo was the Google Assistant integration. At the time, this was a big deal, as Google Assistant debuted in Allo before it was available on all Android and iOS devices as it is now. By typing @google, you could ask the Assistant for directions, information, and other details that you and your chat partner would both see.

Aside from these major features, Allo allowed you to adjust the size of your messages to “whisper” or “shout” through text. While it had an Incognito chat feature for private notifications, encrypted chat, and the ability to have messages expire after a set time, Allo came under fire for its poor privacy practices. Experts recommended avoiding it, as Google stored all messages exchanged on the service.

Google now recommends using the Google Messages app on Android as an alternative. However, this is an SMS app, not an instant messaging solution. So we recommend free chat apps like Telegram or WhatsApp, which most of your friends probably use already.

Google Allo Is Gone, But Google Duo Still Rocks

Google Duo is a handy video calling app because it’s simple to use and works across multiple platforms. Android users likely have it installed by default, and those with an iPhone can set it up easily to chat with Android owners.

While Allo didn’t last, it did introduce the world to Google Assistant. And here’s everything you need to know about Google Assistant.

Read the full article: A Beginner’s Guide to Google Duo and Google Allo


Read Full Article

Media software maker Plex launches new subscriber-only apps for music and server management


Media software maker Plex has released two new projects today from its internal R&D group, Plex Labs. One is an updated take on the classic Winamp player it calls Plexamp, and another is a dedicated app for Plex server administration. The projects are meant to appeal largely to Plex power users who take full advantage of Plex’s software suite, which has grown over time from being only a home media solution to a one-stop shop for everything from live TV to streaming audio.

The first of the new apps, Plexamp, is actually a revamp of the first Plex Labs project to ever be released. In December 2017, Plex introduced its own music player, whose name Plexamp is a nod to the lost-lost Winamp player it aimed to replace. The project, like others from Plex Labs, was built by Plex employees in their spare time.

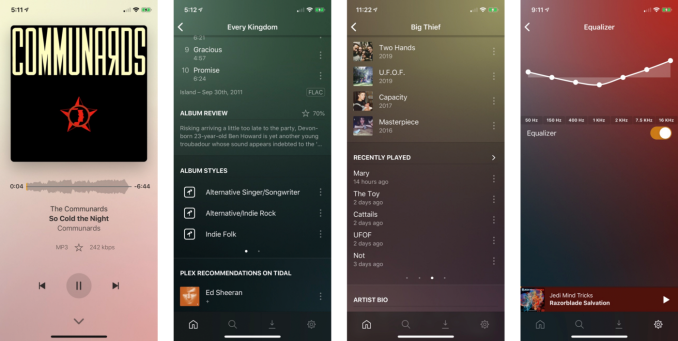
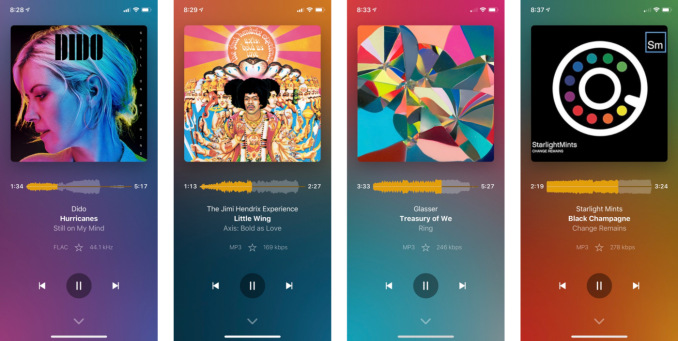
The goal with the original Plexamp was to offer a small desktop player that could handle any music format. The app let you use media keys for playing, pausing and skipping tracks and it worked offline when the Plex server ran on your laptop. It also offered visualizations to accompany your music that pulled from the album art.
While the original app ran on Mac or Windows, the new release works across five platforms, including now iOS, Android and Linux.

The app itself has been completely redone, as well — rewritten from scratch, in fact. And it’s tied into to Plex’s subscription service, Plex Pass — meaning you’ll need to have a subscription in order to use it.

The company explains the original version of Plexamp had issues around portability and licensing; it didn’t have an easy way to add functionality; and it was built with React, which tied it to the web.

To create the new Plexamp (version 3.0), Plex built an audio player library called TREBLE on top of a low-level commercial audio engine. TREBLE has been shipping in Plex’s commercial applications, but this release brings it to Plexamp. The addition helped make the app portable across almost all desktop and mobile platforms, as was it being rewritten in React Native.

The new app provides features Plex Pass music listeners want, like gapless playback, high-quality resampling, Sweet Fades (Plex’s ‘smart’ alternative to crossfades) soft transitions, and pre-caching. Plex also added a few more effects, including one for voice boosting spoken word audio and another for silence compression.

But the app really sells itself to longtime Plex users, as Plexamp lets you go back to see your own “top personal charts” for what you’ve listened to the most in years past. (Sort of a like Plex version of Apple Music’s Replay playlists).

Plexamp 3.0 also introduces a feature that lets you build your own mixes by picking a set of artists. Plus it offers a more expansive list of stations, supports offline listening, and improves its search functionality. The new Recent Searches area, for example, will save your search results from across servers, as well as TIDAL and podcasts. And a new Recent Plays feature shows you the music you consciously chose to play, again including across all servers and TIDAL.

There are some little touches, too, that show the personal care that went into the app’s design — like the way Plexamp uses album art and a process called “UltraBlur” to give each artist and alum page its own look. Or how there are options for light and dark — and lighter and darker — themes.

The other big new release from Plex Labs is the new Plex Dash app.

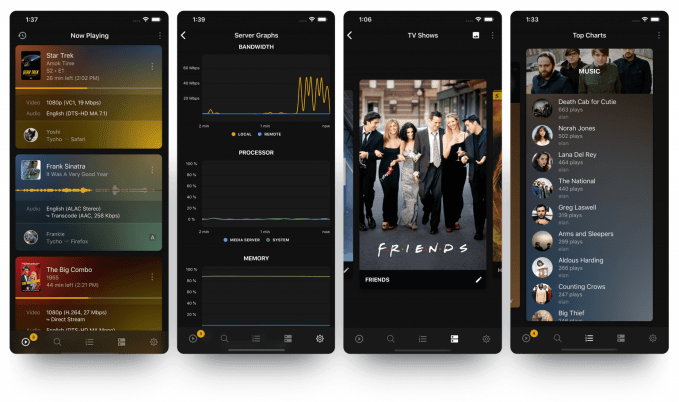
This mobile and tablet app lets you keep a close eye on your personal media server, including a way to see all playbacks even across multiple servers, plus other administrative features.

With Plex Dash, you can edit your artwork, scan for new media, fix incorrect matches, check on server resource usage, tweak library settings, and view server logs live.

Plex suggests you run on the iPad you have mounted in the wall — like in your fancy media room I guess — but for us poorer folks, it runs on your smartphone too.

It’s a power user tool, but one that will be welcomed for those fully immersed in a Plex-run home media setup. (And also a good way to respond to criticism that Plex is too focused today on its streaming and TV options, and not its core home media software customer base.)

Plex Dash also requires a Plex Pass subscription and runs on iOS and Android.

The apps launched today are notable as they’re the first to arrive from Plex Labs since the original release of Plexamp in 2017 and because they require a subscription in order to work.

Plex at the end of 2019 said it had 15 million registered households using its service. Though the service is profitable, only a small percentage paid subscribers. New apps with extra features, then, could convince more Plex users to subscribe.


Read Full Article