08 February 2020

How to Build a Basic Web Crawler to Pull Information From a Website


Programs that read information from websites, or web crawlers, have all kinds of useful applications. You can scrape for stock information, sports scores, text from a Twitter account, or pull prices from shopping websites.

Writing these web crawling programs is easier than you might think. Python has a great library for writing scripts that extract information from websites. Let’s look at how to create a web crawler using Scrapy.

Installing Scrapy

Scrapy is a Python library that was created to scrape the web and build web crawlers. It is fast, simple, and can navigate through multiple web pages without much effort.

Scrapy is available through the Pip Installs Python (PIP) library, here’s a refresher on how to install PIP on Windows, Mac, and Linux.

Using a Python Virtual Environment is preferred because it will allow you to install Scrapy in a virtual directory that leaves your system files alone. Scrapy’s documentation recommends doing this to get the best results.

Create a directory and initialize a virtual environment.

mkdir crawler
cd crawler
virtualenv venv
. venv/bin/activate

You can now install Scrapy into that directory using a PIP command.

pip install scrapy

A quick check to make sure Scrapy is installed properly

scrapy
# prints
Scrapy 1.4.0 - no active project

Usage:
  scrapy <command> [options] [args]

Available commands:
  bench         Run quick benchmark test
  fetch         Fetch a URL using the Scrapy downloader
  genspider     Generate new spider using pre-defined templates
  runspider     Run a self-contained spider (without creating a project)
...

How to Build a Web Crawler

Now that the environment is ready you can start building the web crawler. Let’s scrape some information from a Wikipedia page on batteries: https://en.wikipedia.org/wiki/Battery_(electricity).

The first step to write a crawler is defining a Python class that extends from Scrapy.Spider. This gives you access to all the functions and features in Scrapy. Let’s call this class spider1.

A spider class needs a few pieces of information:

  • a name for identifying the spider
  • a start_urls variable containing a list of URLs to crawl from  (the Wikipedia URL will be the example in this tutorial)
  • a parse() method which is used to process the webpage to extract information
import scrapy

class spider1(scrapy.Spider):
    name = 'Wikipedia'
    start_urls = ['https://en.wikipedia.org/wiki/Battery_(electricity)']

    def parse(self, response):
        pass

A quick test to make sure everything is running properly.

scrapy runspider spider1.py
# prints
2017-11-23 09:09:21 [scrapy.utils.log] INFO: Scrapy 1.4.0 started (bot: scrapybot)
2017-11-23 09:09:21 [scrapy.utils.log] INFO: Overridden settings: {'SPIDER_LOADER_WARN_ONLY': True}
2017-11-23 09:09:21 [scrapy.middleware] INFO: Enabled extensions:
['scrapy.extensions.memusage.MemoryUsage',
 'scrapy.extensions.logstats.LogStats',
...

Turning Off Logging

Running Scrapy with this class prints log information that won’t help you right now. Let’s make it simple by removing this excess log information. Use a warning statement by adding code to the beginning of the file.

import logging
logging.getLogger('scrapy').setLevel(logging.WARNING)

Now when you run the script again, the log information will not print.

Using the Chrome Inspector

Everything on a web page is stored in HTML elements. The elements are arranged in the Document Object Model (DOM). Understanding the DOM is critical to getting the most out of your web crawler. A web crawler searches through all of the HTML elements on a page to find information, so knowing how they’re arranged is important.

Google Chrome has tools that help you find HTML elements faster. You can locate the HTML for any element you see on the web page using the inspector.

  • Navigate to a page in Chrome
  • Place the mouse on the element you would like to view
  • Right-click and select Inspect from the menu

These steps will open the developer console with the Elements tab selected. At the bottom of the console, you will see a tree of elements. This tree is how you will get information for your script.

Extracting the Title

Let’s get the script to do some work for us; A simple crawl to get the title text of the web page.

Start the script by adding some code to the parse() method that extracts the title.

...
    def parse(self, response):
        print response.css('h1#firstHeading::text').extract()
...

The response argument supports a method called CSS() that selects elements from the page using the location you provide.

In this example, the element is h1.firstHeading. Adding ::text to the script is what gives you the text content of the element. Finally, the extract() method returns the selected element.

Running this script in Scrapy prints the title in text form.

[u'Battery (electricity)']

Finding the Description

Now that we’ve scraped the title text let’s do more with the script. The crawler is going to find the first paragraph after the title and extract this information.

Here’s the element tree in the Chrome Developer Console:

div#mw-content-text>div>p

The right arrow (>) indicates a parent-child relationship between the elements.

This location will return all of the p elements matched, which includes the entire description. To get the first p element you can write this code:

response.css('div#mw-content-text>div>p')[0]

Just like the title, you add CSS extractor ::text to get the text content of the element.

response.css('div#mw-content-text>div>p')[0].css('::text')

The final expression uses extract() to return the list. You can use the Python join() function to join the list once all the crawling is complete.

    def parse(self, response):
        print ''.join(response.css('div#mw-content-text>div>p')[0].css('::text').extract())

The result is the first paragraph of the text!

An electric battery is a device consisting of one or more electrochemical cells with external connections provided to power electrical devices such as flashlights, smartphones, and electric cars.[1] When a battery is supplying electric power, its positive terminal is
...

Collecting JSON Data

Scrapy can extract information in text form, which is useful. Scrapy also lets you view the data JavaScript Object Notation (JSON). JSON is a neat way to organize information and is widely used in web development. JSON works pretty nicely with Python as well.

When you need to collect data as JSON, you can use the yield statement built into Scrapy.

Here’s a new version of the script using a yield statement. Instead of getting the first p element in text format, this will grab all of the p elements and organize it in JSON format.

...
    def parse(self, response):
        for e in response.css('div#mw-content-text>div>p'):
            yield { 'para' : ''.join(e.css('::text').extract()).strip() }
...

You can now run the spider by specifying an output JSON file:

scrapy runspider spider3.py -o joe.json

The script will now print all of the p elements.

[
{"para": "An electric battery is a device consisting of one or more electrochemical cells with external connections provided to power electrical devices such as flashlights, smartphones, and electric cars.[1] When a battery is supplying electric power, its positive terminal is the cathode and its negative terminal is the anode.[2] The terminal marked negative is the source of electrons that when connected to an external circuit will flow and deliver energy to an external device. When a battery is connected to an external circuit, electrolytes are able to move as ions within, allowing the chemical reactions to be completed at the separate terminals and so deliver energy to the external circuit. It is the movement of those ions within the battery which allows current to flow out of the battery to perform work.[3] Historically the term \"battery\" specifically referred to a device composed of multiple cells, however the usage has evolved additionally to include devices composed of a single cell.[4]"},
{"para": "Primary (single-use or \"disposable\") batteries are used once and discarded; the electrode materials are irreversibly changed during discharge. Common examples are the alkaline battery used for flashlights and a multitude of portable electronic devices. Secondary (rechargeable) batteries can be discharged and recharged multiple
...

Scraping Multiple Elements

So far the web crawler has scraped the title and one kind of an element from the page. Scrapy can also extract information from different types of elements in one script.

Let’s extract top IMDb Box Office hits for a weekend. This information is pulled from http://www.imdb.com/chart/boxoffice, in a table with rows for each metric.

The parse() method can extract more than one field from the row. Using the Chrome Developer Tools you can find the elements nested inside the table.

...
    def parse(self, response):
        for e in response.css('div#boxoffice>table>tbody>tr'):
            yield {
                'title': ''.join(e.css('td.titleColumn>a::text').extract()).strip(),
                'weekend': ''.join(e.css('td.ratingColumn')[0].css('::text').extract()).strip(),
                'gross': ''.join(e.css('td.ratingColumn')[1].css('span.secondaryInfo::text').extract()).strip(),
                'weeks': ''.join(e.css('td.weeksColumn::text').extract()).strip(),
                'image': e.css('td.posterColumn img::attr(src)').extract_first(),
            }
...

The image selector specifies that img is a descendant of td.posterColumn. To extract the right attribute, use the expression ::attr(src).

Running the spider returns JSON:

[
{"gross": "$93.8M", "weeks": "1", "weekend": "$93.8M", "image": "https://images-na.ssl-images-amazon.com/images/M/MV5BYWVhZjZkYTItOGIwYS00NmRkLWJlYjctMWM0ZjFmMDU4ZjEzXkEyXkFqcGdeQXVyMTMxODk2OTU@._V1_UY67_CR0,0,45,67_AL_.jpg", "title": "Justice League"},
{"gross": "$27.5M", "weeks": "1", "weekend": "$27.5M", "image": "https://images-na.ssl-images-amazon.com/images/M/MV5BYjFhOWY0OTgtNDkzMC00YWJkLTk1NGEtYWUxNjhmMmQ5ZjYyXkEyXkFqcGdeQXVyMjMxOTE0ODA@._V1_UX45_CR0,0,45,67_AL_.jpg", "title": "Wonder"},
{"gross": "$247.3M", "weeks": "3", "weekend": "$21.7M", "image": "https://images-na.ssl-images-amazon.com/images/M/MV5BMjMyNDkzMzI1OF5BMl5BanBnXkFtZTgwODcxODg5MjI@._V1_UY67_CR0,0,45,67_AL_.jpg", "title": "Thor: Ragnarok"},
...
]

More Web Scrapers and Bots

Scrapy is a detailed library that can do just about any kind of web crawling that you ask it to. When it comes to finding information in HTML elements, combined with the support of Python, it’s hard to beat. Whether you’re building a web crawler or learning about the basics of web scraping the only limit is how much you’re willing to learn.

If you’re looking for more ways to build crawlers or bots you can try to build Twitter and Instagram bots using Python. Python can build some amazing things in web development, so it’s worth going beyond web crawlers when exploring this language.

Read the full article: How to Build a Basic Web Crawler to Pull Information From a Website


Read Full Article

The Best YouTube Channels for Self-Improvement and Motivation


youtube-self-improvement

In the quest for self-improvement, you’ll often find yourself in need of inspiration. Self-help books used to be everybody’s go-to resource, but these days, you can get the best motivation from YouTube channels instead.

Some of them explain psychological concepts while others pump you up with motivational speeches. Whatever you need for your personal development journey, you can get it from the best self-help YouTube channels below.

1. TEDx Talks

Total Number of Subscribers: 22.8+ Million

From social change to social media, TED Talks cover just about everything. You can find a vast range of videos about self-help on this international YouTube channel. The presenters sprinkle personal anecdotes into every lesson to ground their teachings in reality.

Check out My Philosophy for a Happy Life or The Art of Letting Go to get started.

2. Be Inspired

Total Number of Subscribers: 6.27+ Million

The title of this channel says it all. There’s a range of inspirational talks, aimed to motivate you into action. Check out videos like Never Lazy Again, Start Your Day Right, and Winner’s Mindset for a sample of what’s on offer.

The sleek, uniform style of Be Inspired makes it one of the best YouTube channels for reliable motivation.

3. School of Life

Total Number of Subscribers: 5.24+ Million

Education shouldn’t stop when you leave school. This YouTube channel devotes itself to providing continued lessons on all important parts of life. Learn about relationships, social philosophy, self-help, and more.

Check out these videos about battling anxiety, helping people around you, or simplifying your life.

4. Big Think

Total Number of Subscribers: 2.7+ Million

Big Think is all about spreading interesting ideas from big thinkers. Listen to experts like Michael Puett, Bill Nye, and Neil deGrasse Tyson give insight into ideas that expand your mind and make it easy to live a better life.

Here are some top choices we picked out for you:

5. Team Fearless

Total Number of Subscribers: 2.45+ Million

This YouTube channel has some of the best motivational videos for getting pumped. Watch everything from three-minute motivational bursts to 20-minute speeches. You can even find playlists of self-development music.

Why not use that motivation to set yourself self-improvement challenges?

6. Matt D’Avella

Total Number of Subscribers: 2.33+ Million

Matt D’Avella is a minimalist filmmaker. His YouTube channel is full of videos to help grasp control and improve your life. As you’d expect from a filmmaker, each video is beautifully shot and edited, making it a joy to watch D’Avella’s work.

Learn how to stop procrastinating, make your habits stick, or wake up at the same time every day. D’Avella also has a series of 30-day experiments that are well worth a watch.

7. Improvement Pill

Total Number of Subscribers: 1.96+ Million

Improvement Pill releases animated lessons designed to help you improve your life in all sorts of different ways. Work on breaking addictions, overcoming fear, and getting yourself motivated. These videos are consistently under 10 minutes, making them easy to squeeze into a busy schedule.

You can follow a range of different courses written by Improvement Pill, or dive into one-off lessons instead.

8. Thomas Frank

Total Number of Subscribers: 1.73+ Million

Once upon a time, this YouTube channel went by the name CollegeInfoGeek. Now rebranded, Thomas Frank is still dedicated to creating the best self-help YouTube videos around.

Among other things, Frank teaches about study techniques, habit tracking, and productive routines. His YouTube videos have everything you need for positive change.

9. Motivation Madness

Total Number of Subscribers: 1.43+ Million

Motivation Madness uploads hours of inspirational speeches from successful figures. Watch them to find out why the one percent succeed or learn the right mindset for inner happiness.

Many of these speeches, like Denzel Washington’s life advice, are from graduation ceremonies. But you can take lessons from these videos wherever you are in life.

10. Fight Mediocrity

Total Number of Subscribers: 1.16+ Million

Most of us don’t have time to read all the best self-improvement books out there:

These books are likely to stay on your reading list forever. But Fight Mediocrity creates animated summaries so you can get the gist in minutes.

Alongside popular book summaries, there are also speeches from inspirational figures like Elon Musk or Arnold Schwarzenegger.

11. Absolute Motivation

Total Number of Subscribers: 1.08+ Million

Absolute Motivation lives up to its name, providing a seemingly endless source of motivational YouTube videos. There are some real gems here, like Psychology of the Great, What It All Means, and Why You’re Not Happy.

Do yourself a favor and think about the message after each video. If you need motivation in ten minutes or less, this one of the best YouTube channels around.

12. ET the Hip Hop Preacher

Total Number of Subscribers: 995,000+

Eric Thomas is a motivational speaker, educator, preacher, podcaster, and entrepreneur. His motivational YouTube videos can help you develop the mindset you need for effective self-help.

If you don’t mind Thomas’s faith-inspired perspective on personal development, this channel is a great resource. Particularly popular videos include You Owe You or Affirm Your Goals.

13. Actualized.org

Total Number of Subscribers: 931,000+

Many of the videos from Actualized.org are nearly an hour long, like One Simple Rule for Acing Life, Lifestyle Minimalism, and The Power of Letting Go. You may want to split them up into shorter sections, but they’re worth making time for.

This YouTube channel seeks to help you master your psychology and improve your life. It covers a wide variety of personal development concepts (with a dose of profanity thrown in for good measure).

14. InnerLight Media

Total Number of Subscribers: 288,000+

Thanks to an ever-increasing supply of motivational videos, this YouTube channel always has something for you to watch. Especially if you need a boost of inspiration.

Check out videos that prompt you to be more kind, find a better direction in life, and accept the person you are. Some of them are cheesy, but those ones usually work the best!

Get Inspired!

Working on your self-improvement should be far easier with the videos on these channels. You can find an endless supply of self-help lessons or motivational speeches on YouTube.

But you don’t need to stick to YouTube for self-help.

Whether you want to learn how to handle finances, weave creativity into your life, or find a healthy relationship, there are plenty of no-nonsense life advice sites designed to help you with all that as well.

Read the full article: The Best YouTube Channels for Self-Improvement and Motivation


Read Full Article

5 Ways to Generate a List of All Installed Programs in Windows


list-apps-windows

You’ve probably installed many programs over time on your Windows PC and might not remember all of them. Let’s look at multiple ways to get a list of installed programs in Windows 10.

Unlock the FREE "Ultimate Windows Keyboard Shortcuts" cheat sheet now!

This will sign you up to our newsletter

Enter your Email

You can refer to this list of installed programs when you set up a new PC or reinstall Windows 10 and know what programs to install.

1. List Installed Programs Using Registry and PowerShell

Querying the registry is an effective way of finding out all installed programs in Windows 10. You can use a combination of the registry and PowerShell to get a list of installed software.

To begin, download the Get-ProgramGet script from TechNet. Store it in C:\Windows\system32 (replace C with whatever your local directory is.)

Press Windows key + X and click Windows PowerShell (Admin), which we’re going to use to run the script.

It’s likely that your computer has a policy enabled to stop you running scripts, so let’s change that.

Input the following:

Set-ExecutionPolicy Unrestricted

Press A to say Yes to All.

Next, input the following:

 . .\Get-RemoteProgram

Press R to Run once.

PowerShell

This will then output a list of programs installed on your local machine. Click and drag to highlight the list. You can then copy this into another program, like Notepad or Excel, to save the list.

2. List Installed Programs Using Settings

One way is to view all your installed programs is to look within Settings. This is a basic solution but is effective if you have concerns about using PowerShell.

Apps and features

Press Windows key + I to open Settings and click Apps. This will list all programs installed on your computer, along with the Windows Store apps that came pre-installed.

Use your Print Screen key to capture the list and paste the screenshot into another program like Paint. You will probably need to scroll down and take multiple screenshots. If this is the case, you might find it easier to paste each image into a word processor and save it as a single file.

3. List Installed Programs Using UninstallView

UninstallView is a program from NirSoft. While it can be used to uninstall programs, it’s also incredibly good at generating a reliable list of your installed programs.

UninstallView

Once downloaded, open the executable and it will show a list of your programs. Use the Options dropdown to toggle the appearance of Windows Apps, if you want them included.

Go to View > HTML Report – All Items to see an HTML export of the list. You can keep that file in the default location as per the address bar, or press Ctrl + S to save it somewhere else.

4. List Installed Programs Using CCleaner

CCleaner is a Windows program designed to free up space on your PC, though CCleaner has a questionable reputation nowadays. Nevertheless, it’s handy for a single use to generate a list of installed programs on your PC that can be saved to a text file.

Once installed, open CCleaner and click Tools on the left, then Uninstall.

CCleaner installed programs

Click the blue Save to text file button in the lower-right corner.

On the Save As dialog box, navigate to the folder where you want to save the installed programs list, enter a File name and click Save.

The list of installed programs includes the company, date installed, size, and version number for each program.

The text is tab-delimited, which makes it somewhat hard to read in a text editor. You can import the text from this file into Excel to make it easier to read.

Convert Your List of Programs Into an Excel Worksheet

Open Excel. Go to Open > Browse and change the dropdown next to File name to be All files. Then navigate to where you exported the text file and open it.

On the first screen of the Text Import Wizard dialog box, make sure Delimited is selected under Choose the file type that best describes your data. Click Next.

Excel text import wizard

On the second screen, make sure Tab is checked under Delimiters.

Click Finish. Your list of programs is then imported into columns on a worksheet in Excel.

5. List Installed Programs Using Geek Uninstaller

Geek Uninstaller is a free, portable Windows program used to thoroughly uninstall programs, including all leftovers. The program will also forcefully remove stubborn or broken programs. You can use Geek Uninstaller to generate and save a list of installed programs on your PC.

Geek Uninstaller

Open the downloaded executable. A list of installed programs displays on the Geek Uninstaller main window.

To save this list to an HTML file, press Ctrl + S. On the Save As dialog box, navigate to the folder where you want to save the installed programs list, enter a File name and click Save.

The HTML file automatically opens in the default browser once it’s saved. The list includes the name and size of each program and the date on which the program was installed.

Press Ctrl + S to save the Installed Programs HTML page to a location you choose with a custom file name.

Geek Uninstaller also allows you to display a list of apps installed from the Windows Store. Go to View > Windows Store Apps. Note that this is a separate list to the other one—it does not combine them.

All the apps installed on your PC from the Windows Store display. You can export this list to an HTML file the same way you did for the list of regular Windows programs.

And while you’re using Geek Uninstaller, you should consider uninstalling unnecessary Windows programs and apps.

Move Your Programs Elsewhere

All of these techniques get you the same end result, so it’s just preference as to which one you want to use. If you don’t want to install anything, go with PowerShell, otherwise, a third-party app works nicely.

Now you know all the programs you have, perhaps you want to move them around. Check out our guide on how to move installed programs in Windows 10.

Read the full article: 5 Ways to Generate a List of All Installed Programs in Windows


Read Full Article

Google Maps Gets New Features to Explore


Google Maps is 15 years old, with Google having launched Maps all the way back in 2005. To celebrate the milestone, Google has updated Maps, with a new icon, a simplified user interface, and news of some new features coming over the next few months.

A Brief History of Google Maps

In February 2005, Google launched Google Maps. At the time, Google Maps was a web application, but was quickly transformed into an app for mobile devices as well. Which, given its usefulness as a tool for navigation, is where it came into its own.

Google Maps has evolved massively over the years, and Google has celebrated 15 years of Google Maps in a series of posts on The Keyword. This includes Sundar Pichai reflecting on the history of Google Maps, and Jen Fitzpatrick looking at the future of Google Maps.

There’s also a post detailing Google Maps’ new look and features.

New Google Maps Features to Explore

The first thing you’ll notice is the new icon. The section of a map with a pin sticking in it is gone, replaced by a simple pin-shaped icon decorated with the red, blue, yellow and green common to all Google apps. Making it much more recognizable as a Google app.

Once you open the app you’ll now see five tabs running across the bottom of the app. These are designed to keep everything you need at your fingertips. Saving you from having to dig through menus and submenus to find what you want.

The five tabs are Explore, Commute, Saved, Contribute, and Updates. Explore helps you explore areas, Commute lets you set up your commute, Saved collates all of your saved places, Contribute lets you share local knowledge, and Updates features trending spots.

Google is also teasing further updates due in the next few months. The first is a new set of features to help you plan your journeys on public transit. The second is an expansion to Live View, which offers augmented reality walking directions.

Here’s to Another 15 Years of Google Maps

Google Maps has been an absolute revelation. From helping us all navigate the world, whether by foot, automobile, or public transit, to showing us where to visit, eat, drink, and park, Google Maps is an essential tool for everyone. So, here’s to the next 15 years.

And if you’re interested in the tech powering the app, here’s how Google Maps works.

Read the full article: Google Maps Gets New Features to Explore


Read Full Article

5 Tips to Buy Safely on AliExpress and Avoid Frauds or Scams


aliexpress-avoid-scams

It’s not always easy to stay safe while you’re shopping online. For every legitimate, reputable site, hundreds want to take your money and run for the hills, never to be seen or heard from again.

If you want to stay safe, it’s important to research the site you’re making your purchases on. Take AliExpress, for example. How does it protect buyers? Is it easy to avoid scams? How does the site handle disputes and refunds?

So, let’s dive into the world of AliExpress and answer some of those questions.

What Is AliExpress?

AliExpress is part of the Alibaba Group. The group is a Chinese eCommerce company that offers a variety of retail services to businesses and consumers around the world. In April 2016, it overtook Walmart to become the largest retailer in the world.

Alibaba launched its AliExpress subdivision in 2010. It’s an online-only company that sells mainly Chinese products. It functions more like eBay than Amazon; it’s a host platform that lets third-party companies sell their wares. It doesn’t sell products itself.

AliExpress is the most popular e-commerce site in Russia and is also widely used throughout Latin America.

1. Buying From AliExpress: Buyer Protections

aliexpress protection for buyers

Buying online comes with inherent risks. Unlike doing your shopping in a physical store, you can’t see the item prior to purchase.

This removes a significant part of the buying process. You can’t feel a product to test for build quality or check an electronic item to make sure all the features work as described.

If you’re buying a well-known brand, you can read online reviews or even head to shop to negate the problem.

But is AliExpress safe to use for purchases? After all, many of the cheap white-label Chinese products on AliExpress are not available in stores; you’re on your own. Normally, you will be making your decision solely based on the description and a few photos. It’s vital, therefore, that the site has a robust buyer protection policy.

Luckily, it does. The company offers two important guarantees:

  1. A full refund if you don’t receive your order: if the item does not show up, or even if it does not arrive within the timescale the seller specifies, you can apply for a full refund. You will get a full refund within 15 days.
  2. A full or partial refund if the item is not as described: if your purchase differs significantly from what you expected, you have two options. You can either return the item for a full refund or keep the item and receive a partial refund.

2. Resolving Disputes

aliexpress dispute process

Unfortunately, as with other eCommerce sites, getting a refund for a missing, defective, or incorrect item is not as simple as merely clicking a “Refund” button. There’s an entire dispute process you need to work through.

On AliExpress, the dispute process involves three steps:

First, you need to contact the seller and raise your issue directly with them. If you’re raising a dispute either before the order has been completed, or more than 15 days after completion, this is the only option open to you.

If you’re still in the pre-completion stage and the seller refuses to cooperate, you have to wait until the order is closed and raise the issue with AliExpress. Sadly, if you’re beyond the 15-day mark and the seller refuses to cooperate, you’re out of options.

Second, if you’re within the 15-day period and you’re not happy with the seller’s response, you can open a dispute ticket. This makes the process formal.

Third, if you’re unhappy with the formal discussions, you can escalate the issue to AliExpress. It will then act as a mediator between you and the seller to reach a resolution.

3. Finding a Reputable Seller: The Feedback Page

aliexpress seller feedback

The easiest way to avoid using the refund and dispute channels is to find a reputable seller. It makes ordering from AliExpress much less worrisome. If thousands of satisfied customers have used the seller in the past, you’re far less likely to run into problems.

The most obvious way to check a seller is to look at their history. On any seller’s page, click the Feedback tab for a complete breakdown. To safely buy cheap tech from Chinese sites, checking seller feedback is essential.

Each seller has a Positive Feedback percentage and Feedback Score. The Feedback Score is the sum of all ratings, converted into points. Four- and five-star ratings are worth one point, three stars are worth zero, and one- and two-star ratings deduct one point.

Further down the page, you can see star ratings sub-divided into Item as Described, Communication, and Shipping Speed. For each sub-category, you can see whether the seller in question is above or below the site average.

Lastly, at the bottom of the page, you’ll see a historical look at their scores along with buyer comments.

4. Check Seller Guarantees

aliexpress seller guarantees

Sellers can also offer buyers specific safeguards. As a general rule, the more guarantees provided, the more confident you can be in your purchase. Again, it helps to make AliExpress a more reliable store.

Sellers offer guarantees on a per-item basis. Just because they offer lots of assurances on one product doesn’t mean the same assurances are replicated across their entire catalog. Make sure you do thorough research before you commit.

There are four different guarantees sellers can offer:

  1. On-Time Delivery. The seller promises to provide a full refund if your purchase does not arrive by a pre-agreed time.
  2. Returns and Refund. The seller promises to offer a full refund if the product is not as described
  3. Domestic Returns. The seller has a warehouse in your country. You can send returns to it without needing to worry about shipping costs or customs fees.
  4. Guaranteed Genuine. If you’re buying a big-ticket electronic item, this is one to look out for. It means the item has been verified as genuine by AliExpress itself.

To see which guarantees are provided for an individual item, check for the Buyer Protection information in the Quick Info part of the product page, or click the Seller Guarantees tab below the product image.

5. Be a Smart Shopper to Avoid Fraud

No matter how much security the site puts in place, you always need to take some responsibility for your own actions.

AliExpress offers some helpful hints to make sure you avoid fraudulent sales. Most of them are common sense, but it’s still prudent to recap some of them:

  • If the price is too good to be true, it probably is. Sorry, but you’re not going to get the latest iPhone for $10. You’re probably buying an iPhone keyring instead. Check the small print.
  • Never send money to a seller’s bank account. If a seller wants you to send money directly to them rather than through AliExpress, do not proceed. Sending money outside of AliExpress means the site will not cover you under its buyer protection policies.
  • Do not confirm delivery before receiving the order. Never say you’ve received an item before it’s in your possession and you’ve thoroughly checked it for problems.

You should also make yourself aware of something called formjacking, anytime you’re shopping online. Check out exactly what formjacking is and how to avoid it if you’d like to learn more.

AliExpress Is Safe

Chinese products often have an unfair reputation for being cheap and poor quality. It’s not true. Many of the products on AliExpress are well made and available for a fraction of the cost of what you would pay for an equivalent item in the shops of North America or Europe.

If you’re a smart shopper, it is safe to shop on AliExpress. The site is no more dangerous than buying something off Amazon or eBay.

Read the full article: 5 Tips to Buy Safely on AliExpress and Avoid Frauds or Scams


Read Full Article

Xbox One Controller Not Working? 4 Tips on How to Fix It!


xbox-one-controller-issues-fix

Is your Xbox One controller not working? This is an annoying problem that a lot of Xbox owners face. While today’s wireless controllers are more convenient than the wired ones of previous systems, they come with their own set of issues.

In this troubleshooting guide, we’ll show you how to fix your Xbox One controller when it won’t connect, sync, or even turn on properly. By the end of it you should be gaming once again.

1. If Your Xbox One Controller Is Not Connecting

Xbox One Controller and System

If you can’t get your Xbox One controller to connect to your console, you should check for a few common issues.

Do you have eight controllers already connected to your console? While you likely don’t use this many often, the maximum amount of controllers an Xbox One supports is eight.

At this point, you can’t connect any more controllers. Hold the Xbox button on a controller and choose Turn controller off on the resulting menu to do so. Then try connecting the new controller again.

Also, remember that you can only pair a controller with one Xbox One system at a time. If you go to a friend’s house and pair your controller with his Xbox, you’ll have to re-pair it with yours again. This also applies when you connect your Xbox One controller to a PC and then try to use it on your console again.

Note: See the “Your Xbox One Controller Is Blinking” section below for more on this.

2. If Your Xbox One Controller Keeps Disconnecting

What if your Xbox controller pairs but then keeps disconnecting? This can ruin a great multiplayer gaming session and is extremely frustrating to deal with.

Do remember that it’s a normal battery-saving feature of the Xbox One controller to disconnect if you don’t use it for 15 minutes. This isn’t a problem when playing games, but can come into play if you primarily use your Xbox One as a media center. You’ll need to move a stick or press a button every so often, otherwise you’ll have to reconnect it later by pressing the Xbox button.

Xbox One Elite Controller Overview

However, if you’re having a problem with disconnecting, it probably happens much more frequently than every 15 minutes. If that’s the case, you can try a few troubleshooting steps.

It’s important to confirm that your batteries are charged when you have this issue. Tap the Xbox button to go back to the Home menu, then look for the battery icon in the top-right corner. If they’re low, replace or charge them as necessary.

Frequent disconnects can also have their root in interference. The Xbox One controller has a range of about 19-28 feet, according to Xbox Support. Try moving closer to your console.

You should also remove obstructions between the controller and console, like laptops, metal shelving, and similar. If your Xbox is inside an entertainment center, try moving it outside the unit to get a better connection.

3. If Your Xbox One Controller Is Blinking

Xbox One Controller Xbox Button Blinking

If you press the Xbox button on your controller and it blinks or flashes, this usually indicates that your controller isn’t paired to a console. As mentioned above, this can happen when you pair the controller to another system. But it can also occur due to glitches.

Follow our guide showing how to sync an Xbox One controller to your console to get yours connected again.

If your controller won’t pair using the buttons, try using a micro-USB cable to pair it. Simply plug the cable into a USB port on your console and connect the other end to your controller, then hold the Xbox button on your controller for a few seconds.

If this fails to solve the problem, you should restart your console. Press and hold the power button on the front of your system for 10 seconds to fully power it off. Then press it again to turn it back on.

4. If todayYour Xbox One Controller Won’t Turn On

Your Xbox controller is not turning on? This is another common problem, with similar solutions to the above.

If your Xbox One controller won’t turn on, first, make sure the batteries aren’t dead. If the batteries are low, the controller won’t turn on at all. Pop the back cover off and replace the two AA batteries, then try again. You can also purchase the Xbox One Play & Charge Kit to gain rechargeable batteries.

Xbox One Controller Battery Compartment

If changing the batteries doesn’t work, try this:

  1. Turn off your Xbox One fully by pressing and holding the power button on the front of the system for 10 seconds.
  2. Unplug your console’s power cable for a few minutes.
  3. Use a micro-USB cable you know is good (try others if the first doesn’t work) to connect your controller to the system.
  4. Plug your Xbox back in and turn it on using the power button on the system. Don’t press anything on the controller until the Xbox boots up.
  5. Try pressing the Xbox button at this point and see if it’s working.

General Xbox One Controller Connection Tips

We’ve covered specific problems above. However, if your Xbox controller is still not working, here are some other general solutions to try.

Update the Controller Firmware

Your Xbox One controller actually has firmware that receives updates at times. While it doesn’t get these often, corrupted or outdated firmware could cause disconnection issues.

If your controller is functional, you can update it by tapping the Xbox button to open the guide. Go to System > Settings > Devices & streaming > Accessories. Select your controller, then choose Device info > Firmware version to check for updates.

Xbox One Update Controller

Remove Connected Xbox Accessories

Sometimes Xbox One accessories, attached either to the controller or console, can introduce connection issues. If you have an external hard drive, keyboard, or similar peripheral connected to your Xbox, try disconnecting it and attempt to connect your controller again. Do the same for the Stereo Headset Adapter on your controller if you have it.

If you’re trying to sync your controller using a micro-USB cable, make sure you’re using a high-quality cord. Low-quality or frayed/damaged cables may not work correctly.

Try Connecting Another Controller

Like most troubleshooting, you can help nail down where the problem lies by trying different devices. Try connecting a different controller (with charged batteries) to your Xbox system.

If it works fine, then the original controller is the issue. But if both have problems, then the problem likely lies with your console instead.

Reboot Your Xbox One

We mentioned it above, but it bears repeating: make sure to reboot your console when troubleshooting controller issues. By default, simply tapping the power button on the front of the system only puts it into sleep mode, so make sure you hold it for at least 10 seconds for a full shutdown.

Sometimes a quick reboot is all you need when an Xbox One controller isn’t working.

Try Using a USB Cable Permanently

Xbox One Controller Connected Cable

If you find that your connection issues clear up when using a USB cable, your best bet might be to use your controller as a wired device to prevent future issues. You can buy an 15-foot MATEIN micro-USB cable so you don’t have to worry about sitting far away from your system.

What If Your Xbox One Controller Is Still Not Working?

If nothing else works, head to Microsoft’s Device Support page. Sign in with your Microsoft account, register your console if you haven’t yet, and you can proceed through the steps to replace your controller. If Microsoft won’t replace it, you should be able to find a deal on a new controller instead.

Hopefully, one of these tips cleared up your Xbox One controller problem. Whether your controller won’t connect, keeps flashing, or won’t turn on, one of these tips should get you back in the game.

And now that you have a working controller, you should check out the best Xbox One exclusives to play today.

Read the full article: Xbox One Controller Not Working? 4 Tips on How to Fix It!


Read Full Article
How to Make a Snapchat Filter in 3 Easy Steps


create-snapchat-filters

Snapchat remains one of the most popular multimedia messaging apps on the planet. And you can even make your own Snapchat filter. So, in this article, we detail how to make a Snapchat filter.

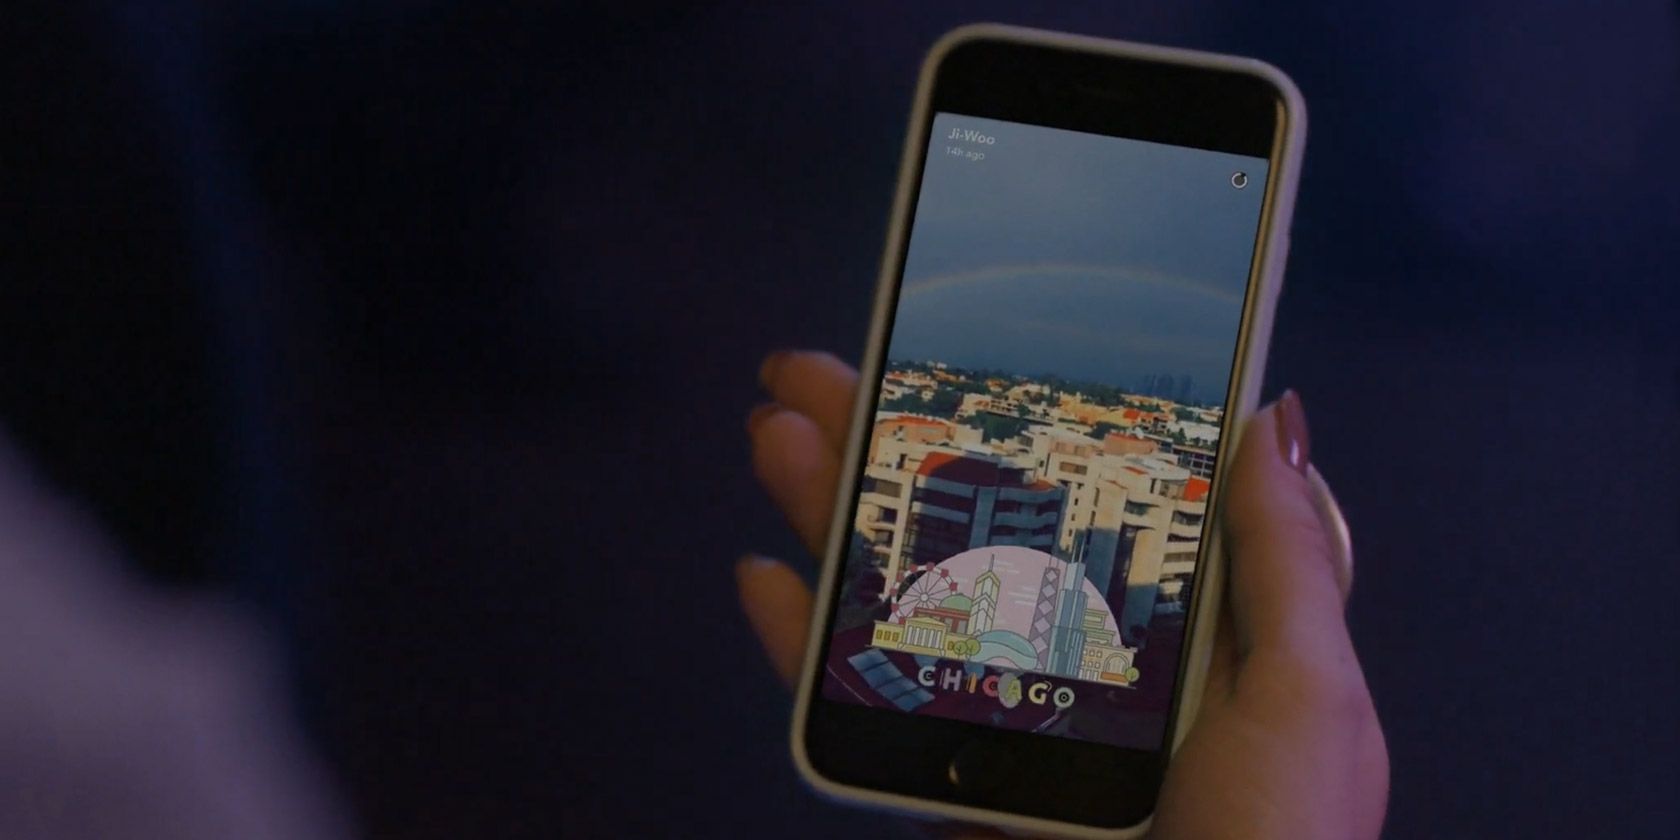
With Snapchat geofilters, you can put artwork, names, and logos, etc. over messages in the app. Snapchat geofilters only work in specific locations and are often available for a limited time.

Do you want to make a Snapchat filter for a wedding, birthday party, or other social event? In this article, we’ll show you how to make a Snapchat filter using the geofilter feature.

How to Make a Snapchat Filter

When you want to show off your business or celebrate a special event, a paid Snapchat filter is the right choice for you. On the other hand, you can also choose to create a free community filter that represents a location (a city, university, landmark, or another public place) or a moment (sports game, concert, etc.).

You can make Snapchat filters either in your web browser or through the Snapchat app. Once you’ve created a filter and submitted it, you should hear back from Snapchat within a few hours on whether it’s been approved. Let’s take a look at exactly how to make a Snapchat filter.

How to Create a Snapchat Filter Online

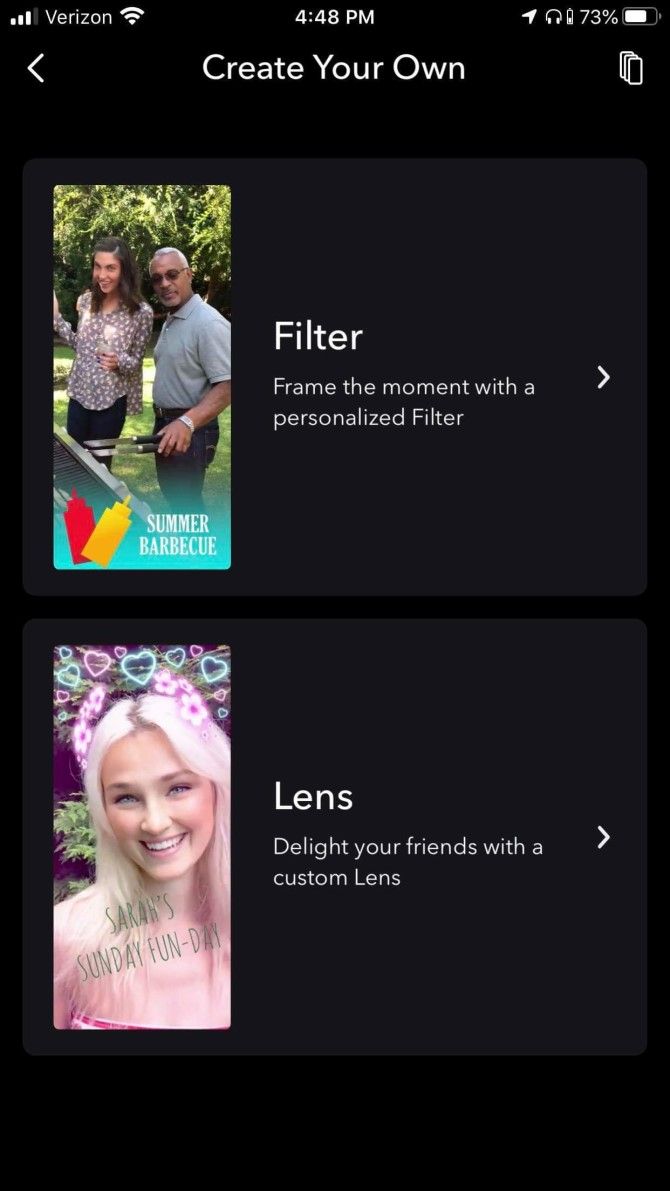
If you’d like to make a Snapchat filter from your computer, follow these simple steps. But first, head to Snapchat’s Create Your Own page, and select Create a Filter from the left side of the screen to start designing.

1. Choose a Design

Snapchat Create a Filter Design

If you have already designed your own filter, click Upload Your Own. Otherwise, select your filter’s occasion from the pulldown menu. Available choices include Celebration, Baby Shower, Birthday, Game Day, and many more.

Once you select a topic, you can choose one of the amazing Snapchat geofilter templates on the left side of the screen. Next, choose a color palette on the right-hand side of the screen, write in new text, choose your font, and upload pictures as needed. You can also add your Bitmoji or Friendmoji.

When the filter is to your liking, click Next.

2. Schedule Your Filter and Draw a Geofence

Snapchat Create a Filter Geofence

On the next screen, you must assign a start and end time for your filter. You can also select Repeating Event to have the filter run at different times, daily or weekly.

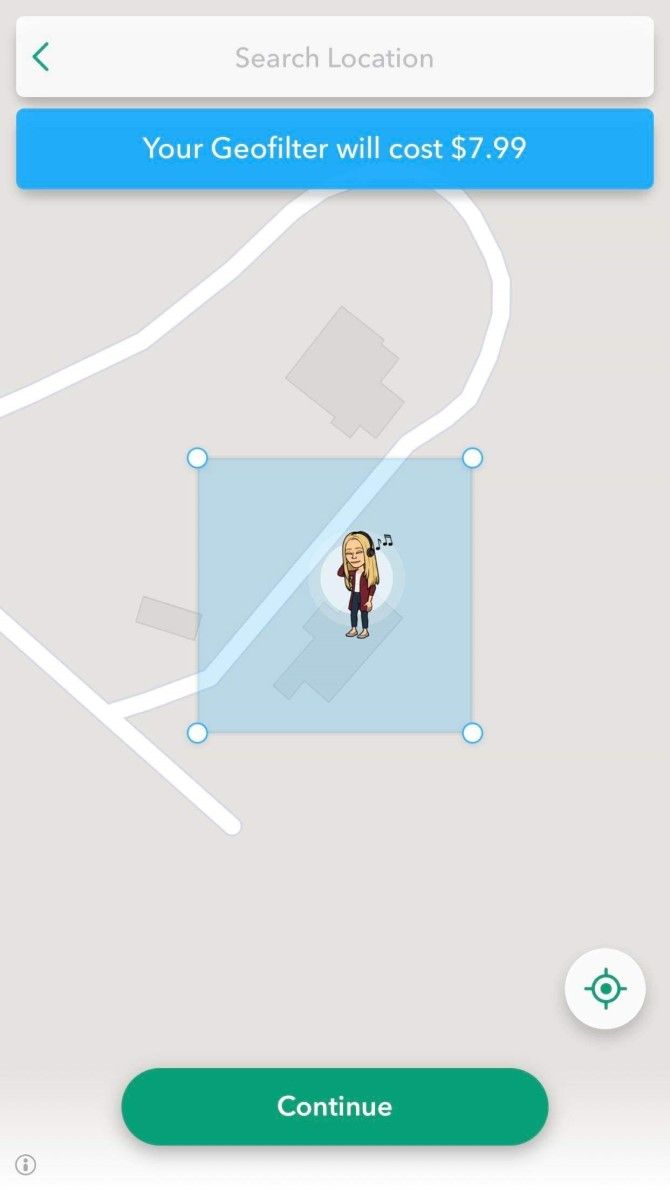
Select Next to draw your geofence. Inside your geofence is the location where Snapchat users will find the filter. Keep in mind that the Snapchat geofilter cost is based on the square footage of the area.

3. Confirm and Pay

When you’re comfortable with your geofence, click Checkout. From here, you’ll name your filter, enter your payment information, and then hit Select. Keep an eye on your email inbox for Snapchat’s approval message.

How to Make Your Own Snapchat Filter in the App

You can also create a Snapchat geofilter through the official Snapchat app, which is available for iOS and Android. Unfortunately, you can only use this feature with an iPhone.

1. Choose a Design

If you have an iPhone, navigate to the filter creation page by opening up your Snapchat app, and clicking your profile at the top-left of the screen. Click the Settings cog in the top-right corner, and head to Filter and Lenses > Filter.

On the next screen, select the filter occasion. Examples include Birthdays, Baby Shower, Date Night, and more. You can then proceed to select a design and customize your filter with text and stickers.

2. Schedule Your Filter and Draw a Geofence

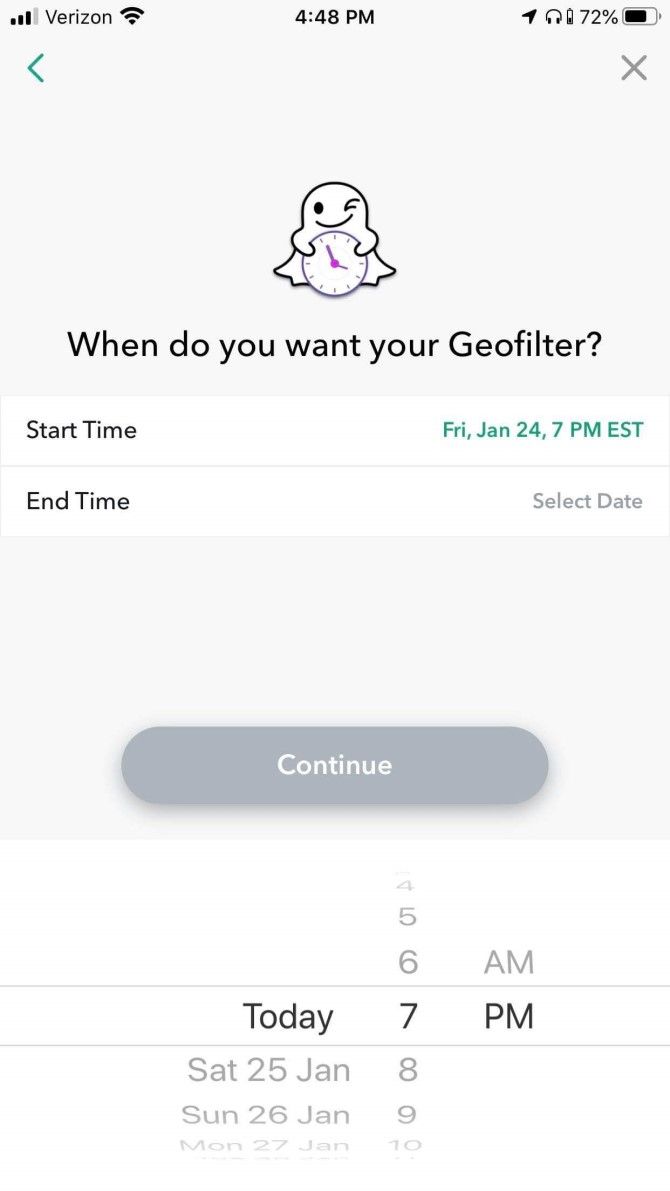
Once you decide on your design, you need to enter a start and end time for the custom filter. Select Continue to create a geofence that shows where you’d like the filter to appear.

3. Confirm and Pay

After agreeing to the filter price, choose Continue. Select Purchase from the summary page, then make your payment. Once you get the approval email, your filter is officially scheduled.

Snapchat Geofilter Cost

Now that you know how to make a geofilter, let’s talk about the cost.

The price for a Snapchat filter depends on the location of your geofence, how big it is, and how long you want it to run. Your payment isn’t charged to your account until the filter has been approved. Package prices are available to businesses.

At the time of writing, Snapchat accepts Visa, MasterCard, American Express, and Discover.

What About Community Snapchat Filters?

You can only create community filters via the Snapchat website in the form of geofilters or moment filters. Since Community filters don’t include templates, you’ll have to send an original design that follows Snapchat’s geofilter guidelines.

Snapchat suggests creating community filters in Adobe Photoshop or Adobe Illustrator. You can also create designs in Canva with zero effort, making it another great choice for making filters. Regardless, Snapchat offers the following submission tips:

  • Provide a good description if the artwork does not speak for itself, including any relevant dates.
  • Snapchat’s geofilter size is 1080px wide and 2340px tall.
  • Make sure no text or important elements are within the buffer zone of your filter (310px from the top and bottom).
  • Files should be under 300KB and in PNG format (transparency enabled).

If you stick with these guidelines, your custom Snapchat geofilter will look great. Have a look at the best Snapchat geofilters for some inspiration.

Adding Snapchat Filters

To add one of the many Snapchat filters (or your own) to your Snap, follow these simple steps:

  1. In Snapchat, capture a Snap, as usual.
  2. Swipe left and right to choose a filter.

To find filters specifically for your area, make sure to allow Snapchat to access your location in your device’s settings.

Personalize Your Snapchat Experience With Filters

Making a Snapchat filter is a great way to personalize your Snapchat experience. Whether you’re thinking of creating a customized filter for an upcoming event or want to advertise the town you call home, knowing how to make a Snapchat filter will definitely come in handy.

Do you want more affordable options for creating a Snapchat geofilter? Learn how to make a Snapchat geofilter on a budget.

Read the full article: How to Make a Snapchat Filter in 3 Easy Steps


Read Full Article

The 8 Best Cases and Covers to Protect Your Apple Watch


apple-watch-case

Unlike with an iPhone, you don’t absolutely need to use a case with your Apple Watch. The materials, especially on the more expensive models, can withstand everyday use.

But there are still plenty of reasons to use a case or cover. It’s an inexpensive way to accessorize your device and add a bit of color. It should also give you peace of mind that your Apple Watch will be protected from knocks and bumps, especially when combined with a screen protector.

Here are eight great Apple Watch cases and covers to protect your wearable device.

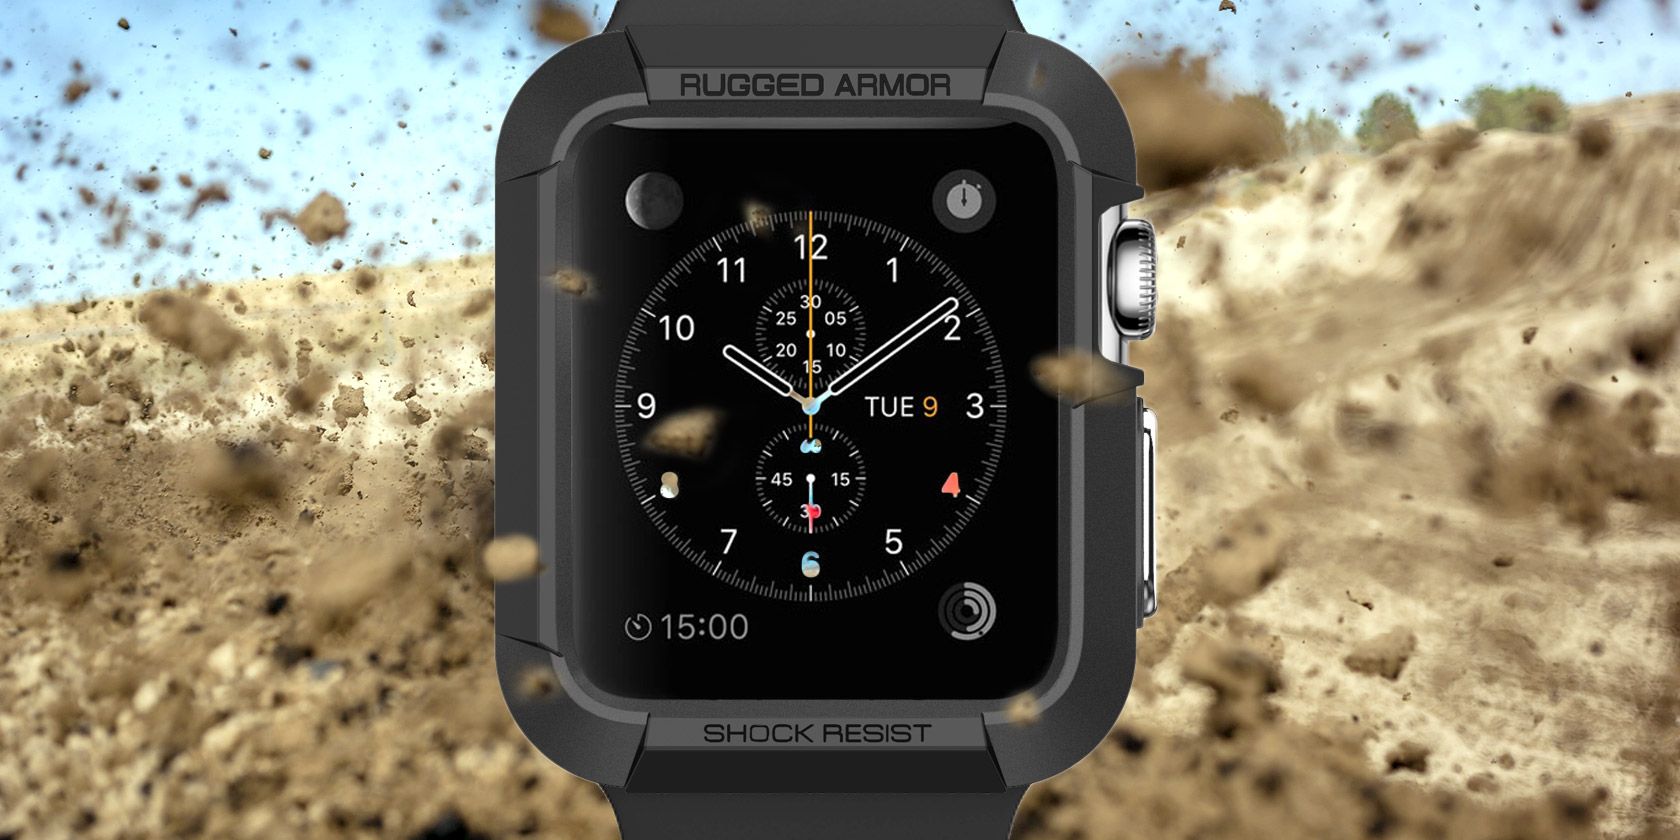
1. Spigen Rugged Armor

Spigen Rugged Armor Spigen Rugged Armor Buy Now On Amazon $12.99

Spigen is a go-to company for protecting every kind of gadget. While immensely strong, the Spigen Rugged Armor case is thoughtfully designed. Thanks to the flexible material, there’s no need to worry about skin irritation. The case holds on tight, is compact, and doesn’t move around your Apple Watch.

A metal button covers the right-hand side of the Apple Watch and gives it a stylish look. The cover doesn’t affect any functionality and encases all sides of the watch. With a slightly raised surface, it’s also designed to protect the Apple Watch screen from scratches and scrapes.

There are several different color options to select from to suit your style. The case is available for the 44mm and 40mm Series 5/4 watches and the 42mm and 38mm Series 3/2/1 devices.

2. Catalyst Waterproof Case

Catalyst Waterproof Case Catalyst Waterproof Case Buy Now On Amazon $49.99

While modern Apple Watch models are waterproof, Apple recommends that you don’t use the device for activities like scuba diving or water skiing. But the Catalyst Waterproof Case can easily give you peace of mind while in the water and offers some of the best protection for an Apple Watch.

Catalyst guarantees protection in up to 330 feet of water. It is also rated to protect the Apple Watch from falls of up to 6.6 feet. Even with the case, the vast majority of features—like heart rate detection—are still available. The only exception is that EKG monitoring isn’t available on the Series 5/4 models.

The case is available for the 44mm Series 5/4 watch and the 42mm and Series 3/2 model. Along with the case, Catalyst includes a compatible band, as well.

3. X-Doria Defense Edge

X-Doria Defense Edge X-Doria Defense Edge Buy Now On Amazon $24.96

Made from anodized aluminum, the X-Doria Defense Edge protects all sides of the Apple Watch exterior. With a soft rubber lining, no metal from the case will actually touch the exterior.

To install the case, just snap it on the exterior of the watch. You can still change bands easily, as the case doesn’t cover the rear of the watch. It’s available for the 44mm and 40mm Series 5/4 watch along with the 42mm and 38mm Series 3/2/1 devices.

4. Julk Case for Apple Watch

Julk Case for Apple Watch Julk Case for Apple Watch Buy Now On Amazon $6.99

The Julk Case for Apple Watch does double duty as it protects both the exterior and the display of the device. Made with a transparent material, the case protects from dust, fingerprints, and scratches. You’ll receive two cases in the package, ensuring you will always have a backup.

The case can’t be used while swimming, however. Julk’s option is available for the 44mm and 40mm Series 5/4 model and the 42mm and 38mm Series 3 watch.

5. Finite Bumper Cover Six-Pack

Finite Bumper Cover Six-Pack Finite Bumper Cover Six-Pack Buy Now On Amazon $5.99

The Finite Bumper Cover Six-Pack is all about style on a budget. It provides you with six different looks for your Apple Watch in various colors. The case maintains the originality of the watch and enhances its look while leaving the side button and Digital Crown open.

The cases are flexible, shock-absorbent, and comfortable as they’re so lightweight. Along with the multi-color pack, you can select from another six-pack with more muted hues. Both packs are available for all Apple Watch models and sizes.

6. Ritastar Apple Watch Cover With Screen Protector

Ritastar Apple Watch Cover With Screen Protector Ritastar Apple Watch Cover With Screen Protector Buy Now On Amazon $12.99

The Ritastar Apple Watch Cover With Screen Protector is a great choice for those who want to swim without having to remove the case. Once you install the cover and screen protector, it’s made to be permanent, and you’ll still have complete access to all buttons and charging.

To help blend in with your Apple Watch, Ritastar offers four different color options that mimic the colors of the watch—black, gold, silver, and rose gold. It’s available for the 44mm or 40mm Series 5/4 watch and 42mm and 38mm Series 3/2/1 device.

7. Secbolt Bling Case

Secbolt Bling Case Secbolt Bling Case Buy Now On Amazon $9.99

Take an Apple Watch to the next level with the Secbolt Bling Case. The exterior of the case is set with sparkly rhinestones. The case can easily snap on and off and doesn’t cover the rear of the device, so you can easily switch bands without having to remove it.

There are a wide variety of case colors to select from—including black, silver, and rose gold—for all sizes and models of the Apple Watch.

8. SupCase Rugged Protective Apple Watch Case

SupCase Rugged Protective Apple Watch Case SupCase Rugged Protective Apple Watch Case Buy Now On Amazon $21.99

The SupCase Rugged Protective Apple Watch Case is a perfect all-in-one option for anyone needing hardcore protection for the device. Along with a full shock-resistant case, SupCase also provides an adjustable watch band to complete the reasonably priced package. To install, just remove your current watch band and then insert it in the case.

SupCase offers a wide variety of band and case color combinations for the 44mm and 40mm Series 5/4 device, along with options for the Series 3 42mm and 38mm editions.

Protect Your Device With an Apple Watch Case or Cover

Whether you use an Apple Watch case is up to you—the device is strong enough to protect against everyday damage. However, especially accident-prone users may want some extra Apple Watch protection. After all, it’s a lot cheaper to replace a case than your watch.

Before you add your new case, make sure to clean your wearable device by following our steps on how to clean your Apple Watch safely and efficiently.

Read the full article: The 8 Best Cases and Covers to Protect Your Apple Watch


Read Full Article

5 Ways to Find Recycling Plant Locations in the US


recycle-smartphone

As we continue to drain the planet’s finite natural resources, recycling as much as possible is more important than ever. Kitchen trash, old electronics, or discarded furniture… it doesn’t matter. Recycling is always a better solution than chucking it all in a landfill or incinerator.

But how do you know where to take all your old stuff? How can you find recycling locations close to your home or office? Keep reading to learn about how to discover nearby recycling drop off locations.

1. Earth911

earth911 recycling

Earth911 wants to save the planet with the help of its large community. Naturally, recycling forms a large part of that.

Earth911 makes it easy to find a recycling plant that caters to your specific needs and is close to you. The plants are subdivided according to the kind of trash they handle. You will find plants that deal that automotive parts, batteries, construction waste, electronics, garden waste, glass, hazardous materials, household trash, metals, paint, paper, and plastics.

You can even search for your specific type of waste if it does not fit into one of the headline categories.

In total, more than 350 different types of waste materials have been classified. The directory itself contains in excess of 100,000 recycling plants across the United States.

The site also offers a phone service. Just dial 1-800-CLEANUP and enter your ZIP code, and an automated voice will provide a list of the most suitable recycling centers near your location.

In addition to the Earth911 recycling search and location directory, the site also has an extensive blog about the topic. It is packed with useful tips on how to reduce your waste, how to recycle in the most appropriate way, and how to engage your community around the topics of recycling and reuse.

Other useful features on Earth911’s homepage include quizzes to help you brush up on your recycling and eco knowledge, a regular podcast, and industry news.

2. ENF Recycling

enf recycling list

The Earth911 website might be the most well-known (and arguably, the most comprehensive) resource for people who need to find recycling drop off locations near their home in the US, but it is not the only option. In the rest of the article, we’re going to introduce you to some of the top alternatives to Earth911. First up, ENF Recycling.

ENF Recycling is the world’s largest directory of recycling companies, recycling machines, and recycling services. It doesn’t have as many US listings as the Earth911 website; however, it has a global directory that Earth911 lacks.

Countries with recycling plants on ENF Recycling include Austria, Czech Republic, France, the UK, Germany, Spain, Russia, Switzerland, Italy, India, Japan, China, Singapore, Brazil, Canada, Mexico, Australia, and many more.

The site’s recycling plants are divided into five main categories for easy navigation. They are Plastic, Metal, Glass, Paper, and Organic. Each category is further subdivided into the type of machine that each plant offers. You’ll see choices such as shredder, dry separator, hard plastics recycling, extruders, balers, and so on.

If you dig into each individual plant’s listing, you will find an address, emails, contact numbers, a map, and other useful snippets of information.

3. Vinyl Institute

vinyl institute recycle directory

Another site that provides a directory of recycling locations is Vinyl Institute. In theory, it covers all of North America, but the information is heavily skewed towards the United States. There are just a handful of listings for Canada.

The information for each listing is not as extensive as on Earth911 or ENF Recycling. You will not find any categories, and each company only has an address and phone number.

4. RecycleNation

recyclenation recycling map

RecycleNation is a recycling and green living-focused website. In addition to the listings, it also has a blog and an iPhone app.

The company has agreements with several large retailers, recycling location aggregators, and private entities, all of which combine to help make RecycleNation one of the most comprehensive ways to find recycling centers near your location.

It is easy to find the listings you need, thanks to the site’s search feature. Just enter the type of material that you want to recycle along with your ZIP code, and you will be shown a list of all the nearby locations that meet your criteria.

Some examples of recent blog posts on the site include “5 Ways to Recycle Old Board Games,” “5 Easy Tips for Sustainable Spring Cleaning,” and “2 Ways to Recycle Your Old Jeans.”

5. Local Recycling Listings

Many metropolitan areas have their own local resources available on the web. They are more likely to list smaller recycling drop off locations that might not have been picked up by the larger directories.

If you still need further information, you could approach your local authority directly. It will be able to tell you all the officially sanctioned recycling locations in the area.

Make sure a recycling location is sanctioned. Fake recycling scams are not uncommon as companies seek to strip the unwanted goods of any parts with a sell-on value.

And remember, all states have slightly different laws about how you should and should not recycle. Thankfully, the team at RecycleNation has put together a great list that links to each state’s official policies.

Learn More About Recycling

If you’re not already recycling, we’d urge you to strongly consider doing so. As these directories prove, it’s highly likely that you’ll have some facilities nearby, even if your local authority is not organizing specific recycling trash collection. If your condo or apartment complex does not recycle, you could try reaching out to the accommodation’s management team.

And remember, some of the most important items to recycle correctly are your old electronics.

They contain a lot of metals that are both expensive to extract from the earth and harmful for the environment—the truth about e-waste may surprise you. Check out our list of the best ways to recycle old electronics if you would like to learn more.

Read the full article: 5 Ways to Find Recycling Plant Locations in the US


Read Full Article
Senators attempt to force Twitter to ban Iranian leadership


Four Senators, including Ted Cruz (R-TX), have asserted that, as a consequence of sanctions placed on Iran, Twitter must cease providing its services to Ayatollah Khamenei and other leaders in the country. “The Ayatollah enjoys zero protection from the United States Bill of Rights,” he wrote in a letter to the company.

Although the move comes as relations between Iran and the U.S. grow ever more strained following a series of violent incidents connected with the country, it is also clearly an attempt to exert executive power over tech companies that have resisted the yoke of federal regulation.

In a letter (PDF) sent to Twitter, the U.S. Attorney for Northern California, and others, the Senators explained the rationale for their demand. The Obama administration created rules in 2014 that specifically made an exception to export rules allowing free messaging and social media type services to be offered to Iranians. The idea being that, though Twitter and many other such apps are mostly banned in Iran, it could not hurt to offer tools for free expression and communication to its citizens.

But there are exceptions even to exceptions, and this is what Cruz et al. claim now apply to Twitter. Specifically, they say that following Trump’s executive order in June imposing additional sanctions on Iran, the Khamenei and foreign minister Javad Zarif have lost the protection the law previously offered.

“All Americans — including you and Twitter — are prohibited from ‘the making of any contribution of provision of…goods[] or services’ to them,” the letter reads. “While the First Amendment protects the free speech rights of Americans… the Ayatollah and any American companies providing him assistance are entirely subject to U.S. sanctions laws.”

Not being an expert in import/export law myself, I can’t judge the merits of this argument, though on its face it seems sound. But it may not be a question of whether Twitter can or can’t “offer services” to persons blacklisted by the federal government. There is the possibility that Twitter choosing to offer the use of its platform to others is itself a protected act of Free Speech.

After all, the White House could just as easily have issued an E.O. blacklisting the leaders of the countries subject to the travel ban. Should that be a possibility? Is it the right of a U.S. company to extend its platform for free speech to anyone in the world, regardless of their legal status in the eyes of the government?

Senators Ted Cruz, Marsha Blackburn (, Tom Cotton (R-AR), Marsha Blackburn (R-MS), and Marco Rubio (R-NJ) think otherwise. It is unlikely Twitter will simply let the matter rest. I have contacted the company for comment and will update this post if I hear back.


Read Full Article