10 August 2020

5 Fixes for the Bad System Config Info Stop Code in Windows 10


bad-system-config-stop

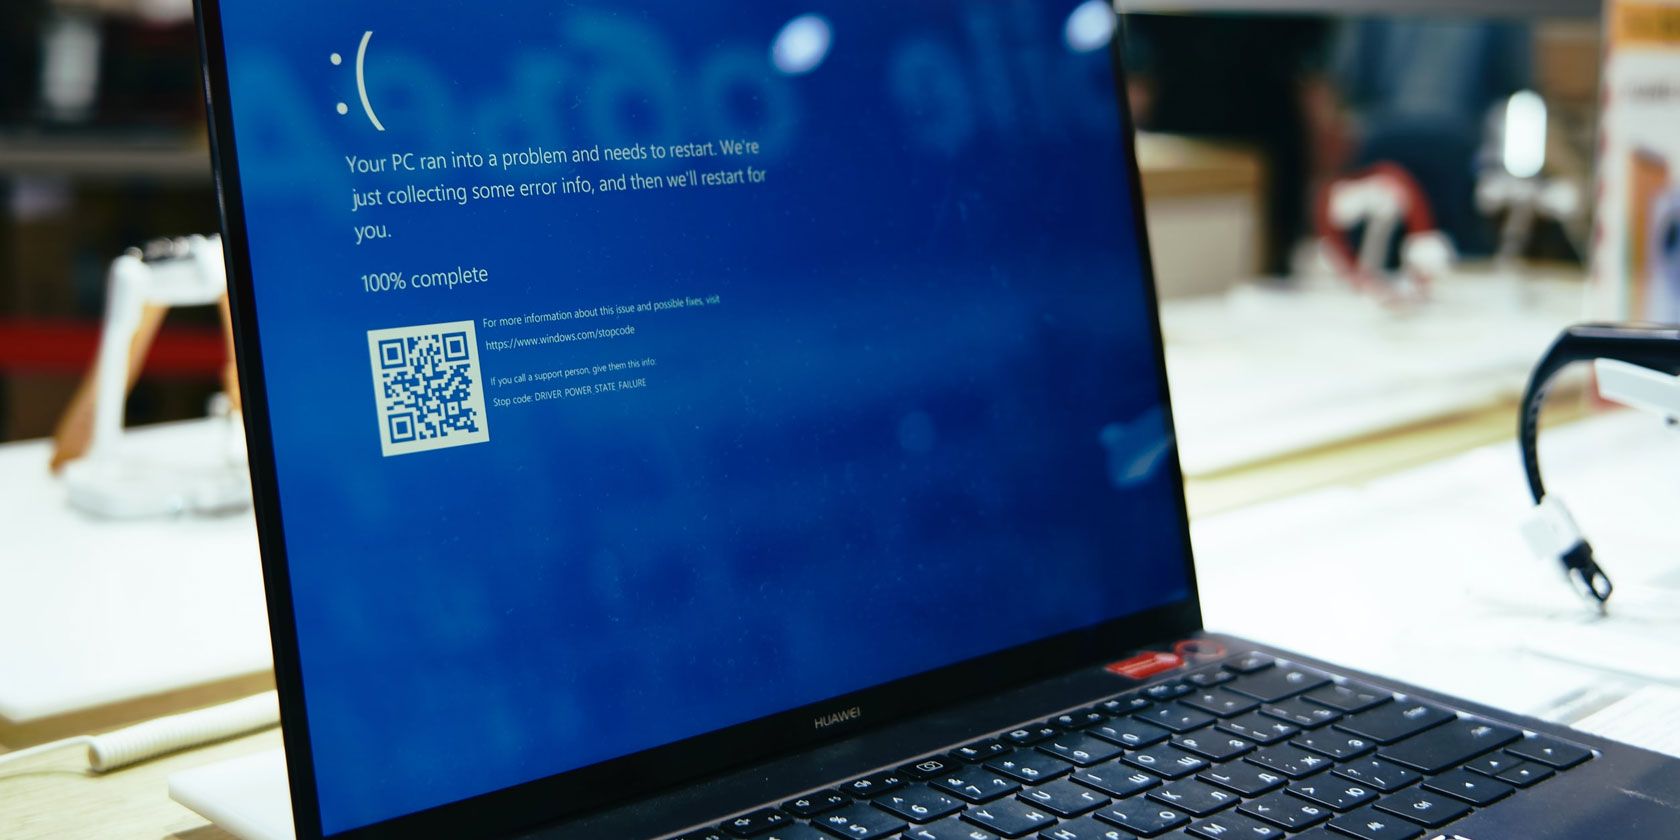
The Bad System Config Info stop code is a common Windows error that can cause a Blue Screen of Death (BSOD). While the system crash and blue screen can seem alarming, the Bad System Config Info error is relatively simple to fix and doesn’t require much technical expertise.

Better still, it doesn’t take long to fix, either. So, here’s how you fix the Bad System Config Info stop code.

What Is the Bad System Config Info Error on Windows 10?

The Bad System Config Info error (Windows stop code 0x00000074) can stem from several areas and relates to a faulty system configuration. Unfortunately, a faulty system configuration is a broad spectrum, covering the Windows Registry, faulty drivers, corrupt system files, and more.

Thankfully, these issues are all easy to fix.

1. Restart Your System

The first fix is always the easiest: restart your computer. Switching your computer off and on again fixes a variety of issues. Before you start running through the other fixes, restart your computer and see if that fixes your Bad System Config Info error.

2. Run SFC and CHKDSK

A persistent Bad System Config Info error can point to a corrupt file system. At times, important Windows system files can become corrupt, in turn causing an issue. The Windows System File Check (SFC) is an integrated Windows system tool you can use to check for errors.

However, before running the SFC command, it is important to check it is working properly. To do this, we use the Deployment Image Servicing and Management tool, or DISM.

Like SFC, DISM is an integrated Windows utility with a wide range of functions. In this case, the DISM Restorehealth command ensures that our next fix will work properly.

Running sfc to fix video scheduler internal error

Work through the following steps.

  1. Type Command Prompt (Admin) in the Start menu search bar, then right-click and select Run as administrator to open an elevated Command Prompt.
  2. Type the following command and press Enter: DISM /online /cleanup-image /restorehealth
  3. Wait for the command to complete. The process can take up to 20 minutes, depending on your system’s health. The process seems stuck at certain times, but wait for it to complete.
  4. When the process completes, type sfc /scannow and press Enter.

CHKDSK is another Windows system tool that checks your file structure. Unlike SFC, CHKDSK scans your entire drive for errors, whereas SFC scans your Windows system files specifically. Like SFC, run the CHKDSK scan from the Command Prompt to fix your machine.

  1. Type command prompt in your Start menu search bar, then right-click the best match and select Run as administrator. (Alternatively, press Windows key + X, then select Command Prompt (Admin) from the menu.)
  2. Next, type chkdsk /r and press Enter. The command will scan your system for errors and fix any issues along the way.

3. Restore the Windows Registry

The Bad System Config Info error can also relate to issues with the Windows Registry. The Windows Registry is essentially a massive internal database containing important, machine-specific information regarding almost everything in your machine:

  • System Hardware
  • Installed Software and Drivers
  • System Settings
  • Profile Information

Restoring the Windows Registry from a backup will eliminate any faults. There is, however, one issue with this fix. Since Windows 10 version 1803, there is no automatic Windows Registry backup. Prior to 1803, Windows would take a Registry backup every 10-days via the RegIdleBackup service.

Microsoft stopped the automatic backup to reduce the size of the Windows 10 footprint. As such, Microsoft recommends using a system restore point to repair a corrupt registry. Before commencing this fix, you can check if you have a Windows Registry backup to restore.

Head to C:\Windows\System32\config\RegBack. This folder contains your Windows Registry backups. If the file sizes show zero, you cannot use this backup method, and you should proceed to the next section.

Otherwise, read on to find out how to restore the Windows Registry manually. If you want to switch automatic Windows Registry backups on, check out our guide on when you should fix Windows Registry issues—and when not to bother.

1. Enter Advanced Startup Options

If the files in the RegBack folder do show that they have data (e.g., there are numerical values in the Size column), you can attempt a manual Registry restoration.

First, you need to boot into the advanced start-up options.

  1. Head to Settings > Update & Security > Recovery
  2. Select Restart Now

Alternatively, open your Start Menu, then hold the Shift key and press Restart.

Once the menu options, press Troubleshoot > Advanced Options > Command Prompt.

windows 10 advanced startup settings

2. Change the Directory, Restore

When the Command Prompt opens, it will default to X:\Windows\System32. This isn’t the actual location of your Windows installation, so we need to move to the correct drive letter before proceeding.

Windows usually installs to the C:\ drive, unless you specify a different location. However, the Windows recovery mode will boot your Windows installation under a different drive letter, usually D:\. Locate the correct drive using the following command:

dir D:\Win*

The Command Prompt will list the directory contents, so you’ll know it is the correct drive.

Now, enter the following commands, in order:

cd d:\windows\system32\config

xcopy *.* C:\RegBack\

cd RegBack

dir

Check the dates of the files in the RegBack directory. If they are from before your issue began, you can enter the following commands:

copy /y software ..

copy /y system ..

copy /y sam ..

And yes, the two periods are part of the command.

Following this, reboot your computer normally.

4. Use System Restore to Fix the Windows Registry

If you do not have a manual Windows Registry backup to restore, you can opt for a system restore point instead. Windows creates automatic system restore points for you to return to, so long as the feature is switched on.

Press Windows + S and search for restore. Select the create a restore point result. This will open System Properties > System Protection where you can check whether protection is on, configure settings, and create a restore point right now.

windows 10 system protection properties options

If you want to use a system restore point, select System Restore, and then the restore point you want to use. Then follow the instructions.

One nice Windows System Restore feature is the ability to Scan for affected programs. If you select your system restore point, then scan to see a list of the programs the system restore point will affect or delete.

windows 10 system restore points

5. Fix Boot Configuration Data (BCD)

If none of the fixes above work, you can attempt to fix your boot configuration data (BCD). Fixing your boot configuration data requires Windows 10 installation media. Follow our guide on creating Windows 10 installation media, then continue.

Switch off your computer. Now, insert the Windows 10 USB flash drive installation media into a USB port, and turn your computer on. You need to boot from the USB flash drive, which means pressing a special key to launch the boot menu during the boot process. The key for the boot menu varies but is typically F8, Del, Esc, or similar.

windows 10 repair your computer

From the boot menu, select the Windows 10 installation media. When the Welcome screen appears, select Repair your computer in the bottom left of the screen.

Now, head to Troubleshoot > Advanced Options > Command Prompt. From the Command Prompt, enter the following commands, in order:

bootrec /repairbcd

bootrec /osscan

bootrec /repairmbr

Now, close the Command Prompt and turn the computer off. Remove your Windows 10 installation media and boot your computer.

Fixing the Bad System Config Info Error

The fixes for the Bad System Config Info error vary in difficulty. Restarting your computer is extremely easy, but might not solve the problem. Work through the fixes for the error, and you’ll have your system up and running in no time.

If you want to learn more about fixing your computer, check out how to solve bluescreen errors using WinDbg and BlueScreenView.

Read the full article: 5 Fixes for the Bad System Config Info Stop Code in Windows 10

ByteDance valuation under huge pressure as TikTok sale nears


As it reached an estimated valuation of $100 billion this year, TikTok’s parent company ByteDance solidified its status as the most valuable startup in private markets. Its success outside China has also become a source of envy and inspiration among its local peers.

Now, the company’s price tag is under tremendous pressure as it’s set to shed its prized asset TikTok, several investors told TechCrunch.

ByteDance last year generated 120 billion yuan ($17.2 billion) in revenue, said an investor with knowledge of the matter. Around 67% was derived from ads sold on its domestic apps Douyin, TikTok’s Chinese version, and popular news aggregator Toutiao. Live streaming targeted at users of Douyin and another app in the family made up about 17%. Nascent businesses including games, e-commerce and TikTok accounted for 20 billion yuan, or roughly another 17%.

The company projected its 2020 revenue at 200 billion yuan ($28.7 billion), with TikTok and other emerging businesses contributing 30 billion yuan, or 15%, according to the investor. Previous reports by Reuters and Bloomberg cited similar revenue figures.

Although TikTok continues to account for only a fraction of ByteDance’s income, the addressable market is enormous. “It went from having a potential overseas market of 6 billion users to just China, where Douyin and Toutiao are reaching saturation,” the investor said.

Moreover, TikTok has only begun to monetize its enormous user base. The app experienced exponential growth and surpassed 2 billion downloads this year as COVID-19 lockdowns kept people indoors, but it’s unclear how much eyeball time it will retain when social life returns to normal. The app already lost its largest market (India), which accounted for about one-third of its user base, according to the investor, though app spending in the country is relatively low.

ByteDance did not respond to a request for comment.

What’s left

Back home, the eight-year-old company faces a crammed market. Tencent-backed Kuaishou claimed that 300 million people used its short-video platform daily at the beginning of this year, while Douyin said it reached 400 million DAU around the same time. Toutiao is coping with challengers from various fronts, from microblogging veteran Weibo to WeChat’s in-app news feature.

Like all other tech giants, ByteDance keeps a pipeline of projects alongside its cash cows. It’s known for its ability to churn out new products, thanks to an organizational structure that divides the firm by functions, primarily technology (development), user growth and monetization, earning it the nickname of an “app factory.”

The company’s more high-profile gestures are in mobile games, a lucrative internet business where it competes head-on with Tencent; education, which could allow it to ride the wave of online education in China; and enterprise software, represented by its work collaboration platform, Lark.

So far, none of these new efforts are remotely close to the success of TikTok, Douyin and Toutiao in user acquisition and monetization. It remains to be seen how the poster child for Chinese apps’ globalization strives to hold onto its domination. One thing is for sure: ByteDance’s founder and CEO Zhang Yiming will not let his company shrink from its global ambitions even as it stumbles overseas.


Read Full Article

New Gboard Update Adds Smart Completion and More


Google recently released a pretty major Gboard update that users will enjoy. However, the company dropped the new features without all the fanfare we typically see from an update to one of Google’s major tools.

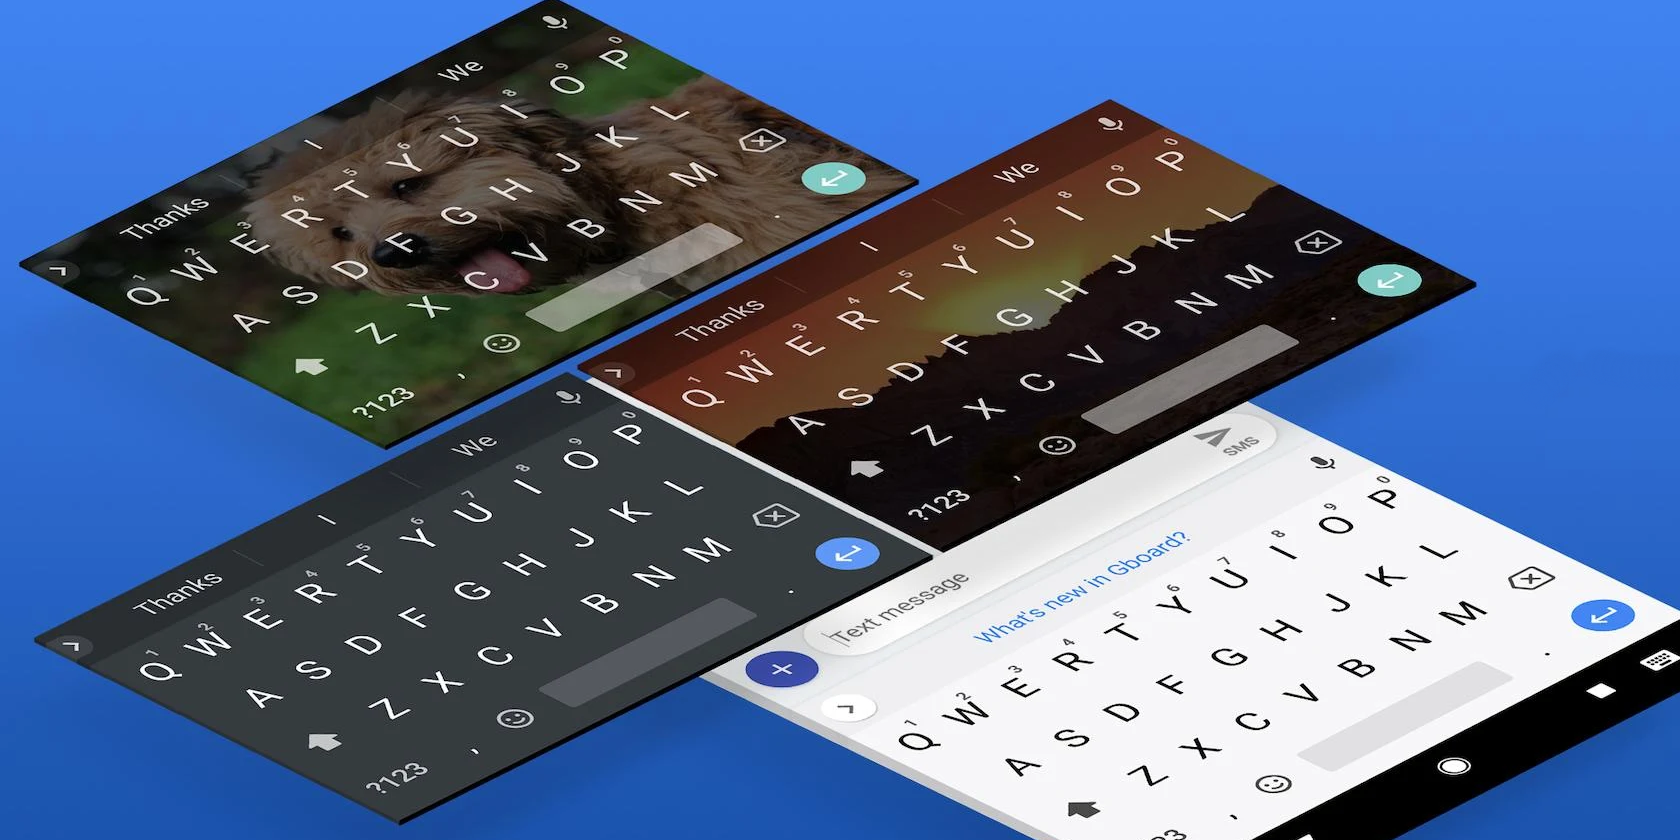
The update makes a few small tweaks and adds a really useful new feature called Smart Completion. The new feature will make typing in a wide variety of apps a quicker, more streamlined experience.

Gboard Smart Completion and Other New Features

As reported by XDA-Developers, The main thing that’s new in Gboard is a feature called smart completion. Basically, it shows some predictive text as you type, making it quicker and easier to send messages or write thoughts in just about any app. If the word Gboard suggests is what you want to say, you simply need to tap the spacebar to complete it.

Technically, this feature was first spotted in Gboard at the end of June, but its implementation was limited to certain apps. With the latest update, it should work with just about any app that requires typing, which is quite a nice change.

Also important to note is that this won’t be useful if you’re using glide typing. However, for users who prefer traditional typing, this could really speed up their workflows.

The other big Gboard change comes to the autocorrect function. Now, there’s a toggle that’ll let you turn the feature on and off. The feature was turned on by default for some time, but for users who find it annoying, it’s nice to see a toggle.

Oddly, some users are reporting that Gboard is turning the feature off automatically. If this happens to you and you want it on, you can simply head to Settings, and then Text Correction to turn it back on.

Google is also rolling out a new Google Assistant-powered dictation feature. This should make typing with your voice a more pleasant experience. However, we’ll have to wait and see how it performs in the real-world.

The last thing that many users are noticing is a missing Google search icon within Gboard.

A user review on the Play Store says, “It also had a nice built-in Google search built-in, which was extremely practical. Not too long ago, they made it a bit more hidden, and this week they cut it out entirely. Why, why, why? Sad.”

This seems like an odd change for Google to make. Search is such a huge part of its business. Facilitating search within its keyboard seems like a no-brainer. Hopefully, Google will fix this in a future update.

How to Change Your Android Keyboard

When it comes to keyboards on Android, you have a lot of choices. There’s Gboard, which is one of the most popular, but there are plenty of other good ones as well. Once you find the one you like, make sure you know how to change your Android keyboard quickly and easily.

Read the full article: New Gboard Update Adds Smart Completion and More


Read Full Article

How to Sideload Any File Onto Your Android Phone or Tablet


sideload-files-android

Once you move beyond the basics of Android, you’re likely to come across the term “sideloading.” And while sideloading is useful and not particularly complicated, if you’re not familiar, the process might confuse you.

Let’s look at what sideloading is, how it works on Android, and the various types of media you can sideload.

What Is Sideloading?

You’ve heard of downloading and uploading, but what is sideloading? In general terms, sideloading means transferring files between two devices of your own. It doesn’t necessarily require an internet connection, hence the “side” instead of “up” or “down.”

In the context of mobile devices, sideloading typically refers to moving files from your desktop computer to your phone so you can use them on your mobile device. For Android specifically, sideloading often means installing apps from outside of the Play Store.

However, because Android gives you the freedom to install and launch media from anywhere, sideloading works for more than just installing apps.

What Can You Sideload on Android?

Let’s look at the different types of files you can sideload on Android, then we’ll discuss how the sideloading process works.

Apps

Much of the time, people use Android sideloading to install apps from sources outside the Play Store. These come as APK files, which are Android package files (similar to EXE files on Windows).

There are many safe places to find APK files, such as APKMirror. You should be careful not to download APKs from random sites, as they could harm your device. Plus, don’t forget that downloading paid apps for free is piracy.

We have a guide specifically for sideloading apps on Android, so have a look at that for everything you need to know.

Music, Books, Videos, and Other Media

If you’re interested in sideloading something other than apps, you have plenty of options. With the right apps on your device, you can enjoy music, ebooks, movies, and other kinds of content:

  • Music: Install one of the best offline music apps for Android and you can enjoy your MP3 collection anywhere.
  • Books: Using Google Play Books or another Android ebook reader, you can load up free ebooks to read on your device or transfer your collection.
  • Movies and TV: VLC is a great all-around choice, allowing you to enjoy any kind of video files you have saved locally.

You could sideload podcasts as well, but it’s much more convenient to just use an Android podcast app to subscribe to your favorite shows and download them automatically.

Custom ROMs and Other Modding Tools

Finally, Android sideloading is an important tool when you’re modifying your device. Using the Android Debug Bridge, or ADB, you can push files from your desktop to install custom ROMs on your Android device.

This is an advanced use, though, so we won’t go into detail about it here.

How to Move Sideloaded Files to Your Android Device

Once you have an appropriate app installed on your phone to handle sideloaded content, the next step is moving the files to your device. This assumes you have content ready on your desktop to move to your phone, so download anything you want to move first.

No matter which method you use, when you place files in your phone’s storage, don’t forget where you put them. Android has several folders already set up for common types of media, such as Music, so either use those or make new folders if needed.

Using a USB Cable

Access Android File Explorer

The most straightforward way to move files to your Android device is by connecting your phone and computer using a USB cable. This lets you simply move the files from your PC to your phone like you would across other folders. While connecting a cable isn’t as convenient as other ways to do this, it’s faster and more reliable than wireless methods.

On Windows, you don’t need anything special to move files over USB. However, on a Mac, you’ll need the free Android File Transfer tool installed first.

Download Files Directly on Your Phone

If you don’t want to bother with a USB cable, it’s often convenient to download files directly on your phone. For instance, if you want to sideload an app, you can just visit the APK download site using a browser on your phone and download it there.

This saves you from having to connect your phone and PC physically. However, it might not be an option if the media you want to sideload only exists on your PC, such as a large MP3 collection.

Move via Cloud Storage, Bluetooth, or Similar

To move data from your PC to phone without a cable, you can rely on wireless methods. If you use a cloud storage app like Dropbox or OneDrive on both devices, put the files in your cloud storage folder on your computer and then open them on your phone.

We’ve also shown how to connect your Android device and PC using Bluetooth. While wireless methods are convenient, keep in mind that they’re slower than transferring over USB and more susceptible to interference. If you have a large file to transfer or are on a slow network, you’re better off connecting physically.

If none of the above methods work for you, see other ways to transfer files from Android to PC.

Accessing Sideloaded Files

Now that you’ve placed files on your device, all that’s left to do is open them. For this, you’ll need an Android file explorer app, so download one of those if you don’t have one already.

Using the file explorer, navigate to where you saved the sideloaded content, then tap to open it. Depending on the type of media, Android will either launch it in your default app, or ask which app you’d like to open the content in.

If it opens in an app that you don’t want to use (such as music opening in YouTube Music instead of a new local music manager you installed), see our guide to managing default apps on Android to change it. Otherwise, you can open the content in any supported app and enjoy it there.

For some kinds of content, you might be able to launch the files through the given app instead of your file manager. For instance, an ebook manager might ask you to specify a folder where your ebooks are stored. If you point this at the folder containing the books on your phone, the manager app will update its content when you add new files to that folder.

Installing sideloaded apps requires additional steps, so be sure to check the guide linked earlier for more help with that.

Take Advantage of Android Sideloading

Now you know how to sideload any type of content on your Android device. Your phone can handle pretty much any type of entertainment file that a computer can, making it easy to take your favorite media on the go. Once you establish a routine for moving new files to your device, it won’t take much time at all.

For more on things worth sideloading, check out the best alternative Android app stores.

Read the full article: How to Sideload Any File Onto Your Android Phone or Tablet


Read Full Article

Save Money Shopping Online With CouponX


couponx-save-money

Shopping online and want to save money? Coupons are a great way to apply discounts and save money, but they’re often out of date. Coupon sites typically promise much but deliver expired or irrelevant coupons.

Aiming to change this is CouponX, a site offering over 100 exclusive coupons from over 100 merchants for all types of online shopping, including major stores.

Get 100% Working Coupons

Coupons are becoming an integral part of the online shopping experience. But sometimes, they disappoint. Outdated or simply fake coupons are a huge issue for shoppers looking to apply coupons at online stores.

Although online stores almost always offer a field to apply a coupon (and some sites even give you a coupon for visiting for the first time or signing up for a newsletter), finding a working coupon to use is harder.

coupon x

To combat this CouponX confirms the authenticity of its coupons, aiming to update its collection of coupons before competitors. Its coupon content curation works to remove expired deals and coupons on a weekly basis.

The result: you get the latest, 100% working coupons.

What Is the CouponX Dealbox?

Get buying tips from CouponX

Offering coupons from major players from online health shops, designers, and even web hosts, CouponX breaks down its available coupons by category. You might find cars, bread machines, video editing tools—the list goes on.

Supporting the wealth of coupons on offer, CouponX also offers the Dealbox blog, which provides buying guides, shopping tips, and tricks. Deals here include eCard ideas, robot vacuums, subscription boxes—they are based on timely occasions and trending gift ideas.

Don’t miss an update from CouponX’s Dealbox blog—sign up to the newsletter for regular updates.

Sign Up to CouponX for the Best Personalized Deals

Another problem with finding the latest coupons for online shopping is that they’re often intended for different territories. CouponX operates for shoppers in the US, UK, Japan, France, and Russia to ensure the right coupons are used in the right regions. Non-English-speaking countries can also see the CouponX site in the regional language.

coupon x

To ensure you find the best available deals, you can sign into CouponX with Facebook or Google. This provides personalized deals and lets you save favorite coupons and stores for later.

And don’t forget to check the site around the time of big holidays and events. On days such as Black Friday and Cyber Monday, you’ll find the site bursting with personalized money-saving coupons and special deals.

Don’t Miss the Latest Coupons With the CouponX Browser Extension

Obviously, it can be a pain to have to open a new tab in your browser to find a coupon website. CouponX offers a smart solution: a Chrome browser extension that helps you find the best coupons to save money.

With your privacy in mind, the extension doesn’t track your activity online (unlike other companies’ extensions). Instead, it simply shares the best coupon to use on the corresponding website.

Find the best discounts for your with CouponX

Simply visit a site where you plan to buy from, then click the extension to list the available coupons. Click one to apply it to your shopping basket, then checkout.

CouponX Will Help You Save Money Today

Everyone needs to save money and buy as much as possible within their budget. A great way to do this is with coupons, which is where CouponX comes in.

With an easy to use site, handy search tool, and even the ability for online stores to submit their coupons, CouponX offers a comprehensive and professional couponing experience. Signing up with Facebook or Google delivers a personal aspect and the Chrome extension makes finding a suitable coupon east.

Meanwhile, if you’re short of inspiration when the holidays come around, the Dealbox will surely highlight a great gift idea.

If you haven’t tried CouponX already, head over there now and check the latest coupons and codes—and maybe bag yourself a bargain.

Read the full article: Save Money Shopping Online With CouponX


Read Full Article

The 7 Best Lightweight Operating Systems for Raspberry Pi


lightweight-os-raspi

Your Raspberry Pi isn’t like a standard PC. Sure, it can act as a desktop replacement, but generally speaking, it’s a more versatile device.

One of the trade-offs is that it doesn’t have massive resources. Raspberry Pi OS is more compact than most distros with some features missing. It’s lightweight, and for good reason: many features usually found in Linux desktops aren’t required on a Raspberry Pi.

By keeping the operating system (OS) lightweight, processing power and RAM can be dedicated to whatever project you plan to run. To keep things more efficient, install one of these lightweight Raspberry Pi operating systems.

1. Raspberry Pi OS Lite

The most obvious choice for anyone looking for a lightweight Raspberry Pi distribution (“distro”) is Raspberry Pi OS Lite.

Based on Debian Buster, Raspberry Pi OS is the new name for the Raspbian operating system. The Lite build is a minimal image without the X-server window manager, related components, and other modules.

There’s also less software, fewer modules, and the operating system uses fewer system resources. The main result of this is that there is more RAM and processing power. While the full Raspberry Pi OS is a 5GB image, Raspbian Stretch Lite is just 1.8GB.

As a result, this “lite” distribution is “headless” (i.e. it has no desktop) and ideal for server use. You’ll see some performance gains, particularly if you use the Pi as a file server or for any other headless task

2. DietPi

DietPi launcher options

Another lightweight Raspberry Pi distro that has its roots in Debian Buster, DietPi is available for several single-board computers. While Odroid, Pine boards, and ASUS Tinker Board are supported, primarily this is for Raspberry Pi boards. DietPi is for all models of Pi board and is based on a compact 589MB version of Debian.

DietPi can fit on a 2GB card and comes with a software tool for installing optimized apps.

While bigger cards obviously offer more storage, with such a lightweight OS, that storage can be maximized for your project.

Optimized apps for the DietPi OS include desktops, media systems, gaming tools, cloud, file, and web servers, and more. If you’re looking for the fastest Raspberry Pi OS, DietPi is the place to start.

3. piCore/Tiny Core Linux

You’ve probably heard of Tiny Core Linux, as it regularly appears on lists of the most compact Linux distributions. Incredibly lightweight, Tiny Core Linux’s Raspberry Pi version, piCore, has a remarkably small download. It’s just under 90MB.

It boots fast, too!

The ultimate minimal Raspberry Pi OS, piCore is fast and flexible, but comes almost devoid of software. Instead, you’ll need to download and install your own web browser, email client, text editor, and other apps.

Smooth and stable, piCore comes with internet connectivity and even manages to squeeze a traditional desktop into the compact package. Without the desktop, piCore uses even fewer resources!

4. Arch Linux ARM

Arch has long been the most popular alternative to Raspbian and Raspberry Pi OS, and with good reason. This ARM-focused version of the 32-bit Arch Linux has all the features and functionality you would expect from a Raspberry Pi operating system.

The end result is a slick distro complete with the Xfce desktop. It’s fast, efficient, and ideal for the various Raspberry Pi projects you might want to run. Full access to the GPIO is also available with Arch Linux, making it a great, lightweight Raspberry Pi operating system.

5. RISC OS

This is a lightweight, non-Linux operating system that you can run on the Raspberry Pi. The original ARM-based operating system, RISC OS dates to the 1980s, and remains useful. Available for several devices, RISC OS has a compact footprint. On the Pi, you’ll need just 119MB of space on your microSD card, although a 2GB card will be needed.

As RISC OS is unrelated to Linux, you’ll need to learn a few new commands. The GUI can be a little challenging at first, as there is no “start” button or dock. Instead, applications are grouped in desktop folders, and prefixed with “!”

Meanwhile, ensure you’re using RISC OS with a three buttoned mouse—a clickable wheel will suffice as a middle button.

While not Linux, this is a good lightweight Raspberry Pi OS. See our walkthrough on installing RISC OS on the Raspberry Pi to find out more.

6. Raspup/Puppy Linux

Another extremely lightweight operating system for Raspberry Pi is Raspup, a version of Puppy Linux. With versions available for all Raspberry Pi models, Raspup brings the Puppy Linux experience to the Pi. This means that if you don’t save your session at the end of use, the next boot will be like a brand-new install.

Clearly this has some disadvantages, but it is excellent for privacy and keeping the operating system lightweight. On the other hand, if you have installed packages, you’ll need to save sessions in order to use the software on subsequent boots.

While installation is lightweight, you should be able to find most of the usual software via the Raspbian repositories.

7. Sugar on a Stick/Sugar OS

You may have heard of the OLPC project (One Laptop Per Child) which began in 2007. It’s aim was to create and distribute educational computers for the developing world, and featured Sugar OS.

The aims of OLPC aren’t that different to those of the Raspberry Pi Foundation (namely, education) so it isn’t too surprising to find Sugar OS available for the Pi. While you can run Sugar as an app on Raspbian, the full version is based on Fedora.

Called Sugar on a Stick, the user interface can take some getting used to, but it is packed with tools. Particularly ideal for younger users, Sugar on a Stick is easy to use, intuitive, and suits the Raspberry Pi perfectly.

Which Lightweight OS Is on Your Raspberry Pi?

With so many lightweight distros for the Raspberry Pi, it should be simple to run projects with maximum system resources. To recap, the lightest Raspberry Pi operating systems are:

  1. Raspberry Pi OS Lite
  2. DietPi
  3. piCore/Tiny Core Linux
  4. Arch
  5. RISC OS
  6. Raspup/Puppy Linux
  7. Sugar on a Stick/Sugar OS

Have you tried any of these out? For the lightest experience, you should look at piCore or Arch.

However, if you want something lightweight, but recognizably part of the Raspberry Pi experience, try Raspberry Pi OS Lite. You might also consider installing Android on Raspberry Pi. For a Windows-like experience, set up Raspberry Pi as a Windows thin client.

And to get more out of your Pi device, consider these top Raspberry Pi accessories.

Read the full article: The 7 Best Lightweight Operating Systems for Raspberry Pi


Read Full Article

10 Awesome Educational Websites for Kids Worth Bookmarking


educational-sites-kids

If you’re a parent or a teacher looking for resources to help your kids take their education a notch higher, you don’t have to look too far. There are lots of great free learning websites for kids to keep them entertained and educated.

Here are some of the best free educational websites for kids that they will want to keep returning to, keeping them out your hair and ensuring they use their computer time productively.

1. BrainPOP

brainpop

BrainPOP tackles every subject from math to music with humorous animated movies. It breaks down even the most complex concepts into easy-to-understand chunks and uses relatable, real-life scenarios as examples.

The videos come with relevant interactive quizzes, activities, and games that help drive each concept home. Kids are sure to love Moby, the funny robot who appears in the videos.

The website is subscription based, but there’s some interesting free stuff as well. Don’t miss the daily spotlight feature that teaches children about various timely and relevant topics, from U.S. presidents to cyberbullying to American Indians.

2. DOGO News

dogonews

It’s good to help kids stay informed about the goings-on in their world, but regular newspapers may not be the ideal way to do that. Child-safe news websites are much better, and DOGO News is one of them. The site doesn’t skirt around the facts or talk down to children but makes it easy for them to understand.

DOGO News brings news and other non-fictional content for kids. You can filter stories based on categories (science, sports, entertainment, etc.) or grades that the material is suitable for.

3. Funology

funology

Want to limit your child’s screen time? Keep them occupied and entertained with offline activities from Funology. The website may be designed as an idea toolbox for parents and teachers, but there’s no reason it can’t double up as an online laboratory and playground for the kids themselves.

Funology has instruction sets to help kids to try their hand at science experiments, arts and crafts projects, and even magic tricks. It also has plenty of games, jokes, and trivia that you can stock up on for later.

The site includes breakfast, lunch, and dinner recipes, and they come with quirky names and descriptions to entice little chefs. Now, who wouldn’t want to snack on melon rainbow salad, a leprechaun’s favorite dish?

4. BBC Bitesize

bbc bitesize

While BBC Bitesize is aimed at the UK curriculum, it’s perfect for children around the world of any age. It has lessons, games, and resources for all the common school subjects: History, Math, English, Science, and more.

BBC Bitesize also has topical learning to help children understand the news and educate them about the world generally, like how to spot fake news or how to prepare for getting exam results.

5. Funbrain

Funbrain

Games are one language that every kid seems to understand without needing to learn it. Funology makes full use of this fact to help children master math, spelling, reading, and more.

Funbrain has hundreds of interactive games designed to educate and entertain kids. Some popular books and comics, such as Diary of a Wimpy Kid and Brewster Rockit, are available as free reads on Funbrain.

If you have a preschooler, head to the Playground section for games that will teach your little one mouse and keyboard manipulation. Bright colors, funny graphics and games, and a safe online environment make FunBrain the perfect online playground for kids.

6. National Geographic Kids

national geographic kids

Like its magazine counterpart, the interactive National Geographic Kids website gets children excited and curious about the world around them. The website’s home page is a mosaic of colorful, clickable content designed to appeal to young minds. Stunning photos and videos of a wide variety of places, flora, and fauna keep both kids and adults hooked.

National Geographic Kids uses cool materials like facts, games, quizzes, and polls to teach young explorers various concepts related to geography, natural science, archaeology, and more.

7. Scratch

scratch

Coding is one of the best tech skills that you can encourage your kids to take up. But you won’t have much success getting them to explore it if you don’t make programming fun. Leave that job to Scratch—a web app that teaches coding with visual tools and an easy-to-use interface.

The website teaches coding via a “cause and effect” approach. You click on various color-coded instructions to see their impact on cute animal sprites. For example, by clicking on a specific button, you can make a sprite move 20 spaces to the left.

Scratch ensures that your child’s introduction to programming is far from boring. They can create and share animations, games, and interactive stories, learning to reason and think creatively along the way.

If this takes your child’s fancy, here are the best coding apps for teaching programming to kids.

8. Science Bob

science bob

Award-winning educator Bob Pflugfelder (aka Science Bob) is on a mission to make science fun for kids. He explains various scientific concepts using video demos of experiments.

Kids won’t find any “don’t try this at home” warnings playing spoilsport. They get detailed instructions to recreate the experiments—an approach that fosters a hands-on approach to science.

Kids can satisfy their curiosity about stuff like “why do we cry when we chop onions?” and “why do our toes get wrinkled in the tub?” via the Q&A section.

9. Rich Kid Smart Kid

rich kid smart kid

Like it or not, money often makes our world go around, and learning how to handle it is a vital skill to have. Give your kids a head start toward financial literacy by teaching them some key concepts about money. Rich Kid Smart Kid (RKSK) does all the work for you.

RKSK uses free interactive games to explain ideas like cash flow, saving, investing, and business. Two adorable cartoon characters, Reno and Toki, are in charge of guiding the kids through the website.

10. Mission US

Mission US

As much as kids dread math, they seem to dread history even more. What if they had a chance to “be there” when the events from our collective past unfolded? Wouldn’t they want to learn more about those times? The folks at sites like MissionUS certainly think so.

With its collection of free video games, MissionUS gives kids a way to immerse themselves as protagonists in US history. They can choose from different missions to complete. Each mission introduces them to a different time and aspect of history, like the Boston massacre and the anti-slavery movement.

Get More Edutainment With Math Games

Hopefully, these websites can not only solve your kid’s cries about being bored but also teach them a thing or two along the way.

If you’d like some more edutainment to keep your little ones occupied, check out these cool and fun math games for kids.

Image Credits: Production Perig/Shutterstock

Read the full article: 10 Awesome Educational Websites for Kids Worth Bookmarking


Read Full Article

Controller Packaging Confirms Unannounced Xbox Series S


Rumors suggest that the Xbox Series X won’t be the only next-gen console from Microsoft. And now we have confirmation on official Microsoft packaging for a new console called the “Xbox Series S.”

How Did the Xbox Series S Leak Occur?

This leak comes courtesy of Twitter user @zakk_exe, who claims to have bought an official Xbox Series X controller from OfferUp for $35. In the tweet, he focuses on the look and feel of the controller; however, the packaging reveals some of Microsoft’s plans.

The back of the box lists all of the systems the controller is compatible with. At the very top, it says “Xbox Series X|S,” implying that the controller works with two different Xbox Series consoles. We already know that Microsoft plans to release the Xbox Series X later this year; the “Series S,” on the other hand, has yet to see official confirmation.

What Does the Xbox Series S Leak Tell Us?

We’ve been hearing rumors of another next-gen Xbox console for a few months. In June 2020, a tweet revealed that Microsoft is working on a console codenamed “Lockhart.” We currently believe it to be a cheaper version of the Xbox Series X that consumes less power.

As such, the controller packaging leak tells us two things. Firstly, it gives us the official name for this cheaper next-gen Microsoft console. Secondly, its appearance on the packaging suggests we’ll know about it when the controller hits the shelves.

The Xbox Series X is scheduled to be released in the holiday season of 2020; as such, there’s a good chance that Microsoft plans to announce the Xbox Series S before then.

Uncovering Microsoft’s Next-Gen Console

While we’ve known about the existence of another new Xbox console for a few months now, the controller leak confirms its name and hints that an announcement is imminent. So, if you love all things Xbox, keep your eyes peeled for more news about Microsoft’s next-gen console plans.

If you’d like to know more about the new Xbox controller, be sure to check out the news that the Xbox Series X controller is compatible with Android and iOS.

Read the full article: Controller Packaging Confirms Unannounced Xbox Series S


Read Full Article

AKASO WT50 Review: Cheap and Cheerful Mini Projector


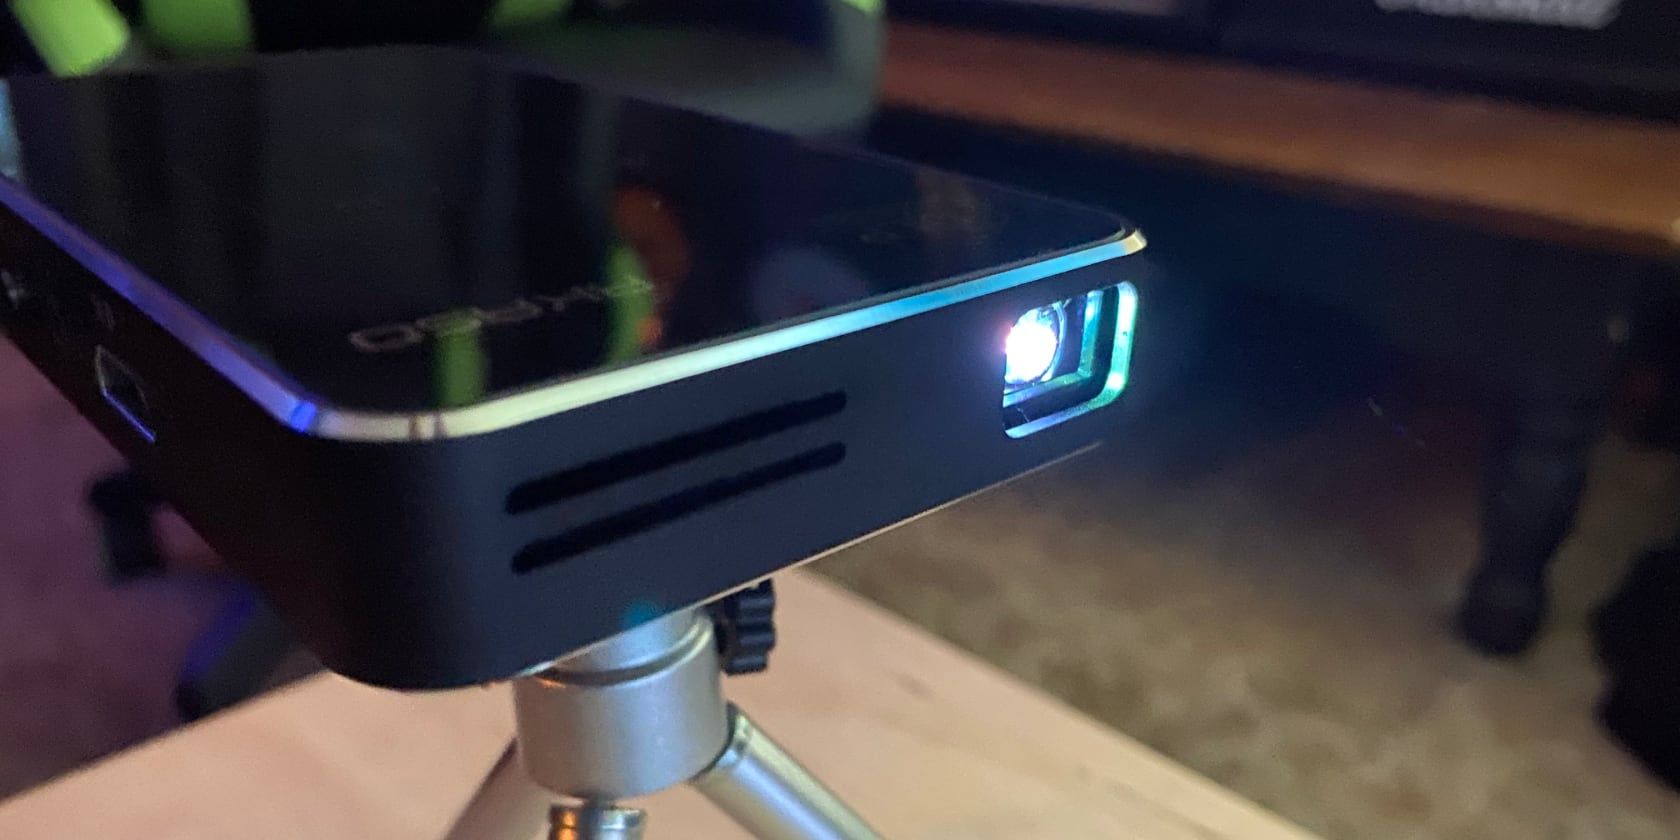
AKASO WT50 in action
Our verdict of the AKASO WT50 Mini Projector:
If you're looking for an ultra-affordable, ultra-portable pico projector, the AKASO WT50 will get the job done, but don't expect to use it in anything but the darkest surroundings.
610

Sure, television screens are getting larger all the time, but if you want a truly large screen without spending tens of thousands of dollars, you need a projector. Of course, a 4K projector capable of display sizes upwards of 100 inches isn’t cheap either. Not everybody needs one of those.

That is why the mini-projector market has sprung up in the last decade or so. They aren’t the most capable, but they’re portable, affordable, and easy to set up and use. Unlike some other manufacturers, AKASO doesn’t lie about what its tiny WT50 Mini Projector is capable of, which is exactly why we think it’s worth a look.

AKASO WT50 Pico Projector AKASO WT50 Pico Projector Buy Now On Amazon $249.99

Specifications

The raw specs of the AKASO WT50 mini projector aren’t going to blow anyone away. Of course, at this price point, it’s a tough call as to who would be expecting incredible hardware specs in the first place. Still, it’s good to know what you’re dealing with.

  • Brightness: 50 ANSI Lumens
  • Resolution: 854×480
  • Dimensions: 5.71×3.15×0.79 inches
  • Weight: 0.64lbs
  • Projection Ratio: 1.19:1
  • Connectivity: Dual-band 802.11ac Wi-Fi, Bluetooth, HDMI, 2x USB, SD Card slot
  • Battery: 3.7V, 5000mAh
  • Android Version: 7.1

As with any piece of technology, there’s a lot more to the performance than numbers on paper and name recognition of the components. First, let’s take a look at the whole package.

What’s in the Box?

AKASO WT50 box contents

Taking the top off the box, the first thing you’ll spy is the projector itself, neatly nestled in form-fitting foam. The bundled accessories are tucked into three separate cardboard boxes underneath, creating a platform for the projector to rest on top of.

In one box you’ll find a tripod with a pivoting head, letting you align the projector at often unnecessarily odd angles, but we’ll get to that later. In the other boxes, you’ll find the AC adapter, HDMI cable for use with external playback devices, remote control (batteries not included), the manual, and a warranty card.

Setting Up the AKASO WT50

Before you can start watching movies or TV shows, the projector requires a bit of setup. Fortunately, this is a relatively simple process and doesn’t take all that long.

AKASO recommends that you fully charge the WT50 before first use. The battery was already mostly charged so this didn’t take long. Still, I plugged in the power adapter before I powered the projector on, just in case. Powering on is a two-step process: First, set the slide switch to “On”, then press the power button right next to it.

AKASO WT50 front

Once the power is on, make sure you’ve got the projector pointed at a suitable surface (a white wall will do) and you can set up the rest. In my case, this meant connecting to Wi-Fi, but you can also set up using a wireless hotspot or no networking at all, assuming you’re plugging in external players.

Before you do that, you’ll need to adjust the focus wheel to get the picture looking sharp and in focus. This is also when you’ll want to try using the included tripod if you need it. The design of the tripod leaves quite a bit to be desired. It’s nice that it’s included, but the pivoting head means it’s far too easy to tilt the projector, making getting a level image from the projector a little tricky.

Connectivity

When it comes to wireless connectivity, the AKASO WT50 has both Wi-Fi and Bluetooth, as mentioned earlier. I was actually surprised that the WT50 supported 802.11ac wireless networks, which isn’t always the case on these lower-cost devices.

The WT50 also has a few ports to make connecting other hardware easier. The full-size HDMI port makes plugging in Blu-ray players, streaming boxes, and game consoles easy. You also get a pair of USB ports, an SD card slot, and a 3.5mm headphone / auxiliary audio jack.

AKASO WT50 ports

If you want to play media from your phone, the AKASO WT50 supports a few different methods. You can use Wi-Fi Display (aka. Miracast), AirPlay, or a third-party app solution that requires you to download an app on your phone. Unfortunately in my testing, I was unable to connect to the AirPlay server on the projector despite trying with multiple devices.

Features & Interface

AKASO WT50 interface

You’ve got two different ways to operate the AKASO WT50: the included remote and the touch interface on top of the projector. It’s handy that these are both included, as it means you’re not out of luck if you lose the remote.

The AKASO WT50 is powered by Android 7.1, meaning it’s a lot more capable out of the box than older, not-so-smart projectors. The Google Play Store is included, as well as a utility for sideloading apps in APK form. This means that you can install any streaming app you want and it should have a decent chance of working.

But don’t expect everything to work perfectly, especially with the included remote. Netflix, which is installed on the WT50 out of the box, worked with the remote long enough to sign in. After that, I thought the remote had quit working. Instead, it turned out that Netflix—at least this version—wasn’t working fully with the remote. Using the touch interface on top of the projector, navigating the menus worked fine, but this was less than ideal. Hopefully, a future firmware update may improve remote compatibility.

The location of the remote sensor is also a slight issue. It’s located on the back of the projector, but the remote is of the IR variety, meaning you need line of sight. Even if you’re a little off to the right or left, getting the remote to work can take some aiming.

Finally, the interface can be a little laggy at times. It’s not worse than a Fire TV Stick or similar device, and it’s not a big problem, but you’ll definitely need to be a little patient at times.

Picture: How Many P?

AKASO WT50 in dim light

Mini or pico projectors aren’t often known for their high pixel counts, and this makes sense. It currently isn’t possible to make something that is capable of 4K resolution that is also small and affordable. Considering those last two points, it’s even tough to hit the 1080p mark without trouble. That said, you’ll see some that support 720p, even in this small size, like the Nebra Anybeam.

The WT50 accepts sources up to 1080p, but it’s not actually showing them at this resolution. Instead, the WT50 uses a native resolution of 854×480, while puts it at 480p. This means that as you push the size of the picture higher by moving the projector farther away from your screen, it’s getting blurrier all the time.

If you keep the screen size around 80 inches or less, it’s nowhere near as blurry as you might imagine. You’ll notice it more with text, especially navigating menus, but once you’re caught up in what you’re watching, you probably won’t notice it looking especially low resolution, unless you’ve just watched a 4K movie on a similarly sized screen.

Adjusting WT50 brightness

The bigger problem with the WT50 is one that AKASO doesn’t shy away from: the limited brightness. At a peak brightness of just 50 ANSI lumens, this isn’t a bright projector. If you’re watching in a very dark room, the brightness isn’t a problem.

If you’ve got anything above minimal ambient light, the projector will struggle. Try watching something with sunlight streaming in the windows and you might as well just turn it off.

Sound Advice

AKASO WT50 touch screen

It’s a very good thing that the AKASO WT50 offers both Bluetooth connectivity and a built-in 3.5mm audio jack. Why? Because the built-in sound, while functional, isn’t something you’ll ever really want to use if you have a choice.

This can’t really be helped, in AKASO’s defense. The WT50 is so tiny that there’s no way anyone could fit a speaker capable of creating movie-ready or even TV-ready sound inside. If you’re using this to quietly project a movie on to a close wall in the middle of the night—something I can’t imagine is all that common—the sound will be adequate, but only barely.

In my testing, I happened to have a Bluetooth-equipped soundbar nearby. Connecting the WT50 to this made a world of difference in making the movie feel more cinematic. Of course, if you’re using the WT50 for an outdoor movie night with the kids, you probably won’t be able to lug along a soundbar, but even a standard portable Bluetooth speaker will be a worthwhile upgrade.

Should You Buy the AKASO WT50?

As we mentioned at the very top of this article, AKASO doesn’t over-promise when it comes to the capabilities of the WT50. Fortunately, it doesn’t under-deliver either. This means that you’re getting exactly what you expect, which is strangely refreshing in this day and age.

That said, the WT50 isn’t for everybody. If you need higher resolutions or a projector you can use in anything resembling daylight, take a look at our favorite projectors for your home theater. On the other hand, if you’re looking for a portable projector to use outside for occasional outdoor movie nights and you don’t live in a brightly lit neighborhood, the WT50 may be just enough for what you need.

AKASO WT50 Mini Projector, 1080P HD Video DLP Portable Projector with Android 7.1, WIFi, Wireless and Wired Screen Sharing, Trackpad Design, Pocket Sized Home Theater Pico Projector for iPhone Android AKASO WT50 Mini Projector, 1080P HD Video DLP Portable Projector with Android 7.1, WIFi, Wireless and Wired Screen Sharing, Trackpad Design, Pocket Sized Home Theater Pico Projector for iPhone Android Buy Now On Amazon $249.99

Read the full article: AKASO WT50 Review: Cheap and Cheerful Mini Projector


Read Full Article

5 Fixes for the Bad System Config Info Stop Code in Windows 10


bad-system-config-stop

The Bad System Config Info stop code is a common Windows error that can cause a Blue Screen of Death (BSOD). While the system crash and blue screen can seem alarming, the Bad System Config Info error is relatively simple to fix and doesn’t require much technical expertise.

Better still, it doesn’t take long to fix, either. So, here’s how you fix the Bad System Config Info stop code.

What Is the Bad System Config Info Error on Windows 10?

The Bad System Config Info error (Windows stop code 0x00000074) can stem from several areas and relates to a faulty system configuration. Unfortunately, a faulty system configuration is a broad spectrum, covering the Windows Registry, faulty drivers, corrupt system files, and more.

Thankfully, these issues are all easy to fix.

1. Restart Your System

The first fix is always the easiest: restart your computer. Switching your computer off and on again fixes a variety of issues. Before you start running through the other fixes, restart your computer and see if that fixes your Bad System Config Info error.

2. Run SFC and CHKDSK

A persistent Bad System Config Info error can point to a corrupt file system. At times, important Windows system files can become corrupt, in turn causing an issue. The Windows System File Check (SFC) is an integrated Windows system tool you can use to check for errors.

However, before running the SFC command, it is important to check it is working properly. To do this, we use the Deployment Image Servicing and Management tool, or DISM.

Like SFC, DISM is an integrated Windows utility with a wide range of functions. In this case, the DISM Restorehealth command ensures that our next fix will work properly.

Running sfc to fix video scheduler internal error

Work through the following steps.

  1. Type Command Prompt (Admin) in the Start menu search bar, then right-click and select Run as administrator to open an elevated Command Prompt.
  2. Type the following command and press Enter: DISM /online /cleanup-image /restorehealth
  3. Wait for the command to complete. The process can take up to 20 minutes, depending on your system’s health. The process seems stuck at certain times, but wait for it to complete.
  4. When the process completes, type sfc /scannow and press Enter.

CHKDSK is another Windows system tool that checks your file structure. Unlike SFC, CHKDSK scans your entire drive for errors, whereas SFC scans your Windows system files specifically. Like SFC, run the CHKDSK scan from the Command Prompt to fix your machine.

  1. Type command prompt in your Start menu search bar, then right-click the best match and select Run as administrator. (Alternatively, press Windows key + X, then select Command Prompt (Admin) from the menu.)
  2. Next, type chkdsk /r and press Enter. The command will scan your system for errors and fix any issues along the way.

3. Restore the Windows Registry

The Bad System Config Info error can also relate to issues with the Windows Registry. The Windows Registry is essentially a massive internal database containing important, machine-specific information regarding almost everything in your machine:

  • System Hardware
  • Installed Software and Drivers
  • System Settings
  • Profile Information

Restoring the Windows Registry from a backup will eliminate any faults. There is, however, one issue with this fix. Since Windows 10 version 1803, there is no automatic Windows Registry backup. Prior to 1803, Windows would take a Registry backup every 10-days via the RegIdleBackup service.

Microsoft stopped the automatic backup to reduce the size of the Windows 10 footprint. As such, Microsoft recommends using a system restore point to repair a corrupt registry. Before commencing this fix, you can check if you have a Windows Registry backup to restore.

Head to C:\Windows\System32\config\RegBack. This folder contains your Windows Registry backups. If the file sizes show zero, you cannot use this backup method, and you should proceed to the next section.

Otherwise, read on to find out how to restore the Windows Registry manually. If you want to switch automatic Windows Registry backups on, check out our guide on when you should fix Windows Registry issues—and when not to bother.

1. Enter Advanced Startup Options

If the files in the RegBack folder do show that they have data (e.g., there are numerical values in the Size column), you can attempt a manual Registry restoration.

First, you need to boot into the advanced start-up options.

  1. Head to Settings > Update & Security > Recovery
  2. Select Restart Now

Alternatively, open your Start Menu, then hold the Shift key and press Restart.

Once the menu options, press Troubleshoot > Advanced Options > Command Prompt.

windows 10 advanced startup settings

2. Change the Directory, Restore

When the Command Prompt opens, it will default to X:\Windows\System32. This isn’t the actual location of your Windows installation, so we need to move to the correct drive letter before proceeding.

Windows usually installs to the C:\ drive, unless you specify a different location. However, the Windows recovery mode will boot your Windows installation under a different drive letter, usually D:\. Locate the correct drive using the following command:

dir D:\Win*

The Command Prompt will list the directory contents, so you’ll know it is the correct drive.

Now, enter the following commands, in order:

cd d:\windows\system32\config

xcopy *.* C:\RegBack\

cd RegBack

dir

Check the dates of the files in the RegBack directory. If they are from before your issue began, you can enter the following commands:

copy /y software ..

copy /y system ..

copy /y sam ..

And yes, the two periods are part of the command.

Following this, reboot your computer normally.

4. Use System Restore to Fix the Windows Registry

If you do not have a manual Windows Registry backup to restore, you can opt for a system restore point instead. Windows creates automatic system restore points for you to return to, so long as the feature is switched on.

Press Windows + S and search for restore. Select the create a restore point result. This will open System Properties > System Protection where you can check whether protection is on, configure settings, and create a restore point right now.

windows 10 system protection properties options

If you want to use a system restore point, select System Restore, and then the restore point you want to use. Then follow the instructions.

One nice Windows System Restore feature is the ability to Scan for affected programs. If you select your system restore point, then scan to see a list of the programs the system restore point will affect or delete.

windows 10 system restore points

5. Fix Boot Configuration Data (BCD)

If none of the fixes above work, you can attempt to fix your boot configuration data (BCD). Fixing your boot configuration data requires Windows 10 installation media. Follow our guide on creating Windows 10 installation media, then continue.

Switch off your computer. Now, insert the Windows 10 USB flash drive installation media into a USB port, and turn your computer on. You need to boot from the USB flash drive, which means pressing a special key to launch the boot menu during the boot process. The key for the boot menu varies but is typically F8, Del, Esc, or similar.

windows 10 repair your computer

From the boot menu, select the Windows 10 installation media. When the Welcome screen appears, select Repair your computer in the bottom left of the screen.

Now, head to Troubleshoot > Advanced Options > Command Prompt. From the Command Prompt, enter the following commands, in order:

bootrec /repairbcd

bootrec /osscan

bootrec /repairmbr

Now, close the Command Prompt and turn the computer off. Remove your Windows 10 installation media and boot your computer.

Fixing the Bad System Config Info Error

The fixes for the Bad System Config Info error vary in difficulty. Restarting your computer is extremely easy, but might not solve the problem. Work through the fixes for the error, and you’ll have your system up and running in no time.

If you want to learn more about fixing your computer, check out how to solve bluescreen errors using WinDbg and BlueScreenView.

Read the full article: 5 Fixes for the Bad System Config Info Stop Code in Windows 10


Read Full Article

How to Prevent Pornographic Virus Alerts From “Apple”


pornographic-virus-alert

Most people are quick to worry about virus alerts, which is why scammers take advantage of them with fakes. This is the case with the recent “pornographic virus alert” messages that claim to come from Apple.

If you see one of these messages, don’t believe it. We’ll explain how these alerts work and how you can get rid of them.

What Is the Pornographic Virus Alert?

While browsing the internet on your Mac, you might see a sudden popup that says “VIRUS ALERT FROM APPLE” or “PORNOGRAPHIC VIRUS ALERT FROM APPLE”. This warns you that your computer is “blocked” because it sent viruses over the internet, is using hacked or illegal software, accessed illegal pornography, or similar.

Fake Virus Alert Apple

The alert usually appears as a popup dialog window at the top of your browser, alongside blocks of text in the background warning you about strange activity on your computer. You may also hear a robotic voice warning you that you need to contact “Apple” right away.

To “resolve” the problem, the alert displays a phone number that it wants you to call. It claims that this leads you to Apple Support, but of course that’s not true.

And to lead you into doing what the scammers want, the popup often locks your browser up. If you’re not aware of how to force-close it, you might feel like you have no choice but to call the scammers.

Are Porn Viruses Real?

Before we show you how to stop this virus behavior, you might wonder why you’re seeing these pornographic virus alerts. As it turns out, this is a fake virus message. You didn’t do anything illegal; everything the ad claims is completely made up.

Most of the time, these virus alerts pop up from rogue online ads. When browsing normally, you may suddenly have your browser hijacked by one of these pages. It uses JavaScript commands to “lock” you in the page, which makes you think it’s actually stuck if you don’t know any other ways out.

The phone number doesn’t go to Apple Support—it leads to scammers who want you to pay for “virus removal” that you don’t need. Remember that legitimate companies like Apple don’t use these scaring tactics and try to have you call random numbers.

While the virus popup might look official because the top toolbar resembles Apple’s site, take a look at the URL in the address bar (if it’s visible) for another telltale sign of a fake. Many of these popup URLs are a string of random characters followed by cloudfront.net—a far cry from the real support.apple.com.

How to Remove Pornographic Virus Alerts on Your Mac

Let’s look at the steps to close out and prevent these alerts from happening in the future. We’ve already looked at how to prevent “Microsoft” pornographic virus alerts, so take a look at those steps if you use Windows too.

1. Close Your Browser

First, you’ll want to close out the fake alert so you can use your computer properly. The easiest way to do this is by completely closing  your browser, whether you use Safari, Chrome, or something else.

To quit the current app on your Mac, press Cmd + Q. This will close Safari and Firefox instantly, but you’ll have to hold it to close Chrome. Re-open your browser, and you should be at a fresh window away from the earlier nonsense.

If the regular method doesn’t work, you’ll need to force-quit the app instead.

Force Quit App from the Applications Window

After closing, a problem can occur if your browser is set up to automatically open the last session when it starts. In that case, it will keep loading the fake virus page. To get around this, hold the Shift button when you click the Safari icon in your Dock to load a fresh session.

If Safari isn’t pinned to your Dock, browse to the Applications folder in Finder and drag it to the Dock to pin it. Otherwise, you can pin the app by right-clicking it in your Dock while it’s open and choose Options > Keep in Dock.

This Shift trick won’t work for other browsers. As a result, if you have them set up to reopen the last session, you’ll need to change that setting. Press Cmd + Comma to open the Preferences panel for your browser and look for an option like On startup or [Browser] opens with to disable loading the previous session automatically.

Chrome Continue Left Off

2. Check for Unwanted Software

Most of the time, these pornographic virus alerts aren’t related to anything on your computer. Because they load from bad online ads, you don’t have much control over them.

However, it’s still a good idea to check for unwanted software when you see these alerts. There’s a chance that it appeared from something you installed on your computer or a browser extension or plugin.

Head to the Applications folder in Finder to see what you have installed and remove anything you don’t recognize or need anymore. Sort by Date Modified to show apps that you installed recently, which are more likely to cause the problem.

Move App to Trash

For more control, check out the best ways to uninstall apps on your Mac.

You should also take a look at your browser extensions and settings to check if anything malicious made its way in. In Chrome, head to the three-dot Menu and choose More tools > Extensions to see what you have installed and disable anything you don’t trust.

In Safari, press Cmd + Comma to open the Preferences panel and look at the Extensions tab to review what you have installed.

In the general settings of each browser, it’s also smart to check your homepage, new tab page, and default search engine to make sure they’re what you expect. Finally, have a look at your Mac’s startup items if you want to make sure that nothing is set to run when you boot up.

3. Scan for Malware

As mentioned, a website abusing JavaScript to spam you with fake pornographic alerts isn’t really a virus. However, it’s not a bad idea to scan for malware while you’re checking your system for something unsavory.

We recommend using the free version of Malwarebytes for Mac to run a scan and see if it finds anything. If this is your first time using the software, it will prompt you to start a free trial of Malwarebytes Premium. This isn’t necessary for a quick scan, but it won’t hurt either.

Avoid Virus Alert Popups in the Future

Once you’re able to get away from the fake alert page and make sure there are no traces of unwanted software on your system, you should keep an eye out for this behavior in the future.

Unfortunately, because this popup typically occurs from rogue ads, you can’t fully control whether you see it. The best step you can take is to avoid shady websites that are more likely to have nasty ads. But these can come from anywhere, as bad actors game the system to sneak them into Google Ads and similar.

If you notice the popups always occur on one site, try to avoid it in the future. And if they show up across sites, an extension like Privacy Badger might help.

Virus Alerts From Apple Are Fake

Now you’re aware what these fake pornographic virus alerts are from Apple, how to deal with them, and what you can do to avoid them in the future. Hopefully, you won’t ever come across them again, but they’re thankfully easy to get rid of when they show up.

For more on Mac security, check these dangerous practices that will infect your Mac with malware.

Read the full article: How to Prevent Pornographic Virus Alerts From “Apple”


Read Full Article