10 July 2019

Snapchat announces new shows from Serena Williams, Arnold Schwarzenegger and others


Snapchat just announced that it’s making shows with big names like Serena Williams, Arnold Schwarzenegger and Kevin Hart, as well as online stars like Emma Chamberlain, Loren Gray, Rickey Thompson, Baby Ariel and FaZe Banks.

Snapchat launched its original content efforts two years ago, and today it’s unveiling a new program called Creator Shows. As  initially announced in the Hollywood Reporter, these will be first-person shows designed around individual creators.

For example, Schwarzenegger will be providing motivational advice in a show called “Rules of Success,” while Thompson will weighs in on fashion and lifestyle trends on “Trend or End” and Gray offers beauty advice on “Glow Up.”

The shows will begin airing this month. They’re all exclusive to Snapchat, and many of them come from creators who’ve a substantial following on other platforms — Chamberlain, for example, was just described in The New York Times as “the funniest person on YouTube.

Rickey Thompson Premieres July 10

“Snapchat has always been my favorite platform to post random and funny things on because it’s so relaxed,” Chamberlain said in a statement. “My favorite part about it is that I get to watch my own Snapchat Stories a few hours after I post them for entertainment…. kind of embarrassing, I know …”

Snap isn’t sharing viewership numbers around its original shows, but it does say that daily time spent watching those shows tripled over the past year.

And as media giants funnel more and more money into original video content, this might be the strategy that Snapchat needs to compete — rather than trying to find the next big-budget hit, it can focus on personality-driven shows from creators with large followings.


Read Full Article

A91 Partners, a new VC fund from former Sequoia Capital India execs, closes $351M maiden fund


India’s growing number of startups now have one additional VC fund that will listen to their business ideas. A91 Partners, a new VC fund founded by former partners at Sequoia Capital India, has closed their maiden fund at $351 million.

A91 Partners will focus on high growth startups in consumer, technology, financial services, and healthcare sectors in India, Abhay Pandey, a partner at A91 told TechCrunch in an interview.

A91, whose maiden fund is one of the largest for any VC funds in India, will focus on early as well mid-stage startups that are looking to raise between $10 million and $30 million, Pandey said. Earlier this year, it invested about $14.2 million in Sugar, a cosmetics brand.

“In our experience, some companies get to this stage after having raised capital and some bootstrap their way into that position,” he added. Other than him, V.T. Bharadwaj, Gautam Mago, Prasun Agarwal — all former partners at Sequoia Capital India, and Kaushik Anand, formerly of CapitalG are also partners at A91. They founded the fund late last year.

The inspiration of the name comes from the country code of India, which is 91. The letter A is inspired from Ashoka, India’s greatest emperor.

“We are excited about the opportunity ahead of us and look forward to partnering with founders building enduring businesses for tomorrow’s India,” the founding members said in a statement.

“Our role in this development and growth is to partner with exceptional founders to build the next generation of enduring Indian businesses. While fulfilling this role, we aspire to build an enduring, excellent, uniquely Indian investment firm,” they said.

A91 raised about 80% of the $351 million capital from overseas investors that include foundations, endowments, family offices and fund of funds, Pandey said. Some of these include the International Finance Corporation and Asia Alternatives, as well as Adams Street and Swiss-based LGT Capital Partners.

India’s tech startups have raised more than $20 billion in the last two years. The country’s growing startup ecosystem is increasingly attracting major VC firms in the nation. SoftBank and Tiger Global, two large global VC funds, count India as one of their biggest markets.

In recent years, Google, Microsoft, Amazon, and Facebook have also begun to infuse money in India’s startup space. Google has invested in delivery startup Dunzo, while Amazon has taken stake in more than half a dozen local companies. Facebook invested in social commerce app Meesho last month.

Earlier this year, Microsoft expanded its M12 corporate venture fund (formerly known as Microsoft Ventures) to India with an investment in Innovaccer, a six-year-old SaaS startup. Samsung Venture, the investment arm of the South Korean technology conglomerate, made its debut investments in Indian startups on Wednesday.


Read Full Article

Nintendo Switch Lite’s trade-off of whimsy for practicality is a good one


Nintendo revealed a new Switch Lite version of its current-generation console today, which attaches the controllers permanently, shrinks the hardware a bit, and adds a touch more battery life – but it also takes away the ‘Switch’ part of the equation, because you can only use it handheld, instead of attached to a TV or as a unique tabletop gaming experience.

The changes mostly seem in service of brining the price down, since it will retail for $199 when it goes on sale in September. That’s $100 less than the original Switch, which is a big price cut and could open up the market for Nintendo to a whole new group of players. But it’s also a change that seems to take away a lot of what made the Switch special, including the ability to plug it into a TV for a big-screen experience, or quickly detach the Joy-Con controllers for motion-control gaming with rumble feedback.

Switch Lite makes some crucial changes that I suspect Nintendo knows are reflective of how a lot of people actually use the Switch, regardless of what the aspirational, idealized Switch customer does in Nintendo’s ads and promo materials. As mentioned, it should bump your battery life during actual gameplay – it could add an extra hour when playing The Legend of Zelda: Breath of the Wild, for instance. And the size savings mean it’s much easier to slip in a bag when you head out on a trip.

NSwitchLiteImageWallImg04 image950w

The new redesigned, permanently attached controllers also include a proper D-pad on the left instead of the individual circle buttons used on the Joy-Pad, and the smaller screen still outputs at the same resolution, which means things will look crisper in play.

For me, and probably for a lot of Switch users, the trade-offs made here are actually improvements that reflect 90 percent of my use of the console. I almost never play plugged into a TV, for instance – and could easily do without, since mostly I do that for one-off party game use that isn’t really all that necessary. The controller design with a D-pad is much more practical, and I have never used motion controls with my Switch for any game. Battery life means that you probably don’t need to recharge mid-trip on most short and medium-length trips, and the size savings means that when I’m packing and push comes to shove, I’m that much more likely to take the Switch Lite rather than leave it at home.

Already, some critics are decrying how this model makes the Switch ‘worse’ in almost every way, but actually I think it’s just the opposite – Nintendo may have traded away some of its trademark quirk with this version, but the result is something much more akin to how most people actually want to use a console most of the time.


Read Full Article

Nintendo announces a handheld Nintendo Switch Lite for $199


Nintendo has unveiled a new Nintendo Switch called the Nintendo Switch Lite. As the name suggests, this console is a bit cheaper than the original Nintendo Switch, but it comes with a few drawbacks.

The biggest difference between the Nintendo Switch and the Nintendo Switch Light is that you can’t connect the Switch Light to a TV. There’s no dock or port designed for TV connection.

That’s not the only compromise you’ll have to make as the Joy-Con controllers aren’t detachable. You can’t put your Switch on a table and keep the controllers in your hands for instance.

Of course, you can buy Joy-Con controllers or the more traditional Nintendo Switch Pro controller separately. You’ll have to find a way to charge your Joy-Con controllers without the Switch — the Charging Grip could do the job for instance.

lite photo 02

But other than that, you’ll be able to play the exact same games that you’ve been playing on the Switch. As long as games support handheld mode, they will work on the Switch Lite — nearly 100% of games work in handheld mode.

The Switch Lite is slightly smaller and slightly lighter than the Switch — 0.61 lbs versus 0.88 lbs (277 g versus 399 g). It features a 5.5-inch touch screen instead of a 6.2-inch touch screen.

If you were wondering what would come after the 3DS, it sounds like the Switch Lite is the perfect replacement for a cheap handheld console. And the good news is that you should get better battery life. Nintendo says you will be able to play for 3 to 7 hours. In their testings, they could play Zelda: Breath of the Wild during 4 hours.

Nintendo will release the Nintendo Switch Lite on September 20. The device will be available in multiple colors — yellow, gray and turquoise.

lite photo 01


Read Full Article

Fedora vs. Ubuntu: Linux Distros Compared


fedora-vs-ubuntu

Fedora and Ubuntu are two of the most popular and well-supported Linux-based desktop operating systems. Both have been around for well over a decade and come from separate corners of the world, but the differences between them are rather nuanced.

So between Fedora vs Ubuntu, which is right for you?

How Fedora and Ubuntu Came to Be

Fedora is a free and open source Linux-based operating system that has been around since 2003. Red Hat, the world’s largest open source company prior to being bought by IBM, sponsors the project. Fedora serves as the foundation for Red Hat Enterprise Linux, a version of Linux intended for companies and servers rather than personal desktop use.

Ubuntu became the most popular Linux-based operating system not long after launching in 2004. Billionaire Mark Shuttleworth created a company called Canonical whose purpose was to create a version of Linux for general computer users. Ubuntu was that desktop.

The Fedora Desktop

Fedora 30 Workstation with file manager open

For several years, Fedora’s tagline has been “Freedom. Friends. Features. First.” The project ships a desktop that is almost entirely free of proprietary code, with the exception being binary drivers found in the Linux kernel that enable Fedora to support the hardware found in most laptops.

Fedora developers focus on creating features that go out to the broader Linux ecosystem. For that reason, Fedora is often a showcase for functionality that alternatives will get in the upcoming months (or in some cases, such as the use of the Wayland display server, years).

The Ubuntu Desktop

Ubuntu 19.04 file manager with desktop icons in the background

Ubuntu’s tagline was originally “Linux for Human Beings”. The goal was to create a desktop aimed at everyday computer users that could compete with Windows and Mac OS X. Canonical tried to hide the more technical aspects of Linux and provide an experience that just works out of the box.

Early versions of Ubuntu came with a straightforward installer with the ability to sample the desktop beforehand, plus easy ways to install Adobe Flash and multimedia codecs. Canonical also went to great efforts to create a unique desktop interface, known as Unity, that would stand out to consumers and PC vendors. The company even tried its hand at bringing Linux to phones.

In recent years, Canonical has given up on most of these projects and has changed its focus to the cloud.

What’s It Like to Use Fedora or Ubuntu?

Ubuntu 19.04 app drawer with new icon theme

When you pit Fedora vs Ubuntu, you will end up using same desktop interface by default. How you launch apps and manage windows is virtually the same.

Fedora doesn’t make changes to this interface, the GNOME desktop environment, so what you see on Fedora matches what you see on GNOME.org.

Ubuntu provides its own themes and comes with an app dock that’s always visible (pictured above).

Which looks better is subjective, but on Ubuntu you will encounter more inconsistencies.

Ease of Use

While Ubuntu began as a more user friendly desktop, that difference between the two has eroded. Things in Fedora are now as likely to “just work,” except when it comes to proprietary hardware drivers.

Ubuntu benefits from having a larger support community, which can make it easier to troubleshoot issues. But Fedora’s community is large enough that this isn’t that big of a deal.

Release Cycle and Support Period

Ubuntu versions available for download

New versions of Fedora come out roughly every six months, with delays not uncommon. Each release receives a little more than a year of support.

Ubuntu comes in two versions. Standard releases come every six months and receive nine months of support. Long-term support releases launch every two years and receive five years of support.

Flavors and Spins

Neither Fedora nor Ubuntu force you to use GNOME. There are many different desktop environments to choose from. You can use one of these alternatives on Fedora or Ubuntu by downloading different versions of either project.

On Fedora, variants are known as Spins and have names such as Fedora KDE Plasma Desktop Edition and Fedora Xfce Edition. The same editions of Ubuntu, known as flavors, go by the names Kubuntu and Xubuntu. Other versions of Ubuntu use a different naming scheme, such as Ubuntu MATE and Ubuntu Budgie.

Getting Apps

GNOME Software open on Fedora

Whether you use Fedora or Ubuntu, you will still turn to GNOME Software to download apps. It is one of several apps stores available for Linux.

Most apps are free and open source. Ubuntu has long mixed in proprietary software, making it easier to find apps like Steam and Spotify with a quick search. Though thanks to Flathub integration, such apps are now easy to install on Fedora, too.

Ubuntu’s repositories contain more software than Fedora’s, but the Linux apps people are most familiar with tend to be available for both.

Package Management

In the Linux world, software is distributed in the form of digital packages. This includes apps, but it also means background libraries and other components.

Fedora uses the RPM package format, whereas Ubuntu uses DEB. You can download packages via the command line. If you do, you will use DNF in Fedora or APT in Ubuntu. Both tools are similar, but people tend to develop a preference over time.

“Universal” Package Formats

There’s no one package format that works across every version of Linux, but developers are working hard to change this. Unfortunately, Fedora and Ubuntu default to a different “universal” package format. Fedora uses Flatpak, and Ubuntu uses Snap packages.

Flatpak seems to have received wider adoption among various Linux-based desktops, so you may find software available as a Flatpak but not a Snap package. On the flip side, since Ubuntu is the most popular and actively pursues developers, there’s also a bit of software available only in the Snap format. Since these are universal formats, it’s possible to install Flatpaks on Ubuntu and Snap packages on Fedora, it just takes a little extra work.

Version Numbers

Fedora tends to update the software in its repositories more quickly than Ubuntu. You may receive major updates to your apps alongside system updates, rather than having to wait six months for the updated versions that come with the next edition of Ubuntu.

Likewise, when a new version of Fedora lands, it’s likely to already include newer software than what Ubuntu provides to begin with. Sometimes Ubuntu will ship older software due to the tweaks or other changes it introduces and needs to maintain.

Playing Games

GOG.com displaying supported versions of Linux

If you’re a gamer, Ubuntu’s going to provide you with an easier time. Platforms like Steam and GOG.com explicitly support Ubuntu, even though it’s possible to run games from both on Fedora.

PC games also tend to be proprietary and depend on proprietary services, which are typically easier to get up and running on Ubuntu. Yet that’s starting to change again thanks to Flathub, which provides proprietary apps for Fedora without Fedora having to distribute such code itself.

Ubuntu users also benefit from proprietary graphics drivers that are easier to install.

Creating Software

GNOME Builder IDE on Fedora

Fedora offers an excellent environment for developers. You get a workspace with relatively few changes to upstream code and faster access to newer software. What you learn on Fedora is also relevant to CentOS and Red Hat Enterprise Linux, which sysadmins encounter often.

A few upcoming Fedora variants focus on containers, such as Fedora CoreOS and Fedora Silverblue. Developers will gain perks such as the ability to easily install, test, and configure separate version numbers of the same app.

Ubuntu is compelling for different reasons. Many tinkerers and makers use Ubuntu, and Ubuntu is more likely to appear on non-enterprise servers. Canonical is making a big push to get Ubuntu on more internet of Things devices.

At the end of the day, Linux as a whole is regarded as ideal for developers, and either Fedora or Ubuntu will serve you fine.

Running Fedora or Ubuntu on a Server

There are desktop and server versions of both Fedora and Ubuntu. While you can install Fedora on a server, it’s not ideal. New versions come out quickly and aren’t supported for long, making Fedora poorly suited for machines that are meant to be stable for lengthy periods of time. If you feel more comfortable with Fedora than Ubuntu, consider running CentOS, which is a non-commercial version of Red Hat Enterprise Linux.

Fedora vs. Ubuntu: Which Is Right for You?

Fedora is a consistent known quantity. Roughly every six months, you will get a polished GNOME desktop offering the latest free software world has to offer.

Ubuntu has provided more of a wild ride over the years. Interfaces and services have come and gone. Sometimes Canonical makes commercial-driven decisions that receives pushback from the community. And frankly, Ubuntu is no longer the easiest version of Linux out there. But the project continues to have the largest brand awareness and receives the most support from outside the Linux community.

At the end of the day, if you’re new to Linux, you can’t go wrong with either Fedora or Ubuntu. But if you want to venture out, there are many more Linux-based operating systems to pick from.

Read the full article: Fedora vs. Ubuntu: Linux Distros Compared


Read Full Article

Mac Disk Permissions Explained: How to Repair macOS Permissions


mac-disk-permissions

“Have you tried repairing permissions?” is a standard Mac troubleshooting tip that’s been floating around the web forever. For many users, this seemed to solve many rare type of problems. But when OS X El Capitan (10.11) released, the Repair Disk Permission option suddenly vanished from the Disk Utility app.

Does that mean Apple has solved the permission-related problems in macOS, or was it something else? We’ll unravel this mystery and show you how disk permissions work on your Mac.

How Permissions Work in macOS

Every item on your Mac, whether it’s a file or folder, carries a set of permissions. These control which user accounts can access it and what kind of access they have. Permissions consist of three activities (read, write, and execute), performed by three types of user (owner, group, and everyone).

You can define privilege rules separately for each ownership tier. Permission, in combination with accounts and ownership, provides you security, enables controlled sharing, can set limited or no access to files, and maintains system integrity.

View File System Permissions

Any user can view the file and folder permissions using Finder’s Info window or the Terminal. In Finder, right-click a file or folder and choose Get Info from the context menu. Click the Sharing & Permissions triangle to expand the item permissions.

choose get info from the finder window

To view this information in the Terminal, type the following:

ls -l "path to your file"

The character after the dash is a lowercase L and reveals the ownership and permission of your file. On the command line, the abbreviation for the read permission is r, while write is w, and execute is x.

view permission of an item in terminal

Owner, Group, and Everyone

Let’s break down the three types of users that appear in Mac permission fields:

  • Owner: An item owner is a user who creates the item or copied it to the Mac. Users usually own most of the items in their home folder.
  • Group: Every item is also owned by a group. A group is a set of user accounts joined together so permissions can apply to all members.
  • Everyone: Use this permission setting to define access for anyone, including local, sharing, and guest users.

Read, Write, and Execute

Next, let’s look at the three types of permissions these users can have:

  • Read: User or group members can open a file but can’t save changes. If it’s a folder, you can browse the list of items.
  • Write: User or group members can modify or delete the file. For a folder, you can make changes to folder contents.
  • Execute: Files with the execute permission can behave as a program or script. In case of a folder, execute means someone can list its contents provided the read permission is also enabled.

Factors That Cause Permission Problems

In OS X Yosemite and earlier, Disk Utility can verify and repair permissions on some files and folders. However, in actuality, the app doesn’t repair permissions. It simply resets them.

Further, to say Disk Utility repairs permissions makes it sound like permissions can go bad or become corrupted over time. But this is not true. Permissions stay the same until something or someone comes along and changes them. There are many reasons this can happen:

  1. App Installers: Some installers change permissions on existing items as a necessary part of the installation process, but fails to return them to the proper settings.
  2. User error: If you’re fiddling with permissions in the Terminal or through a third-party app, mistakes can lead to problems. For example, improper use of the chmod command can change the permission setting of an item.
  3. Sharing a folder: All users on the computer have permission to access items in the Shared folder. If you’re using this folder as a repository for files in transit, then permission problems are unlikely. But if you store items for use by multiple people on a permanent basis, then issues can arise.
  4. Permissions on Copied Items: It’s difficult to predict what permissions macOS will assign when you copy files over an external volume, SMB, or FTP. You may need to employ some trial and error to solve this problem.

What Happened After OS X El Capitan?

In OS X El Capitan, Apple introduced System Integrity Protection (SIP) to all system files, folders, and even bundled apps. It protects system contents from intentional and inadvertent tampering while also preserving default permission settings. SIP protects the following directories: /System, /usr, /bin, and /sbin.

When you update Apple apps or upgrade macOS, the installer will check and reset the permissions of any item if necessary. No third-party app (irrespective of its lousy behavior) can change permissions unless you disable SIP. We’ve dug into more about what SIP does if you’re curious.

What About the User and Home Folders?

System Integrity Protection does not protect items in the /Library folder, apps in /Applications, and everything in your Home folder. The ~/Library folder is especially important, because it consists of core system preference files, third-party app preferences, Keychain data, and more.

If the permissions were changed to any of these files or folders, you can expect a multitude of bizarre of problems on your Mac. Issues that can arise due to incorrect permissions include:

  • Changes that you make to Finder, System Preferences, or the Dock do not get saved.
  • Windows that were open the last time you logged out or quit an app open again after you log in.
  • You’re asked for an administrator password while moving certain items in the Home folder.
  • You repeatedly get a message saying “macOS needs to repair your Library to run applications.”
  • When saving a file, you’ll get a message that a file is locked or don’t have the necessary permissions. This happens a lot with Microsoft Office documents.
  • Default or third-party apps could crash on launch. Some apps might even fail to update.
  • Firefox or Chrome does not load your preferences and says “Unable to load your profile.”
  • Photos and videos you import into Photos don’t appear in the app. Or you get a message to select a default Photos library every time you open the app.

Reset Permissions for the Home Folder

From the Finder sidebar, right-click your Home folder and choose Get Info. Click the Sharing & Permissions dropdown triangle to view its permissions.

choose get info from the finder window

Click the Lock button at the bottom of the window and enter your administrator password. Then select the action menu button and choose Apply to enclosed items.

choose apply to enclosed items from the action menu

Click OK to confirm the action. The updated permissions will propagate through your Home folder.

click OK to apply the permission setting

Next, open the Terminal app and type the following:

diskutil resetUserPermissions / `id -u`

This option resets the user permission on the root volume (/) to the current user ID. If everything goes well, reboot your Mac.

But if you get error 69841, then follow these steps:

On macOS High Sierra or Earlier

  1. Open the Terminal app and enter the following:
    chflags -R nouchg ~
    
  2. Then enter this command once more:
    diskutil resetUserPermissions / `id -u`
    
  3. Restart your Mac.

On macOS Mojave and Later

The steps for Mojave and newer are the same as the above, but you must add Terminal to Full Disk Access before proceeding. To do this, go to System Preferences > Security & Privacy and click the Privacy tab. Click the Lock icon and enter your administrator password to make changes.

select full disk access from system preferences

Next, select the Full Disk Access tab. Then click the Plus button and add the Terminal app.

add terminal app to full disk access

After doing this, proceed through the above Terminal commands mentioned for High Sierra and earlier.

Understanding Mac User Accounts

When the option to repair disk permissions vanished from the Disk Utility app, we didn’t think much of it because it was never an important troubleshooting step. But seeing the type of problems you might encounter because of incorrect permissions, it’s clear that resetting permissions for your Home folder is the last resort when these issues crop up.

It’s surprising to see that Apple doesn’t include this option anymore. But remember, you should only apply these steps when necessary. Understanding permissions is a complex topic. If you understand how macOS user accounts work, it’ll become a lot simpler. Read this guide to setting up multiple user accounts on a Mac to learn more.

Read the full article: Mac Disk Permissions Explained: How to Repair macOS Permissions


Read Full Article

Amazon Records Alexa Commands, Send an Effective Email Apology, DIY Cleaning Slime


email-security-protocols

Christian Cawley and Ben Stegner discuss the latest Amazon privacy issue, and discuss how to apologise via email. We also look at how to clean your tech with DIY slime.

Really Useful Podcast Season 3 Episode 6 Shownotes

In this week’s show:

This week, Christian Cawley is joined by Ben Stegner. They’re both on Twitter:

Please share our podcast with anyone you think would benefit from some jargon-free clarity and honesty about technology. Point them in the direction of the Really Useful Podcast on:

Subscribe to the tech podcast for technophobes today!

Read the full article: Amazon Records Alexa Commands, Send an Effective Email Apology, DIY Cleaning Slime


Read Full Article

Microsoft’s 1.11 App Lets You Revisit Windows 1.0


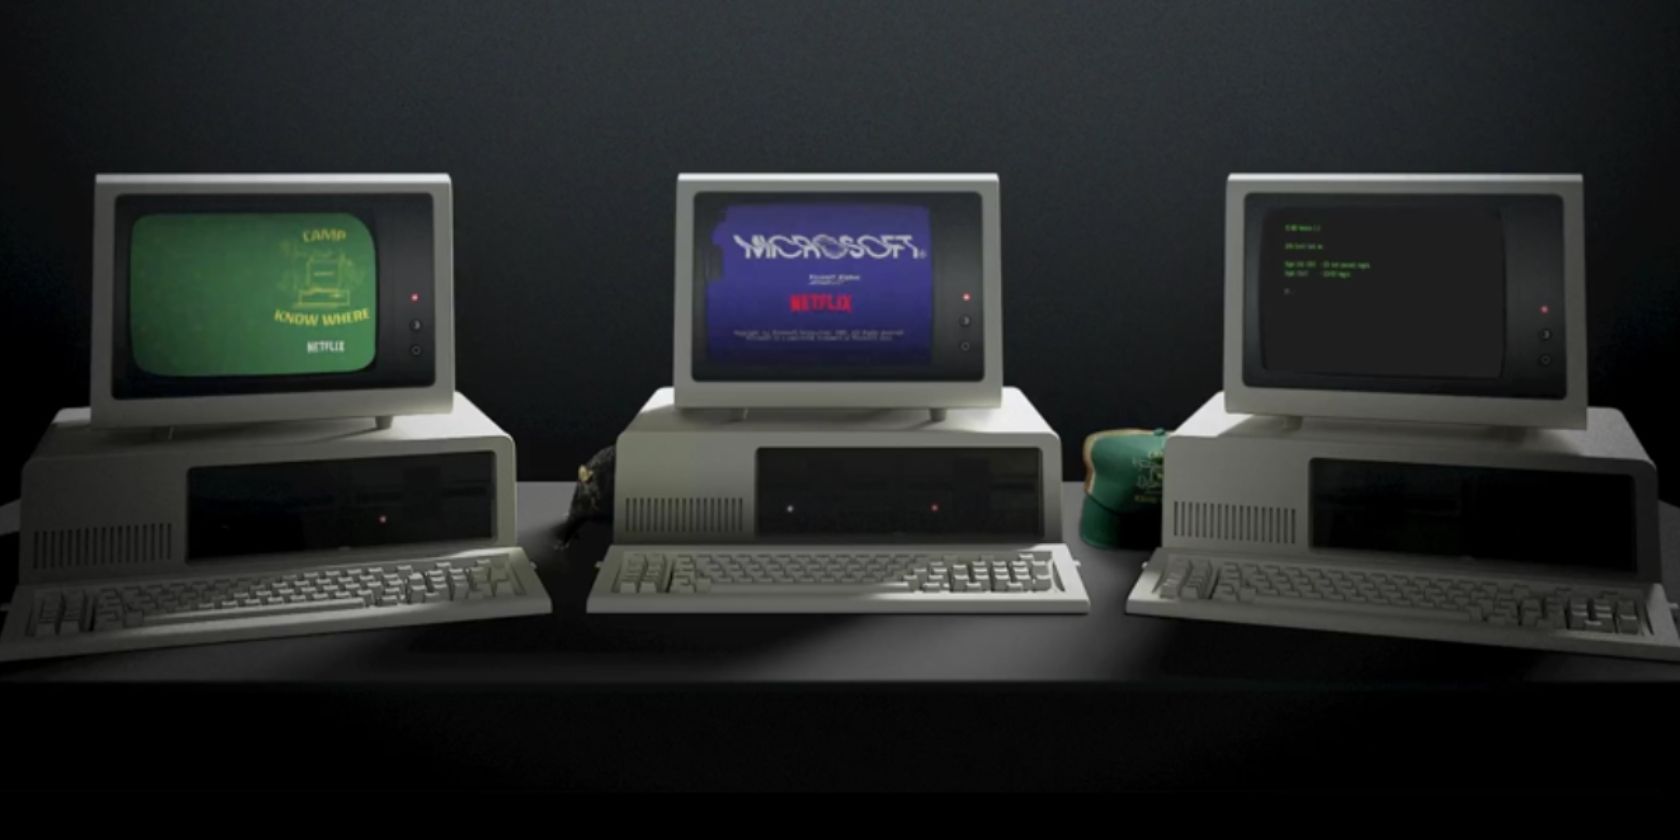
Microsoft has released a new app that should appeal to technology geeks, Stranger Things fans, and nostalgia freaks alike. Windows 1.11 is an app inspired by Windows 1.0 but with a Stranger Things twist. And it’s a fantastic promotional tie-in by any metric.

Microsoft Teases the All-New Windows 1.0

At the beginning of July 2019, Microsoft started posting cryptic messages on social media. The company was teasing “the all-new Windows 1.0,” leading people to speculate as to what Microsoft was up to. After all, Windows 1.0 was originally released in 1985.

That date proved to be a big clue, as Stranger Things 3, which debuted on Netflix on July 4, is set in the summer of 1985. And as many of us guessed as a consequence, the Windows 1.0 Microsoft was teasing is actually a promotional tie-in for Stranger Things.

What Is Microsoft’s Windows 1.11 App?

The app is called Windows 1.11 in honor of the character Eleven, who is Hawkins’ best weapon against the Mind Flayer. The UI is pure Windows 1.0 though, with the original Command Prompt, versions of Paint and Write, and pixelated video footage.

The idea of the app is to work through the clues in order to help save the town of Hawkins, Indiana. You’ll need to read files, play mini-games (with graphics reminiscent of the 80s), and piece everything together. And it’s a lot of fun.

Windows 1.11 is available now. Microsoft is also running Camp Know Where events in stores this summer. There are also themes and wallpapers, and the chance to win a Stranger Things 3 arcade cabinet. See more on Microsoft’s Stranger Things site.

Download: Windows 1.11 for Windows 10

Giving Stranger Things Fans a Dose of Nostalgia

Microsoft’s Windows 1.11 app is a nice diversion, especially if you’re a fan of Stranger Things. And even if you’re not a fan of Stranger Things, the app should give people who remember using Windows 1.0 a nice fuzzy feeling of nostalgia (or bad memories).

As the Windows 1.11 app proves, Netflix is the master at promotional drives for its original programming. The only problem is those episodes fly by too quickly thanks to binge-watching, so here are the shows Stranger Things fans should watch next.

Read the full article: Microsoft’s 1.11 App Lets You Revisit Windows 1.0


Read Full Article
Instagram Launches New Tools to Combat Bullying


Instagram is rolling out two new tools designed to combat online bullying on its platform. One uses AI to warn people that their comment may be offensive, and the other lets users effectively shadow ban anyone that they no longer want to interact with.

Instagram Is a Platform for Bullies

Bullying is a particular problem online, and Instagram is one of the platforms people use to bully others. Things are particularly bad on Instagram thanks to its younger demographic, which is why Instagram is keen to do everything it can to combat the problem.

Instagram has already taken steps to prevent cyberbullying occurring on its platform. And Instagram launched a parent’s guide to Instagram designed to help parents and children alike understand how bad behavior can be discouraged.

How to Prevent Bullying on Instagram

Now, Instagram is upping the ante with two new tools designed to prevent online bullying. In a post on the Instagram Blog, Adam Mosseri, the Head of Instagram, explains how these tools work. And while they’re not perfect, they should have a positive impact.

The first tool is designed to encourage positive interactions. Instagram already uses AI to detect bullying and other harmful content after it has been posted. But now, Instagram will use AI to detect potentially offensive comments even before they’re posted.

The person posting the comment will see a message asking them if they’re sure they want to post the comment. The idea is to shame people into being nicer in the hopes that they’ll undo their comment and post something nicer instead.

The second tool is called Restrict, which helps you protect your Instagram account when you’re being bullied. Restricting someone means only they will be able to see their comments on your posts. They also won’t know when you’re active on Instagram.

Restrict is designed to help people who are afraid of blocking, unfollowing, or reporting someone in case it escalates the situation. Which can be especially bad if the person bullying you is someone you know in real life.

What to Do When You Get Harassed Online

The warnings to post something nicer are rolling out now, with Restrict being rolled out in the coming months. These new tools should help make Instagram a nicer platform for everyone. However, beyond Instagram, here’s what to do when you get harassed online.

Read the full article: Instagram Launches New Tools to Combat Bullying


Read Full Article
The Essential OneNote for Mac Guide


onenote-mac

OneNote is a cross-platform digital note-taking app that provides a single place for keeping all your notes, plans, and research related information. When OneNote for Mac launched, it had a few features. But in the past few months, Microsoft has completely revamped the OneNote app.

The navigation interface is new. It matches the design aesthetics and functionality of OneNote in Windows 10. In this guide, we’ll walk you through some essential features and show you how to use OneNote on Mac.

Note: The minimum system requirements to take advantage of the latest features is macOS 10.10 Yosemite or later.

Creating a Notebook

The primary way of organizing your notes is through notebooks. You may collect everything you want in one notebook and then rely on the search function. Or, you may create a separate notebook for every project. It’s up to you how you want to structure and organize your OneNote content.

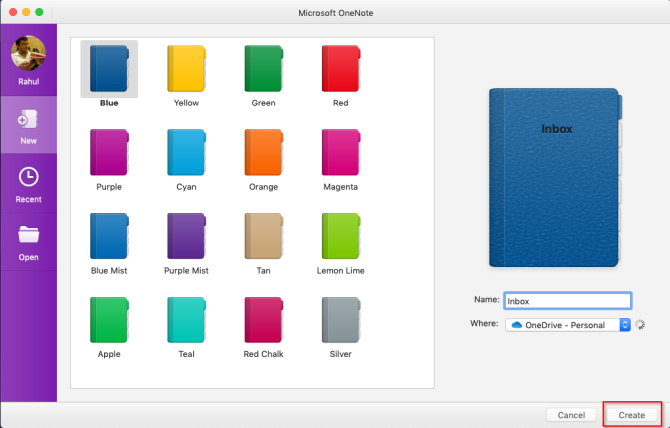
To create a notebook, click File > New Notebook (Ctrl + Cmd + N). Type in the name, choose a color and click Create.

create a notebook in OneNote for Mac

Navigation Layout

The new navigation layout offers you more note-taking space. Click the Navigation button to expand or collapse the navigation pane. In the expanded state, you can view the notebook hierarchy and switch between pages, section, or notebooks. Click the button again to collapse the pane.

toggle navigate pane in OneNote Mac

The list of sections is on the left while pages are on the right. To navigate between the pages, click the title or press Cmd + Ctrl + G to move your focus to the page list. Then use the Up or Down Arrow keys.

To switch to a different notebook, click the Notebooks dropdown arrow button and choose a notebook. If you do not see the notebook you want, click More Notebooks and open it from OneDrive.

switch to a different notebook

Resize the Navigation Pane

If your section and page title appear truncated or you want to maximize the note-taking space without collapsing the navigation pane, then this feature comes useful. Move your pointer over the edge of the pane and drag it to either left or right.

resize the navigation pane in OneNote Mac

Show or Hide the Ribbon

The ribbon spans the top of the app window. If you find the ribbon distracting, you can hide it. Double-click any ribbon tab (for example, Home) or press Alt + Cmd + R to hide or show the ribbon.

show or hide the ribbon

Sections and Pages

Sections make great organizing tools to keep related pages together. You can add any number of sections, move them around, rename or color the tabs, and delete them.

To create a new section, click the Add section button (Cmd + T) at the bottom. When you delete any section, they get moved to the trash. You can recover any deleted data within 60 days.

add section to OneNote Mac

You can even group the related sections to reduce notebook clutter. Choose File > New Section Group or right-click a section and choose New Section Group. Creating a section group has two advantages. Collapse the group to make room for a new section, and you’ll be able to navigate large notebooks easily.

add a new section group

To create a new page, click the Add page button (Cmd + N) at the bottom. Just like sections, you can organize related pages by creating subpages. Right-click any page and choose Make Subpage (Alt+Cmd+]). You can make subpages up to two levels deep and demote them to normal levels.

add pages and make subpages in OneNote

Adding Tags to OneNote in Mac

OneNote provides several tags (or visual markers) that you can apply to mark essential items in your notes. For example, in your research project, you might use the to-do tag to remember the task you need to complete.

To add a tag, click or select the text you want to tag. From the Tags Gallery in the Home tab, click the tag icon. You can even use a shortcut to create a tag.

For example, press Cmd + 1 to make a to-do tag, press Cmd + 2 to add a star, Cmd + 3 for a question, and so on. Go to Format > Tag to see the list of shortcuts.

add a tag to OneNote from tag gallery

You can also create a custom tag. To do this, click the Tags dropdown in the Home tab and choose Create New Tag. A new panel appears from the right. Type in the name, select an icon, and click Create. The tags you create also sync with the OneNote app for Windows 10.

create a custom tag in OneNote

Search Notes in OneNote for Mac

It’s easy to search through your notes no matter where you store them. Press Cmd + F or click the magnifying glass icon near the Navigation toggle button. In the search box that appears, enter a search word or phrase and press Enter.

search notes in OneNote Mac

Just beneath the search box, click Pages to see results found in the text of your notes. Or click Tags to search by note tags.

To adjust the scope of your search results, click the Funnel button, and choose an option from—All Notebooks, Current Notebook, Current Section, and Current Page.

filter your notes and tags by query

If OneNote finds your search text, it’ll appear in the results list. Do remember that OneNote will not search the contents of password-protected sections.

Taking Notes

OneNote is like a free-form canvas. You can add content like text, pictures, audio, handwriting notes, screen clippings, and more. To format your notes, you’ll find all the usual formatting tools options in the Home tab.

formatting tools in OneNote Mac

Creating Linked Notes

If you’re working on a large project with many sections and pages, then OneNote lets you create links between your notes. With the built-in simple wiki system, you can make connections to whatever notebook, section, and pages.

copy link to OneNote page

To get started, right-click any section or pages to copy its link. Then go to your page, highlight the text, and select Insert > Link. From the link dialog box, paste the link you just copied.

insert the link to OneNote page

Web Clipper

With the clipper, you can extract useful information from the web. It has four options—save a full web page, a region of the page (like a screenshot), text with formatting options, or a bookmark.

Click the dropdown menu under Location and select your notebook.

web clipper in action

Download: Clip to OneNote for ChromeFirefoxSafari

Insert Content in OneNote

While working on a project, it’s easy to lose track of things. OneNote for Mac lets you insert files directly into your notes. Go to Preferences > General and check Store file attachments in OneDrive.

enable file attachment in OneDrive feature

As you attach the file, it uploads the file to OneDrive under OneNote Uploads folder and inserts a link to that file. For Office documents, you can view the changes made to your file in real time. In the case of PDF, the attachment will display a link. You can also attach a printout of the document.

attach a word file in OneNote

Embed Your Content

You can embed a wide variety of content into OneNote, including documents, videos, audio clips, and more. Check out the services and sites OneNote supports for embedding contents.

Optical Character Recognition

OneNote for Mac supports OCR. It can extract the text from images so that you can paste it elsewhere in the note. Scan or snap a picture of the text. Click Insert > Picture to insert the image, then right-click and choose Copy Text from Picture.

optical character recognition in OneNote Mac

Insert a Table

Tables are excellent vehicles for the presentation of information. They create visual interest and bring order to ungainly note lists. To create a table, click the Insert tab and choose Tables.

Drag the mouse over the boxes to select how many rows and columns you want. Then, fill the table with text, numbers, files, and more.

insert a table

Create Templates in OneNote for Mac

Creating a template in OneNote has many benefits. They give your pages a consistent look, flexibility in structuring different types of documents, and saves time. But is there support for page templates in OneNote for Mac? Yes, there is.

Set up a note that you want to use for a template. Right-click the page and choose Set as Default Template. A dialog box will pop up for confirmation.

set as default template option

To remove the default template, right-click on the section and choose Remove Default Template. If you want to create a simple template, go ahead and start using this feature.

remove the default template option

Immersive Reader

An immersive reader is a free tool from Microsoft that implements proven techniques to improve reading and writing for people regardless of their age, profession, and ability. To open the immersive reader, select View > Immersive Reader. A full-screen window will open with your OneNote document.

full screen immersive reader in OneNote Mac

There’s a built-in tool to read the text out loud into syllables. To increase your reading comprehension, it offers you various text and reading options. You can change the text size, font, background color, and line spacing.

text options in immersive reader

Parts of Speech control grammar highlighting and helps you understand complex sentences. In reading options, enable Line Focus to highlight a particular set of lines for focussed reading. Translate lets you change the language of the text. It’s a great feature for new language learners.

reading options in immersive reader

Export and Import Notebooks

OneNote lets you take a backup of notebooks. Go to OneNote Online and enter your Microsoft account credentials. Under My Notebooks, right-click the notebook and choose Export notebook.

export OneNote notebook

From the screen that opens, click Export. Follow the dialog prompt and save your file. Each notebook you download gets saved in the ZIP file format.

save the notebook as a zip file

Export Notes as PDF

If you want to share notes with someone without giving them full access, you can export any page as a PDF file. Go to any page and click File > Save as PDF. Type a file name and choose a location.

Import the Notebook

If you want to import the notebook, unzip the file, go to OneNote Notebook Importer and import the entire folder. Use Firefox or Chrome to export and import the notebooks.

import saved notebook

Sharing and Collaboration

OneNote for Mac offers you several options to share your notes. You can invite other people to collaborate or allow them to read your notes. Click File > Share and choose from the following options:

  • Invite People to Notebook—send specific people an invite (through email) to collaborate on a project. Select Can Edit if you want them to make changes.
  • Copy View and Edit Link to Notebook—Create a sharing link so that others can view and edit your notes.
  • Copy View-Only Link to Notebook—Create a sharing link so that others can see your notes.

sharing and collaboration in OneNote Mac

Keep a Productive Schedule

Now that you know how to use OneNote on Mac, learn and develop your own OneNote workflow to make use of the features discussed in this article.

Take a look at our guide on how to use OneNote to manage to-do list and plan your week with OneNote to develop a productive schedule.

Read the full article: The Essential OneNote for Mac Guide


Read Full Article