A blog about how-to, internet, social-networks, windows, linux, blogging, tips and tricks.
24 July 2020
Can light stop the coronavirus? | David Brenner
Far-UVC light is a type of ultraviolet light that kills microbes and viruses and, crucially, seems to be safe to use around humans. Radiation scientist David Brenner describes how we could use this light to stop the spread of SARS-CoV-2, the virus responsible for COVID-19, in hospitals, nursing homes, trains and other public indoor spaces -- paving the way for a potentially game-changing tool in the fight against the coronavirus pandemic. (This virtual conversation, hosted by TED science curator David Biello, was recorded July 7, 2020.)
https://ift.tt/3jBmvt0
Click this link to view the TED Talk
Annke BR200: Strobe and Siren Make This The Smartest Analog Security Cam Yet
With a terrifying siren and red-blue strobe, and reliable motion detection, the Annke BR200 is the smartest analog security camera you'll find and a budget price.
Most security cameras do one job: they capture video and audio. If you’re lucky they also send you notifications when activity is detected, and let you talk back. But in terms of acting as a deterrent to potential intruders, sometimes the presence of a camera alone isn’t enough. They may not even notice it.
The Annke BR200 is a 1080p/2MP analog security camera–nothing remarkable there. But it also features a terrifying loud built-in siren and bright red/blue strobe light, paired with a reliable motion sensor. That added layer of security should be enough to scare anyone away. All at a budget-friendly price of $100.
Read on to find out more, and thanks to Annke, at the end of this review we’re giving away a BR200 alarm camera and 1TB DVR to get you started.
Annke BR200 Specifications and Features
- Connectivity: TVI, AHD, CVI, and CVBS
- Resolution: 2MP / 1080p, F1.0
- Motion sensor: Passive infra-red (PIR)
- Waterproof: IP67 (Junction box may be required to protect cabling)
- Additional features: Red and blue strobe light; 130dB loud siren (~90dB on low volume)
- Dimensions: 3.1″ high x 3.1″ wide x 5″ deep (main body), total weight 15oz
Analog?! What Year Is It?
The Annke BR200 outputs an analog video signal, meaning that you’ll need an appropriate digital video recorder to use it. There is no direct network connectivity, nor an SD-card slot to record locally. It only outputs an analog video stream. For testing, Annke supplied us with a Soter 5MP 4-channel DVR with 1TB drive, which will set you back around $120 (or $60, if you can supply your own HDD).
I should stress that you don’t need to pair the BR200 with this particular DVR. As long as the format is supported (TVI, AHD, CVI, or CVBS), you can pair this with an existing system of your preference. But it must be paired with something.
Don’t let the word “analog” put you off without further consideration. Analog systems tend to be less prone to networking issues that often plague wireless cameras. Once they’re wired in, that’s pretty much it. The only thing that can go wrong is if the rats chew through your cables.
And while the camera itself may not connect to the network, the DVR you plug it in to probably will. The Soter model supplied connects to Ethernet, and in turn allows the use of the Annke Vision app for remote live monitoring, viewing motion events, and receiving notifications. So you’re not entirely stuck in the past. That does, of course, depend on which DVR you choose to pair the BR200 with. If you’re integrating with an existing system, you may not have that functionality.
Installing the BR200
Designed for use outdoors, the BR200 is as easy to install as you’d expect, with a drill template and a few screws.
Unfortunately, we experienced one small hiccup. The cable supplied with our test unit wasn’t capable of delivering enough power to the camera. While it appeared to initially work, after reviewing the footage we found the video feed cut out when the alarm was triggered. I’m not an electrical engineer, but I would guess the voltage drop over such a long, thin cable was just too much, and it was only the additional power requirements of the light and siren that exposed this.
When I got in touch with support, they told us it would need to be wired directly to the supplied power supply, rather than using the DC part of the cable provided. This severely restricts mounting locations for most users, and isn’t detailed in the manual or sales page, nor would the average user expect that to be the case given a dual video and power cable is supplied. Annke’s support assured us that this was normal, but that in future they would provide power extension cables.
Thankfully I had another BNC and DC camera cable from some previous tests, about 50m in length. It ‘s significantly thicker than the cable supplied, and designed for the outdoors with strong rubber shielding. When plugged into that, the camera functioned perfectly. Annke told us that they would not expect consumers to have or use that kind of “industrial” cabling (which I bought on Amazon for less than $50).
Configuring the BR200 Alarm
After a frustratingly tedious initial setup of the DVR for no reason in particular (it’s just sluggish, confusing, and uses an on-screen keyboard to be operated by the included tiny mouse), we explored the system.
Despite the BR200 featuring a built-in alarm, the feature labeled “Alarm” in the DVR interface is not related at all; it just says “Alarm not connected” if you try to use it.
Instead, you use a unique menu system running on the camera itself, which is manipulated using the pan/tilt/zoom commands from the standard live view screen. It’s a very clever approach and feels like Annke has really pushed the limits of what an analog camera should be capable of.
But it’s also a kludge that simply wouldn’t be needed if it was a smarter IP camera instead.
While BR200’s innovative menu system is fairly simplistic, the DVR supplied in the bundle sadly isn’t. If you’re familiar with CCTV systems I’m sure you’ll feel at home, but for those of us more familiar with modern consumer smart home technology, it all feels horribly outdated and full of language issues or feature mismatches.
For example, to enable notifications you’ll need to first enable the motion detection, then go into advanced settings, go to the tab labeled “linkage action”, then enable Surveillance Center. The app isn’t called Surveillance Center, I should note, it’s called Annke Vision. Oh, and that’s assuming you can even get the networking and cloud connectivity working. The interface didn’t indicate it was connected once I’d plugged in the cable, and kept reporting errors. It took a few restarts until it accepted that it did, in fact, have a network connection. But it still refused to connect to the cloud service, which is needed for notifications. After recording the main part of this review, it suddenly decided to start working. Of course. The fact that they need an entire support guide just to enable phone notifications should be indicative.
Thankfully, the core tasks of viewing event directly on the DVR via a connected HDMI or VGA monitor is quite simple, so it’s only the initial configuration where you’ll have the most issues.
Annke BR200 Image Quality
While the alarm and strobe are fantastic deterrents, ultimately a CCTV camera is about capturing video of the intruder. The 1080p image from the BR200 is nothing remarkable, but nor is it particularly bad. You’ll find higher resolution cameras, even analog ones. But since the Annke BR200 is designed to cover a small, motion-activated area, 1080p should be sufficient.
There is no audio recorded, and I had trouble decoding exporting clips in Final Cut. VLC seemed to work fine, but there’s a good reason they include a video player executable file when you export. According to the documentation, videos are stored using h.265+ format, allowing up to 98 days of four cameras worth of footage to be stored on a 1TB drive. I suspect the “+” part of that means something about the implementation is proprietary, however.
Should You Buy the Annke BR200 Alarm Camera?
I can’t fault the design of the Annke BR200, and the image quality is acceptable. But what really makes the BR200 stand out in the terrifying loud alarm and strobe light. The psychological impact of the red and blue lights can’t be underestimated. Thankfully the PIR motion sensor means your neighbors won’t be plagued by constant false alarms.
If you have an existing analog CCTV system and these features appeal, then I highly recommend integrating some of these into your system. It won’t break your budget, and it may actually prevent a break-in, rather than leave you with footage of a masked intruder for insurance purposes.
Unfortunately, the rest of the package that we tested just isn’t up to scratch. I certainly couldn’t recommend an entirely new CCTV install with the Soter DVR and Annke Vision app. A good IP camera system may be more expensive in the short term, but if you value your time and sanity, you’d be well advised to spend a little more instead.
For the average home user looking for a single combined camera and alarm system, you should also look elsewhere. You’ll probably find more useful features like AI face recognition or a more user-friendly app on a modern cloud-connected smart home camera.
While this is undoubtedly the smartest analog security camera around, perhaps it’s time we said our final goodbyes to analog CCTV systems.
Enter the Competition!
Annke BR200 Alarm and Security Camera GiveawayRead the full article: Annke BR200: Strobe and Siren Make This The Smartest Analog Security Cam Yet
Read Full Article
The 9 Best Ceiling Fans to Keep Your Home Cool
Keeping cool in the summer is definitely not easy. When temperatures rise, many of us have air conditioners at home to take care of the heavy lifting.
But a ceiling fan can also help make a room even cooler without making a significant dent in your electricity bill. As a nice plus, you can use a fan in the winter to help keep your home warmer.
Here are the best ceiling fans available to keep your house cool.
1. Hunter Fan Company Symphony Ceiling Fan
Hunter Fan Company Symphony Ceiling Fan Hunter Fan Company Symphony Ceiling Fan Buy Now On Amazon $299.99All you need is your voice to keep cool when using the Hunter Fan Company Symphony Ceiling Fan. You can control the fan speed and lights using any Amazon Alexa device. It’s also compatible with Apple HomeKit or Google Assistant. All of the Wi-Fi electronics are inside the fan to make installation easy. The fan is available in nickel or white.
If you don’t have your phone to hand, you can use the included handheld remote. The 54-inch fan is excellent at keeping larger rooms cool. The motor provides strong airflow as quietly as possible. Hunter also provides an LED light kit. A provided 2-inch down rod can help you find the best spot for optimal air movement.
2. Honeywell Ceiling Fans Glencrest
Honeywell Ceiling Fans Glencrest Honeywell Ceiling Fans Glencrest Buy Now On Amazon $139.98The highlight of the Honeywell Ceiling Fans Glencrest is its vintage design with a clear LED glass light kit. The 52-inch damp-rated fan can be used in a larger room indoors or outside under a covered deck or patio.
You can select a dark walnut or aged teak finish with reversible blades to accent the oil-rubbed bronze finish. For flexibility, you can select from one of three different mounting options. There’s a 4-inch down rod alongside the ability to mount the fan flush to the ceiling or at an angle.
3. Minka-Aire Light Wave
Minka-Aire Light Wave Minka-Aire Light Wave Buy Now On Amazon $279.95 ($0.87 / oz)A great showcase for any room, the Minka-Aire Light Wave is a 52-inch fan sporing three distressed koa wood blades. A built-in LED light kit provides a dimmable warm light.
You can control the lights and three-speed fan with an included remote control. There is also a six-inch down rod is also provided in the package.
4. Westinghouse Lighting Comet
Westinghouse Lighting Comet Westinghouse Lighting Comet Buy Now On Amazon $117.47 ($0.39 / oz)The Westinghouse Lighting Comet can be installed directly to the ceiling or with an optional down rod. The 52-inch fan is great for cooling a medium or larger room up to 400 square feet.
The light kit sports frosted glass and two 40-watt candelabra bulbs are provided. To highlight the fan’s black finish, you can choose one of two colors on the reversible blades—matte black or marble.
5. Honeywell Ceiling Fans Ocean Breeze
Honeywell Ceiling Fans Ocean Breeze Honeywell Ceiling Fans Ocean Breeze Buy Now On Amazon $69.97Sometimes you need to bring a blast of cold air to smaller places in a home like a kitchen, bedroom, or bathroom. The Honeywell Ceiling Fans Ocean Breeze is a great choice. The 30-inch fan is available in three different color options—brushed nickel, bronze, or white.
Each edition has three reversible fan blades with complementary colors you can select from to better match your interior. Two LED lights are included along with a light-frosted globe. The light can dim up to 20 percent and a remote control and wall cradle are provided.
6. Portage Bay Hugger
Portage Bay Hugger Portage Bay Hugger Buy Now On AmazonIf you’re on a budget and need to cool a room, take a look at the Portage Bay Hugger. The 52-inch fan can cool a medium-sized room. This option is great for rooms with a low ceiling, as the fan measures only 11.5 inches from the ceiling to the bottom of the fixture.
The frosted white light kit comes with a bulb. It can dim from 100 percent to 10 percent. The reversible blades are white on one side and maple on the other.
7. Harbor Breeze Mazon
Harbor Breeze Mazon Harbor Breeze Mazon Buy Now On Amazon $109.47 ($109.47 / Count)The Harbor Breeze Mazon is made for smaller rooms of up to 100 square feet and features an energy-efficient integrated LED light kit. The fan and blades sport a modern brushed nickel finish.
With the smaller footprint, the fan is made to be flush mounted on your ceiling. The three-speed fan can be controlled with the included remote. A wall cradle is also provided so you can always locate the remote.
8. Hunter Fan Company Transitional Ceiling Fan
Hunter Fan Company Transitional Ceiling Fan Hunter Fan Company Transitional Ceiling Fan Buy Now On Amazon $199.65 ($0.36 / oz)For larger rooms, consider the Hunter Fan Company Transitional Ceiling Fan. The 70-inch fan can help cool rooms up to 625 square feet. You can install the fan flush with the ceiling, angled, or with the included six-inch down rod for added flexibility in a larger room.
There’s also the option to install the included 180-watt white bowl light fixture. The brown fan blades complement the fan’s bronze finish. Another great feature is the special dust armor coating on the blades. Instead of having to worry about dusting, dust particles will blow away from the surface of the fan and keep it clean.
9. XM Bluetooth Ceiling Fan With Light and Speaker
XM Bluetooth Ceiling Fan With Light and Speaker XM Bluetooth Ceiling Fan With Light and Speaker Buy Now On Amazon $199.99You can do more than just keep cool with the XM Bluetooth Ceiling Fan With Light and Speaker. Along with a retractable ceiling fan, the unit also sports a Bluetooth speaker and light that can change colors. To start rocking out, use a companion smartphone app to connect your Bluetooth device and play tunes. There are three different colors to select from—gold, nickel, or silver.
You can also use an app to set the color of the light or even have the light change to the melody of the music. It is possible to set a timer for the fan to stop after anywhere from one to eight hours of use. The three-speed fan is 42-inches, making it ideal for smaller rooms. You can mount the fan flush to the ceiling or with a 5-inch down rod.
Keep Cool With the Best Ceiling Fans
If you’re losing the battle with heat during the summer, a ceiling fan is a great way to help make a home cooler and more comfortable.
And if you’re looking for another way to keep cool without going through the hassle of installation, make sure to take a look at the best portable fans that you can use anywhere in your home.
Read the full article: The 9 Best Ceiling Fans to Keep Your Home Cool
Read Full Article
What’s the Difference Between the Raspberry Pi 4 and Other Models?
You’re just getting to grips with the Raspberry Pi when along comes a new model. The Raspberry Pi 4 is here, but should you buy it? What does it offer that the other boards don’t?
The Raspberry Pi 4 is a game-changer. Here’s what you need to know about the Pi 4 and how it compares to the earlier Raspberry Pi 3B+.
Raspberry Pi 4 vs. Earlier Models
The main difference you’ll find between the Raspberry Pi 4 and its predecessors is the speed. With a faster processor, more RAM, and a Gigabit Ethernet port, each indicator of performance has been enhanced.
Some believe that the Raspberry Pi 4 is the first 64-bit version of the computer, but this isn’t true. In fact, the Raspberry Pi 2 was the first to feature a 64-bit processor. However, it wasn’t until 2020 that a 64-bit operating system was made available by the Raspberry Pi Foundation.
Meanwhile, the USB ports have also been upgraded. All in all, the Raspberry Pi 4 is the most powerful version of the Raspberry Pi. Better still, it retains the familiar flexibility that makes the device perfect for almost any computing project.
Choose From 3 Raspberry Pi 4 Models
The Pi 4 is the first version of Raspberry Pi to be available with multiple RAM configurations. Earlier models have been upgraded with minor revisions (such as the Pi Zero and Pi Zero W, or the Raspberry Pi 3 and 3B+). You have a choice of three versions of Raspberry Pi 4:
- Raspberry Pi 4 2GB
- Raspberry Pi 4 4GB
- Raspberry PI 4 8GB
The three versions of the board each has a different price point, commensurate with the amount of RAM.
(A Raspberry Pi 4 1GB model was originally released. However, following release of the Raspberry Pi 4 8GB, this has been withdrawn.)
Raspberry Pi 3 vs Raspberry Pi 4 Specifications
The most powerful version of the Raspberry Pi prior to the Pi 4 is the Raspberry Pi 3 B+, released in 2018. This boasts:
- Quad-core Cortex-A53 1.4GHz CPU
- Broadcom VideoCore IV @ 250MHz GPU
- 1GB
- 4 x USB 2.0 ports
- 5mm TRRS a/v port
- 2 x Micro-HDMI ports
- Gigabit Ethernet port (hardware limited to 300Mbps)
- b/g/n/ac dual band 2.4/5GHz Wi-Fi
- Bluetooth 4.2
- microUSB power connection
- Weighs 45 grams (1.6 ounces)
The three Raspberry Pi 4 boards share the following specifications:
- Quad-core Cortex-A72 1.5GHz CPU
- Broadcom VideoCore VI @ 500MHz GPU
- 2GB/4GB/8GB RAM
- 2 x USB 2.0 ports
- 2 x UBS 3.0 ports
- 5mm TRRS a/v port
- 2 x Micro-HDMI ports
- Gigabit Ethernet port
- b/g/n/ac dual band 2.4/5GHz Wi-Fi
- Bluetooth 5.0
- USB-C power connection
- Weighs 46 grams (1.6 ounces), a gram heavier than the Raspberry Pi 3 B+
Every specification here is an improvement on the Raspberry Pi 3 B+. Further, some additional enhancements have been introduced, for example additional interfaces via the GPIO and other ports.
Also, the Raspberry Pi 4 needs a dedicated USB-C power source. Repurposing an older PSU with a microUSB to USB-C adapter won’t work as the Raspberry Pi 4 requires 600mA (3W) average when idling. This requirement obviously increases under heavy loads.
Is the Raspberry Pi 4 Compatible With Existing Accessories?
If you already have cases, HATs, and pHATs, you probably want to know if they’re compatible with the Pi 4.
Over the years since its original release, the Raspberry Pi model B has barely changed. The board has remained at 85.60mm x 56.5mm, and the ports (Ethernet, power, TRRS) have remained in the same place.
Some revisions have occurred, however. Two additional USB ports were added to the Raspberry Pi B+ (2014) which have been retained in subsequent models. Similarly, the original Raspberry Pi A and B boards had 26 GPIO pins. Again, the Model B+ expanded this to 40 pins.
These board revisions have been retained with the Raspberry Pi 4, but there are some changes. Specifically, these include a USB-C power connector and two micro HDMI ports. As a result, while expansion boards probably work on the Pi 4, your Raspberry Pi case probably won’t fit.
As this is perhaps the most important accessory for the Pi, you’ll need a replacement. Check our round up of the best Raspberry Pi 4 cases for the best options.
As for HATs and pHATs, the GPIO remains unchanged. Any that you own should still fit on the Pi 4 and run as expected, although you should download updates to ensure you’re running the latest software.
What Can You Do With a Raspberry Pi 4?
While the Pi 4 is designed with backward compatibility in mind, it has several advantages over earlier models. Some of these might seem obvious. You might, for example:
- Build a retro gaming machine with increased reliability
- Use it for streaming media (e.g. with Kodi or Plex)
- Manage a DIY NAS box
- Host online games
- Run a web server
- Create a compact podcast studio
- Stream PC games
It doesn’t end there. The increased system spec of the Raspberry Pi 4 and its minimum 2GB of storage introduces something new. You may know that the Pi has long been able to run LibreOffice, send email, and other desktop tasks. It is only with the Pi 4 series that it feels powerful enough to manage these tasks without hanging.
This little computer is now a sub-$100 desktop replacement. Tempted? Use the 8GB model for the best Raspberry Pi experience (the 4GB version is an adequate substitute).
Which Raspberry Pi 4 Model Should You Choose?
RAM aside, there is little to choose between the various Raspberry Pi 4 boards. So how can you choose which to buy?
If you’re looking for an upgrade for the Raspberry Pi 3 B+ or earlier, then the Raspberry Pi 4 2GB model is ideal. You get the latest board and a doubling of RAM all for a price in the same areas as the Pi 3 B+.
Building a NAS, server, or some other project with a requirement for more RAM than usual? Use the Raspberry Pi 4 4GB. It can also revolutionize your retro gaming system and handles media hosting and streaming better than ever.
For a Raspberry Pi experience that is as close to a desktop computer as possible, buy the 8GB board. It might be more expensive, but the Raspberry Pi 4 8GB can cope with anything the earlier models can—and more.
But what if you want a powerful Raspberry Pi but can’t afford a Raspberry Pi 4? Then the Raspberry Pi 3 B+ is your best option. Struggling to afford any Raspberry Pi board? Think about buying the Raspberry Pi Zero.
Our guide to the different Raspberry Pi models will help you choose the right Pi for you.
The Raspberry Pi 4 Is Worth the Upgrade
Perhaps the great thing about the Raspberry Pi 4 is that it is a seamless upgrade. Most (if not all) existing Pi projects run on it. Meanwhile, operating system maintainers may need to make some tweaks, but otherwise they should all run on the Pi 4.
With a good choice of boards, the Raspberry Pi 4 is a platform that can handle almost anything. From robot projects to running as a reliable desktop replacement, this is a Raspberry Pi that everyone should own.
First time buying a Raspberry Pi? Check our list of the best Raspberry Pi projects to get started.
Read the full article: What’s the Difference Between the Raspberry Pi 4 and Other Models?
Read Full Article
How to Download Photos From iCloud
With iCloud Photos, you can view your entire photo collection in the cloud from any device. But you need to download those photos if you want to minimize loading times, back up your library, or make any edits using native and third-party apps.
It isn’t always obvious how to download photos from iCloud, despite the fact that there are several methods at your disposal. We’ll explain all the different ways to download iCloud photos on iPhone, Mac, or a Windows PC so you can start accessing your photos offline.
How to Download Photos From the iCloud Website
Whatever device you’re using, you can sign in with your Apple ID account to download photos from directly the iCloud website. It’s possible to download up to 1,000 photos at a time. If you need to download more than that, you must break it up into multiple sections.
This method creates a copy of your iCloud photos. That means the original photos are still available in iCloud and any edits you make to the downloaded photos don’t affect the ones in your iCloud library.
To download photos from the iCloud website to an iPhone:
- Open Safari and go to iCloud.com.
- Sign in to your iCloud account and go to the Photos page.
- Tap Select and choose which photos you want to download by tapping them.
- Tap the More (…) button in the bottom-right corner, then choose Download. Confirm you want to Download the selection in the window that opens.
- Follow the progress in the Downloads button at the top-right corner. Your photos will save to the Downloads folder in iCloud Drive; you can find them using the Files app.
To download photos from the iCloud website to a Mac or Windows PC:
- Open your web browser and go to iCloud.com.
- Sign in to your iCloud account and click Photos.
- Click to select which photos you want to download. Hold Shift to select multiple consecutive photos or hold Cmd (Ctrl in Windows) to select non-consecutive photos.
- Click the Download icon in the top-right corner to start your download.
- If you download multiple photos at once, iCloud will save them in a ZIP folder.
How to Download iCloud Photos on an iPhone or Mac
When you choose to optimize your device storage with iCloud Photos, your iPhone or Mac only saves compressed versions of each photo on the device. It downloads the full-resolution version of each picture when you open it in the Photos app.
You can see the progress of this download from a circular icon that appears in the bottom-right corner of the Photos app. When this circle fills up, your photo pops into focus and Photos switches to the full-resolution version.
These photo downloads are only temporary. Your iPhone or Mac reverts to the compressed version again as soon as you run out of storage.
To retrieve photos from iCloud permanently, use one of the methods below instead.
Export or Save to Files From the Photos App
Much like downloading photos from the iCloud website, you can use the Photos app to download a copy of your photos. These photos save in the Downloads folder on your Mac, or the Files app on your iPhone.
To do this on an iPhone, open Photos and tap Select. Choose which photos you want to download by tapping or swiping. Then tap the Share button, scroll down, and tap Save to Files.
Your iPhone downloads the selected photos and saves them to the Downloads folder in iCloud Drive. You can view them using the Files app. Alternatively, use this same method to save photos to Google Drive or Dropbox.
On a Mac, open Photos and click to select the photos you want to download. Hold Shift to select consecutive photos or Cmd to select non-consecutive photos. Then go to File > Export > Export Photo and choose where you want to save the downloads on your Mac.
Download and Keep Originals in Photos Settings
You can stop optimizing storage with iCloud Photos to download all your photos to your device. Your photos still upload to iCloud after doing this, which is how they remain available on other devices. But you won’t need to wait for them to download the next time you want to view a full-resolution version.
You might need to create more free storage on your iPhone or Mac to be able to do this. Depending on the size of your photo library, downloading every photo might also take several hours.
On an iPhone, open Settings and scroll down to find Photos. Select Download and Keep Originals.
On a Mac, open Photos and go to Photos > Preferences from the menu bar. Choose to Download Originals to this Mac.
You can view the progress of your downloads from the bottom of the Photos app.
Turn Off iCloud Photos
If you don’t want to upload your photos to iCloud anymore, turn off iCloud Photos entirely. You can choose to download your entire photo library when you do so. Of course, this is only possible if you have enough storage on your device for all your photos.
Turning off iCloud Photos doesn’t delete any photos from your iCloud account. It only downloads a copy to your device and stops syncing them with the cloud. Downloading every photo might take several hours. It’s best to connect to Wi-Fi and wait overnight for the downloads to complete.
On an iPhone, open Settings and scroll down to tap Photos. Turn off iCloud Photos, then choose to Download Photos & Videos from the popup alert.
On a Mac, open Photos and go to Photos > Preferences from the menu bar. Deselect the iCloud Photos option and choose to Download your photos.
Follow the progress of your download from the bottom of the Photos app.
How to Download iCloud Photos on a Windows PC
Download and install iCloud for Windows to access all your iCloud data, including photos, from your Windows PC.
After signing in to iCloud for Windows with your iCloud account, open File Explorer to transfer your photos from iCloud to your PC. Select iCloud Photos from the sidebar, then click Download photos and videos from the navigation bar.
Choose the photos you want to download, based on the year or album, then click Download. You can find your downloaded iCloud photos by going to Pictures\iCloud Photos\Downloads.
To automatically download new photos, open iCloud for Windows and click Options next to Photos. In the settings that appear, enable the option to Download new photos and videos to my PC.
Learn Much More About iCloud Photos
iCloud Photos is a powerful service that makes it easy to access your photos from a wide range of devices, and now you know how to download them on any device. Thankfully, you don’t need to worry about losing your entire photo collection if something happens to your iPhone.
But downloading photos from iCloud is only one aspect of the service. There’s plenty more to learn, including how to upload photos, share albums, or delete pictures to free up your iCloud storage. Check out our iCloud Photos master guide to learn everything you need to know.
Read the full article: How to Download Photos From iCloud
Read Full Article
Data from Dutch public broadcaster shows the value of ditching creepy ads
For anyone interested in the contested question of how much ‘value’ — or, well, how little — publishers derive from the privacy-hostile practice of tracking web users to behaviorally target them with ads, pro-privacy browser Brave has published some interesting data, obtained (with permission) from the Netherland’s public broadcaster, NPO.
The data shows the NPO grew ad revenue after ditching trackers to target ads in the first half of this year — and did so despite the coronavirus pandemic landing in March and dealing a heavy blow to digital advertising globally (contributing, for example, to Twitter reporting Q2 ad revenues down nearly a quarter).
The context here is that in January the broadcaster switched to serving contextual ads across its various websites, where it has an online video audience of 7.1M per month, and display reach of 5.8M per month.
Brave has just published an analysis of six months’ worth of data which shows NPO’s ad revenue increased every month over this period. Year-over-year increases after the broadcaster unplugged the usual morass of background adtech that makes surveillance capitalism ‘function’ are as follows:
- January: 62%; February 79%; March 27%; April 9%; May 17%; June 17%;
Earlier this month Brave published five months’ worth of the NPO ad revenue data. So this is actually an update on an earlier blog post on the topic. The updated figures from Ster, the NPO’s ad sales house, slightly amend the earlier amounts, revising the reported figures further upwards. So, in short, non-tracking ad revenue bump has been sustained for half a year. Even amid a pandemic.
Now the idea that switching from behavioral to contextual targeting can lead to revenue growth is not a narrative you’ll hear from the ad tracking industry and its big tech backers. Aka the platform giants whose grip on the Internet’s attention economy and the digital infrastructure used for buying and selling targeted ads has helped them to huge profits over the past half decade or so (even as publisher revenues have largely stagnated or declined during this boom period for digital ad spending).
The adtech industry prefers to chainlink tracking and targeting to ad revenue — claiming publisher revenues would tank if content producers were forced to abandon their reader surveillance systems. (Here’s Google’s VP of ad platforms, last year, telling AdExchanger that the impact of tracker blocking on publishers’ programmatic ad revenues could cut CPMs in half, for example.)
Yet it’s not the first time there’s been a report of (surprise!) publisher uplift after ditching ad trackers.
Last year Digiday reported that the New York Times saw its ad revenue rise in Europe after it switched off creepy ads ahead of a major regional regulatory update, shifting over to contextual and geographical targeting.
The NYT does have a certain level of brand cache which not every publisher can claim. Hence the tracking industry counterclaims that its experience isn’t one that can be widely replicated by publishers. So the NPO data is additionally interesting in that it shows revenue uplift for a public broadcaster even across websites that aren’t dominant in their particular category, per Brave’s analysis.
Here’s its chief policy & industry relations officer, Dr Johnny Ryan, who writes:
NPO and its sales house, Ster, invested in contextual targeting and testing, and produced vast sales increases even with sites that do not appear to dominate their categories. This may be a tribute to Ster’s ability to sell inventory across NPO’s media group as a collective, but this benefit would have applied in 2019 and does not account for the revenue jump in 2020. A publisher does not therefore need to have market dominance to abandon 3rd party tracking and reproduce NPO’s vast revenue increase.
And here’s Ryan’s take on why “legitimate” (i.e. non junk/clickbait) publishers of all sizes should be able to follow the NPO’s example:
Although it is a national broadcast group, NPO websites do not dominate the web traffic rankings in the Netherlands. Only one of NPO’s properties (Nos.nl) ranks in the top 5 in its category in the Netherlands, according to Similar Web. None of the other NPO properties are in the Netherland’s top 100. The other NPO websites for which Similar Web provides a traffic rank estimation (versus other websites in the Netherlands) range from 180th to 5,040th most popular in the Netherlands. NPO properties’ popularity or market position in each content category are not correlated with increases in impressions sold. Country site rank, category site rank, and numbers of page views, vary widely between the properties, whereas the increases in impression sold are all above 83%, with one explicable exception [due to technical difficulties over the tracked period which prevented ads being served against one of its most popular programs].
Brave has its own commercial iron in the fire here, of course, given its approach to monetizing user eyeballs aligns with an anti-tracking marketplace ethos. But that hardly takes away from the NPO’s experience of — surprise! — revenue growth from ditching creepy ads.
Joost Negenman, NPO’s privacy officer, told TechCrunch they had certainly not expected to see ad revenue uplift from making the switch. The decision to move to contextual ads was made mid last year, as a result of the public broadcaster becoming “convinced” the programmatic targeting ad system it was using wasn’t compatible with its “public task”, as he tells it.
“We expected a rather dramatic drop in revenue,” says Negenman, noting that at that time the NPO was only getting a consent rate from users of around 10% for the ad cookies Ster needed for its programmatic ad system — down from 75%+ prior to GDPR (“probably” because its Cookie Consent Module at the time had been based on “implicit instead of explicit consent”; whereas GDPR mandates for consent to be legally valid it must be specific, informed and freely given).
“We also expected a drop because advertisers could completely ignore us when NPO and Ster turned away from this market adtech standard together, at a time when there was no sophisticated alternative in place,” he continues. “This fortunate misjudgment on our side was also fuelled by the strong belief (and preaches) in programmatic ad-solutions by online marketeers and companies.”
Negenman attributes the surprise revenue bounty from selling contextual ads to a couple of factors: Namely the “A-brand” pull of NPO and its affiliate broadcasters, meaning advertisers still wanted to be able to reach their users. And, well, to having the pro-privacy zeitgeist on its side.
“We’re all aware of the growing scrutiny on the adtech business, no explanation needed!” he says.
It’s worth noting the NPO’s switch to contextual ads did require some investment to pull off. The publisher shelled out for technology to enable contextual targeting across its web properties — such as building out descriptive metadata to enable more granular contextual targeting on video content. And the level of investment required to achieve similarly sophisticated contextual ad targeting might not be available to every publisher.
Yet the sustained revenue bump NPO experienced post-switch means it very quickly earned back what it spent — so for publishers that can afford to invest up front in transitioning away from tracking it looks like a very compelling case study.
“It paid for itself within a month or so!” confirms Negenman. “Considering all the money Ster didn’t have to share with Google and other in-betweens. From 1 advertisement Euro, 1 Euro goes to Ster!”
Though he also notes the broadcaster was helped by Dutch law placing an obligation on it to have subtitles for over 90% of its assets — meaning some of the leg work to build out contextual targeting had already been done.
“Subtitles data of course provides valuable descriptive metadata. So those tools where already in place,” he says. “But beside subtitles — that are nowadays easier to automate — standard program information like (sub)genre, titles of actors are of great value as well to add context on a video asset.”
Brave’s Ryan posits that the role of NPO’s sales house is also important to its success with contextual ads. “Smaller publishers may benefit from engaging with reputable sales houses that can aggregate supply as Ster does for NPO’s various properties,” he suggests. “Publishers of all sizes will benefit according to their reputations — unless advertisers and agencies purchase from sales houses with poor reputations.”
Asked whether he believes the switch would work for all publishers, Negenman does not go that far. “For all A-brands I definitely see this approach working, also news outlets have the perfect (meta)data needed to feed such a system,” he says, arguing there’s a place in the market for both contextual and targeted ads.
“Not all online advertising is the same,” he argues. “A shoe annoyingly following you online is something other than creating (A-)brand awareness. Perhaps the contextual system can start by creating privacy friendly ‘lagoons’ where a person is not tracked or followed by a shoe. There the system gets time to prove its worth in revenue and respect for its audience.”
“For other public broadcasters I believe they have more or less an (moral) obligation to at least start testing contextual ads,” he adds. “The adtech system’s use of personal and behavioral data has become so un-explainable that the GDPR information obligation is almost impossible to meet.”
As we’ve said before, the evidence of viable alternatives to privacy-torching surveillance capitalism is stacking up — even as harms linked to adtech platforms’ exploitation of people’s information keep piling up.
And while contextual ads may not sum to a revenue boom for every type of publisher, the notion that it’s tracking or nothing is clearly bogus.
(You could also make a pretty compelling case that abusive exploitation of people’s data that sustains low grade publishing is not at all a net societal good and so supporting a system that supports bottom feeding clickbait (and massive levels of ad fraud) is simply bad for everyone — well, other than the bottom feeders… )
Ryan goes so far as to call conventional adtech “a cancer eating at the heart of legitimate publishers”. And having worked inside the beast he’s castigating, via an earlier stint at anti-ad-blocking adtech company called PageFair, his critique is all the more hard hitting.
He’s used his insider knowledge to file a number of complaints with European regulators — most notably against the real-time bidding (RTB) practice programmatic advertising can rely on, drawing in vast quantities of Internet users’ personal information and scattershotting it back out again.
He contends this high velocity trading of personal data can’t possibly be compliant with Europe’s data protection framework — which, conversely, mandates that people’s information be securely handled, not spread around like confetti. (Though he believes RTB can work fine if you strip out personal data and only use it for contextual ads.)
European data protection regulators agree there’s a ‘lawfulness’ problem with current adtech practices. But have so far sat on their hands rather than taking enforcement action, given how widespread the problem is.
(Interestingly, Negenman says the NPO investigated continuing using programmatic RTB but with personal data stripped out. Though, in the event, he says this idea never got past the production stage. “Personally I can imagine a compliant combination,” he notes, adding: “Most importantly, the personal data must not leave the trusted data partner [and be shared with] the advertisers.”)
Turning a tanker clearly takes time. But the more publishers that see not pushing creepy ads on their users as an opportunity to experiment with alternatives, the more chance there will be for the market to shift wholesale for privacy — a shift that can be a huge win for publishers and users alike, as the NPO experience illustrates.
Competition regulators, meanwhile, are closing in on big (ad)tech’s market power — and the conflicts of interest that arise from the “vertically integrated chain of intermediaries” which work to funnel the lion’s share of digital ad spend into platform coffers. So it’s not hard to conceive of an intervention to force market reform by breaking up Google’s business empire — to separate the ‘ad’ bits from its other ‘tech’.
The self-interested forces that underpin surveillance capitalism made their fortunes when no one was really looking at how their methods exploit people’s data. Now, with many more eyes trained on them, they are operating on borrowed time. It’s no longer a question of whether change is coming. The sands are shifting, with platforms themselves now moving to limit access to third party tracking cookies.
Savvy publishers would do well to get out ahead of the next round of platform power moves — and skate to where the puck’s headed.
Read Full Article
4 Ways To Open WebP Images In Windows 10
CLICK HERE TO SEE FULL POST
Every now and again, we get asked by users what exactly WebP extension is and where it used? People often want to know how good it is compared to other image formats. In this guide, we will see what WebP is and how to open WebP images in Windows 10. What is WebP? WebP is […]
The post 4 Ways To Open WebP Images In Windows 10 appeared first on Into Windows. Content from IntoWindows website.
Apple begins assembling iPhone 11 in India
Apple’s contract manufacturing partner Foxconn has started to assemble the current generation of iPhone units — the iPhone 11 lineup — in its plant near southern city of Chennai, a source familiar with the matter told TechCrunch.
A small batch of locally manufactured iPhone 11 units has already shipped to retail stores, but the production yield is currently limited, the person said, requesting anonymity as matters are private. Apple, in general, has ambitions to scale up its local production efforts in India, the person said.
The local production of current iPhone 11 models illustrates Apple’s further commitment to India, the world’s second largest smartphone market, as it explores ways to cut its reliance on China, which produces the vast majority of iPhone models today.
Apple’s contract manufacturing partner Taiwan-based Wistron first began assembling older iPhone models in 2017. But until now, Apple has not been able to have an assembly partner produce the current generation iPhone model in India.
Wistron, which has locally assembled older iPhone SE, iPhone 6s, and iPhone 7 models in the past in its Bangalore plant, currently assembles iPhone XR units in India. Apple discontinued the local production of iPhone SE and iPhone 6s last year, the person said.
Piyush Goyal, India’s Minister of Commerce and Industry, tweeted on Friday that Apple had begun assembling iPhone 11 models in India. Apple did not comment on this story.
Assembling handsets in India enables smartphone vendors — including Apple — to avoid roughly 20% import duty that the Indian government levies on imported electronics products.
Xiaomi, Vivo, Samsung, Oppo, OnePlus, and a range of other smartphone companies, have inked deals with contract manufacturers across India in recent years to produce much of their locally sold smartphones units in the country itself.
Xiaomi, which has been the top smartphone vendor in India since late 2018, said earlier this month that nearly every smartphone it sells in India is produced in the country.
Apple has been exploring ways to ramp up its production in India for years, but the company has struggled to find contract manufacturers that adhered to its safety and quality standards, people familiar with the matter have told TechCrunch.
News outlet The Information reported in March that some of Apple’s other contract manufacturers have attempted to enter — or expand in — India, but have run into regulatory and local laws issues. Pegatron, another assembly partner of Apple, plans to set up a local subsidiary in India and begin operations in the country, according to Bloomberg.
Foxconn, which counts India as one of its biggest markets, plans to invest $1 billion in its operations in the country, Reuters reported earlier this month. New Delhi announced a $6.6 billion plan to attract top smartphone manufacturers in June this year.
Apple plans to launch its online store in India in a few months and open its first brick-and-mortar retail store next year, chief executive Tim Cook announced earlier this year. The online store’s launch in India remains on track despite the pandemic, a person familiar with the matter said.
The iPhone-maker currently commands roughly 1% of the smartphone market in India, but is among firms that dominate the premium handset segment (phones priced at $4000 or above). Apple has also been the least impacted smartphone maker in the country amid the coronavirus pandemic.
Read Full Article
Movierulz Review — Your Best Friend In Free Time
No matter what the age a person is, watching movies is everyone’s all-time favorite. You’ll rarely find someone who doesn’t like to watch movies. However, in today’s fast-paced world, even people who are movie freaks struggle to make time out to watch their favorite movies and TV shows. Their hectic schedules and jam-packed routines are […]
The post Movierulz Review — Your Best Friend In Free Time appeared first on ALL TECH BUZZ.
VPN Free Trial — How to get one and why is it important?
How many times have you found yourself in a situation where you felt the need to access a restricted site, for which you had to look for a free VPN? Most people prefer using free VPN because it’s not very often that they have to access restricted WebPages. However, once they download them, they are […]
The post VPN Free Trial — How to get one and why is it important? appeared first on ALL TECH BUZZ.
The Impact of Artificial Intelligence on the iGaming Industry
Long gone are the days when humans did all the work. Now, computers can do a lot more without much outside input. Artificial intelligence has seen a drastic development in the last couple of years, with more and more industries using it to take advantage of all the automation benefits that it offers. The iGaming […]
The post The Impact of Artificial Intelligence on the iGaming Industry appeared first on ALL TECH BUZZ.
How To Uninstall McAfee from Windows, Mac & Website?
Most of the people today are well-acquainted with technology and have access to computers and mobile devices. The chances that they will not know what anti-virus software is or how important they are for the protection of your personal data are quite slim. Any wise individual is sure to have anti-virus software installed on their […]
The post How To Uninstall McAfee from Windows, Mac & Website? appeared first on ALL TECH BUZZ.
Google Messages Gets Reactions and Other New Features
When it comes to messaging apps, Google Messages isn’t the first that comes to mind for many. It’s probably not even the fourth or the fifth with the incredible popularity of apps like Telegram, WhatsApp, and Facebook Messenger.
Google is looking to change that by making some substantial improvements to its Messages service that could make it the go-to messaging app for many users. Or at least that’s the hope.
What’s New in Google Messages?
Google announced on The Keyword that it is bringing five substantial new features to Messages. Unsurprisingly, they all sound quite useful (though some have been available in other messaging apps for some time).
First, Google is adding reactions, a feature that’s proven rather popular in Apple iMessage. You simply need to long-press on a message to see the different reaction options. There’s like, love, laughter, surprise, sadness, anger, and dislike available. While not reinventing the wheel (reactions to messages are nothing new), it’s good to see Google catching up.
One of the cooler features of Messages is Smart Reply, and Google is making it even better than it already is. With the feature enabled, you’ll see stickers mixed in with the Smart Reply options, which should save you some time while creating a more personal feel.
Make the most of virtual moments with Messages:
?? Send reactions to messages
? Add stickers with Smart Reply
? Edit your photos directly in Messages
? Send voice messages
? Start a Duo video call directly from Messages
Learn more ? https://t.co/iow2rtiiJr pic.twitter.com/WVFtwleoSe— Google (@Google) July 22, 2020
A big part of messaging friends and loved ones is sharing photos. To make this a little more fun, Google has added an image editor directly into Messages. You can use it to draw or add text to images, which will make them feel a bit more special.
While voice messages aren’t new in Google Messages, the latest update provides a dedicated button that’ll make sending them quicker.
Video calling is integrated directly into Messages with this update. Google has added a button on the top of the screen that will quickly switch a text conversation to a Google Duo video chat.
How to Get the New Google Messages Features
Fortunately, you don’t need to jump through any hoops to try out the new Google Messages Features. You just need to download the latest version of the Messages by Google app for Android.
And if you’re not sure which messaging app to use, take a look at our comparison of the best free messaging apps to make a more informed decision.
Read the full article: Google Messages Gets Reactions and Other New Features
Read Full Article
How to Start a Digital Journal: A Quick Guide for Beginners
Journaling is a great way to build your writing skills, express your thoughts, and record your life. Everybody would benefit from keeping a private journal. And in this technological age, digital journaling sounds better than pen and paper.
A digital journal is better than the physical alternative in several ways. It’s more accessible and more private. It can save photos, audio clips, and videos. And it’s easier to organize your memories with tags and search features.
Here’s how to start a digital journal on your smartphone, computer, or web browser.
How to Choose the Best Digital Journal App
The biggest downside to digital journaling is the overwhelming number of apps you have to choose from. With a physical journal, any notebook will get the job done. But with digital journaling, you need to make a big decision before you can even get started.
Take a look at our rundown of the best digital journaling apps to get an idea of some popular options. Most digital journaling apps are free, but you might need to pay for a premium account to unlock every feature.
Compare your favorite apps with the features below to ensure they offer everything you need. If you don’t fancy the research, one of the best digital journaling apps is Day One. You can use it on iOS, macOS, Android, and web browsers.
Download: Day One for iOS | Android | macOS (Free, premium subscription available)
What to Write in Your Digital Journal
Getting started with a digital journal is easy. All you need to do is type exactly what you would normally write in a physical journal. If you aren’t sure how to start your digital journal, try some free-flow writing without worrying about what you want to say.
Another benefit of digital journaling is that you can always edit your entries at a later date.
If you need more ideas on how to start your electronic journal, take a look online for digital journaling templates. These offer prompts and questions you can answer to fill out your journal entries.
Lots of digital journaling apps even let you save the template so it appears each time you create a new entry.
Access Your Journal Across Any Platform
You can only write in a paper journal when you physically have it with you but a good digital journaling app lets you access it on your smartphone, computer, or through a web browser when you’re out and about. Just make sure you sign out again afterward.
Think about which devices (and which operating systems) you want to be able to use your digital journal with. A mobile app is the most portable, but many of us are slower to type on the touchscreen keyboard. A desktop app offers more control with better focus, but it’s not as portable.
You should be able to sync your journal to the cloud, which means you can view and access entries from any of your devices. Make sure the app you use to create your digital journal supports the platforms you use.
Use Notifications to Build a Journaling Habit
One of the most important aspects of beginning a journal, physical or digital, is that you build a habit to regularly write in it. The easiest way to form a good habit is to write in your journal at the same time in the same place, each and every day.
Thanks to built-in notifications from most digital journaling apps, it’s easy to set up alerts that remind you when you need to write in your journal. You can even track your word count and set yourself a target to reach with each entry.
Before long, your ingrained habits will make you write in your journal without depending on notifications.
Add Photos and Media to Your Digital Journal
Digital journaling lets you add much more than just the written word to your journal entries. Use photos, audio clips, and videos to fill out your journal. The added color and sound works to bring you memories to life when you read back through it.
One picture is worth a thousand words, after all.
Many digital journaling apps also add other metadata to your journal entries. These show more about your day without you needing to write it. They could include your step count, location, time of entry, and even the music you’re listening to while you write.
Use Social Integration to Capture Your Whole Life
Many of us spend a substantial portion of our time on social media. Thanks to social integration, you can create automated systems to add this side of your life to your digital journal as well.
Every time you post a tweet, get tagged in a photo, or update your Instagram story, these systems create a new entry to capture it in your journal. If the digital journaling app you use doesn’t offer built-in social integration, use IFTTT to get the job done instead.
Keep Your Journal Organized With Tags
Finding a particular entry is far easier with a digital journal than a physical one. Say goodbye to rifling through the pages of countless dusty diaries and start using a search bar to find the memories you’re looking for instead.
You can also add an extra layer of organization by tagging your journal entries. Create useful categories like “Work,” “Family,” or “News.” Then you can view all your work-related entries, for example, by selecting the “Work” tag.
Some apps even let you create multiple journals to use alongside each other. This is a great idea if you want to create a dream journal or a work journal and keep them separate from your personal day-to-day entries.
Digital Journaling Is Private and Archivable
Anybody can jimmy open the padlock on a physical diary. But people are going to have a hard time cracking into your digital journal if you lock it with a six-digit passcode or your fingerprint. If you want to keep your inner thoughts private, an encrypted digital journal is the best option available.
On a similar note, many digital journaling apps offer a backup service, which means you never need to worry about losing your journal. If you don’t trust cloud services, you can also export your journal as a PDF and manually archive it yourself.
In fact, we recommend that you do this to back up your journal in case the digital journaling app eventually gets discontinued.
Make It Easier to Start Journaling
Starting a new journal can be a daunting prospect, especially when you have all these extra features to consider for your new digital journal. But it doesn’t always need to be so complicated.
Some digital journaling apps are dedicated to offering a simplified journaling experience. If that sounds like something you need, take a look at our list of the best apps to start a new diary.
Read the full article: How to Start a Digital Journal: A Quick Guide for Beginners
Read Full Article
5 Text, Voice, and Video Call Web Apps That Need No Registration
Ready to stop registering new accounts? By using websites with no signups, you’ll never need to make another account again. You’ll also cut down on privacy concerns by learning about anonymous ways to join a video chat.
To start saving your time and privacy, try these video chat tools with no registration options.
1. JumpChat
JumpChat provides one of the easiest ways to make free calls online without registration. From its homepage, it’s as simple as clicking the start your JumpChat now button. Once you’ve clicked it, you’re instantly in an anonymous video chat.
Getting others to join is as easy as using a hotkey or clicking add users from the chat menu. You can choose to either copy a link, use a QR code, or email your friends. Plus, JumpChat has no limit on how many people can join the chat.
In terms of features, JumpChat supports video chat, text chat, screen sharing, and file sharing. If you use an ad-block, you might notice some issues when connecting. If so, you may need to disable your ad-blocker for the duration of the call.
While chatting, JumpChat lets you conveniently share files. For those concerned with privacy concerns, you can specify which users to share with or otherwise skip. Then it’s as easy as choosing the file and having them accept the download.
To make it even easier to get a group together, JumpChat supports most major browsers. For desktop users, JumpChat officially works on Chrome, Firefox, Opera, and Safari. JumpChat also supports Chrome and Firefox on Android or Safari on iOS.
If you want to share your screen in your browser, JumpChat will let you pick from your browser’s screen-sharing options. If you find them limiting, try these free online screen sharing tools and websites.
2. WebRoom
WebRoom offers a more in-depth option for those wishing to host online videos for classes or meetings. Up to fifteen people can join the HD no registration video chat. While WebRoom does require you to input a name and email address to make a room, you don’t have to use a working email unless you want a short summary email afterward.
So after inputting any name or email, WebRoom proceeds to check and test your browser, speakers, microphone, and the camera then generates a room for you. Each chatroom then divides into three sections: participants, workspaces, and chat/notes. The participant’s area focuses primarily on controlling invites, grouping users, switching audio/video, and sharing your screen.
The workspace area makes up the majority of the room as it allows you to share websites, PDF presentations, YouTube links, embed video, create a whiteboard, upload files, or play an MP3. For a built-in whiteboard, WebRoom’s tools will satisfy most users. However, if you need a little more customization you can share a website with the help of free online digital whiteboard alternatives.
With the chat/notes section, you can alternate between chat or notes at the click of a header tab. The chat section shows a time-stamped text chat along with a few emojis and two clickable automatic responses. Meanwhile, the note section just lets you enter text with no additions.
Overall, WebRoom features a surprising amount of detail for a free service. If you do decide to register after using WebRoom, you can tweak a few more options, and you also will receive a more detailed session history report after any chat.
3. Volafile
Volafile gives you the best of both worlds. Not only do you get an anonymous text chat, but you can share files too.
To keep things anonymous, you start with an automatically generated username. If you don’t name your room, Volafile will also generate a name for it as well. For additional privacy, you can set a password or Volafile PRO users can change the URL.
Once you’ve shared the room URL, it’s time to share files. Volafile lets you share files up to 20GB in size per file. Files will then last for up to two days before expiring.
Anyone can search or filter the files by different categories including video, image, music, documents, other, or archives. However, only the room creator can delete files or timeout ban any misbehaving user. If anyone needs to be banned, you can set timeouts for thirty minutes, two hours, or a whole day.
Despite being a more minimal chatroom on the surface, Volafile helps those who understand the undeniable reasons why you need online anonymity.
4. Chatzy
Chatzy feels like an old-school chatroom app but with a ton of modern features. It aims to be accessible for everyone, so it doesn’t use custom HTML or Javascript code. However, you can type in rich text, share images, and post playable video thumbnails.
Rather than relying on preset buttons, Chatzy relies a lot on manually entering things in the chat. You’ll have much more control if you’re willing to carefully set up your chatroom, learn the chat commands, and understand its special features.
For your privacy, Chatzy assigns each chatroom a unique ID number. Unless anyone attempting to break in can guess correctly between a zero and a trillion, you have a good chance of keeping your chat anonymous.
5. Messenger Rooms
Messenger Rooms isn’t completely registration free. Sadly, the initial room maker must have a Facebook or Messenger account. After creating the room, others can join the video chat without an account.
Just enter a username and start your chat. Afterward, you’re free to use the room as a video or voice call for as long as you want. There’s also the option to share your screen if you’re joining from the desktop.
As such, if you have privacy concerns you can always opt to just join after someone else launches a room. With a plan to integrate this into other sources (WhatsApp, Instagram, and Portal devices), it’ll be easy to launch a room from your everyday social media accounts.
Skip Registration to Chat Online
While many services will try to get you to register, it’s not necessary to give out your information. There are many ways to make free calls online without registration while keeping your privacy intact. If you are searching for more apps of this type, try these free video conference apps for office meetings and friendly calls.
Read the full article: 5 Text, Voice, and Video Call Web Apps That Need No Registration
Read Full Article
11 Amazing Android Apps That’ll Change How You Use Your Phone
There are millions of apps in the Play Store that range from addictive games to essential productivity tools to great ways to customize your phone.
Even better, there are also apps that will completely change how you use Android. Some enhance the user interface, others automate common tasks, and some take popular features in the operating system and make them even better.
Let’s take a look at some of the most amazing apps for Android.
1. Lynket Browser
Social media is great for finding interesting articles around the web, but it isn’t always convenient to read them right away. Sometimes it’s better to queue up several articles and come back to them later.
That’s what you can do with Lynket Browser. It opens web pages in the background. You can access whenever you want by tapping floating, onscreen bubbles.
It’s simple, yet so useful. The app works with your existing default browser, and can also speed up browsing by automatically loading the AMP versions of the links you click.
Download: Lynket Browser (Free, in-app purchases available)
2. Popup Widget 3
The best Android widgets are really useful, but if you use too many of them, they’ll quickly clutter your home screens and slow down your phone.
Popup Widget 3 rethinks how they work. It turns all your selected widgets into 1×1 icons on your home screen. When you tap one, it’ll pop open so you can see what’s inside.
The app gives you the convenience and speed of widgets—you don’t need to launch the full app just to see your latest tweets or check the weather—without the performance hit.
Download: Popup Widget 3 (Free)
3. Notification Notes
Notification Notes does something so obvious you’ll wonder why it isn’t already a part of Android. Put simply, it allows you to create notes and then pin them to your notifications panel as reminders.
The app doesn’t offer many options, but it doesn’t really need to. You can group notes or keep them separate, and activate or deactivate them as required. They’ll also show on your lockscreen, ready to jog your memory whenever you need them.
Download: Notification Notes (Free)
4. MacroDroid
Take the tedium out of the common tasks you perform every day by turning them into macros, a series of commands that happen automatically.
MacroDroid is similar to the popular Android automation app Tasker. But using Tasker effectively has an incredibly steep learning curve, and MacroDroid is an app you can install and start using instantly.
The app needs you to configure as few as two settings—just an action that will be prompted by a trigger. So plugging in your headphones could be the trigger, and the corresponding actions could be the automatic launch of the Spotify app and adjustment of the volume level. Or you could have your phone switch to Airplane mode (the action) at night (the trigger). You could also tell it to read your text messages aloud when your phone’s in a car dock.
You can add optional constraints to fine-tune the conditions under which your macro can run. This gives the app even more power, and your macros can be as simple or as complex as you need them to be.
Download: MacroDroid (Free, in-app purchases available)
5. IFTTT
While MacroDroid is perfect for on-device automation, IFTTT does the same for web services. The official IFTTT app enables you to create applets that connect two internet-based services or devices, with your Android phone as the central hub.
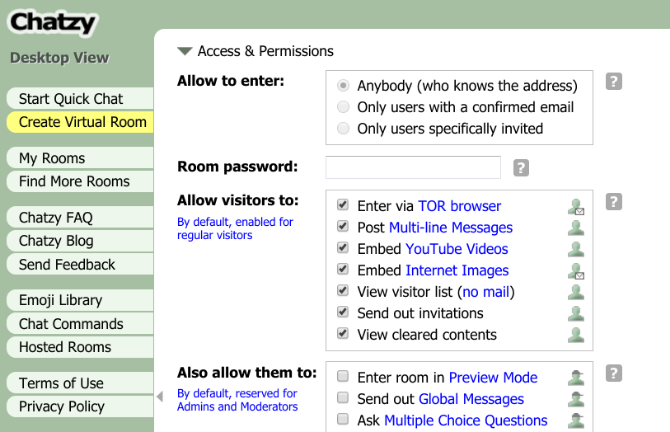
The possibilities are almost endless. You can use IFTTT to automatically tweet, to get SMS alerts for your Google Calendar appointments, or to get notifications on price drops for products you’re looking to buy. Once you get it up and running, you’ll wonder how you ever went without it.
Download: IFTTT (Free)
6. Full Screen Gestures
The last few versions of Android have introduced gesture controls, but they’re quite limited. They only work at the very bottom of the screen, and they don’t let you do much beyond basic navigation.
Full Screen Gestures fixes that. It makes gestures work anywhere along the left, right, and bottom edges of the display. And it also allows you to assign two functions to each edge—one for a short swipe and one for a long swipe.
These extra options enable you to control the volume, launch Google Assistant, toggle the flashlight, and much more.
Download: Full Screen Gestures (Free, in-app purchases available)
7. MightyText
If you spend any amount of time sitting at your PC throughout the day, SMS Text Messaging from MightyText becomes an essential app.
It syncs with your PC, Mac, or Linux computer via a browser extension and gives you full access to your SMS messages on the bigger screen. You can read, reply, or create new messages, as well as viewing notifications from all your other apps. You can even make calls, so you’ll hardly need to pick up your phone again.
There is a monthly sending limit in the free version, so you might consider another tool if you’re a heavy user. For more like it, see other apps that let you text from your PC.
Download: MightyText (Free, in-app purchases available)
8. Universal Copy
Copy and paste on Android is mostly fine, until it doesn’t work. Some apps just don’t support it—for example, tweets, as well as YouTube and Instagram descriptions.
With Universal Copy you can copy and paste almost anything, from any app. It integrates seamlessly with the system. A long press is all you need for the option to copy your chosen text to the clipboard.
Download: Universal Copy (Free, in-app purchases available)
9. Sesame
Sesame is a universal search and shortcut maker. It’s so good that it could easily become your most-used app.
Sesame can search within almost all your other apps, showing messages from Slack or playlists in Spotify right from your home screen.
It also creates shortcuts to specific features within those programs. Whether you want to load up your daily route to work, or quickly check the live scores in your favorite sports app, you can with just a single tap.
Download: Sesame (Free, in-app purchases available)
10. Nova Launcher
The overall best way to customize your Android phone is to install a new launcher. There are a huge number to choose from, the best of which is Nova.
It’s small, fast, stable, and infinitely customizable. The default settings are perfect, but it also comes packed with extra features that you might not know about. These range from support for icon packs to the ability to resize any widget.
But the built-in gesture controls beat everything. These enable you to assign functions—from activating settings, to navigating the interface, to launching apps—to a series of taps, swipes, and pinches.
If you’re a power user, Nova’s gestures will fundamentally change how you interact with your device.
Download: Nova Launcher (Free) | Nova Launcher Prime ($4.99)
11. Super Status Bar
Android has always been heavily customizable, but one area that most people tend to ignore is the status bar. This app finally changes that.
With Super Status Bar you can adjust your display brightness or volume level by swiping along the top of the screen. You can set up a ticker to get previews of your incoming messages and notifications. And you can configure many other gesture controls, monitor your battery life, or change the look and feel of the whole area.
There’s so much going on here that it even includes a few more advanced customizations for rooted users.
Download: Super Status Bar (Free, in-app purchases available)
More Great Android Apps
This group of interesting apps will change how you use your Android phone. They make it easier to handle and let you find things you need more quickly.
But this is only the start of the great tools you can find in the Play Store. For more cool apps, check out the best apps to clean up your device as well as the most popular apps for Android.
Read the full article: 11 Amazing Android Apps That’ll Change How You Use Your Phone
Read Full Article