20 December 2019

Is Your Mac Running Slow? 10 Simple Tips to Speed It Up


mac-slow-battery

It’s well known that all computers, including Macs, slow down over time. This drop in performance can be frustrating, and it’s easy to think that you need to splash out on extra RAM—or even buy a new machine—sooner than you’d like.

Unlock the free "Most Useful Mac Keyboard Shortcuts" cheat sheet now!

This will sign you up to our newsletter

Enter your Email

But there are a number of easy tweaks that can boost your computer’s performance and speed up that slow Mac, and they won’t cost you a penny.

First: Mistakes That Make Your Mac Run Slow

We’ve previously covered some causes of a slow Mac when we looked at common mistakes that slow down your Mac. Before continuing, you should go through that guide so you know what not to do.

It covers quick fixes like closing demanding programs and clearing your caches which bring immediate performance improvements in your Mac. But if your computer still isn’t performing as you’d like, continue with the tips below.

1. Upgrade macOS

Many people still believe the myth that operating system upgrades always slow down your machine. And while they can sometimes have performance issues on really old computers, these updates usually do more good than harm. They include bug fixes, patches, and improvements that often increase the speed of your Mac.

These OS update files can be pretty large, though. So if you’re running low on hard drive space, you’ll likely want to free that up first (see step 2, below).

To update your OS, make sure your laptop is connected to a power outlet, and back up your Mac first in case anything goes wrong. Click the Apple menu in the top-left corner of your screen and go to About This Mac > Software Updates.

If a software upgrade is available, you’ll see an Upgrade Now button. Click that and the download will start.

macOS upgrade

After a while, your computer will restart itself, and you’ll walk through the installation process. This update process will update not just the operating system, but also many of the default apps from Apple.

2. Free Up Hard Disk Space

As your storage drive reaches its capacity, performance drops off rapidly. Large files have been shown to have more of a negative effect on your Mac’s speed than small files. It’s thus always wise to keep at least 25% of your disk space free if possible.

To check how much free space you have on your hard drive, go to Apple menu > About This Mac > Storage.

Mac Storage Low

If you’re running low on space, as shown in the image above, it’s worth going through our guide on how to free up space on your Mac. That takes you through how to do each of the following step-by-step:

  • Empty the trash
  • Uninstall apps you don’t use
  • Find and delete large files
  • Delete iTunes files and iOS backups
  • Take a look at cloud storage apps
  • Optimize storage in the photos app
  • Store your Desktop and Documents folders in the cloud

In addition, we’d also recommend moving your photos and music libraries over to an external hard drive, as they can take up a huge amount of space. Make at least two copies (or back up with a cloud provider) in case one of your drives fails.

After working through the steps in that guide, I freed up an additional 34GB of hard drive space.

Free up mac hard disk space

3. Remove Startup Items

To help your Mac boot up faster, you should minimize the number of background processes that load each time you restart. To do this:

  1. Go to System Preferences > Users & Groups and select your account name on the left sidebar.
  2. Click Login Items.
  3. Select the items you no longer wish to load at startup.
  4. Remove these by clicking the minus button.

Mac startup items

4. Delete Unnecessary Widgets

Having a bunch of widgets running in the background can also have an impact on your Mac’s speed. To remove some of these:

  1. Open the Notification Center by clicking the button at the top-right corner of the screen.
  2. Go to the Today tab.
  3. Click Edit at the bottom of the Notification Center.
  4. Click the red delete button to remove any widgets that are unnecessary.

Delete Widgets From Notification Center

5. Rebuild the Spotlight Index

If Spotlight has stopped returning the results you’d expect, or is running particularly slow, rebuilding the Spotlight index should help. Follow these steps to do so:

  1. Go to System Preferences > Spotlight > Privacy.
  2. Click the Plus button and select the drive or folders that you want to reindex.
  3. Confirm that you want to (temporarily) exclude these from Spotlight.
  4. Select the same drive or folder, and click the minus button to remove these again.

Mac Spotlight Reindex Shorter


This will force Spotlight to reindex that drive or folder, which should make searching run more smoothly. This can take some time, so be patient if Spotlight seems finicky at first.

6. Turn Off Visual Effects

The barely-noticed visual effects of macOS can impact your computer performance more than you think. To disable these:

  1. Go to System Preferences > Dock.
  2. Untick Animate opening applications.
  3. Set the Minimize windows using option to Scale effect.

Visual Effects Mac

Then:

  1. Go to System Preferences > Accessibility > Display,
  2. Select Reduce Transparency.

Mac Accessibility Settings

7. Don’t Sync Too Much Cloud Data at Once

If you’re attempting to sync large folders to the cloud using services such as iCloud, Google Drive, or Dropbox, this will likely slow everything down. Be sure to routinely review which files and folders are uploading to the cloud to ensure you’re not sending too much at once.

You can review and adjust which data backs up to iCloud by going to System Preferences > Apple ID > iCloud.

To manage which folders sync with other cloud storage providers, you’ll generally need to go to the Preferences panel of the specific app that you use (like Dropbox or Google Drive). Try to avoid syncing folders that change frequently.

8. Set a Default Finder Folder

Each time you open Finder, it needs to load the folder set as its default. If this is a large folder, that can take more time than you’d like (such as if you have tons of items on your desktop). Instead, you should change this to a smaller, less demanding folder so that Finder can load faster:

  1. Open Finder.
  2. Go to the menu bar and click Finder > Preferences.
  3. In the General tab, go to the New Finder windows show dropdown, and select a new default folder.

Finder Preferences Mac

9. Remove Browser Add-ons

Since so much of most people’s computer work these days is done within a browser, it can be easy to mistake a slow browser for a slow Mac. The easiest fix here is to remove unneeded and bulky add-ons/extensions from whichever browser you use.

We’ve shown how to clean up your browser extensions the easy way. If you need more specific info, check out these official help pages:

10. Keep Your Apps Up to Date

Outdated apps that haven’t been optimized for the latest macOS update can cause your Mac to feel slower than it really is. It’s therefore always worthwhile to keep the software on your computer up to date.

To do this, go to App Store > Updates. If any app updates are available, you’ll see them listed. Either click to update each app individually, or choose Update All in the top-right corner to install all available updates at once.

Mac Running Slow? Not Anymore!

With these simple tips, you should see a noticeable improvement in your Mac’s speed. However, if your machine still isn’t working at a speed that’s acceptable, there are a couple more extreme (or expensive) options.

If your computer is really old, you may be best off buying a refurbished Mac to save some cash. For a less expensive option, if your model is old enough, you might be able to upgrade the RAM in your Mac.

Failing either of these, you can completely reinstall macOS, without or without erasing your storage disk entirely. Doing so essentially restores your Mac to its factory settings. Hopefully it won’t come to this, though, and these tips will get you plenty more use out of your Mac.

Read the full article: Is Your Mac Running Slow? 10 Simple Tips to Speed It Up


Read Full Article
The Top 7 Calculator Apps for iPhone, iPad, and Apple Watch


calculators-ios-watchos

The iPad still doesn’t have a calculator, and Apple’s basic iPhone calculator is a bit… basic. It’s fine for solving simple problems (and even has a handful of scientific functions) but there are a large number of alternatives on the App Store that offer more features and options.

Maybe you’re in need of advanced scientific functions, are looking for unique ways to help complete your homework, or you’re simply bored of the way Apple’s calculator looks and feels. You might even have reached a stage in your education where you want the best calculator available to you.

Whatever your (math) problem, the App Store can help solve it. Take a look at some of the best calculator apps for the iPhone, iPad, and even Apple Watch.

Your iPhone’s Basic Calculator

iPhone calculator

Unless you’re an iPad user, the default Apple calculator app is probably all you need for day-to-day problem-solving. Whether you’re splitting a bill, working out an IOU, or wondering how much you spent on rent in the last year, simply flick up to reveal Control Center and hit the Calculator icon.

You’ll see basic numerals and operators in portrait mode; turn your phone sideways to get access to the scientific functions. These are basic but useful, including operators like sin/cos/tan, support for brackets, constants like Pi, and a random number generator.

Unfortunately, this calculator suffers from a lack of graphing features, limited history logging, and a rigidly restrictive calculation view. And on the iPad, the app is completely absent. Luckily, there are lots of alternative calculators to choose from.

1. Calzy

It’s hard to go wrong with Calzy. This offering is a great calculator app for your iPhone, along with the iPad and even Apple Watch. One of the best features of the app is the Memory Area that allows you to store multiple values to reuse across any session with a drag-and-drop gesture.

You can also bookmark a calculation with date and time to view anytime. Another great feature is the ability to spell out calculations in English and 65 other languages.

When you want to switch between a basic and scientific calculator, you can make the switch with a long press on the screen instead of having to rotate to landscape mode. There are also many other buttons that offer Haptic Touch to quickly access additional features.

For a more complete custom experience, you can also rearrange keypad buttons to better suit your taste. And thanks to the app’s widget, you can make a quick calculation by heading to the Today View on your iPhone or iPad. If you love this, make sure to also take a look at some of the best iPhone widgets.

Download: Calzy ($2.99)

2. PCalc

PCalc describes itself as the App Store’s “best calculator,” with a price tag to match. If $10 seems a bit steep for a math app, consider the cost of a scientific calculator that does everything PCalc can do.

It works on both the iPhone and iPad, with an optional Apple Watch app to boot. The app is aimed at “scientists, engineers, students, programmers, or indeed anybody looking for a feature-rich calculator.” If the reviews are anything to go by, this is the gold standard for calculators on the App Store.

Of note is the app’s customizability and ability to handle fast number input. There are a huge number of operators, constants, functions, support for graphs, and more. Calculator nerds rejoice: this is the one you’ve been looking for. It even does Reverse Polish Notation (RPN).

Download: PCalc ($9.99)

3. Photomath

Photomath takes a different approach to the rest of the apps on this list. It works on both the iPhone and iPad, and through your device’s camera allows you to take a picture of your math problem to instantly see the solution.

The app really comes into its own as a learning tool, since it provides step-by-step instructions on how the result was achieved. There’s a slight danger that it will make your homework a little too easy, but used in the right context it could be an invaluable learning tool.

In addition to handwriting recognition via the camera, Photomath includes a regular old calculator that can handle arithmetic, trigonometry, fractions, decimals, roots, quadratic equations, and more. It even includes a graphing tool to boot.

Download: Photomath (Free, in-app purchases available)

4. Calcbot 2

Calcbot is an “intelligent calculator” app from Tapbots, which also makes the highly respected Twitter app Tweetbot. Now on its second version, Calcbot 2 is a free download with two notable features hidden behind an in-app purchase: unit conversion (including live currency rates) and the ability to add your own custom scientific constants.

Beyond that, the app is free to use and exudes the clean and visually-pleasing design seen in Tapbots’s other applications. Small design flourishes, like a history tape that records all your calculations, elevate it above Apple’s basic iOS calculator in terms of functionality too.

Simplicity is key, with an “expression view” for displaying everything you’ve typed on one screen, the ability to save favorite calculations, and iCloud sync between devices to keep your history tape current. It’s also worth noting that it looks and feels slick, with custom animations and one-tap actions for results.

Download: Calcbot 2 (Free, in-app purchases available)

5. Tydlig

Tydlig is a different kind of calculator app for iPhone and iPad. The app starts with just a blank canvas, and you can add the different components that suit your needs. When editing any number on a canvas, all the various results will automatically update instead of having to adjust each one individually.

Select a result to make a link on the line below. It’s also possible to drag a result from anywhere on the canvas to make a link. The results below will then automatically update. To help make better sense of your calculations, you can also add text labels to any number. When it’s time to graph, select any number and use the slider to see how the results change. The graph will also automatically update.

And this calculator app isn’t just for simple math. You can long-press any number on a canvas to make “X,” then tap the graph action to make a graph.

Download: Tydlig ($1.99)

6. Archimedes Calculator

Archimedes Calculator brings a graphing calculator experience to the iPhone and iPad. The calculator app automatically calculates the answer in both the numeric and exact form. Switch between both options by simply swiping horizontally.

The app also saves your calculation history. Scroll up to see previous answers. If the calculations were chained together, all the other calculations will automatically change when modifying the original. Automatic unit conversion and constants are also built-in. Archimedes Calculator supports both the metric and imperial measurement systems.

An in-app upgrade will unlock an integrated formula library, automatic unit handling, and the ability to directly interact with plots by just dragging your fingers across the screen.

Download: Archimedes Calculator (Free, premium version available)

7. Calcularium

There are multiple ways to interact with Calcularium. Along with using the keypad, you can take a photo of the problem, use Siri, or even write it in script. The design of the app is based on tokens with the same structure. The left part shows an element type, while the right shows the result or an entered value with its name on top. Pure numbers and math operators are additional components, along with tokens.

When a calculation is complete, you can Haptic Touch on the total and share the solution as plain text, an image, or styled text.

A subscription brings an ad-free environment, unlimited functions/constants, more script and photo math scans, and unit/currency conversion.

Download: Calcularium (Free, subscription available)

The Best Calculator Apps for iPhone, iPad, and Apple Watch

While the built-in calculator on the iPhone is great for basic day-to-day use, it’s definitely lacking when you need to do more complex work. And you’re completely out of luck when using an iPad. But these calculator apps offer a plethora of unique features for almost any type of task.

Are you interested in other types of calculators too? These online calculators are about more than math.

Read the full article: The Top 7 Calculator Apps for iPhone, iPad, and Apple Watch


Read Full Article

Why You Shouldn’t Learn to Code With Codecademy


codeacademy-donts

Codecademy is a web app designed to teach new developers the building blocks of coding. It’s wildly popular but does have a lot of things it can do better.

Since 2011 they’ve taught millions how to code for free, and have launched the careers of thousands of developers. At the same time, their product and teaching methods leave much to be desired.

So, what’s wrong with Codecademy? There are a couple of problems that should be talked about and learning the things it does not do well might lead to some better alternatives to learn code.

Codecademy Problem 1: It Doesn’t Teach the Mindset

Reddit programming challenge question substitute for codecademy

It’s fantastic to know a language by heart, but being a programmer is more than simply being able to memorize syntax. It’s about having a particular mindset and learning how to break a problem down, solve it with algorithmic thinking, and then code the solution.

You need to be able to look at a problem on a grand scale and understand how each step you take affects the rest of the program. On top of that, you need to be able to tolerate a high level of frustration and persevere when you hit a mental brick wall.

You need to be able to research errors, Google for answers, and communicate your problem to other developers. Simply put, you need to be able to think like a coder.

Codecademy courses do not teach you to think like a coder.

Rather, it teaches you the basics of a number of programming languages without much instruction on how you’d apply them to real-life problems.

What are better ways to get that problem-solving experience?

I’m a big fan of Project Euler and Reddit’s Daily Programmer Subreddit, which feature programming puzzles to solve. I’m a big fan of the latter because you’re encouraged to share your code and receive feedback from other developers.

The Daily Programmer subreddit comes with daily puzzles for all skill levels, from absolute beginners to code experts.

Codecademy Problem 2: Blink and You’ll Miss It

Interactive javascript code for codecademy

One of my biggest frustrations with Codecademy’s approach to teaching is the speed that the courses move. You learn something, complete a challenge, and may never revisit that topic again. Blink, and you’ll miss it.

If you want to cement your progress, you’re going to have to do some deliberate practice outside of Codecademy. One of the best ways to do that is to simply write code. Many programmers swear by notetaking and reinforcement with flashcards.

Paper flashcards are cheap and effective. In fact, you can buy packs of 1,000 on Amazon to get started.

Oxford Blank Index Cards, 3" x 5", White, 1,000 Cards (10 Packs of 100) (30) Oxford Blank Index Cards, 3" x 5", White, 1,000 Cards (10 Packs of 100) (30) Buy Now On Amazon $11.99

If you prefer digital, there’s also a number of apps you can use. I’m a huge fan of Anki because of how customizable it is. It has thousands of community-built flashcards and is extensible through its application programming interface (API).

For mobile users, there are also lots of flashcard applications for Android, and for the iPhone.

Codecademy Problem 3: Syntax Does Not Equal Programming

Codecademy will teach you the syntax of a programming language but for the most part, won’t tell you how to apply it. This is why you often see questions like this, posted on the LearnProgramming Subreddit.

Reddit codecademy javascript question

The developer is learning JavaScript and is beginning to understand the language, but does not know how to actually apply it. It may not be the developers’ fault.

The introductory JavaScript course doesn’t dive into using the Document Object Model with JavaScript. The Java course doesn’t teach you how to compile your code in order to run it.

That’s not all that tends to get glossed over. Codecademy doesn’t give you tips for writing cleaner code. It doesn’t teach you how to write code that’s self-documenting. It doesn’t teach you about package management, or how to use other people’s code in your own projects.

This is something you can overcome by finding an alternative to Codecademy. Look for instruction that teaches these important habits, and your coding will flourish.

Codecademy Problem 4: Does Not Explain Theory

Codecademy java code example

The reason Codecademy is successful is that it takes coding and transforms it into addictive bite-sized pieces that are easy to accomplish. It feels great right now, but not so much over the long term. Learning to be a developer means learning the principles of software development, which are quite honestly very challenging. It’s the reason why good developers are so valuable.

In Codecademy’s curriculum, you don’t learn about the theory of programming. The stuff that Donald Knuth spent thousands of pages—and the better part of two decades—writing about in The Art of Computer Programming.

The Art of Computer Programming, Volumes 1-4A Boxed Set The Art of Computer Programming, Volumes 1-4A Boxed Set Buy Now On Amazon $162.33

Codecademy shields you from the complicated part of programming. There’s no way around this, other than having the discipline to do your own research. If you don’t know what you should be looking at, a good way to learn is finding experienced developers that can mentor you.

Codecademy Alternatives

If you prefer the structure that Codecademy provides but want some alternatives, there are some options.

Code School vs. Codecademy

Main Logo Code School Pluralsight

Code School will teach you how to code just like Codecademy, but with some significant advantages. Code School (recently acquired by Pluralslight) offers a deeper selection of classes from software development to cybersecurity.

Classes are taught with video by coding professionals that explain the concepts in-depth. The curriculum spans from beginning to advanced level coding. Code School learning is separated into coding paths and each path could be upwards 20 hours just on one language.

Code School is not free, but the price you pay monthly will cover all of their material. It’s a serious investment with serious results.

FreeCodeCamp vs. Codecademy

Main Page for FreeCodeCamp

As the name implies, FreeCodeCamp is free just like Codecademy. Just like Code School, you’ll get some pretty in-depth material to learn.

FreeCodeCamp is centered around getting you a job. They tout over 40,000 graduates getting jobs at high-profile companies like Microsoft and Google. They offer seven different certifications, each at around 300 hours.

Where you will see the real difference is the coding interview prep. FreeCodeCamp provides thousands of hours of challenges all centered around learning the logic behind the coding. Companies want to know how you solve problems not memorize a language, so this is a huge benefit.

Codecademy Isn’t That Bad

Now look, there’s a lot to like about Codecademy. This isn’t meant to discourage budding programmers, learning is always the goal. Codecademy has introduced thousands to the fundamentals of computer science. But there’s considerable room for improvement, too.

There are alternatives to learning code. For web programmers looking to grow, you can learn JavaScript with these Udemy courses. If you need some inspiration for real-world ideas, check out some great beginner projects for new programmers.

Read the full article: Why You Shouldn’t Learn to Code With Codecademy


Read Full Article

What Are Popsockets? 6 Reasons Why You Should Consider Buying One


popsockets-what

Have you seen one of those weird circular discs slapped on the back of someone’s phone? Chances are, that’s a PopSocket. They’re hugely popular right now, especially with the younger crowd.

But what is a PopSocket? And more importantly, are PopSockets removable? We’re going to dive right in and answer all of your burning questions.

What Is a PopSocket?

What is a PopSocket?
Image Credit: Sarah Pflug/Burst

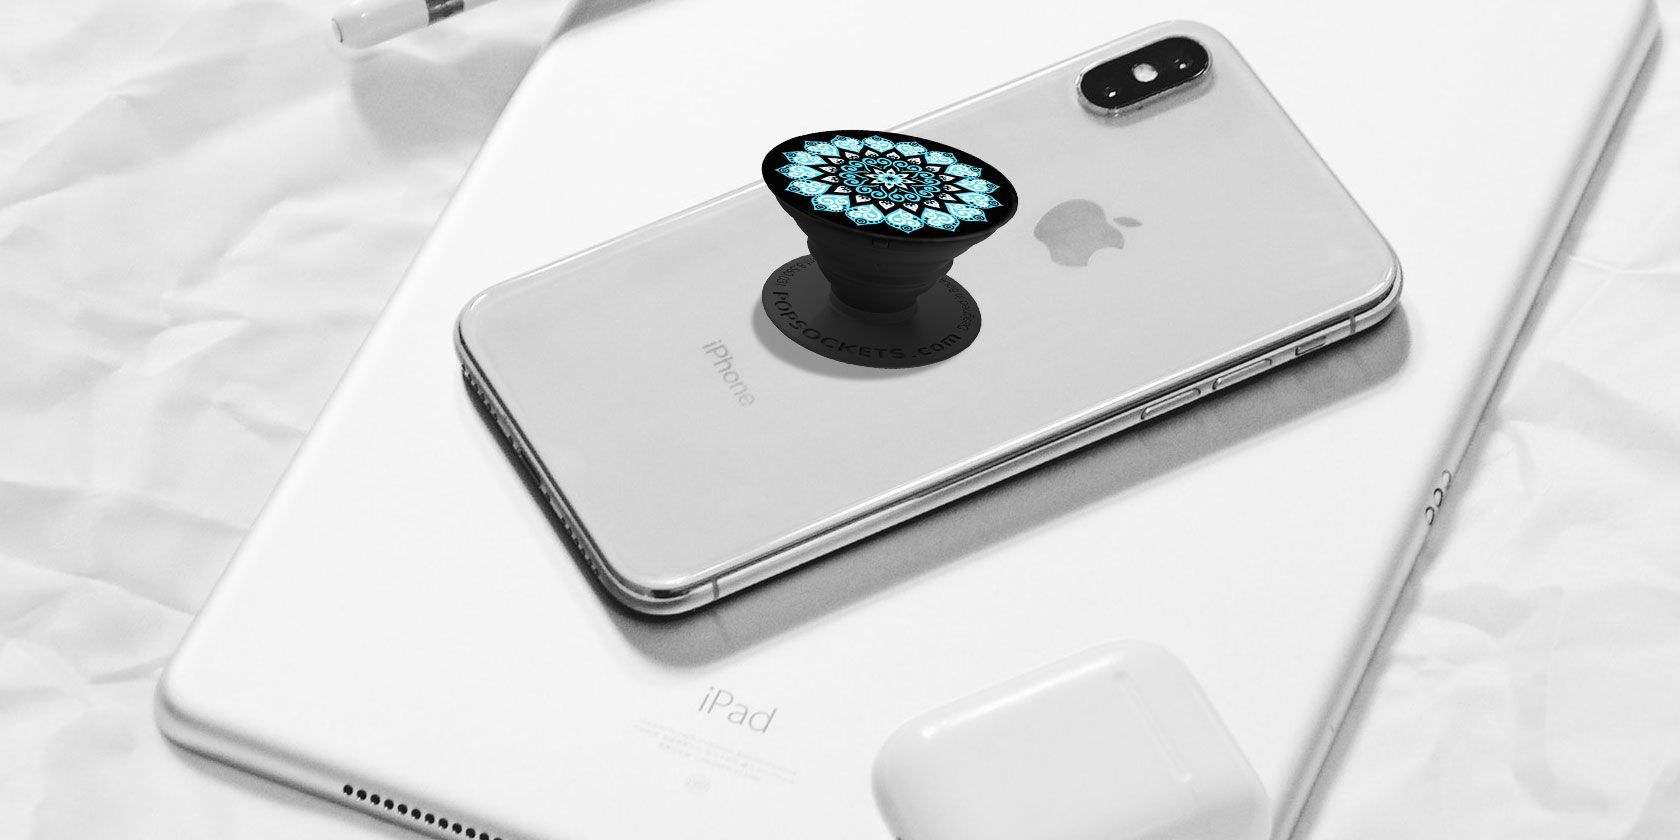
A PopSocket is a plastic circle that you attach to a flat phone (or case) with a sticky adhesive. Once you pull or “pop” it out twice, the PopSocket extends like a small accordion. That way, you can slip your fingers in between your phone and the end of the PopSocket, allowing for a more comfortable and tighter grip.

Are PopSockets Reusable?

If the idea of having a slight bulge on the back of your phone all the time bothers you, don’t worry. PopSockets are easy to remove, install, or reposition at any time.

You’ll notice that PopSockets come in two parts: the base (the adhesive disc), and the PopTop (the design portion). While the PopTop portion easily comes off when you get bored of its look, removing the base is a little trickier.

To completely remove the base, make sure your PopSocket is flattened, then peel it up slowly from the case. If you have any issues removing the PopSocket, slide dental floss or a credit card underneath the platform to lift and separate the adhesive.

Keep in mind that the adhesive gel might dry out over time. If it feels dry, simply rinse it with warm water and let it air dry. Make sure it doesn’t dry for any longer than ten minutes.

How to Use a PopSocket

Although you might think that PopSockets only have a single purpose, they actually have many uses. So, what are PopSockets used for? Overall, they make it much easier to do simple things with your smartphone. The following tips and tricks will help you get the hang of using a PopSocket.

1. Get a Better Grip

A PopSocket mainly functions as an additional grip, which is especially useful for larger smartphones. If you frequently drop your phone, or find it hard to hold a large phone comfortably, a PopSocket fixes that.

As an owner of a Samsung Galaxy Note 9, I sometimes struggle to get a good grip on my phone with only one hand. With a PopSocket, I can hold my device one-handed and browse without issue. Plus, it’s much more comfortable.

I also tend to drop my phone quite a bit. Since using a PopSocket, I’ve dropped it much less. The PopSocket allows me to wrap two fingers around it, making my phone appear like it’s floating in my hand. I get quicker access to my phone this way, and I’m always camera-ready.

2. Take Picture-Perfect Selfies

In addition to providing a much better grip on your device, the PopSocket is great for taking selfies.

Why is this? The PopSocket makes it easier to hold your phone with one hand, letting you reach the shutter button effortlessly. It also provides more freedom with the angle, and the sturdy grip means you no longer need to fumble around to find the most flattering shot.

3. Use It as a Stand to Prop Up Your Phone

If you need to prop your smartphone or tablet while watching videos or playing games, the PopSocket has you covered. Using a PopSocket as a stand works better when there are two of them attached to your phone or tablet (especially the latter), but a single one works too.

With one PopSocket, just pop it out twice and lean your device in landscape orientation. This works best when the PopSocket is centered on your phone—otherwise, it just falls over.

For larger devices, such as your tablet, it’s best to use two PopSockets, placed slightly off-center at the top and bottom. This way, you can easily prop your tablet up on a table.

You can also use the PopSockets Multi-Purpose Mount to hang your PopSocket on any vertical surface. The PopSockets Car Mouns for your vent, dashboard, or windshield is also a great option if you’re looking for a car phone holder.

4. Manage Your Wired Earbuds

Not everyone wants to use Bluetooth headphones—you still might want to take advantage of your phone’s existing headphone jack. But with wired earbuds, come tangled messes. Fortunately, PopSockets, solve this annoying issue.

To do this, attach one PopSocket towards the top of your phone, and one towards the bottom. You can use this setup to wrap your wired earbuds around the PopSockets for tangle-free cord storage when they’re not in use. It may look a bit silly, but it’s easier than having to untangle those earbuds each time you dig them out of your pocket.

5. Customize Your PopSocket

Customize Popsocket Page

The only way to create a custom PopSocket is through the PopSocket website. From here, you can upload images from your device, or import something from your Instagram. You can then pick the colors of the base, as well as the accordion portion of the grip.

Perhaps you’re wondering, “How much are PopSockets when customized?” The price for custom PopSockets starts at $15. It’s reasonably priced and adds a splash of character to your device that’s hard to replicate.

6. Finding Cheap PopSockets

If you don’t care to spend the extra money to customize your PopSocket, you can always find them on Amazon or eBay for a cheaper price. One quick search for PopSockets on eBay yields tons of results, like this awesome Jawbreaker Gloss PopSocket. The regular PopSockets are only about $10, while the metallic or textured versions are about $15.

Picking the Perfect PopSocket For Your Phone

While PopSockets may look silly at first, there are many great ways to use them. It takes time to get used to your phone’s PopSocket, but after a while, it becomes an essential accessory. You’ll find it hard to go back to a phone or tablet without one.

Better yet, you can easily mount your phone to your car once you get a PopSocket and its accompanying car mount. Don’t forget to look into these must-have smartphone accessories for your car as well.

Read the full article: What Are Popsockets? 6 Reasons Why You Should Consider Buying One


Read Full Article

The Best Wired Headphones 2019


best-wired-headphones

Wired headphones offer portability and simplicity. Between wired and wireless options, wireless headphones pretty much only win in convenience—wired headphones offer a lot more than that.

Let’s explore the best wired headphones on the market this year.

The Best In-Ear Wired Headphones

In-ear headphones (or earphones) offer the most portability. They’re useful for everything from relaxing to running around your neighborhood—though fitness buffs may want to invest specifically in sports earphones.

Budget: Panasonic ErgoFit

The Panasonic ErgoFit costs little, but you can’t tell from looking at it alone. As you might expect from its name, the ErgoFit offers comfort without sacrificing sound quality.

At this price point, a good pair of headphones sounds halfway decent and won’t chafe your ears. The ErgoFit ticks both of these boxes, making them some of the best cheap wired earbuds. Just be careful with them, as they aren’t exactly durable.

Enthusiast: Sony MDRXB50AP Extra Bass Earbuds

Fancy a little more from your buds without paying a great deal of money? Try the Sony MDRXB50AP Extra Bass Earbuds. The non-tangle cord, built-in microphone, and the media controls make it ideal for smartphone usage, while its extra bass is great for home use.

Audiophile: Bose QuietComfort 20 Noise Cancelling Headphones

Bose QuietComfort 20 Noise Cancelling Headphones Bose QuietComfort 20 Noise Cancelling Headphones Buy Now On Amazon $249.00

If you can’t imagine leaving home without the best headphones possible, the Bose QuietComfort 20 Noise Cancelling Headphones won’t let you down. They doesn’t try to pander to both Android and iPhone at the same time. Instead, there are variants for both iOS and Android devices, allowing for greater control over your preferred operating system.

These headphones are designed to help you hear your music, no matter how loud the outside world gets. They offer a comfy fit and noise-canceling technology, which both work together to keep the tunes in and the noise out. If you do need to hear your surroundings, touching the Aware Mode button lets you hear what’s around you.

The Best On-Ear Wired Headphones

On-ear headphones are exactly what they sound like; they sit over your ears without fully covering them. As a result, they tend to press your ears against your skull. On-ear headphones are a compromise between in-ear headphones (portable but subpar sound quality) and over-ear headphones (often heavy but best sound quality).

Budget: Vogek On Ear Headphones

Vogek On Ear Headphones Vogek On Ear Headphones Buy Now On Amazon $16.99

The Vogek On Ear Headphones are a great choice for people on a tight budget. They come with a built-in microphone, 1.5 meters of cable, and an attractive range of colors to choose from.

Fortunately, despite the low price point, the Vogek headphones have decent audio quality. It’s not studio-levels by any means, but it still punches above its weight class.

Enthusiast: Grado SR80e Prestige

Grado SR80e Prestige Grado SR80e Prestige Buy Now On Amazon $99.00

Although the Grado SR80e Prestige were released back in 2014, they’re still on our radar today. The headphones have a sleek and compact design, though blemished slightly by the prominent text on the cups. They are also very comfortable, and you can tell right away that this is a well-made product.

The sound produced by the SR80e is great—from low notes through to high notes, and even through the middle notes. The audio profile is excellent regardless of volume level. Just note that the cans are open-backed, so you’ll be able to hear everything going on around you even as you listen.

Audiophile: Audio-Technica ATH-ESW990H

Audio-Technica ATH-ESW990H Audio-Technica ATH-ESW990H Buy Now On Amazon $349.00

Audio-Technica are known for producing great audio devices across all budgets, and the Audio-Technica ATH-ESW990H are no exception. It’s hard to find on-ear headphones in this price range that sound as good as these, all the way from bass to treble.

Notable features include 42mm drivers, a detachable 3.9-foot cord with microphone and volume controls, durable leather earpads for long-term comfort, and wooden can housings made from polished sycamore.

The Best Over-Ear Wired Headphones

Over-ear headphones tend to produce the best sound quality, if only because the circumaural cups are excellent at isolating ambient noise (but only when the cups are closed-back). If you’re worried about the stuffiness and dampness of over-ear headphones, opt for ones with open-back cups (which won’t be as good at isolating noise).

Budget: Creative Aurvana Live!

Creative Aurvana Live! Creative Aurvana Live! Buy Now On Amazon $49.99

The Creative Aurvana Live! are, in a word, impressive. You shouldn’t expect top-grade performance out of them, but at this price point, it’s rare to find audio quality that sounds even half as good. Audio quality is decent, especially in the lower notes.

The earpads are detachable, which is fantastic for cleaning and for when they need replacing. The cord is five feet long and comes with a 3.5mm-to-6.3mm adapter for use with home audio equipment. This makes the Creative Aurvana Live! a choice pick for those on a budget.

Enthusiast: Audio-Technica ATH-M50X

Audio-Technica ATH-ESW990H Audio-Technica ATH-ESW990H Buy Now On Amazon $349.00

The Audio-Technica ATH-M50X are some of the best headphones the company has ever put out, and they are regularly used by professionals—even though it’s a consumer-grade set of headphones.

One of the best parts about the ATH-M50X is their exceptional noise isolation. These were, after all, designed as studio monitors—so if you want perfect audio without any distracting background or ambient noise and at a reasonable price, this is the set for you.

Audiophile: Sony MDR-1A

Sony MDR-1A Sony MDR-1A Buy Now On Amazon

If you’re looking for something a little better than the ATH-M50X and you’re willing to pay about double the price, the Sony MDR-1A is a solid choice. They delivers excellent sound with maximum comfort and are built for comfort, too.

The Best Noise-Canceling Wired Headphones

A lot of people hear noise-cancelling and immediately think that these headphones will block out everything. Unfortunately, that’s not true. When active, they can block out certain kinds of sounds such as background and ambient noises, but you may still hear loud conversations, buses driving by, etc. The feature can also reduce audio fidelity while active.

Budget: FMLOVES Active Noise Cancelling Headphones

FMLOVES Active Noise Cancelling Headphones FMLOVES Active Noise Cancelling Headphones Buy Now On Amazon $39.99

When you’re on a budget, you’re never going to get truly high-quality noise cancellation. That doesn’t mean it doesn’t exist on the budget level, however. The FMLOVES Active Noise Cancelling Headphones make a decent attempt at blocking out ambiance so you can enjoy your tunes.

Despite being wired headphones, noise-canceling models still have a battery on-board to power the technology behind the cancellation. Fortunately, even at the budget level, these headphones can last 20 hours with noise cancellation on before they need a recharge.

Enthusiast: Bose QuietComfort 25

Bose QuietComfort 25 Bose QuietComfort 25 Buy Now On Amazon $129.00

For top-notch consumer-grade noise cancellation, you really can’t go wrong with the QuietComfort series. The Bose QuietComfort 25 are over-ear models, making them very effective when you need to block out as much noise as possible without sacrificing comfort.

The sound quality is the best you are likely to get with noise-canceling headphones. Despite this, the quality is far from disappointing, so these should suffice for all but the pickiest of audiophiles.

The Best Wired Headphones for You

Regardless of your budget options or your headphone preference, there’s a model for everyone. From the cheap-but-stylish in-ear headphones to the audiophile’s dream, there’s never a shortage of wired headphones to suit your needs.

If you want to protect your brand new purchase, be sure to read why your headphones keep breaking and how to avoid it.

Read the full article: The Best Wired Headphones 2019


Read Full Article

Epic Is Giving Away Free Games for Christmas


The Epic Games Store Holiday Sale is taking place right now. And as well as offering savings on hundreds of great games, Epic is also giving away some free games. Which means you can spend your holidays playing new games without spending a penny.

Everyone likes saving money on video games. And what’s even better than paying less than the RRP of a game? Getting it for free instead. Which is where the Epic Games Store Holiday Sale comes in. As Epic is giving away 12 days of free games.

How to Get Free Games From the Epic Games Store

Epic is giving away a new free game every day throughout the 12 days of the sale. Each free game is only available for 24 hours, so you’ll have to be quick to grab them all. Still, if you miss one at least you know another one will be available straight after.

The Epic Games Store Holiday Sale kicked off on December 19, 2019. And it’s running until January 1, 2020. For the duration of the Holiday Sale there will be discounts of up to 75 percent on hundreds of games, including Borderlands 3 and The Division 2.

However, the headline, and what you’re probably more interested in, is the opportunity to pick up some games for free. Which you can do right now if you’re reading this between December 19, 2019 and January 1, 2020. If not, better luck next time.

Each of the free games is available for 24 hours from 11am EST. The first free game is/was Into the Breach. All you need to do is visit the Epic Free Games page, click through to the game page, click “Get”, and then log in to your Epic Games Store account.

Reasons to Stop Buying Games on Steam

Once claimed, the free games are yours to keep and play forever. So there is really no reason not to grab the games on offer while you can. And if you miss one (or more) of the games Epic is giving away over Christmas, you can always just buy them instead.

This is another reason to visit the Epic Games Store. Which is, of course, Epic’s reason for giving away free games. The Epic Games Store offers an alternative to Steam. And with that in mind, here are some reasons to stop buying games on Steam.

Read the full article: Epic Is Giving Away Free Games for Christmas


Read Full Article

Which Operating System Should You Choose for Your Next PC?


pc-os

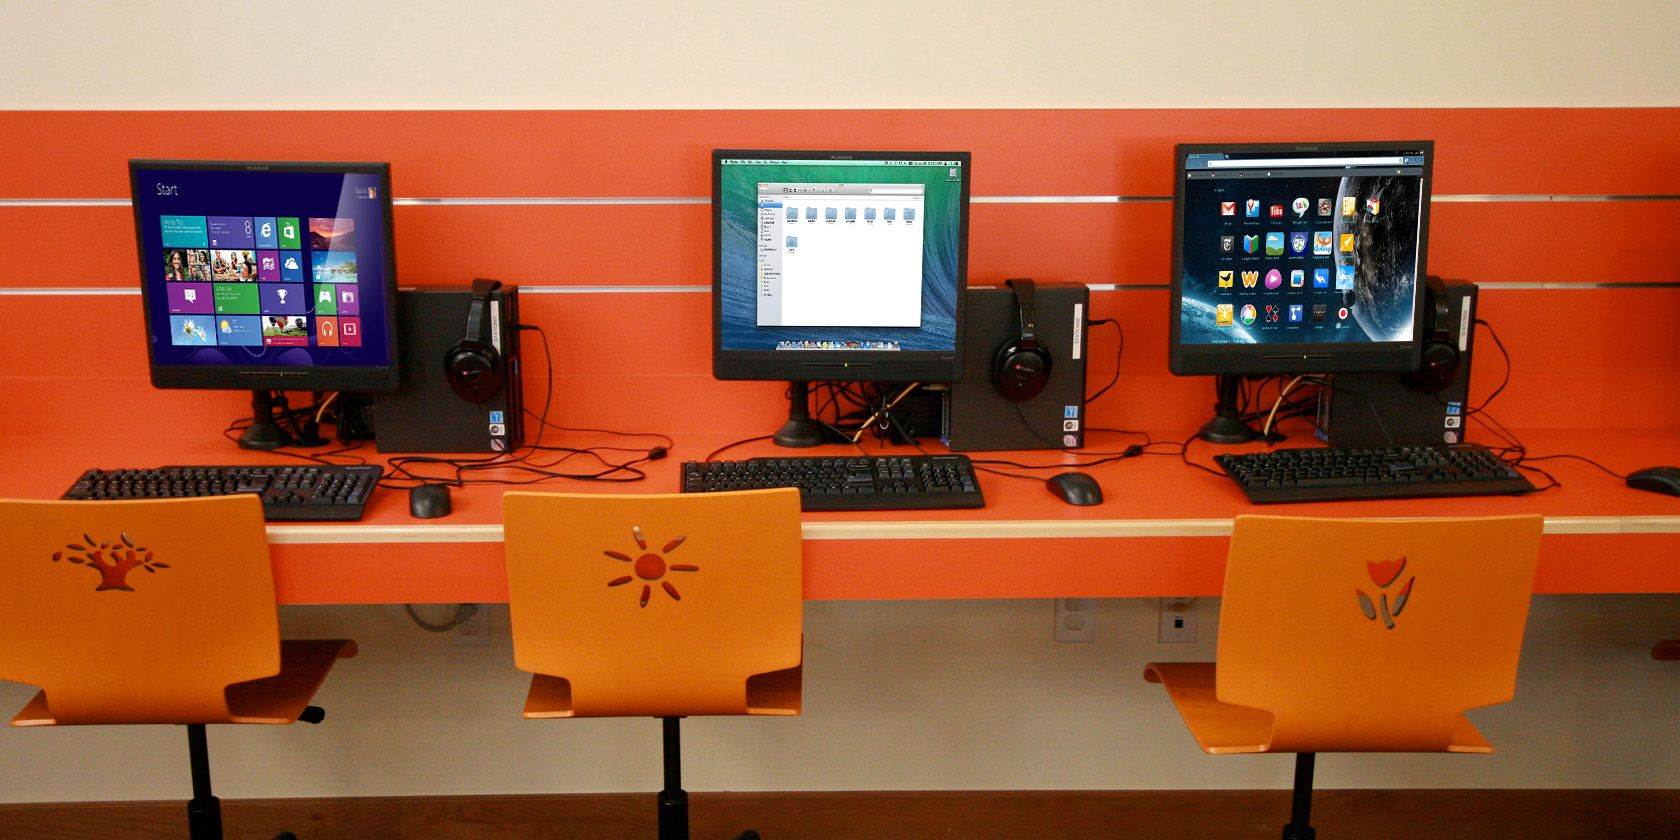
Buying a new computer? You have more operating system choices than ever. Windows is still popular, but Macs are a great choice for creative professionals. Google offers Chromebooks that are simple and cheap, and Linux laptops are an option, too.

Unlock the "Chrome OS Keyboard Shortcuts" cheat sheet now!

This will sign you up to our newsletter

Enter your Email

But what is the best operating system for your new computer? We’ll give you an overview of all your choices, along with their advantages and disadvantages. Minor spoiler: There’s no one best option for everyone.

Should You Use Windows?

Is Windows the best operating system for your PC?

Windows is the most familiar operating system to most users. Microsoft released latest version, Windows 10, in 2015, and it is a considerable improvement over previous versions such as Windows 8. The advantage of Windows is that is has a very broad range of software available. All kinds of software is available for Windows, from business software to home computing apps.

The disadvantage of Windows is that it does have security issues, as it is the target of a large amount of malware. If you’re going to use Windows, it’s important that you keep your operating system up to date.

One group of people for whom Windows is the best OS is gamers. If you like to play games, especially AAA titles, then the best operating system for your PC will be Windows. The selection of games available on Linux and macOS is getting better, especially since the launch of Apple Arcade and Steam bringing support platforms beyond Windows.

Should You Use macOS?

macOS on an Apple MacBook

A preferred operating system among creative professionals is macOS. Unlike Windows, which you can install on most PC hardware, macOS is generally only available on Mac hardware. (You can install macOS on non-Apple hardware to create what’s called a Hackintosh, but this is complex.) For most users who want to use macOS, they’ll need to buy a Mac machine.

The advantage of macOS is its exceptional support for creative software such as Adobe Photoshop or Premier. While this kind of software is available on Windows too, it generally functions better and has more options on macOS. Another plus point for macOS is that Apple updates it regularly, and that upgrading to the latest version of the OS is usually free. It is also less frequently targeted by malware.

The disadvantage of macOS is that Apple hardware can be expensive, with laptops and desktops costing thousands of dollars. There’s also much less free software available for macOS than other operating systems, so be prepared to spend more on software too.

Should You Use Linux?

Purism Librem 13 Linux OS

One option you might not have considered in your search for the best operating system for a laptop or desktop is Linux. Linux has a reputation for being hard to use, although in recent years more user-friendly distributions have become available.

Linux’s greatest strength is its flexibility. You can change just about anything you want in a Linux system, as long as you have the required knowledge. This is why the operating system is so popular among power users who want to perform complex tasks in an efficient way.

However, for the average user the learning curve for Linux is rather steep. Some people are intimidated by the command line. And it can take a long time before you learn the commands you need to use the operating system efficiently. For this reason, Linux isn’t well suited to less techy-savvy users.

There’s one area where Linux does absolutely shine, though—resurrecting old hardware. If you have an ancient computer which is too slow to run Windows, try installing a lightweight Linux distribution on it and you may be able to keep using it for simple tasks like web browsing and email.

Should You Use Chrome OS?

Should you use Chrome OS?

One interesting contender for the best laptop operating system is Chrome OS. Google’s Chrome OS is a lightweight competitor that’s capturing more of the market. Chromebooks run a simplified operating system that’s basically just the Chrome web browser with some desktop bits. You have access to Chrome, Chrome apps, and Android apps—that’s it. You can’t run Windows desktop software.

Chrome OS can be the best OS for laptops because Chromebooks are simple. They update automatically, sync with Google Drive for file storage, and don’t require antivirus software. Most Chromebooks cost between $200 and $300, and don’t include bloatware.

If you only ever use Chrome and want a simple PC with a full keyboard and powerful desktop web browser for not much money, a Chromebook is a good option. On the other hand, there’s still a lot a Chromebook can’t do—if you use Photoshop daily, look elsewhere.

Should You Use BSD?

Could BSD be the best operating system for your laptop?

An interesting and lesser-known alternative to Linux is BSD, which stands for Berkeley Software Distribution. This Unix-based system was developed for researchers, and it is open source. Nowadays, you’ll most often see descendants of BSD like FreeBSD or OpenBSD in use.

BSD systems are most useful for advanced users who prioritize functions like complex networking or a high level of security. In some ways, BSD is even more flexible than Linux and can be installed on an even larger range of hardware. The big limitation with BSD is that there’s not a lot of support for it from third-party developers. So much familiar software you use every day won’t run on a BSD system.

Dual Booting OSes and Virtual Machines

One option to consider if you can’t decide on an OS or if you like features of more than one OS is a dual boot. This is where you install two (or more) operating systems onto one machine. When your computer boots up, you can choose which operating system you’d like to use for that session. This gives you the opportunity for the best of both worlds.

For example, you could install Linux for your primary productivity tasks, then also have Windows available for gaming. However, there are risks associated with dual booting Linux and Windows that you should be aware of.

Another option if you only need a few functions from a different operating system is to run a virtual machine. This is where you run a different operating system virtually, inside your main operating system. To learn more about these options, see our guide to dual booting versus virtual machines.

Which OS Should You Choose?

We’ve covered a number of different options for the best computer operating system here, but no single one is the winner. Each operating system has its own strengths and different choices will work out for different people.

Hopefully, we’ve given you a place to start your research on which operating system you should use and helped you eliminate a few choices.

Comparing all these operating systems is a tough task. If you’re unsure whether you should opt for Windows or go with one of the many Windows alternatives available, you should probably go play with these operating systems in person. Try using a friend’s PC, working with a display laptop at a store, or dual booting Linux on your current machine.

Read the full article: Which Operating System Should You Choose for Your Next PC?


Read Full Article