22 January 2020

Unearth the future of agriculture at TC Sessions: Robotics+AI with the CEOs of Traptic, Farmwise and Pyka


Farming is one of the oldest professions, but today those amber waves of grain (and soy) are a test bed for sophisticated robotic solutions to problems farmers have had for millennia. Learn about the cutting edge (sometimes literally) of agricultural robots at TC Sessions: Robotics+AI on March 3 with the founders of Traptic, Pyka, and Farmwise.

Traptic, and its co-founder and CEO Lewis Anderson, you may remember from Disrupt SF 2019, where it was a finalist in the Startup Battlefield. The company has developed a robotic berry picker that identifies ripe strawberries and plucks them off the plants with a gentle grip. It could be the beginning of a new automated era for the fruit industry, which is decades behind grains and other crops when it comes to machine-based harvesting.

Farmwise has a job that’s equally delicate yet involves rough treatment of the plants — weeding. Its towering machine trundles along rows of crops, using computer vision to locate and remove invasive plants, working 24/7, 365 days a year. CEO Sebastian Boyer will speak to the difficulty of this task and how he plans to evolve the machines to become “doctors” for crops, monitoring health and spontaneously removing pests like aphids.

Pyka’s robot is considerably less earthbound than those: an autonomous, all-electric crop-spraying aircraft — with wings! This is a much different challenge from the more stable farming and spraying drones like those of DroneSeed and SkyX, but the choice gives the craft more power and range, hugely important for today’s vast fields. Co-founder Michael Norcia can speak to that scale and his company’s methods of meeting it.

These three companies and founders are at the very frontier of what’s possible at the intersection of agriculture and technology, so expect a fruitful conversation.

$150 Early Bird savings end on Feb. 14! Book your $275 Early Bird Ticket today and put that extra money in your pocket.

Students, grab your super discounted $50 tickets right here. You might just meet your future employer/internship opportunity at this event.

Startups, we only have 5 demo tables left for the event. Book your $2200 demo table here and get in front of some of today’s leading names in the biz. Each table comes with 4 tickets to attend the show.


Read Full Article

A personal health coach for those living with chronic diseases | Priscilla Pemu

A personal health coach for those living with chronic diseases | Priscilla Pemu

There's no shortage of resources to help people change their health behaviors -- but far too often, these resources aren't accessible in underserved communities, says physician Priscilla Pemu. Enter "culturally congruent coaching," a program Pemu and her team developed to help patients with chronic diseases monitor their health with the assistance of a coach from their community. Learn more about how this approach transcends language and cultural barriers -- and could potentially transform health care in America.

Click the above link to download the TED talk.

Is TikTok Really a National Security Threat?


tiktok-threat

TikTok is a popular app for watching and sharing short videos, usually set to music. It has followed in the footsteps of Vine as somewhere to post and watch quick, funny videos.

However, recently concerns have been raised about whether the app is secure. We’ll explain what these concerns are, then cover what steps you can take to make your account less vulnerable.

What Happened in the TikTok Breach?

TikTok security risks - TikTok breach

In December 2019, a security firm called Check Point Research revealed it had discovered multiple security vulnerabilities within TikTok. As the researchers demonstrated in a blog post, in combination these vulnerabilities allowed hackers to:

  • Get a hold of TikTok accounts and manipulate their content
  • Delete videos
  • Upload unauthorized videos
  • Make private “hidden” videos public
  • Reveal personal information saved on the account such as private email addresses

One example of how these vulnerabilities could be used is a technique called SMS spoofing. This is where hackers send messages to a user which appear to come from an official TikTok number. This works because TikTok has an option on its website to send an SMS message to yourself to download the TikTok app.

But TikTok has not properly secured this system. Therefore, hackers can manipulate it to send malicious links to unsuspecting users. The users would assume these are coming from a genuine TikTok number and click the malicious link.

It gets worse, however. There is a function built into the TikTok app which displays webpages. This can be used in combination with the SMS spoofing to open a malicious webpage within the TikTok app. From here, the users’ information could be stolen or malware sent to their device. And there were plenty of other ways the researchers found to attack the TikTok app and website as well.

Checkpoint disclosed this issue to TikTok in November. TikTok has since updated its security to prevent the attacks described.

Why Is TikTok Considered a National Security Threat in the US?

TikTok security risks - national security threat

These are not the only security concerns regarding TikTok. In 2019, a number of US government officials raised concerns about the app, even going as far as to call it a threat to national security.

The reason people are concerned is that TikTok has been acquired by a Chinese company called ByteDance. The Chinese government exerts a great deal of control over businesses in China, and it can even force businesses to hand over data. Therefore, officials in the US are concerned that the TikTok app could be sending data about US users to China.

At first it might sound funny, the idea that short silly TikTok videos are a security threat. But if the app is insecure, and many people use it, then it provides a way for hackers to access many devices. This includes devices of people in important positions and who handle sensitive data. For example, the US Army has banned the TikTok app from government phones, as has the US Navy.

US Senator Chuck Schumer has been vocal about the dangers of the platform. In a letter to the US Army secretary, he called it “a potential target of foreign influence campaigns like those carried out during the 2016 election on US-based social media platforms.” There have also been reports that TikTok may be under national security review.

How Can You Make Your TikTok Account More Secure?

TikTok security risks - secure your account

This goes to show that even a fun, lighthearted app like TikTok can create security issues. If you want to keep using the app, there’s not much you can do about the potential sending of your data to China. But you can be aware that the videos you share may not be as harmless as they seem. Videos can contain a lot of personal information, so be careful what you record and share.

There are also some steps you can take to make your account more secure.

1. Use Strong Passwords

As for any service you use, you should create a strong password. This is particularly true when the service hosts personal data like videos of you. You should make your password a mixture of numbers, letters, and symbols. Don’t use a familiar name or date as your password.

Also, don’t ever reuse an old password, or use the same password on multiple sites. This is important because if one of your other accounts is breached, you don’t want hackers to have access to your TikTok account as well.

It’s especially vital to have a strong TikTok password as the service doesn’t support two-factor authentication.

2. Make Your Account Private

If you want to post freely on TikTok but restrict who can see your videos, then you can set your account to private. This way, the only people who can see your videos are people who you allow to follow you. This does take some of the fun away from the random discovery element of TikTok. But it means that you can post without worrying about whether anyone is observing you.

It’s worth noting that making your account private will not prevent TikTok itself from seeing your information. But it will prevent random members of the public from seeing your videos.

To make your TikTok account private, open up the app and go to the Profile tab. Then tap on the Settings icon in the top right corner. Now go to Privacy and Safety. From here, you can enable Private Account.

3. Unlink Your Instagram and YouTube Accounts

There’s an option within TikTok to link your account with your accounts on other sites. This includes sites like Instagram and YouTube. The idea is that when your accounts are linked, you can easily post your TikTok videos to other platforms as well.

However, linking your accounts in this way makes it much easier for companies to collect data about you. They can create a more complete picture of your online activities, and learn more about you. To reduce this invasion of your privacy, you can unlink your accounts.

To unlink accounts from TikTok, open the TikTok app and go to your profile page. Now tap on Edit Profile. At the bottom you will see a section saying Instagram and YouTube, with your linked account names on the right. Tap on the account name and from here, you can remove the account.

4. Keep Your Software up to Date

You should also be sure to regularly update your OS and your apps. Keeping apps up to date means the developers can fix security problems like the ones raised by Check Point. To make your life easier, turn on automatic app updates on your phone, so you don’t need to remember to update your apps manually.

Be Aware of the Security Risks of Using TikTok

TikTok is a fun app to use, but you need to be aware of security issues when you use it. Be careful that videos you upload don’t give away too much information about you, and consider setting your account to private. Also, as with all services, use strong passwords and keep your apps up to date.

To learn more about TikTok and how to use it, see our list of TikTok tips for beginners.

Read the full article: Is TikTok Really a National Security Threat?


Read Full Article

RØDE VideoMic NTG On-Camera Shotgun Microphone Review


Our verdict of the RØDE VideoMic NTG:
The RØDE VideoMic NTG is lightweight, versatile, and filled with useful features. The ease of use and broadcast-grade audio quality makes this a great tool for all professionals.
1010

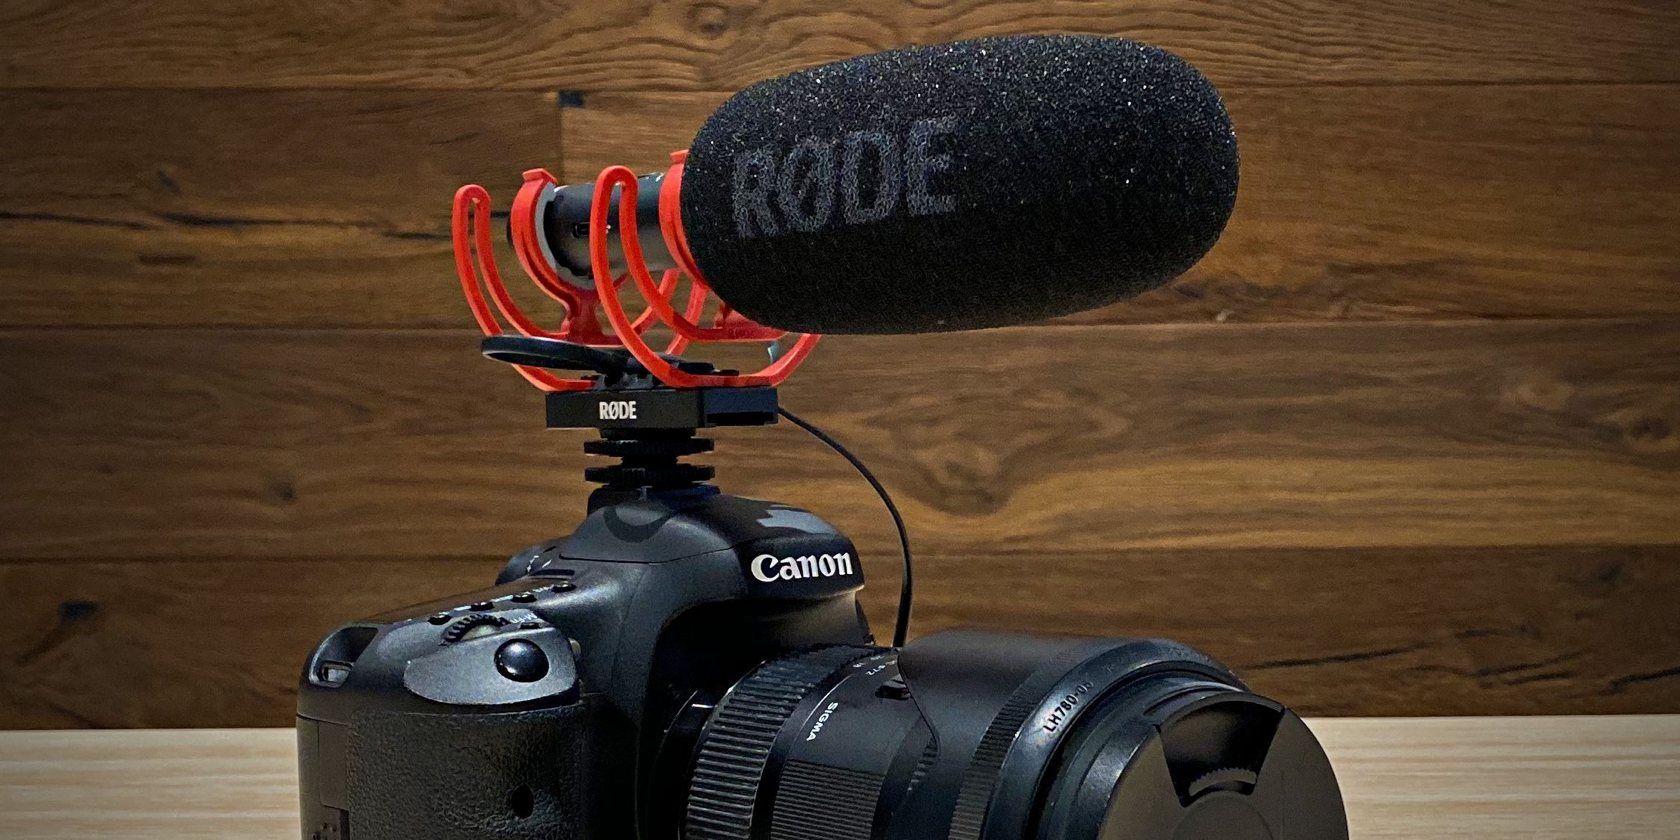
If you’re looking for a high-end recording mic that is reasonably priced, and small enough for you to carry around, look no further. As the dominating shotgun mic producer, RØDE has just created one of the most versatile mics ever.

Combining the signature broadcast-quality sound of the NTG shotgun mic and creating a compact version that can be used in most devices people own, the RØDE VideoMic NTG is definitely a mic worth trying.

With some brand-new features that standard shotgun mics have been lacking, to the small details which make this mic so easy to use, here’s why I think the RØDE VideoMic NTG will soon become the go-to mic for all different types of content creators.

RØDE VideoMic NTG: Specifications

  • Acoustic Principle: Pressure Gradient Electret Condenser
  • Polar Pattern: Super-cardioid
  • Frequency Range: 20Hz-20kHz
  • Frequency Response: 35Hz-18kHz ± 3dB
  • Output Impedance: 10 ohm
  • Signal to Noise Ratio: 79dBA
  • Dynamic Range: 105dB SPL (A-weighted, as per IEC651)
  • Equivalent Noise: 15dB SPL (A-weighted, as per IEC651)
  • Sensitivity: -26dB re 1V/Pa (50mV @ 94dB SPL) ± 1dB @ 1kHz
  • Input SPL at 1% THD: 120dB SPL
  • High Pass Filter Frequency: 75Hz, 150Hz
  • Battery Life: over 30 hours
  • Battery Capacity: 350mAh
  • Output Connection: 3.5mm auto-sensing, USB-C
  • Bit Depth: 24 bit
  • Sample Rate: 48kHz
  • Weight: 3.31 ounces (94 grams)
  • Diameter: 0.85 inches (21.6 millimetres)
  • Length: 6.73 inches (171 millimetres)

What’s In The Box?

In addition to the VideoMic NTG Microphone, it also comes with:

  • SM7-R Camera Mount
  • Foam Windshield
  • SC10 Cable
  • USB Cable (USB-A to USB-C)rode videomic ntg review nicholas teh overview

RØDE VideoMic NTG: Build Quality and Design

When I first held the RØDE VideoMic NTG in my hands, I was pleasantly surprised. The weight distribution in the mic itself felt very even, and the body felt nice and solid. It definitely felt high quality, as you’d expect from a body built from “rugged aerospace-grade aluminum”.

The two main buttons on the mic are responsive and have a good feel to them when pressed. The gain knob is smooth when you adjust it, and has quite a nice amount of resistance so that it won’t change if you happen to accidentally knock or brush it. Overall, it seems that a lot of thought has been put into the design, and I believe that it will stand the test of heavy use, through all different scenarios.

rode videomic ntg review features upclose

Setting Up The Mic

The RØDE VideoMic NTG is actually quite straightforward to use and self-explanatory if you have some basic experience using audio gear. Straight out of the box, the mic is already sitting on the SM7-R mount, with the windshield on. All you need to do is connect it to your DSLR and it’s ready to go!

First, let’s talk about some of this mic’s exciting features. It has an auto-sensing 3.5mm output that interacts seamlessly with both cameras and mobile devices, and will auto-detect whether it’s plugged into a TRS or a TRRS input. Just plug it straight into your mobile devices, tablets, or cameras that accept a 3.5mm input, and it will work right away.

For the streamers and podcasters, the VideoMic NTG also comes with a USB-C output that allows you to connect it to desktops or laptops via USB-A, and it should be detected as an external mic.

rode videomic ntg review nick teh mic used as audio input podcasting

Features and Usability

The RØDE VideoMic NTG has some built-in settings that you can adjust on the fly. It comes with 2 high pass filters (at 75Hz and 150Hz), a high-frequency boost (that you might like to enable when the windshield is on), a pad at -20db, and the option to use a safety channel (that will record in stereo with one channel at -20db). On the mic itself is also a dB peak warning light to alert you if your audio source is too loud.

One of my favourite features is actually the unique infinitely variable gain control that is situated at the back of the mic. It is an active control that allows you to deliver anything from mic level signal, all the way to a headphone level output. This results in cleaner audio and also a highly improved signal-to-noise ratio, all done on the mic before it even hits your recording device!

Some other handy features include a rechargeable lithium-ion battery that provides over 30 hours of battery life, and only takes 2 hours to fully charge from empty. It can be charged via USB-C which allows continuous recording with a power bank.

The auto-power feature can also be quite helpful – it switches the mic on or off based on the state of your camera, and works as long as your camera delivers plug-in power. This also works if you are using the microphone in USB audio mode.

rode videomic ntg review nicholas teh side profile

Audio Quality: How Does The RØDE VideoMic NTG Hold Up?

As you would expect from a RØDE product, it lives up to its name.

I did a few quick tests and was very happy with the results, at a few different distances in a controlled environment, without changing any settings, I recorded my voice at 3, 10, and 20 feet.

There was clarity and a nice depth to the voice when I was 3 feet away (such as in an interview or streaming distance). For the time it took to set it up and calibrate the microphone – which was probably under a minute – it was pretty close to studio standard and hard to fault!

Sure, you could edit it in post-production and make it sound exactly the way you want it, especially if doing video type projects. But even if it’s just recorded directly for live stream or podcasts, I’m sure your audience will be pleased with the quality.

If your subject happens to be at further or varying distances, and you don’t have the luxury of calibrating the gain settings for each scenario (especially in moving scenes), I found that digitally increasing volume and enhancing the audio waves in an editor was actually pretty simple.

Just turning up the gain and equalizing out the noisy frequencies produced audio that I was quite happy with, and I don’t think many people would even be able to tell the difference!

I also happened to have its predecessor – the RØDE NTG-2 (which is built for broadcast and used by many professionals around the world), so I actually did a quick comparison. And to my surprise, the quality was similar.

So it was great to see that they’ve managed to maintain that audio quality in the smaller form factor of the VideoMic NTG, making it so much more versatile and convenient.

rode videomic ntg review mic without windshield

RØDE VideoMic NTG: Final Thoughts

The RØDE VideoMic NTG is the perfect tool for filmmakers, podcasters, or just content producers who want a multipurpose mic handy for whenever the need arises.

At $249 for a broadcast-quality mic, with more than 30 hours battery life, the flexibility to be used with most cameras and mobile devices, while also being small enough to fit into almost any bag, the RØDE VideoMic NTG is a great mic to help anyone from amateurs to professionals increase the quality of their work.

RØDE has kept to their high standards, as anyone who has used their products should be used to. For those new to their line of gear, this would be a great time to give them a shot!

Read the full article: RØDE VideoMic NTG On-Camera Shotgun Microphone Review


Read Full Article

How to Customize Your LinkedIn Feed


linkedin-customize-feed

A large percentage of the LinkedIn userbase use LinkedIn as an online resume. And that’s it. Despite its social media capabilities, people don’t always make full use of its tools.

One of these tools is the LinkedIn Feed, which is a robust way of keeping track of posts from people in your industry. If you want to make full use of LinkedIn, here’s how to customize your LinkedIn feed to its maximum potential.

NB: We will be focusing on LinkedIn as viewed through a web browser rather than the mobile app. However, most of the tips will still apply.

Step 1: Find Your LinkedIn Feed Controls

There are two crucial controls related to your LinkedIn Feed that you need to know about before we get started.

The first one is your Quick Help menu, located in a dropdown menu at the top of your home page.

You can find it by clicking on the small white arrow next to the Me icon where you see a small replica of your profile picture, then scrolling down to the link Quick Help.

Here, you can ask questions and find easy answers with a click of the mouse. Within this menu, you’ll also find a link that says LinkedIn Feed – Overview. This page will break down what goes on through your feed and its specific controls more thoroughly.

LinkedIn Quick Help Menu

The second set of controls that you’ll need to deal with relates to the customization of your LinkedIn Feed. At the top of your feed—where you see the latest post—you’ll also see three little dots on the right-hand corner of that post.

Click on them.

LinkedIn Feed

A dropdown menu will emerge. There, you will see multiple options for this post. At the bottom, there is also a general option called Improve my feed. This will allow you to manage your feed as a whole.

Click on Improve my feed now.

Step 2: Learn How to Use Feed Controls

Once you click on Improve my feed, you’ll be taken to a place where you can control what shows up in your feed. Under Manage my network on the left-hand side of the desktop app, you’ll find four links:

  • People I Follow
  • Groups
  • Pages
  • Hashtags

These are your top-level controls for deciding what you want to see on your feed, and from whom.

LinkedIn Feed Manage My Network

To the right of this box, you’ll also see a section devoted to recommended people, pages, and companies that you can follow. Let’s go through some of those subsections now.

Step 3: Add LinkedIn Feed Recommendations

As part of this list of recommendations, you’ll see a section called Popular pages across LinkedIn.

These recommendations are from pages that are popular across the website. The pages might also align with your interests or the interests of your LinkedIn followers.

If you’re looking for a list of guaranteed hits, here’s a handful of companies that everyone should follow on LinkedIn.

Additionally, you will also find a section called Popular people to follow across LinkedIn.

Once again, the recommendations being offered are a combination of your interests, your industry, people who are popular on LinkedIn, and those people that your followers are interested in.

Popular People on LinkedIn

Alongside popular pages and people, you also have:

  • Popular hashtags across LinkedIn.
  • People who are in the (named) industry also follow these hashtags.

These two sections are my personal favorites, as LinkedIn will take a look at your job experience and what you’re skilled at, and then say “OK, most of the people who have your skills follow these hashtags. Would you like to follow these hashtags, too?”

Because of this, each person’s list of recommended hashtags will be very specific to them and their skillset. To follow one of these hashtags, click on the Follow button beneath it. It will change to Following.

Follow Hashtags on LinkedIn

To unfollow a hashtag, click on the Follow button again.

Lastly, you’ll find a People in your network also follow these people section. It is here that you’ll see recommendations based upon who your connections are interested in.

While this section can get a bit unpredictable—who your colleagues follow might not be the sort of people you need to follow—you can definitely find some useful information.

Step 4: Manage Your LinkedIn Groups

Now that we’ve gone over how to add new interests to your LinkedIn Feed, we can talk about the maintenance of that feed.

Let’s say—for example—that you’re following too many groups, or people within those groups. How do you clear those extra groups out?

Well, the best way to do this is by scrolling back up to your Manage my network section. Click on Group or Groups.

Manage LinkedIn Groups

I personally don’t follow a lot of groups, but let’s say I did and I wanted to get rid of one of these groups entirely.

To leave a group, click on the three dots located to the right-hand side of the group’s name in the Your groups list. Click Leave this group.

Leave a LinkedIn Group

If you go over to your Requested section—and you currently have no pending requests for groups that you want to join—you may see a sign that says Discover groups.

Discover LinkedIn Groups

If you click on this sign, LinkedIn will take you to a new page where you can browse groups related to your interests. This will contribute to your LinkedIn Feed and give you a more enhanced experience on the website.

Step 5: Manage Your Hashtags

Under Manage my network, you can also manage Hashtags. This is especially useful, as hashtags can easily get out of hand if you follow too many.

I personally follow over 30 hashtags. This is not a super high number, but also more than I need. So let’s click on the Hashtags link to adjust this.

Delete Hashtags on LinkedIn

In this section, you’ll see all of the hashtags you follow displayed in a grid. To unfollow a hashtag, click on the Following button beneath each one. This will unfollow the hashtag for you.

LinkedIn Hashtags

Once you’ve trimmed out some of these hashtags, click Done in the top right-hand corner.

Step 6: Manage Your LinkedIn Followers

There is one more way that you can manage your network. Under People I Follow, you can click on the button outlined here in red to do just that:

Find People I Follow LinkedIn

Once you’re under this section, you’ll see three more sections.

  • Follow fresh perspectives
  • Following
  • Followers

Follow fresh perspectives introduces you to a whole new group of people you wouldn’t normally think to follow. By clicking on that button, you’ll find a bunch of active accounts, companies, and hashtags that might be relative to your interests, with some overlap from previous sections.

Follow Fresh Perspectives LinkedIn

You can try scrolling through them now to see if you can find something you like.

Step 7: Customize Your LinkedIn Feed on a Granular Level

After you’ve customized the content you follow, you can go back to your LinkedIn Feed to see new posts. If you’ve made changes there should be a noticeable difference. But what if some of these changes include posts that aren’t the greatest?

Well, you can hide individual posts that don’t relate to your interests.

To hide a post, click on the three dots in the top-right hand corner of the post in question. Instead of clicking on Improve my feed, click on Hide this post instead. This will hide the individual post.

Hide Post LinkedIn Feed

The final adjustment you can make is how the posts show up on your feed: most popular posts versus chronological.

To change your viewing order, go to the very top of your feed. Beneath the box that says Write an article on LinkedIn, you’ll see a dropdown menu that says Sort by on the right-hand side. Click on it.

LinkedIn Feed Chronological

From there, you can choose your preferred viewing method: top versus recent. After you choose an option, LinkedIn will rearrange your feed for you.

Customize Your LinkedIn Feed

LinkedIn is a great social networking site made more interesting when you know how to utilize it properly. By following our guide you can customize your LinkedIn feed to suit your own needs.

However, customizing your feed isn’t the only way you can get the most out of LinkedIn. Here’s how to use LinkedIn Skill Assessments to stand out.

Read the full article: How to Customize Your LinkedIn Feed


Read Full Article

How to Rotate a Video in Windows Media Player


rotate-media-player

Wonky videos can be a pain in the neck—literally! Videos recorded in landscape mode often look as though they’ve been made with the phone in portrait mode. The result is a video that needs rotating before it can be viewed.

While some mobile apps can’t rotate videos, what if the video has already been synced to your PC? Alternatively, it might have been shared with you without the sender realizing it was wonky.

So, how can you rotate a video in Windows Media Player?

Windows Media Player? Really?

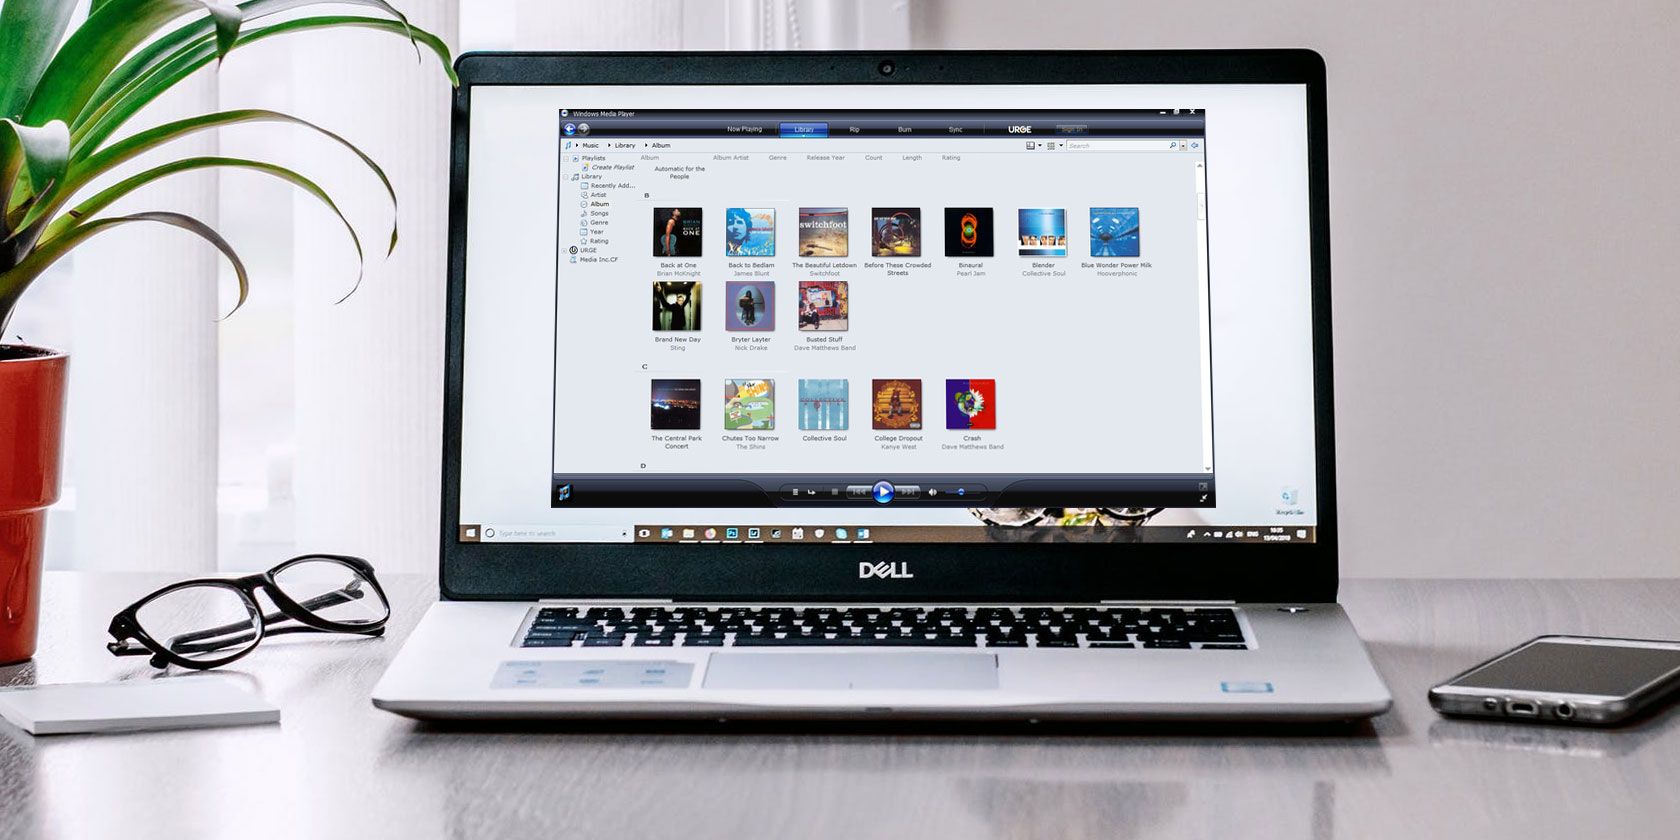
First introduced in Windows 3.0, Windows Media Player has been a fixture of Microsoft’s desktop operating system for 30 years. It’s still available—you’ll find it in Windows 10 by tapping Start and searching for “windows media”. Otherwise, you can download Windows Media Player 12.

Windows Media Player 12 has support for H.264 and MPEG-4 Part 2 video formats, MP4 and MOV container formats, AVCHD, and several others.

So, there’s a good chance that you’re using Windows Media Player to view your videos. But what happens when the video has been recorded in the wrong orientation?

You Can’t Rotate a Video in Windows Media Player

Sadly, Windows Media Player does not support video rotation. In fairness, this should not come as much of a surprise. Other tools have been released over the years that offer a far superior media player experience.

Windows Media Player is good for playback of video files, including HD/Blu-ray standard. However, rotation and advanced filters are not options with this tool.

As a result, you will have to use a third-party tool to flip your video.

Rotating a Video for Windows Media Player

If you want to continue using Windows Media Player, you’ll need another app to handle things like fixing and rotating videos.

Three key options are available for rotating a video for playback in Windows Media Player:

  • Free Video Flip and Rotate from DVDVideoSoft
  • RotateMyVideo at rotatemyvideo.net
  • VLC media player from Videolan

Each solution rotates your video with the minimum of fuss, saving it in a format Windows Media Player can play.

(Windows Movie Maker can also rotate videos, but as this is no longer supported, it is not recommended.)

Free Video Flip and Rotate

The first way to rotate a video for Windows Media Player playback is with Free Video Flip and Rotate.

Start by downloading Free Video Flip and Rotate from DVD Videosoft. This is a free Windows video rotation tool, compatible with Windows XP Service Pack 3 and later. It is particularly suited to Windows 10.

  1. Install and click Add file (or drag your video file into the app window).
  2. With the video selected, check the previews in the main app window. On the left is the default view of the video in its current state. On the right, you’ll see a preview of how the video looks once rotated.

    Free Video Flip and Rotate interface

  3. Below the video, you will find a row of arrows. The first three are for rotation (the others are for flipping video clips). Click one of the arrows to rotate the video.
  4. Select the correct conversion format in the drop-down in the bottom left corner. For Windows Media Player, use MP4. When you’re ready, click Save. The finished video will be set to the desired orientation.

How to Rotate a Video Online With RotateMyVideo

If you don’t want to install another tool, but want to stick with Windows Media Player (despite it being no good for rotating videos) why not use an online utility?

RotateMyVideo rotates and flips your videos, letting you download the results to your PC. You might also share it on Facebook or YouTube or download it to your phone.

Windows users should visit the site and click the Pick Video button. Select the video you wish to rotate, then wait as it is uploaded to the site. Then follow the simple steps below.

Rotate your video in Windows with RotateMyVideo

  1. Use the Rotation arrows to rotate the video left or right, in 90-degree steps.
  2. Change the ratio if necessary and when done click Rotate Video.
  3. Once done, click Download to save the rotated video to Windows. You can then view it in Windows Media Player.

Permanently Rotate a Video With VLC Media Player

To rotate a video with VLC media player, start by visiting www.videolan.org and downloading the app.

  1. Open the video via Media > Open File.
  2. To rotate the video, use Tools > Effects and Filters then Video Effects > Geometry.
  3. Look for Transform, check the box, and set the drop-down box to rotate as required. You can rotate videos by 90, 180, or 270 degrees.
  4. Click Save, then Close to finish, and Play to view the fixed video.

Rotate a video for playback in Windows

Unfortunately, this is isn’t temporary; it will also rotate all subsequent videos played in VLC media player. As such, remember to disable rotation by clearing the Transform checkbox.

To save the rotation and view the rotated video in a different app such as Windows Media Player, use the Convert/Save tool.

  1. First, complete the steps above, then open Media > Convert/Save and click Add.
  2. Find the file you wish to rotate, then Convert/Save.
  3. In the subsequent screen, find the conversion Profile and click Settings (spanner icon).
  4. In Profile Edition, click Video Codec > Filters and check the Video transformation filter.

    Rotate videos in Windows with VLC

  5. Click Save, then Start to begin the conversion.

VLC media player will display a bar to denote progress. Once this has completed, click Play to enjoy the rotated video.

With the file saved, view the rotated video in Windows Media Player or any other player of your choice.

Don’t Get a Crick in Your Neck—Rotate Your Videos in Windows!

Incorrectly oriented videos are a massive inconvenience. Rather than rotate your screen, or living with a bad neck, the best solution is to use software. We’ve offered three suggestions to rotate your videos for subsequent viewing in Windows Media Player.

Free Video Flip and Rotate is a useful downloadable utility, while RotateMyVideo is a handy web app. Both effortlessly rotate videos recorded at the wrong orientation.

Finally, VLC media player can also rotate videos in Windows (and other operating systems). However, it is also an accomplished media player, and can effortlessly replace Windows Media Player.

VLC media player is jam-packed with useful tricks. Check our guide to some of the top free VLC media player features.

Read the full article: How to Rotate a Video in Windows Media Player


Read Full Article

How to Download Movies on Your iPad or iPhone


download-movies-ipad

Streaming a movie without Wi-Fi leads to buffering, pixelation, and expensive data charges. You should find out how to download movies to your iPad or iPhone instead. That way, you can watch movies whenever and wherever you want.

When you download a movie to your device, it’s available offline and in the highest quality: perfect for a long flight or a trip to the boonies.

Here are all the ways to download movies to your iPhone or iPad to watch offline.

Download Movies That You Bought or Rented Digitally

There’s no shortage of excellent options to buy or rent a movie online. You can get films from Apple, Google, Amazon, and even YouTube. But just because you paid for a new movie doesn’t mean you’ve automatically downloaded it to your device.

Most of these services let you stream your purchased movies without downloading them first. This gives you instant access since you don’t need to wait for the download to finish first. However, you can’t watch your latest purchases if you find yourself without an internet connection.

To watch movies offline on your iPhone or iPad, you need to download it using the app you bought or rented it from. Most of these apps work in roughly the same way.

Let’s look at how to buy and download a movie in the Apple TV app as an example.

How to Download Movies From the Apple TV App

Apple TV on the App Store

The Apple TV app replaces the Videos and iTunes Store apps on your iPad or iPhone. You can use it to find out what’s popular at the moment, buy or rent movies, and watch your purchased content.

You should already have the Apple TV app on your device. If you don’t, download it from the App Store.

Download: Apple TV for iPadOS and iOS (Free)

Here’s how to buy and download movies on your iPad or iPhone using the Apple TV app:

  1. Open the Apple TV app on your iPad or iPhone.
  2. Go to Watch Now or Search to find a movie you want to purchase.Apple TV app showing latest movies
  3. Tap Buy or Rent to purchase the movie. (Rented movies are available for 30 days or 48 hours after you start watching them.)Apple TV movie Buy and Rent buttons
  4. Enter your Apple ID details or use Face ID or Touch ID to confirm your purchase.
  5. Tap Download to begin downloading your movie, or go to the Library and tap the Cloud icon to download previously purchased movies.Apple TV app Play and Download buttons
  6. Keep your device connected to the internet while the progress circle fills up.
  7. Go to Library > Downloaded to view all your downloaded movies.Apple TV downloaded movie with device icon

After watching a downloaded movie in the Apple TV app, find it in your library and tap the device icon to see the Remove Download option. It’s a good idea to erase downloaded movies after you watch them to keep some free space on your device.

Download Movies From a Streaming Service

While you can buy movies one-off, most people have fully embraced the age of subscription services. This is largely thanks to the rise of Netflix, although there are plenty of other great subscription streaming services as well: Amazon Prime, Hulu, Disney+, and many more.

Almost all these services, Netflix included, give you the option to download movies to your iPad or iPhone so you can watch them offline. Of course, you need to have an active subscription to do so.

The process is very similar to buying a movie from the Apple TV app. The main difference is that you don’t need to “buy” anything because you already pay for the subscription service.

As another example, here’s how to download Netflix movies to your iPad or iPhone. The process is largely the same for whichever streaming service you use.

How to Download Movies From Netflix

Netflix on the App Store

If you haven’t already, you need to download the Netflix app on your iPad or iPhone from the App Store. You also need an active Netflix subscription to watch and download movies.

It’s also important to note that not all movies and TV shows are available to download from Netflix. If you don’t see a download button, then that title isn’t available for download.

Download: Netflix for iPadOS and iOS (Free, subscription required)

Follow these instructions to download Netflix movies to your iPad or iPhone:

  1. Open Netflix on your iPad or iPhone.
  2. Tap Home or Search to find the movie you want to download.Netflix latest movies
  3. Select the movie, then tap the Download icon (a downward facing arrow). If you don’t see a Download icon, it means that movie isn’t available to download.Netflix download button
  4. Keep your device connected to the internet while the progress circle fills up.
  5. Tap Downloads to view and watch all your downloaded movies and TV shows.Netflix downloaded movie

After watching a downloaded movie on Netflix, go to the Downloads page and swipe left to reveal an X button. Tap it to delete your movie download. Make sure to do this occasionally, as you can’t have more than 100 titles downloaded at once from Netflix.

How to Download YouTube Videos on iPad and iPhone

YouTube on the App Store

If you spend a lot of time watching YouTube videos, you probably want to know how to download them to your iPad or iPhone. As it turns out, the process is a lot like downloading movies from most streaming services. It’s even more so the case since you need to pay for a YouTube Premium subscription to do so.

YouTube Premium is a monthly subscription service that eliminates YouTube ads, unlocks original content, and allows you to download YouTube videos to your computer or mobile devices.

Download: YouTube for iPadOS and iOS (Free, subscription available)

If you have YouTube Premium, here’s how to download videos to your iPad or iPhone:

  1. Open YouTube on your iPad or iPhone.
  2. Go to Trending, Subscriptions, or Search to find a video you want to download.YouTube Original movies
  3. Start playing the video, then tap the Download button beneath the player.YouTube Download button
  4. Choose the download quality you want, then keep your device connected to the internet until the download is complete.
  5. Go to Library > Downloads to see all your downloaded videos.YouTube downloaded movie

Tap the Downloaded button beneath the video player to delete your downloads. Or go to Library > Downloads and tap the Ellipsis (…) button to delete other downloaded videos.

Create Plenty of Free Space for Downloaded Movies

Now you know how to download movies to your iPad or iPhone. You can do so from a range of online stores or streaming subscription services. But simply knowing how to download movies doesn’t necessarily mean you have enough space for them.

Movies are some of the biggest files you’re likely to have on your devices. If you want to download some movies before a long flight or a weekend away, make sure you create free space on your iPhone or iPad to make plenty of room for them all.

Read the full article: How to Download Movies on Your iPad or iPhone


Read Full Article

Octi launches a social network built around augmented reality


Octi has created a new social network that uses augmented reality to connect the act of seeing your friends in real life with viewing digital content like their favorite YouTube videos and Spotify songs.

When I wrote about the startup in 2018, it was building AR technology that could do a better job of recognizing the human body and movement. Last week, co-founder and CEO Justin Fuisz (pictured above) told me that this was “a really cool feature,” but that Octi’s investors pushed him “to do more, go deeper.”

Speaking of those investors, the startup says it’s now raised $12 million in funding (including a previously announced seed round of $7.5 million) from Live Nation, Anheuser-Busch InBev, Peter Diamandis’ Bold Capital Partners, Human Ventures, I2BF, Tom Conrad, Scott Belsky and Josh Kushner.

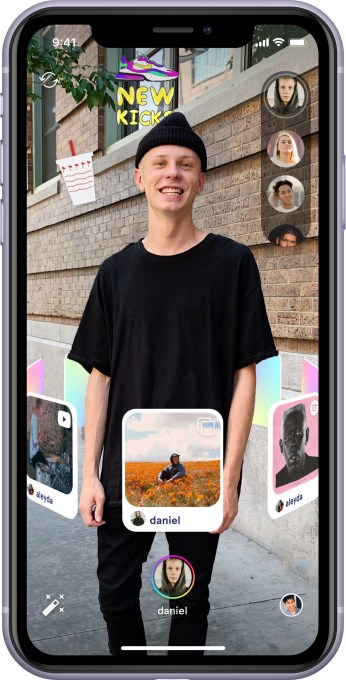
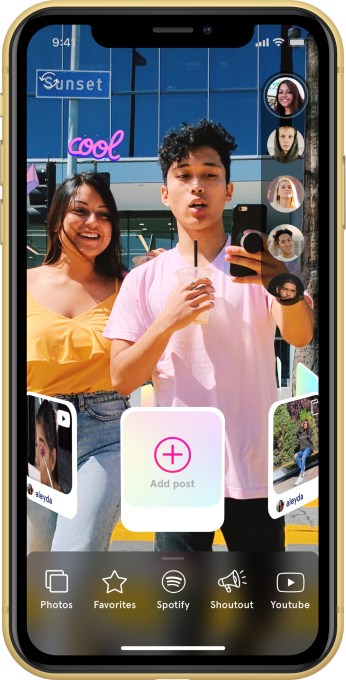
Last week, Fuisz demonstrated what he now sees as Octi’s “mic drop” moment — opening the new app and pointing his iPhone camera at a colleague. The app quickly recognized her, allowing Fuisz to send her a friend request. And once the request was accepted, could Fuisz look at her through the camera again, where she was surrounded by a floating “belt” of virtual items that she’d created with videos, songs and photos.

Octi app

Octi also allows you to include fun effects and stickers. Your friends can change your profile too, making you wear a funny hat or giving you a rousing theme song for the day.

To create a facial recognition experience that’s fast and simple, Fuisz said that Octi’s powered by a “neural network on the edge,” allowing the app to process images on the device (rather than uploading them to the cloud) in a privacy-friendly way.

He said the company has taken other steps to optimize the process, like prioritizing friends-of-friends rather than searching through the faces of everyone in the network, resulting in an app that can identify a friend in as little as 20 milliseconds.

While Octi allows you to view friends’ profiles remotely, it’s worth emphasizing that the core experience is meant to be in-person. In fact, the company provided a statement from analyst Rich Greenfield in which he described the app as “an impressive technology that gives teens a compelling reason to be present and communicate with their phones, while gathered with their closest friends.”

Octi app

I wondered whether a new social dynamic also provides new opportunities for harassment and bullying, but Fuisz noted that for now, Octi profiles and belts are only visible to friends that you’ve approved. So if one of your connections is doing something you don’t like, “You just say goodbye. That’s it. That’s a simple way of dealing with it.”

Fuisz added that this initial version provides a foundation for many more experiences: “There’s endless opportunity for games and other fun things you can do.”

Ultimately, he’s hoping to turn this into a WeChat-style platform for outside developers to build social tools and content. And since Octi works on iPhone 7 and above (with plans for an Android version later this year), it can potentially reach an enormous audience out of the gate, rather than facing the scale issues of a more specialized AR or VR hardware platform.


Read Full Article