01 March 2019

Rotten Tomatoes Wants You to Stop Review Bombing Movies


rotten-tomatoes

Rotten Tomatoes is making changes to prevent people from review bombing movies. Review bombing is the best term for it, but, thanks to Rotten Tomatoes’ “Want to See” feature, this is actually affecting movies that haven’t even been released yet.

What Is Review Bombing?

Review bombing describes a coordinated effort to lower a review score. This has been used on movies and video games for different reasons. Some are because of something in the piece of content itself, but oftentimes it will be something else altogether.

In the latest example, the new Captain Marvel movie has been subjected to intense criticism. Not because of the film itself (which hasn’t even been released yet) but because of comments made by Brie Larson, the actress playing the titular Captain Marvel.

The comments themselves aren’t important. All that matters is that because of these comments, certain individuals have expressed their dislike of the film using Rotten Tomatoes as its as platform. And Rotten Tomatoes has had enough.

Rotten Tomatoes Disables the Haters

As explained on the Rotten Tomatoes Product Blog, Rotten Tomatoes “will no longer show the ‘Want to See’ percentage score for a movie during its pre-release period.” Because this is often filled with haters, and confused with the actual ‘Audience Score’.

Rotten Tomatoes is also “disabling the comment function prior to a movie’s release date” due to “an uptick in non-constructive input, sometimes bordering on trolling”. Comments will be enabled again once a movie has actually been released in theaters.

You’re Still Free to Express Opinions

There’s nothing wrong with not wanting to see a movie, whatever your reasoning. There’s also nothing wrong with expressing an opinion about an upcoming movie, even if that opinion is negative. And you’re still free to do any and all of that.

However, Rotten Tomatoes is under no obligation to allow its platform to be used in such a way. Especially as certain releases are being condemned before anyone has even seen them. Which proves films are being judged for reasons other than their artistic merit.

Judging something before you’ve even seen it or played it is patently ridiculous. Especially if this desire to knock something is being done with the intention of persuading other people not to see it or play it. And no, this doesn’t impact your right to free speech.

Read the full article: Rotten Tomatoes Wants You to Stop Review Bombing Movies


Read Full Article

What’s the Best Browser for iPhone? 7 Apps Compared

Taking Screenshots on a Chromebook: A Quick and Dirty Guide


chromebook-screen

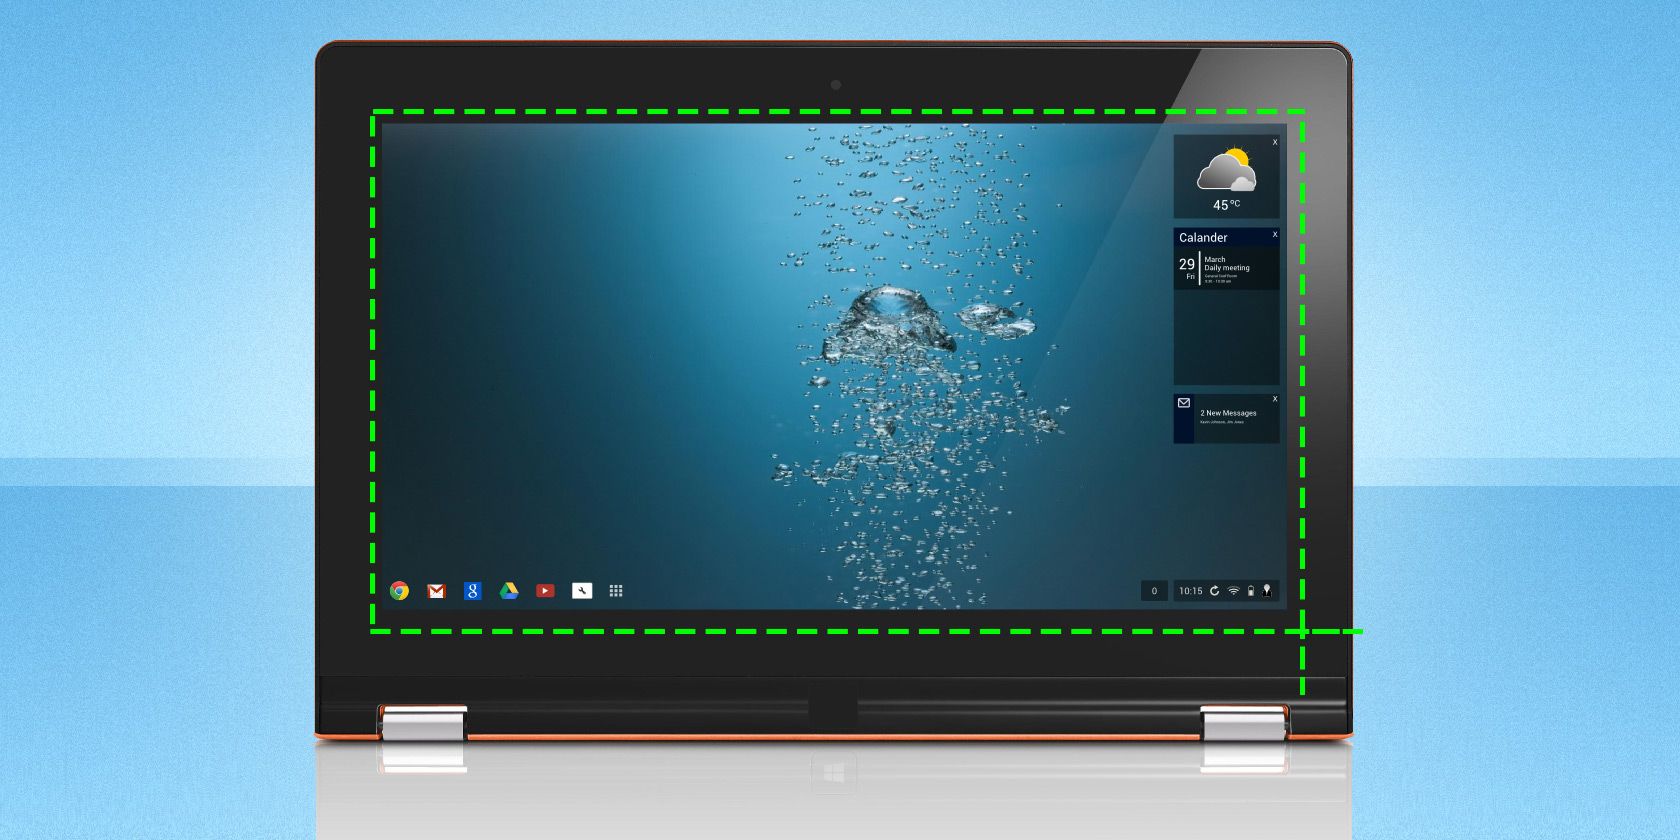
With Chromebooks getting better all the time, more people are using them to get work done. I’ll assume you’re one of them, and you’ve reached a point where you need to take a screenshot. Fortunately for you, Google has built this feature into Chrome OS.

Here’s how to take a screenshot on a Chromebook, find it, and share it. We’ll also go over a couple great apps that let you take a picture on a Chromebook and edit with annotations in the browser.

How to Take a Screenshot on a Chromebook

If you’re familiar with Microsoft Windows, you may search your Chromebook keyboard looking for a Print Screen key. Chromebooks don’t have a dedicated screenshot key, but you still start a screen capture in much the same way.

To get a screenshot of your whole screen or a part of your screen (even your login screen), you need to use the Show Windows key. This is the button that has a stack of rectangles on it, representing a bunch of windows. It is generally the 5th or 6th key in the top row, between the Full Screen and Brightness Down keys.

  • For a full screen screenshot, press Ctrl + Show Windows.
  • For a partial screenshot, press Ctrl + Shift + Show Windows and drag the selection to your preferred size.

Take Screenshot on a Convertible Chromebook Tablet

Many newer Chromebooks have screens that you can fold all the way back, converting your laptop into a tablet. This is one of the more exciting features of new Chromebooks.

Since the keyboard is no longer active in tablet mode, and the virtual keyboard doesn’t offer the same buttons, Google has provided an alternative way to take screenshots. Simply hold down Power + Volume Down.

Where to Find Your Screenshot

Chrome OS displaying a notification after a screenshot

Chrome OS will automatically save your screenshot to your Downloads folder. The image will be in the PNG format, and the name will include the date and time. For example: Screenshot 2019-02-15 at 1.22.47 PM.png.

A notification will appear as soon you take the screenshot. Clicking this notification is the easiest way to locate your file. Chrome OS will open the Files app and highlight the image.

If you miss or accidentally clear the notification, you can find it again by clicking on the system icons near the clock and browsing the the list of notifications. Alternatively, you can navigate to the file yourself. Open the Files app and click on the Downloads section.

How to Share Your Screenshot

Chromebooks allow you to access files as you would on any other computer. You can attach these screenshots to an email, share them on social media, upload them to cloud storage, or copy them to a USB stick or SD card.

When you plug in a removable drive, like a USB stick or SD card, a notification will appear. Click it to open the available storage in the Files app. Alternatively you can find the flash drive or SD card in the Files app’s sidebar.

Another quick way to access this screenshot on another device is to drag and drop it to the Google Drive section of the Files app. If you prefer Dropbox, OneDrive, or another cloud storage provider, you will have to upload the screenshot to your account by visiting their websites.

Note: If you’re using the guest account, make sure you copy the files to an SD card or Google Drive before you exit. The guest account Downloads folder is emptied when the guest logs out, so all those screenshots will be deleted.

Helpful Google Chrome Extensions and Web Apps

The Awesome Screenshot Google Chrome web app

While Chrome OS has expanded beyond being a web browser in a computer, the bulk of the experience still centers around Google Chrome. You can increase what your computer can do by installing Chrome extensions.

There are also numerous extensions for taking screenshots from within the Chrome browser. You can find them in the Chrome Web Store. Some Chrome extensions or web apps, such as Awesome Screenshot, allow you to edit or annotate your screenshots right away, providing functionality not built into Chrome OS by default.

While Google no longer offers an official Chrome screenshot extension, Save to Google Drive is one you may find useful. This extension gives you the option to save images directly to your Google drive using the right-click context menu.

Download: Awesome Screenshot (Free)
Download: Save to Google Drive (Free)

Also Try Chromebook-Compatible Android Apps

As you may have noticed, the screenshot shortcut for Chromebooks in tablet mode is the same as Android devices. The similarity doesn’t stop there. Now that Chromebooks come with Google Play, you can capture screens on Chromebooks in much the same way as you take screenshots on an Android device.

Not every third-party app is compatible with Chrome OS, but many are. Screenshot Easy, for example, not only works on Chromebooks, but it has an interface that scales up to larger screens. The folder view makes screenshots easy to browse, and the app comes with its own editing tools.

Download: Screenshot Easy (Free)

Do You Need More Chromebook Help?

Chromebooks are simple computers, so there isn’t nearly as much to learn as there is on Windows, macOS, or other versions of Linux. Chrome OS comes with an app called Get Help that can answer many of your questions. Or you could check out our ultimate Chromebook how-to guide.

Image Credits: John Baer/Flickr

Read the full article: Taking Screenshots on a Chromebook: A Quick and Dirty Guide


Read Full Article

How to Use Old Games and Software on Windows 10


Microsoft tries to make programs and file formats backward compatible. It doesn’t always work. Sometimes the gap between operating systems is too far.

Applications designed for Windows XP, Windows 98, and older are now starting to struggle. Many cease to function unless you find a specific Windows 10 fix for the older software. Even using the Windows 10 built-in compatibility modes, some programs refuse to come back to life.

Before you give up hope, try these tips to get your old Windows games and programs running on Windows 10.

Why Don’t Old Games and Apps Run on Windows 10?

Some old games and programs do run on Windows 10. It depends on the program. If the program or game is especially valuable to its user base, a workaround might exist. Otherwise, you should consult this short list of reasons your old software is refusing to play ball with Windows 10.

  • Dependencies on Old Software Versions: Some software depend on old libraries no longer automatically included in the Windows 10 installation.
  • 16-bit Software: 64-bit versions of Windows do not contain the built-in compatibility layer for older 16-bit applications. You can read more about why 64-bit Windows no longer supports 16-bit applications here.
  • DOS Software: Windows 10, like all versions of Windows since Windows XP, no longer runs on top of DOS. Some DOS programs still run, but the vast majority—especially games—simply fail to work.
  • DRM: Another issue facing old Windows programs is non-existent or deprecated DRM solutions that stop programs booting. For instance, SecuROM DRM causes major issues for old games on new systems.

How to Use Old Games and Programs on Windows 10

1. Run as Administrator

If your issue is with a Windows XP program, the first thing to try is running the application as an administrator. During the Windows XP era, most users were typically administrators. This isn’t always the case with Windows 10, as Microsoft attempts to shore up security. Developers coded applications with the assumption they had administrator access and will fail if not.

red alert run as administrator

Head to the application executable or its shortcut, right-click, and select Run as Administrator.

2. Program Compatibility Troubleshooter

If right-clicking the application fails to work, we can try to let Windows 10 make its own decision about compatibility settings. Windows 10 has an integrated Program Compatibility Troubleshooter that helps to “detect and fix common compatibility problems.”

Use the Start menu to search for run programs. Select the best match to open the troubleshooter.

run programs made for previous windows versions

Select Advanced > Run as Administrator, then Next to proceed.

run program run as admin

The troubleshooter will now scan your system for potential compatibility issues. If your application isn’t listed, select the Not Listed option, and select Next.

run program not listed

You’ll have to browse to the executable or shortcut. I’ll be testing one of the greatest football management games ever made: Premier Manager 98.

run-program-browse-to-file

Select Try recommended settings.

run program use recommended settings

Once you apply the settings, test the program. As you can see, the program now works, albeit notifying me that I need the original CD-ROM. Press Next.

premier manager 98 compatibility test

Program Compatibility Failure

The troubleshooter will now ask you if the fix was successful or not. Selecting Yes, save these settings for this program will close the troubleshooter. Selecting No, try again using different settings will open an additional dialogue containing the following options:

  • The program worked in earlier versions of Windows but won’t install or run now.
    Example: The setup program won’t begin.
  • The program opens but doesn’t display correctly.
    Example: Wrong colors, size, or resolution.
  • The program requires additional permissions.
    Example: Access denied errors appear, or the program requests administrator permissions to run.
  • I don’t see my problem listed.

Make your selection based upon the results of the test we ran in the previous section. The examples listed should help you understand which option is right for your application. However, it might take a combination of fixes to get it up and running, so don’t lose hope at the first hurdle.

run program more problems encountered

3. Manual Compatibility Settings in Windows 10

You don’t have to use the troubleshooter to figure out how to play old games on Windows 10. You can access Windows 10 compatibility options through the application Properties menu.

premier manager 98 properties option

Select the Compatibility tab. Use the Compatibility mode option to run your application in a previous version of Windows. Furthermore, you’ll find compatibility settings for Reduced color modes, Run in 640 x 480 screen resolution, Disable display scaling on high DPI settings, and Run this program as an administrator.

premier manager 98 compatibility properties

The automated troubleshooter offers the same options. When you’re finished, press Apply > OK.

compatibility properties run in windows version

Keep in mind that these changes only affect your user account. If you’d like to apply the compatibility settings changes for every user, use the Change settings for all users button.

As with the automated troubleshooter, this will be a process of trial and error.

4. Unsigned Drivers

64 and 32-bit Windows 10 uses driver signature enforcement. Driver signature enforcement requires all drivers to have a valid signature. Driver signing helps with security and stability, ensuring malicious or unstable drivers don’t slip through the net.

In some cases, your old game or program will not use up-to-date drivers. In that instance, Windows won’t let the program install or run. However, you can disable driver signature enforcement—but your system will become slightly more vulnerable afterward. It all depends on how desperate you are to play the game or use the program.

Disable Driver Signature Enforcement

You can use the Advanced Boot Options menu to boot Windows 10 with driver signature enforcement disabled. Using the boot option to disable the driver signature signing is not a permanent change, and the enforcement will reenable next time you restart Windows 10. However, it should remove the drivers you install while the enforcement is switched off.

Open the advanced boot menu by pressing Shift while you click Restart.

windows 10 advanced boot options troubleshoot

Select Troubleshoot > Advanced Options > Startup Settings. You should have arrived at this screen:

windows 10 advanced boot options startup settings

Press Restart.

windows 10 startup settings restart

Select 7 at the Startup Settings screen to active the “Disable driver signature enforcement” option. Press Enter to boot your system. You’re now free to install your unsigned drivers.

5. Use a Virtual Machine

Windows 7 included a “Windows XP Mode.” It was an excellent feature that was essentially just a virtual machine with an XP license. Nonetheless, it made booting older applications that bit easier. Unfortunately, Windows 10 doesn’t have an XP mode. However, you can use a virtual machine to create your own XP mode.

create virtual machine for windows xp in virtualbox

All you need is a virtual machine, like VirtualBox or VMware Player, and an old—but crucially, spare—Windows XP license. Install your Windows XP license in the virtual machine, and you’ll be able to run your application in the older version of Windows, in a window on your desktop.

Realistically speaking, this isn’t an ideal solution. The success of a virtual machine depends on the application. Furthermore, virtual machines have limited hardware support.

6. DOSBox

If you’ve got an old DOS program or game refusing to work, DOSBox is going to be your friend. DOSBox is a free application that runs a full DOS environment on your Windows 10 system, allowing you to run old DOS games and applications.

DOSBox brings hundreds of classic games back to life. It is extremely well used, meaning if you’re stuck, there will be a solution online. Similarly, you can purchase games via GOG.com pre-packaged to run in a DOSBox instance.

Download: DOSBox for Windows

Run Your Old PC Games and Software at Last!

Nostalgia is a powerful attraction. I know: I love booting up old Windows games. Windows 10 doesn’t always want to play ball, though. Ideally, you’ll be able to find modern alternatives for old applications. However, it isn’t always possible, and just isn’t possible for some business applications.

Luckily, one of the methods we’ve detailed above will be the solution, so give them a try!

If you feel the need to play some old PC games, check out these sites where you can download old games for free!

Read the full article: How to Use Old Games and Software on Windows 10


Read Full Article

The 15 Best Sites to Watch TV on Your Computer Over the Internet


With the rise of streaming services, there are now more ways than ever to watch TV online, whether you’re binge-watching TV series, watching free live TV, or sitting through endless movies.

Here are the best sites to watch TV on your computer over the internet.

1. Netflix

If you want to watch TV series online, Netflix is the undisputed king.

You can find everything from the best period dramas to awesome Netflix originals you’ve never heard of. There’s also a vast library of movies, documentaries, kids’ shows, and more.

2. Hulu

For a long time, Hulu was the go-to place for people looking to stream free TV. You could find old episodes of shows that you haven’t seen in years. If you were willing to pay, you could find a growing library of movies and more recent TV episodes.

Today, there is no free tier. If you want to watch the current seasons of popular TV shows, you will need to pay for a subscription. Hulu is also a good place to find recent movies and even some original series.

3. Amazon Prime Video

Amazon offers two different solutions for watching TV series and movies.

Firstly, there’s Amazon Prime Video. The service is a competitor to Netflix, and you get access as part of your Amazon Prime subscription. Secondly, you can rent or buy digital copies of TV shows and movies that you can watch on your various devices.

4. Vudu

Vudu started out offering its own devices via proprietary peer-to-peer technology. In March 2010, Walmart acquired the company, and it shifted to providing a library of thousands of movies and TV series.

Vudu’s pricing for individual video rentals is competitive with Amazon’s pricing structure, with the added competitive advantage that there’s absolutely no membership fee for signing up with Vudu. You pay for whatever you watch.

The app also has a free section. Anyone can watch TV shows for free without downloading them; you can choose from a library of hundreds of free movies or TV shows. All of the free TV shows and movies are ad-supported.

5. Xfinity Stream

xfinity stream app

Through its Xfinity brand, Comcast is quickly expanding its entertainment offering to include internet-based media streaming services. The service offered to all of its customers is called Xfinity Stream.

This service allows customers to choose from a collection of popular (and recent) TV series and movies.

6. iTunes

Apple provides digital content through iTunes. On iTunes, you’ll notice two categories: TV Shows and Movies.

Prices for both movies and TV episodes are comparable to other services like Amazon and Vudu, but you get the added benefit of quick access to iTunes from all of your Apple devices.

7. Google Play

google play movies list

Google provides digital content through Google Play. On Google Play, you’ll find a Movies and TV section where you can buy and stream both movies and TV episodes to your Android (and other Google) devices.

Prices are generally equivalent to iTunes prices, but again the benefit of using this service is how quick and easy it is to access all of your favorite entertainment straight from your Android devices. Fast, easy, and with no subscription required.

8. FandangoNOW

Fandango has been around for a long time as one of the internet’s most well-known movie review sites. But the site is also a place you may want to go to watch movies as well. Fandango’s streaming service is called FandangoNOW.

There is no subscription fee. Just pay for the TV series and movies you want to watch on an a la carte basis.

9. Sling TV

Many of the services we have looked at so far are suited towards streaming TV shows on demand rather than letting you stream live TV. Sling, however, is different. It enables you to stream many of the mainstream American TV networks in real-time.

Two packages are available: Orange and Blue. Orange provides access to AMC, CNN, ESPN, the Food Network, TBS, and a few other mainstream channels. Blue adds channels from FOX and NBC. You can watch on one device at a time with Orange and up to three devices with Blue.

Sling TV is cheaper than the competition because it does not carry local programming. To learn more, read our comparison of Sling TV vs. DirecTV vs. PlayStation Vue.

The service is only available in the US.

10. YouTube TV

If you want to watch live TV over the internet, check out YouTube TV. It carries live programming from more than 60 American TV networks. The country’s biggest networks—such as ABC, CBS, NBC, FOX, CNN, TBS, and ESPN—are all included. You can also enjoy international channels like BBC World News.

YouTube TV is also a must-have if you’re a baseball or soccer fan. It has a deal in place with MLB.tv and regional broadcasting deals with the Seattle Sounders and Los Angeles FC.

After initially launching in New York, Los Angeles, Chicago, Philadelphia, and San Francisco, YouTube TV is now available in 98 percent of US homes.

11. PlayStation Vue

Despite the name, you do not need to own a PlayStation or subscribe to PlayStation Plus to access PlayStation Vue. Instead, the service is a standalone product that lets you watch live TV on a computer or other device.

In addition to live TV, PlayStation Vue also offers on-demand video and a cloud-based DVR feature.

There are different packages available. The cheapest package— PlayStation Vue Access—costs $45/month and includes channels from CNN, ESPN, Disney, FOX Sports, MSNBC, Telemundo, and more.

The premium package (PlayStation Vue Ultra) costs almost $80/month.

12. DirecTV Now

DirecTV Now won’t let you stream TV shows for free, but for a small monthly fee, you can get access to a host of live TV shows. Like PlayStation Vue, the service offers on-demand TV shows and movies.

The basic package includes channels from many of the leading US TV networks, including A&E, AMC, CBS, Discovery, Disney, FOX, NBC, and Univision. If you pay an extra fee, you also get access to HBO GO, Showtime on Demand, Starz on Demand, amd Max GO.

Once again, the app is only available to people who live in the United States.

13. USTVNow

ustv now prices

If you want to watch free TV shows, your options are more limited. Sure, there are plenty of illegal options out there, but if you want to stay within the confines of the law (and you really should), there are fewer services available.

If you’re an American, it’s always worth checking out USTVNow. There’s a free plan which provides access to five channels. They are ABC, CBS, The CW, PBS, and My9.

For $19/month, you can upgrade to 24 channels. The channels include AMC, Animal Planet, BBC America, Bravo, CNBC, Comedy Central, Discovery Channel, ESPN, ESPN2, FX, FOX News, MSNBC, National Geographic, NBC Sports, Nickelodeon, Syfy, and TLC.

You need to be either an American citizen or an American resident to use USTVNow.

14. Pluto TV

Pluto TV is another way to watch free TV and movies online.

The content line-up is somewhat different from the apps and services we have discussed so far. Although there are some mainstream TV networks available—including Bloomberg, Sky News, and CNBC—many of the channels are online-only networks like Cheddar and Newsy.

Pluto also offers several specialist movie channels that focus on a particular genre. For example, there’s Pluto TV Westerns, Pluto TV Romance, Pluto TV Family, Pluto TV Horror, and many more.

In total, there are more than 100 free TV channels for you to browse.

15. FuboTV

Anyone who loves sports should give serious consideration to FuboTV. It specializes in airing NFL, MLB, NBA, and soccer from around the world. The app has exclusive English-language rights to Friday night matches in Mexico’s Liga MX; it is the most popular soccer league in the US.

Don’t Forget TV Network Sites!

Finally, it’s always worth checking the websites of the major TV networks. Most of the big names have some way to watch their latest TV shows a day or two after they air.

Some require you to have an existing cable connection (so they may not be a solution for cord cutters). However, others make their shows available to everyone.

Other Ways to Watch TV on Your Computer

If you want to stream TV shows online, these sites and services aren’t your only options. You can also use apps like Kodi and Plex.

To learn more, check out our articles on private Roku channels you should install right now and everything you need to know about Plex live TV.

Read the full article: The 15 Best Sites to Watch TV on Your Computer Over the Internet


Read Full Article

Why MP3tag Is the Only Music Tag Editor You’ll Ever Need


best-mp3-tag

In the age of music streaming where everything is categorized and searchable in seconds, you might not think much about metadata. But anyone with a music collection knows the pain of trying to manage a poorly tagged library.

This is why a music tag editor is essential—and MP3tag is the best in the business. Let’s take at what MP3tag has to offer and how to use it efficiently.

Why Use a Music Tag Editor?

In case you’re not aware, MP3 (and other audio file formats) supports various metadata. Metadata refers to information kept about data; in the case of music, this includes the artist, album, year of release, genre, and similar information.

It’s important to note that metadata is completely separate from the filename. You can have an MP3 file named The Beatles – Come Together.mp3 that has zero metadata. In this case, the only way you have to identify the track is its filename. This becomes a mess in a playlist and provides you no good way to organize tracks by artist, genre, or similar.

Music you buy from sources like iTunes or Amazon Music likely comes with the proper tags already. But a tagging editor is still vital for music you’ve downloaded from other sources, allowing you to fix errors, etc.

Getting Started With MP3tag

Download MP3tag from its official website to begin. The installer is straightforward with no nonsense to worry about. The software is only officially available for Windows, but the site includes instructions for running it on macOS via Wine.

Despite its name, MP3tag works with many other audio file formats. It’s compatible with AAC, FLAC, OGG, WMA, and more.

Once you’ve installed MP3tag, you’ll be greeted with its main interface. You should first tell MP3tag what directory you’d like to work in. This will likely be your Music folder by default, but you can change it via File > Change Directory or the Ctrl + D shortcut.

Mp3tag Change Directory

Once you’ve done this, MP3tag will show all the music files in that folder, with their metadata information, in its main panel. This can become overwhelming, so it’s a good idea to work on a single album or artist first until you get the hang of it.

Basic MP3 Tag Audio Tagging

If you only need to tag a few files, you can use MP3tag’s simple utilities. Click a track in the main panel list and you’ll see its basic tags appear in the left sidebar. If you don’t see this, toggle View > Tag panel or press Ctrl + Q.

In this panel, you’ll see some common tags like Title, Artist, Album, Year, and Genre. Simply click inside each of these fields and enter the desired info. Note that MP3tag also allows you to add album art. Right-click the current art and choose Extract cover to grab it from the files if available, or Add cover to set any image as the cover.

Each field also has <blank> and <keep> entries in the dropdown list. Use keep to leave one or more values the same while changing others.

MP3Tag Tag Editor Panel

If you want to change tags for multiple songs (for example, selecting all tracks from an album so you don’t have to enter the album name multiple times), you can use the same keys as in File Explorer. Hold Ctrl to select multiple files, or select one file and hold Shift while clicking a second to select to every item between them. You can also press Ctrl + A to select everything in view.

When you select more than one track, MP3tag will automatically populate many fields with <keep>. This prevents you from accidentally changing unique fields; for instance, you might want to set the same Year for all tracks in an album, but leave each Title as it was.

MP3tag Saving Behavior

Before you move to another track, it is vital to remember that by default, you must save tags in MP3tag before moving to another file. If you make changes to one track and click another without hitting the Save icon in the top-left corner (or hitting Ctrl + S), you will lose those changes.

To change this behavior, open Tools > Options and select the Tags category in the left panel. Check the box labeled Save tags when using arrow keys/single mouse click and MP3tag will automatically save all changes when you move to another track.

MP3Tag Autosave Changes

Just be careful of saving accidental changes when using this option.

Customize the Tag Panel

By default, the tag panel probably contains some fields you don’t really use. You can remove unnecessary tags and add others by right-clicking inside the panel and hitting Customize.

Here you’ll see checkboxes to disable any of the built-in fields. Double-click one to change its name, default value, and size. Select the New icon to add an additional field.

You’ll have to scroll through the Field dropdown to pick one. This contains tons of choices, many of which aren’t that useful (most people probably don’t categorize their songs by BPM). Choose a Name, Default value, and Size of field, then press OK to add it.

Mp3tag Customize Tag Panel

Use the arrows in the bottom-left of this panel to rearrange them however you like. Click OK in the Options window when done to apply your changes.

Advanced MP3tag Audio Tagging

The above will work fine for quick tag editing. But if you plan to use MP3tag often, you should get familiar with its more powerful features that will save you time.

Actions

MP3tag’s Actions let you create predefined actions that you can apply to groups of files. For example, you might create an action to normalize capitalization, or standardize common abbreviations like Feat and Featuring to feat.

Select one or more tracks to start, then go to Actions > Actions or press Alt + 6. Here you’ll see a few default action groups. Double-click one to see the individual actions it contains, or hit the New button to create your own group. Give it a name, then hit New again to start creating actions in it.

MP3Tag Actions Editor

You can choose from a dropdown list of actions. These include case conversion, remove fields, replace, and more. There’s a lot to get into here, including regular expressions if you’re really advanced. Check out MP3tag’s help page on Actions for descriptions of each option.

To run an action once without creating a group, choose Actions > Actions (Quick) or press Alt + Shift + 6.

Import Tags

Often, you don’t have to do the heavy lifting of manually entering track information on your own. MP3tag supports importing tags from online databases, which is super handy.

For best results, you should have an entire album selected, with the songs in the original album order. Then click Tag Sources > freedb. In the resulting menu, choose determine from selected files.

If it finds a match, you’ll see a new window with the imported tag information. It’s wise to review this first. Because Freedb is an open service, there’s no guarantee that whoever added the tags got them completely correct.

MP3 Tag Import Tags freedb

Review the imported information and make any changes you find necessary. When that’s done, click OK and you’ll save the tags to your music.

Sometimes, the automatic match with Freedb won’t work properly. In case that happens, visit the Freedb website and run a search manually. Find the album (if it’s there) in the search results and expand it. Copy the Disc-ID field and note the genre listed.

MP3Tag freedb Disc ID Search

Then in MP3tag, select the tracks again and choose Tag Sources > freedb, but this time select the Enter option. Paste the ID value you copied earlier and make sure the Category is set correctly. This should bring up the tag information, which you can then import.

MP3 Tag Enter freedb ID Manually

Conversions

Conversions are extremely useful when you have information already in the filename or tags, but they’re not in the right places. You can use these tools to easily move this data around to import tags from filenames, craft new filenames from tags, and more.

Note that these all use percentage signs around a tag as a placeholder. For example, for Michael Jackson’s Thriller album, %artist% – %track% %title% will show up as Michael Jackson – 04 Thriller. Click Preview to make sure you have it right before you click OK to save the conversion. Remember you can use Ctrl + Z to undo any mistakes you make.

Select one or more tracks for conversion, then pick one of the following options under the Conversion entry on the toolbar:

  • Tag – Filename allows you to create a new filename based on its tags. It’s useful if your current filename is messy and you want to make a new template, similar to the above example. This is obviously best done once you’ve got the tags set properly.
  • Use Filename – Tag to populate tags based on the current filename. This keeps you from having to enter some information by hand if you can’t import it and it’s already in the filename. You’ll need to match the filename formatting placeholders to match your files for MP3tag to use them.

MP3Tag Filename to Tag Conversion

  • Use Filename – Filename to take elements from the existing filename and turn them into a new one. For instance, if you have (ARTIST – ALBUM) 01 TITLE – YEAR and want to change the order, simply use %1 for the first element, %2 for the second, and so on. So you could use %3 – (%1 – %4) to get 01 – (ARTIST – TITLE).

MP3Tag Filename to Filename Conversion

  • Text file – Tag allows you to import a text file and use its values as tags. For most users, this isn’t as useful as the other options.
  • Finally, Tag – Tag lets you copy the contents of one field to another. Again, this one isn’t as generally useful, but you could use it to easily copy the Artist field to the Album Artist field, for instance.

Like other features, there’s a lot you can do with conversions. Have a look at MP3tag’s help page on conversion for more guidance.

MP3tag Is a Must-Have Music Tag Editor

As we’ve seen, MP3tag is a powerful tool for editing music tags. Its many features make it just as great for casual users as those who tag their music all the time. Keep it around for the next time you need to correct some tags.

And if you don’t have a local music collection, here’s how to convert your old CDs and cassettes to MP3.

Read the full article: Why MP3tag Is the Only Music Tag Editor You’ll Ever Need


Read Full Article

We’re Giving Away an All-New Amazon Echo Plus (2nd Gen)!


Amazon Alexa second generation smart speaker.

That’s right! You too could soon be asking Alexa to play music, answer questions, read the news, set alarms, control smart home devices, and more. Because this month we’re giving away an all-new Amazon Echo Plus (with Philips Hue Bulb), worth $150! And there’s more good news.

You don’t need to give us any of your personal data to enter, and it’ll only take you two minutes to be in with a chance of winning.

How to Enter

To enter, all you have to do is like and comment on the giveaway post at the top of our Facebook Page, letting us know which genuine tech problems and topics you’d love to see us write more about at MakeUseOf.

For example, let us know about:

  • The apps you want to learn more about.
  • Gadget issues you need to solve.
  • Tech buying decisions you need help with.
  • Problems you want to solve with your tech.

The more specific, the better!

We’re always looking for fresh, useful topics to cover, so we want to hear from you, our readers, to learn even more about the topics that concern you.

Want in?  Go ahead and like and comment on the giveaway post at the top of our Facebook Page to be in with a chance of winning an all-new Amazon Echo Plus! Good luck!

Terms and Conditions

This giveaway is hosted solely by MakeUseOf, and is not sponsored, supported or endorsed by Facebook or Amazon. The giveaway ends at midnight EST on 11 March 2019.  The winner will be selected at random from genuine entries, and will be alerted via Facebook by 16 March 2019 to arrange delivery of the prize. Worldwide shipping is available. Entrants can comment multiple times, but will only receive one entry into the giveaway.

Read the full article: We’re Giving Away an All-New Amazon Echo Plus (2nd Gen)!


Read Full Article

How to Tell If a Site Stores Passwords as Plaintext (And What to Do)


websites-store-password

Whenever you register with a site, you’re trusting them with your personal details. They have access to your email address at least, and probably much more—including, of course, your password.

But how can you tell if the site is taking proper care of your private information? Why is it a problem when sites store account details in plaintext? And what can you do about it?

What Is Plaintext? Why Is It a Problem?

Plaintext is precisely what it sounds like: your password is stored exactly as you write it down.

Let’s say a site you use has been hacked. The hacker has access to a list of accounts with passwords noted down. Let’s suppose your password is “Pa$$w0rd” (and we really hope it isn’t). The cybercriminal can scan down the list, find your email address, and easily read that your “secure” login is “Pa$$w0rd”.

The big issue is, it doesn’t matter how obscure and unguessable your password is. Because anyone with access to your account can read it, as easily as you’re reading this.

email registration password stored as plaintext

It’s even more worrying if you use the same password across numerous platforms. MakeUseOf advises against doing that for this very reason, as do all security experts. Nonetheless, we understand the temptation to stick with a password that’s easy to remember.

But if you do, you risk hackers using leaked plaintext sources to get into your online banking accounts, your Facebook, and whatever else you duplicate the password on.

An estimated 30 percent of eCommerce sites store their passwords in plaintext. This isn’t something we can easily overlook.

It’s not confined to small, independent sites either. Some big companies have been caught out, including the NHL, Match.com, LinkedIn, the National Trust, and Vodafone. Fortunately, they’ve since implemented more secure methods of storage.

How Can Passwords Be Stored Securely?

What’s the alternative to plaintext? Actually, there are a few options for storing passwords, but not all are as secure as they may initially sound.

Many sites use a hash function, which transforms your password into another set of digits. If a hacker gets in, they can only see these randomized characters. It’s a flawed algorithm, however, because every time you enter your password, it generates the same hash. The system then makes sure those digits correlate to give you access to your account.

And yes, they can be cracked, especially through brute-force attacks.

If you run an eCommerce site, though, you should instead use salted hashes. These take the same principle, but additional digits bookend your password before it enters the hash algorithm.

Slow hashes are even better—they limit the number of times a hacker can attack the data set per second. If a cybercriminal knows it will take them longer to crack a password, they’re less likely to target the account.

How to Tell If a Site Stores Passwords as Plaintext

It’s difficult to tell unless you work for the company in question. And if you do, you need to alert your technical team that storing private data in plaintext is unethical.

Still, there’s a good indicator you can go by. If you set up an account and the site sends you an email which lists your password, it’s likely stored in plaintext.

password stored as plaintext shown through email

They’re certainly unsecure if you click “Forgot Password” and they send it to you via email. If it had been encrypted, they wouldn’t be able to do this. Instead, you’d need to verify that it’s your account then reset your password altogether.

Emails aren’t secure anyway. They’re susceptible to hacking. Even if the site doesn’t store your information as plaintext, sending you a detailed message isn’t safe.

If you want to take a thorough approach to your online actives, use a placeholder password when registering with an online store. Then click “Lost My Password” (or a variation of it) and check your email. If the only option is to reset it, do that.

Otherwise, if you can clearly see your placeholder password in your inbox, this is a worrying sign.

You could also check out Plaintext Offenders, a site dedicated to highlighting firms which don’t take your security seriously enough.

What Can You Do About It?

If you suspect a site stores your password in plaintext, email them. Ask them to address your concerns.

You should hear back from them, in which case they will likely assure you that they use encryption to secure your details. But don’t let that dissuade you. Don’t believe the myth that encryption is fool-proof.

Otherwise, we need to talk about damage limitation. Don’t use the same credentials for everything. We know it’s tempting and you probably figure there’s no real harm in it. But you’re wrong. We’re sure a firm you’ve used in the past has been hacked already. That could be MySpace, Tumblr, Dropbox… or a whole host of sites.

Check by typing your email address into Have I Been Pwned.

Do Password Managers Secure Plaintext?

how to check if your email address has been leaked breach

Password managers are a neat way of keeping your credentials safe without having to remember them all. You use one secure password to access the manager which knows the rest for you.

But they don’t help fight sites using plaintext. The manager is a storage system for your security, not the site’s. Your private data will still be readable if anyone gets into your account.

Nonetheless, you’re clearly interested in keeping your private information to yourself, so there are definitely benefits of using password managers.

Plaintext Passwords Are Not Secure!

Plaintext just means your password is stored exactly as you write it. And that’s a problem because hackers can easily read it.

Once registering with a site, any welcome emails you received shouldn’t have your password included; if they do, that’s indicative of an account using plaintext. If you click “Forgot my password”, and they email the actual password to you, that’s a definite sign your personal information is held in an unsecure manner.

Concerned a site isn’t doing this securely? Email them about your worries. They might assure you that they use encryption, but nothing is unbreakable. If not, find out how reputable websites should store passwords and tell them.

Read the full article: How to Tell If a Site Stores Passwords as Plaintext (And What to Do)


Read Full Article

7 Useful Apps to Manage Your SIM Card on Android

How to Customize the Mac Terminal and Make It More Useful


customize-mac-terminal

The Terminal app is your gateway to the command line in macOS. It provides an interface with a shell or command interpreter that takes your command and invokes others to perform both routine and complicated tasks.

If you’re just getting started or spend considerable time in the Terminal, you might want to customize the look, feel, and various attributes. We’ll show you some interesting ways to customize the Terminal and make it work best for your environment and workflow.

Basics of the Terminal Window

When you open the Terminal app, you’ll see a nearly empty window with two lines of text. The first line reveals the date and time of your last login. For example:

Last login: Wed Feb 13 01:08:35 on ttys000

The second line is the actual command prompt; that rectangular box at the end is your cursor. You’ll type commands on this line:

Rahul-Mac:~ rahulsaigal$

Here’s what each of those elements mean:

  • The first part of the prompt is the name of your Mac. The colon (:) is a visual separator.
  • The second part begins with a tilde (~). It indicates that you’re in the home directory and uses a short user name.
  • Finally, the dollar sign ($) means that you’re logged in as a non-root user.

terminal window

Modify the Terminal Window

The Terminal window behaves just like any other app in macOS. You can minimize, move, resize, zoom, and scroll through the content. After you’ve used Terminal for any length of time, the commands you type will produce a lot of text.

This text is small, hard to analyze, and can make it difficult to locate the cursor. Although you can resize the window, those changes are lost when you quit the app.

To modify the Terminal window, go to Shell > Show Inspector or press Cmd + I to open the Inspector window. Under the Window section, enter values into the Columns and Rows field or resize the window to your liking to fill those values automatically.

Once you get the Terminal window to a particular size, shape, and position, choose Shell > Use Settings as Default.

modify the terminal window

Tweak the Terminal Theme

The default Terminal comes with black text on a white background. But you can customize its various attributes like background color, font (typeface and size), text color, cursor type, and much more.

Navigate to Shell > New Window and try some of the built-in themes. These include Grass, Homebrew, Man Page, Ocean, Red Sands, and more.

choose a new theme for Terminal window

The Preferences > Profiles pane displays all the prebuilt themes. It shows visual thumbnails on the left sidebar and attributes on the right panel. This is split into six sections: Text, Window, Tab, Shell, Keyboard, and Advanced.

To tweak the attributes, select a theme and choose Duplicate Profile from the Gear menu.

modify a terminal theme

Text Attributes

Terminal allows you to customize various text attributes. To change the font used, click the Change button in the Font section and choose a font typeface and size.

You can apply text smoothing, use bold fonts, use bright colors for bold text, and more. If you wish to change the color of the text, click the Text color and select an option.

To change the cursor shape, select Block, Underline, or Vertical Bar. Click the color button next to the word Cursor to change its color, too. You can make the Terminal window transparent by adjusting the Opacity and Blur sliders.

In this way, you can put a Terminal window directly above a web page and type in commands as you read the instructions.

customize the opacity of terminal

Window Attributes

The window attributes include title, size, scrollback limit, and other behaviors. Remember, the options you choose in this pane apply only to the profile, not the entire Terminal app. To change the name of the window, type new text into the Title field.

Select any or all of the checkboxes to display name of the active process, working directory, path, shell name, and more. You can change the default window size for the current theme and even configure the size of scrollback buffer to save the history of commands you typed into Terminal days or weeks ago.

customize Terminal window attributes

Shell Attributes

In this section, you can fine-tune how Terminal works. You can choose a command to run on startup; for example, start an alternate shell. It’s also possible to have Terminal prompt you before closing the windows. Set Ask before closing to Always to prevent accidentally killing it, or set it to Never if you find that prompt annoying.

If you check Only if there are processes other than the login shell and, Terminal will alert you before you quit the app. This feature is useful if you accidentally click the wrong window element or press the wrong key sequence.

customize the shell attributes

Working With Window Groups

Do you like to have your Terminal windows arranged in a particular way and want to resume a session without having to rearrange and relaunch? The Window Groups feature will save you time and increase your productivity. Using it, each window can have its own process, attributes, and position on the desktop.

For example, you might be editing a file with Vim in one window and running Octave in another. Perhaps you want to refer the program’s man page in one window while trying out the command in another window. And if one shell is busy in performing long tasks, you might want to run a command in another window.

terminal window groups

Saving a Window Group

Before you establish a window group, you’ll need to:

  • Organize windows onscreen as desired.
  • Tweak the attributes, size, and shape of each window.
  • Run any commands for each window that you want to resume.

Then choose Window > Save Windows as Group. Type in a name, check Use window group when Terminal starts, and click Save.

save windows as a group

Restore the Window Group

To restore the window group, choose Window > Open Window Group. That way you can keep working on your current shell but open the group any time you need to run a specific set of tasks.

Open Preferences > Window Groups and click the Gear icon to import, export, or delete window groups. If there are other application windows, assign the window group to a separate desktop workspace to avoid distractions.

manage window groups in terminal

Setting Up the Default Shell

The default login shell for macOS is the bash shell. However, it also offers a host of different shells, including /bin/bash, /bin/csh, /bin/zsh, /bin/ksh, and more. Unix enthusiasts love to work with the zsh (or Z) shell because it offers many features on top of the bash shell and supports dozens of plugins.

If you’re a newbie, sticking to the default bash shell for now is fine. But you should know how to switch them when needed.

Find Out Which Shell You’re Using

To find out which shell you’re using, type in this command:

echo $0

The Terminal shows you the shell name, preceded by a hyphen.

Change the Login Shell

To change the default shell for your user account, open System Preferences > Users & Groups. Click the lock icon and enter your administrator credentials. Then right-click your name from the list and choose Advanced Options.

change the default login shell

In the dialog window that appears, change the option under Login shell. You don’t have to restart your Mac for this to take effect; just quit and resume the Terminal session to start with a new shell.

change the bash shell to zsh

To change the default shell Terminal for any user account, choose Terminal > Preferences and click General on the toolbar. Next to Shells open with, select Command (complete path) and enter the path to your new shell in the field.

change the terminal shell through preference

Customize the Command Prompt

The default command line prompt shows you the same information every time you open the Terminal. There are many special character sequences that, when used to define the prompt, can reveal interesting bits of data.

The appearance of the prompt is stored in the environment variable $PS1. When you type in the following:

echo $PS1

The resulting text is string-coded with the default settings of the shell prompt in this format:

\h:\W \u\$
  • \h represents the host computer name
  • \W is the current working directory
  • \u stands for current user

On macOS, .bash_profile can contain a variety of preferences for how you want the shell to look and behave. The customizations you make in .bash_profile apply only to a shell session; they don’t apply to shell scripts. To edit .bash_profile in nano, type in:

nano ~/.bash_profile

In the new line, add PS1=”…”. In between those quotation marks, put a sequence of characters to customize the prompt. There’s acomprehensive list of prompt special characters in the bash documentation manual. For example:

PS1="\!\d\u\$"
  • ! represents the history number of this command
  • \d is the date in weekday/month/date format
  • \u stands for username
  • $ is effective UID

Once you type in the sequence, press Control + O to write the new information. Then press Control + T to save this information into the .bash_profile file. Quit and relaunch Terminal to see the changes.

add the character sequence in the bash profile

One prompt sequence that I like is:

PS1="\w \! \$"

Give this a try and see if you like it. On a multiuser system, you can put the hostname, username, bash version, history number of command, and more to get more information.

Try Some Terminal Alternatives

The Terminal app has been the default command line interface for decades. Whether you’re just getting started or have used Terminal for a long time, these customizations can make you more productive. Like most Apple apps, Terminal tries to strike a balance between accessibility for new users and power features for developers.

To become a power user of the command line you need more features, like split-pane support, autocomplete suggestions, search, paste history, and more. Check out these useful Terminal alternatives that can fit your workflow.

Read the full article: How to Customize the Mac Terminal and Make It More Useful


Read Full Article