16 July 2020

8 Quick Ways to Transfer Photos From iPhone to iPhone


transfer-photos-iphone

For many of us, the most precious data on our iPhones is the photo library. It’s what we’re most concerned about when upgrading to a new iPhone and what we’re most likely to share with other people. When you need to send pictures to a different iOS device, your iPhone offers a few different ways to do it.

We’ve split these methods into two categories: transferring photos from an old iPhone to a new iPhone, and transferring photos from your iPhone to someone else’s.

How to Transfer Photos From an Old iPhone to a New iPhone

When you upgrade to a new iPhone, Apple gives you a few different ways to transfer your photos from one iPhone to the other. The best method to use depends on how long you can wait to start using your new device, how fast your internet connection is, how much iCloud storage you have, and if you want to transfer everything or just send your photos.

When you transfer photos from iPhone to iPhone using one of these options, it will overwrite the photo library on the new iPhone. That means you shouldn’t use these methods if you already have photos on the new iPhone that you don’t want to lose.

1. Use Quick Start to Transfer Data

When you have a brand-new iPhone that isn’t set up yet, a Quick Start transfer is your most convenient option. Quick Start uses Wi-Fi to transfer all the data from your old iPhone to your new iPhone: apps, messages, settings, photos, and similar.

You can’t use either of your iPhones while the Quick Start transfer takes place, which could take an hour or more depending on how much data you have.

To start the Quick Start transfer, move your new iPhone close to your old one. Then follow the onscreen prompts to Set Up New iPhone and choose whether you want to Transfer from iPhone or Download from iCloud.

Using iCloud lets you use your iPhone again sooner, but is only a good idea if all your data is already synced with iCloud.

Quick Start Transfer information from iPhone

When the Quick Start transfer is complete, all your photos, apps, and other data will be ready to use on your new iPhone.

2. Restore an iCloud, Finder, or iTunes Backup

If you don’t have access to your old iPhone, you can use an existing backup to transfer photos to your new device instead. An iPhone backup includes every photo, app, message, and other piece of data stored on your iPhone.

A backup doesn’t include any photos if you use iCloud Photos with storage optimization on your iPhone. This is because your photos are stored in iCloud, not on your iPhone storage.

If you don’t already have one, you can make a new iPhone backup using iCloud, iTunes, or Finder. To make an iCloud backup, go to Settings > [Your Name] > iCloud > Backup. To make an iTunes or Finder backup, connect your iPhone to a computer, open the appropriate app if needed, and click Back Up Now.

iCloud Back Up Now button

After making a backup, follow the setup prompts on your new iPhone until you reach the Apps & Data page. From this page, choose to restore your backup, which could take an hour or more.

During this time you can continue to use your old iPhone if you still have it.

3. Sign Into iCloud Photos

With iCloud Photos turned on, your iPhone uploads every photo you take to iCloud. This makes your entire photo library available on any other device using your Apple ID.

If you only want to transfer photos to your new iPhone without also transferring apps and other data, you should use iCloud Photos to do it.

On your old iPhone, go to Settings > [Your Name] > iCloud > Photos and turn on the iCloud Photos option. Your iPhone will upload every photo to iCloud. Follow the progress of this upload by scrolling to the bottom of the Photos app.

iCloud Photos settings on iPhone

After your photos are uploaded, open Settings on your new iPhone and sign in to the same Apple ID account. Then go to [Your Name] > iCloud > Photos and turn on iCloud Photos.

If you want to transfer photos from your iPhone without using iCloud, you can also use this same method with other photo sync services. Take a look at our comparison of iCloud Photos, Google Photos, and Dropbox to find the best service for you.

How to Transfer Photos to Someone Else’s iPhone

The methods above won’t help if you want to transfer photos from your iPhone to a friend’s iPhone. In this case, you usually only want to send a handful of photos at once—not your entire photo library.

You can use any of the methods below to send photos to a friend’s iPhone quickly and easily, without overwriting the photos already on their device.

4. Transfer Photos Using AirDrop

AirDrop uses Wi-Fi and Bluetooth connections to let you wirelessly transfer files between any two Apple devices. When you send a photo using AirDrop, it transfers in full quality at rapid speed.

Open the Photos app on your iPhone and select the photo or group of photos you want to transfer. Then tap the Share button and select AirDrop. Your iPhone shows every device nearby with AirDrop turned on. Select your friend’s iPhone to begin the transfer.

iPhone Share Sheet AirDrop button

If you can’t see your friend’s iPhone, ask them to open Control Center, tap and hold the top-left section with wireless options, then turn on AirDrop. They also need to Accept the transfer after you start sending photos to their iPhone. Find out how to troubleshoot AirDrop if it’s not working properly.

5. Share an iCloud Link to Your Photos

If you use iCloud Photos, one of the easiest ways to transfer photos to another iPhone is using an iCloud link. After creating an iCloud link for your photos, you can share it with anyone over text, email, and instant messaging apps.

To create an iCloud link, open the Photos app and select the photo or photos you want to share. Tap the Share button, then scroll down and tap Copy iCloud Link. Your iPhone takes a moment to prepare those photos in iCloud, then saves a link to your clipboard.

Copy iCloud Link button in iPhone Share Sheet

Paste the link in a message to a friend to let them download the photos on their iPhone.

6. Upload Your Photos to a Cloud Storage Service

The best way to transfer photos from one iPhone to another without using iCloud is to save them to a different cloud storage service, like Google Drive, Dropbox, or OneDrive.

Download and sign into the relevant cloud storage app on your iPhone. Then select the photo or photos you want to share in the Photos app. Tap Share and scroll across the second row of apps in the Share Sheet to find your cloud storage app. You may need to tap More at the end of the row to view more apps.

Copy to Dropbox button in iPhone Share Sheet

After tapping your cloud storage app, a popup window appears that lets you choose where to save those photos. Once the upload is complete, share a link to those files from within the relevant cloud storage app.

7. Create an iCloud Shared Album

Whether you use iCloud Photos or not, you can use iCloud to create a Shared Photo Album to share with other people. This lets you share an album of up to 5,000 photos with up to 100 different people.

Open the Photos app and select the photo or photos you want to share. Then tap the Share button and choose to Add to Shared Album. Create a New Shared Album or add photos to an existing album, then choose who to share it with from your contacts.

iCloud Shared Album creation window

Whoever you share your iPhone photos with can also add photos of their own, or comment on and download the photos you add to the album.

8. Send Your Photos Using Messages

Perhaps the easiest way to transfer photos from your iPhone to someone else’s iPhone is to send them using iMessage. If iMessage isn’t available, you can still send photos over MMS in the Messages app. However, your cell carrier may charge you for MMS messages, and the quality will suffer.

Open the Messages app and start a conversation with the person you want to transfer photos to. Tap the Apps icon next to the text box above the keyboard and choose Photos from the app icons there. Select the photo or photos you want to transfer, then tap the Send button.

Photos app in Messages app

Depending on your mobile internet speed and service plan, Messages might compress the photos you send to reduce transfer time and data usage.

Transfer Contacts to Another iPhone

Using the methods above, you should be able to transfer photos from one iPhone to another with little trouble. Use them when you set up a new iOS device or need to share pictures with friends.

Of course, photos aren’t the only data you might need to transfer between phones. Find out how to transfer contacts from your iPhone as well so you can keep everyone up to date with the latest contact details.

Read the full article: 8 Quick Ways to Transfer Photos From iPhone to iPhone


Read Full Article
3 Ways to Boot Multiple OSes on a Raspberry Pi


sd-card-os-raspberry

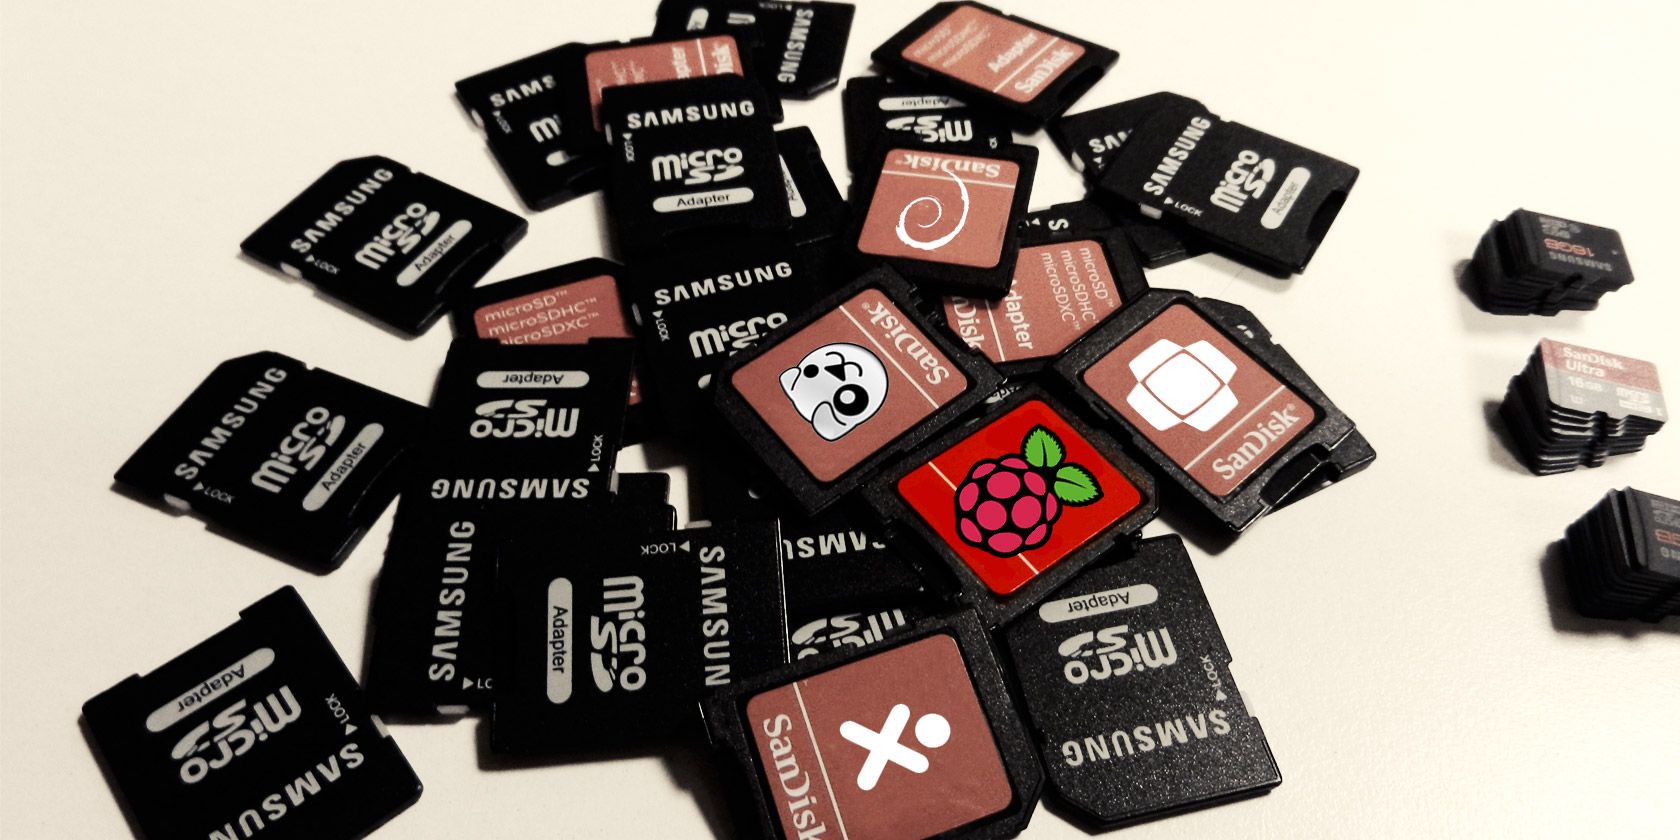
The Raspberry Pi is usually set up with a single operating system that boots from the SD card. However, this can prove restrictive to some users. For example, you might want to install multiple versions of the Raspberry Pi OS for different projects. Or you might want to multiboot your Raspberry Pi 4 with Kodi, RetroPie, and Ubuntu MATE.

Different options are available for multibooting a Raspberry Pi, depending on your model and preferred storage media. Here’s how to install multiple Raspberry Pi OSs for dual boot and multiboot use.

Why You Need Multiple OSs on the Raspberry Pi

The Raspberry Pi has so many strengths. It’s flexible, as suitable as a desktop computer as a development environment for kids. Its versatility and portability surpass the competition thanks to an imaginative community and support from the Raspberry Pi Foundation.

But the Raspberry Pi does have one key shortcoming. Booting the operating system from the SD card means that the Pi is locked to a certain configuration. This can prove problematic if you’re working on, say, a camera project and want to switch to a Bluetooth speaker.

Usually, you have two options here:

  1. Back up the OS, reformat the SD card, and write a fresh new version,
  2. Buy a new SD card and keep a record of what is on which SD card

However, a third option, usually overlooked, is available: installing multiple operating systems on your Pi. Let’s look at how that works.

SD Card, USB Storage, or Network Multiboot?

In the early days of the Raspberry Pi, there was only one choice for operating system boot media: SD card.

As the platform has progressed, however, so more options have been added. Since the release of the Raspberry Pi 3, it has been possible to program the board to boot from USB.

This has resulted in USB flash drives, USB hard disk drives (HDDs), and USB solid-state drives (SSDs) replacing SD cards. In the case of USB flash drives, these are low power devices suited to the Raspberry Pi. Most USB HDDs and SSDs, however, require independent power supplies, albeit with some exceptions.

For example, Western Digital’s Labs team (WD Labs) released a (now discontinued) range of “PiDrive” HDDs that shared the Raspberry Pi’s power connection.

The Raspberry Pi 3 also introduced network booting to the platform. Using PXE (Pre eXecution Environment), the Pi 3 and later models can be booted from server-hosted images.

1. Multiple Pi Operating Systems With NOOBS

Raspberry Pi NOOBS software

NOOBS can be used to simply install multiple OSs on your Raspberry Pi SD card.

You have a choice of two NOOBS versions. One is an online installer that downloads the operating systems you choose. The other is an offline installer with all the operating systems pre-loaded for you to select from. Use the version that suits your internet connection.

To install a Raspberry Pi operating system with NOOBS:

  1. Download the installer
  2. Unzip the contents
  3. Copy them to your formatted SD card
  4. Insert the card in your Raspberry Pi
  5. Boot the Pi
  6. Navigate the NOOBS menu

In the menu, select one or more operating systems to be installed. Several operating systems are available, from the Raspberry Pi OS to media center options like OpenElec.

When you’re done, each time you boot the Pi you can choose which OS you want to run.

NOOBS can be used with any model of Raspberry Pi.

2. Multiboot Your Raspberry Pi With BerryBoot

Use BerryBoot to run multiple Raspberry Pi operating systems

Before NOOBS there was BerryBoot. It’s a bootloader, rather than an installer. This slight difference means that it is optimized to run multiple operating systems.

Like NOOBS, BerryBoot requires you to download a file, unzip, and copy the contents to a formatted SD card. Unlike NOOBS, however, BerryBoot has no offline installer. You’ll need to ensure your Raspberry Pi is online to download your chosen operating systems.

BerryBoot supports installation to SD card, USB devices, and even network drives. To install multiple Raspberry Pi operating systems with BerryBoot:

  1. Download BerryBoot
  2. Extract ZIP file to a formatted SD card
  3. Insert the card in your Raspberry Pi
  4. Power up the Raspberry Pi
  5. Select and install one or more operating systems
  6. Choose which OS you wish to use each time you boot your Raspberry Pi

Our full guide to multibooting a Raspberry Pi with BerryBoot outlines these steps in greater detail.

Like NOOBS, BerryBoot will run on any version of the Raspberry Pi board.

3. Network Boot Multiple Raspberry Pi Operating Systems With PiServer

Finally, there is the network booting option. This comes built into the Raspberry Pi OS desktop but requires that all devices connect over Ethernet. Wi-Fi is not supported.

However, it is ideal if regular replacement of your Pi’s SD card has become an issue. With network booting, the SD card isn’t required—the Pi boots from a disk image stored on a network drive. The Raspberry Pi website provides a detailed explanation on how to set up PXE booting with PiServer.

Using this method, you could maintain multiple Raspberry Pi OS environments, one for development, another for desktop productivity. Simply reboot the Raspberry Pi to select a different OS. The server will back up the operating system, too, meaning you won’t be prone to corrupt SD cards.

This option is most suitable for Raspberry Pi 3 and later.

Multiboot: The Future of Raspberry Pi Computing!

The days of having to repeatedly reformat your Raspberry Pi’s SD card to start a new project are now over. All you need is a multiple boot tool! Once you’re done, you’ll have every Raspberry Pi OS you need, restricted only by the size of your storage device.

While NOOBS and BerryBoot make good use of your physical storage, the PiServer option is potentially the biggest game changer. Having said that, NOOBS is certainly the simplest Raspberry Pi multiboot installer.

Now you just need to choose which Raspberry Pi operating systems to install.

Read the full article: 3 Ways to Boot Multiple OSes on a Raspberry Pi


7 Vital Google Image Search Tips and Tricks to Know


As Google is the world’s home for searching the web, so is Google Images the most popular place to search for pictures. Enter any query, and you’ll see thousands of images related to it. It’s easy enough, but what if you want to go deeper?

If you’re overwhelmed with the number of image results or want to learn some advanced tricks, start with these Google Image search tips.

First: How to Do a Google Image Search

Before we jump into the advanced tricks, let’s cover the basics. To search Google for an image, simply visit Google Images. You can also click the Images link in the top-right of Google’s homepage to get there quickly.

Type what you want to search for into the bar and press Enter; you’ll likely see tons of results. Click an image to view it in a callout box that appears on the side of your screen. This will display its resolution and related images, as well as buttons for visiting the page, sharing the image, and saving it for later.

Basic Google Image Search

Now, let’s take a look at Google Image tricks so you can go deeper.

1. Take Advantage of Search Tools

Underneath the Images search bar, click Tools to see several ways to filter your searches. It will expand to show the following options:

  • Size: Choose from the general sizes Large, Medium, and Icon. Google removed the Larger than and Exactly options from this panel, so you’ll have to rely on the approximate options.
  • Color: Shows only images in Black and white or those that are Transparent. It also lets you filter images by a certain color. If you’re trying to find PNG images on Google, the Transparent tool makes it easy to find them, as that will filter out JPEGs.
  • Usage rights: Lets you only show images that are labeled for reuse in various scenarios. Most images Google shows aren’t freely available, so make sure you have permission to use them in your own endeavors. See our guide to Creative Commons for more info.
  • Type: Shows image types like Clip Art, Line Drawing, and GIFs.
  • Time: Allows you to search for images uploaded in a certain time frame.
  • Clear: Click this after applying one or more of the above to remove those filters. Note that you can apply more than one, allowing you to show large images uploaded in the past month, for example.

Google Image Search Tools

2. Search Google Images By File Type

If you’re only interested in a particular image file type, there’s no point sifting through all the results looking for it. Unfortunately, Google Images no longer has the easy file type selector below the search box.

Instead, you can use the advanced operator filetype. For instance, filetype:png will search Google for PNG images.

Once you enter this and search, the filetype text will disappear, but the page will update with only images of that type. What’s more, this will add a new command to the Tools menu. You’ll see PNG files (or whatever you entered) and can click this dropdown to select another file type, such as JPG or BMP.

Google Images Filetype Search

3. Master Using Reverse Image Search

A normal Google Images search returns images for a text query. But you can also use an image to search Google instead—this is known as a reverse image search.

To try this, visit Google Images and click the Camera icon in the search bar. Here, you can paste an image URL from the web to search, or upload an image from your computer. If you prefer, you can also drag and drop an image onto the search bar.

Google Reverse Image Search Home

Once you do, Google will provide its best guess for the image you’ve provided. You can click All sizes or a size category to see other copies of the image.

Below that, you’ll see Visually similar images, followed by web pages that include matching images. This is a great way to get more information about an image you’re unsure about.

Google Reverse Image Search Results

If you use Chrome, there’s a handy built-in shortcut for reverse image search. Right-click on an image, then press the S key to instantly search Google for it. Check out the best reverse image search apps if you use this feature often.

4. Restore the “View Image” Button

Google Restore View Image Button

In 2018, Google made a lot of users upset when it removed the View image button from Google Images results, thanks to complaints from stock photo company Getty Images. Now it’s a lot less convenient to grab images from Google, especially when you have to visit a page that doesn’t have the image easily accessible.

Thankfully, it’s easy to restore this button with an extension. We recommend View Image, available for Chrome and Firefox. It returns both the View image and Search by image functions. The extension even offers a few customization options.

5. Don’t Forget About Advanced Search Operators

We covered the filetype operator above, but you should know about Google’s advanced operators for images, too.

For instance, try site: to search for images only on a specific site. Or use the – (minus) operator to exclude certain words from a search. Putting your query in quotes will search for only that exact phrase.

If you don’t like using operators, you can click Settings > Advanced search on any Google Images results page to open Advanced Image Search. This lets you access many of the same commands but through simpler text boxes.

In particular, the image size box allows you to select from several Larger than options, which don’t appear on Tools bar in Google Images anymore. Have a look at the aspect ratio box too, as it lets you pick from sizes like Square or Panoramic.

Google Images Advanced Search

6. Save Images in Collections

Have you ever found the exact image you were looking for, but forgot to save a copy of it? It’s often difficult to locate that image again in the future. That’s why Google implemented its own feature for saving images right inside the service.

To use it, just perform a Google Image search while signed into your Google account. Click on the image you’re interested in to open its callout box. There, click the Save button (which looks like a bookmark ribbon) and you’ll see the ribbon icon fill in and highlight in blue.

Google Images Save an Image

Now, when you want to view your saved images, click the three-dot menu on any image and choose Collections. You can also visit google.com/collections to access this page.

Images you’ve saved appear in a folder called Favorite images. Click one to view it, and use the New collection button on the left if you’d like to make new folders for sorting. Use the Select button at the top to choose multiple images to move into another folder or delete.

Google Image Collections

The Share button makes it simple to send your favorites to a friend.

7. Mobile Google Image Search Tricks

When you’re searching for images using Google’s mobile app, there are a few special features you should know about.

First, keep an eye out for badges in the bottom-left corner of images. Depending on your query, these may be Recipe, GIF, Product, or similar. When you tap one, you’ll get more information than just the image.

For instance, if you type donut into Google Images and tap an image with the Recipe badge, you’ll find a recipe for making those donuts. Similarly, an image with the Product tag will show you details like reviews, price, and availability in stores near you. You can also jump right to the purchase page for that item.

Google Images also offers more filtering options when you search on mobile. For example, if you search for sweaters, you’ll see options at the top like Material, Pattern, and Brand. A search for TV lets you search by Display Type, Screen Form, and similar. This helps you nail down exactly what you’re looking for when searching for something general.

The World’s Images at Your Fingertips

We’ve looked at some of the most useful Google Images search commands and tricks. While it’s a simple tool, knowing a few advanced tips will help you use it more efficiently. Just remember that it’s your responsibility to make sure you have permission to use images you find on Google.

For more Google mastery, check out our Google Search FAQ.

Read the full article: 7 Vital Google Image Search Tips and Tricks to Know


TikTok is a marketers’ shiny new toy, but how do you optimize campaigns?


TikTok is a rising star in the social media category. Since its launch three years ago, the company has secured 800 million active users worldwide. That makes TikTok ninth in terms of social network sites, ahead of LinkedIn, Twitter, Pinterest and Snapchat. As more people start using the platform and remain engaged, it goes without saying that TikTok is an increasingly desirable destination for marketers.

But outside the sheer numbers, is there any real sustenance to the platform from a marketing perspective, or is this just a temporary fad brands are flocking to? Here’s a look into what makes TikTok unique through a marketer’s lens, and a few things the platform can improve on to make it a permanent option for brands looking to explore mobile.

Better user experiences lead to more unique advertising

Digital advertising is only as effective as a platform’s user experience — that fact presents a unique differentiator for TikTok. Being in 2020, where content creators continue to blossom, TikTok provides an opportunity for literally anyone to reach millions of people with their content. It is a “platform for the people,” as the algorithm sends user content to groups of 5-10 people, and based on the engagement, it will continue sending it out to the masses. What’s interesting here is that it resembles an early era of Instagram, where all content was user-generated.

Additionally, unlike other leading social media channels, a user is focused on one piece of content at a time. TikTok videos take up the entire screen, which leads to more engagement and genuine interest from the viewer. That said, creative plays an incredibly important role in every campaign you run on the platform, especially when trying to grab the user amid a mass of alternative entertainment options. The TikTok audience is hyperfocused on viewing organic, visually stimulating content that could be the next big meme or viral sensation.

Creative is the key

On Facebook, Trump’s next false voting claims will come with an info label


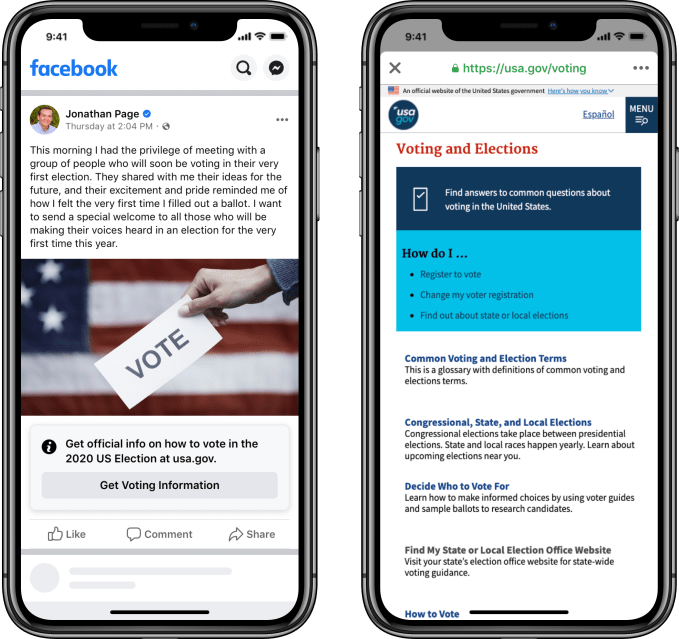
As part of its effort to steel its platform against threats to the 2020 election, Facebook will try surfacing accurate voting info in a new place — on politicians’ own posts.

Starting today, Facebook posts by federal elected officials and candidates — including presidential candidates — will be accompanied by an info label prompting anyone who sees the post to click through for official information on how to vote. The label will link out to usa.gov/voting. For posts that address vote-by-mail specifically, the link will point to a section of the same website with state-by-state instructions about how to register to vote through the mail.

Image via Facebook

Facebook plans to expand the voting info label to apply to all posts about voting in the U.S., not just those from federal-level political figures. That plan remains on track to launch later this summer with Facebook’s Voter Information Center, its previously announced info hub for official, verified information related to the 2020 election. The voter info center, like the coronavirus info center Facebook launched in March, will be placed prominently in order to funnel users toward useful resources.

The company did not mention any specific reason for the decision to prioritize elected officials before other users, but in May Facebook faced criticism for its decision to allow false claims by President Trump about vote-by-mail systems and the 2020 election to remain on the platform untouched. At the time, Twitter added its own voting info label to the same posts, which also appeared as tweets from the president’s account.

In a June post, Mark Zuckerberg discussed voter suppression concerns, saying that Facebook would be “tightening” its policies around content that misleads voters “to reflect the realities of the 2020 elections.” Facebook will also focus on removing false statements about polling places in the 72 hour lead-up to the election. Zuckerberg said that posts with misleading information that could intimidate voters would be banned, using the example of a post falsely claiming ICE officials are checking for documentation at a given polling location.

Zuckerberg made no specific mention of President Trump’s own false claims that expanded mail-in voting in light of the coronavirus crisis would “substantially fraudulent” and result in a “rigged election.” Zuckerberg did say that Facebook would begin labeling some “newsworthy” posts from political figures, leaving the content online but adding a label noting that it violates the platform’s rules.

While false claims from political figures are a cause for concern, they don’t account for the bulk of voting misinformation on the platform. A new report from ProPublica found that many of Facebook’s most well-performing posts about voting contained misinformation. “Of the top 50 posts, ranked by total interactions, that mentioned voting by mail since April 1, 22 contained false or substantially misleading claims about voting, particularly about mail-in ballots,” ProPublica writes in the report, noting that many of the posts appear to break Facebook’s own rules about voting misinformation but remain up with no labels or other contextualization.

While its past enforcement decisions remain controversial and often puzzling, Facebook does appear to be rethinking those choices and gearing up its efforts in light of the coming U.S. election. For Facebook, which goes to sometimes self-defeating lengths to project an aura of political neutrality, that’s less about expanded fact-checking and more about making correct, verified voting information at hand and readily available to users.

In early July, Facebook announced a voter drive that aims to register 4 million new U.S. voters. As part of that effort, Facebook pushed a pop-up info box to app users in the U.S. reminding them to register to vote, check their registration status with links to official state voter registration sites. Those notifications will soon appear in Instagram and Messenger as part of the same voter mobilization push.

Facebook is also apparently mulling the idea of banning all political advertising in the lead-up to November, a decision that would likely alleviate at least one of the company’s headaches at the cost of leaving both political parties, which rely on Facebook ads to reach voters, frustrated.


Read Full Article

Instagram confirms its TikTok rival, Reels, will launch in the US in early August


Instagram confirmed it’s preparing to soon launch its TikTok competitor, known as Reels, in the U.S. The company expects to bring the new video feature — which is designed specifically for short-form, creative content — to its platform in early August, according to a spokesperson. The U.S. launch comes shortly after Reels’ arrival in India this month, following a ban of TikTok in that market. Reels has also been tested in Brazil, France, and Germany.

NBC News reported this morning Instagram would arrive in the U.S. and more than 50 other countries in a matter of weeks, citing sources familiar with the matter.

A Facebook spokesperson confirmed the U.S. (and international) launch, saying “We’re excited to bring Reels to more countries, including the U.S., in early August,” without providing specific details of which further markets will be added.

“The community in our test countries has shown so much creativity in short-form video, and we’ve heard from creators and people around the world that they’re eager to get started as well,” the spokesperson added.

Reels was designed to directly challenge TikTok’s growing dominance. In a new area in the Instagram app, Reels allows users to create and post short, 15-second videos set to music or other audio, similar to TikTok. Also like TikTok, Reels offers a set of editing tools — like a countdown timer and tools to adjust the video’s speed, for example — that aim to make it easier to record creative content. Instagram, however, doesn’t have the same sort of two-tabbed, scrollable feed, like TikTok offers today.

The move to more quickly roll out Reels to more markets comes as TikTok has come under intense scrutiny for its ties to China. India banned the app, along with 58 other mobile applications designed by Chinese firms, in June. The Trump administration more recently said it was considering a similar ban on TikTok, for reasons related to national security. Yesterday, it said such a decision could be just weeks away.

Since the news of a possible ban hit, other TikTok rivals got a boost in the charts, including Byte, Triller, Dubsmash, and Likee, for example. Snapchat also began testing TikTok-like navigation for its public video content, and YouTube is running a smaller test of its own.

Because of Instagram’s reach, it has a shot at stepping in to pick up tens of millions of U.S. users if TikTok disappears. But TikTok users may not jump en masse to a single new app if a ban takes place. Already there are signs of the TikTok community splintering — dancers prefer apps like Dubsmash and Triller, while young Gen Z’ers like Byte, for example.

No exact launch date for Instagram Reels in the U.S. was provided.


Read Full Article

Google’s latest R&D project is Shoploop, a mobile video shopping platform


Google’s latest experiment is a video shopping platform designed to introduce consumers to new products in under 90 seconds. The company today is launching Shoploop, a project from Google’s internal R&D division, Area 120, where it tests out new ideas with a public user base.

Shoploop’s founder, Lax Poojary, had previously worked on online trip planner, Touring Bird, also at Area 120. Last year, that effort became one of a small number of R&D projects to graduate and become a part of Google itself. 

Poojary says his new idea for interactive shopping was inspired by how consumers today use a combination of social media and e-commerce sites together when considering purchases. For example, users will pop between a social media app, like Instagram, then head to YouTube to see a tutorial or demo, then — if they like what they saw — actually make a purchase.

Of course, video shopping is not a novel idea. A number of startups, and even large companies, have already embraced a combination of video and commerce.

Image Credits: Google

Amazon, for example, runs a livestreaming platform, Amazon Live, on its retail site. YouTube this year introduced a new shoppable ad format and is placing products to buy underneath videos. Facebook has enabled live shopping, as well, and made an acquisition in this area in 2019. Instagram now has its own Shop destination, too.

There are also a number of mobile shopping startups that have embraced video, like Dote, which raised $12 million last year. Popshop Live raised $3 million in January. NTWRK combines shopping and live events. Depop sells with both photos and videos, similar to Instagram.There’s also Yeay, Spin, and other apps. And there are startups focused on providing technology for brands and influencers engaging in this space, like Bambuser, MikMak, and Buywith, to name a few.

That is to say, Shoploop hasn’t discovered a new, untapped trend. It’s simply joining in.

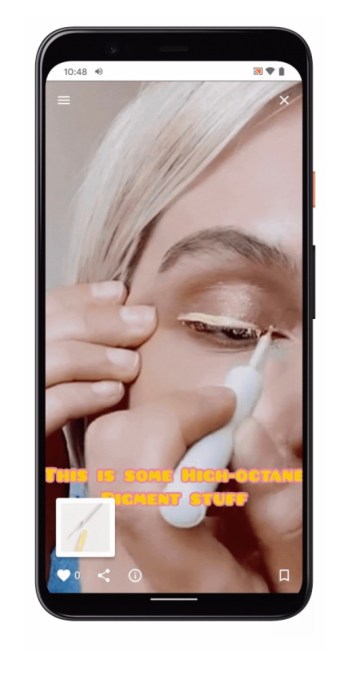
The shopping experience on Shoploop is interactive. Users don’t just scroll through images and text, but instead watch videos where creators show off things like  nail stickers,  hair products or makeup. The team says it’s starting with products in categories such as makeup, skincare, hair and nails and its working with creators, publishers and store owners in this market for the app’s content.

The experience is similar to watching YouTube tutorials, but distilled down to the best bits. (Or perhaps it’s more like TikTok, in that case) The demos are meant to be relatable, giving consumers a feel for the brands and products in real life. When consumers find a product they like, they can save it for later or click to be directed to the merchants website to complete the purchase. The app also allows you to follow your favorite Shoploop creators and share videos with friends and family.

Such a product could prove important to Google’s larger mission around Shopping, if it gains traction. Google recently redesigned its Shopping vertical and shifted it to include mostly free listings, in response to Amazon’s growing ad business. Finding more ways to engage online consumers could be beneficial to the internet giant, and this video-slash-influencer fueled shopping experience appeals to a younger demographic, in particular.

Shoploop is launching today on mobile and is working on a desktop version. You can reach it via https://shoploop.app from your smartphone.


Read Full Article

EU antitrust lawmakers kick off IoT deep dive to follow the data flows


The potential for the Internet of Things to lead to distortion in market competition is troubling European Union lawmakers who have today kicked off a sectoral inquiry.

They’re aiming to gather data from hundreds of companies operating in the smart home and connected device space — via some 400 questionnaires, sent to companies big and small across Europe, Asia and the US — using the intel gleaned to feed a public consultation slated for early next year when the Commission will also publish a preliminary report. 

In a statement on the launch of the sectoral inquiry today, the European Union’s competition commissioner, Margrethe Vestager, said the risks to competition and open markets linked to the data collection capabilities of connected devices and voice assistants are clear. The aim of the exercise is therefore to get ahead of any data-fuelled competition risks in the space before they lead to irreversible market distortion.

“One of the key issues here is data. Voice assistants and smart devices can collect a vast amount of data about our habits. And there’s a risk that big companies could misuse the data collected through such devices, to cement their position in the market against the challenges of competition. They might even use their knowledge of how we access other services to enter the market for those services and take it over,” said Vestager.

“We have seen this type of conduct before. This is not new. So we know there’s a risk that some of these players could become gatekeepers of the Internet of Things, with the power to make or break other companies. And these gatekeepers might use that power to harm competition, to the detriment of consumers.”

The Commission recently opened up a consultation on whether regulators needs new powers to address competition risks in digital markets, including being able to intervene when they suspect digital market tipping.

It is also asking for views on how to shape regulations around platform governance.

The IoT sectorial enquiry adds another plank to its approach towards reformulating digital regulation in the data age. (Notably competition chief Vestager is simultaneously the Commission EVP in charge of pan-EU digital strategy.)

On the IoT front, risks Vestager said she’s concerned about include what she couched as familiar antitrust behaviour such as “self-preferencing” — i.e. a company directing users towards its own products or services — as well as companies inking exclusive deals to send users “preferred” provider, thereby locking out more open competition.

“Whether that’s for a new set of batteries for your remote control or for your evening takeaway. In either case, the result can be less choice for users, less opportunity for others to compete, and less innovation,” she suggested.

“The trouble is that competition in digital markets can be fragile,” Vestager added. “When big companies abuse their power, they can very quickly push markets beyond the tipping point, where competition turns to monopoly. We’ve seen that happen before.  If we don’t act in good time, there’s a serious risk that it will happen again, with the Internet of Things.”

The commissioner’s remarks suggest EU lawmakers could be considering regulations that aim to enforce interoperability between smart devices and platforms — although Vestager also said they will be asking about any barriers to achieving such cross-working.

“For us to get the most out of the Internet of Things, our smart devices need to communicate. So if the devices from different companies don’t work together, then consumers may be locked in to just one provider.  And be limited to what that provider has to offer,” she said.

“We’re asking about the products they sell, and how the markets for those products work. We’re asking about data – how it’s collected, how it’s used, and how companies make money from the data they collect. And we’re asking about how these products and services work together, and about possible problems with making them interoperable.”

Vestager has raised concerns about the potential for voice assistant technology to lead to market concentration and distortion before — saying last year that they present an acute challenge to regulators who she said then were “trying to figure out how access to data will change the marketplace”.

The question of how access to digital data feeds platform monopolies has been a long standing preoccupation for the now second term competition chief. Although the Commission’s work on figuring out how data access changes marketplace function remains something of a work in progress.

Vestager has an open investigation into Amazon’s use of third party data on her plate, for example. It also inked a first set of rules on ecommerce platform fairness last year. More rules may be incoming in a draft proposal for reformulating wider liability rules for platforms that’s slated to land by the end of this year, aka the forthcoming Digital Services Act.

The Commission noted today that a prior sector inquiry — into ecommerce markets — helped shape new rules against “unjustified geoblocking” in the EU, although it has not yet been able to dismantle geoblocking barriers to accessing digital services across the Single Market’s internal borders.

Last year privacy concerns raised in Europe around how tech giants operate voice assistant ‘quality grading’ programs, which involved human contractors listening in to users’ recordings, led to a number of changes — including the previously non-transparent programs being publicly disclosed, and choice/controls being provided to users.


Read Full Article

Google’s latest R&D project is Shoploop, a mobile video shopping platform


Google’s latest experiment is a video shopping platform designed to introduce consumers to new products in under 90 seconds. The company today is launching Shoploop, a project from Google’s internal R&D division, Area 120, where it tests out new ideas with a public user base.

Shoploop’s founder, Lax Poojary, had previously worked on online trip planner, Touring Bird, also at Area 120. Last year, that effort became one of a small number of R&D projects to graduate and become a part of Google itself. 

Poojary says his new idea for interactive shopping was inspired by how consumers today use a combination of social media and e-commerce sites together when considering purchases. For example, users will pop between a social media app, like Instagram, then head to YouTube to see a tutorial or demo, then — if they like what they saw — actually make a purchase.

Of course, video shopping is not a novel idea. A number of startups, and even large companies, have already embraced a combination of video and commerce.

Image Credits: Google

Amazon, for example, runs a livestreaming platform, Amazon Live, on its retail site. YouTube this year introduced a new shoppable ad format and is placing products to buy underneath videos. Facebook has enabled live shopping, as well, and made an acquisition in this area in 2019. Instagram now has its own Shop destination, too.

There are also a number of mobile shopping startups that have embraced video, like Dote, which raised $12 million last year. Popshop Live raised $3 million in January. NTWRK combines shopping and live events. Depop sells with both photos and videos, similar to Instagram.There’s also Yeay, Spin, and other apps. And there are startups focused on providing technology for brands and influencers engaging in this space, like Bambuser, MikMak, and Buywith, to name a few.

That is to say, Shoploop hasn’t discovered a new, untapped trend. It’s simply joining in.

The shopping experience on Shoploop is interactive. Users don’t just scroll through images and text, but instead watch videos where creators show off things like  nail stickers,  hair products or makeup. The team says it’s starting with products in categories such as makeup, skincare, hair and nails and its working with creators, publishers and store owners in this market for the app’s content.

The experience is similar to watching YouTube tutorials, but distilled down to the best bits. (Or perhaps it’s more like TikTok, in that case) The demos are meant to be relatable, giving consumers a feel for the brands and products in real life. When consumers find a product they like, they can save it for later or click to be directed to the merchants website to complete the purchase. The app also allows you to follow your favorite Shoploop creators and share videos with friends and family.

Such a product could prove important to Google’s larger mission around Shopping, if it gains traction. Google recently redesigned its Shopping vertical and shifted it to include mostly free listings, in response to Amazon’s growing ad business. Finding more ways to engage online consumers could be beneficial to the internet giant, and this video-slash-influencer fueled shopping experience appeals to a younger demographic, in particular.

Shoploop is launching today on mobile and is working on a desktop version. You can reach it via https://shoploop.app from your smartphone.


Read Full Article

Nextdoor launches Sell for Good for easy donations to local nonprofits


Nextdoor is launching a new feature called Sell for Good, allowing uses to sell items on the neighborhood-focused social network and donate the proceeds to local nonprofits.

CEO Sarah Friar said that since the pandemic started, conversations about donations have increased 7x on Nextdoor.

“Communities are hurting,” Friar said. “People are looking to go donate, but things like Goodwill and so on are closed.”

At the same time, nonprofits are struggling. Pointing to a recent survey from the Nonprofit Finance Fund, she explained, “A lot of them depend on in-person events — the race that you might do, the book drive they always have, all of that has dried up.”

One way to support those nonprofits is to sell goods (perhaps the very same goods you were planning to give to Goodwill) on Nextdoor’s For Sale and Free section and then donate the money from the sale. In fact, Product Manager Rhett Angold said that users have already been doing this — for example, someone in Berkeley raised thousands of dollars for a local animal shelter by selling homemade masks.

So Sell for Good is designed to make this process as straightforward as possible. Nextdoor has partnered with the PayPal Giving Fund to support nonprofits in different cities, including A Better Chicago, LA Voice, New York Cares, Operation HOPE, Spark, The Hidden Genius Project and ViBe Theater Experience.

Sellers can choose which organization to support, then their sale will be identified as a donation. Once an item has been purchased, the seller can approve the donation and they’ll receive a receipt for their tax-deductible contribution.

And while the feature currently donates the full sale proceeds (minus the “typical PayPal processing fees”), Angold said his team is working on giving sellers the ability to donate a smaller portion as well.

Sell for Good is currently available to all Nextdoor users in the United States.


Read Full Article

What if you could help decide how the government spends public funds? | Shari Davis

What if you could help decide how the government spends public funds? | Shari Davis

What if you could help decide how the government spends public funds in your community? That's the idea behind participatory budgeting, a process that brings local residents and governments together to develop concrete solutions to real problems close to home. In this inspiring call to action, community leader Shari Davis shows how participatory budgeting can strengthen democracy, transform neighborhoods and cities -- and give everyone a seat at the table. "We've got to open the doors to city halls and schools so wide that people can't help but walk in," she says.

https://ift.tt/2CgczEs

Click this link to view the TED Talk

The Espresso Display is a fantastic portable display for your Mac or PC


Australian-based hardware startup Espresso Displays has taken a category with a lot of relatively unremarkable, but functional entrants, and added features, design and quality improvements to set itself apart from the crowd. The Espresso Display offers a portable form factor for easy packing, magnetic mounting, single cable operation via USB-C with a compatible modern Mac, built-in speakers and 2.5mm audio out, and optional touch functionality.

The basics

Image Credits: Darrell Etherington

Espresso’s display comes in two different sizes – a 13.3 inch or a 15.6-inch model. The display itself is very thin and light, at just under 0.2 inches thick, and under 2 lbs. The display panel features touch sensitivity, which works in tandem with a driver that you install on your Mac to enable touch features.

The display is made of glass and aluminum, and feels very high quality to match your MacBook. There are two USB-C and a mini HDMI port on the side, and a 2.5mm mini stereo jack for audio out. One of the USB-C ports is dedicated to power only, and the other is for connecting a display, with power delivery supported as well for a single-cable connection to modern Macs.

Espresso offers 4K resolution, and provides a unique mounting system that uses magnets to secure it to the optional folding display stand. The company also offers a VESA mouth adapter for attaching it to more traditional stand or mounting arm. There’s also a soft case included to protect the display during transit.

Image Credits: Darrell Etherington

The company is currently funding the display’s production via Indiegogo, but is nearing mass production, and the unit they sent me to test out definitely felt like a finished product. The 13-inch version is $249 USD but will retail for $320, and the Display 15 will retail for $350 when generally available.

Design and performance

The Espresso Display is a cut above the competition when it comes to both build quality and materials, as well as actual panel image quality and color. I’ve actually been using a 15.6-inch portable display purchased from Amazon recently, and while that has been a satisfactory solution for extending my desktop when I want to work from a few different locations, it’s definitely sub-par with its color rendering and all plastic build.

Espresso’s glass and metal composition feels much more at home with my MacBook Pro, and while I can’t quite tune its colors to match my Apple’s output, the built-in profile is generally pleasing and fairly color accurate. It’s bright enough, and renders crisp text and graphics at 4K resolution, with excellent contrast.

Image Credits: Darrell Etherington

Also unlike my generic Amazon display, Espresso Display actually works with just a single cable with my MacBook Pro. The other doesn’t draw enough power through just a USB-C connection, and so requires an adapter to be plugged in. Espresso works flawlessly in this regard, using the includes USB-C cable for true on-the-go one cable connectivity.

Espresso also offers touch capability, which comes in handy for things like graphics work. It ships with a small stylus, but don’t think of this as a Wacom alternative – it’s more for multi-touch interactions than pen input, and lacks pressure sensitivity. The touch features are further helped by the flexibility of the magnetic stand, which can flip around for a more low-angled mode that facilitates hands-on work. It’s easy to then flip it up for a more iMac-like stand orientation, or turn it to portrait orientation for working on documents or code.

Image Credits: Darrell Etherington

The stand is actually a big part of Espresso Display’s appeal, since it makes it very flexible for working anywhere. I’ve yet to find a great stand solution for other portable displays that match their portability, and this one definitely does, folding into a square no larger than a thin slice of toast.

At 4K and 60Hz, the performance of the display panel itself is excellent, and provides a great way to gain a whole lot more screen real estate than is possible with your built-in screen alone.

Bottom line

The portable display market is increasingly crowded, but the Espresso Display manages to stand out thanks to its use of high-quality materials and unique magnetic mounting solution. Many existing options out there require some kind of compromise or trade-off, of varying degrees of severity, but the Espresso Display is thin, light, durable and provides a great image, with easy, flexible mounting options and true single-cable connectivity.


Read Full Article