23 September 2019

The 7 Best Bubble Shooter Games on the Web


So, you have a few minutes to kill. You don’t want to run down the battery on your phone, and you don’t want to install anything on your computer. You need one of these bubble shooter games.

The web is full of free time wasters from clickers to puzzle games. And if you’re looking for a puzzle game that isn’t yet another spin on Tetris, a bubble shooter might be the perfect solution.

What Are Bubble Shooter Games?

Bubble shooters are a subgenre of the match three game. The premise is simple: shoot bubbles from the bottom of the screen to line up with matching bubbles at the top. The twist comes in the Breakout-influenced way you can deflect bubbles off of the side of the screen.

The original bubble shooter game was Puzzle Bobble, an arcade game released in 1994. Puzzle Bobble took its look and characters from an older game, the 1986 classic Bubble Bobble. If you remember Bubble Bobble you may have spent too long playing arcade games in the 80s.

1. Bubble Shooter

Bubble Shooter is one of the more basic takes on the format

While it’s not as old as the game that started it all, Bubble Shooter has been around for a long time. This is one of the simplest takes you’ll find on the genre, which makes it a great place to start. Just start aiming and clicking to make your matches.

The game uses HTML5, so it should work in any browser. You don’t need to worry about Flash or any other plugins. You can play this anywhere, but considering the way the play field is laid out, it’s a better fit for the desktop than it is for your phone.

2. Smarty Bubbles

Smarty Bubbles is simple, but still addictive

Smarty Bubbles doesn’t offer much in the way of building on top of the bubble shooter formula. That said, it looks nicer than Bubble Shooter, and it uses a narrower play field. That makes this game much better suited to mobile devices such as smartphones and tablets.

When you shoot the bubbles, they shift slightly. It’s no complex physics simulation, but it does give a better visual indication of where your shot is landing.

3. Candy Bubble

Candy Bubble might be the best-looking bubble shooter

Candy Bubble offers a combination of straightforward bubble shooter gameplay with candy-coated graphics that bring Candy Crush to mind. It’s also a great introduction to the genre. Instead of starting out with a massive group of semi-randomized bubbles, you’ll start with simpler groupings.

Candy Bubble also uses the three-star system made popular by games like Angry Birds. This adds a nice layer of replayability on top of the basic mechanics. The game also includes other quality-of-life features, like a visual indicator that shows how shots will bounce off walls, helping you get the hang of deflected shots.

4. Kitty Bubbles

Kitty Bubble fills the cat meme slot on this list

We’re talking about games you play online here, so of course there is a version with cats. Hey, it is the internet.

In Kitty Bubbles, balls of yarn replace the usual bubbles. A cat sits at the bottom of the screen in place of the usual launcher, swatting your ball of yarn up to join the others.

This game is also mobile friendly, to the point that it’s pillar-boxed if you play it in a browser on your computer. Kitty Bubbles doesn’t shake up the genre, but it’s a solid bubble shooter.

5. Bubbles Shooter

Bubbles Shooter has an unremarkable name but plays great

No, that’s not a typo in the name. This is a different game than Bubble Shooter, and it’s not just because of the extra letter in the title. To start, it has music and sound effects, which may or may not matter to you, but it’s nice to see them included.

Bubbles Shooter also allows you to store and swap a single bubble. This is handy when you’re one shot away from a game-saving combo and don’t get the right color. It doesn’t break the game, but it will help prevent a game over in certain situations.

6. Soccer Bubble

Soccer Bubble doesn't add much to the formula, but it's an interesting take

Like Kitty Bubbles, Soccer Bubble is more of a visual overhaul of the bubble shooter genre than an actual different take. Here the bubbles are replaced by—yep, you guessed it—soccer balls, while the launcher at the bottom is a human.

Other than the visual changes, this is a basic bubble shooter. That said, the changes to the graphical elements might just make it your favorite of the more basic bubble shooters on the web.

7. Bubble Dragons

Bubbles Shooter has an unremarkable name but plays great

Bubble Dragons takes the general idea of a bubble shooter and runs with it. This could just be a graphical overhaul, but instead it reaches much further. The goal here is to not just match three bubbles of the same color, but to match them near dragon eggs.

If you successfully match three near one of these eggs, it explodes. This explosion has a radius, and if another egg is within that radius, it will explode as well. This lets you set up massive combos in a way that we don’t often see in basic bubble shooters.

This is also one of the few bubble shooter games that is friendly to color blind players, with icons showing each bubble type so that you don’t have to rely solely on color.

Bubble Dragons also has the swap-out mechanic found in Bubbles Shooter, plus music and sound effects. Like Candy Bubble, there is a nice visual ricochet indicator to help you bank shots more easily. There are also more mechanics we could mention, but you’ll have more fun discovering them on your own.

More Puzzle Games to Play in Your Browser

While bubble shooter games can and do have varying mechanics and twists, they’re all based on the same formula.

Fortunately, bubble shooters aren’t the only type of game you can play for free on the web. You’ll also find tower defense and clicker games, plus lots of puzzle games.

We’ve previously gathered together a list of the best puzzle games to play in your web browser. Which includes other games in the match three genre, as well as some unique puzzle games.

Read the full article: The 7 Best Bubble Shooter Games on the Web


Read Full Article

The 7 Best Freelance Jobs and Which Websites to Search for Them


freelance-jobs

Get to the office, punch in, count down the hours, punch out? I don’t do any of that, and neither do 18 percent of all workers around the globe. We choose to work from home instead of pursuing traditional careers thanks to the best freelance jobs available.

There’s no reason why you can’t work this way too. It’s not easy, of course. Tax complications and running a solo business can hobble you. But it has its perks! You are your own boss, you work your own hours, and you live every day doing what you love.

Here are the top freelance jobs out there right now, plus relevant search tools and sites to help you find those jobs. Good luck!

1. Web or Mobile Developer

Web development and mobile development are two of the highest-in-demand programming jobs right now. Java, Swift, Python, Ruby, JavaScript—whatever language you’re fluent in, there’s likely someone out there looking to hire you.

But as lucrative as programming can be, keep one thing in mind: working with non-programmers on programming-centric projects (like web and mobile apps) is often frustrating. Be ready to pull out your hair as you bounce from one unreasonable client to the next.

Where to find freelance web or mobile developer jobs:

Want to work for a startup? Then Product Hunt and AngelList have the two best job boards to check out. White Truffle is an option if you want to get anonymously matched with best-fit tech companies. WordPress Jobs is good for WordPress developer positions. Otherwise, you can’t go wrong with general programmer-centric job boards like GitHub Jobs and StackOverflow Jobs.

2. Transcriptionist

Transcription is easy to do but hard to do well. You’ll go crazy if you don’t use a transcription pedal and dedicated transcription software. But with such equipment, and with fast typing skills, it’s one of the best freelance computer jobs.

A pedal allows you to control audio playback—play, pause, rewind, fast forward—using your foot so your hands can stay on the keyboard. The best value option for new transcriptionists is the Infinity USB Foot Pedal. For software, we recommend the industry-leading Express Scribe Pro.

General transcription can earn a modest rate, but medical and legal transcription can demand much more. If you have any background in the medical or legal fields, you may want to focus there and leverage your experience for better rates.

Where to find freelance transcriptionist jobs:

TranscribeMe requires that you pass a test, then sends you work as it becomes available, starting at $20 per audio hour. Quicktate and iDictate are sister sites that both offer freelance transcription jobs that are paid by the word. You can also check out transcription postings on FlexJobs.

3. Photographer

These days, freelance photography is the most effective way to make money from photography. Most lucrative photography businesses can be run solo or with a partner, including wedding, product, and real estate photography.

But professional photography is hard. Really hard. Particularly because you’ll likely run into unforeseen legal issues for photographers. Then again, if you’re skilled at snapping shots and marketing yourself, you can earn a six-figure income working part-time hours.

Where to find freelance photographer jobs:

For photojournalism, check out Journalism Jobs. Otherwise, you should visit The Creative Loft for the best freelancer jobs in photography. You could also visit local restaurants and real estate agencies and ask if they’re interested in improving their businesses with better photos.

Another option is to sell your own stock photos online.

4. Writer or Editor

Writing has long been one of the best self-employment opportunities. All you need is a computer and a working internet connection to get started. Beyond that, developing your expertise comes through practice and feedback.

Anyone can become a freelance writer/editor. However, you may need to slog through many unsavory gigs at the beginning while you hone your skills, build your portfolio, establish new contacts, and prove yourself a strong writer/editor.

Where to find freelance writer and editor jobs:

Freelance Writing Jobs is the first place you should look because it has all kinds of writing positions: reporting, copywriting, blogging, ghostwriting, technical writing, etc. BloggingPro and FlexJobs are both solid for finding freelance jobs online, and if you’re good at networking, you could find success using LinkedIn Jobs.

5. Web or Graphic Designer

Logo, website themes, infographics, posters, brochures, pamphlets, email newsletters, PowerPoint presentations, UX design… the possibilities are endless if you want to be a freelance graphic designer.

But freelance design can be stressful because you’re always churning through clients, more quickly than in other kinds of freelance work. However, if you really impress your clients, they may be open to keeping you on retainer for all their design work!

Where to find freelance web and graphic designer jobs:

Behance Jobs can be a good starting point for graphic design, illustration, web design, and UX design. Other starting points include Fiverr and 99designs, but you’ll need to put in effort to find the jobs worth doing. If you aren’t careful, you could find yourself severely underpaid for your work.

6. Virtual Assistant

A virtual assistant is more than just a remote secretary—the scope of your tasks will depend on the needs of the client. And if you get a good client, this can be one of the best freelance jobs from home.

Basic administrative tasks could include taking phone calls and maintaining schedules. More advanced tasks may involve managing a website, coordinating in-depth research, creating PDFs from source material, etc.

The details of a particular virtual assistant gig will be (or at least should be) mentioned in each job posting.

Where to find virtual assistant jobs:

FancyHands is a virtual assistant service where you get paid per task you complete. You can define your own hours, and there’s a career advancement path for those who want to do more than just per-task jobs. ZipRecruiter and FlexJobs can provide good leads for virtual assistant positions as well.

7. Voice Actor

The voice acting industry is competitive: it’s hard to stand out and you need both skills and equipment to produce the quality of work that clients will love. Unless you’ve been blessed with a magical voice, you’ll probably need voice coaching as well.

But if you think you can cut it, and if you’re serious about becoming a top talent, you can make a comfortable living as a freelance voice actor. Types of voice acting include commercials, audiobook narration, public announcements, training videos, promotional materials, and even entertainment media like animation and video games.

Where to find freelance voice actor jobs:

There are three reputable sites for serious voice actors: Voices, Voice123, and VoiceBunny. They’re all free to use, but Voices and Voice123 provide even better results if you sign up for their premium account plans.

Other Freelance Jobs and Career Options

You could look into easy ways to earn money online for pocket money rather than full-blown job positions.

Otherwise, consider looking into tech jobs that require zero coding skills and entry-level technical support jobs.

Read the full article: The 7 Best Freelance Jobs and Which Websites to Search for Them


Read Full Article

Integrate Weather Data on Your Homepage With Weatherstack API


inegrate-weather-data

Want to share the latest weather details with your website visitors? Widgets and other code that display location-based weather forecasts are increasingly popular, particularly on news and sports-based sites. Such details also appear on mobile apps and even home screens.

This is thanks to APIs (application programming interfaces), which are essentially software that you use for building other software. Here’s how weatherstack API lets you add weather data to your website.

Why Does Your Site or App Need a Weather API?

How Weatherstack API might look on your site

Unless you’re prepared to maintain your own database of current weather around the world, your websites need a weather API. It’s either this, or checking the weather manually for every single visitor or app user. Obviously, doing so is out of the question.

Weather APIs provide access to collated data from weather stations. This allows for the provision of live weather information to end users via websites, apps, or even desktop widgets.

All you need to do is access an API endpoint and format the data to provide information to your users.

What You Can Do With Weatherstack API

The weatherstack API features a collection of tools for a variety of programming languages, backed up by location-based weather data. Six endpoints are available:

  • Current Weather: Delivers current weather data.
  • Historical Weather: View historical weather data.
  • Historical Time-Series: Returns historical time-series weather data.
  • Weather Forecast: Get weather forecasts for up to 14 days.
  • Location Lookup: Check weather at one or multiple locations.

Meanwhile, weatherstack API also promises hour-by-hour weather data for millions of locations worldwide. The data is delivered in milliseconds from a server with almost 100 percent uptime.

Interested in creating a weather app with the weatherstack API? Try it out with the free signup. This is perfect for development and offers a great entry point to commercial use of the service. In short, you could publish an app or service using the weatherstack API and potentially earn money from it.

Weatherstack API Pricing Guide

The free weatherstack API package gives you 1,000 API calls per month. A “call” is a single instance use of the API data, and at this level is ideal for development.

Weatherstack pricing options

Once you’ve got your app up and running, you have several project levels to step up to:

  • Standard: $9.99 per month ($7.99 if billed yearly). It includes 50,000 API calls a month, unlimited support, real-time weather, location lookup, HTTPS encryption, astronomy data, hour-by-hour data, and full historical data.
  • Professional: $49.99 per month ($39.99 with yearly billing). This allows for 300,000 calls and all the above features, plus 7-day forecasts, support for 40 languages, and bulk queries.
  • Business: $99.99 per month ($79.99 if billed yearly). This option gives you 1,000,000 calls, premium support, and 14-day forecast data.

There is also an Enterprise package offering additional features, dedicated support, custom solutions, and more. If your project runs at this scale, weatherstack API will negotiate a price with you. Among weatherstack API’s satisfied customers are Deloitte, Microsoft, Warner Bros., and Schneider Electric.

Get Started With Weatherstack API

Anyone can get started by accessing the weatherstack API at no charge. Head to the weatherstack API signup page to create a free account. You don’t need to provide any payment details at this stage.

After account setup, you’ll get access to an API key. This personal key authenticates you with the API; if necessary you can reset it in the account dashboard screen. (It is also here that you’ll find details of your current weatherstack API plan.)

You can play around with the API initially in your browser window. Returned data is displayed in your browser window in JSON format. You can improve how this looks by installing a browser extension such as JSON Viewer.

Weatherstack API JSON output

Going forward with development, however, you’ll need a suitable integrated development environment (IDE).

Using the Weatherstack API Output

The basic API output from weatherstack lets you pull the current weather for a specific location.

Current Weather

http://api.weatherstack.com/current

? access_key = YOUR_ACCESS_KEY

& query = New York

You can also include additional optional parameters:

// optional parameters:

& units = m

& language = en

& callback = MY_CALLBACK

The same pattern repeats throughout the various API calls. The core command is required text, while you can choose to set optional parameters if you wish.

Historical Endpoint

Here’s a secondary example, using the Historical Weather API Endpoint. This time, you can specify a date for weather data.

// Historical Weather API Endpoint

http://api.weatherstack.com/historical

? access_key = YOUR_ACCESS_KEY

& query = New York

& historical_date = 2015-21-01

// optional parameters:

& hourly = 1

& interval = 3

& units = m

& language = en

& callback = MY_CALLBACK

Again, the basic output from the API will display in your browser window. Note that free accounts can only use the Current Weather API.

Using the JSON Data From Weatherstack API

You can take advantage of the JSON output from weatherstack API in several ways. If you’re familiar with PHP, Python, Node, jQuery, and Ruby, for example, you can use the data in an app or display it on a web page.

For web pages, you’ll need the code file to grab the JSON data, the HTML file, and a CSS. In most cases, you’ll also need some style elements to make it slightly more readable!

Put Global Weather Data on Your Website or App

Clearly, the weatherstack API is a great solution for anyone who needs an affordable and straightforward weather API for their site. You can find out more about the API’s details and documentation at weatherstack.com.

As it’s compatible with PHP, Python, Node, jQuery, and Ruby, weatherstack API could revolutionize weather updates on your website. The historical aspects of the API are particularly useful too.

With a free signup for development use and affordable price plans going forward, weatherstack API is certainly a look.

Looking for other APIs? We’ve also reviewed the IP Geolocation API, which provides an easy way to get started with geolocation data.

Read the full article: Integrate Weather Data on Your Homepage With Weatherstack API


Read Full Article

6 Ways to Identify the Tune Stuck in Your Head

How to Create Your Own Private Self-Hosted Read-It-Later App


create-readlater-apps

The internet is a vast treasure trove of knowledge. But it is fleeting and there are no guarantees that the content you like will be there in the future. If you can’t afford to lose that content, you can use a web archiving tool to store a copy of the web page.

Many people use read-later services for saving web articles. These apps work best with text-based content and do not handle complicated webpage designs or media properly. Want some more control?

Let’s see how you can create a clone of Instapaper or Pocket in your computer without losing any web page asset.

Introducing ArchiveBox

ArchiveBox is an Open Source solution that can help you host your own alternative to an archiving service like the Wayback Machine. You don’t give up your privacy or stay locked in a service you cannot control.

It takes the list of URLs you want to archive and creates a local, browsable HTML clone of the content in multiple formats. It includes local copies in HTML, a screenshot of the page, a PDF file, and WARC (Web ARChive).

These copies stay with you even if the original webpage disappears in the future.

ArchiveBox is written in Python 3. It also uses dependencies like Wget, Headless Chrome, Youtube-dl, and other Unix tools to save the webpage. You don’t need a constantly running backend server. Just run it each time you want to import new links and update the static output.

Once the archiving completes, you can open the generated output/index.html in your browser to view the archive.

ArchiveBox

Advantages of ArchiveBox

  • It archives the links in several file formats that work as backups.
  • It tries to retain the original webpage using sophisticated capturing methods.
  • Has the ability to automatically extract the content and save them to a single folder.
  • It also provides a simple, command-line interface to deal with multiple links, feeds, and bookmarks. You have to set it once and run it on a schedule to archive newer links.

Disadvantages of ArchiveBox

  • ArchiveBox extracts all the assets from the webpage. It consumes significant disk space and is CPU intensive.
  • The app requires three or more dependencies beyond Python 3.5. It takes trial-and-error to make these components work together.
  • The app does not completely support Windows OS. You have to install Docker or enable Windows Subsystem for Linux (WSL). Even then some features may or may not work.

Supported Operating Systems

ArchiveBox officially supports the following operating systems:

  • macOS: 10.12 Sierra with Homebrew.
  • Linux: Ubuntu, Debian (with APT). The app may (or may not) work in distros like Fedora, CentOS, SUSE, Arch, and more.
  • BSD: FreeBSD, OpenBSD, NetBSD (with pkg).

Dependencies

ArchiveBox is a flexible web archiving tool. You must install the following dependencies and meet the minimum requirements.

  • Python 3. Don’t use the default Python 2.0 that comes with macOS.
  • Wget 1.16
  • Chromium 59. If you already use Google Chrome, don’t install Chromium.
  • Youtube-dl (Optional): Media resources need a lot of storage space. Give it a detailed thought before archiving your bookmarks.

Set Up ArchiveBox

There are two ways of setting up ArchiveBox—Automatic and Manual.

In the automatic method, a helper script will install the app and their dependencies. But you won’t be able to troubleshoot the problem if any error arises. It’s better to install the app manually.

For the purpose of demonstration, we’ll use macOS 10.14.6.

Installing the Dependencies

The best way to install dependencies is through a package manager called Homebrew. To understand its basics, check out this article on how to install Mac apps with Homebrew.

Open Terminal and type in

brew install python3 git wget curl youtube-dl
brew cask install chromium 

(Skip this if you already have Google Chrome/Chromium installed in Applications)

Check the Version Number of All Dependencies

To check the version number of all dependencies, type in

dependency app --version

(Replace the dependency app with python3, wget, youtube-dl, and more)

check the version of all dependencies

Download Your Bookmarks Export File

All the read-later services and browsers can export your bookmarks as an HTML file. Follow the instructions in this article on how to export bookmarks from your browser. You can also save a single link or the list of URLs in a text file.

Install ArchiveBox

Clone the repo from the GitHub. Open Terminal, and type in

git clone https://github.com/pirate/ArchiveBox

Then,

cd ArchiveBox/

When you clone this repo, the installer will create an ArchiveBox folder in your Home directory. This folder contains all the main application and configuration files.

install ArchiveBox

Add Your URL to the Archive

If you want to archive a single link, then type in

echo 'https://example.com'| ./archive

archiving a single link

Navigate to your ArchiveBox folder to see the newly created output folder. In here, you’ll see an index.html file.

ArchiveBox output folder

Adding Multiple Links to the Archive

When you want to save multiple links (dozens or more), it’s better to add your links to a text file. The app will parse the URLs inside the file and archive them. Open Terminal and type in

./archive [Path to Your File.txt]

If your file is located in the Downloads folder, your path will look like

./archive /Users/(Home directory name)/Downloads/links.txt

Wait for a few minutes/hours to complete the process. To access your archive, open the output/index.html in your browser. You can sort by column, search title using the box in upper-right section, and see the total number of links at the bottom.

archived links through ArchiveBox

Click the favicon under the Files column to visit the details page. You’ll find links to individual file format as seen in the screenshot. The same link also gets uploaded to archive.org.

detail page of each archived link

In the same way, export your Instapaper or Pocket links as an HTML file. Then, type in

./archive ~/Downloads/instapaper-export.html

You can also import a list of links from the feed URL. But remember you might encounter too many failures or session timeouts. If there are thousands of URLs, it’s better to break them into smaller files to increase the success rate.

Configure ArchiveBox

The default settings work in most cases, but there are certain important parameters you can tweak to get more features. The configuration file lives in

~/ArchiveBox/etc/ArchiveBox.conf.default

Note: Do not modify this file, because they’ll get erased whenever you update the app. To create a persistent config file, type in

cp ~/ArchiveBox/etc/ArchiveBox.conf.default ~/.ArchiveBox.conf

The cp command will create a duplicate copy of the configuration file in your home directory. By default, the file is not visible in your directory. To unhide press Cmd + Shift + Period. Open the config file in TextEdit.

copy of the ArchiveBox config file

Parameters

ArchiveBox offers you many options. Here are some important ones;

  • ONLY_NEW: Set this to True to download the archive for newly added links. Comes useful if you regularly bookmark links.
  • TIMEOUT: Possible values are 60 or 120 seconds. If you see frequent timeout errors increase it to 120 seconds.
  • URL_BLACKLIST: You can use regex expression to exclude certain domains, extensions, or URL patterns from the archive.
  • FETCH_MEDIA: Fetch all audio and video files using youtube-dl. Set this to True only when you have enough storage.
  • WGET_USER_AGENT: Use it to change the user agent during archiving. If you’re getting blocked by certain servers, this option comes useful.

To know more about the configuration details, visit the ArchiveBox Configuration for more information.

Publishing Your Archive

The archive produced by ArchiveBox is compatible with any provider that can host static HTML. For example, GitHub pages.

You can also serve it from a home server or VPS by directly uploading the output folder to your web directory.

Make sure you’re not running any content as CGI or PHP, you want to host only static HTML files.

Hosting your archive has both pros and cons. When you download links from random sites, you must understand the dangers of hosting malicious CSS and JS files in your shared domain. You may also want to blacklist your archives in robots.txt file to remain private.

Download Entire Websites Offline

Web archiving has attracted attention over the past few years. They record the entire contents of a web page, including source HTML, embedded images, stylesheets, and JavaScript code. ArchiveBox fits right into the broad category of web archiving tools and services.

If you’re frustrated with Instapaper or Pocket, then ArchiveBox is an excellent alternative. Apart from web articles, you might want to archive entire websites to access them offline or to preserve their knowledge. If this interests you, read this piece on how to download any website for offline reading.

Read the full article: How to Create Your Own Private Self-Hosted Read-It-Later App


Read Full Article

How to Create an Amazing Chart in Google Slides


create-chart-google-slides

Google Slides is an amazing presentation tool with the ability to create complex slideshows. Its easy-to-use interface and online sharing capabilities give it a leg up over other programs, and one of the many things you can create with Google Slides is a graph or chart.

To keep this simple, here’s how to create a chart in Google Slides, along with some basic graphic design tips to make sure you’re building the best data visualizations possible.

How to Create a Google Slides Chart

The first thing you’ll need to do is set up your slideshow, either by creating a brand new file or by opening a document that’s already in progress.

If you have already created a graph or chart outside of Google Slides, the process of including one is extremely simple. Just go Insert > Image, then place your image file in the presentation.

If you want to create a chart in Google Slides directly, there are a few more steps involved.

To create a graph or chart in Google Slides, click Insert > Chart, then choose the style of chart that you want to include. For this tutorial, we’re going to go with a very simple bar graph.

Insert a Chart Into Google Slides

Once you choose a chart style, Google Slides will populate a pre-made chart into your slideshow.

To tailor this Google Slides chart, click on the dropdown arrow in the top right-hand corner of this pre-made chart. Choose Open source. This will allow you to begin editing.

A Simple Bar Graph in Google Slides

Note: In this tutorial, we are not going to talk about collecting data, only how you can design a chart for Google Slides.

If you’re looking for ways to collect data for a chart, here’s the best guide to Google Forms you’ll need.

Step 1: Learn About Your Chart Editor

Once you click Open source, Google Slides will take you to a pre-made Google spreadsheet.

In this spreadsheet, you will see columns listing the data points in your chart, along with the number values attached to them. You’ll also see a miniature version of your chart just beneath that.

Add Data to a Chart in Google Slides

Double-click on this chart to open your Chart editor.

Open up Your Chart Editor in Google Slides

Your Chart editor will open on the far side of your spreadsheet, seen here in red. In it, you will find the two sections where you can customize a chart in Google Slides: Setup and Customize.

Setup allows you to control top-level design and data options for your chart, from Chart type, to Stacking, and Data range.

Customize is full of different dropdown menus where you can adjust Chart style, Chart & axis titles, Series, Legend, Horizontal axis, Vertical axis, and Gridlines.

Customize Your Google Slides Chart With the Chart Editor

Under Chart style specifically, you can adjust:

  • The Background color of your chart.
  • The Chart border color.
  • The default Font for this chart.

Under Chart & axis titles, you can adjust what your chart title says. You can also change the Title font, size, format, and color. It’s simple stuff, but always handy to know.

Chart and Axis Titles in Google Slides

After you finish with Chart & axis titles, you’ll find the dropdown menu Series. This is where you can format individual data points, which can come in handy when you want to have different colors on your chart to illustrate a point. We’ll get to that shortly.

Series Dropdown Menu in Google Slides

Next is Legend. This is where you can adjust the “explanation” of your data points and how to display them, including their position on the page.

Google Slides Chart Legend

Lastly, you’ll come to three sections:

Horizontal axis controls the way horizontal data points are displayed on your chart.

Google Slides Horizontal Axis

Vertical axis controls the way your vertical labels are displayed.

Gridlines control the way the lines in your chart are displayed.

Step 2: Delete a Column in a Google Slides Chart

Once you’re familiar with your Chart editor, you’ll need to know a few tips for customizing this chart.

We chose a default bar graph for our Google slideshow, but you might have noticed that each data point (i.e. Team 1) has two separate bars. What if you only need one bar per point?

To delete a bar, go to the data points in your Google spreadsheet above your chart. Right-click on the top of the column where it says “C,” to highlight the whole section that contains the data that you want to delete.

Click Delete column. This will automatically delete the entire column from your spreadsheet and update your previewed chart.

Delete a Column in a Google Slides Chart

Step 3: Update a Linked Chart in Google Slides

As we’ve worked on this chart in a linked Google spreadsheet, it’s important to note that your Google Slides presentation is still open in another browser window.

If you go back to that window and you want to see what this updated chart will look like, go to the top right-hand corner of your chart and click Update. Google will read the new changes on the spreadsheet and update your chart accordingly.

Update a Linked Chart in Google Slides

Go back to your Google spreadsheet to continue working.

Step 4: Change Data Point Names and Values

Another step that is useful is knowing how to change the names and values of the data points in your chart.

To change the names, go to the table in your Google spreadsheet above your chart. Double-click on the individual cells and start typing. Press Enter/Return once you’re done inputting.

Change Name of Data Points in Google Slides Chart

Step 5: Change the Color of Your Data Points

This simple bar graph has come a long way, but it’s still boring. One of the quickest and easiest ways that you can spruce it up is through color.

For this tutorial, we’ve decided to chart favorite colors based upon an individual number of responses, divided by categories. What if we changed each line on the bar graph to show the color itself?

You can switch this by going to Chart editor > Customize > Series, then clicking Add next to Format data point.

Format a Data Point in Your Google Slides Chart

When you click on Add, a window will pop up that says Select data point. Use the dropdown menu to pick an individual data point to format, then click OK.

For this tutorial, we’ve chosen “Red” as our data point to update. Once you select your data point, go back to the Series dropdown menu and choose a new color from the color palette.

Change Color of Data Points in Google Slides Chart

If you don’t like your data points having individual colors, just Delete each individual data point in the Series section. When you do, they will revert to their uniform color.

If you want to add more colors, just click Add again. Repeat the same process with another data point.

Step 6: Move Your Chart Legend

The last crucial step you’ll need to know is how to move your legend.

Regardless of how simple or complex your data is, you’ll want to make sure the data you’re presenting is clearly labeled and easy to understand. In this bar graph, for example, having our legend all the way off to the right doesn’t make much sense, especially with each bar a different color. It doesn’t tell us anything.

To move the legend around your graph, go to Chart editor > Customize > Legend.

Under the dropdown menu Position, choose where you want to place the legend on the page. Our own legend works best under the graph, so that’s where we’re putting it.

Move Your Legend in Your Google Slides Chart

After you’re done with your chart customization, go back to your Google slideshow and update the view.

Design Tips for Creating an Amazing Chart or Graph

Finished Chart for Google Slides

Now that you know how to create a chart in Google Sides—using Google Sheets as an additional tool—here are some tips to keep in mind when displaying your data. These tips can be applied to all the charts you create in Google Slides.

1. Make Sure You’re Using the Right Type of Chart

The type of data you’re displaying will affect the type of chart you use, as different charts serve different purposes:

  • Bar charts are good for data that is sorted by groups.
  • Line charts are good for data showing a trend over time.
  • Pie charts are discouraged by statisticians. They’re hard to read and often distort data. If you do need to use one, keep in mind that they’re used to display parts of a singular data point.

2. Remember Your Audience

Are you designing a chart for the general public who may have a hard time deciphering complex data? Best to keep your chart simple and cut back on complicated visualizations so they make the connections quicker.

3. Make Things Easy to See

Design your data in a way that is intuitive and easy to grasp. Don’t put too much information on your chart so it becomes difficult to read, and cut out unnecessary visual elements like extraneous border decorations to make your data cleaner.

4. The Importance of Color

Use strong colors between your different data points so they stand out. Don’t use too many colors either, or it can become confusing. Avoid red and green color combinations, as they are not accessible to readers with color blindness.

5. Be Wary of Flashy Effects

Avoid 3D graphs or flashy effects. They’re usually difficult to read because the 3D shape can often distort the data you’re presenting.

Make Your Google Slides Chart Stand Out

Now that you know how to create a chart or graph in Google Slides—and have some tips on how to design one—you can now buckle down and create something great.

Looking for other useful things you can do with Google Slides? Here are some key Google Slides tips and tricks.

Read the full article: How to Create an Amazing Chart in Google Slides


Read Full Article

7 Hidden Plex Settings You Should Be Using


hidden-plex-setting

Plex has several hidden settings available for users. However, they are not available via the main Plex Media Server app’s interface. Instead, you’ll need to delve into Plex’s own files and make the changes manually.

Although they are primarily aimed at advanced users, there are some hidden Plex settings that all users should use. So, let’s take a look at these hidden Plex settings and how to find them on Windows, Mac, and Linux.

A Word of Warning

Before you dive into the article, let us sound a note of caution. If you make an error while adjusting these settings, you could render Plex unusable.

The situation is fixable, but you’ll end up losing your regular settings and have to start from scratch. We’ll explain this in more detail at the end of the article, but you need to be aware before you start tweaking these hidden Plex settings.

How to Find Hidden Plex Settings on Windows

plex registry settings

On Windows, you will need to head to Plex’s entry in the registry. Follow the instructions below to learn how:

  1. Press Win + R.
  2. Type regedit and hit Enter.
  3. Go to HKEY_CURRENT_USER\Software\Plex, Inc.\Plex Media Server.
  4. Create a new String Value, Integer, or Boolean term as per the specific setting’s requirements.

(NB: Some values might already exist. If they do, you can merely edit the value to change the setting.)

How to Find Hidden Plex Settings on Mac

plex plist mac settings

If you run the Plex Media Server on a macOS machine, you need to head to the library preferences for the operating system’s user account.

The easiest way to access the library preferences is to open Finder and use the Go menu to navigate to ~/Library/Preferences/com.plexapp.plexmediaserver.plist.

Open the PLIST file in a text editor and either add new lines or amend existing values as required. You’ll need to reboot your machine before the new settings will take effect in the Plex Media Server app.

Experienced users can also achieve the same result from the Terminal by using one of these two commands:

  • defaults write com.plexapp.plexmediaserver [option name] [value]
  • defaults write com.plexapp.plexmediaserver [option name] -boolean [Value]

How to Find Hidden Plex Settings on Linux

Linux users can adjust the secret Plex settings by opening the app’s Preferences.xml file. In most Linux distros, you will find it at $PLEX_HOME/Library/Application Support/Plex Media Server/.

There are some exceptions, however. On Debian, Fedora, CentOS, and Ubuntu, it’s at /var/lib/plexmediaserver/Library/Application Support/Plex Media Server/. On FreeBSD is at /usr/local/plexdata/Plex Media Server/, FreeNAS is at ${JAIL_ROOT}/var/db/plexdata/Plex Media Server/, and on ASUSTOR NAS drives it’s at /volume1/Plex/Library.

The Best Hidden Plex Settings

Now that you know where to find the advanced Plex settings, here are our favorite hidden Plex settings that all users should know about.

1. Change the Default Album Sort Criteria

Option Name: AlbumSort
Value: String

Everyone has their own preferred way of listening to their music collection. If you’re the type of person who likes to enjoy full albums rather than picking and choosing single songs, this secret Plex setting is a lifesaver.

You can choose to sort by year, artist, name, or any other piece of metadata that’s attached to your album file by default. Make sure you choose both the sort option and whether you want the data in ascending or descending order (for example, artist:desc).

2. Remove Authentication for Specific Networks

Option Name: allowedNetworks
Value: String

You can allow users from some networks to access your Plex Media Server without authentication. Doing so will reduce the security of your server, but will allow people to access your media with far less hassle.

To add an allowed network, you need to know the IP address, netmask IP, and netmask. Format them with a slash in between each value ([IP]/[netmask IP]/[netmask]).

3. Change the Number of Log Files That Plex Keeps

Option Name: LogNumFiles
Value: Integer

Log files are a great way to monitor what other users are watching on your Plex server, as well as being a vital tool for identifying and fixing any errors.

By default, Plex retains five log files and deletes the oldest every time a new one is created. To keep more, simply enter your preferred number as a new integer.

4. Enable/Disable DLNA Access

Option Name: DlnaEnabled
Value: 1/0

DLNA is short for Digital Living Network Alliance. It’s a certification standard from 2003 that allows digital media to be shared across various devices.

Plex is DLNA-enabled, but you might not want your library popping up in your computer’s network locations or on your TV’s media page. If you don’t, set the value of the setting to 0. A value of 1 means the feature is enabled.

5. Adjust Transcoding Priorities

Option Name: BackgroundTranscodeLowPriority
Value: 1/0

Transcoding is the process whereby Plex changes the file format and resolution of a video file to suit the type of device that you’re watching on.

Unfortunately, the process eats through a lot of CPU power. If your Plex Media Server runs on a low-power machine, it makes sense to divert the power to real-time streaming over background transcodes. To do so, set the value of the setting to 1.

6. Change Library Scan Intervals

Option Name: ScheduledLibraryUpdateInterval
Value: Integer

You can make Plex scan your library for new content at specific intervals. However, in the server’s user interface, only seven options are available: every 15 minutes, every 30 minutes, hourly, every two hours, every six hours, every 12 hours, or daily.

If you want to set a customized amount of time, set the integer as the number of seconds you want to elapse between scans.

7. Ignore Words When Sorting Titles

Option Name: ArticleStrings
Value: String

You can get Plex to ignore specific words from movies, artists, song titles, and other media when sorting alphabetically. For example, you could get Plex to ignore “The” in the “The Beatles” so that the band would appear under the letter “B” rather than the letter “T.”

Just enter all of the words that you want Plex to overlook as a comma-separated list (for example, the, a, in, that, to, etc.).

How to Undo Changes to Plex’s Hidden Settings

As you’ve probably gathered from reading this article, the process for changing Plex’s secret settings can quickly become rather confusing. Due to the nature of the files you’re editing, a typo or misplaced option name could mean Plex no longer works as expected.

If you encounter issues, you can remedy the problem by either deleting the Plex preferences file (Mac and Linux) or removing all Plex entries in the registry (Windows).

When you reload Plex, it will create a new, blank preferences file. All your previous settings will be lost, and you’ll have to re-customize them, but at least the Plex Media Server will be functional again.

Learn More About Using Plex

Plex’s hidden settings are a great way to customize the app. But there are a lot of other things you can do to make Plex work the way you want.

If you’d like to learn even more about getting more out of Plex, be sure to read our articles detailing how to watch and record live TV with Plex and the best Plex plugins for power users.

Read the full article: 7 Hidden Plex Settings You Should Be Using


Read Full Article

Amazon’s Echo Show can now identify household pantry items held in front of its camera


Amazon is introducing a new feature to its Alexa Show device designed to help blind and other low-vision customers identify common household pantry items by holding them up in front of Alexa’s camera and asking what it is. The feature uses a combination of computer vision and machine learning techniques in order to recognize the objects the Echo Show sees.

The Echo Show is the version of the Alexa-powered smart speaker that tends to sit in customers’ kitchens because it helps them with other kitchen tasks, like setting timers, watching recipe videos, or enjoying a little music or TV while you cook.

But for blind users, the Show will now have a new duty: helping them better identify those household pantry items that are hard to distinguish by touch — like cans, boxed foods, or spices, for example. 

To use the feature, customers can just say things like “Alexa, what am I holding?” or “Alexa, what’s in my hand?” Alexa will also give verbal and audio cues to help the customers place the item in front of the device’s camera.

Amazon says the feature was developed in collaboration with blind Amazon employees, including its principal accessibility engineer Josh Miele, who gathered feedback from both blind and low-vision customers as part of the development process. The company also worked with the Vista Center for the Blind in Santa Cruz on early research, product development, and testing.

“We heard that product identification can be a challenge and something customers wanted Alexa’s help with,” explained Sarah Caplener, head of Amazon’s Alexa for Everyone team. “Whether a customer is sorting through a bag of groceries, or trying to determine what item was left out on the counter, we want to make those moments simpler by helping identify these items and giving customers the information they need in that moment,” she said.

Smart home devices and intelligent voice assistants like Alexa have made life easier for disabled individuals, as it allows them to do things like adjust the thermostats and lights, lock the doors, raise the blinds, and more. With “Show and Tell,” Amazon hopes to reach the wide market of blind and low-vision customers, as well. According to the World Health Organization, there are an estimated 1.3 billion with some sort of vision impairment, Amazon says.

That being said, Echo devices aren’t globally available — and even when they are offered in a particular country, the device may not support the local language. Plus, the feature itself is U.S.-only at launch.

Amazon isn’t alone in making accessibility a selling point for its smart speakers and screens. At Google’s I/O developer conference this year, it introduced a range of accessibility projects, including Live Caption which transcribes real-time audio; Live Relay for helping the deaf make phone calls; Project Diva, for helping those who don’t speak use smart assistants; and Project Euphonia that helps make voice recognition work for those with speech impairments.

Show and Tell is available now to Alexa users in the U.S. on first and second-generation Echo Show devices.


Read Full Article

Google Play Pass launches with 350+ premium apps and games, initially for $1.99 per month


Following the well-received launch of Apple Arcade, Google today is officially introducing its own take on subscription-based access to premium mobile games — or, Google’s case, premium mobile apps, too. The new Google Play Pass subscription, arriving this week, will offer over 350 apps and games that are completely unlocked, with no upfront fees, in-app purchases, or advertisements. And the initial price point is something of a no-brainer — it’s just $1.99 per month for the first year, Google says.

That price will increase to $4.99 per month after the first 12 months have passed, which is the same price as Apple Arcade at launch. This launch promotion is only available until October 10, 2019, however.

The two services are similar in concept, as both are providing a large library of premium content for a monthly subscription. But there are some differences between the two.

For starters, Apple Arcade is filled with exclusives — meaning its games will not be found on Andriod. The reverse is not true for Google Play Pass. Instead, the Play Pass catalog includes many cross-platform titles, including some that even found their fame first on iOS, like ustwo’s Monument Valley.

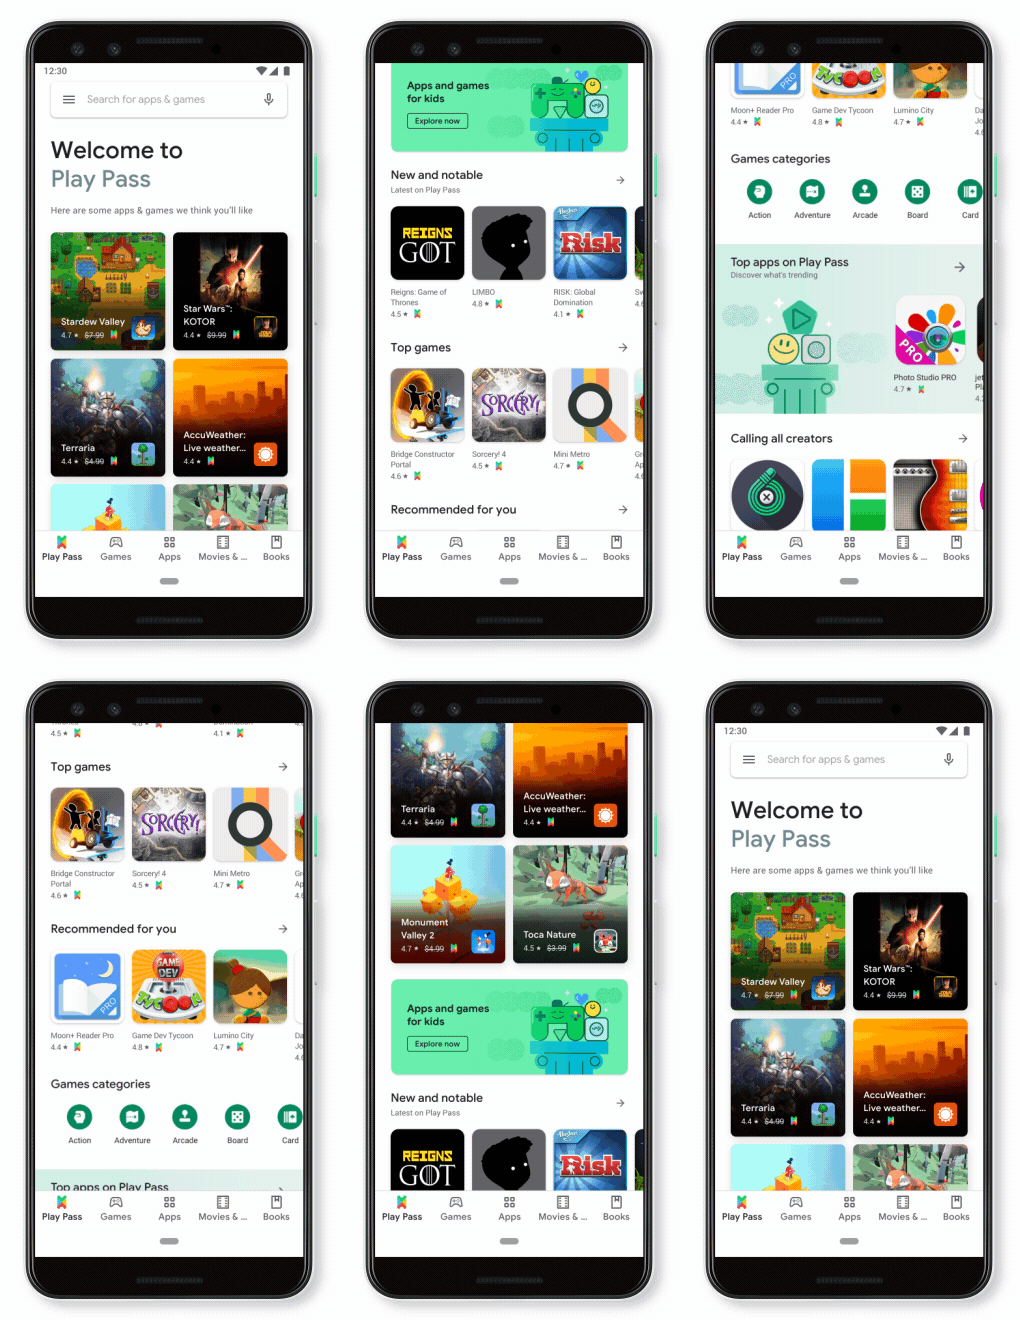
In addition, Play Pass’s launch titles aren’t all games. There are also ad-free versions of popular mobile apps, like AccuWeather, Facetune, and Pic Stitch, for example.

Notable launch titles include Stardew Valley, Risk, Terraria, Monument Valley, Star Wars: Knights of the Old Republic, Reigns: Game of Thrones, Titan Quest, and Wayward Souls. Some lesser-known additions include LIMBO, Lichtspeer, Mini Metro, and Old Man’s Journey. Others, like This War of Mine and Cytus, are coming soon. And for little kids, there are some preschooler-friendly titles like Toca Boca classics and the My Town series.

More titles are added on a monthly basis, Google says.

pph realistic

Because it’s not relying on exclusives, Google’s catalog is more than triple the size of Apple’s at launch. That being said, Apple’s Arcade library is filled with gorgeous, high-quality games while Play Pass is rounded out with a lot of more utilities, like weather apps and photo editors.

Play Pass ticket logoLike Apple Arcade, the new subscription gets its own tab in the Google Play app, where the games are organized by genre, popularity and other factors — just like a mini app store. However, unlike Apple Arcade, where games are only found in the Arcade tab or through search, Google Play Pass titles will appear directly in the Play Store. They’ll be designated with a Play Pass ticket badge, so you can easily identify them.

The Play Pass subscription also allows the games to be shared with the whole family. The family manager can share their Play Pass subscription with up to five other family members, who can each access the titles independently. This is comparable to Apple Arcade.

We already knew Google was working on an Apple Arcade competitor before today. The Play Pass subscription’s existence had been leaked, and Google later confirmed the service with a tweet. What we didn’t yet know was the launch date, lineup, or the official pricing.

Google Play Pass service is rolling out this week to Android devices in the U.S., with more countries coming soon. A 10-day subscription is available, before it converts to the $1.99 per month limited promotion, followed by the $4.99 per month price point when the promotion ends.

While neither Apple nor Google is discussing the terms of their deals with developers, Google says that the more people who download a Play Pass title, the more the revenue developers receive on a recurring basis. It also explained that Google itself is funding the initial launch offer, so developers can gain more subscriber interest without impacting their revenue.


Read Full Article