Plugins help turn GIMP from a good program into a great one. They add new features, improve your workflow, and help make GIMP one of the best free alternatives to Photoshop.
But it’s complicated. The whole GIMP plugin experience is not very user friendly. They can be hard to find, tricky to install, and there are lots of compatibility issues.
But that’s where we come in. In this guide we’ll walk you through where to get the best GIMP plugins and how to install them. So let’s get started…
Where to Find GIMP Plugins
The GIMP plugin scene is a bit of a mess. Plugins used to be collected together in the GIMP Registry, but that no longer exists. Which means they’re now scattered around the internet.
Some are also very old. In many cases they haven’t been updated in a decade or more. There’s no guarantee that plugins will play nicely with the newest versions of GIMP. Indeed, popular ones like the GIMP DDS plugin or BIMP are now abandoned and no longer work.
How to Install GIMP Plugins
Inevitably, the installation process is also complicated. There are two main ways to install GIMP plugins.
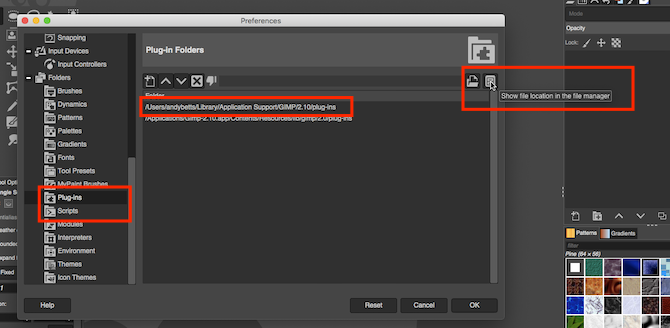
First is the manual way. If your plugin is in a ZIP file then you need to copy the contents to GIMP’s plugins and scripts folders.
- Unzip the download.
- In GIMP, go to Preferences > Folders. Locate the Plug-ins and Scripts sections.
- There are two folders in each section. One is a system folder, the other a user folder. Select the latter then click Show file location in the file manager to open it.
- If your downloads are in the PY format move them into the Plug-ins folder.
- If they’re in the SCM format move them into the Scripts folder.
- Now restart GIMP.
The second way is the automatic method. Some plugins come packaged with their own installer. Just double-click this and install it as you would any other application.
Installers are platform-specific, so you might find plugins that are only available for Windows, but not Linux or Mac. Also, remember that opening random installers off the internet is a risky business, so make sure your antivirus software is up-to-date and running properly.
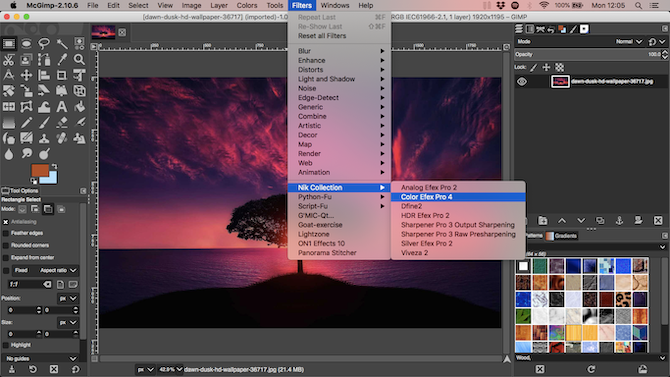
There is a third option, which is to install a customized version of the entire GIMP application. A popular build found at partha.com comes with several plugins pre-installed, including Resynthesizer and G’MIC.
These are among the best GIMP plugins, as we’ll see next.
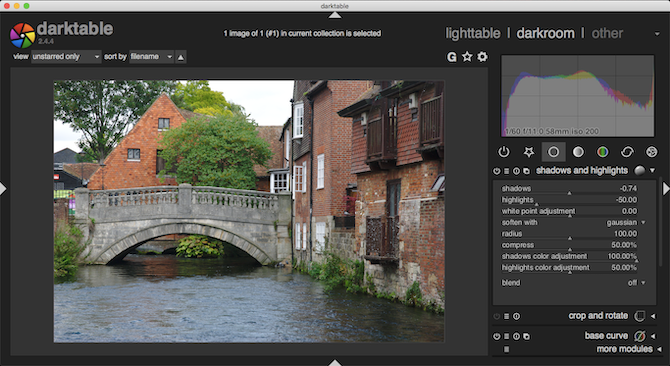
GIMP 2.10 (how to get started using GIMP) is one of the best free photo editing apps you can get. You can even use it with your RAW photos, but you need to add your own RAW editor first. There are two main options, DarkTable and RawTherapee.
Both are worth testing, but we prefer DarkTable due to its more accessible interface, shallower learning curve, and some advanced features including masking tools.
Once installed you can drag your RAW images into GIMP and it will launch DarkTable, wherein you can begin editing. The effect is the same as what you get with the famous Photoshop and Adobe Camera RAW combination, and just as good.
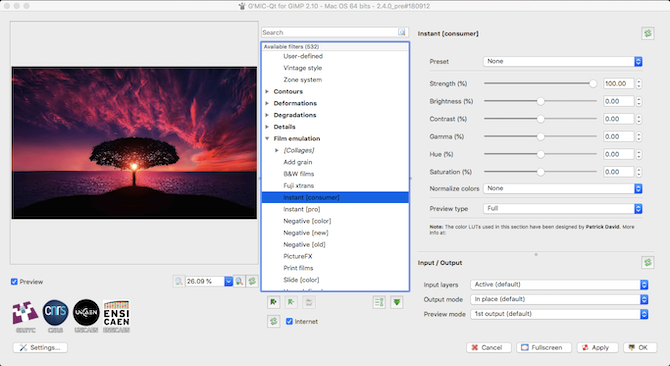
Another plugin for photo editors, G’MIC offers over 500 filters and effects that you can use to jazz up your shots.
The range is astounding. There are basics like film stock emulations and frames, more advanced things like noise reduction and other repair tools, and even some 3D effects. You can use each one with its default settings with a single click. But if you prefer, you can use the series of sliders for each filter to customize the look, and get the exact result you want.
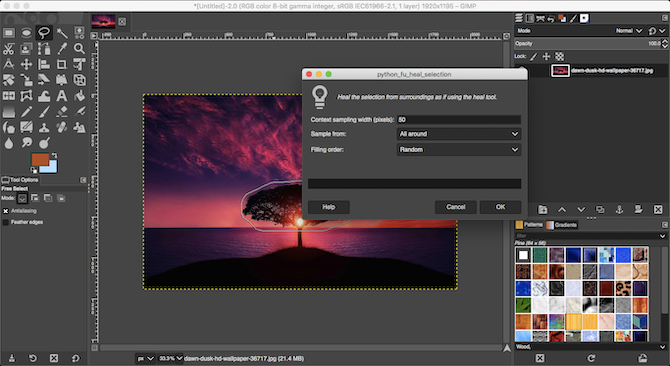
Resynthesizer is one of GIMP’s oldest plugins, and one of its most essential. It provides a series of tools based around working with textures. You’ll find the key part under the Enhance menu: Heal Selection.
This is GIMP’s equivalent to Photoshop’s Content Aware Fill tool, one of the things Photoshop can do that GIMP can’t. It enables you to remove unwanted objects from a photo completely seamlessly.
Heal Selection magically replaces the intrusion with surrounding content from the background of your image, and it blends perfectly. So, if you remove something from the sky, the space will be filled with more sky. You’d normally have to use the Clone tool for that. It’s a much more laborious process.
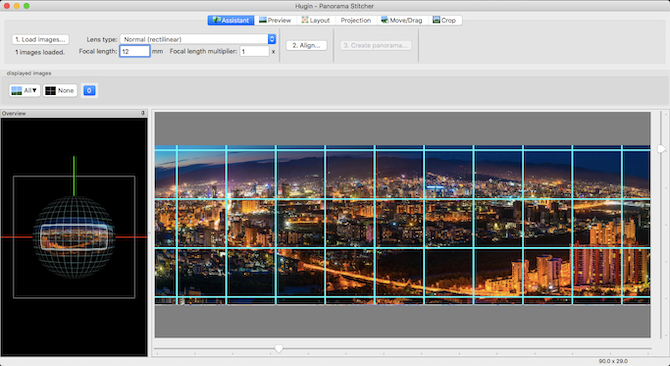
When you need to stitch together a series of images to create a panorama, Hugin is the best tool to use for GIMP. It’s simple to get started. Just load up your images, specify a few common points on each, and the app will merge them together. It’ll also correct for mismatching angles and exposures.
Hugin functions as a standalone app, and is available for Windows, Mac, and Linux.
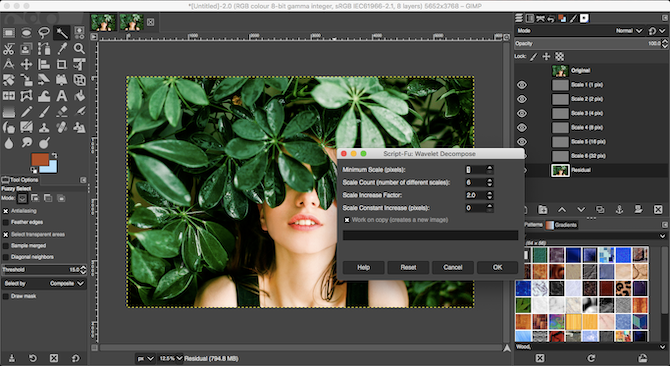
Skin retouching is an integral part of portrait photography. Wavelet Decompose is the best plugin for that on GIMP.
The plugin uses an advanced form of frequency separation. It splits the image into multiple layers, each containing different sets of details. This gives you very fine tuned control over which details you want to smooth, and which to keep.
Sound complicated? Well, the concept is, but the practice isn’t. Just load up the plugin and use the blur and smooth tools to make your skin shine.
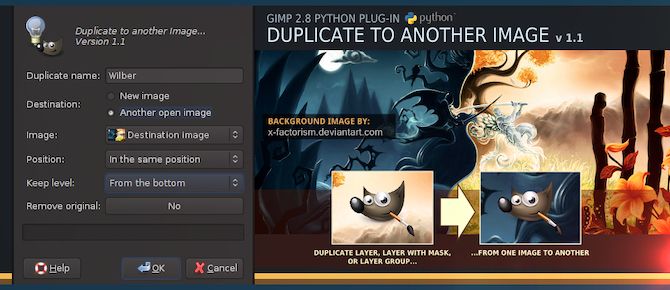
This simple script is a real time saver. Its name describes exactly what it does: it duplicates a selection to another image file.
Can’t GIMP already do this? Yes, but not as well. The Duplicate to Another Image plugin has a whole lot more features. You can copy a selection onto a new image the same size as your original one, with the object in the same place, making it easy to change the background of an image.
Or, you can copy to a new image, and crop it to size, when you want to isolate individual objects. And you can copy the object to another image you’ve already got open.
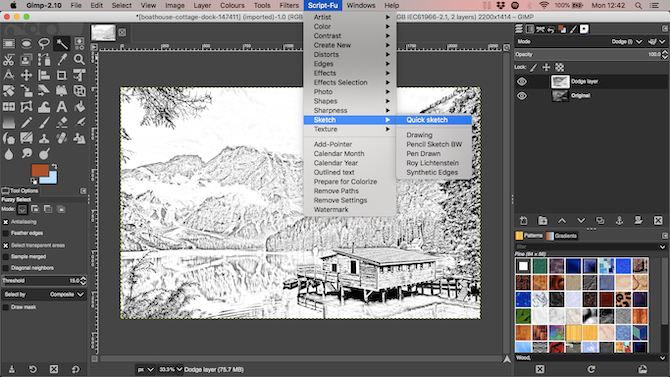
GIMP plugins come in lots of sizes and complexities, but often it’s the single-function ones that you end up using most.
This collection of over 100 scripts gives you a host of shortcuts for common image editing and graphic design tasks. You get a GIMP sketch plugin, a few scripts for sharpening photos or adding frames, and some for generating effects or emulating film stock. There’s a lot here to play with. They’re all tested and fully compatible with GIMP 2.10.
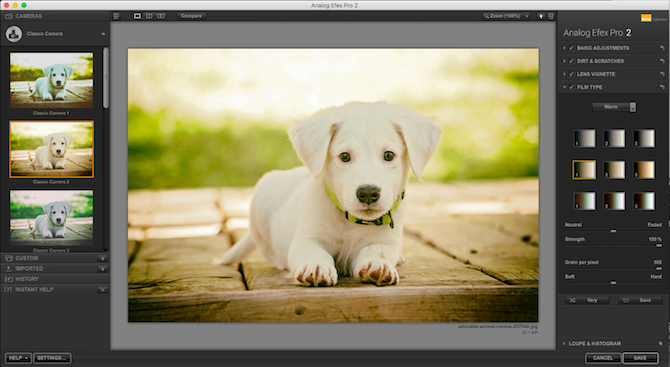
Finally, the Nik Collection, the professional-class suite of photo editing programs. It gives you access to pro-level sharpening and noise reduction, color filters, HDR effects, and lots more. It truly takes GIMP to a new level.
So if it’s so good why have we kept it to the end? Two reasons.
First, the free version of the Nik Collection is no longer officially available. You can still download it from The Internet Archive, and you can set it up if you’ve already got it installed on your PC. Second, you have to jump through a few hoops to get it working. Fortunately, we’ve got a guide to using Google’s free Nik plugins with GIMP that shows you what to do. Rest assured that it’s worth the effort.
How to Use GIMP Plugins
Once you’ve installed your GIMP plugin it will show up in one of several locations. It may appear under the Filters menu, or one of the submenus there. It may be under Image or Layers, or you may get a whole new menu called Script-Fu. Sometimes, plugins (like a RAW editor) run as a separate app, triggered to launch whenever they’re needed.
When you find a plugin you like, make sure you keep a copy of the downloaded file. You never know when it might disappear. That, unfortunately, is the reality of working with GIMP plugins.
Plugins aren’t the only way to power up GIMP. If you’re looking for a GIMP watercolor plugin, for instance, you might be better off with a brush instead. And for that you need our guide to the the best GIMP brushes.
Read the full article: The 8 Best GIMP Plugins and How to Install Them
Read Full Article
