12 August 2019

Huawei’s new OS isn’t an Android replacement… yet


If making an Android alternative was easy, we’d have a lot more of them. Huawei’s HarmonyOS won’t be replacing the mobile operating system for the company any time soon, and Huawei has made it pretty clear that it would much rather go back to working with Google than go at it alone.

Of course, that might not be an option.

The truth is that Huawei and Google were actually getting pretty chummy. They’d worked together plenty, and according to recent rumors, were getting ready to release a smart speaker in a partnership akin to what Google’s been doing with Lenovo in recent years. That was, of course, before Huawei was added to a U.S. “entity list” that ground those plans to a halt.


Read Full Article

Sequoia leads $40M investment in mobile messaging startup Attentive


Attentive, a startup helping retailers personalize their mobile messages, is announcing that it has raised $40 million in Series B funding.

The startup was founded by Brian Long and Andrew Jones, who sold their previous startup TapCommerce to Twitter. When they announced Attentive’s $13 million Series A last year, Long told me the startup is all about helping retailers find better way to communicate with customers, particularly as it’s harder for their individual apps to stand out.

Attentive’s first product allowed for what it calls “two-tap” sign-up, where users can tap on a link on their phone, creating a pre-populated text that signs them up for SMS messages from that retailer.

Since then, it’s built a broader suite of messaging tools, with support for cart abandonment reminders, A/B testing, subscriber segmentation and other features that allow retailers to get smarter and more targeted in their messaging strategy.

The startup says its platform can improve clickthrough rates by more than 30%, and that it now works with more than 400 customers including Sephora, Urban Outfitters, Coach, CB2 and Jack in the Box.

The Series B was led by Sequoia, with participation from new investors IVP and High Alpha, as well as previous backers Bain Capital Ventures, Eniac Ventures and NextView Ventures. The plan for the new funding is to grow the entire team, especially sales and engineering.

“CRM is changing,” Long said in a statement. “Businesses can’t build a relationship with the modern consumer through email alone. Email performance, as measured by how many subscribers click-through on a message, is down 45% over the last five years. Rather than continuing to shout one-way messages at consumers, smart brands will stay relevant by embracing personalized, real-time, two-way communication channels.”


Read Full Article

How to Fix a Black Screen of Death Error in Windows 10


You’ve heard of the Blue Screen of Death (BSOD), a common Windows error screen displayed when a system fault occurs. But the B in BSOD doesn’t always stand for blue.

A Black Screen of Death can prove to be more difficult to resolve as it doesn’t display an error message. It’s simply a black screen, often with a movable mouse pointer, but no other Windows features.

Here are a few common causes and solutions for the Black Screen of Death.

What Causes the Black Screen on a Computer?

Various issues can cause the black screen of death. In this guide, we’ll give you solutions for the most common causes:

  • Incomplete Windows 10 installation
  • Windows Update
  • Software and driver errors
  • Display issues
  • Overheating
  • Power supply problems

All the above can lead to a black screen in Windows. Fortunately, almost all Black Screen of Death cases can be resolved.

Installing Windows 10: Beware the Black Screen!

Computer crash and black screen in Windows 10

If you’re installing Windows 10, whether updating from a previous version or onto a formatted hard drive, errors can occur.

Among them is the Windows 10 Black Screen of Death, which can occur in this instance if:

  • Setup is still in progress: In this case, check if the hard drive LED is blinking. Setup is probably still running, but slow, which might be due to the age of the computer. Windows 10 should install within a couple of hours in most cases.
  • Setup is stuck: If this has happened and there is no HDD activity, power off the computer by holding the power button for five seconds. Disconnect any non-vital peripherals, then power up again. Setup should restart; if not, and you’re updating from an old Windows version, try installing with the media creation tool.
  • A device driver has failed: In this case, reboot the computer into Safe Mode. See the section “Repair a Black Screen of Death in Safe Mode” below for more information on this.

Installing Windows 10 and hitting a Black Screen of Death might discourage you from persisting. If this is the case, and you’re using old hardware, consider a free alternative operating system.

Windows 10 Update: Black Screen of Death Issue

On Windows 10 systems, a Black Screen of Death can be caused by an unfinished Windows Update.

What typically happens is that the system reboots as part of the update process and you’re presented with a login screen. However, after entering your password, Windows 10 hangs with a black screen after login.

The mouse is responsive; you might see some desktop icons; there is no taskbar. In short, Windows 10 is stuck with a black screen.

To resolve this problem, simply hold the power button down on your PC or laptop to switch off the computer. A cold start should result in the system booting properly. If not, check our tips on how to recover Windows 10.

Software Error Causes Windows Black Screen

A black screen error is often caused by a software glitch. This most frequently occurs when dealing with a program that takes over your entire screen. Typical culprits are PC games, or media players running in full-screen mode.

In these instances, the computer should otherwise appear to run well. Diagnosis should be easy to reproduce. Simply launch the program for a game or media player, and view in full screen mode.

Solving the problem, however, can be difficult; if the bug lies in the software, there may be no solution. You can try fixing it by running the program at a different resolution.

Also, try running the software as an administrator and, if issues still continue and the program is quite old, try enabling Windows compatibility mode.

Display Error or Faulty Connection

Video errors are another very common cause of the Black Screen of Death. No video output means a black screen, no matter what the specific problem might be. Windows may even be presenting a Blue Screen of Death—but you’d never see it!

Check your video connection before you get too worried. Make sure that both ends of your DVI, HDMI or DisplayPort cable is firmly seated and that the cord is undamaged.

Did you just upgrade your monitor? If so, make sure your connection can handle the resolution. Some versions of DVI and HDMI can’t handle resolutions above 1080p.

GPU issues can cause a black screen of death in Windows 10

If these easy solutions don’t work, you’re likely dealing with video adapter issues. If you have a discrete video card, try removing your card and connecting to your motherboard’s integrated video (if it has such capability).

Does your monitor work? Then the video card is the problem. Try updating to the latest driver version available or, if you just recently did that, revert to an old driver. Also check the video card for obvious signs of defect, like a broken cooling fan or charred electronics.

Should the monitor not work when connected to integrated graphics, however, you may have a monitor issue. Check it by connecting to another computer. If the monitor does work with another PC, but not with yours, then you’re probably looking at a hardware fault elsewhere that impacts the video card’s ability to work. Likely candidates include the motherboard, the power supply, and the hard drive.

Overheating Can Cause Windows Black Screen Errors

All computers generate heat. This heat must be removed to keep the system running; high temperatures can cause components to lock-up and become damaged. Fortunately, computers are built to shut down before that occurs.

This will usually result in a featureless black screen, which may or may not be followed by a restart.

In many cases, overheating is caused by the video card or the processor. As noted, you should suspect the video card if you receive a black screen when the computer otherwise appears to be working (the fans are on, the hard drive light active, etc).

If the processor has overheated, the black screen will usually prompt a reboot or automatic shutdown of the PC.

Overheating can often be solved by opening your PC and cleaning out the cobwebs. Use a vacuum to suck up obvious dust (avoiding internal cables, of course) and use a can of compressed air to dislodge stubborn dirt. Also, check that all fans are still working and replace any that aren’t. If the problem persists after these steps, you may have a faulty cooler or flawed video card and/or processor.

Repair a Black Screen of Death in Safe Mode

Hardware and driver issues resulting in a Black Screen of Death can be repaired via Safe Mode.

If your computer is hanging with a black screen, restart the computer and hold F8 or Shift and F8. This should boot the computer into Safe Mode.

Unable to reach Safe Mode in this way? Try turning the computer off then back on again during the Windows splash screen. On the third attempt, the system will automatically boot into Safe Mode.

With Safe Mode running, click the Advanced options button then Troubleshoot > Advanced options > Startup Settings > Restart. In the subsequent screen, select option 4, Enable Safe Mode then wait for Windows Safe Mode to start.

Boot your computer into Safe Mode

Once booted, press Windows + X to open the Quick Link menu, then select Device Manager.

Here, expand Display adapters then right-click the device and select Disable.

Restart the computer to recommence installation of Windows 10. If successful, run a Windows Update to download the latest device drivers and solve the Black Screen of Death issue.

Computer Stuck on a Black Screen? Check the PSU

A faulty power supply unit (PSU) may cause your PC to hang with a black screen.

PSU issues can be difficult to diagnose, and you’ll often come to it simply through the process of elimination. If you’ve checked other hardware and no components are overheating, then the power supply is a likely culprit.

In some cases, the PSU may not even be at fault. Upgrades to power-hungry new video cards or processors can impact the power supply. In short, your computer is not receiving enough power.

You can only know for sure by replacing the PSU. As this is a last resort, work through the other solutions first.

Fix the Black Screen of Death With These Tricks

The black screen of death is usually caused by a software glitch (or Windows Update) but can usually be reproduced and repaired.

Black screens that occur seemingly at random are usually the result of a more serious hardware problem. This will require component repair or replacement. Whatever the case, there is almost always a solution.

Need more Windows troubleshooting tips? Here’s how to fix the Blue Screen of Death.

Read the full article: How to Fix a Black Screen of Death Error in Windows 10


Read Full Article

5 No-Signup Free Online Video Editors That Keep You Anonymous


online-video-edit-anonymous

You shoot videos regularly, but you don’t always need to edit those videos. On the off chance that you want to edit, try these free online video editors with no downloads and no registration.

With these free online video editors, you can resize, rotate, trim or cut, and reduce the file size of any video with ease. You can even add captions or subtitles, and increase the volume. Plus, since these websites need no signups nor registrations, you are virtually anonymous and protect your privacy.

1. Kapwing: Resize Videos for Social Media and Add Subtitles

Kapwing is a free online video editor to resize videos for social media or add subtitles

Kapwing has a series of free online video editors for common alternations. Two of these outclass the others: a video resizer for social networks and a tool to add subtitles.

The resizing tool will instantly fit your video to the best size for popular social networks. Upload your video and choose what you want to resize it for: Instagram feed, Instagram Story or IGTV, uncropped Instagram story, Facebook, or Twitter. Kapwing has built-in settings for that and will show you a preview too. You can directly publish the video on that social network, or download it to your hard drive.

The subtitle or caption tool is as simple as they come. Pause the video where you want and add the text. Create a new line and a new timestamp for more text. It’s super easy and the best online tool we’ve seen to add captions.

These features make Kapwing one of the standouts among free online video editors.

2. VideoLouder: Increase or Decrease the Volume of Any Video

VideoLouder is a free online video editor to increase or decrease the volume of any video without registration or signup

This is simple, isn’t it? You’ve got a video where the volume is too low to hear clearly. So head over to online video editor VideoLouder, and artificially boost it. Or if the video is too loud, decrease the volume, even all the way to mute it.

VideoLouder works with any AVI, MPEG, MP4, MOV, or XVID file, of up to 500MB. It’s as simple as it comes, but you can’t change the file format while you’re at it. The site also protects your privacy by removing the video from its servers a few hours after the initial upload.

Like Kapwing, VideoLouder is part of a larger set of free online video editing tools. You can extract or remove the audio of any video file as well. There’s also a video file size compression app, but forget about that and use the next tool in this list, Compressify.

3. Compressify: Reduce File Size Without Affecting Quality

Compressify is a free online video editor to reduce file size of videos by up to 60%

Social networks drastically limit the file size of videos. So when the size is too large, pass the file through Compressify to shrink your video without losing quality.

The “magic” lies in using Google’s WebM format, a file format designed for videos on the internet. It makes videos 20 to 60 percent smaller than the original. All the major social networks support WebM, so you’re good to use the video. And you can check a before-after comparison to see how good the file compression is.

Like the others in this list, Compressify requires no registration and no downloads. And if you like this file size reduction tool, check out other apps to reduce the file size without losing quality.

4. RotateMyVideo.net (Web): Rotate Any Video Quickly

RotateMyVideo.net is a free online video editor with no registration and no download that lets you rotate any video and change its aspect ratio

Shooting videos on your smartphone can be problematic later. Vertical (or portrait) videos don’t look good on YouTube, while horizontal (or landscape) videos are weird on Instagram or Snapchat. RotateMyVideo is a free online video editor to fix this in a jiffy.

Upload a video from your hard drive, and you’re ready to flip it. Rotate it left or right with the buttons. You can also change the aspect ratio of the video, flip between 4:3, 16:9, or keep the original. Once you’re done, download the video or share it directly on social networks.

Of course, when faced with a large file, you are probably better off using offline Windows or Mac tools to rotate the video. But this free online video editor works well for smaller ones.

5. Online-Video-Cutter: The Best All-in-One Tool

Online-video-cutter is the swiss army knife of free online video editors with no registration and no downloads

If there is one site you need to remember in this whole list, it’s Online-Video-Cutter. It has been around for a long time and is a Swiss Army knife of free online video editors.

The web app works with files up to 500MB in size, and in almost any file format. Here’s a quick list of what you can do:

  • Trim: Cut a small clip out of a longer video. You can preview it too.
  • Crop: Like cropping a photo, you can crop a video and change its frame.
  • Rotate: It’s as easy as RotateMyVideo, but you can’t change the aspect ratio.
  • Convert: You can convert the file from one popular video format to another.

Online-Video-Cutter is completely free, and unlike some other online tools, you don’t need Adobe Flash to use it. The web app also protects privacy by deleting your video a few hours after you are done, so no one else can access it.

For Advanced Video Editing…

While Online-Video-Editor does all of the jobs well, the other apps in this list that specialize in one or two tasks are better at those tasks. For example, none of the other file size reducers manage compression as well as Compressify.

That said, these are basic free online video editors with no registrations and no downloads. If you need more than the aforementioned features, you’re better off with these advanced free online video editors, which require you to sign up to use.

Read the full article: 5 No-Signup Free Online Video Editors That Keep You Anonymous


Read Full Article

How to Spot If Gmail Has Been Hacked and What to Do Next


gmail-hacked

While you can reclaim your Gmail account from a hacker, it’s not always evident that your account is under attack in the first place. As such, it’s a good idea to learn about the tools and tricks available to you, so you can catch a hacker red-handed and protect your account.

Let’s explore how to tell if someone hacks your Gmail account, and what to do if you find someone snooping within your inbox.

How to Tell If a Hacker Has Your Gmail Account

There are several “tells” that will tip you off to a hacker, some more obvious than others. If you notice any of these occur, be sure to act quick and regain access to your account.

1. You Receive Security Alert Emails From Google

An email from Google warning about a new login attempt

Thankfully, you don’t have to do a lot of sleuthing when it comes to Gmail accounts. That’s because Gmail does all the work for you; every time someone logs into your account, Gmail double-checks to see if it’s from a location or device you’ve previously used.

If something looks suspicious, Gmail will suspend the login attempt and send you an email asking to verify the login.

This is a handy tool against hackers, as their login attempt will be flagged as suspicious by Gmail. Even if they’re on the same Wi-Fi network as you, using a different device than what you usually use will trigger an alert.

As such, Gmail’s suspicious sign-in detection a great way to keep scammers out. Best of all, it’s enabled by default, so you don’t need to do anything more.

2. You See Strange Inbox and Outbox Activity

If you think someone else has hijacked your account, keep an eye on your inbox and outbox. If the hacker is using your account as part of a spam email botnet, you’ll see a lot of spam emails in your outbox (known on Gmail as “Sent”). Hackers can delete messages in your outbox, however, so be vigilant even if your outbox is empty.

You may also see some strange activity in your inbox. For example, people may email you asking you to stop spamming them, or you receive sign-up notifications for services you never used. This implies someone else is using your email account, so change your password while you still can.

3. Friends Tell You Something Is Wrong

If you start receiving emails from your friends that something is wrong, it may be due to unauthorized activity on the account. Some scammers will send messages to the contacts on a compromised email account to trick friends and family into clicking malicious links.

As such, they may email or phone you to inform you that they received a strange correspondence from you. If this happens, double-check the activity log as above to see if anyone managed to sneak in.

4. Gmail’s Login Activity Log Shows Weird Entries

A table of Gmail login history

There is a problem with the suspicious sign-in emails, however. What if someone used your devices to access your account?

While the above method is fantastic for catching overseas hackers, it won’t stop a family member or co-worker from using your account. That’s because they’re using the same device and IP address as you, which doesn’t tip Gmail off that something suspicious is happening.

If you’re looking to catch someone snooping on your devices, you can still find their tracks via the activity log. This keeps a detailed account of every time someone logged into your Gmail account, and from what device. This includes any non-suspicious login attempts, including ones made from your computer.

To check the activity log, scroll to the bottom of your inbox and look at the bottom right. It’ll inform you of when your last activity was. If it’s displaying a time where you’re sure you weren’t using Gmail, you have a hacking problem.

You can go more in-detail by clicking Details underneath the text. Here, you’ll see a table of recent login attempts, including the device used, the IP address, and the date and time the login occurred. This makes it easy to spot strange entries that identifies a hacker.

5. Your Gmail Password Suddenly Changes

Sometimes you don’t quite type the password correctly. If you’re absolutely sure you’re entering it right, and it’s still not accepted, there’s a chance that someone has gone in ahead of you and changed it.

How to Get Your Gmail Account Back

If you notice a hacker gained access to your account, you need to take action immediately. The longer you wait, the more damage a hacker can do with your account. Thankfully, it’s not too complicated to get your account back.

Change the Password (If It Still Works)

Sometimes, a hacker won’t change the account password in fear that it’ll tip you off to their presence. If this happens, consider yourself lucky; you can use your old password to get back in and lock the hacker out again.

When you’re making a new password, be sure to choose something stronger than your old one. Ideally, it should be different from the one you just used for the account. That way, the hacker can’t get back in by making small modifications to your old password.

Use the Lost Your Password Tool

If the hacker has changed your password but hasn’t changed your emergency secondary email address, you can request a password change via the lost password tool.

When you go to log-in, click the “Forgot Password” text that appears underneath the password field. Follow the steps to get a new password sent to your emergency account, then log in and reset it to something different—don’t reuse any passwords!

Use the Account Recovery Tool

If the hacker has changed your password, they’ve made a move to lock you out of your account. This may include changing the emergency email on the account, so you can’t use the above method to get back in.

If this happens, your best bet is to go through the Google Account Recovery Page. This will guide you through the steps of getting your account back. You need to remember a password you previously used on the account, so be sure to have that ready when going through the steps.

Securing Your Account After a Hack

Once you have your account back in your own hands, it’s important to reinforce your security to stop it happening again. By performing some simple actions, you can prevent these attacks from occurring again.

Change Your Password to Something Complex and Different

The reason a hacker got into your account the first time is due to one of two methods; either your password was too weak, or a database breach leaked your password.

In either case, when you gain your account back, you need to change the password to something secure and new. If you want to practice good password hygiene, use a password you use nowhere else on the internet.

You should also make it secure, but easy enough to remember. If you struggle to think of something, study up on the best method for creating a strong password you will not forget.

Add Two-Factor Authentication (2FA) to Your Account

2FA is a great way to stop a hacker in their tracks. If you set up 2FA on your smartphone for your Gmail account, a hacker will need both your password and your phone to log in. As such, it’s a good idea to set one up now to prevent this from occurring again.

If you’d like to know more, be sure to learn how to secure your Gmail account with 2FA.

Keeping Yourself Safe in Gmail

Gmail has some great tools for detecting hackers, but sometimes they can slip through the net. Thankfully, there are ways you can play detective to see if someone else is using your account.

If you want to further secure your Google account, be sure to change the four essential Google Account settings for better security.

Read the full article: How to Spot If Gmail Has Been Hacked and What to Do Next


Read Full Article

Ubuntu Linux: Add and Remove Users to Groups the Easy Way


ubuntu-user-groups

Even if you’re a relatively experienced Linux user, groups may not be something you think about all that often. In many cases, the basic groups created when you create a new user while setting up your system are all you need.

Still, as you administer your system, you may encounter situations where you need to add a user to a group. It’s easy to add or delete a user from a group on Ubuntu, you just may not be aware of how to do so yet.

What Groups Are Used for in Linux

A group in Linux is exactly what it sounds like: a collection of users. These are used for managing permissions across a number of users instead of modifying them on a per-user basis. It’s worth knowing your way around groups as this concept is used across Unix-like operating systems as a whole, not just Linux.

A user needs to belong to at least one group. This is the user’s primary group. A user can and usually does belong to other groups, known as secondary groups. There is often a limit on how many secondary groups a user can belong to, but this isn’t something you’ll run into often.

Of course, groups aren’t the only way to handle Linux permissions. For dealing with permissions on a per-user basis, see our guide to the chmod command.

Add a User to a Group in Ubuntu

There are two commands you should know when you want to add a user to a group on Linux. These are the groups command and the usermod command. The former lets you see which groups you’re already assigned to. Simply run the following:

groups

Before you add a user to a group, you want to make sure the user actually exists. To do this, you can use the getent command. To list all groups, run the following:

getent group

You’ll see a list of groups, as well as what users are assigned to them.

Listing groups on Ubuntu with the getent command

To add a user to a group, use the usermod command. Typically, you’d do this with a command like the following:

sudo usermod -a -G group username

With the above command, replace group with the name of the group you want to add the user to, and username with the name of the user. For example:

sudo usermod -a -G sudo kwouk

This would allow the user in question to use the sudo command. Since only users in that group can use sudo, you can only run the usermod command if you’re already in that group.

While this guide focuses on Ubuntu, to add a user to a group on other distros, you would use the same exact steps.

Creating a New Group in Ubuntu

Sometimes you’ll run into situations where you need to add a user to a group, but that group doesn’t exist. In this case, you’ll need to create the group yourself, which is where the groupadd command comes in.

This command is very easy to use. Simply run it under sudo with the name of the group you’d like to create. For example:

sudo groupadd newgroup

Creating a group with the grouped command

The above would create a group known as “newgroup.” This command isn’t one you may ever need to run, but installing certain software can require you to create new groups. To add a user to a group you just created, use the same steps outlined above.

Adding a user to a group with the usermod command

Remove a User From a Group in Ubuntu

Now you know how to add a user to a group on Linux, but what about removing them from a group? This can vary across Linux distributions, but fortunately it’s easy on Ubuntu to remove a user from a group.

The deluser command, as the name implies, is often used to delete a user entirely. You can also use it on Ubuntu to delete a user from a group, as well as on other distros like Debian where the package is also available. To remove a user from a group, use the command the following way:

sudo deluser username groupname

Always make sure to double check that the group name is present. If you run the command without a group name, it will simply delete the user entirely. For example, the following command will remove the user from the group “sudo.”

sudo deluser kwouk sudo

If you omitted the final “sudo” from the above command, it would delete the user “kwouk.”

Removing a user from a group with the deluser command

It can help to double check what groups a user is already assigned to. To do this, simply run the following:

sudo groups username

An Easier Way to Add and Remove Users From Groups

Plenty of people would prefer using a graphical tool on Ubuntu to add users and remove them from groups. If you frequently need to do this and don’t prefer working from the command line, this can make your like much easier. Fortunately, not only is this possible, but easy to do as well.

To do this, you’ll need to install the “gnome-system-tools” package, which contains a few different utilities. We’re only interested in the “Users and Groups” application, but we need to install the entire package anyway. To do this, run the following command:

sudo apt install gnome-system-tools

Installing gnome-system-tools on Ubuntu

Answer yes to the prompts, then wait for the packages to download and install. Once the installation is complete, launch the Users and Groups application.

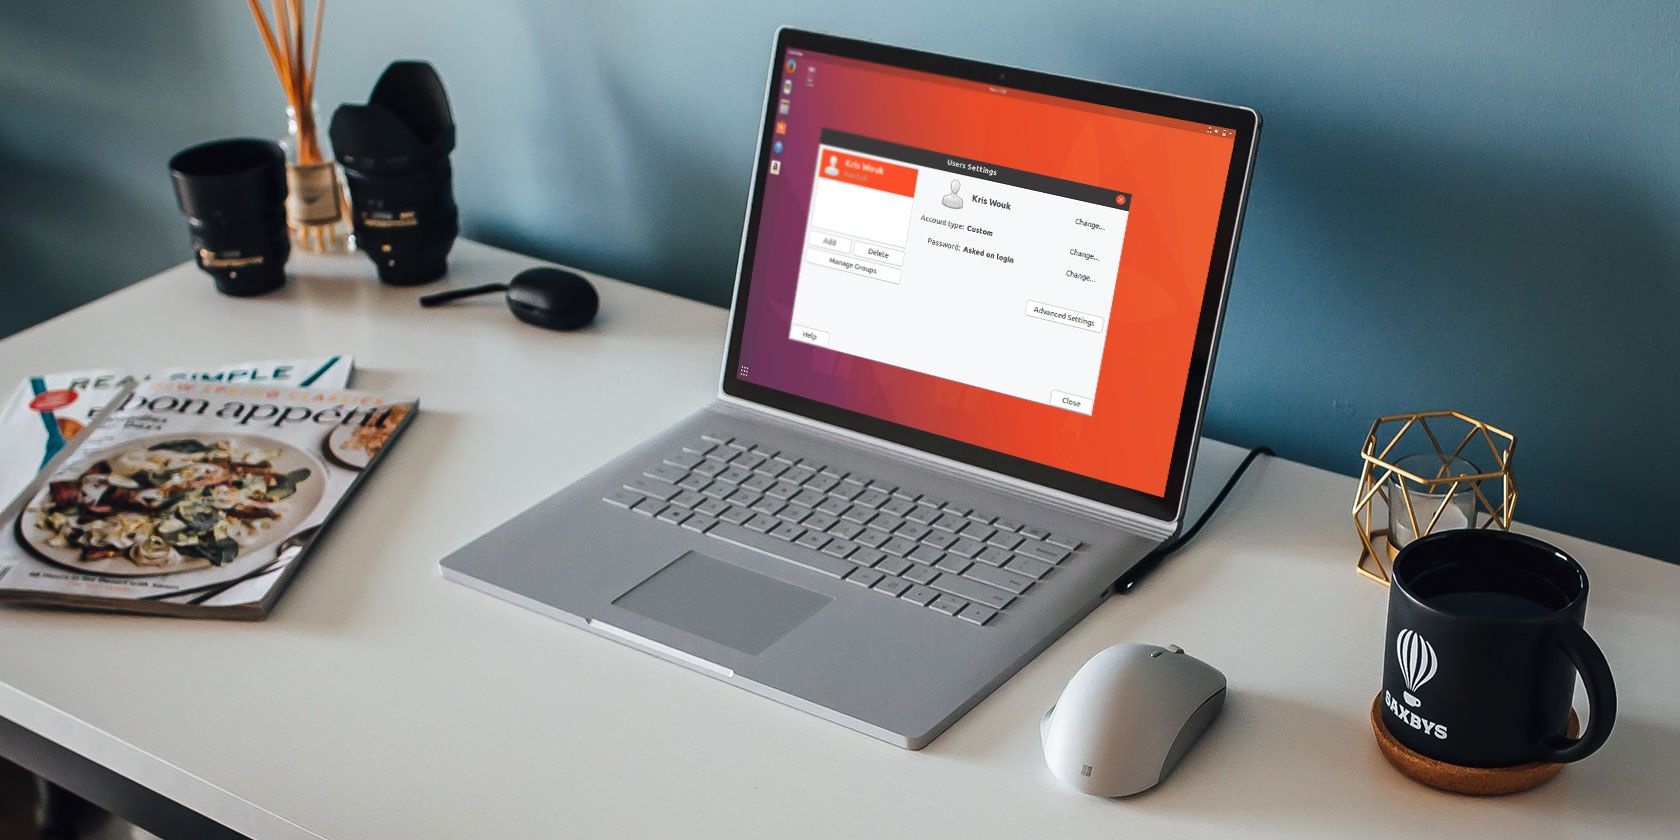
The Users and Groups application on Ubuntu

On the left side, you’ll see a list of the users on your system. To add and remove users from groups, click on Manage Groups. You’ll see a list of all the groups available in your installation of Ubuntu. Add users to groups by clicking Properties and checking the checkbox next to their names. Delete users from groups by unchecking the box.

Managing groups with a GUI tool

New Ways to Manage Permissions in Ubuntu

While its Unix roots date back to the 1970s, Linux is constantly evolving. This doesn’t just mean better hardware support and performance tweaks either. As Linux evolves, we’re seeing more ways to manage users and permissions.

Among other things, Ubuntu 19.10 brings Gnome version 3.32 which adds app permission control. This will let you use smartphone-style app permissions. While this feature is still in its infancy, it could end up making the Linux desktop more secure. For a look at other new things on the way, see our guide to the new features coming in Ubuntu 19.10.

Read the full article: Ubuntu Linux: Add and Remove Users to Groups the Easy Way


Read Full Article

7 Must-Know Tricks to Master Your Mac’s Calendar App


master-mac-calendar

You can do so much more with your Mac’s Apple Calendar app than just create calendars and events. So if you’ve only skimmed the surface of the native macOS calendar so far, let’s delve deeper into it with the advanced Calendar tips below.

To catch up on the basics of the app, check out our Mac Calendar tips for beginners first.

1. Add Multi-Day Events

Edit Event popup for multi-day event in Calendar on Mac

Did you know that you can add multi-day events to a calendar with a simple click-and-drag action? To begin, in the Month view, click on the first day of the upcoming event, drag the cursor all the way to the last day of the event, and then release the cursor. Calendar then schedules the event as all-day sessions spanning multiple days.

To schedule multi-day events in the Week view, drag across the relevant consecutive days in the all-day section at the top. If you click and drag across days in the sections below, the event gets scheduled between the first and last time slots on which you’ve clicked.

2. Add Events From Mail and Notes

Add to Calendar popup in Mail on Mac

Wouldn’t it be convenient if you could add email invites to parties, meetings, and other events to your calendar without leaving the Mail app?

That’s indeed possible, but only after you enable a checkbox under Mail > Preferences > General: Add invitations to Calendar automatically.

After tweaking this setting, when you hover over a date/time snippet in any email, you’ll see a marquee selection appear over it. When you click on the tiny down arrow button next to the marquee, Mail lets you add that event to the Calendar app from a popup. (See the screenshot above for a sample view of the Add to Calendar popup in Mail.)

Since you can schedule only upcoming events, the marquee selection doesn’t show up for dates in the past.

The Notes app also allows you to turn dates and times in your notes into events. The process is similar to the one in Mail, but it involves an additional step. Here, when you click on the button next to the marquee selection, you’ll see a small popup menu. You have to click on the Quick Look Event option in this menu to reveal the Add to Calendar popup.

3. Set Reminders for Birthdays, Meetings, and More

Create birthday alert from Edit Event popup in Calendar on Mac

If you want to, say, receive alerts about someone’s birthday or reminders about upcoming flights, you can program Calendar to deliver them.

The app lets you set up alerts while adding events to your calendar. If you skip adding alerts, you can still go back and add them later. To add an alert to an existing event, first double-click on the event in your calendar to open the Edit Event popup.

Next, click on the date and time section in the popup to reveal a hidden section. There, from the alert dropdown menu options, select when you want Calendar to send you an alert about the event. After you select an option, you’ll notice a plus button show up next to the new alert. That button, as you might guess, lets you create multiple alerts.

For events in need of recurring reminders, also choose a suitable option from the repeat dropdown menu.

The combined setup of the alerts and repeat dropdown menus comes in handy for birthday calendars. With this setup in place, Calendar creates new items for the recurring event automatically and also sends you birthday alerts on time.

If you need a more robust reminder system, check out these great reminder apps for macOS.

4. Open Files and Apps on a Schedule

Set Mac Calendar to open file during an event from Edit Event popup

Let’s say you work on a certain PDF invoice template on the first day of every month before sending it off to a client. Or maybe you need to have certain files ready to go before every meeting. For such repetitive tasks, why not program Calendar to open up the associated file(s) automatically on a schedule? That’s easy to do.

To get started, create an event for the task and then double-click on it in the calendar to open the Edit Event popup.

In the popup, click on the date to reveal the hidden options, then select the Custom option from the alerts dropdown menu. You’ll then see another tiny popup appear. In this second popup, click on the Message with sound dropdown menu to reveal the Open file option.

Once you click on Open file, a new dropdown menu appears, from which you can select the file (or app) that you want Calendar to launch automatically. Tweak the other dropdown menus available to specify when exactly you want to bring up the file and hit the OK button to wrap up.

Notice the plus button that shows up next to the first alert. Use that to create alerts to launch multiple files/apps, one alert at a time.

If a certain file didn’t open on schedule, check if Do Not Disturb was active on your Mac then. If scheduled files are not opening at all, see if you have hidden notifications/alerts via Calendar > Preferences > Alerts or under System Preferences > Notifications > Calendar.

5. View Events as a List

View events as a list in Calendar on Mac

It’s nice that you can see events laid out for the entire week or month in Calendar. But what about when you want to view them as a list or an agenda? Calendar doesn’t have a one-click view option for that.

But you can use this hidden workaround for a makeshift list view: type a double quote () into the search box at the top-right of the app and hit Enter. This reveals a scrolling list of all your events—past, present, and future—across all calendars. That’s handy, right?

6. Hide All-Day Events

When you’re taking in all your scheduled events at a glance in the Month view, all-day events such as birthdays and tasks can be distracting. But you can hide them temporarily with the View > Hide All-Day Events menu option.

To reveal them again, click on View > Show All-Day Events.

7. Let Another Person Manage Your Schedule

Delegation tab for an account in Calendar settings on Mac

The macOS Calendar lets you delegate your calendar-management tasks to someone else, such as a colleague.

To bring in another person to view and edit your calendar, visit Calendar > Preferences > Accounts. There, select an account in the sidebar and click on its Delegation tab in the right-hand pane. The Edit button below this pane lets you grant access to your calendars for that account.

Click on it to start adding the name of the person whom you’d like to invite to manage your calendars. Be sure to select the Allow Write checkbox if you want to grant edit privileges to the delegate.

How is delegating different from sharing in Calendar? When you share calendars, you’re granting access to selective calendars only. But when you delegate, you’re sharing all calendars associated with a particular account.

Note that certain calendar accounts don’t support delegation. You can rely on the Delegation tab for such accounts to tell you so.

Apple Calendar: A Smart Free Calendar App for Mac

Calendar seems like a barebones app when you open it for the first time. But as you get to know it better, you’ll appreciate that it has so many useful features tucked away here and there.

It’s a pity that Calendar doesn’t give you a quick way to add reminders from the macOS menu bar. But as always, “there’s an app for that.” We’re referring to Itsycal, one of those tiny time-saving Mac apps you’ll fall in love with. Itsycal syncs with Apple Calendar and lets you add Calendar items from the menu bar!

Read the full article: 7 Must-Know Tricks to Master Your Mac’s Calendar App


Read Full Article

Bluetooth Not Working in Windows 10? 10 Ways to Fix Pairing Problems


windows-bluetooth-issues

Bluetooth is a wireless technology that lets you connect devices together. On Windows 10, you can use Bluetooth to pair keyboards, phones, speakers, and more.

Bluetooth is great when it works, but you might encounter problems when trying to pair your device to a Windows 10 system. We’re going to show you how to fix those pairing problems.

1. Check If Your Device Has Bluetooth

This might sound silly, but it’s easy to mistakenly assume that a device has Bluetooth. Check the product specifications of your device—look for the Bluetooth logo on the packaging. If you can’t find any reference to it, chances are it doesn’t support Bluetooth and instead needs to be connected via Wi-Fi or cable.

If it’s your Windows 10 computer that doesn’t have Bluetooth, don’t worry. You can buy a cheap Bluetooth adapter that is small and fits into a USB slot.

2. Ensure Bluetooth is Enabled

Your device won’t necessarily have Bluetooth enabled by default.

On Windows 10, press Window key + A to open the Action Center. Ensure that the Bluetooth tile is highlighted and on. If it isn’t, click on the tile to enable it. If you don’t see the Bluetooth tile, click Expand. While you’re here, double check that Flight mode is disabled because this turns Bluetooth off.

Enable Bluetooth on Action Center

Alternatively, press Windows key + I to open Settings and go to Devices > Bluetooth & other devices and slide Bluetooth to On.

The device you want to pair will have its own method to enable it, so check its documentation. It may even have a physical switch to turn Bluetooth on.

3. Double Check the Bluetooth Service Status

Bluetooth is a service on Windows 10. That service should turn on as part of the processes above. But it’s always best to check again.

Press Windows key + R to open Run and input services.msc. The list is sorted by alphabetical Name, so look for all those that begin with Bluetooth.

Enable Bluetooth service

Double click each and check the Service status. If it shows as Stopped, click Start to get it going.

4. Make Your System Discoverable

Confusingly, Windows 10 settings are still fragmented, and this is also true of Bluetooth.

The setting to make your PC discoverable to other Bluetooth devices is not where you might expect. Press Windows key + I and go to Devices > More Bluetooth options.

Bluetooth Discovery settings

Tick Allow Bluetooth devices to find this PC and click OK. This shouldn’t be necessary if you want to pair something like a mouse or keyboard, but can be helpful to pair devices like phones.

5. Reposition Your Device

Bluetooth has a limited range. The specific value varies, but in a home setting, it’s roughly ten meters. That can be greatly reduced by physical barriers like walls.

As such, make sure that the device you want to pair to your computer is turned on, fully charged, and in close range to your Windows 10 system.

Also, make sure it isn’t too close to another device using a USB 3.0 port. Unshielded USB devices can occasionally interfere with Bluetooth connections.

6. Disable Other Bluetooth Devices

Technically, you shouldn’t need to disable other Bluetooth devices, but they might be causing interference when you try to pair a new device.

Remove Bluetooth device

To disable them, press Windows key + I to open Settings and click Devices. In turn, click each Bluetooth device and click Remove device > Yes.

Of course, remember to pair these devices again if you still need them.

7. Read the Event Log

In June 2019, Microsoft patched Windows 10 to protect from a Bluetooth security vulnerability. However, this caused some Bluetooth devices to suffer connectivity issues.

You can see if this is impacting you. Press Windows key + X and click Event Viewer. Beneath Summary of Administrative Events, expand Error and look for the following:

  • Event ID: 22
  • Event Source: BTHUSB or BTHMINI
  • Name: BTHPORT_DEBUG_LINK_KEY_NOT_ALLOWED
  • Event Message Text: Your Bluetooth device attempted to establish a debug connection. The Windows Bluetooth stack does not allow debug connection while it is not in the debug mode.

If you see this, Microsoft recommends contacting the manufacturer of your Bluetooth device to see if they’ve made a patch. If not, you may need to buy a new Bluetooth device entirely.

8. Check for Windows Updates

It’s best to keep Windows up to date to benefit from the latest features and security patches. This can help resolve problems with Bluetooth.

Windows 10 check for updates

Windows 10 will automatically update, but you can manually check for and install updates. To do this, press Windows key + I to open Settings. Go to Update & Security and click Check for updates.

Your system will either be running the latest version already, or it will begin to download and install new patches.

9. Update the Drivers

Your Bluetooth drivers may be outdated. This will often be the case if you recently updated Windows 10.

To check for driver updates, press Windows key + X and click Device Manager. Expand Bluetooth and right click the adapter.

Click Update driver > Search automatically for updated driver software. Follow the instructions. Once the driver has updated, restart your system.

Updating Bluetooth drivers

If this process doesn’t find any drivers, double check your manufacturer’s website and download from there. If it’s an EXE file, open it up and follow the instructions.

Alternatively, it’s another format, like INF or SYS, follow the instructions above to update via Device Manager, but select Browse my computer for driver software when prompted. Browse to what you just downloaded, select the location, click OK, then Next to see the wizard to the end. Restart your computer when done.

10. Run the Bluetooth Troubleshooter

Windows 10 has a built-in Bluetooth troubleshooter. This will detect any problems and automatically try to repair them.

Bluetooth troubleshooter on Windows 10

To run it, press Windows key + I to open Settings and go to Update & Security > Troubleshoot > Bluetooth > Run the troubleshooter. Follow the instructions.

It should fix any problems it finds, but some of them might require your manual action.

Fix Your Bluetooth Pairing Problems

It can be frustrating when Bluetooth doesn’t work, so hopefully one of our steps have resolved your problem.

If you’re interested in finding out even more about Bluetooth, take a look at the most common Bluetooth questions answered—find out who invented it, where the name came from, and more.

Read the full article: Bluetooth Not Working in Windows 10? 10 Ways to Fix Pairing Problems


Read Full Article

Twitter’s latest test lets users subscribe to a tweet’s replies


Twitter in more recent months has been focused on making conversations on its platform easier to follow, participate in, and in some cases, block. The company’s latest test, announced via a tweet ahead of the weekend, will allow users to subscribe to replies to a particularly interesting tweet they want to follow, too, in order to see how the conversation progresses. The feature is designed to complement the existing notifications feature you may have turned on for your “must-follow” accounts.

Many people already have Twitter alert them via a push notification when an account they want to track sends out a new tweet. Now you’ll be able to visit that tweet directly and turn on the option to receive reply notifications, if you’re opted in to this new test.

If you have the new feature, you’ll see a notification bell icon in the top-right corner of the screen when you’re viewing the tweet in Twitter’s mobile app.

When you click the bell icon, you’ll be presented with three options: one to subscribe to the “top” replies, another to subscribe to all replies, and a third to turn reply notifications off.

Twitter says top replies will include those from the author, anyone they mentioned, and people you follow.

This is the same set of “interesting” replies that Twitter has previously experimented with highlighting in other ways — including through the use of labels like “Original Tweeter” or “Author,” and as of last month, with icons instead of text-based labels. For example, one test displayed a microphone icon next to a tweet from the original poster in order to make their replies easier to spot.

The larger goal of those tests and this new one is to personalize the experience of participating in Twitter conversations by showcasing what the people you follow are saying, while also making a conversation easier to follow by seeing when the original poster and those they mentioned have chimed in.

This latest test takes things a step further by actually subscribing you to those sorts of replies — or even all the replies to a tweet, if you choose.

The new experiment comes at a time when Twitter is attempting to solve the overwhelming problem of conversation health in other ways, too. Beyond attempting to write and enforce tougher rules regarding online abuse and harassment, it also last month officially launched a “Hide Replies” feature in Canada that would allow the original poster to put replies they didn’t feel were valuable behind an icon so they weren’t prominently displayed within the conversation. It’s unclear how “Hide Replies” would work with this new reply notifications option, however — presumably, you’d still get alerts when someone you follow responded, even if the original poster hid their reply from view.

Twitter says the new test is available on iOS or Android.


Read Full Article

India’s Reliance Jio inks deal with Microsoft to expand Office 365, Azure to more businesses; unveils broadband, blockchain, and IoT platforms


India’s Reliance Jio, which has disrupted the telecom and features phone businesses in India in less than three years of existence, is now ready to aggressively foray into many more businesses with the help of global giants including Microsoft.

The subsidiary of India’s largest industrial house Reliance Industries today announced that it will commercially launch its optical fiber broadband business next month, an IoT platform on January 1, 2020, and “one of the world’s biggest blockchain networks” in the next 12 months.

The broadband service, called Jio Giga Fiber, is aimed at individual customers, small and medium sized businesses, as well as enterprises, Mukhesh Ambani, Chairman and Managing Director of Reliance Industries, said at a shareholders meeting Monday. The service, which will be available to consumers starting September 5, will offer free voice calls, high-speed internet and start at Rs 700 per month.

The company also announced a 10-year partnership with Microsoft to leverage the Redmond giant’s Azure, Microsoft 365, and Microsoft AI platforms to launch new cloud datacenters in India to ensure “more of Jio’s customers can access the tools and platforms they need to build their own digital capability,” said Microsoft CEO Satya Nadella in a video appearance Monday.

“At Microsoft, our mission is to empower every person and every organization on the planet to achieve more. Core to this mission is deep partnerships, like the one we are announcing today with Reliance Jio. Our ambition is to help millions of organizations across India thrive and grow in the era of rapid technological change… Together, we will offer a comprehensive technology solution, from compute to storage, to connectivity and productivity for small and medium-sized businesses everywhere in the country,” he added.

As part of the partnership, Nadella said, Jio and Microsoft will jointly offer Office 365 to more organizations in India, and also bring Azure Cognitive Services to more devices and in many Indian languages to businesses in the country. The solutions will be “accessible” to reach as many people and organizations in India as possible, he added.

Ambani also said Jio is working on a “digital stack” to create a new commerce partnership platform in India to reach tens of millions of merchants, consumers, and producers.

More to follow…


Read Full Article

India’s Reliance Jio inks deal with Microsoft to expand Office 365, Azure to more businesses; unveils broadband, blockchain, and IoT platforms


India’s Reliance Jio, which has disrupted the telecom and features phone businesses in India in less than three years of existence, is now ready to aggressively foray into many more businesses with the help of global giants including Microsoft.

The subsidiary of India’s largest industrial house Reliance Industries today announced that it will commercially launch its optical fiber broadband business next month, an IoT platform on January 1, 2020, and “one of the world’s biggest blockchain networks” in the next 12 months.

The broadband service, called Jio Giga Fiber, is aimed at individual customers, small and medium sized businesses, as well as enterprises, Mukhesh Ambani, Chairman and Managing Director of Reliance Industries, said at a shareholders meeting Monday. The service, which will be available to consumers starting September 5, will offer free voice calls, high-speed internet and start at Rs 700 per month.

The company also announced a 10-year partnership with Microsoft to leverage the Redmond giant’s Azure, Microsoft 365, and Microsoft AI platforms to launch new cloud datacenters in India to ensure “more of Jio’s customers can access the tools and platforms they need to build their own digital capability,” said Microsoft CEO Satya Nadella in a video appearance Monday.

“At Microsoft, our mission is to empower every person and every organization on the planet to achieve more. Core to this mission is deep partnerships, like the one we are announcing today with Reliance Jio. Our ambition is to help millions of organizations across India thrive and grow in the era of rapid technological change… Together, we will offer a comprehensive technology solution, from compute to storage, to connectivity and productivity for small and medium-sized businesses everywhere in the country,” he added.

As part of the partnership, Nadella said, Jio and Microsoft will jointly offer Office 365 to more organizations in India, and also bring Azure Cognitive Services to more devices and in many Indian languages to businesses in the country. The solutions will be “accessible” to reach as many people and organizations in India as possible, he added.

Ambani also said Jio is working on a “digital stack” to create a new commerce partnership platform in India to reach tens of millions of merchants, consumers, and producers.

More to follow…


Read Full Article
India’s Meesho raises $125M to expand its social commerce business


Meesho, a Bangalore-based social commerce startup, has raised $125 million in a new financing round to expand its business in the country and change the way millions shop online.

The Series D round was led by Naspers, and existing investors SAIF, Sequoia, Shunwei Capital, RPS and Venture Highway participating as well. Facebook also participated in the round, so did Arun Sarin, former CEO of Vodafone Group. The startup has raised $190 million to date.

Meesho is an online marketplace that connects sellers with customers on social media platforms such as WhatsApp, Facebook, and Instagram. The four-year-old startup claims to have a network of more than 2 million resellers from 700 towns who largely deal with apparel, home appliances and electronics items.

These resellers are mostly homemakers, most of whom have purchased a smartphone for the first time in recent years. Eighty percent of Meesho’s user base is female.

meesho android

Meesho said the startup will use the fresh capital to expand its reach in the nation and add as many as 18 million new sellers by end of next year. “The latest investment will also strengthen Meesho’s aim to grow its community of women entrepreneurs who have dreamt of running their own businesses but lacked the funds and expertise to do so,” the company said.

More than 90% of businesses in India are still offline and unorganized. Meesho is trying to get these businesses, most of whom don’t have working capital to enable their own online presence, sell online, Vidit Aatrey, Meesho co-founder and CEO, told TechCrunch in an interview.

“I am particularly proud that Meesho has cut across gender, education levels, risk appetites and vocations to create livelihoods for people with no investment of their own. Our social sellers are small retailers, women, students and retired citizens, with 70% being homemakers who have found financial freedom and a business identity without having to step outside their homes,” said Aatrey.

Meesho also plans to use the new funds to further build its technology platform to accommodate new product lines, and to evolve its analytics and machine learning platforms to handle national scale.

“The phenomenal growth they are already experiencing shows that Meesho has hit a sweet spot in the market and is well-poised to serve the next 500 million online shoppers in the country,” said Ashutosh Sharma, Head of India Investments, Naspers Ventures, in a statement.

More to follow…


Read Full Article