26 December 2018

5 Sites Like Craigslist to Buy and Sell Used Stuff


make-money-craigslist

Craigslist is an interesting part of the internet’s legacy. Founded over 22 years ago as an email distribution list, the site has steadfastly refused to change its minimalist design and easy-to-use posting system. Craigslist remains a favorite shopping site to sell stuff locally hunters and an enduring site to post your classified ads for free.

Other sites like Craigslist want to sell stuff online too. Most of those alternatives to Craigslist have failed before anyone knew they existed. Still, there are a few which managed to withstand the web’s churn and have endured as a viable choice to Craigslist.

Let’s look at several other online classified sites where you can sell old and new stuff online with a few clicks.

1. Oodle Marketplace

Oodle - a website like Craigslist

Oodle is both a site like Craigslist and an anti-Craigslist at the same time. The basic concept of posting online classifieds is the same, but it embraces Facebook to provide a more personal experience and recommendations from friends.

It uses the same technology that powers Facebook Marketplace. You don’t have to use Facebook to post, but you have to connect your profile to your genuine Facebook profile.

Oodle’s focus on social networking makes it a bit less intuitive for people looking to find items in a specific category. Some people will prefer this design, and others will find it frustrating.

There’s a lot of activity on Oodle. You can not only sell your stuff online but also use it to find jobs nearby. This site seems to do a better job of providing geographically relevant results than many competitors and there is support for several countries besides the United States. The site operates in Australia, Canada, India, Ireland, New Zealand, and the United Kingdom.

2. Sell.com

Sell.com - A Craigslist alternative

Sell.com is not as old as Craigslist but not by much as it started in 1999. It started its life with only buying and selling ads. Today, it covers other kinds of classifieds like Pets and Animals, Jobs, and Services.

The site also does not categorize classifieds by region automatically, though there is the option to enter your zip code. You can also drill down to the city of your choice and then refine it with an advanced search.

Want to save yourself some time?

Log-in to the site and set up an alert to match new ads to your keyword. Sell.com allows you to make your ads more visible on the site by paying money. You’ll find eBay-like features such as seller ratings and a shopping cart. Products are more visible thanks to the thumbnails.

Do note that there’s no charge to browse, make offers, or buy items and services on Sell.com. But, you have to pay a small fee to list and sell items and services.

3. Geebo

Geebo - Lists stuff for sale

Here’s another internet veteran of the buy and sell industry. Geebo has never obtained the household name status of companies like Craigslist and eBay but has remained relevant for anyone who’s looking for an alternative classified site.

Like most classified sites, the design is simple, but like eBay Classifieds it is far more colorful and modern than Craigslist. Another similarity is this site’s focus on the United States.

Geebo uses the tagline “safe community classifieds” and claims to have a more personal atmosphere than the competition. The site’s blog does spend a lot of time bashing the competition for sketchy practices, but otherwise, the site isn’t any safer than any other online classified site.

4. Facebook Marketplace

Facebook Marketplace

There was a hint of Facebook’s own market when we talked about Oodle. There are already thousands of groups on Facebook that have the same idea at their heart but the Marketplace makes it a bit more organized. Think of it as a more specialized corner where you can do a more localized search for stuff you want to buy and sell.

Snap a photo and publish it to sell your stuff. To buy stuff, type the keywords and filter by location, category, and price or through a map.

With the community-powered marketplace, you can “know” the person you are dealing with through their social profile. That’s always a wise precaution before any big-ticket purchase even though it can be a hotbed for scammers too.

Check the listings carefully and the Facebook public profile behind it. Opt for verified profiles on the Marketplace. You can talk to the seller using Facebook Messenger to negotiate a final price and close the sale. If you spot a red flag, be careful of the details you give out.

Marketplace is available in the Facebook app and on desktops and tablets. Look for the Shop icon at the bottom of the app on iOS or at the top of the app on Android.

Download: Facebook for Android | iOS (Free)

5. LetGo

LetGo - a Craigslist alternative

LetGo follows the template of Facebook Marketplace and others with its large thumbnails. But it seems to do a better job than Facebook with its pinpoint filters. It is a mobile app first and website second.

For instance, it’s much easier to click a photo and load the information with the apps. It uses artificial intelligence to categorize the product and title it. Also, the in-app chat platform is a must when you want to talk to the buyers and sellers.

Letgo is free and doesn’t charge sellers a fee for posting their listings. You don’t have to give a percentage of your sales either. Letgo offers in-app purchases to allow you to feature your listing. It’s an optional feature that you can pay for to highlight your product amidst the crowd.

Download: LetGo for Android | iOS (Free)

Online Flea Markets: Other Honorable Mentions

Craigslist is barebones. Several alternatives have found a home in mobile apps because it is easier to click, upload, and list the stuff you want to sell online. So pick one that reaches the largest audience or has a thriving community. Even selling internationally is no longer hard.

  1. OfferUp
  2. Locanto
  3. Carousell
  4. Your Classifieds
  5. Wallapop
  6. Gumtree (UK)
  7. AdlandPro
  8. AdsGlobe
  9. Mercari
  10. Bookoo

More Ways to Take Advantage of Craigslist

There are a lot of sites like Craigslist, but these were picked because of their strong user communities. A classified site is not of much use if no one ever visits it. Today you can take your pick from social shopping apps and many niche apps that list only one or two categories.

Keep searching for good bargains on Craigslist but don’t stop yourself from listing your stuff on other classified sites too.

Read the full article: 5 Sites Like Craigslist to Buy and Sell Used Stuff


Read Full Article

7 Useful Ways to Control YouTube Video Volume


Who knew that controlling the volume of YouTube videos could be such a complex topic? After all, what options do you really have beyond the on-screen slider? You’d be surprised, actually.

It turns out there are multiple different ways to control YouTube video volume. Here are some of the best methods we’ve found.

1. Volume Slider

youtube volume slider on video

Let’s kick-off with the on-screen slider. It’s the primary way that most people adjust YouTube’s volume.

The slider is self-explanatory. Move it to the left to decrease volume and move it to the right to make YouTube louder.

There’s also a mute function to instantly kill the sound; just click on the speaker icon.

2. Keyboard Shortcuts

We always advocate using keyboard shortcuts for any task where possible. Learn them well, and they are faster than using a mouse. Meaning you can be more productive.

YouTube is no different. There are a plethora of handy YouTube keyboard shortcuts available. You can do everything from skipping the video to turning subtitles on and off.

YouTube’s keyboard shortcuts for volume control are the arrow keys. Pressing Up will increase the volume in five percent increments; pressing Down will decrease the volume by the same amount.

(Note: If the shortcuts aren’t working, try clicking on the video first. If the video is not “in focus,” you might find that the arrow keys scroll the entire webpage up and down instead.)

3. Use Your Mouse

You can also change the volume on YouTube using your mouse scrolling wheel—but it’s a bit fiddly.

The change was introduced in a 2017 update. To make the feature work, you need to first hover your mouse over the speaker icon to reveal the volume slider, then hover your mouse over the slider itself.

Once you’re hovering, scroll up to increase the volume and scroll down to decrease the volume. If the cursor strays off the slider, the scroll wheel will move the webpage up and down.

In this implementation, it’s not clear what benefits using your mouse scroll wheel has over merely clicking on the slider. Clicking is faster and less likely to misfire.

Third-Party YouTube Volume Controls

When it comes to controlling YouTube’s volume, you aren’t only limited to the native functionality. There are a host of third-party YouTube extensions and extensions which provide extra features. Some of them let you adjust the volume of YouTube videos.

4. YouTube Mouse Controls

youtube mouse controls options

Available on: Chrome

If you’re running Google Chrome, you should start by checking out the YouTube Mouse Controls extension.

It lets you make YouTube louder and quieter by using the scroll wheel on your mouse. However, unlike the previously-described mouse scrolling method, it will work as long as your mouse cursor is hovering somewhere over the video player. As such, it’s less error-prone than the native methodology.

You can also use the extension to seek through videos. Click the scroll wheel and move your mouse left or right. Click the scroll wheel for a second time when you’re ready to start watching.

You need to access the extension settings page to activate it before the mouse controls will work.

Download: YouTube Mouse Controls ($0.99)

5. Magic Actions for YouTube

magic actions youtube options

Available on: Chrome

The second Chrome extension worth talking about is Magic Actions for YouTube. It is a more full-featured add-on than YouTube Mouse Controls.

In addition to letting you use your mouse to adjust the volume, it also offers a cinema view, auto HD, day and night viewing modes, automatic video replays, one-click video screenshots, an easy way to view and delete your watch history, ratings previews for Related Videos, and more information about users in the comments section.

Download: Magic Actions for YouTube (Free)

Other Ways to Control YouTube Video Volume

Let’s finish by looking at two more ways to control the YouTube video volume that you may not have thought of previously.

6. VLC Media Player

youtube on vlc volume boost

Available on: Windows, Mac, Linux, Android, iOS

We’ve all experienced it: You click on a YouTube video, and it’s barely audible, even if the volume on your computer and the player itself are both turned up to 100 percent.

If the volume is low on a YouTube video you want to watch, you should consider watching the video directly through VLC Media Player. It lets you make YouTube louder thanks to its sound booster.

Sure, it might be a bit too much hassle for a two-minute video of a cat doing catty things, but if it’s a movie or similarly long video that you’re struggling to hear, you’ll reap the rewards.

To watch a YouTube video on VLC Media Player, follow the step-by-step instructions below:

  1. Download and open VLC Media Player.
  2. Head to YouTube and copy (Ctrl + C) the URL of the video you want to watch.
  3. On VLC, navigate to Media > Open Capture Device.
  4. Click on the Network tab.
  5. Paste the YouTube URL that you copied in Step Two.
  6. Click on Play.

After a couple of moments, the video should start playing. You can then use the volume slider in the lower right-hand corner to boost the volume to 125 percent of its original maximum.

Download: VLC Media Player (Free)

Note: The ability to use the app to watch YouTube is just one of many VLC Media Player secrets you should learn.

7. Normalize Audio Output on Your PC

YouTube doesn’t have a native way to normalize audio output. Instead, you should use third-party tools.

Windows has a built-in tool. You can activate the operating system’s loudness equalization by right-clicking on the speaker icon in the taskbar and heading to Sounds > Playback > Speakers > Properties > Enhancements and marking the checkbox next to Loudness Equalization.

If you’re using macOS, there’s no built-in loudness normalization tool. Luckily, there are plenty of third-party equalizers which do the job perfectly well. Two of the most popular are Boom and eqMac2.

Windows also has third-party sound equalizers if you don’t like the native functionality.

More Help for Budding YouTube Ninjas

So, there you have it. A multitude of different ways to control YouTube video volume. But if you know of any more, be sure to let us know about them in the comments below.

And if you’d like to learn more about using YouTube, check out our article on YouTube tricks for video ninjas.

Read the full article: 7 Useful Ways to Control YouTube Video Volume


Read Full Article

Snapchat Launches Lenses for Dogs


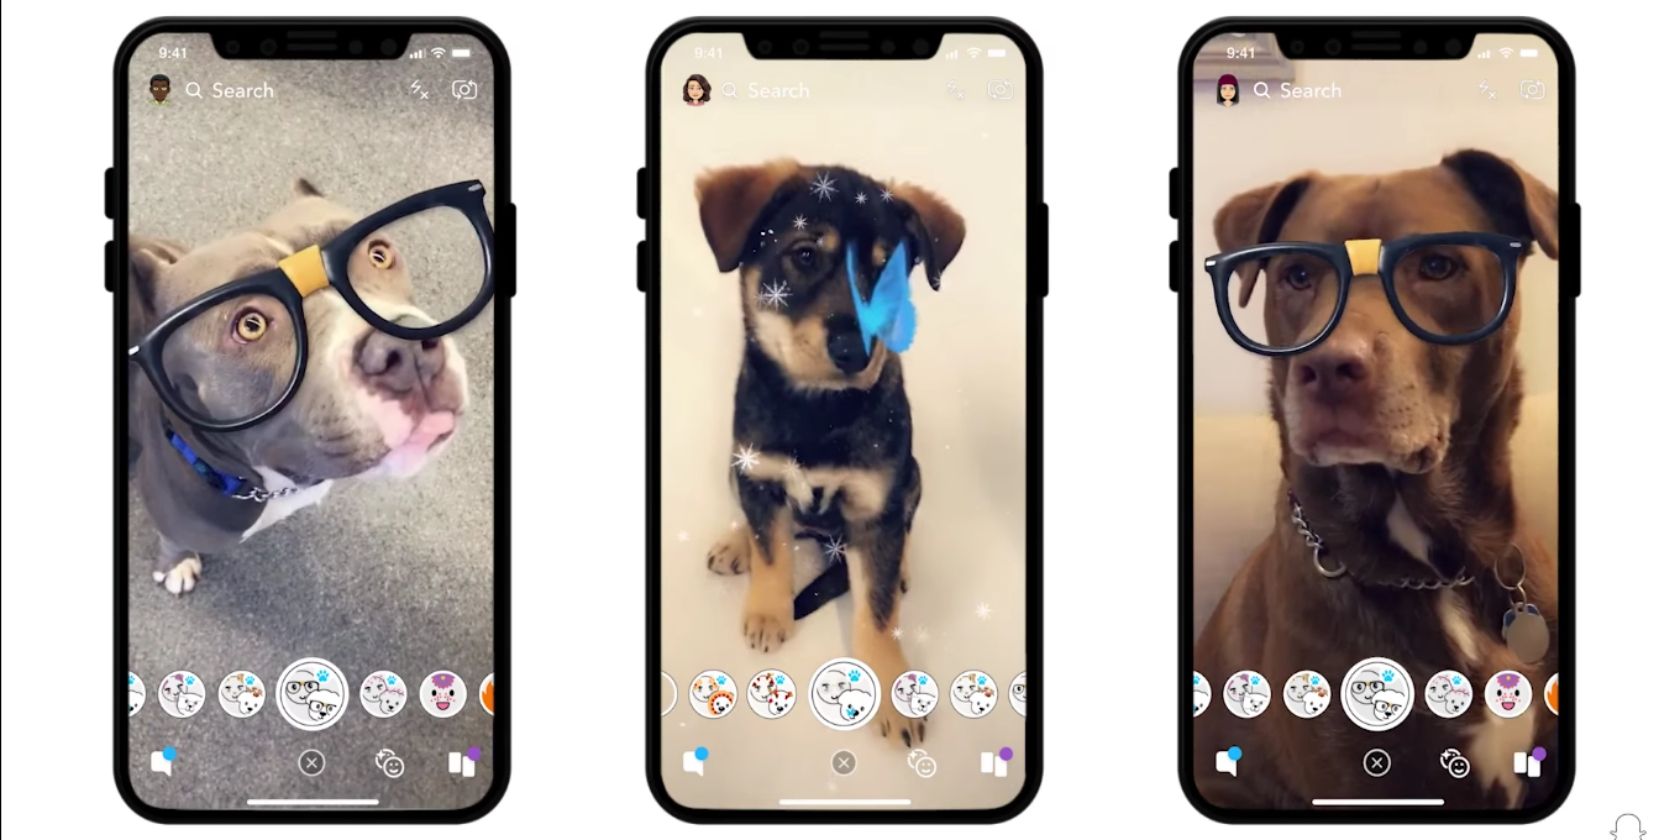
Snapchat has released a new range of dog-friendly lenses designed to make your good boy look as ridiculous as you do through a Snapchat lense. Not only that, but Snapchat is now much better at recognizing dog faces, meaning your doggo won’t feel left out.

They say, “A dog is for life, not just for Christmas.” And if you have accepted a dog into your life, there’s nothing better than making them look ridiculous. Now, thanks to Snapchat, you don’t even have to dress your canine friend up in actual costumes to do so.

Snapchat Humiliates Your Good Boy

You may have previously tried to use Snapchat lenses on your dog with varying degrees of success. However, until now, Snapchat lenses have not been designed to work with dog’s faces. Which seems a glaring oversight on Snapchat’s part. One it has thankfully rectified.

Now, Snapchat’s camera will recognize dog faces as well as human faces. This means you can point your smartphone at your doggo and make it look like an idiot. Which is something we doubt wolves ever expected when they first accepted food from humans.

To coincide with this update to its object recognition technology, Snapchat has released a handful of new lenses designed specifically for dogs. These Snapchat lenses for dogs include a pizza collar, antlers, a butterfly flapping its wings, and thick-rimmed glasses.

While we’re pretty sure your doggy friend won’t thank you for this humiliation, they’re dogs, so don’t have any say in the matter. And rest assured that if you’re in the frame with your dog Snapchat will also make something appear on your face too.

Dogs Are the New Internet Overlords

While cats were once the kings and queens of the internet, dogs have taken over of late. So, Snapchat is sensible to have responded to this trend by releasing lenses for dogs. Just remember that if you do make your dog look ridiculous, they may come back to haunt you.

Snapchat has had a tough time of it of late, leading to millenials moaning about Snapchat. However, all the while Snapchat is releasing new filters (for humans and dogs alike) people will keep using the app. And here’s our list of the best Snapchat filters to use.

Read the full article: Snapchat Launches Lenses for Dogs


Read Full Article

5 Ways to Save Money When Buying a MacBook

The Era of 4K TVs: Do You Really Need HDR?

10 Must-Have Professional Apps for Your iPad Pro


ipad-pro-apps

Based on benchmarks, the 2018 iPad Pro is faster than the 2018 MacBook Pro. But that’s just numbers. The problem with the iPad Pro is not performance, it’s iOS and the lack of macOS-like professional apps. Or at least, that’s the current narrative.

But that’s a narrow viewpoint. iOS ushers in a new way of getting work done. So of course you won’t find Final Cut Pro X on the iPad. But you can get pretty close. In fact, dozens of professional-grade iOS apps will help you with high-level photography, art, graphic design, calligraphy, writing, and video editing projects.

We’ve highlighted the best options below.

1. Procreate

Procreate is the Apple Pencil’s best new companion. It’s the $10 app that every iPad Pro user should install, whether you’re creative or not. Install the app and play around with your Apple Pencil and the templates. Just creating some patterns and editing templates will give a kick to your creative bone.

But if you’re a designer or an artist, Procreate will open up a whole new world for you. You can use the app for sketching, designing, painting, calligraphy, and a lot more. If you can dream it, you can probably make it in Procreate.

Procreate’s user interface is inspired by desktop apps like Photoshop, but it’s adopted for a touch screen. So you’ll find intuitive sliders, and sliding panels around the canvas. Use one of the 100+ brushes to get close to a real-life pencil feel on the iPad.

Just like Photoshop, you can even create your own brush. You get access to multiple layers, blend modes, masks, and full PSD support.

Download: Procreate ($10)

2. Affinity Designer

Affinity Designer is the Adobe Illustrator for iPad that never was. The app gives you a desktop-class vector design environment on the iPad. Everything you need from a graphic design software is available here.

Start out by sketching, then turn it into vector lines and shapes. Now you have precise control over every shape in the design. Once you have the framework, you can switch to raster anytime and start coloring in. There are more than a hundred brushes in the app.

The app also supports professional-grade typography tools. You can align text to a grid, flow text through a path, and frame text around other elements. If you’re working on a logo, you can select a letter and start changing its design as well.

Once you’re done, you can export the design as a PDF, PSD, EPS, SVG, JPEG, or PNG.

Download: Affinity Designer ($20)

3. Affinity Photo

Affinity Photo is a professional photo editing tool for the iPad. While you wait for Photoshop to arrive, this is what you should use.

No matter your skill in this area, Affinity Photo will fit right into your workflow. You can use it to quickly retouch photos, make color correction, or start with complex editing using multiple layers.

If you’ve used Photoshop on Mac, you’ll be able to pick up Affinity Photo quite easily. It follows the same nomenclature and design language but adapts it for a touch screen interface. You’ll find tools and layers panel on either side of the canvas.

Affinity Photo makes use of iPad Pro’s amazingly fast processor to give you something that an entry-level MacBook running Photoshop can’t. There’s no lag, even when you open RAW images and have dozens of layers (the app supports unlimited layers).

Using the Apple Pencil, you can make super-accurate selections in photos. Everything else that you need from a professional photo editing app is here: noise reduction, brushes, lens correction, adjustment layers, patch tool, clone tool, mask, blur, and so on.

Download: Affinity Photo ($20)

4. LumaFusion

LumaFusion is the best video editing app on the iPad. It puts a professional-level, multi-track video editing studio on your iPad. Making use of the six-core processor on the powerful new iPad Pro, it lets you scrub through 4K footage without any lag.

LumaFusion’s interface is similar to video editing apps like Final Cut Pro, but it’s adapted for the iPad screen. You can preview the video in the top-right corner, import and arrange clips and sounds in the top-left, and the bottom part is where the magic happens.

Here you’ll find a fully featured multi-track editor. Just drag and drop a video file and use your finger to move it around. You can select and instantly cut a video as well. Once your track is laid out, use transition effects, add background audio, and export the video.

LumaFusion has a preset for uploading videos to YouTube, so you don’t need to mess around with format technicalities either.

Download: LumaFusion ($20, subscription available)

5. Ferrite Recording Studio

Ferrite brings multi-track audio recording and editing to the iPad. You can use the app to record interviews and even edit podcasts. Ferrite starts you off simply—just tap on the microphone button to start recording.

But when you get to the editing view, you’ll see just how comprehensive the editing options are. You can lay audio files on a multi-track editor and use Ferrite’s automation tool to quickly improve your audio.

You can automatically adjust the low and high volumes, remove the silence between words, reduce noise, and more. Plus, if you have a particular editing style, you can set all the parameters just as you like them and turn it into a template.

Download: Ferrite Recording Studio (Free, premium version available)

6. Microsoft Office Suite

For millions of users across the world, productivity means an Office document. And if you need to collaborate with your coworkers using a Word document or an Excel spreadsheet, you’ll be happy to know that you can do it all from your iPad Pro.

Log in with your Office 365 account, and all your cloud and shared documents will show up. You’ll find all the familiar formatting, collaboration, and export options in the app.

Download: Microsoft Word (Free, subscription required)
Download: Microsoft Excel (Free, subscription required)
Download: Microsoft PowerPoint (Free, subscription required)

7. Pixelmator

If you feel a bit overwhelmed by the feature set in Affinity Photo, try Pixelmator first. Pixelmator is a fully featured image editor that’s easy to use. It has advanced photo editing, painting, and graphic design features—but it’s best known for combining them.

For example, Pixelmator makes it easy to open huge RAW files. Then you can use tools to fix and retouch the image and apply edits to make it look better. The graphic design tools will help you add stylized text over the image, and you can even use the Apple Pencil to paint over the parts of the image.

Download: Pixelmator ($5)

8. BeatMaker 3

BeatMaker is an audio and MIDI workstation specifically designed for the iPad. It brings the power of traditional desktop music-making software to the new era of the iPad Pro.

You have access to 128 banks of 128 pads where you can record, edit, chop, assemble, and resample to your heart’s content.

Download: BeatMaker 3 ($25, in-app purchases available)

9. Scrivener

Scrivener is what professionals use to write their books. It’s an all-in-one app that takes care of research, notes, writing, and editing. Now you can get the same polished writing environment on your iPad.

You can open Final Draft or Word documents in the app and just start writing. Use the built-in tools to keep track of plot points, characters, and more.

Download: Scrivener ($20)

10. PDF Expert

In the business world, PDFs are preferred for information exchanges. This makes PDF Expert an essential iPad app for anyone who wants to be productive on the go.

PDF Expert simplifies some of the biggest headaches of using PDFs. You can quickly open a PDF, edit it (even if it wasn’t designed to be editable), add and remove text, sign it, and send it back in just a couple of seconds. This lets you manage PDFs on iOS all from one app.

Download: PDF Expert ($10, in-app purchase available)

Load Your iPad Pro With the Best Apps

If you’ve spent years or decades using a Mac, getting used to iOS apps can be a struggle. And it might not be worth the time. But iOS and the iPad Pro are clearly ushering us into the future, and the future is only going to get brighter. The iPad Pro app problem of yesteryear is improving all the time.

When you start exploring professional apps on the iPad Pro, be open to the new way of working. Because if you get into the mindset that you can’t work without the same keyboard shortcuts and interface layout, it will be harder to ride the next wave of professional software.

And the best way to get used to the iPad Pro is by mastering all the new gestures. You can use quick swipe gestures to go Home, access the Dock, add apps in split mode, and more.

Read the full article: 10 Must-Have Professional Apps for Your iPad Pro


Read Full Article

7 Online Cover Letter Mistakes That’ll Derail Your Job Search

5 Ubuntu Themes That Will Steal Your Breath Away

How to Turn On and Off Your Phone’s Flashlight

Alexa crashed on Christmas Day


Amazon this morning said its Alexa devices were among the holiday season’s best-sellers, particularly the Echo and Echo Dot. But the influx of new users setting up their devices for the first time on Christmas Day appeared to be more than Alexa could handle. The service crashed briefly on Christmas, as thousands of new Alexa device owners tried to connect their Echo to Amazon’s servers around the same time.

The Guardian first reported the Alexa outage, which began around 10 AM GMT and led existing Echo owners to complain they were unable to use their devices for regular tasks like playing music or smart home controls, for example.

Others said they were unable to set up their device, despite not having any other internet or home Wi-Fi issues, which seemed to point to a server-side outage.

Amazon’s Twitter account noted the issues were isolated to Europe, saying at 8:43 AM EST (1:43 PM GMT): “Over the past two hours some Echo devices in Europe have had intermittent connections.” The outage was resolved by the time the account had responded, meaning it had only lasted a couple of hours.

An Amazon spokesperson also confirmed the outage to TechCrunch.

“For a short period yesterday morning we had an issue that intermittently impacted some Alexa customers’ ability to interact with the service,” the spokesperson said. “The Alexa service is now operating normally.”

Amazon declined to offer details on what caused the outage, or explain how it was resolved. Likely, it was related to the increased number of requests.

The website Down Detector had also spotted troubles with Alexa which impacted Europe, with a peak of 2,183 reports coming in at the height of the outage. The reports then tapered off a couple of hours later.

This isn’t Alexa’s first outage by any means, nor even its first this year. The service can become unresponsive at times, either due to server issues or overloads. In March, for example, the voice service went down even while the Alexa mobile app still worked.

And in September, Alexa went down across Europe, apparently related to an AWS outage in Ireland. That was followed by a U.S. outage the following month, which led the assistant to respond to requests with “sorry, something went wrong.”

Europe is a growing market for Alexa, with Amazon having introduced its smart speaker to Italy and Spain, this June. Alexa’s other international markets include the U.K., Australia, India, New Zealand, Germany, Japan and Ireland.


Read Full Article

Feathered Dinosaur Venn Diagram


Feathered Dinosaur Venn Diagram

Researchers are putting fish into augmented reality tanks


Researchers at the New Jersey Institute of Technology, while testing the “station keeping” functions of the glass knifefish, have created an augmented reality system that tricks the animal’s electric sensing organs in real time. The fish keeps itself hidden by moving inside of its various holes/homes and the researchers wanted to understand what kind of autonomous sensing functions it used to keep itself safe.

“What is most exciting is that this study has allowed us to explore feedback in ways that we have been dreaming about for over 10 years,” said Eric Fortune, associate professor at NJIT. “This is perhaps the first study where augmented reality has been used to probe, in real time, this fundamental process of movement-based active sensing, which nearly all animals use to perceive the environment around them.”

The fish isn’t wearing a headset but instead the researchers have simulated the motion of a refuge waving in the water.

“We’ve known for a long time that these fish will follow the position of their refuge, but more recently we discovered that they generate small movements that reminded us of the tiny movements that are seen in human eyes,” said Fortune. “That led us to devise our augmented reality system and see if we could experimentally perturb the relationship between the sensory and motor systems of these fish without completely unlinking them. Until now, this was very hard to do.”

To create their test they put a fish inside a tube and synced the motion of the tube to the fish’s eyes. As the fish swam forward and backward, the researchers would watch to see what happened when the fish could see that it was directly effecting the motion of the refuge. When they synced the refuge to the motion of the fish, they were able to confirm that the fish could tell that the experience wasn’t “real” in a natural sense. In short, the fish knew it was in a virtual environment.

“It turns out the fish behave differently when the stimulus is controlled by the individual versus when the stimulus is played back to them,” said Fortune. “This experiment demonstrates that the phenomenon that we are observing is due to feedback the fish receives from its own movement. Essentially, the animal seems to know that it is controlling the sensory world around it.”

Whether or not the fish can play Job Simulator is still unclear.

“Our hope is that researchers will conduct similar experiments to learn more about vision in humans, which could give us valuable knowledge about our own neurobiology,” said Fortune. “At the same time, because animals continue to be so much better at vision and control of movement than any artificial system that has been devised, we think that engineers could take the data we’ve published and translate that into more powerful feedback control systems.”


Read Full Article

Two years later, I still miss the headphone port


Two years ago, Apple killed the headphone port. I still haven’t forgiven them for it.

When Apple announced that the iPhone 7 would have no headphone port, I was pretty immediately annoyed. I figured maybe I’d get over it in a few months. I didn’t. I figured if worse came to worse, I’d switch platforms. Then all of the other manufacturers started following suit.

This, of course, isn’t a new annoyance for me. I’ve been hating headphone adapters on phones right here on this very website since two thousand and nine. For a little stretch there, though, I got my way.

It was a world full of dongles and crappy proprietary audio ports. Sony Ericsson had the FastPort. Nokia had the Pop-Port. Samsung had like 10 different ports that no one gave a shit about. No single phone maker had claimed the throne yet, so no one port had really become ubiquitous… but every manufacturer wanted their port to become the port. Even the phones that had a standardized audio jack mostly had the smaller 2.5mm port, requiring an adapter all the same.

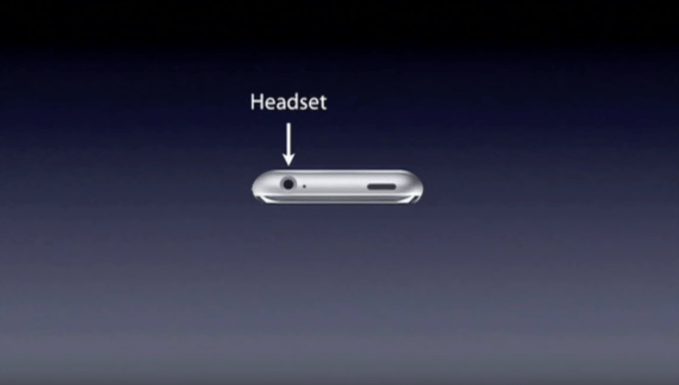
Then came the original iPhone with its 3.5mm headphone port. It was a weird recessed 3.5mm port that didn’t work with most headphones, but it was a 3.5mm port! Apple was riding on the success of the iPod, and people were referring to this rumored device as the iPod Phone before it was even announced. How could something like that not have a headphone port?

Sales of the iPhone started to climb. A few million in 2007. Nearly 12 million in 2008. 20 million in 2009. A tide shifted. As Apple’s little slab of glass took over the smartphone world, other manufacturers tried to figure out what Apple was doing so right. The smartphone market, once filled with chunky, button-covered plastic beasts (this one slides! This one spins!), homogenized. Release by release, everything started looking more like the iPhone. A slab of glass. Premium materials. Minimal physical buttons. And, of course, a headphone port.

Within a couple years, a standard headphone port wasn’t just a nice selling point — it was mandatory. We’d entered a wonderful age of being able to use your wired headphones whenever you damn well pleased.

Then came September 7th, 2016, when Apple had the “courage” to announce it was ditching the 3.5mm jack (oh and also by the way check out these new $150 wireless headphones!).

Apple wasn’t the first to ditch the headphone port — but, just as with its decision to include one, its decision to remove it has turned the tide. A few months after the portless iPhone 7 was announced, Xiaomi nixed the port on the Mi 6. Then Google ditched it from its flagship Android phone, the Pixel 3. Even Samsung, which lampooned Apple for the decision, seems to be tinkering with the idea of dropping it. Though leaks suggest the upcoming Galaxy S10 will have a headphone port, the company pulled it from the mid-range A8 line earlier this year. If 2016 was the year Apple took a stab at the headphone jack, 2018 was the year it bled out.

And I’m still mad about it.

Technology comes and goes, and oh-so-often at Apple’s doing. Ditching the CD drive in laptops? That’s okay — CDs were doomed, and they were pretty awful to begin with. Killing Flash? Flash sucked. Switching one type of USB port for another? Fine, I suppose. The new USB is better in just about every way. At the very least, I won’t try to plug it in upside down only to flip it over and realize I had it right the first time.

But the headphone jack? It was fine. It stood the test of time for one hundred damned years, and with good reason: It. Just. Worked.

I’ve been trying to figure out why the removal of the headphone port bugs me more than other ports that have been unceremoniously killed off, and I think it’s because the headphone port almost always only made me happy. Using the headphone port meant listening to my favorite album, or using a free minute to catch the latest episode of a show, or passing an earbud to a friend to share some new tune. It enabled happy moments and never got in the way.

Now every time I want to use my headphones, I just find myself annoyed.

Bluetooth? Whoops, forgot to charge them. Or whoops, they’re trying to pair with my laptop even though my laptop is turned off and in my backpack.

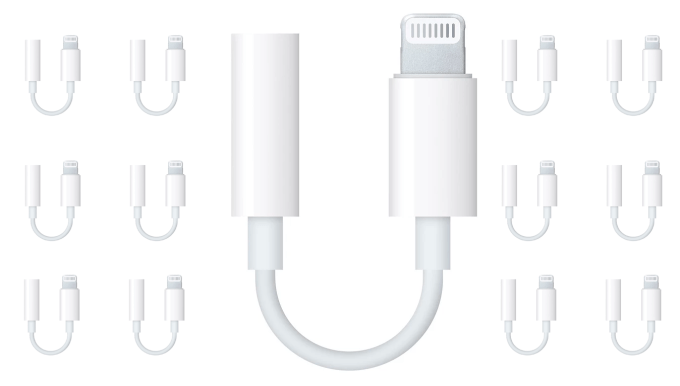
Dongle? Whoops, left it on my other pair of headphones at work. Or whoops, it fell off somewhere, and now I’ve got to go buy another one.

I’ll just buy a bunch of dongles, and put them on all my headphones! I’ll keep extras in my bag for when I need to borrow a pair of headphones. That’s just like five dongles at this point, problem solved! Oh, wait: now I want to listen to music while I fall asleep, but also charge my phone so it’s not dead in the morning. That’s a different, more expensive splitter dongle (many of which, I’ve found, are poorly made garbage).

None of these are that big of a deal. Charge your damned headphones, Greg. Stop losing your dongles. The thing is: they took a thing that just worked and just made me happy and replaced it with something that, quite often, just bugs the hell out of me. If a friend sent me a YouTube link and I wanted to watch it without bugging everyone around me, I could just use whatever crappy, worn out headphones I happened to have sitting in my bag. Now it’s a process with a bunch of potential points of failure.

“But now its water resistant!” Water-resistant phones existed before all of this, plenty of which had/have headphone ports. As a recent example, see Samsung’s Galaxy S9 with its IP68 rating (matching that of the iPhone XS.)

“But it can be slimmer!” No one was asking for that.

“But the batteries inside can be bigger!” The capacity of the battery barely jumped in the years from the 6S to the 8 — from 1,715mAh to 1,821mAh. It wasn’t until a few years later with the iPhone X, when the standard iPhone started getting wider and taller, that we saw super big jumps in its battery capacity.

Will this post change anything? Of course not. Apple blew the horn that told the industry it’s okay to drop the headphone port, and everyone fell right in line. The next year — and the year after that — Apple sold another 200M-plus phones. At this point, Apple doesn’t even bother giving you the headphone adapter in the box. Apple’s mind is made up.

But if you’re out there, annoyed, stumbling across this post after finding yourself with a pair of headphones and a smartphone that won’t play friendly together in a pinch, just know: you’re not the only one. Two years later, I’m still mad at whoever made this call — and everyone else in the industry who followed suit.


Read Full Article

The 10 Best iPhone Keyboard Apps: Fancy Fonts, Themes, GIFs, and More

5 Common Bluetooth Myths You Can Safely Ignore Now


bluetooth-myths

For some time now, Bluetooth has been the preferred technology to wirelessly pair two gadgets, and over the years, we’ve seen it change and become better and better in the process. Yet, unfortunately, some old-school myths about it still persist. It’s time to bust them.

Today’s Bluetooth is different from the Bluetooth of years ago. Here are the most common misconceptions that people still hold and what you should know instead.

1. “Enabling Bluetooth Kills Battery Life”

Keeping Bluetooth switched on does not kill battery life

In the early days of smartphones, yes, keeping your Bluetooth switched on led to a drop in your battery life. That’s because once your connection was on, it would actively look for devices to pair with at all times.

But that’s a smartphone myth you can now forget. With the new Bluetooth standards starting with version 4 and beyond, we got something called the Low Energy (LE) module.

LE modules use different technologies to similarly search for Bluetooth devices in your vicinity without taking up the same amount of power as the earlier versions of Bluetooth.

Similarly, once a connection has been made, an LE device won’t draw substantial power when data is not being transferred. For example, if you have paired your smartphone with a pair of great Bluetooth headphones, it won’t draw power when you aren’t playing a song.

As a result, Bluetooth LE’s overall power consumption has been lowered by half or more. Where the classic Bluetooth would use 1W, Bluetooth LE would use between 0.01 to 0.5W. A massive improvement.

2. “Bluetooth Is Bad for Your Health”

Bluetooth isn't bad for your health

At this point, there is no solid consensus on whether radiation from mobile phones is harmful to your health. However, we do know one thing for sure: certain Bluetooth headsets are definitely much safer for you.

Radiation is about power and Bluetooth excels in that regard. Bluetooth’s maximum output for a Class 1 device is 100mW (milliwatt) of power, and it rarely does that.

In fact, most Bluetooth devices you use have a maximum of 1mW of power. On the other hand, standard phones operate at 1,000mW or 2,000mW when you’re using 3G or 4G services.

So no, Bluetooth might not be completely safe, but wearing a Bluetooth headset is better for your exposure to radiation than a smartphone. You obviously can’t escape having a phone with you in this day and age, so if you are a little wary of the radiation consequences, get a Bluetooth headset.

3. “Bluetooth Only Works in Small Rooms”

Bluetooth works in large rooms and across spaces

Does your smartphone’s Bluetooth only work across a short range? Probably, yes. But what you may not know is that Bluetooth has three classes, and the operating distance of Bluetooth depends upon which class the device falls into:

  •         Bluetooth Class 3 devices have a range of less than 10 meters.
  •         Bluetooth Class 2 devices have a range of around 10 meters.
  •         Bluetooth Class 1 devices have a range of around 100 meters.

Generally, you’ll only get Bluetooth Class 1 in devices which have their own power source or have a significant power unit, like desktop computers or speakers that require an electrical connection. Most smartphones and tablets use Bluetooth Class 2 or 3.

Yet even then, 10 meters is the theoretical distance that they’re aiming for. Without any interference, like walls, you’ll find that it sometimes extends beyond that.

4. “Non-Discoverable Bluetooth Is Secure”

Bluetooth security is complex, making it non-discoverable isn't a fix

No! No, no, no! Bluetooth technology has never had a great reputation for security, but the more recent versions have plugged a lot of holes and gaps. Chief among these myths is that if you set your device as non-discoverable, then others with malicious intent can’t find it and you’ll be safe.

Well, that’s not true at all.

The Bluetooth Device Address (BDA) might be hidden in non-discoverable mode, but hackers have gotten wise to that over the years. Scanners and sniffer devices can still find your BDA and infiltrate it even when it’s non-discoverable.

The biggest culprits in this infiltration are the default passwords that are used on most Bluetooth devices: 0000 or 1234. Because of this, almost anyone can connect to your Bluetooth device once they have your address.

This simple, illogical system is the cause behind most cases of eavesdropping and Bluejacking (connecting to a phone to send spam) on Bluetooth devices. So the first thing you need to do right now is go to your phone’s Bluetooth settings and change the password to a secure four-digit PIN.

If you’re really worried about a malware attack through Bluetooth, keep your connection OFF instead of non-discoverable. Bluetooth can’t be infiltrated if it’s off.

5. “Bluetooth Interferes With Wi-Fi”

Bluetooth does not interfere with Wi-Fi

Like most other wireless technologies, Bluetooth uses the 2.4 GHz radio frequency to send and receive data. That’s the same frequency used by everything from your Wi-Fi network to your microwave oven.

So naturally, the first thought is that your Bluetooth connection’s stability and speed depends upon what other devices are running in the vicinity and whether they’re broadcasting data on said wireless frequencies.

Well, not quite.

Bluetooth uses something called adaptive frequency hopping and this has really improved with Bluetooth 5.0. Let’s break it down to understand what it does exactly.

The 2.4 GHz frequency is a band that goes from 2,400 MHz to 2,483.5 MHz. Bluetooth uses two channels, each monitoring 50% of the band. The signal rapidly “hops” from one free frequency to another, thus ensuring that it won’t get disrupted by other devices trying to use that band.

The end result is that while other wireless connections can seek to use the same frequency that Bluetooth is using, its super-fast adaptive hopping keeps your connection stable without drops in speed.

Learn More About Bluetooth

In a nutshell, Bluetooth is a convenient and safe technology to connect devices wirelessly. Feel free to use it, especially with Bluetooth 5.0 gadgets, without worrying too much about battery life.

Such myths and misinformation spreads only when you don’t know enough about a topic. If you have any further doubts about Bluetooth, we have answers to the most common Bluetooth questions.

Read the full article: 5 Common Bluetooth Myths You Can Safely Ignore Now


Read Full Article

How to Install Mac Apps in Terminal Using Homebrew


brew-install

After you’ve configure a new Mac from scratch or reloaded macOS, installing a dozen or more apps is an overwhelming job. Visiting all the right websites and setting the apps up according to your needs is a hassle.

You can solve this problem with a package manager. Homebrew is a package manager for macOS that simplifies the installation of free Unix tools and GUI apps. We’ll show you how to install apps with Homebrew and keep them up-to-date without any trouble.

What Is Homebrew?

Homebrew a free and open source package manager that lets you easily install command line tools and GUI apps on macOS. With a single command, you can search, install, uninstall, or update free Unix tools. Before installing Homebrew, you’ll need the following:

  • Terminal, located in the /Application/Utilities folder.
  • macOS 10.12 (Sierra) or higher.
  • Command Line Tools, or Xcode from the Mac App Store.

How to Install Homebrew on Mac

If you have Xcode installed, there’s no need to install Command Line Tools, since the package is already baked into Xcode. But if not, you don’t have to install Xcode just for Homebrew.

After installation, Xcode consumes around 10GB of disk space, which is no small amount. If you’re just getting started with these commands, then installing Command Line Tools (roughly 150MB) will get the job done.

Step 1: Install Command Line Tools

To install Command Line Tools, press Cmd + Space to launch Spotlight and search for Terminal. Then type:

xcode-select --install

As you type this command, a popup will appear with the message The “xcode-select” command requires the command line developer tools. Would you like to install these tools now? Click the Install button to proceed with the installation.

In my case, since the package is already installed, this shows an error message.

install command line tools

Step 2: Install Homebrew

To install Homebrew, copy and paste the following command into the Terminal:

/usr/bin/ruby -e "$(curl -fsSL https://raw.githubusercontent.com/Homebrew/install/master/install)"

When you paste this command, you’ll see a series of lines about what the script will install and where. Press Return again to continue, or any other key to cancel.

install homebrew with a single command

Then enter the administrator password to begin the installation. Installation takes a bit of time, depending on the speed of your Mac and internet connection. On completion, you’ll see an Installation successful message.

successful installation of homebrew

Step 3: Verify the Homebrew Installation

Run this command to validate the Homebrew installation and check for any errors:

brew doctor

If you see any Warnings messages, you can safely ignore them, but you should check out common issues that might affect a Homebrew installation. In most cases, you won’t see any errors if your copy of macOS and Command Line Tools/Xcode are up to date.

You should this check for any pending updates in the App Store before you install Homebrew.

verify the homebrew installation

Installing Popular Unix Tools With Homebrew

Since Homebrew is a package manager, it automates the entire process of installing, updating, and removing apps from the system. It compiles packages and handles all the dependencies for you.

For example, one app might rely on two others to work properly. Rather than installing those other apps yourself, Homebrew installs them and configures them to work with your requested app without any issues.

Here are a few handy tools you can install with Homebrew:

  • youtube-dl: Lets you download videos from YouTube and other more sites.
  • geoip: Gives you the geolocation data for a particular IP address. Useful for system administrators, security researchers, and web developers.
  • wget: Lets you download data from the web and FTP. You can download a file or even an entire website with this tool.
  • cask: This one lets you install macOS apps with a GUI.
  • htop: Command line alternative of Activity Monitor. It gives you thorough information on CPU, memory, processes, and more.

Manage Unix Tools With Homebrew

Running these Homebrew formulas is easy. Just type:

brew install [formula name]

To install youtube-dl, for instance, type in:

brew install youtube-dl

Type the following to see the list of commands that Homebrew supports:

brew help

You can browse a big list of available commands on the Homebrew formulae page. And use the following commands for more options:

  1. search: Search for a formula
  2. uninstall: Uninstall a formula
  3. list: List all the installed formulas
  4. upgrade: Fetch the newest version of Homebrew from Github
  5. upgrade [formula name]: Install updates for a particular formula

brew help to list all commands

How to Install Homebrew Cask on Mac

Homebrew Cask extends Homebrew and lets you easily install macOS GUI apps directly from the command line. With this simple script, you can install and manage many apps without needing to download them individually and go through the typical drag-and-drop routine.

To install Cask, type this into Terminal:

brew tap caskroom/cask

Just after installing Cask, type this:

brew tap homebrew/cask-versions

The second Cask command is intended for installing alternate versions of Casks. For example, they include betas, development versions of browsers you might want to install, latest versions of legacy open source apps, and more.

With Cask installed, you can also enter this command:

brew cask

This syntax will tell you commands that Cask supports. Every time you use a command, don’t forget to prepend with brew cask. The most frequently used commands you need to remember are:

  1. install: Installs the given cask
  2. uninstall: Uninstalls the given cask
  3. list: Lists installed casks
  4. outdated: List all outdated casks
  5. upgrade: Upgrades all outdated casks

brew cask commands

You don’t have to remember the commands. If you ever forget a command, type in brew cask to see the list. You can also take a printout of the manual page and open it in the Preview app.

This syntax will export the man page output to Preview.

man -t [Command Goes Here]|open -f -a /Applications/Preview.app

For example, the below string will open the manual page for brew cask in Preview:

man -t brew-cask|open -f -a /Applications/Preview.app

printout of the man page

Once the man page opens in the Preview app, choose File > Export As PDF to save the file as a PDF document for future reference.

Installing Mac Apps With Cask

You probably have a list of frequently used apps you install on every new Mac. Instead of doing so individually, you can install those apps through Cask. To search for an app, use this syntax:

brew search

Let’s see if there’s a Cask for Firefox. To do so, type this into Terminal:

brew search firefox

As you might know, Firefox supports many different release channels. Mozilla uses these channels to slowly roll out updates to users, starting with daily Nightly builds to more Stable builds. If you want to install Nightly build of Firefox, you would type:

brew cask install firefox-nightly

install firefox nightly with homebrew cask

Or to install the Google Chrome Beta, try this:

brew search chrome

Once you get relevant matches, enter:

brew cask install google-chrome-beta

install chrome with homebrew cask

Sometimes, you might not remember a particular app name. Thankfully, you just need to enter some relevant keywords and Cask will search for apps that contain them. The below screenshot shows what happens when you enter this command:

brew search sync

brew search tactics

Uninstalling Apps With Cask

To uninstall Chrome Beta, simply type:

brew cask uninstall google-chrome-beta

For uninstalling Firefox, use:

brew cask uninstall firefox-nightly

The app gets uninstalls completely with no traces left behind. Once you install an app with Cask, it’s fine to update the app even if Cask doesn’t show updates. Don’t forget to check for configuration issues to further mitigate any problems. You can do so with this command:

brew doctor

Before checking for any Cask upgrade, don’t forget to periodically update the Homebrew core and casks. To do this, type:

brew upgrade

GUI Versions of Homebrew and Casks

Although there is no GUI app to install Homebrew and Casks, there are third-party apps that lets you update Homebrew core, check configuration issues, install and update apps from Cask repository, and much more.

Cakebrew is a free, open source app that works in tandem with Homebrew. It lets you see the list of formulas you’ve installed, plus it can run a quick search and show the description of formulas you want to install. This is functionality the command line version doesn’t have.

If you like Homebrew, but don’t want to use the command line for every purpose, this app will prove useful to you. To install Cakebrew, type in:

brew cask install cakebrew

cakebrew app for homebrew

Homebrew and Cask Workflow for Alfred lets you easily install, uninstall, and manage Homebrew and casks in tandem. The script filters brew and cask with support for doctor, install, list, search, uninstall, and more.

Then launch Alfred, type in brew or cask, and you can manage your apps right there in Alfred. You need to have the Alfred Powerpack installed to use this and other workflows.

manage homebrew and cask with alfred

Install These Open Source Mac Apps

Homebrew is a great package manager to install free Unix tools and macOS apps. If you’re setting up a Mac from scratch or work in a company where you manage multiple Macs, Homebrew can save you a lot of time and energy.

It’s easy to get lost with all these commands, but you don’t have to hurry. Go slow with these steps and take notes frequently.

Although you might want to install common Mac apps at first, take a look at some lesser-known open source Mac apps and install them with Homebrew Cask too.

Read the full article: How to Install Mac Apps in Terminal Using Homebrew


Read Full Article

How to Test Your PC for Failing Hardware: Tips and Tools to Know


If you’ve ever opened up your computer, you know there is a lot of hardware in there. It’s all a potential point of failure. There are certain pieces of hardware which are more prone to failure than others.

Equipment that either generates heat or has moving parts tends to fail most often. Thanks to computer hardware tests, you can scan your system and spot failing hardware before everything crashes.

What Can Go Wrong With PC Hardware?

The parts that most commonly break are fans, hard disk drives, CPUs, and GPUs.

RAM also tends to fail too. It is continually being written and re-written to (flashed). Solid-state memory can only handle so many flashes before it begins to fail. The problem also applies to solid-state hard drives.

The best way to avoid being caught out is to perform regular hardware diagnostic tests on your computer. Here’s how to do hardware tests on Windows 10.

Windows 10 Hardware Diagnostic Tools

Windows 10 has two built-in hardware diagnostic tools. The first analyzes system performance on your computer and the second runs memory tests on your Windows 10 PC.

  1. Performance Monitor
  2. Windows Memory Diagnostic

Performance Monitor

windows 10 performance report

Performance Monitor is a native desktop app on Windows 10. It’s the operating system’s most holistic tool for locating and diagnosing hardware and system issues.

To open the app, search for its name in Cortana and click on the link. You may have to wait for a few seconds while the app collects data.

If you want a quick overview of your system’s hardware, use the left-hand panel to navigate to Reports > System > System Diagnostics > [Computer Name].

It provides you with multiple checks for your hardware, software, CPU, network, disk, and memory, along with a long list of detailed statistics.

Dig a little deeper, and you’ll find live performance graphs (in Monitoring Tools > Performance Monitor) and customizable data sets (in Data Collector Sets).

Windows Memory Diagnostic

windows memory diagnostic

A computer’s central processing unit (CPU) uses RAM to store short-term information. Anything contained in the RAM is lost when you turn off your machine.

There are lots of warning signs when your RAM is close to failing. They include worsening performance, frequent crashes, video cards failing to load on boot, corrupted data files, and incorrect RAM information in the Windows System app.

If you’re wondering how to run a memory test on the RAM, you need to use the Windows Memory Diagnostic tool.

It works by writing to, then reading, your computer’s RAM. Differing values signal faulty hardware.

To launch the tool, press Windows + R to open the Run window, then type mdsched.exe and hit Enter. Windows will prompt you to restart your computer.

The test will take a few minutes to complete. When it’s over, your machine will once again restart. You’ll see the results of the screen once you return to the Windows desktop.

(If Windows doesn’t automatically show you the results, open the Event Viewer by right-clicking on the Start button, then head to Windows Logs > System and find the most recent file called MemoryDiagnostic.

Third-Party Hardware Diagnostic Apps

If you’re looking for something specific or a little more powerful, you’ll need to turn to third-party software.

There is a lot to choose from, but here are four of the best computer diagnostic apps.

1. MemTest86

memtest

MemTest86 is well established as the best tool to test your RAM on Windows. It’s more powerful than Microsoft’s Windows Memory Diagnostic tool.

The app has 13 different RAM testing algorithms and supports DDR4, DDR2, and DDR3 RAM. You can boot it directly from a USB stick or a CD, and Microsoft has signed the app’s code for Secure Boot compatibility.

Unlike the Windows tool, MemTest86 also has a full-featured graphical interface.

Download: MemTest86 (Free)

2. CrystalDiskInfo

CrystalDiskInfo

If you want to focus on testing your hard drives, you should install CrystalDiskInfo.

The app’s key feature is the “Self-Monitoring, Analysis, and Reporting Technology” (SMART) test. It provides data about several aspects of your drives, including the read error rate, a count of reallocated sectors, the spin-up time, and a whole lot more.

CrystalDiskInfo also includes advanced power management and audio management tools.

And, if you leave the app running in the background, it can even provide you with live alerts if drives become too hot or are suffering from other failures.

Download: CrystalDiskInfo (Free)

3. HWiNFO

 HWiNFO.

HWiNFO is way ahead of the pack when it comes to the amount of information provides. Indeed, if you’re new to the world of hardware testing, we recommend giving this one a wide-berth until you’re more familiar with the concepts and terminology.

From a hardware test standpoint, we are most interested in the app’s system health monitoring features. They provide detailed real-time reports and graphs about your machine’s CPUs, GPUs, mainboards, drives, and peripherals.

You can also download a bunch of add-ins that provide HWiNFO with extra functionality. They include screen tuners, widgets, and log viewers.

Download: HWiNFO (Free)

4. RWEverything

RWEverything

Finally, we’ll leave you with a tool for uber-geeks: RWEverything. It won’t win any design awards, but it’s extraordinarily powerful.

You can use it to check almost every aspect of every piece of hardware in your machine. More pertinently, you can also write to all the hardware. That means you can tweak any setting, no matter how small.

Warning: If you don’t know what you’re doing, don’t start changing settings. You risk irrevocable damaging your hardware.

Download: RWEverything (Free)

Check Your Computer’s Battery Health

Another piece of laptop hardware that’s prone to failure is the battery.

We’ve written about five tools that’ll help your test the health of your laptop battery if you’d like to learn more.

Other Computer Hardware Tests

Keeping an eye on your hardware is only one part of maintaining a healthy computer that runs smoothly.

For more information, check out our guide to checking the health of a Windows PC.

Read the full article: How to Test Your PC for Failing Hardware: Tips and Tools to Know


Read Full Article