31 July 2020

How to Fix Common Microsoft Outlook Issues: 7 Tips to Try


fix-outlook-issues

Losing access to your email account on Outlook can be an absolute disaster. It can be hard to troubleshoot Outlook issues because the error messages can be vague or non-existent.

However, you can solve many common Outlook problems with a few clicks. Here are all the ways to fix common Microsoft Outlook issues.

1. Check If Outlook Is Up-to-Date

It’s good to keep both Windows 10 and Outlook updated. This ensures that you get the latest features and bug fixes. They should keep themselves updated automatically, but you can manually double check.

For Windows 10, press Windows key + I to open Settings and click Update & Security > Check for updates.

outlook update

For Outlook, open the program and go to File > Office Account > Update Options > Update Now.

2. Use the Support and Recovery Assistant

Microsoft is well aware of the difficulties that users can have with Outlook and the Office suite as a whole. To address these issues, Microsoft developed a tool that might be able to right any wrongs automatically.

Microsoft Office 365 Support and Recovery

The Support and Recovery Assistant is available from the Outlook Support Center, and can help out when Outlook stops responding when the client can’t receive emails when shared calendars and mailboxes stop working when the program keeps asking for your password, and when the program claims to be “trying to connect” or complains about being “disconnected”.

Download the Assistant and follow the wizard through. It will try to automatically detect and repair any problems.

3. Disable Compatibility Mode

If you’re using an older version of Windows and get a “cannot start Microsoft Outlook” error message, then compatibility mode is probably to blame. This feature is intended to facilitate the use of the program on an older operating system, but it can sometimes cause problems of its own.

To check whether compatibility mode is activated, you need to find the Outlook.exe file. To do this, open Start, enter Outlook.exe. Then, right click the result and select Open file location.

Alternatively, navigate there via File Explorer at the following path: Program Files > Microsoft Office > Root > Office16.

Right-click the file and choose Properties, then head to the Compatibility tab. If any of the fields on this screen are checked, uncheck them. Then click OK.

4. Run Outlook in Safe Mode

If Outlook stops responding while a “processing” message is on-screen, it’s worth starting the program in Safe Mode to possibly diagnose the issue.

outlook safe mode run

To do so, press Windows key + R to open Run, enter Outlook.exe /safe and click OK.

If Outlook opens successfully, close the program and then open it again as normal. Hopefully, it will no longer hang at the “processing” dialog. If not, you could try to boot Windows 10 in Safe Mode.

5. Make Repairs

Outlook startup issues are often caused by a corrupted installation or damaged data files. Fortunately, it’s simple to run a repair operation on these files.

Repair the Office Suite

To repair Office as a whole, press Windows key + I to open Settings and click Apps. Find Microsoft Office on the list, select it, then click Modify.

Quick Repair Wizard for Microsoft Office

This will open a window that asks how you would like to repair Office. Assuming you’re connected to the internet, select Online Repair, then click Repair. Let the wizard run and see if it fixes your issues.

Repair Your Outlook Data Files

If Outlook isn’t working properly, but the rest of the Office suite is, there could be a problem with the program’s data files. To remedy this, we can use the Inbox Repair Tool.

Location of SCANPST Executable

The Inbox Repair Tool is installed by default alongside your Office installation. Go to your Outlook installation folder (Program Files > Microsoft Office > Root > Office16), and open SCANPST.exe. More information about this tool can be found on Microsoft’s Repair Outlook Data Files page.

Repair Your Outlook Profile

Searching for the Mail App in Windows 10

A corrupted profile might also be the cause of your difficulties with Outlook. To get started on a fix, open the Control Panel (search for it on the Start menu) and search for Mail.

Setting Up Email Accounts in Mail App

This will launch the Mail Setup window. Click the box labeled Email Accounts.

Repairing Email in Outlook Account Settings

On the next screen, find your account and click Repair.

Follow any further steps in the wizard as necessary—the actions may differ depending on the problem.

6. Use Command Line Switches

If you’re unable to open up a particular program, you can use command line switches to manipulate certain options and settings in order to get things up and running. To do so, enter the following strings into a Command Prompt window (Windows key + X > Command Prompt (Admin)), or directly into the Windows 10 Start menu search bar.

  • outlook /resetnavpane resets the program’s Navigation Pane, a common source of several prominent issues.
  • outlook /resetfolders restores any missing folders at the default delivery location.
  • outlook /cleanreminders removes any alarms and events attached to the Outlook calendar, which can solve certain start-up issues.

Here are more useful command line switches to use with Outlook.

7. Disable Active Add-Ins

If you can open Outlook while using Safe Mode, but problems persist when it’s deactivated, one of your add-ins might be at fault. This situation is often accompanied by an error message relating to a particular add-in, but the instructions given in that message aren’t likely to fix the problem.

Instead, start Outlook in Safe Mode (see instructions above) and disable all add-ins by navigating to File > Options > Add-ins. Open the program again without Safe Mode activated to check that it works, then activate each add-in individually to see which particular item is the culprit.

In the worst case scenario, disabling the add-in that’s causing problems will allow you to access Outlook normally once again, even if you have to go without the functionality that it offers. Once you’ve narrowed the issue down to a single add-in, you can search online or get in contact with its developer for more information on a fix.

Tips to Master Your Email Inbox

The worst part of Outlook is how difficult it can be to diagnose the problem. Try all the steps above and hopefully it should resolve your problem. If not, you may need to contact Microsoft support.

If you have got Outlook back up and running, it’s time to become an email master. Here are loads of tips for email productivity and security.

Image Credits: ESB Professional/Shutterstock

Read the full article: How to Fix Common Microsoft Outlook Issues: 7 Tips to Try

How to Manage the Huge WinSxS Folder in Windows 10


winsxs-windows10

When your system disk space gets low, third-party utilities help you spot large files and collections of smaller files at a glance. That’s where you might stumble upon the WinSxS folder. It has a size of almost 5–10GB, and for many users, it’s like a black box in the Windows world.

Naturally, it raises the question of what exactly are those files installed in WinSxS and why it’s so huge. Web searches and forums are full of questions about this folder. Let’s demystify the secrets of WinSxS and the correct way to manage it.

WinSxS Explained

WinSxS (Side-by-Side) was created in response to solve the “DLL Hell” problem in Windows OS. In simple terms, it involves instances when any program alters the dynamic link library (DLL) file to affect the critical function of other applications that need to use the same DLL.

For example, assume that an app requires a DLL with version number 1.0.2. If another app replaces the resource with a different version, say 1.0.3, then the previous app which relies on version 1.0.2 will either crash, cause compatibility issues or worse result in the Blue Screen of Death.

Launch of WinSxS

Windows XP saw the proper launch of the component store. In this, each component (DLL, OCX, EXE) lives in a directory called WinSxS. It would store all the different versions of DLLs installed by software and hardware packages and load the correct version on demand.

So how does an app knows what version of a DLL it needs to load? This is where the “manifest file” plays an important role. It contains settings that inform the operating system how to handle a program when it starts and the correct version of DLL.

Each component has an identity with a unique name that may include processor architecture, language, version, and ID. Specific versions of these components are then collected together into packages. They’re used by Windows Update and DISM to keep your system up-to-date.

winsxs component packages in windows 10

This timeline shows a progressive improvement of WinSxS with each major OS upgrade.

timeline of winsxs improvement in Windows OS

The WinSxS Folder and the Role of Hard Links

Hard links are used throughout the Windows OS. In terms of WinSxS, it’s the only location where components live on the system. All the other instances of the files outside the component store are hard-linked to the WinSxS folder. So, what is a hard link?

According to Microsoft Docs, a hard link is a file system object which allows two files to refer to the same location on disk. It means that Windows can keep multiple copies of the same file without taking any extra space.

Whenever you update Windows, a whole new version of the component gets released and projects into the system through hard links. The older ones remain in the component store for reliability but with no hard links.

With the help of fsutil command, you can check the hard links of any system file. Press Win+X and choose Command Prompt (Admin), then type in

fsutil hardlink list [system file path]

For example, if I want to check the hard links of a system file called “audiosrv.dll,” then type in

fsutil hardlink list "C:\Windows\System32\audiosrv.dll"

fsutil hardlink list in command prompt

Importance of WinSxS

The component store plays a vital role in supporting the functions needed to customize and update Windows. These are as follows:

  • Recover your system from boot failure or corruption
  • Enable or disable Windows features on demand
  • Move systems between different Windows editions
  • Uninstall problematic updates
  • To install the new component versions using Windows Update

WinSxS Folder Size

WinSxS contains all the files necessary to maintain compatibility with hardware and software on your PC. One of the biggest strengths of Windows is its capacity to run older hardware and apps. But this legacy compatibility comes at the cost of disk space and bugs.

Navigate to the C:\Windows\WinSxS, right-click it and choose Properties. This folder consumes almost 7.3GB of disk space. But the thing is, that’s not the real size. The reason for that is “hard links” that File Explorer and other third-party tools don’t consider.

It counts each reference to a hard link as a single instance of the file for each location. So, if a system file resides in both WinSxS and System32 directory, File Explorer would inaccurately double the folder size.

winsxs folder size in Windows10

Check the Actual Size of WinSxS

To check the Windows component store’s actual size, open an elevated command prompt window and type in

Dism.exe /Online /Cleanup-Image /AnalyzeComponentStore

Note: The /AnalyzeComponentStore option isn’t recognized on Windows 8 and earlier.

After the analysis, the actual size of the component store comes down to 5.37GB. This value factors in hard links within the WinSxS folder. Shared with Windows gives you the size of hard-linked files. Date of Last Cleanup is the date of the recently completed component store cleanup.

analyze the size of the component store in Windows10

Methods to Reduce the Size of the WinSxS Folder

Many users often ask if it’s possible to manually delete the files from the WinSxS folder. The answer is a Big No.

It will most likely damage Windows and critical Windows Update may fail to install properly. Even if you’re successful in removing files from the WinSxS folder, you never know which app will stop working.

You can though reduce the size of the WinSxS folder with a few in-built tools. We’ll use tools like Disk Cleanup, DISM commands, and remove Features on Demand to trim the WinSxS folder.

Disk Cleanup Tool

In the search box, type in disk cleanup, and select Disk Cleanup. From this window, click the Clean up system file button. That restarts the utility and unlock access to the full range of cleanup options. You can remove installation files, previous Windows versions, and more. Disk Cleanup tool is the starting point for cleaning up Windows 10.

disk cleanup tool in admin mode

Read this step-by-step guide to find out the best ways for cleaning Windows 10.

Remove Features on Demand

Windows lets you enable or disable default Windows features on demand. You can add some useful features—Hyper V, Print to PDF, Windows Subsystem for Linux (WSL), and more.

Features that you uncheck remain in the WinSxS folder and take up disk space. Users with a low amount of storage might want to slim their Windows installation as much as possible. Open an elevated command prompt window, and type in

DISM.exe /Online /English /Get-Features /Format:Table

You’ll see a list of feature names and their status

windows feature on demand list

To remove a feature from your system, type in

DISM.exe /Online /Disable-Feature /featurename:NAME /Remove

(Replace “NAME” with the name of the feature mentioned in the list)

remove a windows feature with DISM

If you run the /Get-Features command again, you’ll see the status as “Disabled with Payload Removed” instead of just “Disabled.” Later on, if you choose to install the removed components, Windows will prompt you to download the component files again.

DISM Component Cleanup

Windows 8/8.1 includes a built-in feature to automatically clean up the component store when the system is not in use. Open Task Scheduler and navigate to Microsoft > Windows > Servicing. Right-click the item and click Run.

startcomponentcleanup parameter in task scheduler

The task will wait at least 30 days after an updated component gets installed before uninstalling the previous version of the component. The task also has a one hour timeout and may not clean up all the files.

With DISM /Cleanup-Image parameter, you can immediately remove the previous version of the component (without a 30 day grace period) and do not have a one hour timeout limitation. Open Command Prompt (Admin) and type in

DISM.exe /online /Cleanup-Image /StartComponentCleanup

If you add ResetBase switch, you can remove all the superseded version of every component. But remember, you’ll not be able to uninstall any current updates (even if they’re faulty).

DISM.exe /online /Cleanup-Image /StartComponentCleanup /ResetBase

The following command will remove any backup components needed for the uninstallation of service packs. It’s a collection of cumulative updates for a particular release of Windows.

DISM.exe /online /Cleanup-Image /SPSuperseded

Delete Windows Files to Free Up Disk Space

WinSxS component store has an important role to play in the day-to-day functioning of Windows. So you shouldn’t delete the files, or move the WinSxS folder as a solution to your space problems. Windows upgrades have brought in-depth reporting and cleanup tools you can use to find the other space hogs instead.

If you follow the techniques as described above, you can reduce the size of the WinSxS folder slightly. Read this piece to find out Windows files and folders you can delete to further free up disk space.

Read the full article: How to Manage the Huge WinSxS Folder in Windows 10


How to Fix Common Microsoft Outlook Issues: 7 Tips to Try


fix-outlook-issues

Losing access to your email account on Outlook can be an absolute disaster. It can be hard to troubleshoot Outlook issues because the error messages can be vague or non-existent.

However, you can solve many common Outlook problems with a few clicks. Here are all the ways to fix common Microsoft Outlook issues.

1. Check If Outlook Is Up-to-Date

It’s good to keep both Windows 10 and Outlook updated. This ensures that you get the latest features and bug fixes. They should keep themselves updated automatically, but you can manually double check.

For Windows 10, press Windows key + I to open Settings and click Update & Security > Check for updates.

outlook update

For Outlook, open the program and go to File > Office Account > Update Options > Update Now.

2. Use the Support and Recovery Assistant

Microsoft is well aware of the difficulties that users can have with Outlook and the Office suite as a whole. To address these issues, Microsoft developed a tool that might be able to right any wrongs automatically.

Microsoft Office 365 Support and Recovery

The Support and Recovery Assistant is available from the Outlook Support Center, and can help out when Outlook stops responding when the client can’t receive emails when shared calendars and mailboxes stop working when the program keeps asking for your password, and when the program claims to be “trying to connect” or complains about being “disconnected”.

Download the Assistant and follow the wizard through. It will try to automatically detect and repair any problems.

3. Disable Compatibility Mode

If you’re using an older version of Windows and get a “cannot start Microsoft Outlook” error message, then compatibility mode is probably to blame. This feature is intended to facilitate the use of the program on an older operating system, but it can sometimes cause problems of its own.

To check whether compatibility mode is activated, you need to find the Outlook.exe file. To do this, open Start, enter Outlook.exe. Then, right click the result and select Open file location.

Alternatively, navigate there via File Explorer at the following path: Program Files > Microsoft Office > Root > Office16.

Right-click the file and choose Properties, then head to the Compatibility tab. If any of the fields on this screen are checked, uncheck them. Then click OK.

4. Run Outlook in Safe Mode

If Outlook stops responding while a “processing” message is on-screen, it’s worth starting the program in Safe Mode to possibly diagnose the issue.

outlook safe mode run

To do so, press Windows key + R to open Run, enter Outlook.exe /safe and click OK.

If Outlook opens successfully, close the program and then open it again as normal. Hopefully, it will no longer hang at the “processing” dialog. If not, you could try to boot Windows 10 in Safe Mode.

5. Make Repairs

Outlook startup issues are often caused by a corrupted installation or damaged data files. Fortunately, it’s simple to run a repair operation on these files.

Repair the Office Suite

To repair Office as a whole, press Windows key + I to open Settings and click Apps. Find Microsoft Office on the list, select it, then click Modify.

Quick Repair Wizard for Microsoft Office

This will open a window that asks how you would like to repair Office. Assuming you’re connected to the internet, select Online Repair, then click Repair. Let the wizard run and see if it fixes your issues.

Repair Your Outlook Data Files

If Outlook isn’t working properly, but the rest of the Office suite is, there could be a problem with the program’s data files. To remedy this, we can use the Inbox Repair Tool.

Location of SCANPST Executable

The Inbox Repair Tool is installed by default alongside your Office installation. Go to your Outlook installation folder (Program Files > Microsoft Office > Root > Office16), and open SCANPST.exe. More information about this tool can be found on Microsoft’s Repair Outlook Data Files page.

Repair Your Outlook Profile

Searching for the Mail App in Windows 10

A corrupted profile might also be the cause of your difficulties with Outlook. To get started on a fix, open the Control Panel (search for it on the Start menu) and search for Mail.

Setting Up Email Accounts in Mail App

This will launch the Mail Setup window. Click the box labeled Email Accounts.

Repairing Email in Outlook Account Settings

On the next screen, find your account and click Repair.

Follow any further steps in the wizard as necessary—the actions may differ depending on the problem.

6. Use Command Line Switches

If you’re unable to open up a particular program, you can use command line switches to manipulate certain options and settings in order to get things up and running. To do so, enter the following strings into a Command Prompt window (Windows key + X > Command Prompt (Admin)), or directly into the Windows 10 Start menu search bar.

  • outlook /resetnavpane resets the program’s Navigation Pane, a common source of several prominent issues.
  • outlook /resetfolders restores any missing folders at the default delivery location.
  • outlook /cleanreminders removes any alarms and events attached to the Outlook calendar, which can solve certain start-up issues.

Here are more useful command line switches to use with Outlook.

7. Disable Active Add-Ins

If you can open Outlook while using Safe Mode, but problems persist when it’s deactivated, one of your add-ins might be at fault. This situation is often accompanied by an error message relating to a particular add-in, but the instructions given in that message aren’t likely to fix the problem.

Instead, start Outlook in Safe Mode (see instructions above) and disable all add-ins by navigating to File > Options > Add-ins. Open the program again without Safe Mode activated to check that it works, then activate each add-in individually to see which particular item is the culprit.

In the worst case scenario, disabling the add-in that’s causing problems will allow you to access Outlook normally once again, even if you have to go without the functionality that it offers. Once you’ve narrowed the issue down to a single add-in, you can search online or get in contact with its developer for more information on a fix.

Tips to Master Your Email Inbox

The worst part of Outlook is how difficult it can be to diagnose the problem. Try all the steps above and hopefully it should resolve your problem. If not, you may need to contact Microsoft support.

If you have got Outlook back up and running, it’s time to become an email master. Here are loads of tips for email productivity and security.

Image Credits: ESB Professional/Shutterstock

Read the full article: How to Fix Common Microsoft Outlook Issues: 7 Tips to Try


Read Full Article

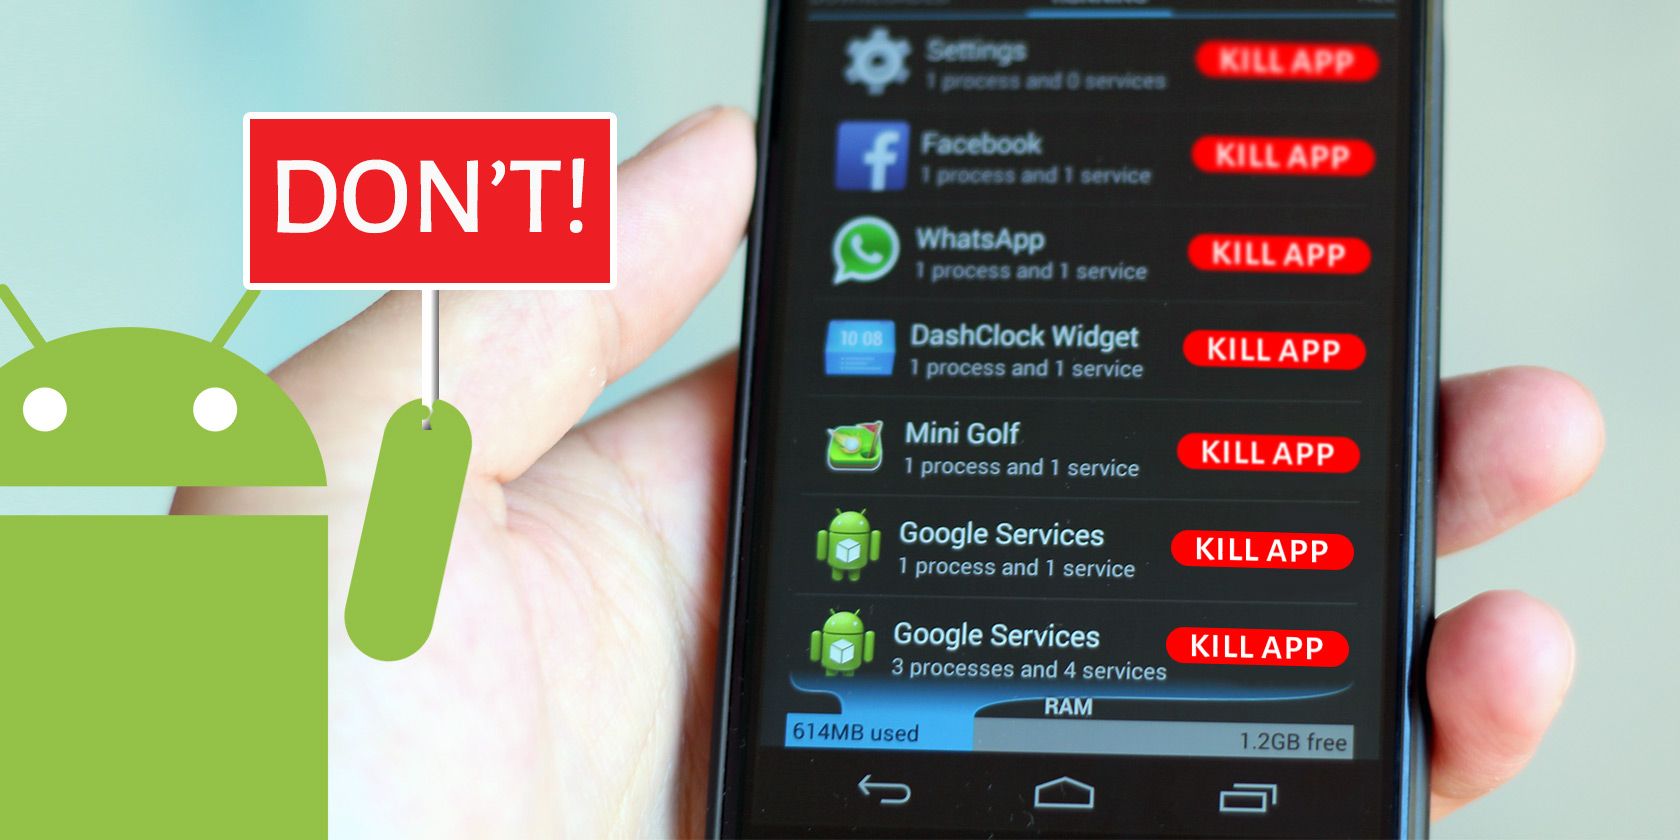
Why RAM Boosters and Task Killers Are Bad for Android


android-task-kill

If you use Android, you may have heard advice about using a RAM booster or task killer app. Scroll through the Google Play Store and you’ll see a ton of task killers on offer with high reviews.

This may lead you to ask if RAM boosters really work. As it turns out, your phone doesn’t need these kind of apps and using them can even harm your performance. Let’s see why.

A Primer on RAM

Before looking at how task killers work, we must understand what RAM is and its purpose for your phone. RAM stands for Random Access Memory and is a fast yet volatile type of storage used by computers and phones.

Operating systems—whether Windows, Android, or something else—use RAM to store currently running programs. This means when you open an app on your phone, Android loads it into RAM. It keeps the app there for a while so you can easily switch back to it and pick up where you left off without reloading the app fully.

RAM is volatile, meaning that when you shut down your phone, everything stored in it disappears. This contrasts with the permanent storage on your phone, which obviously persists between reboots. Loading something from RAM is much faster than pulling it from main storage, though.

See our quick guide to RAM if you’re interested in more information.

How Android Uses RAM

Now, because your device only has so much RAM, you might think that manually managing processes is essential. This is easy to assume if you’re a Windows user.

On Windows, the OS keeps unused RAM free for programs that may need it in the future. If you have so many processes running that they fill up your RAM, Windows has to switch to the page file. This is a chunk of your storage drive that acts as pretend RAM when the system needs more.

Even an SSD is still much slower than RAM, so you’ll feel the slowdown when Windows uses the page file. At that time, it’s a good idea to close some running programs and free up RAM.

32-Bit Apps Task Manager

But this isn’t the case on Android. While it’s not a perfect adage, Android follows the “free RAM is wasted RAM” principle from Linux. The Linux kernel puts “unused” RAM to use for caching, which makes your system performance feel smoother.

Practically, in Android, this means that apps you opened some time ago will stick around in RAM until newer apps need that RAM. Android discards the older apps to make room for higher-priority processes based on your usage.

An Example of Android’s RAM Usage

To take an example, let’s suppose (for simplicity’s sake) that your device has 4GB of RAM and each app takes up 500MB. That means your phone can hold eight apps in RAM before it runs out of room (we’re excluding RAM used by system processes here).

Now, say you open four apps and check each of them for a minute, then put your phone down for 30 minutes. When you pick it back up, if you open any of those four apps, they’ll resume right where you left them, since your phone kept them in RAM.

If you then open up five more apps, the fifth will exceed the amount of RAM on your device. Android will thus analyze which app in RAM is least important based on which ones you’ve used most recently and which apps have priority. For example, if you’re playing music on Spotify, Android will keep that background process alive even if you haven’t opened it in a while.

From there, Android discards the least important app from RAM so it can hold the one you just opened. If you switch back to the app that was discarded, it will have to load from a cold state again.

Why Task Killers Are Terrible

Now that you understand how Android uses RAM, let’s consider how task killers affect this operation.

Most task killers and RAM boosters follow a similar format: they show you what apps are currently running (and thus using RAM), then offer to free up some RAM by having you tap a button to kill those processes. After closing, it shows you that those apps aren’t “wasting resources” in the background anymore.

The problem is that after you kill those apps, they have to start up again from scratch next time you open them. Plus, some processes will start up again right after they’re killed, as they need to run in the background for various reasons.

Thus, killing apps constantly is a waste of resources compared to just letting the app stay in RAM so you can quickly swap back to it when needed. As discussed, Android is smart enough to juggle what’s in RAM based on your usage, and the RAM you “free up” by killing tasks doesn’t contribute to performance.

Continuing the above example, say you’ve opened four apps recently, so Android has them all in RAM. If you run a RAM booster at this point, it will likely kill all those apps to “free up memory.”

This is pointless—if you’re going to use those apps in a few minutes, freeing up the memory they used doesn’t do you any good. Android keeps recent apps in RAM to make your experience as seamless as possible, and task killers interfere with that.

Additionally, some task killers can run automatically in the background and kill apps on a schedule. This uses up some of your system resources and offers nothing in return.

Swiping Apps Away Isn’t Necessary, Either

Even if you don’t use a task killer, there’s a built-in feature of Android that acts similarly to a RAM booster if you go overkill with it. The Recents screen, which you access by swiping up from the bottom and holding (or hitting the square button on the navigation bar) lets you easily switch between recent apps.

If you swipe up on an app, you’ll clear it from the Recents menu and also close its process. Many people do this obsessively, swiping away all apps in the switcher every time they’re done using their phone.

This is not necessary! Closing apps that you were just using has the same effect as ending them with a task killer. You’re making your phone work harder because it has to start them anew next time you open them. This would be like if you completely closed your desktop browser and launched it again every time you wanted to navigate to a new page.

Think of the Recent menu as a handy shortcut switcher, not a list of open apps that you need to close. Only swipe an app away if you don’t want cluttering up the switcher or really don’t want it to run in the background.

How to Really Make Android Feel Faster

Chances are that you installed an Android task killer because your phone feels slow. Thankfully, there are several steps you can take to improve your Android device’s performance that don’t involve killing tasks.

We’ve looked at tons of ways to actually make your Android phone faster; check those out for actionable advice.

Avoid Android Task Killers at All Costs

We’ve seen that Android RAM boosters and task killers are useless at best and can hamper device performance at worst. In the end, it’s best to just let the Android OS do its job by managing memory on its own. Having free RAM doesn’t improve performance; you’ll get the best results when apps stored in memory open quickly.

Now that you aren’t killing apps all the time, check out the best ways to multitask on Android.

Read the full article: Why RAM Boosters and Task Killers Are Bad for Android


Read Full Article

Can You Actually Hire Computer Hackers Online?


In films and TV shows, there are always hackers for hire. From action movies to crime procedurals, a skilled computer hacker can help disable security systems, locate confidential information, or piece together a crime in seconds.

It’s easy to dismiss this as fiction and creative license, though. That said, it does make you wonder whether there really are genuine hackers for hire.

Is Hacking Legal?

glasses in focus on a laptop

In most people’s minds, hacking is an illegal activity. Reported hacking incidents often involve criminal behavior for harmful or unlawful outcomes. Despite this common impression, hacking covers a wide range of technical skills, only some of which are illegal. Before hiring a hacker online, it’s important to note the difference between white hat, grey hat, and black hat hacking.

While many of the techniques are the same, the intent and expected outcomes differ between the three groups. When most people discuss hacking, they are usually referring to black hat hackers. This group is traditionally classed as cybercriminals as their primary objective is often personal or financial gain. However, they could also be working on behalf of government agencies involved in nation-state cyber attacks.

White hat hackers use similar methods, but their goals are different. In place of personal gain, white hat hackers help organizations and individuals to improve their security by performing penetration testing. These tests are pre-agreed, and the objective is to highlight security weaknesses.

Given the positive outcome, this is also referred to as ethical hacking. As you have permission to compromise systems, ethical hacking is legal as well. Grey hat hackers sit somewhere between the other two categories, often compromising systems without permission but to strengthen security rather than profit from the lack of it.

Can You Hire Black Hat Hackers?

a person editing code on a laptop

Given how lucrative illegal hacking can be, there are black hat hackers for hire available online. However, you won’t find them advertising their services on a professional website or listing their achievements on LinkedIn. The most common way to find a black hat hacker is through online forums, chat rooms, and the dark web.

Most also won’t accept traditional payment methods like credit or debit cards. Instead, you’d be expected to pay with something less traceable. In many cases, this will be a pseudonymous cryptocurrency like Bitcoin. Even if they did offer card payments, it’s probably unwise to trust a black hat hacker with your personal information.

Though, just because you can find black hat hackers online, doesn’t mean that you should purchase their services. Even if you aren’t performing the hack itself, you have initiated an illegal activity, making you party to the crime. Unless you are already experienced with criminal practices, you will often be easier for law enforcement to identify as well.

Popular sites like hackers24hrs, hirehacking, and thoriumhacks have prominent search result positions. However, reviews and comments elsewhere do not paint them as reputable services. Generally, if you want to hire a hacker to break into someone’s account, install malware, or obtain sensitive information, this will not fall under white hat or ethical hacking.

Additionally, there is no guarantee or legal agreement once you hire a black hat hacker. There’s always the possibility that they will take your money but fail to deliver the service. It’s also likely that your target will be a person or organization you know or have been affected by. In which case, the hacker could find information with which to blackmail you.

Overall, we strongly recommend that you don’t hire black hat hackers or involve yourself in illegal activity.

Can You Hire White Hat Hackers?

two keys in a door lock

As a white hat hacker’s objective is to identify weaknesses so you can improve your security, their services are widely and legally available online. However, very few organizations add a white hacker label to their business or website, so it’s essential to thoroughly research a company before entrusting them with this work. That said, you can use these websites to teach yourself how to hack legally as well.

Additionally, if you search the internet for legit hackers for hire or similar, you’ll be presented with a broad set of results. It won’t be immediately obvious which services fall under which category, and the legal status of what’s on offer. This makes it even more critical that you research the company before purchasing their services.

Although white hat hacking is a descriptive grouping for many kinds of ethical hacking, you’ll need to determine the most suitable type of hacking service you require. Penetration testing—attempting to break through security measures—comes in many forms. For example, one of the most popular segments is network pen-testing.

One of the most critical areas is your connection to the wider internet, so it makes sense that this is the most common ethical hacking service available. Likewise, physical pen-testing, where hackers attempt to break into real-world spaces, is an offline equivalent. However, you may also want to test the effectiveness of your software and hardware too.

It’s often said people are an overlooked security risk. Social engineering is a form of white hat or ethical hacking explicitly focused on your systems’ human element. The social engineer will attempt to trick, confuse, or gain other people’s trust to bypass security measures and extract information.

Beware of Scams and Set Boundaries

Someone paying for goods using the NFC on a credit card.

As hacking is a generic term for a wide range of services—some legal, some not—it can be a challenge to find reputable hackers. To exploit those who are aware of the work’s illegality, some hackers and criminals operate scams, knowing that victims are unlikely to report the crime to the police or authorities.

As such, you must research your chosen hacker or hacking firm before investing in their services. Most white hat hacking groups are legitimate businesses offering a legal and vital service. However, as you would with any other product or service, look for reviews, comments, and complaints before handing over your money.

Although white hats aren’t hacking for malicious reasons, you should also set boundaries for their work. If you only want them to test specific systems or software, or break into them, but without accessing personal or confidential information, be sure to agree on this before the work starts.

Finding Hackers for Hire

Although the terms can be confusing, it is possible to find genuine hackers for hire online. However, it’s important to note the difference between illegal black hat hacking and ethical white hat hacking. Before purchasing their services, be sure that you feel comfortable with the service and the agreement’s terms.

If you’d prefer a career in the industry rather than hiring hackers, legal options are open to you. For instance, it is possible to earn a living as an ethical hacker.

Read the full article: Can You Actually Hire Computer Hackers Online?


Read Full Article

Can You Really See Better At Night With a $500 Night Vision Driving Display?


lanmodo vast driving assist
Our verdict of the Lanmodo Vast 1080p Night Vision Driving Display:
Easy to install and with several positioning options, you might find the Lanmodo Vast NVS is perhaps too large and cumbersome for all but the biggest vehicles. On the other hand, the all-important night vision is good, and it’s cheaper than a showroom optional extra.
810

Driving in the dark can be dangerous. Wherever you live, there’s always a risk of driving around in pitch black conditions.

A solution that car manufacturers have been adding to vehicles in the past view years is night vision. This is a pricey optional extra that delivers a black and white representation of the road ahead for added visibility. You could pay over $1000 to have one added and installed on a new car. But there is a cheaper option: you install your own night vision system (NVS).

That’s where the Lanmodo Vast 1080p automotive night vision system comes in.

What You Can Expect from the Lanmodo Vast

With a night vision system installed in your car, you can expect to see an improved, brighter, and visible view of the road ahead.

The Lanmodo Vast does this with the Hyper-wide dynamic range camera that feeds real-time, live footage of the road ahead to the 8.2-inch IPS display. Live images are displayed in 1080p full-color resolution, a marked step up from showroom night vision systems.

Lanmodo Vast 1080p Night Vision System

It ships with the mounting options you need to keep a 1.2-kilogram display measuring 245 x 185 x 125-millimeter device safely in place.

Designed to sit relatively unobtrusively on your car dashboard, the Lanmodo Vast can be switched off when not required.

Unboxing the Lanmodo Vast 1080p Night Vision System

In the box with the Lanmodo Vast you’ll find a cigarette lighter socket adapter power cable, an OBD-II power cable, and an input cable for handling the power supply and an optional rear camera (not reviewed here).

Two mounts are included. One is a suction cup mount, with a screw attachment to secure the Lanmodo Vast. The other is a more straightforward non-slip mat for use with the included stand.

Two screws are also in the box, along with a screwdriver and a pair of adhesive pads.

What’s Inside the Lanmodo Vast?

So, how does a dashboard-mounted camera display a night vision video feed to the driver?

It starts with the 28mm 7G full glass high definition optical lens, capable of viewing up to 300 meters ahead. Behind this is a Sony MCCD photosensitive chip, and processor with full-color Hyper-wide dynamic range imaging.

With LVDS digital HD decoding, the IPS display relays real-time, live footage at 1920x1080p. The minimum illumination of the display is 0.0001 Lux.

The operating voltage is 12V 560mA-2000mA, and the device operates in most interior conditions, from -20 to 80 degrees Celsius (-4 to -176 degrees Fahrenheit).

Installing the Lanmodo Vast

As referenced above, you have two main ways to mount the Lanmodo Vast:

  1. Dashboard, mounted with non-slip mat
  2. Windscreen, mounted with suction cup

Both work well, although I had reservations about using the suction cup due to the 1.2kg weight of the device. As such for testing, the Lanmodo Vast was mounted on the dashboard with the stand and non-slip mat.

Due to the peculiarities of the vehicle (a 2011 Citroen C4 Grand Picasso), there isn’t actually a flat portion of the dashboard to rely on. This is where the adhesive pads come in useful.

Lanmodo Vast 1080p Night Vision System

With two power solutions for this night vision system, it doesn’t take long to get things up and running. I opted for the OBD-II power connector. This is a smart option if you have a dashcam already using the cigarette lighter port. However, if your vehicle’s OBD-II port supplies 24V rather than 12V, you’ll need to use the cigarette lighter for power.

Installing any type of in-car camera system comes with time spent tidying cables out of sight or securing them in place. While you should rely on routing cables behind upholstery wherever possible, this isn’t always possible. The Lamodo Vast ships with a cable of sufficient length to handle most eventualities, although you’ll need to take steps to secure it on the dashboard or windscreen. No cable hooks or clips are included in the box.

Once powered up, the Lanmodo Vast is ready to use. Whether you’re using the cigarette lighter port or OBD-II power, inserting keys in the ignition and powering on the battery (as opposed to starting the engine) will prompt the device to switch on.

The initial set up of the Lanmodo Vast revealed a strange quirk. The display revealed a weird, skewed camera angle. A few moments of investigation revealed that this was down to the position of the camera, which can be adjusted for the best view.

Controlling the Lanmodo Vast

Across the top edge of the Lanmodo Vast are seven buttons. Central and most prominent is the power button. This is the one you’ll need to use the most.

Lanmodo Vast 1080p

Other buttons either side are for signal switch (when the rear camera is connected), a menu to control screen brightness and language, and screen rotation. Two menu scroll buttons are on the right hand of the power button, along with a switch to toggle between color and black and white vision.

There are arguably too many buttons. Further, they’re largely indistinguishable, the symbols are tricky to discern from up to a meter away. While buttons naturally shouldn’t be used while driving, they can barely be accessed when stationary without detaching the NVS from its mount.

A weakness in an otherwise solid set up.

Driving With the Lanmodo Vast Night Vision System

To test the Lanmodo Vast, I took a short drive to find roads with and without streetlights. Overall, there was little difference. The HWDR image processing provides a uniform representation whatever the conditions. While some colors may seem different—for example, the shade of green in the trees, or the depth of grey of clouds—the detail and legibility of the night vision system’s display is surprising.

Passengers in the back might feel compelled to look at the display rather than the road. This can be disconcerting and possibly trigger motion sickness, so isn’t recommended. It’s smart to switch the Lanmodo Vast’s display off when using the device during daylight hours.

Adding an additional dimension of safety to your night driving, the Lanmodo Vast clearly has its place as an NVS. I was admittedly dubious at first, but the results are good enough to reconsider.

It’s worth noting that the Lanmodo Vast does not have a storage option. There is no removable storage, you can’t add storage, and there’s no video out port. In short, it’s not a dashcam, and there’s no way to save the footage.

If you Need Night Vision, Consider the Lanmodo Vast

Ultimately, the Lanmodo Vast 1080P Automotive Night Vision System offers a cheaper alternative to car manufacturer-provided night vision. Better still, it’s easier to install, so no waiting around for showroom specialists to spend three hours on a 60-minute job. You’ll even save at least $500 into the bargain.

The big question, of course, is “do you need an NVS?” Well, it depends how much nighttime driving you do away from the urban centers, and your confidence behind the wheel. With the motor accident rate so much higher at night, an NVS can certainly improve road safety after dark.

Enter the Competition!

Lanmodo Vast Night Vision Driving System Giveaway

Read the full article: Can You Really See Better At Night With a $500 Night Vision Driving Display?


Read Full Article

Why Online Dating Sucks for Men AND Women


online-dating-bad

Online dating has been around for decades in various forms. First there were bulletin boards, then came the dating websites, and now there are dating apps. In fact, online dating has long shed its original stigma and is now the most popular way that couples meet.

Despite that, online dating sucks. And it doesn’t matter who you are or what you’re looking for. It puts most of the focus on appearance, it can be hard to strike up fresh conversations, and it’s all too easy to be ghosted. For both men and women, online dating is hard.

Here are all the reasons why online dating sucks…

1. There’s Too Much Choice

It would be a good day if you had a flirtatious chat with one person at a party. Thanks to dating websites and apps, you can check out and chat to a seemingly endless stream of people. So how do you know when you’ve found “the one”?

Casting your net so wide might seem like a good idea, but there’s a risk of becoming hyper focused on trying to find the perfect match; swiping “no” on everyone because you think there’s going to be someone better out there.

Not only are there loads of potential matches available at your fingertips, but there are too many free dating sites promising to help you find love. This mean you might find yourself constantly switching between apps to maintain all of the chats. Which can get overwhelming.

2. It’s All About Appearance

man on phone
Image Credit: Austin Distel/Unsplash

Of course, appearance is a major factor when it comes to dating, both offline and online. It’s only natural to be drawn to people that you find physically attractive, and there’s nothing wrong with that.

However, online dating puts a huge focus on looks. Apps like Tinder are especially problematic for this, where you can swipe someone left or right immediately based upon one photo. If your photos are bad, you’re out of luck. There’s no chance to dazzle someone with your personality because they’ve already dismissed you.

Happily, there are some dating services that are looking to overcome the vanity. For example, Hinge matches people based on personality and preferences and lets you create a more interesting and rounded profile to draw people in.

3. Starting Conversations Is Hard

You might have a few chat-up lines up your sleeve. Perhaps some jokes. Maybe an interesting fact or two. Well, good luck coming up with something unique that the other person hasn’t heard countless times.

After a while, it becomes difficult to stand out from others and open the conversation in an interesting way. Also, if you’re a man then you’re often expected to be the one doing just that—unless you’re on an app like Bumble, where women go first.

On top of that, if you do get into a conversation, you’ll probably end up discussing the same topics that you’ve talked about with everyone else. It soon gets repetitive.

4. Ghosting is Commonplace

If you’re not familiar with the term ghosting, it means to suddenly cut off contact with someone without explanation. In the world of online dating, ghosting is far too commonplace.

Ghosting can happen at any stage—whether it’s while you’re chatting or after you’ve gone on a date—and it’s because the other person is too scared to admit they don’t want to continue. Obviously, the later it happens, the more hurtful it is.

If you were dating a friend or colleague, it would be very hard to suddenly disappear and never see or contact them again. Sadly, with online dating, it’s very easy to do precisely that, leaving the ghosted party hurt and confused.

5. People Lie to Make Themselves Sound Better

It’s very easy to lie on the internet, and that includes online dating. The extent of the lies can vary drastically, though.

For example, in extreme circumstances you might get catfished—when someone uses a fake identity. Or it might be more subtle, like using the wrong age or pretending to share your interests.

Everyone wants to be their best self, so they’ll use the most flattering photos that might not truly represent them in person. This isn’t an outright lie, but just something you need to be cautious about.

6. It’s a Big Time Investment

dating apps

It might seem like a quick thing to launch a dating app, swipe through some profiles, and then carry on with your life. But you’ll soon find yourself drawn in, juggling multiple matches and the conversations that come with them.

You might thrive and enjoy this, but it’s a big time sink, especially since only a proportion of those matches and conversations have a chance of leading to anything more. You’ll probably find yourself spending more time online dating than you do attending actual dates.

7. There Are Different Expectations

Some people use online dating to enjoy quick hook-ups. Others are looking for a relationship. Both are perfectly valid options, but it can be tricky to determine someone’s intentions unless they are upfront about them, and you might end up disappointed if you want one thing and they want another.

That said, this is also true when it comes to offline dating, but the issue is more prevalent when it comes to the rapid and throwaway nature of online dating.

8. You Might Receive Unwanted Attention

Sadly, trolls and harassers can be found everywhere on the internet, and it’s no different for online dating. While most good services let you block people, few have filters.

The Pew Research Center found that women under the age of 35 are more prone to being on the receiving end of harassing behavior:

60% of female users ages 18 to 34 say someone on a dating site or app continued to contact them after they said they were not interested, while a similar share (57%) report being sent a sexually explicit message or image they didn’t ask for.

While this problem primarily impacts women, it does happen to men too. Everyone should be prepared to see something they might not want to while online dating.

9. Online Chemistry Can Be Meaningless

Are you an online Casanova? Do you know your way around a keyboard, and can say just the right thing at the right time? That’s a skill in itself, but be wary that online chemistry can be meaningless and doesn’t necessarily translate to real sparks.

When online dating, you have all the time in the world to think up the perfect response and say things that you might be nervous to say in person.

If you do meet up, you might find yourself tongue-tied or not feeling the physical attraction that you did online.

10. You Could Get Scammed

tinder scam

Something you should be very alert about is being scammed while online dating. Everyone is susceptible to an online scam, though older people are more vulnerable and therefore bigger targets.

Whether the scammer immediately opens a chat by asking you to visit a dodgy website, or plays the long game to extract money from you, online dating is not safe from scammers.

To stay safe, read our advice on how to spot and avoid an online dating scammer.

How to Find New Friends and Potential Partners

Those are all the reasons why online dating sucks for both men and women. That said, if you do want to start dating online, hopefully you’ll have a positive experience.

If you have had nothing but bad experiences dating online, you should uninstall Tinder and try one of these alternatives for finding new friends.

Read the full article: Why Online Dating Sucks for Men AND Women


Read Full Article

How to Find and Change the IP Address on Your Mac


find-change-ip-mac


Finding the IP address of your Mac isn’t difficult, and you can change it from the same panel. You might want to double-check your Mac’s IP address for informational purposes, or perhaps you’ve run into the “Another device on the network is using your computer’s IP address” error.

Here’s how to review and change the IP address on your Mac when needed.

How to Find Your IP Address on a Mac

The easiest way to check your Mac’s IP address is through the Network panel of System Preferences. Click the Apple menu in the top-left of your screen and choose System Preferences to open it, or use Cmd + Space to search for it with Spotlight. There, click Network to open the relevant options.

On the left side, you’ll see the various network connections your computer uses. A green dot appears next to your current connection—click Wi-Fi if you’re using that (or Ethernet if you’re wired in) to view the relevant information.

Mac Network Options

For a Wi-Fi connection, under Status, you’ll see a line that says Wi-Fi is connected to [Network] and has the IP address [Address]. Wired connections will show your IP Address in a list of information on the same page.

This is where you’ll see your Mac’s current IP address. On most home networks, this will be in the 192.168.X.Y or 10.0.X.Y format.

Viewing Your Mac’s IP Address Through the Terminal

The above method is quick and reliable, but you can also find your Mac’s IP address using a Terminal command if you want a geekier way. Open Terminal by searching for it on Spotlight (Cmd +Space).

Next, enter the following command to show your IP address on a Wi-Fi connection:

ipconfig getifaddr en0

For an Ethernet connection, use this command instead:

ipconfig getifaddr en1

Mac IP Terminal

Either way works; if you can memorize this handy Terminal command, it’s a bit faster than clicking through the System Preferences menus.

How to Change the IP Address of Your Mac

Viewing your IP address provides you with information, but what if you need to get a new IP address on your Mac? This is usually necessary when you see the “another device is using your IP address” message, though you can change your address whenever you like.

To change your Mac’s IP address, head back to the same Network panel mentioned above. On the page for your current connection type, click the Advanced button at the bottom.

This will open a new window with many options. Select the TCP/IP tab at the top and you’ll see options related to your current IP address. Next to Configure IPv4, you’ll probably see Using DHCP.

Mac TCP IP Settings

DHCP, or Dynamic Host Configuration Protocol, is a feature that allows routers to automatically hand out and manage IP addresses. Thus, when you connect a new device to your network, you don’t have to manually choose a free IP address for it; the router does that automatically.

To get a new IP address from your router, click the Renew DHCP Lease button. This will result in your computer releasing its IP address and getting a new one, which should resolve the duplicate IP error.

How to Set a Manual IP Address on macOS

If resetting and renewing your IP address doesn’t work, you may need to assign an IP address manually. This lets you specify an address that will not change for your device, which can help resolve issues with duplicate IP addresses.

You can set a static IP address right on your Mac. To do this, on the TCP/IP tab mentioned above, change the Configure IPv4 box to Using DHCP with manual address.

You can choose Manually if you want, but the former option only has you specify the IP address, so you don’t need to confirm any other information.

Mac Manual IP

Finding an Unused IP Address

When setting a manual IP, you’ll need to choose an IP address that isn’t already in use on your network. Otherwise, you could still end up with the duplicate IP problem.

While you can log into your router to check IP addresses in use, that’s not necessary; you can instead do this using the ping command in Terminal. Use Cmd + Space to open Spotlight and search for Terminal.

To check if an IP address is already in use, you need to know the IP format for your network. You’ll find this on the TCP/IP tab visited earlier—the address of the Router is the format your network uses. This is often 192.168.0.X, but you should double-check what yours is.

Now, in Terminal, enter the following command to ping an address to see if it exists on your network, replacing the address with one you want to use:

ping 192.168.0.102

Mac Ping IP Address

If this results in something like 64 bytes from 192.168.0.102 followed by other information, that means a device with that address exists on your network and is responding to your ping. Don’t use that address for your Mac; try the ping command again with a new address until you find one that’s available.

When you get a response that starts with Request timeout, you’ve found a free address. You can enter that IP address in the IPv4 Address field of the Network settings page. Once you do this and hit OK > Apply on that page, your Mac’s IP address will stay the same unless you change it.

Reserving a Manual IP in Your Router

For best results, when you set a manual IP address on your Mac, you should also reserve that address in your router. That way, your router knows that your Mac expects to use the same address all the time.

To open your router’s management panel, open your browser and type the IP address that appears next to Router in the TCP/IP panel you used earlier. You’ll then need to log in with your router admin and password, which is different than the password you connect to Wi-Fi with.

If you’ve never logged into your router before, check Routerpasswords.com to find the default for yours, then be sure to change it for security. And if you’re not familiar with working in a router, you may want to read our general router introduction first.

IP address reservation options will differ slightly depending on your router. On a modern TP-Link router, for instance, you’ll find the options under Advanced > Network > DHCP server. In the Address Reservation section, click Add, then you’ll need to specify the MAC Address of your Mac.

The example below has a Scan button that lets you pick a device from those currently connected. If your router doesn’t have this, you’ll need to find your Mac’s MAC address manually.

TP-Link Address Reservation

Next, enter the manual IP you chose in the Reserved IP box, followed by a friendly name in the Description field so you remember what device this is. Make sure Enable this entry is checked, then hit Save to finalize the reservation.

See our guide to static IP addresses for more help.

IP Address Conflict Troubleshooting

Hopefully, either resetting and renewing your IP address or assigning a manual IP fixed the “another device is using your IP address” error on your Mac. If not, we have a guide to fixing IP address conflicts that you should consult next.

No two devices on your network can have the same address, since your router won’t know which is which. This is why you see this message, which shouldn’t usually happen unless your router is acting up or you’ve manually assigned a duplicate address.

However, it can also happen if a computer is in hibernate mode for a long time; when it wakes up, it might have an old copy of an IP address that your router has since assigned to something else. In that case, releasing and renewing the address as described above should fix it.

Public vs. Private IP Addresses

Finally, we should quickly mention the two different kinds of IP address to prevent any confusion.

Everything we discussed above pertains to private IP addresses, which are used only on your network. Most home networks use the same range of addresses (starting with 192.168.0.X), but those values are only used by your local network. A manual or static private IP makes it easier to locate devices on your network by their IP addresses.

In contrast, your public IP is what the rest of the internet sees when any device on your network goes online. While you can pay your ISP for a static IP address, for most people, a dynamic public IP is fine. Your public IP doesn’t affect the “another device is using your IP address” error that you might see on your Mac.

To find your public IP, simply Google “what is my IP address” or visit a site like MyIP.com.

Find and Change Your Mac’s IP Address Easily

We’ve looked at how to view your Mac’s IP address, as well as changing it if needed. In most cases, you can rely on DHCP and don’t need to manage IP addresses manually. While setting addresses by hand does have its uses, the increased overhead isn’t worth it unless you’re doing so to troubleshoot a problem.

For more on home networking, why not learn about port forwarding next?

Read the full article: How to Find and Change the IP Address on Your Mac


Read Full Article