13 November 2019

MacBook Pro 16” first impressions: Return of the Mack


In poker, complacency is a quiet killer. It can steal your forward momentum bit by bit, using the warm glow of a winning hand or two to cover the bets you’re not making until it’s too late and you’re out of leverage. 

Over the past few years, Apple’s MacBook game had begun to suffer from a similar malaise. Most of the company’s product lines were booming, including newer entries like the Apple Watch, AirPods and iPad Pro. But as problems with the models started to mount — unreliable keyboards, low RAM ceilings and anemic graphics offerings — the once insurmountable advantage that the MacBook had compared to the rest of the notebook industry started to show signs of dwindling. 

The new 16” MacBook Pro Apple is announcing today is an attempt to rectify most, if not all, of the major complaints of its most loyal, and vocal, users. It’s a machine that offers a massive amount of upsides for what appears to be a handful of easily justifiable tradeoffs. It’s got better graphics, a bigger display for nearly no extra overall size, a bigger battery with longer life claims and yeah, a completely new keyboard.

I’ve only had a day to use the machine so far, but I did all of my research and writing for this first look piece on the machine, carting it around New York City, through the airport and onto a plane where I’m publishing this now. This isn’t a review, but I can take you through some of the new stuff and give you thoughts based on that chunk of time. 

This is a re-think of the larger MacBook Pro in many large ways. This is a brand new model that will completely replace the 15” MacBook Pro in Apple’s lineup, not an additional model. 

Importantly, the team working on this new MacBook started with no design constraints on weight, noise, size or battery. This is not a thinner machine, it is not a smaller machine, it is not a quieter machine. It is, however, better than the current MacBook Pro in all of the ways that actually count.

Let’s run down some of the most important new things. 

Performance and thermals

The 16” MacBook Pro comes configured with either a 2.6GHz 6-core i7 or a 2.3GHz 8-core i9 from Intel. These are the same processors as the 15” MacBook Pro came with. No advancements here is largely a function of Intel’s chip readiness. 

The i7 model of the 16” MacBook Po will run $2,399 for the base model — the same as the old 15” — and it comes with a 512GB SSD drive and 16GB of RAM. 

Both models can be ordered today and will be in stores at the end of the week.

The standard graphics configuration in the i7 is an AMD Radeon Pro 5300M with 4GB of memory and an integrated Intel UHD graphics 630 chip. The system continues to use the dynamic handoff system that trades power for battery life on the fly.  
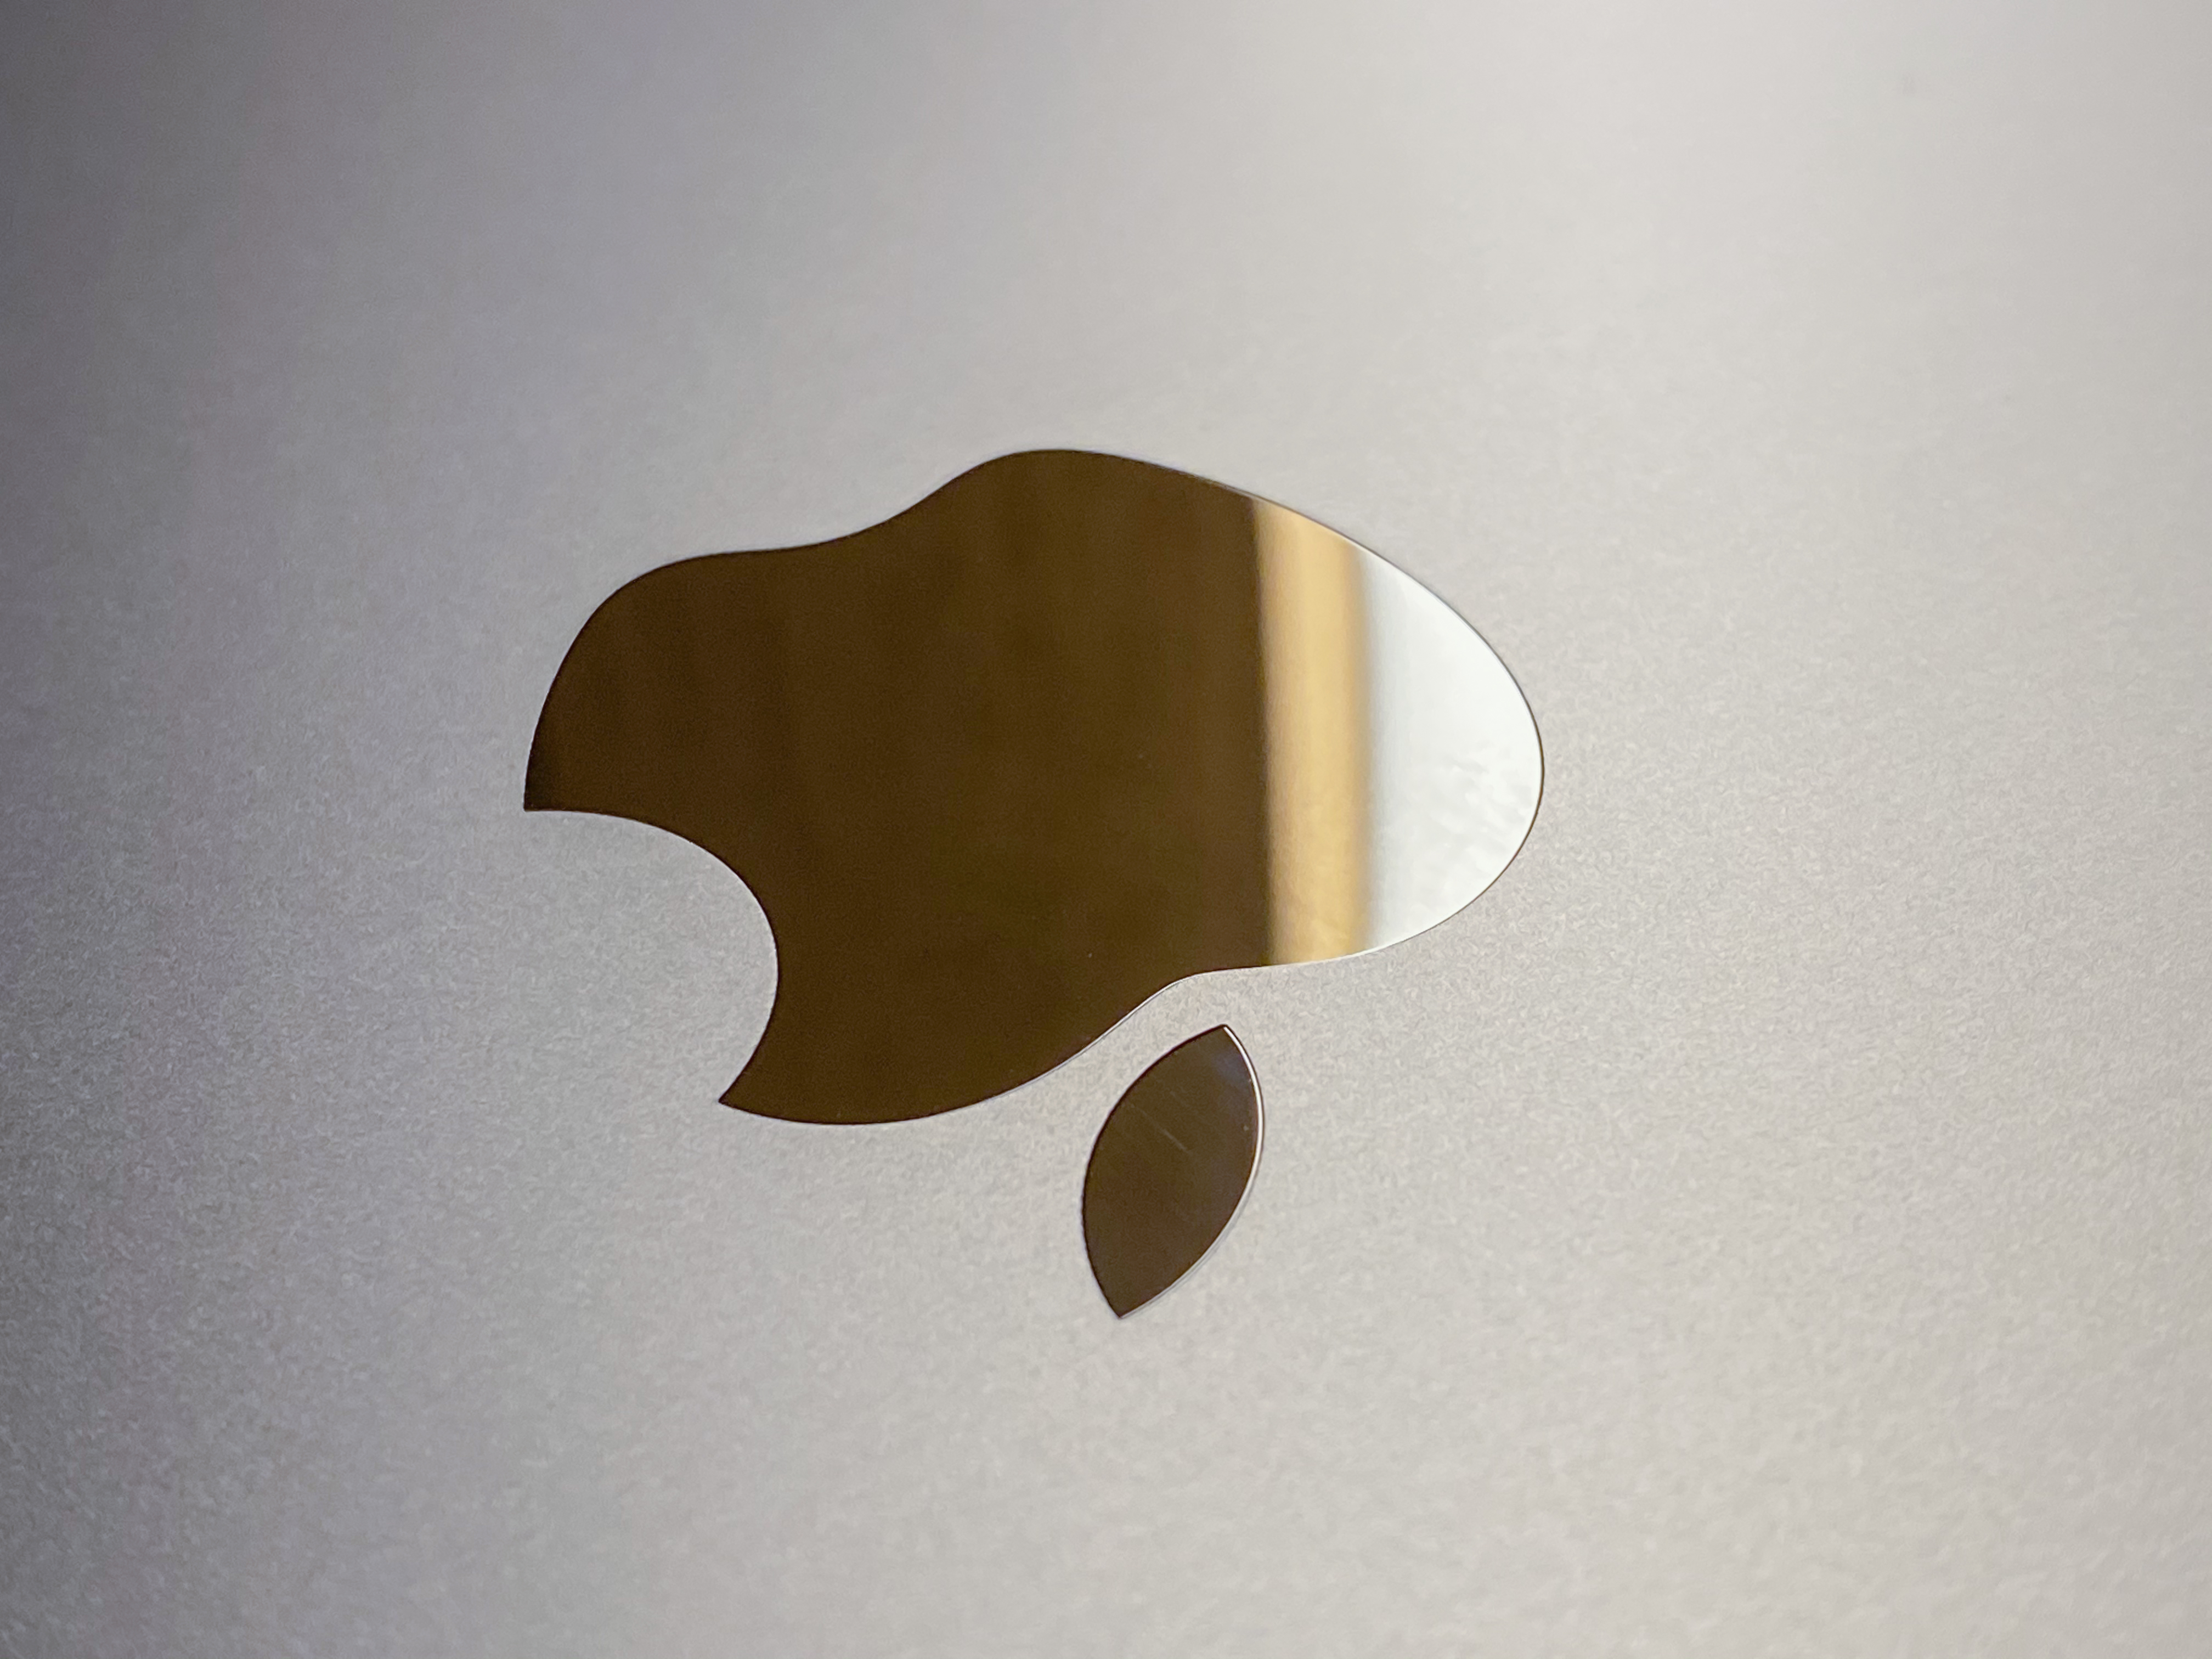

The i9 model will run $2,699 and comes with a 1TB drive. That’s a nice bump in storage for both models, into the range of very comfortable for most people. It rolls with an AMD Radeon Pro 5500M with 4GB of memory.

You can configure both models with an AMD Radeon Pro 5500M with 8GB of GDDR6 memory. Both models can also now get up to 8TB of SSD storage – which Apple says is the most on a notebook ever – and 64GB of 2666 DDR4 RAM but I’d expect those upgrades to be pricey.

The new power supply delivers an additional 12w of power and there is a new thermal system to compensate for that. The heat pipe that carries air in and out has been redesigned, there are more fan blades on 35% larger fans that move 28% more air compared to the 15” model. 

The fans in the MacBook Pro, when active, put out the same decibel level of sound, but push way more air than before. So, not a reduction in sound, but not an increase either — and the trade is better cooling. Another area where the design process for this MacBook focused on performance gains rather than the obvious sticker copy. 
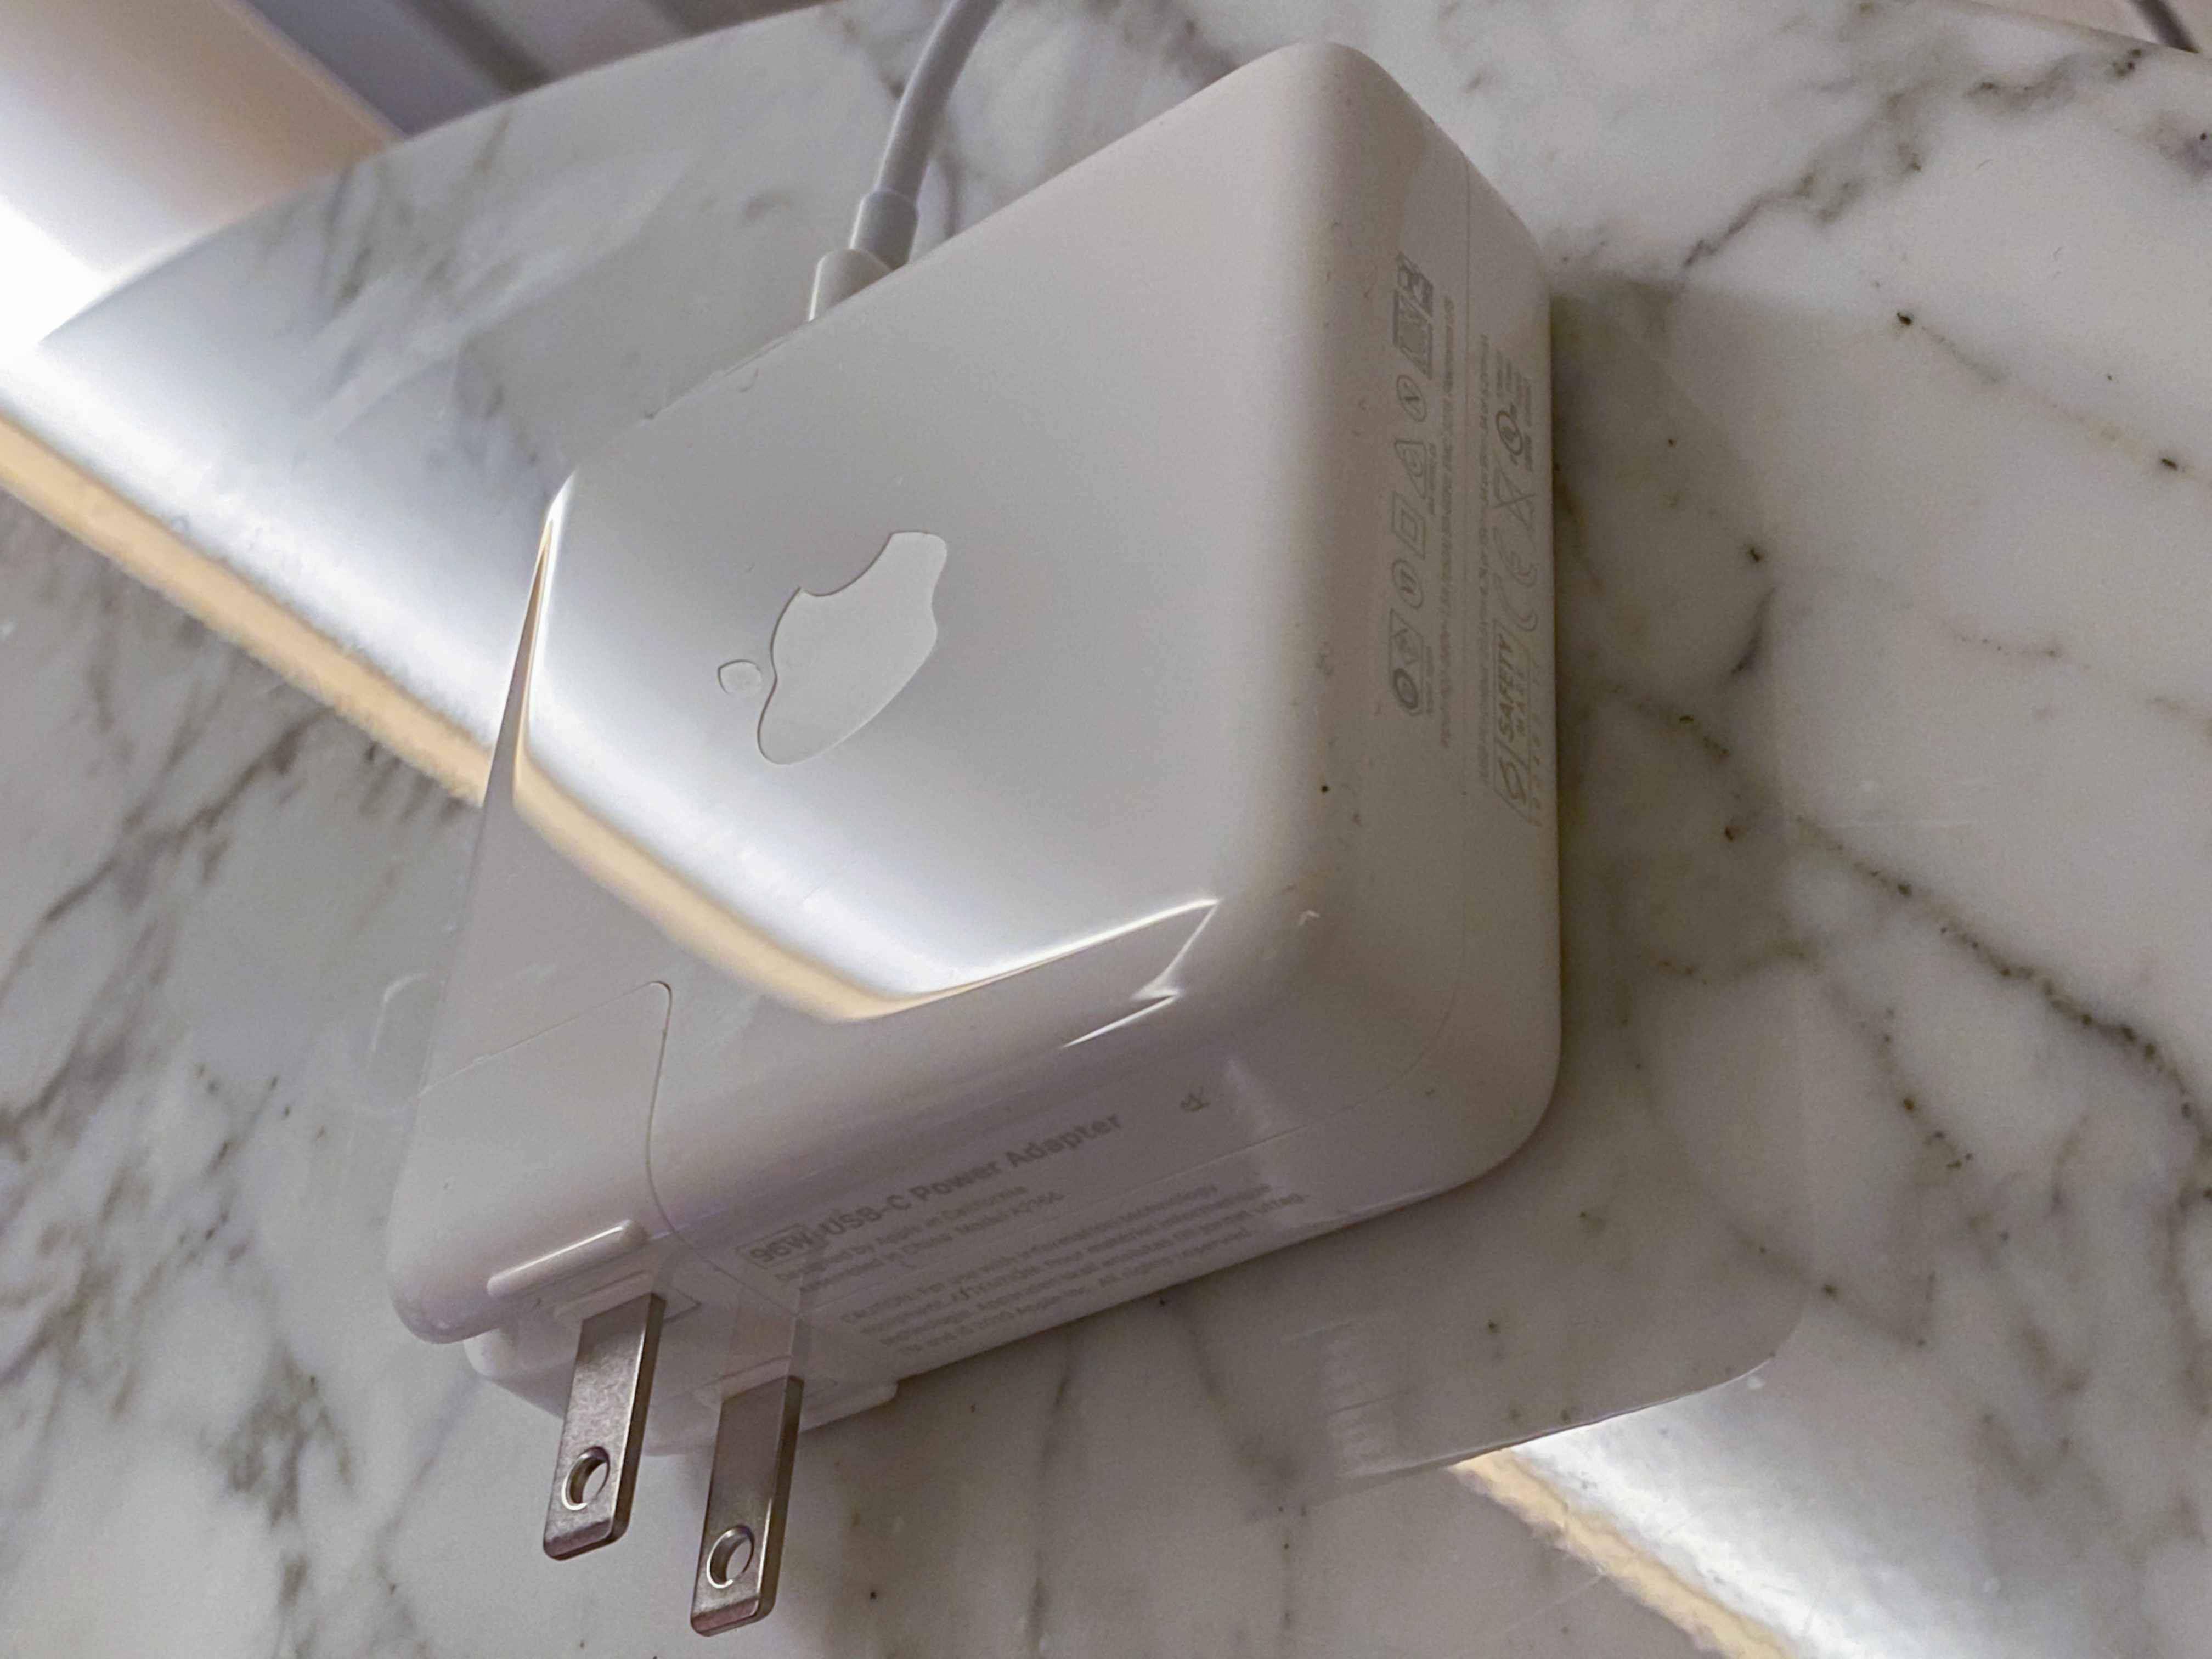
There’s also a new power brick which is the same physical size as the 15” MacBook Pro’s adapter, but which now supplies 96w up from 87w. The brick is still as chunky as ever and feels a tad heavier, but it’s nice to get some additional power out of it. 

Though I haven’t been able to put the MacBook Pro through any video editing or rendering tests I was able to see live demos of it handling several 8K streams concurrently. With the beefiest internal config Apple says it can usually handle as many as 4, perhaps 5 un-rendered Pro Res streams.

A bigger display, a thicker body

The new MacBook Pro has a larger 16” diagonal Retina display that has a 3072×1920 resolution at 226 ppi. The monitor features the same 500 nit maximum brightness, P3 color gamut and True Tone tech as the current 15”. The bezels of the screen are narrower, which makes it feel even larger when you’re sitting in front of it. This also contributes to the fact that the overall size of the new MacBook Pro is just 2% larger in width and height, with a .7mm increase in thickness. 
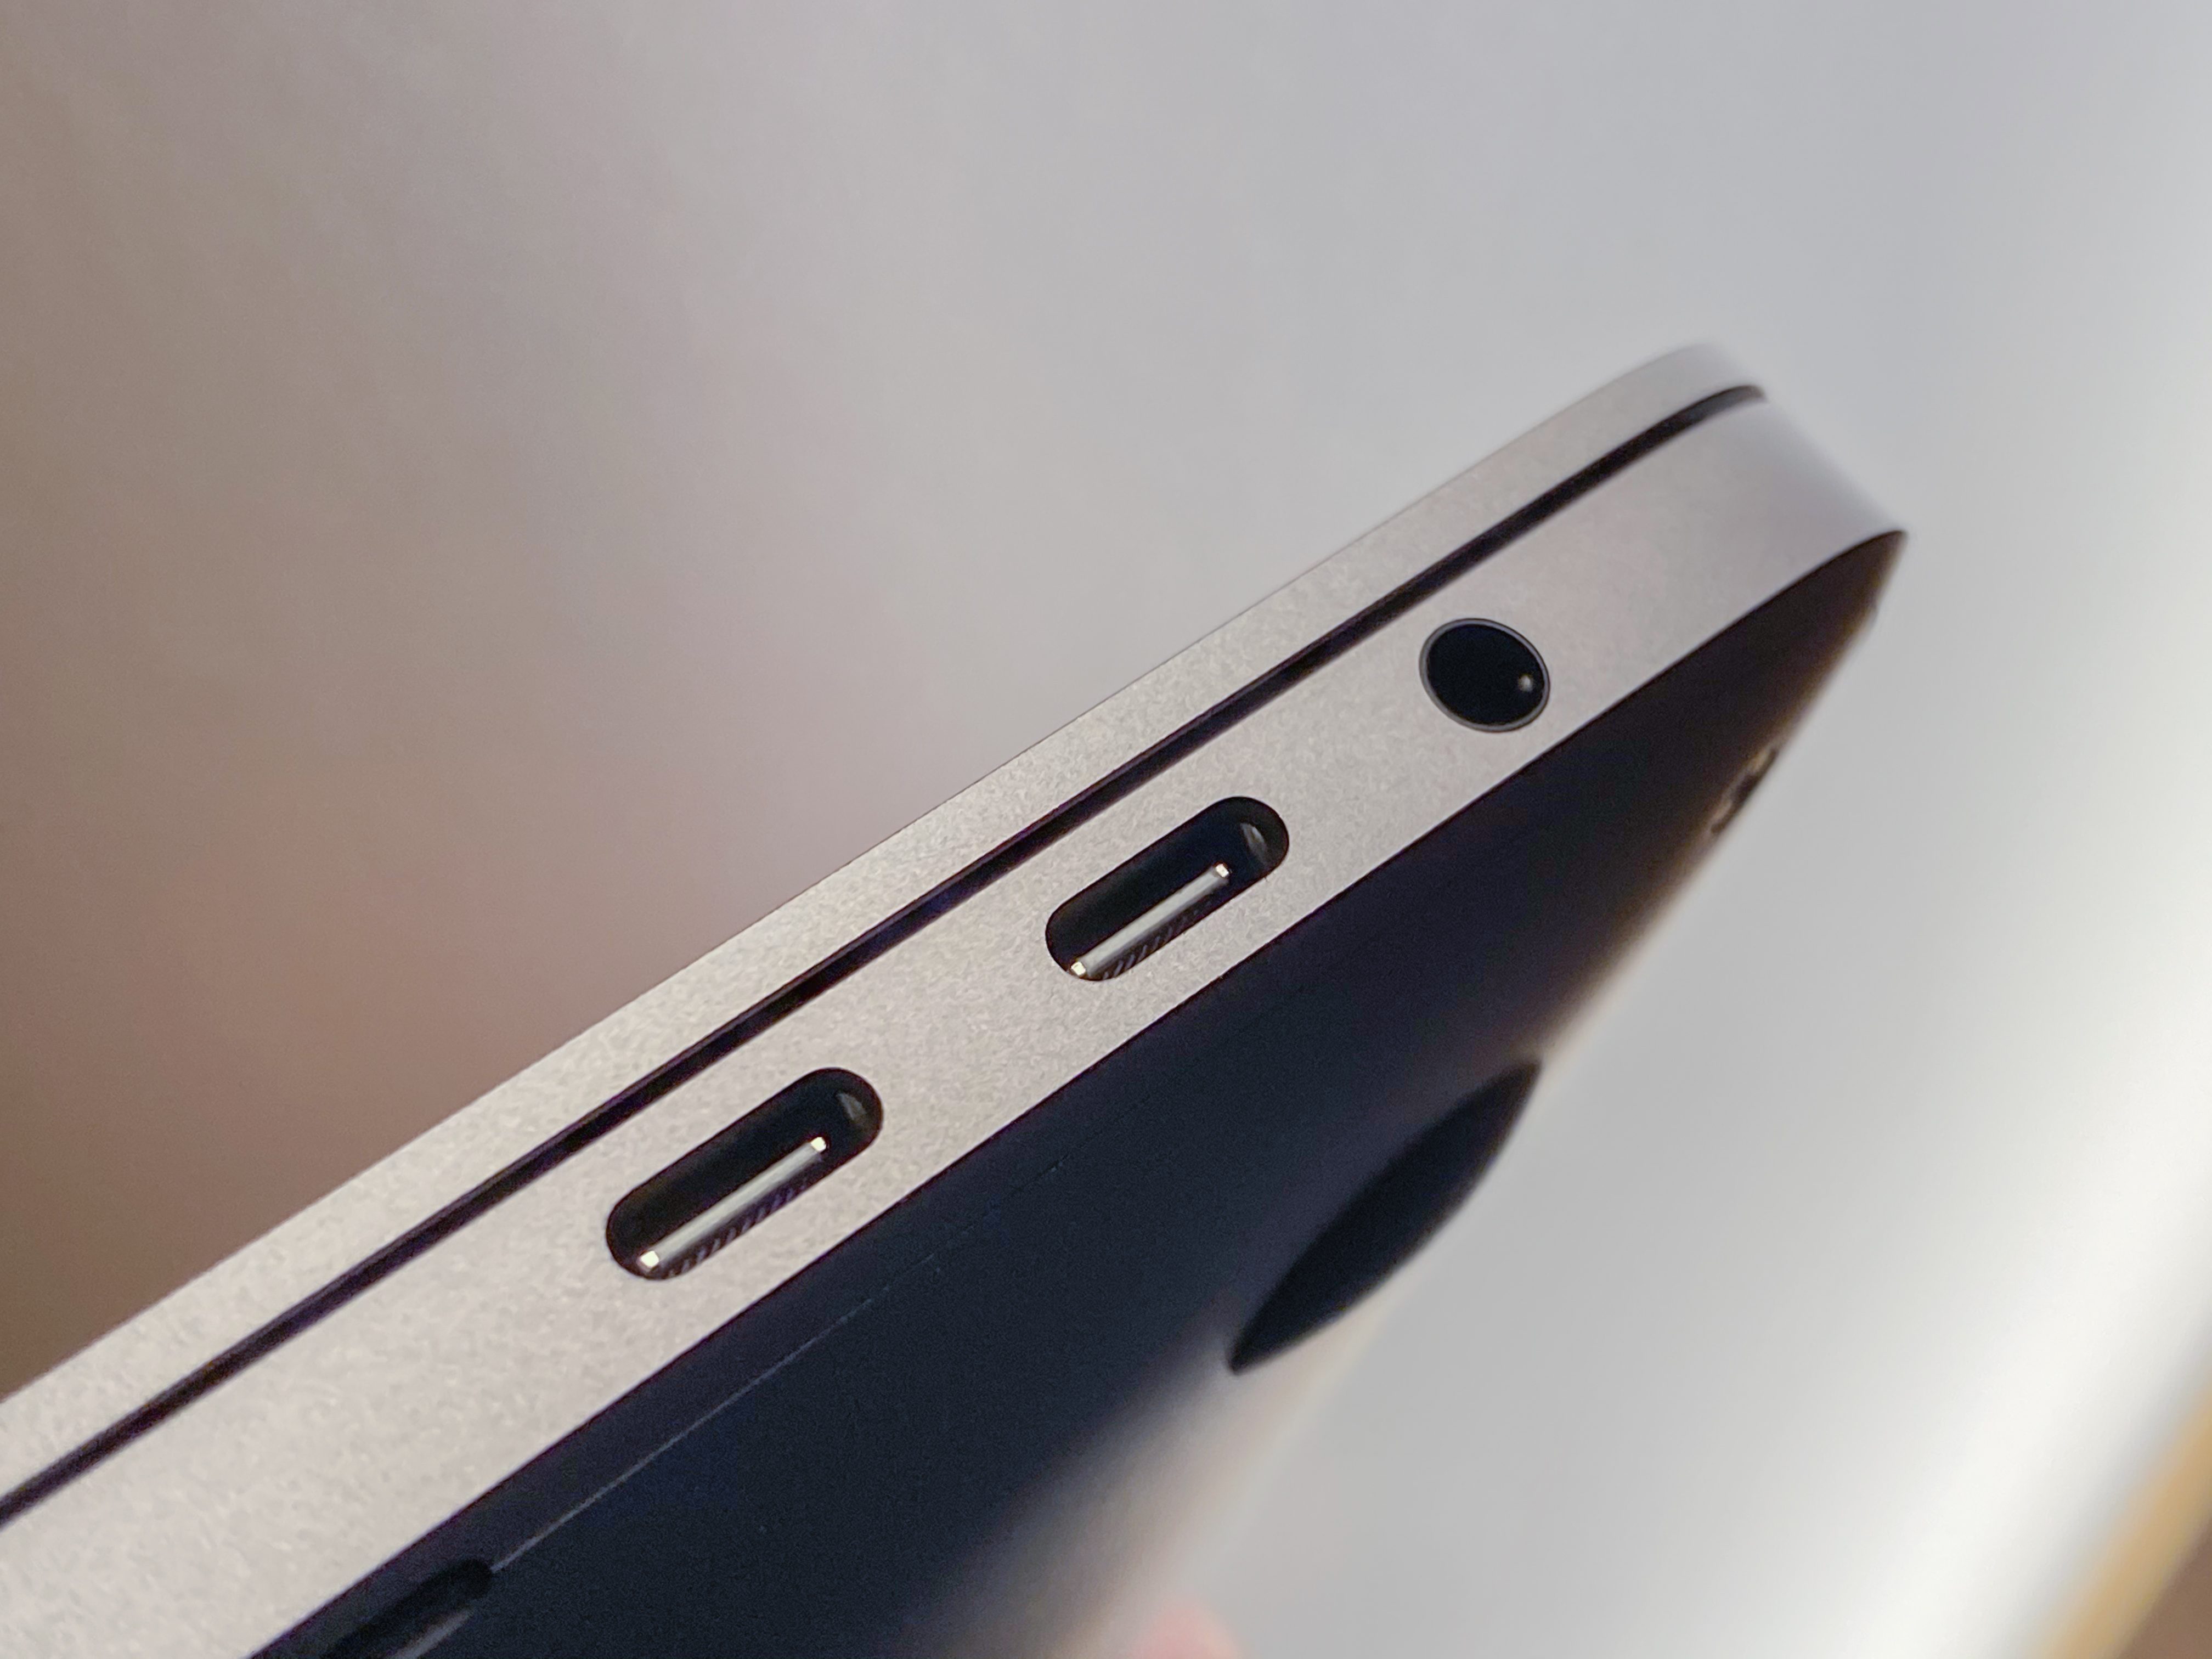
The overall increase in screen size far outstrips the increase in overall body size because of those thinner bezels. And this model is still around the same thickness as the 2015 15” MacBook Pro, an extremely popular model among the kinds of people who are the target market for this machine. It also weighs 4.3 lbs, heavier than the 4.02 lb current 15” model.

The display looks great, extremely crisp due to the increase in pixels and even more in your face because of the very thin bezels. This thing feels like it’s all screen in a way that matches the iPad Pro.
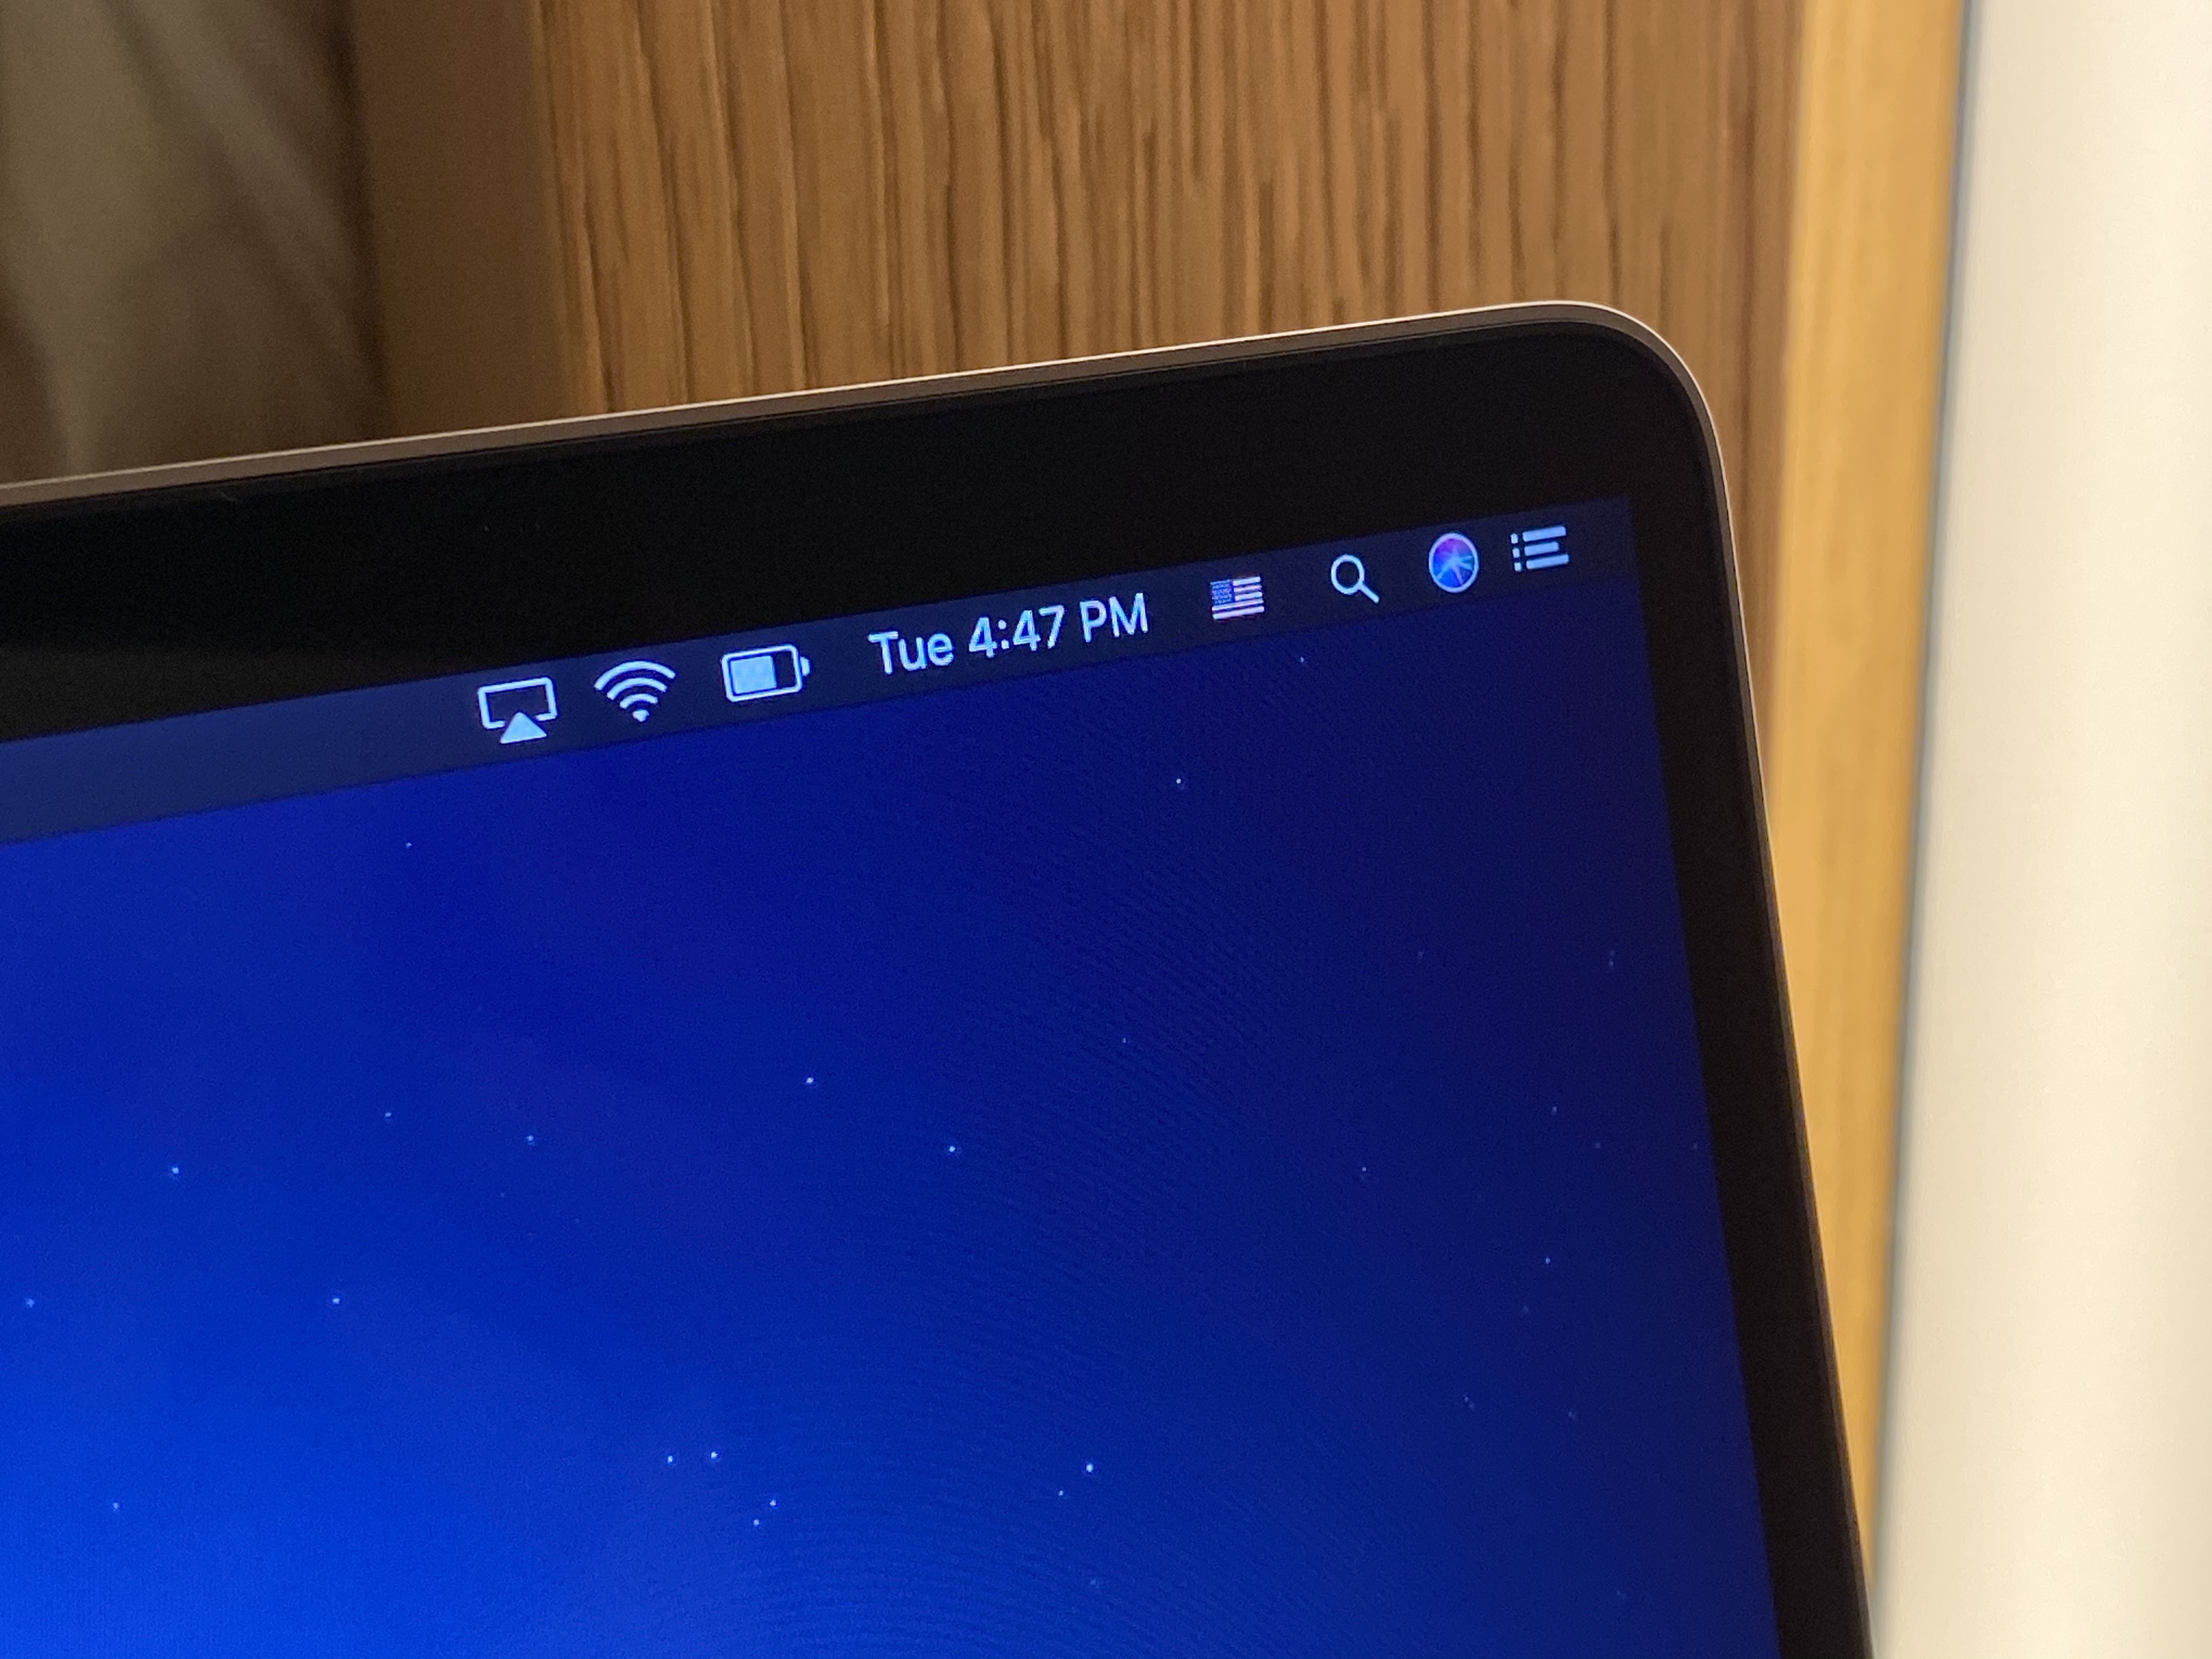
This thick boi also features a bigger battery, a full 100Whr, the most allowable under current FAA limits. Apple says this contributes an extra hour of normal operations in its testing regimen in comparison to the current 15” MacBook Pro. I have not been able to effectively test these claims in the time I’ve had with it so far. 

But it is encouraging that Apple has proven willing to make the iPhone 11 Pro and the new MacBook a bit thicker in order to deliver better performance and battery life. Most of these devices are pretty much thin enough. Performance, please.

Speakers and microphone

One other area where the 16” MacBook Pro has made a huge improvement is the speaker and microphone arrays. I’m not sure I ever honestly expected to give a crap about sound coming out of a laptop. Good enough until I put in a pair of headphones accurately describes my expectations for laptop sound over the years. Imagine my surprise when I first heard the sound coming out of this new MacBook and it was, no crap, incredibly good. 

The new array consists of six speakers arranged so that the subwoofers are positioned in pairs, antipodal to one another (back to back). This has the effect of cancelling out a lot of the vibration that normally contributes to that rattle-prone vibrato that has characterized small laptop speakers pretty much forever.

The speaker setup they have here has crisper highs and deeper bass than you’ve likely ever heard from a portable machine. Movies are really lovely to watch with the built-ins, a sentence I have never once felt comfortable writing about a laptop. 

Apple also vents the speakers through their own chambers, rather than letting sound float out through the keyboard holes. This keeps the sound nice and crisp, with a soundstage that’s wide enough to give the impression of a center channel for voice. One byproduct of this though is that blocking one or another speaker with your hand is definitely more noticeable than before.

The quality of sound here is really very, very good. The HomePod team’s work on sound fields apparently keeps paying dividends. 

That’s not the only audio bit that’s better now though, Apple has also put in a 3-mic array for sound recording that it claims has a high enough signal-to-noise ratio that it can rival standalone microphones. I did some testing here comparing it to the iPhone’s mic and it’s absolutely night and day. There is remarkably little hiss present here and artists that use the MacBook as a sketch pad for vocals and other recording are going to get a really nice little surprise here.

I haven’t been able to test it against external mics myself but I was able to listen to rigs that involved a Blue Yeti and other laptop microphones and the MacBook’s new mic array was clearly better than any of the machines and held its own against the Yeti. 

The directional nature of many podcast mics is going to keep them well in advance of the internal mic on the MacBook for the most part, but for truly mobile recording setups the MacBook mic just went from completely not an option to a very viable fallback in one swoop. It really has to be listened to in order to get it. 

I doubt anyone is going to buy a MacBook Pro for the internal mic, but having a ‘pro level’ device finally come with a pro level mic on board is super choice. 

I think that’s most of it, though I feel like I’m forgetting something…

Oh right, the Keyboard

Ah yes. I don’t really need to belabor the point on the MacBook Pro keyboards just not being up to snuff for some time. Whether you weren’t a fan of the short throw on the new butterfly keyboards or you found yourself one of the many people (yours truly included) who ran up against jammed or unresponsive keys on that design — you know that there has been a problem.

The keyboard situation has been written about extensively by Casey Johnston and Joanna Stern and complained about by every writer on Twitter over the past several years. Apple has offered a succession of updates to that keyboard to attempt to make it more reliable and has extended warranty replacements to appease customers. 

But the only real solution was to ditch the design completely and start over. And that’s what this is: a completely new keyboard.

Apple is calling it the Magic Keyboard in homage to the iMac’s Magic Keyboard (but not identically designed). The new keyboard is a scissor mechanism, not butterfly. It has 1mm of key travel (more, a lot more) and an Apple-designed rubber dome under the key that delivers resistance and springback that facilitates a satisfying key action. The new keycaps lock into the keycap at the top of travel to make them more stable when at rest, correcting the MacBook Air-era wobble. 

And yes, the keycaps can be removed individually to gain access to the mechanism underneath. And yes, there is an inverted-T arrangement for the arrow keys. And yes, there is a dedicated escape key.

Apple did extensive physiological research when building out this new keyboard. One test was measuring the effect of a keypress on a human finger. Specifically, they measured the effect of a key on the pacinian corpuscles at the tips of your fingers. These are onion-esque structures in your skin that house nerve endings and they are most sensitive to mechanical and vibratory pressure. 

Apple then created this specialized plastic dome that sends a specific vibration to this receptor making your finger send a signal to your brain that says ‘hey you pressed that key.’ This led to a design that gives off the correct vibration wavelength to return a satisfying ‘stroke completed’ message to the brain.
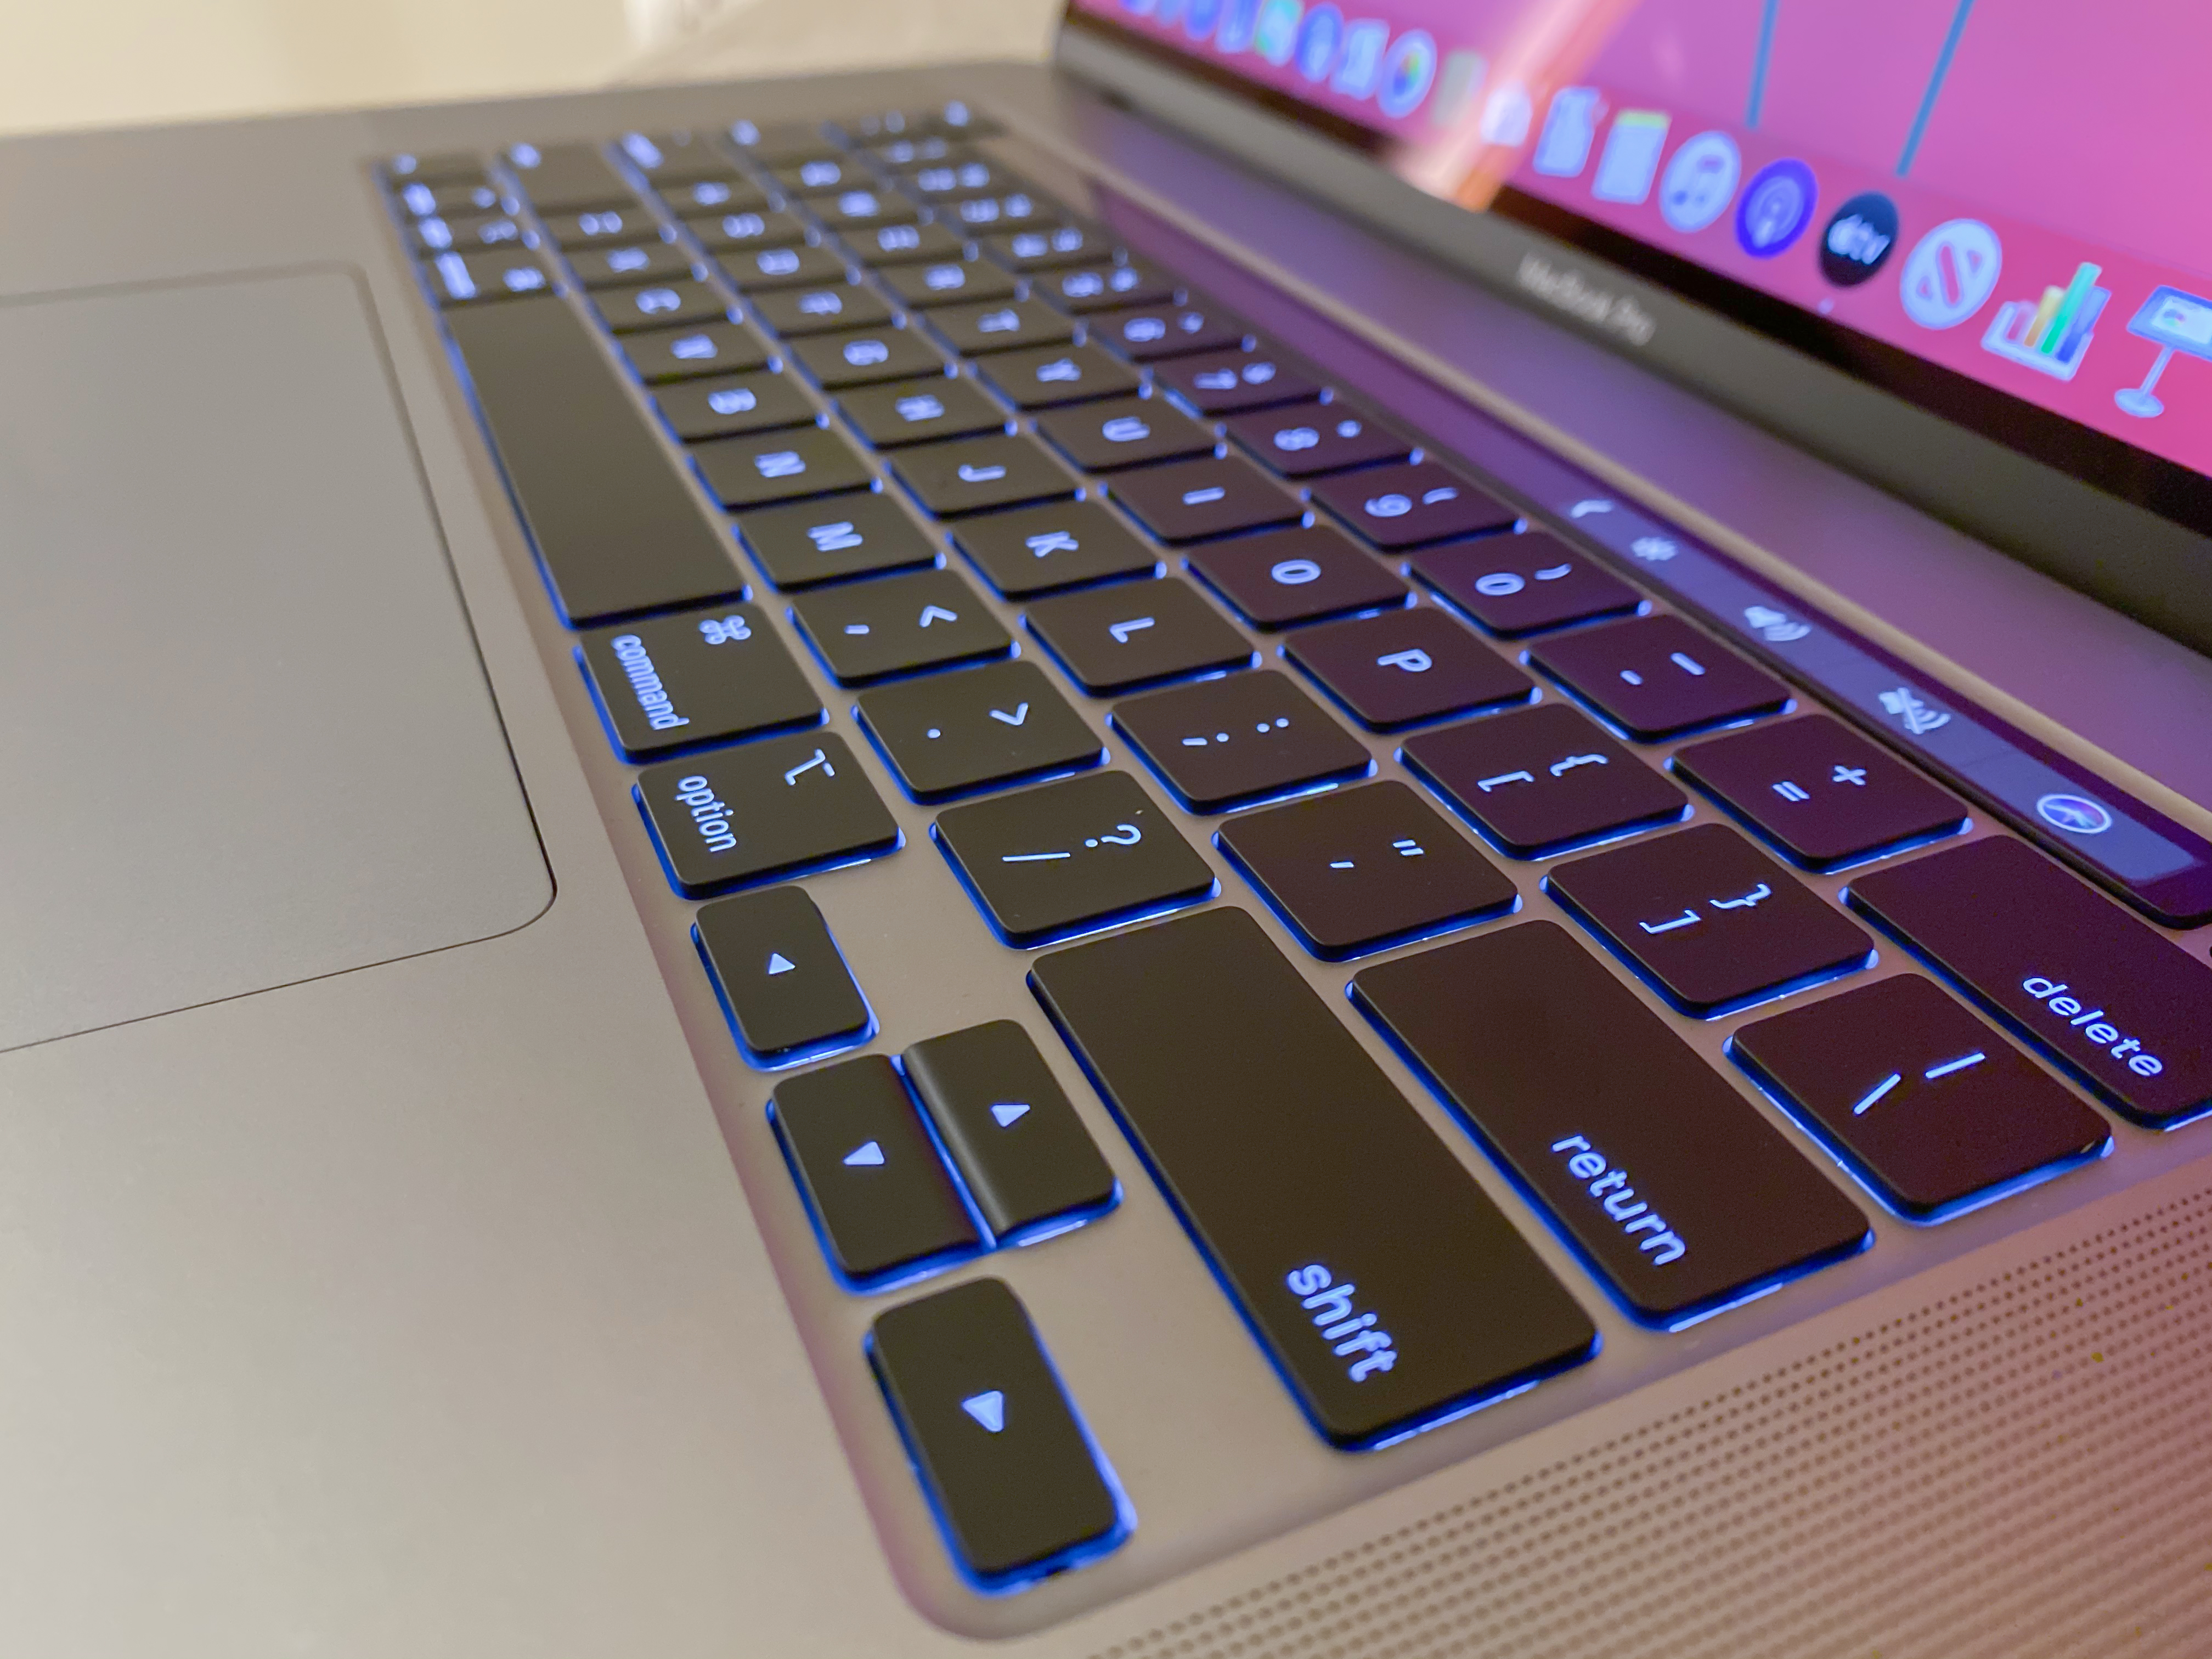
There is also more space between the keys, allowing for more definitive strokes. This is because the keycaps themselves are slightly smaller. The spacing does take some adjustment, but by this point in the article I am already getting pretty proficient and am having more grief from the autocorrect feature of Catalina than anything else. 

Notably, this keyboard is not in the warranty extension program that Apple is applying to its older keyboard designs. There is a standard 1 year warranty on this model, a statement by the company that they believe in the durability of this new design? Perhaps. It has to get out there and get bashed on by more violent keyboard jockeys than I for a while before we can tell whether it’s truly more resilient. 

But does this all come together to make a more usable keyboard? In short, yes. The best way to describe it in my opinion is a blend between the easy cushion of the old MacBook Air and the low profile stability of the Magic Keyboard for iMac. It’s truly one of the best feeling keyboards they’ve made in years and perhaps ever in the modern era. I reserve the right to be nostalgic about deep throw mechanical keyboards in this regard, but this is the next best thing. 

Pro, or Pro

In my brief and admittedly limited testing so far, the 16” MacBook Pro ends up looking like it really delivers on the Pro premise of this kind of machine in ways that have been lacking for a while in Apple’s laptop lineup. The increased storage caps, bigger screen, bigger battery and redesigned keyboard should make this an insta-buy for anyone upgrading from a 2015 MacBook Pro and a very tempting upgrade for even people on newer models that have just never been happy with the typing experience. 

Many of Apple’s devices with the label Pro lately have fallen into the bucket of ‘the best’ rather than ‘for professionals’. This isn’t strictly a new phenomenon for Apple, but more consumer centric devices like the AirPods Pro and the iPhone Pro get the label now than ever before. 

But the 16” MacBook Pro is going to alleviate a lot of the pressure Apple has been under to provide an unabashedly Pro product for Pro Pros. It’s a real return to form for the real Mack Daddy of the laptop category. As long as this new keyboard design proves resilient and repairable I think this is going to kick off a solid new era for Apple portables.


Read Full Article

These sneakers vibrate


Sometimes it seems like you can hear a song all the way in your toes. With these new sneakers, you actually can.

Meet the new EP 01 sneakers out of DropLabs. Yes, you read that right. We’re talking about sneakers.

Invented by a man named Ross Seiler, and led by former Beats by Dre CEO Susan Paley, DropLabs aims to take audio to a whole new level by syncing music, movies and other audio to shoes that vibrate the soles of your feet.

It started when Seiler, who works in the music industry, was standing in a side room at a recording studio while a band was recording. He could feel every beat and low note in the song in his feet while standing over this particular patch of floor, and wanted to experience all music like that, as though he could feel the energy of the stage itself.

Eventually, Paley signed on as CEO of DropLabs and the EP 01 was born.

The EP 01 is a slightly chunky sneaker that’s equipped with Bluetooth, a speaker-grade transducer, and a power source to sync with almost any audio. As a movie or music or video game plays, the sneaker picks up the audio and sends it as a perfectly synced vibration right to the soles of your feet. For big, thunderous steps of a T-Rex in Jurassic World, the vibrations are heavy and full. For the pitter patter of the townspeoples’ footsteps in Red Dead Redemption II, the vibrations are light and muted.

What’s more, the vibrations are slightly directional. Noise that’s coming from the right vibrates on the right, and vice versa, which can be particularly impactful while playing video games.

Indeed, Paley sees gaming as a huge opportunity to enter the market. Audio, and particularly good directional audio, is incredibly important for gamers who compete at a high level. The growth of esports has allowed a number of brands to emerge as the “X for gamers”, not least of which being energy drinks.

DropLabs has an opportunity to market to gamers, offering a more immersive experience across their games and potentially even a competitive advantage.

Paley explained to TechCrunch that the brain actually functions at a higher level when three or more of the senses are engaged. Feeling something, alongside hearing and seeing it, flips a switch when it comes to processing information.

For this reason, Paley sees a huge potential to target gamers as an early demographic, particularly big name streamers and gaming influencers.

In fact, DropLabs has given the shoes to various researchers and universities around the country to learn more about how these shoes might be used. After meeting with them, Paley believes that there are applications that extend well beyond entertainment and into the health space.

I got a chance to try on the shoes and play around with them for a little while last week, and while I’d like to reserve my complete thoughts for a proper review, it goes without saying that wearing the shoes surely leaves an impression.

[gallery ids="1911372,1911373,1911374,1911375,1911376"]

But the EP 01 have challenges ahead.

For one, the shoes cost upwards of $549. It’s a mighty high price point for a gadget that most folks will need to try before they feel committed to buying.

“Whenever you create a new category and a new product, you have the challenge of asking consumers to change their behavior,” said Paley. “And this, in particular, is so visceral. How do you communicate viscerally what is an emotional experience? You can talk about it, but it’s very different to put someone in the shoe.”

The EP 01 must also find their place in a category that’s defined by fashion and personal style. Our shoes say something about us, and for now, the EP 01 comes in one style and one color (black). It’s as universal a shoe as it can be, considering all the electronics packed in there, but it doesn’t leave customers many options to change up their own look.

Of course, DropLabs is deep in the learning phase, soaking up as much information about its first-gen sneaker as possible as it looks to iterate for v2.

The EP 01 is available for pre-order now, and DropLabs has plans to launch pop-up shops and other IRL experiences for folks interested in the shoes.


Read Full Article

Google to offer checking accounts in partnership with banks starting next year


Google is the latest big tech company to make a move into banking and personal financial services: The company is gearing up to offer checking accounts to consumers, as first reported by the Wall Street Journal, starting as early as next year. Google is calling the projected “Cache,” and it’ll partner with banks and credit unions to offer the checking accounts, with the banks handling all financial and compliance activities related to the accounts.

Google’s Caesar Sengupta spoke to the WSJ about the new initiative, and Sengupta made clear that Google will be seeking to put its financial institution partners much more front-and-center for its customers than other tech companies have perhaps done with their financial products. Apple works with Goldman Sachs on its Apple Card credit product, for instance, but the credit card is definitely pretend primarily as an Apple product.

So why even bother getting into this game if it’s leaving a lot of the actual banking to traditional financial institutions? Well, Google obviously stands to gain a lot of valuable information and insight on customer behavior with access to their checking account, which for many is a good picture of overall day-to-day financial life. Google says it’s also intending to offer product advantages for both consumers and banks, including things like loyalty programs, on top of the basic financial services. It’s also still considering whether or not it’ll charge service fees, per Segupta – not doing so would definitely be and advantage over most existing checking accounts available.

Google already offers Google Pay, and its Google Wallet product has hosted some features beyond simple payments tracking, including the ability to send money between individuals. Meanwhile, rivals including Apple have also introducing payment products, and Apple of course recently expanded into the credit market with Apple Card. Facebook also introduced its own digital payment product earlier this week, and earlier this year announced its intent to build its own digital currency called ‘Libra’ along with partners.

The initial financial partners that Google is working with include Citigroup and Stanford Federal Credit Union, and their motivation per the WSJ piece appears to be seeking out and attracting younger and more digital-savvy customers who are increasingly looking to handle more of their lives through online tools. Per Sengupta’s comments, they’ll also benefit from Google’s ability to work with large sets of data and turn those into value-add products, but the Google exec also said the tech company doesn’t sue Google Pay data for advertising, nor does it share that data with advertisers. Still, convincing people to give Google access to this potentially sensitive area of their lives might be an uphill battle, especially given the current political and social climate around big tech.


Read Full Article

Britbox, Douglas Adams, Morse Code Apps, How to Clean an LCD Screen


Christian Cawley and Ben Stegner bring you a host of tips, tricks, and news that matters to everyone in the tech podcast for technophobes. This week, we learn about Britbox’s UK launch, YouTube’s homepage redesign, and Netflix’s “skip politics” options.

There’s also an early look at Google’s Stadia gaming platform, some recommended videos, and our regular round up of tips and tricks.

Really Useful Podcast Season 4 Episode 11 Shownotes

In this week’s Really Useful Podcast we talk about:

Your rating or brief review on iTunes can help us reach more listeners. Or, you can share the Really Useful Podcast via email and social media. We’re available wherever you can listen to podcasts, including:

See you next week!

Read the full article: Britbox, Douglas Adams, Morse Code Apps, How to Clean an LCD Screen


Read Full Article
Twitter Now Lets You Follow “Topics”


Twitter is launching a new feature called Topics. As the name suggests, these are topics you can follow in order to see tweets about those subject matters. Which could help you see tweets that interest you and people who share similar interests to you.

The Problem With Following People on Twitter

Twitter isn’t the easiest social media platform to understand. A lot of people sign up for an account, and then don’t know what to do next. The obvious answer is to follow people and hope they follow you back, but individuals talk about a myriad of different subjects.

You may follow a footballer only to find they tweet about politics. Or follow a comedian to find they only tweet about their upcoming tour. The answer may be to forget about people and follow topics instead. Which is why Twitter is launching Topics.

Twitter Introduces Topics for You to Follow

Twitter explains how Topics works on the Twitter Blog. In a nutshell, Topics will be specific interests you follow in the same way you follow people. With a single tap, you’ll be able to see “the most relevant and interesting Tweets about what you care about”.

Once you follow a topic, you’ll see tweets about that subject matter from a range of different people. These could be experts, fans, or just people who tweet about that subject matter a lot. The point is you don’t have to be following them as people.

Twitter will suggest Topics based on your activity on the platform. So, if you follow lots of accounts related to Major League Soccer, it’s likely to suggest that as a topic. These suggestions will “appear in your timeline and in search” over the coming months.

Topics is rolling out on Twitter right now, with 300 Topics available at launch. These cover interests across sports, entertainment, and gaming, but Twitter is likely to add more as time goes on. If you see a Topic that interests you, just tap to follow it.

How to Use Twitter

Since its inception people have been complaining that it’s hard to get started using Twitter. The new Topics should help both old and new users find interesting people and tweets to follow. And if all else fails, check out our guide to using Twitter.

Read the full article: Twitter Now Lets You Follow “Topics”


Read Full Article

10 Cool Gift Ideas for Mac Users This Holiday Season


mac-cool-gifts

Looking to snag the perfect gift for a Mac fan this holiday season? We’re here to help! Here are some great accessories that will make perfect gifts for any Mac owner.

1. Jabra Elite 85h

Jabra Elite 85h Jabra Elite 85h Buy Now On Amazon $290.00

A good pair of headphones is a must-have for any Mac owner. They can help drown out distractions and help you focus on the task at hand. A combination of active noise cancellation technology and a comfortable fit make the Jabra Elite 85h hard to beat. The wireless over-ear headphones can provide up to 36 hours of music playback on a single charge.

In a pinch, you can add five hours of playback with just a 15-minute charge with the included USB-C cable. There’s no need to worry about an on/off button on the headphones; the headphones will automatically turn on when worn and will and pause playback when removed. Jabra offers four different color options, too.

You can find out more about the headphones in our Jabra Elite 85h review.

2. Logitech MX Master 3

Logitech MX Master 3 Logitech MX Master 3 Buy Now On Amazon $99.99

Logitech has long been one of the best choices for anyone needing a mouse for the Mac. And the Logitech MX Master 3 offers great features to help you be even more productive during the workday. One of the best features of this model is an all-metal scroll wheel that’s quiet and can scroll through almost 1,000 lines in a second. There is also a thumbwheel to help you scroll horizontally.

You can customize the mouse for almost any app and take advantage of stock customization options for apps like Safari, Microsoft Word, Adobe Photoshop, and Google Chrome. A built-in battery can go for up to 70 days of use on a single charge. The mouse connects to a Mac via Bluetooth or a small USB receiver. You can select from a graphite or gray version of the mouse.

3. CalDigit TS3 Plus Thunderbolt 3 Dock

CalDigit TS3 Plus Thunderbolt 3 Dock CalDigit TS3 Plus Thunderbolt 3 Dock Buy Now On Amazon

Thunderbolt 3 technology has quickly become the standard on Mac laptops and desktop models. To make the most of the technology, a Thunderbolt 3 dock can solve the dongle dilemma and add other connections, including USB-A, HDMI, and others. One of the best on the market is CalDigit TS3 Plus.

The dock can provide up to 85W of power, which is good enough for even the largest 15-inch MacBook Pro. There are 15 ports on the dock, allowing you to connect up to two 4K monitors or a single 5K monitor. Other options include five USB-A ports, Gigabit Ethernet, digital optical audio, and an SD card reader.

4. HP Tango X Printer

HP Tango X Printer HP Tango X Printer Buy Now On Amazon $199.89

The HP Tango X Printer is a modern take on the ubiquitous accessory and designed to work with both a Mac and iOS devices. Getting started with the wireless printer is quick and easy, as there is no need to worry about drivers. The printer is AirPrint compatible, making it simple to print from any Apple device.

Along with a cover that doubles as an output tray, the small printer can fit almost anywhere in your home. An optional ink subscription service will always keep your printer ready to go. And as a nice plus, any subscriber can print photos from their iPhone for free.

5. TwelveSouth PlugBug Duo

Twelve South PlugBug Duo Twelve South PlugBug Duo Buy Now On Amazon $59.71

Nearly every MacBook owner has the ubiquitous—and hefty—Apple charger in their bag. The TwelveSouth PlugBug Duo makes it much more useful. The device is compatible with Apple’s MagSafe and USB-C power chargers, and snaps on top of the adapter to add two additional USB plugs.

Both of these ports provide 2.1A to charge another device like an iPhone or iPad quickly. For the world traveler, Twelve South also includes five different AC prongs that will convert a MacBook charger to fit most electrical outlets around the globe.

6. Mophie Powerstation USB-C XXL

Mophie Powerstation USB-C XXL Mophie Powerstation USB-C XXL Buy Now On Amazon $99.95

The Mophie Powerstation USB-C XXL is a powerhouse battery pack that can charge pretty much any Apple product imaginable. This even includes newer MacBook models that have a USB-C connection. The 19,500mAh battery can provide up to 14 hours of additional battery power for a USB-C laptop at 30W. That means you can charge a MacBook or a MacBook Air as quickly with the battery as with a normal power adapter.

It can also juice up the new iPad Pro devices quickly using the USB-C port. This model also includes a 2.4A USB-A port to charge other devices, like a smartphone. Its LED indicator will let you know how much power remains. As a nice plus, the exterior is covered with soft fabric that’s easy to hold and won’t scratch other devices in your bag.

7. Belkin USB-C to Lightning Cable

Belkin USB-C to Lightning Cable Belkin USB-C to Lightning Cable Buy Now On Amazon $29.99

These days, USB-C cables are essential, especially for any modern MacBook. If you have an iPhone, the Belkin USB-C to Lightning Cable is a great choice. This cable is MFi certified and made with special DuraTek fiber that is built to stand the test of time.

The cable is also one foot longer than Apple’s official option for more flexibility to charge your iPhone. A built-in leather strap helps keep your desk organized and free of cable clutter. Belkin also provides a 5-year warranty on the cable.

8. Incase ICON Backpack With Woolenex

Incase ICON Backpack With Woolenex Incase ICON Backpack With Woolenex Buy Now On Amazon $139.97

When it’s time to hit the road with your MacBook, a good backpack can help protect the expensive investment and give you space for everything else you need. The Incase ICON Backpack with Woolenex holds up to a 15-inch MacBook in a padded laptop compartment. The exterior of the backpack is made with Woolenex fiber that’s durable and resists stretching and shrinking.

Along with space to hold small and large items inside, the backpack sports an iPad pocket on the side for quick access and a small pocket on the bottom with an integrated cable port for power or audio. While wearing the backpack, airflow channels on the back panel and padded shoulder straps help keep you comfortable.

9. WD My Passport Portable SSD

WD My Passport Portable SSD WD My Passport Portable SSD Buy Now On Amazon $167.99

Additional external storage can go a long way, especially for Mac users who need to store large photo or video libraries .The WD My Passport Portable SSD is available in sizes up to 2TB.

It can transfer files at speeds of up to 540MB/s. The drive is ready to use with any USB-C port and is also compatible with a USB-A. It even offers password protection and hardware encryption for additional layers of security.

10. Rain Design mStand360

Rain Design mStand 360 Rain Design mStand 360 Buy Now On Amazon $49.96

A stand is another great way to improve ergonomics while working with a MacBook. It can raise the screen to eye level and help reduce neck strain. A solid all-around choice is Rain Design’s mStand360. The aluminum stand is compatible with all MacBook models and cools your laptop by acting as a heat sink.

A swivel base allows you to quickly access ports and share your screen with others. As a nice touch, the built-in cable organizer can help reduce wire clutter on your desk. You have three colors of the stand to select from; space gray, gold, or rose gold.

The Best Gifts for Mac Users

Hopefully, one of these gift ideas will make your shopping even easier this holiday season. Whether you pick out a stand, power bank, or something else entirely, these accessories should bring a smile to any Mac owner.

Don’t have time to wait for these to arrive? Check out last-minute gifts that don’t need shipping instead.

Read the full article: 10 Cool Gift Ideas for Mac Users This Holiday Season


Read Full Article

The 10 Best Tech Gifts for College Students


nifty-gadgets-students

College students always have a lot going on. On any given day, you’ll find them juggling between numerous tasks like attending classes, tests, projects, assignments, and social activities.

So, while picking up a tech gift for them, it’s best to look for something that will fit in their fast-paced lifestyles and make their lives easier. Here are the best tech gifts for students you can choose from.

1. Google Nest Hub Max

Google Nest Hub Max smart display

Google’s smart display, the Nest Hub Max can prove useful to a student in several ways. With built-in stereo speakers, the Nest Hub Max will ensure they never miss an alarm or appointment. You can ask the Google Assistant a wide range of questions and view the results on a wide 10-inch touchscreen.

In addition, the Nest Hub Max supports various other services. You can read step-by-step recipes and configure it to display a slideshow of your pictures. The Google Nest Hub Max can also keep an eye on your dorm room. Since it can function as a home security camera, you have the ability to check the camera’s live feed from your phone remotely.

2. Anker Nebula Capsule 2

Anker Nebula Capsule 2 Anker Nebula Capsule 2 Buy Now On Amazon $579.99

Students have a tight budget, and spending tens of dollars on movie tickets every other week is generally not an option. Therefore, Anker’s portable, soda can-sized projector, the Nebula Capsule 2, is an ideal gift for them. The device turns any room into a mini theater by projecting 100-inch HD video content on a wall.

It runs on a battery, so you don’t have to deal with any cables while watching. Thanks to the compact form factor, you can even carry it around with you. You can play movies or videos either through the projector’s own Android interface or connect it to a computer or phone. The Nebula Capsule 2 supports Chromecast, allowing you to stream videos wirelessly.

If you want to know more about the projector before you buy, check out our review of the Anker Nebula Capsule 2.

3. Sony WH-XB900N Wireless Noise Canceling Headphones

Sony WH-XB900N Wireless Noise Canceling Headphones Sony WH-XB900N Wireless Noise Canceling Headphones Buy Now On Amazon $248.00

College students often work and study in noisy environments like shared housing. In those scenarios, Sony’s WH-XB900N Wireless Noise Canceling headphones will allow them to focus and instantly shut off external noise. The Sony WH-XB900N costs half as much as other premium noise-canceling headphones but offers many of the features you’d need.

They have touch-sensitive ear cups for music control and an Attention Mode for when you’d like to talk to someone. On a single charge, the Sony WH-XB900N headphones can last a day and you can charge them with a USB Type-C cable.

4. Audible Subscription

audible app running on a smartphone

Students are often pushed for time, so your well-meaning, gift-wrapped book may end up unread. Instead, you should consider giving them an Audible subscription. This entitles them to one audiobook from Amazon’s vast catalog each month.

You can listen to them on your phone or computer. What’s more, Audible members get a 30 percent discount on audiobook purchases.The Audible mobile app allows listeners to adjust the playback speed to their liking, add bookmarks, and save specific sections.

5. Amazon Gift Card

Amazon Gift Card Amazon Gift Card Buy Now On Amazon $10.00

Students usually have a lengthy list of overdue purchases they need but don’t have the resources for. Therefore, an Amazon gift card is a handy present for college students as well.

A gift card will enable them to buy the items that have been sitting in their Amazon cart. You can add up to $2,000 on one card; plenty for almost all situations. Amazon also has a range of gift boxes you can buy for occasions such as birthdays and Christmas.

6. Samsung T5 SSD

Samsung T5 SSD Samsung T5 SSD Buy Now On Amazon $184.99

Living the student life involves stocking hours of lectures, projects, and notes. The Samsung T5 SSD will save them from clogging up their computer’s storage. It has a 1TB capacity and can reach read and write speeds of up to 540MB/s.

The drive fits in the palm of a hand and doesn’t take much space. You have the option to password protect it, and Samsung includes both a USB-C-to-C and USB-C-to-A cable so that you don’t have to invest in a third-party dongle. The Samsung T5 SSD is also available in 500GB and 2TB variations and in four color options.

7. Philips Wake-Up Light Alarm Clock

Philips Wake-Up Light Alarm Clock Philips Wake-Up Light Alarm Clock Buy Now On Amazon $44.85

The Philips Wake-Up Light Alarm Clock is a nifty gift for someone who has trouble waking up early in the morning for classes. It’s a circular lamp that can naturally wake you up by simulating a sunrise.

The Philips Wake-Up Light begins gradually increasing its brightness 30 minutes before your alarm is set to go off. You can use it as a bedside reading lamp as well. It has dedicated buttons, too, for snoozing the alarm and tweaking the light’s intensity.

8. Tile Pro

Tile Pro Tile Pro Buy Now On Amazon $59.99

It’s easy to lose track of keys when you’re running around campus to reach classes on time. That’s why the Tile Pro wireless tracker is the perfect match for college students. You can attach the Tile Pro keychain to any item you want to keep tabs on.

Once activated, it allows you to track the object from your phone and ring the tracker, so long as it’s in range. The process works the other way around too. Pressing the button on the Tile Pro lets you ring your phone even if it’s in the silent mode.

9. JBL Flip 4

JBL Flip 4 JBL Flip 4 Buy Now On Amazon $79.95

Whether you’re hanging out with your friends at home or at a pool party, the JBL Flip 4 is one of the best Bluetooth speakers for playing music. It has a powerful sound and a 3000mAh battery that’s rated to last 12 hours. On top of that, its exterior is waterproof and features a dedicated button for talking to Google Assistant or Siri.

10. Ember Temperature Control Smart Mug

Ember Temperature Control Smart Mug Ember Temperature Control Smart Mug Buy Now On Amazon $90.00

An endless supply of hot beverages is what gets students through a day. The Ember Temperature Control Smart Mug ensures every sip is just that right temperature.

You can specific your perfect temperature on the device, and the cup will keep your drink at that heat. It also ships with a coaster that doubles as the mug’s charger. The Ember Temperature Control Smart Mug has a battery life of 1.5 hours, and it automatically goes to sleep when you’re not using it.

The Best Tech Gifts for College Students

Most of these gifts will end up being helpful to any student. You can choose one based on what you know about the person and their interests.

Alternatively, you can buy them a a more practical tool for their studies, such as a laptop. For that, we’ve compiled a list of the best high-quality laptops for students on a budget.

Read the full article: The 10 Best Tech Gifts for College Students


Read Full Article

How to Free Up Your DRM Protected Music


Digital Rights Management—better known as DRM—is a scourge for anyone who’s bought music online. By preventing the buyer from copying or sharing music, DRM limits what the owner can do with the track they’ve purchased.

Thankfully, there are a few tools that can remove the DRM from the music you’ve downloaded. This frees it from the virtual shackles and lets you use it in any way you please. Here are several different ways to remove DRM from your music files.

1. AppleMacSoft DRM Converter for Mac

AppleMacSoft DRM Converter for Mac remove DRM

In the old days, any music you bought from iTunes used to have DRM attached to it. The DRM was so restrictive that you could only play the music on Apple devices.

Thankfully, that’s no longer the case. Today, all songs listed in the iTunes Store are categorized as “iTunes Plus.” That means they’re in the AAC format and don’t have any DRM attached. But what about all of those old songs you downloaded in years gone by?

In theory, Apple will let you redownload a non-DRM version. However, if you’ve long since lost access to the original account, that’s a non-starter. You need a DRM removal app.

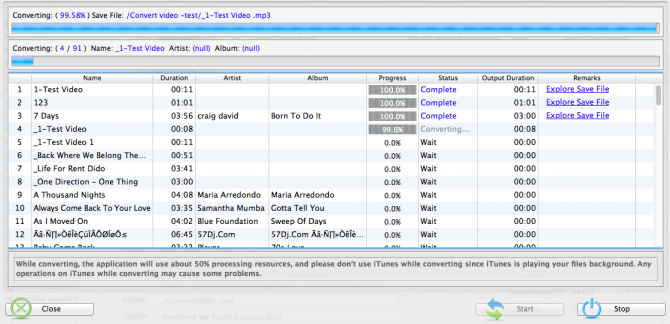
One solution is to use AppleMacSoft DRM Converter for Mac. It integrates directly with iTunes and can remove DRM in bulk. You can save your new audio file as an MP3, M4A, M4R, AAC, AC3, AIFF, AU, FLAC, or MKA file, and can even use the tool to remove DRM from your Apple audiobooks.

Download: AppleMacSoft DRM Converter for Mac ($40, free trial available)

2. MuvAudio

MuvAudio remove DRM

Many of the tools that can remove DRM from music take advantage of the “analog hole.” For those who don’t know, the analog hole is the term given to the phenomenon whereby any digital audio or video file can be recaptured in a fairly straightforward way once it becomes perceptible to humans.

But this approach has a downside. By using your system’s soundcard, you can experience a significant loss in quality. MuvAudio is different. It uses a digital conversion process, thus allowing you to retain the audio quality of the original file.

MuvAudio can convert DRM protected file formats that are only readable on certain devices into files that are device-agnostic. The app can read the major formats, as well as some more niche ones like SPX, MPC, APE, OFR, OFS, TTA, and MPE. The seven supported output formats are MP3, M4A, WMA, OGG, FLAC, WV, and WAV.

Some of the app’s other features include the ability to split long audio tracks into shorter files, a way to edit a DRM-protected file’s metadata data before you create the DRM-free version, and a search tool for missing album artwork.

The trial version of the app lets you remove the DRM from 60 songs. If you have more tracks to fix up, you’ll have to pay for the full version.

Download: MuvAudio ($19, free trial available)

3. Audacity

Audacity remove DRM

If you’d prefer to save some money and take the “analog hole” approach to removing DRM from your music files, you only need a simple audio recording app. Both Windows and macOS come with such an app as a native part of the respective operating systems.

However, we’d recommend going one step further and downloading a more powerful tool such as Audacity.

Use Audacity to Remove DRM on Windows

To use Audacity to remove DRM on Windows, follow these steps:

  1. Open Audacity.
  2. In the dropdown menu in the upper left-hand corner, select Windows WASAPI.
  3. Hit the Record button.
  4. Start playing the DRM-protected track.
  5. Click Stop when the track finishes.
  6. Trim the file to remove the silence from the beginning and end of the recording.
  7. Go to File > Export.
  8. Select Export as MP3.
  9. Give the file a name and press Export.

Use Audacity to Remove DRM on MacOS

If you’re using a macOS device, the situation is slightly more complex. Macs do not have a native way to record a computer’s audio output. As such, you’ll need to download and install another third-party app—Soundflower—before you begin.

When you’re ready, use the following step-by-step guide:

  1. Go to Apple > System Preferences > Sound.
  2. Click on the Output tab at the top of the Window.
  3. Select Soundflower (2ch) from the list of options.
  4. Open Audacity and go to the Preferences menu.
  5. Head to Devices > Recording.
  6. Select Soundflower (2ch) in the Device dropdown menu.
  7. Hit the Record button.
  8. Start playing the DRM-protected track.
  9. Click Stop when the track finishes.
  10. Trim the file to remove the silence from the beginning and end of the recording.
  11. Go to File > Export.
  12. Select Export as MP3.
  13. Give the file a name and press Export.

The downside of using Audacity to remove music DRM is two-fold. Firstly, you need to play each DRM-protected track in full. If you have thousands of DRM-protected songs that you’re trying to work through, that might not be practical.

Secondly, you’re making an entirely new file. As such, you’ll lose any metadata from the original file. Again, if you’re working with hundreds of songs, that’s a significant extra workload that you’ll have to take on.

Download: Audacity (Free)
Download: Soundflower (Free)

To learn more about using the app, check out our article detailing how to remove ambient noise using Audacity.

4. Burn a CD

rip CD to remove DRM

You can also burn DRM-protected music files onto a CD. So, a simple way to bypass DRM is to create a CD of the tracks you want to free up, then immediately rip the CD back into your computer’s music player.

The only requirement is that you use a music player on Windows or Mac that has CD burning capabilities. Most of the best music managers on both platforms have this functionality.

Naturally, your computer also needs to have a CD drive. If it doesn’t, check out the Rioddas External CD Drive on Amazon.

And remember, if you use this technique, you don’t even need to burn a physical CD. You could download an app like TuneClone to create virtual CDs—AKA ISO files—then rip them back onto your machine.

Download: TuneClone ($35, free trial available)

Remove DRM From More Media

Music isn’t the only type of media that’s afflicted by DRM protection. Some audiobooks, movies, TV series, and ebooks are locked behind Digital Rights Management.

But don’t worry. Just like audio files, you can remove the DRM from those types of media too. If you’d like to learn more, check out our article explaining how to remove the DRM on every ebook you own.

Read the full article: How to Free Up Your DRM Protected Music


Read Full Article

20 Common Snapchat Terms You Need to Know


snapchat-terms

Snapchat can be intimidating. The social media platform has a language all of its own, with various Snapchat terms meaning users can struggle to understand what’s going on.

Whether you need help getting started with Snapchat or you’re a longtime user who has encountered a new phrase, here are the common Snapchat terms you need to know.

1. Snapcode

Snapchat QR code profile

This is the start of your journey.

A Snapcode is simply a QR code linked to a particular user. Every user has a unique Snapcode, making it easy to add friends. Find your own Snapcode by clicking on your profile, found in the top-left of the screen.

2. Capture Button

The circular button at the bottom of the main Snapchat interface is known as the Capture button. Click it once to take a photo. Hold it down to record a video.

Images and videos are both known as Snaps.

3. My Story/Our Story

This is a series of Snaps or videos that you can share either with a limited Friends list (My Story) or with the public (Our Story). It means you’re not sending a particular image to one person; you want numerous people to see it.

4. Chat

Everyone knows what a Snap is, but newbies might not realize the app also boasts a standard Chat function. Think of it like iMessage or Facebook Messenger.

You can view your conversation lists by swiping left from the camera interface.

5. Discover

Swiping right lets you view other people’s Stories, including those from publications Snapchat thinks you’ll like.

Your friends’ Stories are listed at the top. Websites, celebrities, and advertisers will feature below this, including any you’ve subscribed to.

6. Team Snapchat

Snapchat will occasionally send you messages. They’re mainly about updates or holidays like Easter. These aren’t particularly common, but expect to see Team Snapchat listed in your Chats.

7. Snapchat Score

We’re constantly judged in every aspect of our lives, and even Snapchat judges you with a Snapchat Score. This is a numerical score based on how active you are on the platform. Find yours in your Profile. Several factors determine this, but it’s primarily based on how many Snaps you send.

Some people’s Score will consist of six figures. They’re successful Snapchatters. Others’ will be minimal, showing a lack of interaction on the app. Who are the real losers? We’ll leave you to decide.

8. Snap Streak

A Snap Streak is when you send Snaps on consecutive days to a friend and that user similarly responds with Snaps. You have to each send Snaps every 24 hours to maintain the Streak. A Snapchat Streak is established after three days of consecutive Snaps, and you can’t merely use Chats.

When you’re on a Streak with a friend, a flame emoji will appear next to a friend’s name. If you lose a Snapchat Streak, here’s how to get a lost Snapchat Streak back.

9. Bitmoji

A Bitmoji is a cartoon avatar of yourself. Your Bitmoji is a fun bit of personalization which displays when typing in real-time or in your profile if you’ve not added a Story.

It also shows in friend suggestions, so others can easily identify the right user to add.

10. Lens

Lenses are Augmented Reality (AR) interfaces that let you add illustrative elements to Snaps. They focus on your face in a video as you record it then overlays cartoons. The most famous Lens is a long tongue and dog ears.

Face and World Lenses are to the right of the Capture button.

11. Snappables

Snappable are a variation of Lenses that invite others to get involved too.

Some are multiplayer games, while others offer “experiences”—a loose term which merely means another type of AR. Snappables can be sent to a Friend, and they can sometimes further the fun by forwarding on their contribution to the Lens.

You can find the Snappables to the left of the Capture button.

12. Filters

These are another form of customization like Lenses, albeit added after a Snap is taken. Filters can include location services, color effects, and your Bitmoji.

Just take a Snap then swipe either left or right. Activate Filters first or click Enable Filters after swiping.

13. Stickers

As with Filters, Stickers overlay a Snap after it’s been taken.

They’re graphic designs often related to specific days, i.e. “Happy Humpday” on a Wednesday or a Christmas tree during the festivities. Some are GIFs, while others are plain drawings. You can change their size by pinching the screen with your fingers.

14. Scissors

When previewing a Snap, you’ll see a menu of options in the top-right. One of these is Scissors.

Scissors let you trace around an object in a Snap and save it to use again as a Sticker.

15. Bounce

Snapchat used to solely allow self-destructing Snaps. Now, you can choose a time limit or create an infinity loop, so the video carries on playing until the recipient closes it. Bounce is part of the latter.

It loops a certain portion of a video, meaning you can focus on a particularly fun bit. You can record a video of someone scoring a goal, then loop the football actually hitting the net.

16. Geofilters

By exploring the world, you can get more Snapchat filters, lenses, and stickers. Geofilters are determined by where you are. It means Snapchat needs access to your location.

As with other Filters, Geofilters are applied after a Snap is taken, so appear on the preview page. Geofilters become available when you’re near a landmark. These generally include an emoji version of the attraction and a flashy sign to show off where you’ve been.

17. Live Stories

These are a series of Snaps curated by the Snapchat team and typically feature a range of celebrities and the general public. They generally happen around major events or locations.

Don’t worry, Snapchat doesn’t collate your Stories without your permission. When sending a Snap, a Live Story option may appear, so it’s up to you whether you contribute. And then it’s up to the Snapchat Team to decide what makes the cut.

18. Snapsterpiece

A Snapsterpiece is a fusion of “Snap” and “Masterpiece”, and it’s an effort to give extra importance to your photos and scribblings.

Snapchat uses the term typically when you attempt to abandon a Snap. It doesn’t matter whether it’s an image you’re deleting because it’s blurred or if you’ve spent ages drawing and adding Filters. Snapchat still thinks it’s a masterpiece. How sweet/gullible/cringey.

19. Snap Camera

Snapchat on PC and Mac filters lenses

Snap Camera is Snapchat’s expansion into the world of desktop and laptop computing. They relay AR elements like Filters and Lenses over video chats and streaming services like Twitch through your webcam.

20. Memories

We recognize Snapchat as an app that doesn’t store content, but you can instruct it to. If you have a Snap that you love, save it to Memories. You could previously save everything to your Camera Roll; this is another in-app option. Snapchat will remind you of certain milestones too, telling you what you were up to a year or two ago.

You Now Know the Common Snapchat Terms

Learning these common Snapchat terms can help you to understand Snapchat. Which is key if you want to use the social media platform to its full potential. And don’t worry if Snapchat still sounds intimidating; it gets easier once you’re used to the interface.

And if you spend time on the app and aren’t enamoured by it, that’s fine. Snapchat isn’t for everyone.

Read the full article: 20 Common Snapchat Terms You Need to Know


Read Full Article

Robo Wunderkind: The Best Way to Teach Programming to Children


Our verdict of the Robo Wunderkind Education Kit:
It's not perfect, but this robotics and programming learning tool teaches the fundamentals with an innovative graphical state machine. If you can wait a bit, back their new Kickstarter for the improved model.
810

Learning how to program has come a long way since I was a child. At age 7, I was learning BASIC on the Amstrad. The most fun I could have was changing the color of the screen. Nowadays, kids are spoilt for choice. The Robo Wunderkind kits introduce programming using a unique graphical interface and customizable robotics toy. It’s easy to use, simple to build, and masterfully engaging for kids of 6 years and up.

Available now as a Starter or Education kit, Robo Wunderkind is also currently Kickstarting their next-generation model, with shipping due next year. If this review piques your interest, head on over to back their newest Kickstarter.

What’s in the Box?

There are two kits available: Starter and Educational, retailing at $179 and $249 respectively.

Inside the Starter Kit, you’ll find:

  • The main body of the robot, with Bluetooth connection.
  • Two motor modules, wheels, and connecting plates.
  • Small back wheel stabilizer.
  • Push-button module.
  • RGB LED module.
  • Four LEGO-compatible blanking plates.
  • Micro-USB charging cable.
contents of robo wunderkind education set
Contents of the full Education kit.

The Educational Kit takes things a step further, adding:

  • One servo module and flexible connector cable.
  • One connector block.
  • Distance sensor module.

The included blanking plates allow you to both protect exposed connectors and customize your robot endlessly. Bricks, minifigs, or technical LEGO pieces can be attached in a variety of ways.

robo wunderkind lego compatible for endless customization

Getting Started with Robo Wunderkind

The only included printed instructions is a booklet listing all the different modules. Have a look through that so you know what each one is. They’re all color-coded.

You’ll need to download either the RoboLive or RoboCode app to get started. Each app includes a handful of robot designs.

robolive app robot designs
Choose your robot design.

Activate the main body module, pair it using the app, and you’re set. Once you’ve chosen a design, you’re shown an exploded view of the robot. As you click each module into place, a green check will appear to indicate it was successfully detected. My 5-year-old had no problem clicking the various bits together, mostly in the right place. The only tricky part is orienting the main body correctly; if you start with it facing the wrong direction, the panel with the on/off switch might prevent you from clicking things on.

From there, tap on “I’m done”, and you’ll be taken to either the remote control dashboard or the graphical coding view, depending on which app you chose.

RoboLive

The first app is RoboLive, which simply offers a remote control feature of all connected modules. This is probably the easiest place to start children and gives them immediate feedback of what a particular module can do. There are five or six included robot designs with a pre-built dashboard, though you’re also free to begin a new project from scratch. Control components can be dragged and dropped onto the dashboard, and some have parameters you can adjust.

I found RoboLive to be ultimately unfulfilling, though it was the easiest option for my son to pick up and play. Once the basic understanding of what each module does is out of the way, I’d suggest moving onto RoboCode.

RoboCode

This is where the real programming fun comes into play. After building your robot, you’re presented with a graphical state machine. First, just hit play to see what happens. You’ll be able to follow along as each step is highlighting in green as the robot progresses through the state machine. If a particular transition condition has been triggered, that’s also highlighted.

Of course, if you like a challenge, you can always start your machine programming entirely from scratch.

A single state can hold a number of actions to be performed simultaneously, and each state is connected to another via a simple one-way arrow (ie, move onto the next state when this one has finished). Conditions (shown in red) can also be attached to states, so a single state can have multiple outward paths depending on which condition is met. It shouldn’t take you more than 15 minutes to grasp the basics, and soon you’ll be modifying the programs. Be careful in delete mode though: everything you tap on will disappear immediately–there is no confirmation dialog!

This Isn’t “Scratch”

Though I really love the graphical state machines of RoboCode, it’s worth noting that if your child is already learning a little programming at school, it’s likely that they’re using Scratch. The two concepts are profoundly different. Scratch is a modular graphical programming system where children drag around code blocks and fill in the blanks. It’s a lot closer to actual coding than the RoboCode system.

With RoboCode you’re building state machines that better represent control flow around a system.

That said, I think both are incredibly useful to study. In fact, if you study for a Computer Science degree, you’ll likely study state machines at some point. They’re far more useful for examining how control flows around a system, and relate more directly to robotics than Scratch does.

You can, of course, achieve the same end results with either method, but I feel that the RoboCode state machine idea is a useful tool to complement the other.

Soon though, you won’t have to choose. The Robo Wunderkind team is working on a RoboBlockly app for next year; which is their implementation of Scratch for robotics. You can have the best of both worlds!

roboblockly screenshot
RoboBlockly, coming soon to the next generation Robo Wunderkind kits.

Download the Teaching Curriculum

I must admit, I felt a bit lost initially, with no printed tutorial to be found in the box other than a very brief leaflet explaining which piece does what. Opening up the RoboCode interface for the first time is quite daunting, and the included help system is simply a long list of buttons. As a programmer, it was simple enough for me to understand, but I wasn’t sure of the best way to teach it to my son.

Then I discovered the extensive curriculum, freely available to download and suitable for all ages. It consists of teaching guidelines, full lesson plans, worksheets, and answers for both RoboLive and RoboCode. Keep your laptop handy so you don’t have to print everything and follow through it with your child. It explains everything in bite-sized chunks.

Next Generation Robo Wunderkind Kickstarter

We’ve reviewed the current generation of RoboWunderkind kit, and while it’s a fantastic package, it’s not without its flaws. Thankfully, RoboWunderkind has taken a lot of the feedback on-board for their next-gen model, which it’s Kickstarting now.

As well as small improvements across all the current hardware modules, it’s introducing a set of new ones:

  • LED matrix display
  • Motion sensor
  • Light sensor
  • Line-following sensor

These open a huge range of new input opportunities for your programs.

RoboUniverse is the new app, which brings together the disparate RoboCode and RoboLive, and introduces a new RoboBlockly, a Scratch-like programming interface. In addition, there’s a new Arduino and Python API under development, for the older kids.

Buy the Robo Wunderkind Kit, or Wait?

The truth is that today’s schools simply aren’t doing to prepare our children for the technological world they’re entering into (amongst other things they’re not teaching, like financial responsibility, but I digress). It’s up to us, as parents, to fill in those gaps. The Robo Wunderkind Education Kit is a great way to do that.

The state machine representation of RoboCode combined with the easy-to-build and customizable robot is a winning combination, the only downside being that it may confuse older children if they already study Scratch at school. Hopefully, the RoboBlockly Scratch app will be available soon to remedy that.

Thanks to Robo Wunderkind, we have a complete Education Kit to give away to one lucky reader. Enter below for your chance to win!


Enter the Competition!

Robo Wunderkind Educational Robotics Kit Giveaway

Read the full article: Robo Wunderkind: The Best Way to Teach Programming to Children


Read Full Article