11 July 2019

Need a Google Suite Alternative? 4 Reasons to Try Zoho


google-suite-alternative

Here’s your dilemma: you want to replace Google’s suite of products in your life with an alternative, but you don’t fancy the idea of cobbling together a bunch of random apps to come up with a solution. You want a cohesive all-in-one package. That’s exactly what the cloud software suite Zoho is all about.

Zoho targets mainly businesses, but it’s an excellent choice for individuals too. We recommend getting a Zoho account for personal use. Here are four top reasons why.

1. Email at Your Own Domain for Free

Details of Zoho's Forever Free plan

Personalized email addresses are a nice touch to polish up your digital identity. They’re considered a must-have if you work online as a freelancer.

But creating an address that ends with @your_domain_name.com is most likely to bring a recurring expense. Now, you might think that that’s overkill for personal email, or maybe, that’s an expense you can’t afford right now. Fortunately, you have free options available. Zoho Mail is one of them.

If you sign up for a business email account with Zoho, you can host email at your own domain. This account comes with a free tier, which is more than enough for personal use for many people. So what if it says “business email” on the tin?

The catch with the free account is that you can access your email only with the web-based version of Zoho Mail and not through a desktop email client.

To create a business email account, visit mail.zoho.com, select the Business Email radio button, and then click on the Sign Up Now button.

Since the next step requires you to connect your domain to Zoho, you’ll need to have a domain name registered beforehand. Depending on the domain name registrar you go with, you might have access to a one-click setup option to configure Zoho Mail with your custom domain. iwantmyname.com is one such registrar that has this option.

Keep in mind that if you go with Zoho’s free personal email service, you get an email address that ends with @zoho.com.

Note: Short of ideas for your domain name? These tips to find personal domain name ideas will help!

2. Robust Apps in a Single Package

Grid view of all Zoho apps

Like Google, Zoho has plenty of apps to keep you organized and productive. For starters, apart from the mail and calendar apps, you’ll find apps to:

  • Create notes, tasks, invoices, forms, and websites.
  • Manage contacts, bookmarks, and passwords.
  • Create documents, spreadsheets, and presentations.
  • Back up your files to the cloud.

Here are three of our absolute favorite Zoho apps:

  1. Zoho Mail: This is one of the best free email accounts you need to consider. Don’t think you’ll be stuck with a bunch of basic features because you aren’t paying anything. That’s not the case at all.
  2. Zoho Notebook: While a few Zoho apps look a bit dated, Zoho Notebook doesn’t have that problem. It’s an absolute pleasure to use! You can create any number of notebooks and notes. Zoho Notebook has a web clipper extension for Chrome and Safari. It’s one of those Zoho extras that you’ll want to explore further.
  3. Zoho Writer: It made our list of the best free online word processors. When we pitted Zoho Writer against Google Docs and Microsoft Word Online, Zoho Writer came out on top.

It’s important that Zoho has put a good amount of thought into designing each of its apps. That’s not to say the apps are all flawless. But, given that you have so many positives to focus on, you’ll probably be willing to overlook the occasional negative. Then again, it depends on whether the flaws are deal breakers for you personally.

3. Less Intrusive Approach to Data Collection

There are many people who want to ditch Google for privacy reasons. But not all of them have the time, inclination, or the know-how to set up self-hosted, open-source, or in general more private alternatives. Zoho comes across as a viable compromise for such people.

For starters, Zoho:

  • Keeps all its products clear of advertising, even at the free tier.
  • Has a better privacy policy than that of similar services out there.
  • Has apps that need zero to minimal setup and are easier to use than many other more private alternatives. It also has detailed guides to get you through the occasional complex bits.

Of course, we must reiterate here that while Zoho does not collect as much data as Google and Microsoft do, it does collect some data to do its job well. As a result, Zoho’s apps are not as private as, say, a self-hosted app could be.

4. Mobile App Support

Zoho OneAuth homepage view

While Zoho does not have a full set of apps for the desktop, it has mobile counterparts for many of its web apps. The portable apps are quite good and not just token versions created to appease mobile users.

It can be annoying to sign in to each Zoho app separately on mobile, but you can fix that problem by installing Zoho OneAuth. Once you log in to this mobile app, Zoho won’t ask you for your credentials when you open any of the other Zoho apps on your mobile device.

Zoho OneAuth also adds an extra layer of protection to your Zoho account with multi-factor authentication. In other words, to guard your account against password breaches, the app has more than one checkpoint to confirm your identity:

  • Your login credentials
  • A second method such as a one-time password

Zoho Is Worth Paying For

There’s no doubt that Google is the best at what it does. It gives you all the tools you need to manage your work and life efficiently, but at a price—a subtle, but persistent intrusion of your privacy. That should be enough to make you consider jumping ship.

Unfortunately, there aren’t many alternatives that can match up to Google’s capabilities. Zoho is one of the very few that does this, and it’s well worth exploring, both for personal and business use.

Of course, if you want to replace Google Search, you’ll have to look beyond Zoho. We recommend choosing from one of these privacy-focused Google Search alternatives.

Read the full article: Need a Google Suite Alternative? 4 Reasons to Try Zoho


Read Full Article

Luminar eyes production vehicles with $100M round and new Iris lidar platform


Luminar is one of the major players in the new crop of lidar companies that have sprung up all over the world, and it’s moving fast to outpace its peers. Today the company announced a new $100M funding round, bringing its total raised to over $250M — as well as a perception platform and a new, compact lidar unit aimed at inclusion in actual cars. Big day!

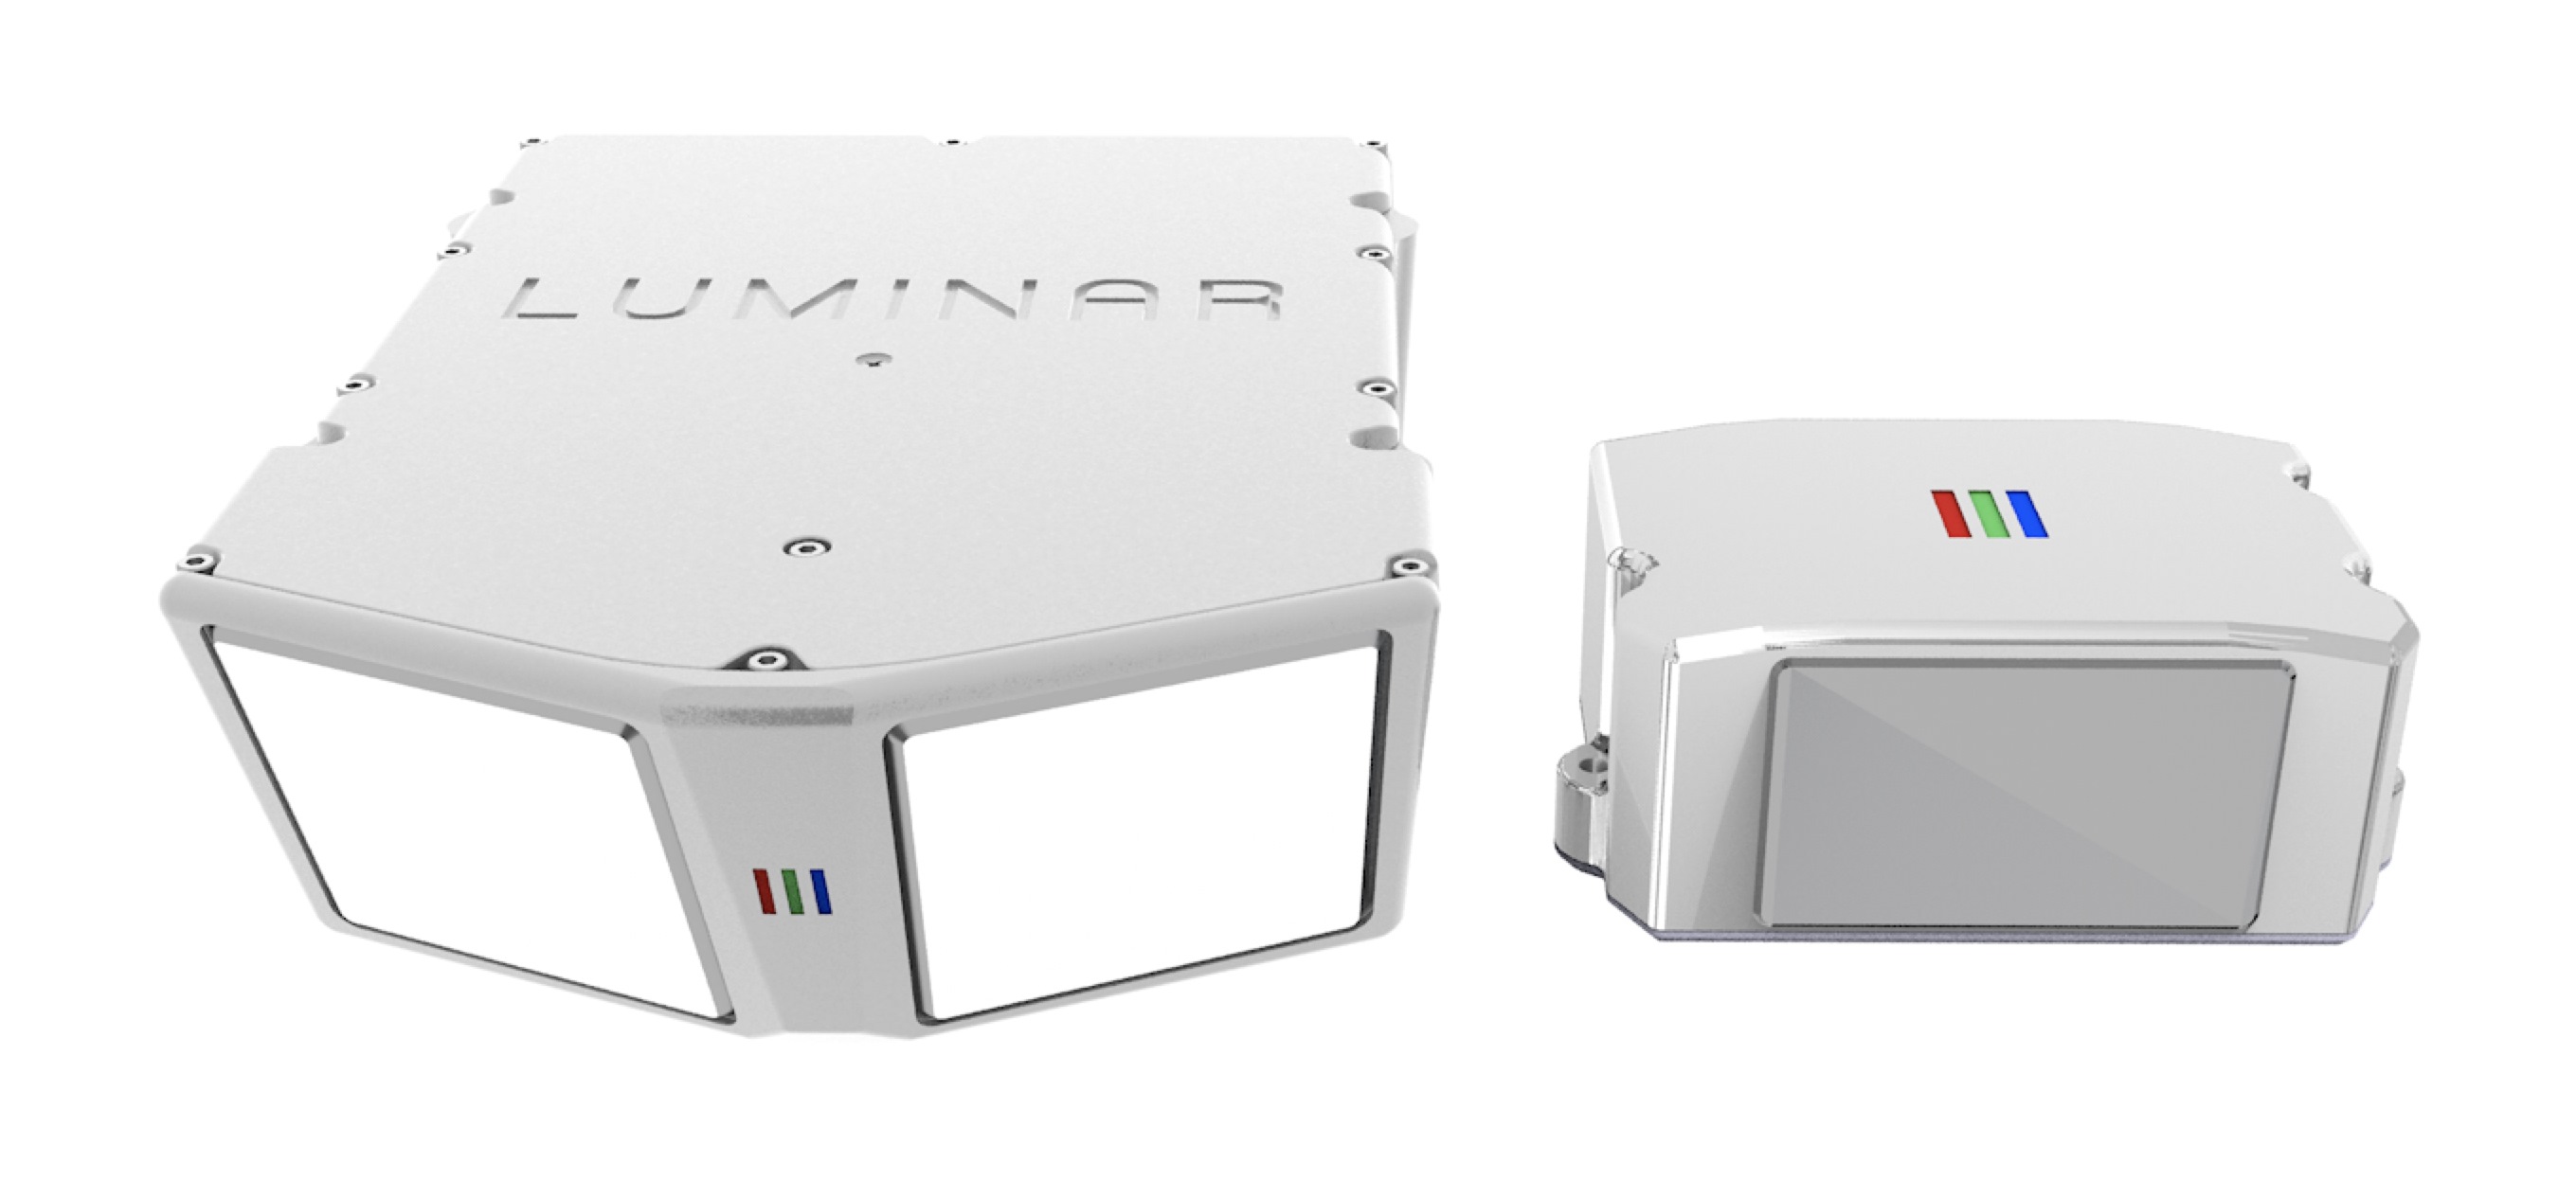
The new hardware, called Iris, looks to be about a third of the size of the test unit Luminar has been sticking on vehicles thus far. That one was about the size of a couple hardbacks stacked up, and Iris is more like a really thick sandwich.

Size is very important, of course, since few cars just have caverns of unused space hidden away in prime surfaces like the corners and windshield area. Other lidar makers have lowered the profiles of their hardware in various ways; Luminar seems to have compactified in a fairly straightforward fashion, getting everything into a package smaller in every dimension.

Luminar IRIS AND TEST FLEET LiDARS

Test model, left, Iris on the right.

Photos of Iris put it in various positions: below the headlights on one car, attached to the rear-view mirror in another, and high up atop the cabin on a semi truck. It’s small enough that it won’t have to displace other components too much, although of course competitors are aiming to make theirs even more easy to integrate. That won’t matter, Luminar founder and CEO Austin Russell told me recently, if they can’t get it out of the lab.

“The development stage is a huge undertaking — to actually move it towards real-world adoption and into true
series production vehicles,” he said (among many other things). The company who gets there first will lead the industry, and naturally he plans to make Luminar that company.

Part of that is of course the production process, which has been vastly improved over the last couple years. These units can be made quickly enough that they can be supplied by the thousands rather than dozens, and the cost has dropped precipitously — by design.

Iris will cost under $1,000 per unit for production vehicles seeking serious autonomy, and for $500 you can get a more limited version for more limited purposes like driver assistance, or ADAS. Luminar says Iris is “slated to launch commercially on production vehicles beginning in 2022,” but that doesn’t mean necessarily that they’re shipping to customers right now. The company is negotiating more than a billion dollars in contracts at present, a representative told me, and 2022 would be the earliest that vehicles with Iris could be made available.

LUMINAR IRIS TRAFFIC JAM PILOT

The Iris units are about a foot below the center of the headlight units here. Note that this is not a production vehicle, just a test one.

Another part of integration is software. The signal from the sensor has to go somewhere, and while some lidar companies have indicated they plan to let the carmaker or whoever deal with it their own way, others have opted to build up the tech stack and create “perception” software on top of the lidar. Perception software can be a range of things: something as simple as drawing boxes around objects identified as people would count, as would a much richer process that flags intentions, gaze directions, characterizes motions and suspected next actions, and so on.

Luminar has opted to build into perception, or rather has revealed that it has been working on it for some time. It now has 60 people on the task split between Palo Alto and Orlando, and hired a new VP of Software, former robo-taxi head at Daimler Christoph Schroder.

What exactly will be the nature and limitations of Luminar’s perception stack? There are dangers waiting if you decide to take it too far, since at some point you begin to compete with your customers, carmakers who have their own perception and control stacks that may or may not overlap with yours. The company gave very few details as to what specifically would be covered by its platform, but no doubt that will become clearer as the product itself matures.

Last and certainly not least is the matter of the $100 million in additional funding. This brings Luminar to a total of over a quarter of a billion dollars in the last few years, matching its competitor Innoviz, which has made similar decisions regarding commercialization and development.

The list of investors has gotten quite long, so I’ll just quote Luminar here:

G2VP, Moore Strategic Ventures, LLC, Nick Woodman, The Westly Group, 1517 Fund / Peter Thiel, Canvas Ventures, along with strategic investors Corning Inc, Cornes, and Volvo Cars Tech Fund.

The board has also grown, with former Broadcom exec Scott McGregor and G2VP’s Ben Kortland joining the table.

We may have already passed “peak lidar” as far as sheer number of deals and startups in the space, but that doesn’t mean things are going to cool down. If anything the opposite, as established companies battle over lucrative partnerships and begin eating one another to stay competitive. Seems like Luminar has no plans on becoming a meal.


Read Full Article

N26 launches its challenger bank in the U.S.


European fintech startup N26 is now accepting customers in the U.S. The company is launching a bank account with a debit card that should provide a better experience compared to traditional retail banks.

If you’re familiar with N26, the product that is going live today won’t surprise you much. Customers in the U.S. can download a mobile app and create a bank account from their phone in just a few minutes. It’s a true bank account with ACH payments, routing and account numbers.

A few days later, you receive a debit card that you can control from the mobile app. Every time you make a transaction, you instantly receive a push notification telling you how much money you just paid. You can set up your PIN code, customize limits, turn on and off online payments, ATM withdrawals or payments abroad.

And that’s about all there’s to know. But what about fees? Basic N26 accounts are free. There’s no monthly fee and no minimum balance. There’s no fee on transactions in a foreign currency and you get two free ATM withdrawals per month.

N26 is going to progressively roll out signups over the summer as a sort of beta program. If you’ve signed up to the waitlist, you’ll get an invitation over the coming hours, days and weeks. There are currently 100,000 people on the waitlist. N26 will then open signups to everyone later this summer.

When N26 rolls out its final product in a couple of months, the company says that it plans to automatically find and reimburse fees the ATM operators are charging. N26 cards in the U.S. work on the Visa network instead of Mastercard.

Just like Chime, N26 will also try to let you get paid up to 2 days early if you get paid via direct deposit. Instead of waiting a couple of days to clear those transactions, N26 will go ahead and top up your account.

N26 US 2

White label

Behind the scene, there are a few differences between N26 in Europe and N26 in the U.S. While N26 has a full-fledged banking license in Europe, the company has partnered with Axos Bank who is acting as a white-label partner in the U.S.

Axos Bank essentially manages your money for you, and N26 acts as the interface between customers and their bank accounts. As a result, you get an FDIC-insured account.

N26 first partnered with a third-party company in Europe as well. But it was a costly deal that wasn’t meant to stick around. The startup got a banking license in Germany that was good for Europe at large. In the U.S., it’s a different story as the market is not as unified as in Europe — it’s complicated to get a license to operate in all 50 states.

“We looked at 30 players, we did some due diligence and we're happy to partner with Axos Bank. The deals that you get in the U.S. for white-label banks are much more favorable than in Europe,” N26 co-founder and CEO Valentin Stalf told me. “It’s a setup for the longer term. It’s good for a couple million customers,” Stalf added later in the conversation.

Just a start

N26 is already planning more features for the U.S. The company plans to roll out two premium plans — N26 Metal and then N26 Black.

And it sounds like there will be some changes when it comes to perks for premium users. “We took that to a separate level,” Stalf said.

Another feature, shared Spaces are finally arriving in the coming months. Spaces are sub-accounts designed to put money aside. You can swipe money from one Space to another or you can set up automated rules.

Eventually, you’ll be able to share a Space with other people so that you can save money and spend money together. It’ll work “like a WhatsApp group,” Stalf said.

N26 currently has 3.5 million customers in Europe and has raised over $500 million in total so far. There are now a thousand people working for N26 in Berlin, 60 employees in New York, 80 people in Barcelona and a small team of 5 to 10 people starting soon in Vienna.

“It went from being a small company to being an international company,” Stalf said.

N26 Spaces ENUS


Read Full Article

Google Maps now shows users discounts from nearby restaurants in India


Google said today that it has started to display discounts from restaurants in its Maps app in India as the Mountain View giant works to expand its ever growing reach and relevance in one of its key overseas markets.

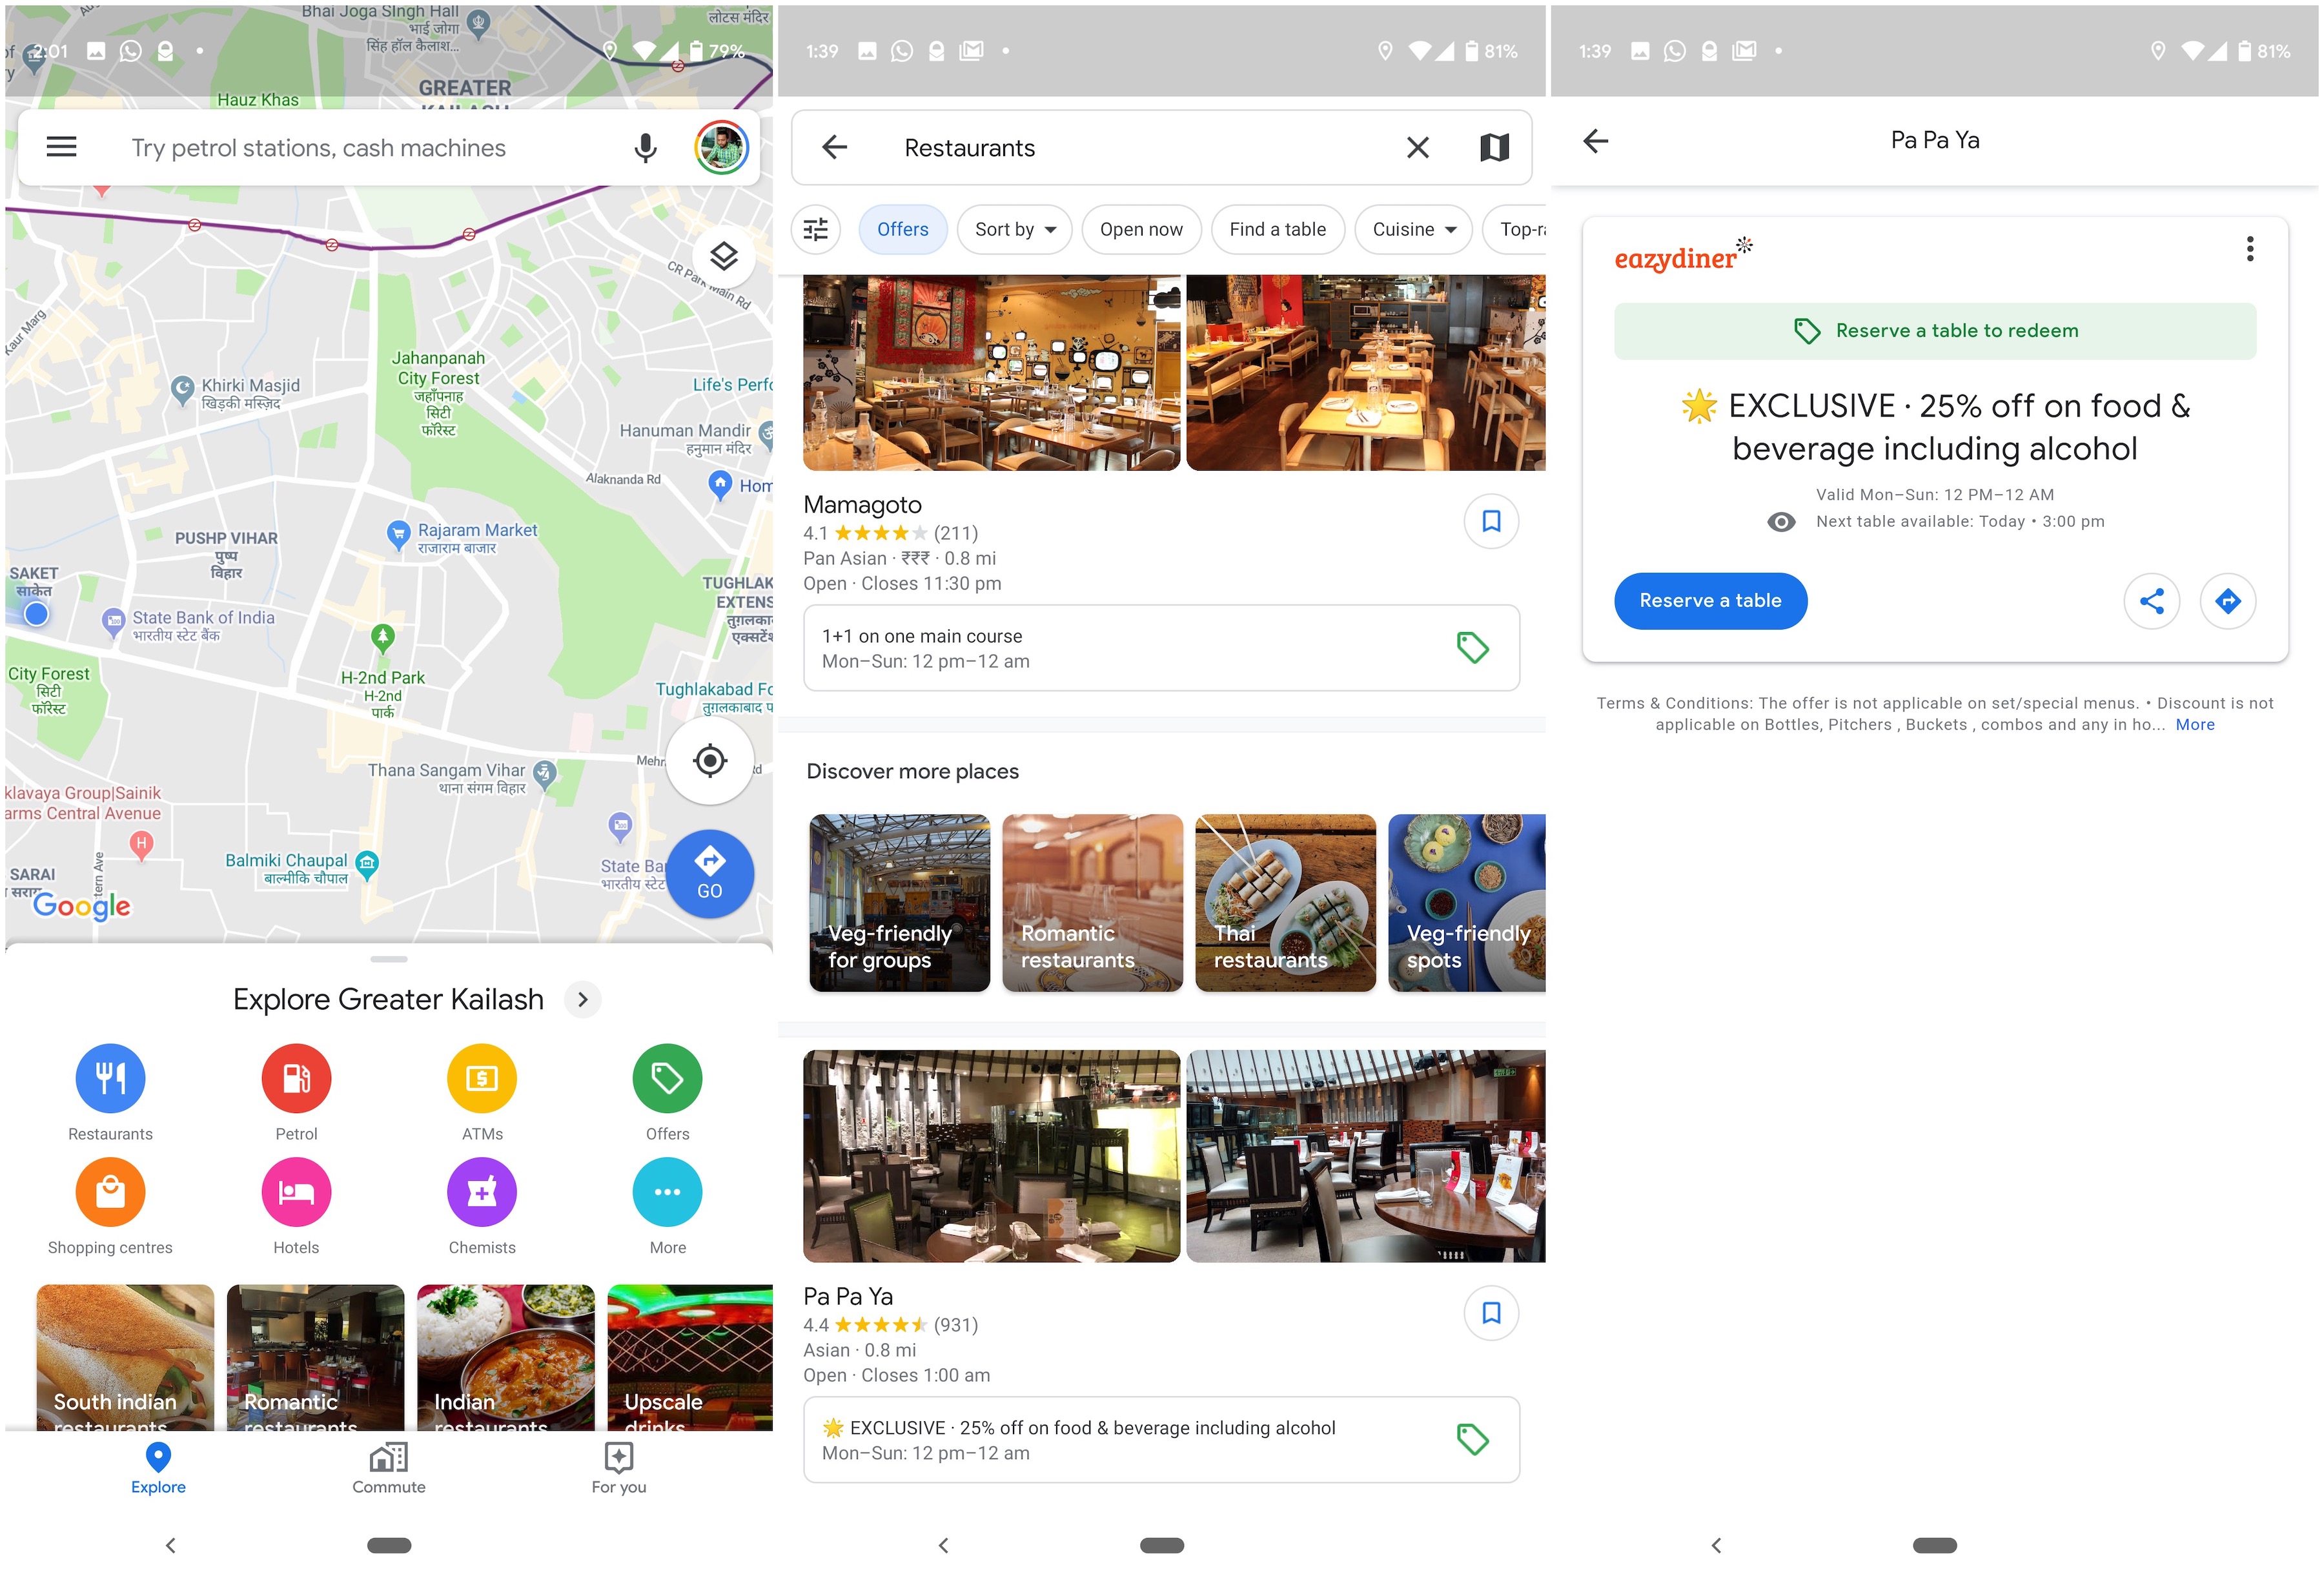
The company today rolled out an update to add three new features to Google Maps app in India. Users can now see a new ‘offers’ option in the ‘explore tab’ that will display promotional offers from local restaurants. Google said it has partnered with EazyDiner, a table reservation platform, to display offers from over 4,000 restaurants. The feature is live in 11 metro cities in India.

Restaurant offers are just the beginning, as the company plans to ink deals with more partners and expand to more categories in future, it said. Users can also book a table to a restaurant directly from the Maps app. Google did not reveal the financial agreement it had with EazyDiner, a five-year-old New Delhi-based startup that has raised more than $13 million to date.

google maps

The new offering comes as Google explores way to make more money off Google Maps. The company maintains a Google Maps Platform for enterprise customers, and has increased its access price over the years, but it has yet to monetize the consumer-facing part of the service in a significant way.

As part of today’s announcement, the company has also revamped the ‘explore tab’ in India to “reflect the rich diversity of local neighborhoods and communities,” said Krish Vitaldevara and Chandu Thota, Directors of Google Maps, in a blog post. As part of the fresh paint job, Google said it has added seven shortcuts to give users quick navigation to restaurants, ATMs, shopping, hotels, pharmacy, and of course, offers.

Additionally, there is also an option in the explore tab to get directions to top areas in each city. The company said it uses machine learning to identify these areas. “Besides your own city, you can also look up other Indian cities by just searching the city name — an easy way to get up to speed before you travel,” Vitaldevara and Thota wrote.

The third feature, dubbed ‘For You’, displays personalized recommendations for new restaurants and other trending places. Users in India can now also follow a business and get updates and news on events

“This feature also uses the ‘Your Match’ score, which uses machine learning to combine what we know about millions of places with the information you’ve added — restaurants you’ve rated, cuisines you’ve liked, and places you have visited. The first time you use this feature you can select the areas/localities you are interested in, and get more personalized and relevant recommendations over time,” the executives wrote.

Google continues to bulk up its Maps offerings in India. In recent months, it has added the ability to check if a cab goes off the usual route, and look for real-time status of trains and buses, among other features.

The company, which has amassed over 300 million users in India, continues to use the nation as a testbed for many of its services. This approach has helped Google, which operates Android mobile operating system that runs on 98% of smartphones in India, gain wide adoption in the country.

But it has also instilled an antitrust probe on its influence in the nation.


Read Full Article

How to Email Spreadsheets Automatically on a Recurring Schedule


Introducing Email Spreadsheets, a Google Sheets add-on that lets you automate the reporting of spreadsheet data and dashboards by email. If you are an office worker who has been emailing spreadsheets to colleagues manually, this add-on will save you a ton of time. And because it runs on the Google Cloud, your spreadsheet reports will be delivered even while you are offline or on vacation.

With Email Spreadsheets, you can schedule reports and it will automatically send them by email on a recurring schedule. You can email entire workbooks, specific sheets inside a workbook or even range of cells. Watch the video tutorial to get started.

Email Google Sheets Automatically

Go to the Google add-on store and install Email Google Sheets. Next, open any Google Spreadsheet in your Google Drive, go to the Add-ons menu inside the sheet, choose Email Spreadsheets from the dropdown and then choose Rules to create your first scheduled email report.

You are presented with a 3-step wizard to help the email schedule of your spreadsheet report.

Step 1: Select Sheet Export Options

Google Sheet - Export Options
  1. Expand the “Select Sheets” dropdown and select one or more sheets that you would like to include in the email. Each sheet is attached as a separate file in the email but you can choose the “Merge all sheets” option to create a single file from all sheets in the workbook.
  2. Select the export format. You can choose between PDF, Excel (xlsx), OpenDocument or CSV formats. The “Email without Attachment” option can be used to embed a specific range of cells in the email body without including any sheet as an attachment.
  3. If you have selected PDF as the export format in step 2, you are presented with a few more options. For instance, you can change the paper orientation (Portrait or Landscape), the paper size or alter the print margins to fit more content on a page. You can choose to show gridlines, notes, sheet names and page numbers in the exported file.
  4. (optional) The Cell Range option lets you specify a range in A1 notation and only that range will be exported in the PDF file.

Tip: Use the Preview button to test how your exported files would be like with the various export options.

Step 2: Write the Email Template

Email Template with Dynamic Sheet Cell Values

Next, we create an email template that will be sent with your reports. You can specify one or email recipients in the TO, CC, or BCC fields. Multiple email addresses should be separated by a comma.

You can also specify dynamic email recipients based on cell values in the spreadsheet. For instance, if the email address of the recipient is specified in cell B2 of a sheet titled “Employee Shifts”, you can put in the To field, and the add-on will pull the dynamic value from the cell at the time of sending the email report.

These dynamic cell values enclosed inside double curly braces can be used inside any of the email fields including subject, email body, and the sender’s name.

The email body can include dynamic cell values as well as ranges that make it easy of you to send portions of the spreadsheet without sharing the full workbook. For instance, you can write  to include only the specific range (B2:F9) from the Wages sheet. Internally, the add-on converts the range to an HTML table, retaining all the display formatting with CSS, and embed it into the email.

You can also include standard HTML tags like H1, IMG, A, B, EM and more to include images and rich formatting in your emails.

Tip: Use the Test Email button to send an email with the exported files before setting up the schedule.

C: Create the Email Schedule

Email Sheets Daily, Hourly, Weekly or Monthly

The Google Sheets add-on includes a scheduler to help you set up recurring schedules visually. You can send email hourly, daily, weekly, monthly or even on a yearly recurring basis.

It is also possible to setup advanced schedules like:

  • Send a recurring email on the last working day of the month.
  • Send email reports every alternate day and end the reporting after 15 days.
  • Set up a quarterly schedule and send email reports on the first Monday of the quarter.

That’s it. After specifying the schedule, hit the Save button and your email report will be scheduled.

If you would like to edit your current email report or schedule a new report, go the add ons menu again, choose Email Spreadsheets and Rules.

Download Email Sheets

Email Google Sheets – How it works?

The add-on is written in Google Apps Script. It uses the Google Sheets API to convert sheets to PDF files and uses the Gmail API for sending the converted files as attachments.

The post How to Email Spreadsheets Automatically on a Recurring Schedule appeared first on Digital Inspiration.


Get Lifetime Access to 250 Presentation Templates With Slideshop for $39.99


Let’s face it: slideshow presentations can be really boring. Even if your pitch is dynamic, dull slides can really let you down. If you want to make your presentations more engaging, Slideshop can help. This platform gives you unlimited access to over 250 stunning template slides, covering every conceivable style. Right now, you can get a lifetime subscription for only $39.99 at MakeUseOf Deals.

The Slide Library

When you’re creating your slideshow, the easy option is to use the templates provided in PowerPoint and Keynote. The problem is, everyone else is using those templates — and that can make you look unprofessional.

Slideshop offers a simple and stylish solution. Used at Samsung, Nike and AT&T, this huge online library is packed with slick templates. There are 250 core styles to choose from, covering business, planning, charts, and more. However, you can customize all of these slides with your own branding and content.

The editing tools are really easy to use, and you have an impressive range of options available. Along with regular slides, you can create eye-catching infographics and colorful charts.

Slideshop provides templates for PowerPoint, Keynote, and Google Slides. As a lifetime subscriber, you get unlimited downloads for use in any presentation.

Save over $2,900

Lifetime access to Slideshop is worth $2,940, but you can get your subscription now for just $39.99 with this deal.

Read the full article: Get Lifetime Access to 250 Presentation Templates With Slideshop for $39.99


Read Full Article

Spotify Lite Is Now Available on Android


Spotify has released Spotify Lite, a lightweight version of the Spotify app. Lite is designed for people who own an older handset, suffer from a lack of storage, or are stuck with an underwhelming data plan. Spotify Lite fixes all of these things.

What Is Spotify Lite?

On the Spotify Newsroom, Lite is described as “a small, fast, and simplified version” of its app. You’ll still be able to do (almost) everything you can with the regular app. However, there are “a few extra features making it ideal for older devices and operating systems.”

In a nutshell, Spotify Lite puts you more in control of your data and storage. It only weighs in at 10MB (instead of the usual 100MB). It also lets you set a data limit (and get a notification when you reach it), and lets you clear the cache with a single tap.

Kalle Persson, Senior Product Manager, said, “Spotify Lite was built from the ground up based on user feedback from around the world, allowing millions more to enjoy the world’s best music experience—especially in areas with limited bandwidth and phone storage.”

Spotify Lite is available on Android (v4.3 or higher) in 36 countries across Asia, Latin America, the Middle East, and Africa. The countries include Argentina, Brazil, Canada, Chile, Egypt, India, Mexico, Peru, the Philippines, Saudi Arabia, South Africa, and Vietnam.

Download: Spotify Lite for Android

The Best Lite Apps on Android

There’s no need to download Spotify Lite if your phone is already running the main Spotify app without any issues. Still, for those who are stuck using an old phone or who don’t have unlimited data to play with, Spotify Lite could be a Godsend.

Spotify is actually rather late to the party here, with other companies having already launched Lite versions of their apps. Here are the best Lite Android apps you can use, including Facebook Lite, Skype Lite, Twitter Lite, and Shazam Lite.

Read the full article: Spotify Lite Is Now Available on Android


Read Full Article

Advancing Semi-supervised Learning with Unsupervised Data Augmentation


Success in deep learning has largely been enabled by key factors such as algorithmic advancements, parallel processing hardware (GPU / TPU), and the availability of large-scale labeled datasets, like ImageNet. However, when labeled data is scarce, it can be difficult to train neural networks to perform well. In this case, one can apply data augmentation methods, e.g., paraphrasing a sentence or rotating an image, to effectively increase the amount of labeled training data. Recently, there has been significant progress in the design of data augmentation approaches for a variety of areas such as natural language processing (NLP), vision, and speech. Unfortunately, data augmentation is often limited to supervised learning only, in which labels are required to transfer from original examples to augmented ones.
Example augmentation operations for text-based (top) or image-based (bottom) training data.
In our recent work, “Unsupervised Data Augmentation (UDA) for Consistency Training”, we demonstrate that one can also perform data augmentation on unlabeled data to significantly improve semi-supervised learning (SSL). Our results support the recent revival of semi-supervised learning, showing that: (1) SSL can match and even outperform purely supervised learning that uses orders of magnitude more labeled data, (2) SSL works well across domains in both text and vision and (3) SSL combines well with transfer learning, e.g., when fine-tuning from BERT. We have also open-sourced our code (github) for the community to replicate and build upon.

Unsupervised Data Augmentation Explained
Unsupervised Data Augmentation (UDA) makes use of both labeled data and unlabeled data. To use labeled data, it computes the loss function using standard methods for supervised learning to train the model, as shown in the left part of the graph below. For unlabeled data, consistency training is applied to enforce the predictions to be similar for an unlabeled example and the augmented unlabeled example, as shown in the right part of the graph. Here, the same model is applied to both the unlabeled example and its augmented counterpart to produce two model predictions, from which a consistency loss is computed (i.e., the distance between the two prediction distributions). UDA then computes the final loss by jointly optimizing both the supervised loss from the labeled data and the unsupervised consistency loss from the unlabeled data.

An overview of Unsupervised Data Augmentation (UDA). Left: Standard supervised loss is computed when labeled data is available. Right: With unlabeled data, a consistency loss is computed between an example and its augmented version.
By minimizing the consistency loss, UDA allows for label information to propagate smoothly from labeled examples to unlabeled ones. Intuitively, one can think of UDA as an implicit iterative process. First, the model relies on a small amount of labeled examples to make correct predictions for some unlabeled examples, from which the label information is propagated to augmented counterparts through the consistency loss. Over time, more and more unlabeled examples will be predicted correctly which reflects the improved generalization of the model. Various other types of noise have been tested for consistency training (e.g., Gaussian noise, adversarial noise, and others), yet we found that data augmentation outperforms all of them, leading to state-of-the-art performance on a wide variety of tasks from language to vision. UDA applies different existing augmentation methods depending on the task at hand, including back translation, AutoAugment, and TF-IDF word replacement.

Benchmarks in NLP and Computer Vision
UDA is surprisingly effective in the low-data regime. With only 20 labeled examples, UDA achieves an error rate of 4.20 on the IMDb sentiment analysis task by leveraging 50,000 unlabeled examples. This result outperforms the previous state-of-the-art model trained on 25,000 labeled examples with an error rate of 4.32. In the large-data regime, with the full training set, UDA also provides robust gains.
Benchmark on IMDb, a sentiment analysis task. UDA surpasses state-of-the-art results in supervised learning across different training sizes.
On the CIFAR-10 semi-supervised learning benchmark, UDA outperforms all existing SSL methods, such as VAT, ICT, and MixMatch by significant margins. With 4k examples, UDA achieves an error rate of 5.27, matching the performance of the fully supervised model that uses 50k examples. Furthermore, with a more advanced architecture, PyramidNet+ShakeDrop, UDA achieves a new state-of-the-art error rate of 2.7, a more than 45% reduction in error rate compared to the previous best semi-supervised result. On SVHN, UDA achieves an error rate of 2.85 with only 250 labeled examples, matching the performance of the fully supervised model trained with ~70k labeled examples.
SSL benchmark on CIFAR-10, an image classification task. UDA surpases all existing semi-supervised learning methods, all of which use the Wide-ResNet-28-2 architecture. At 4000 examples, UDA matches the performance of the fully supervised setting with 50,000 examples.
On ImageNet with 10% labeled examples, UDA improves the top-1 accuracy from 55.1% to 68.7%. In the high-data regime with the fully labeled set and 1.3M extra unlabeled examples, UDA continues to provide gains from 78.3% to 79.0% for top-1 accuracy.

Release
We have released the codebase of UDA, together with all data augmentation methods, e.g., back-translation with pre-trained translation models, to replicate our results. We hope that this release will further advance the progress in semi-supervised learning.

Acknowledgements
Special thanks to the co-authors of the paper Zihang Dai, Eduard Hovy, and Quoc V. Le. We’d also like to thank Hieu Pham, Adams Wei Yu, Zhilin Yang, Colin Raffel, Olga Wichrowska, Ekin Dogus Cubuk, Guokun Lai, Jiateng Xie, Yulun Du, Trieu Trinh, Ran Zhao, Ola Spyra, Brandon Yang, Daiyi Peng, Andrew Dai, Samy Bengio and Jeff Dean for their help with this project. A preprint is available online.

Custom Search Engines in Google Chrome: Essential Tips and Tricks


google-chrome-freezing

Chrome’s Omnibox is an address bar and search box rolled into one. Type a search query instead of a website URL into the box and you’ll see the relevant search results in Google because that’s Chrome’s default search engine.

But what happens when you want to use a different search engine, say, a privacy-focused one like DuckDuckGo? Or how about when you want to search MakeUseOf for articles or your Google Drive for files? You don’t have to go the tedious route of visiting each website to access its search features.

Instead, you can create custom search engines to search these websites directly from the Chrome address bar. Let’s see how you can make that happen!

How to Switch to a Different Search Engine in Chrome

Default search engine options in Chrome

If you don’t want to use the Google Chrome search engine, you can pick from alternatives like Bing, Yahoo, and DuckDuckGo. To switch to one of these, click on the More toolbar button (three dots placed vertically). On Chrome’s settings page that shows up, scroll down to the Search engine section and select a search engine of your choice from the Search engine used in the address bar dropdown menu.

The next time you enter a search query in the address bar and hit Enter, Chrome shows the results in the search engine you configured.

Managing Search Engines in Chrome

Search MakeUseOf from Chrome address bar with custom search engine

Let’s create a custom search engine to search makeuseof.com directly from Chrome’s address bar.

You have to head to Chrome’s settings page once again, and this time, click on the Manage search engines option under the Search engine section. Alternatively, right-click in the address bar and then click on Edit Search Engines from the context menu. You’ll end up on the same screen in both cases; the second method is quicker, of course.

On the screen in question, you’ll see a list of the search engines embedded in Chrome by default, plus the option to add a search engine to Chrome.

Surprised to see search engines here that you haven’t added? That’s Chrome at work. Chrome automatically adds search engines to the list after you search from a site. So if you have already searched MakeUseOf before, you should see a listing for it there. If you don’t see it, click on the Add button to add it manually.

Manage search engines screen in Chrome settings

How to Add a Custom Search Engine

In the dialog box that pops up after you click on the Add button, all you’ve to do is fill the following fields:

  • Search engine: A name for the search engine for your reference. Let’s go with MakeUseOf for our example.
  • Keyword: Pick something short and easy to remember, since you’ll have to prefix your search queries with this keyword. Let’s use muo as our keyword. You can use yt for YouTube, fb for Facebook, insta for Instagram, and so on.
  • URL with %s in place of query: With this URL, you’re telling Chrome where to place the search string.

To find the correct URL for the third field, run a search on the site—in this case, makeuseof.com. Now, replace your search query in the address bar with %s and then copy-paste the URL in the requisite field in Chrome. Better yet, search the site for %s and then copy-paste the entire URL just as it appears. (You might have to fall back on the first method if using %s as your search query introduces extra characters in the URL.)

Chrome settings popup to add search engine

For the search engines that Chrome has added automatically, you’ll see that the site’s domain name and extension—for example: makeuseof.com—doubles up as the keyword.

As we mentioned above, it’s a good idea to replace this default keyword with something short and memorable. To do this, click on the Edit menu item hidden behind the More button next to the search engine’s name in the list and enter a new keyword of your choice in the appropriate field.

In this hidden menu, you’ll also find a Make default option to set the current search engine as the default for Chrome searches. Switched to a new default and now want Google back? The same setting comes in handy when you want to make Google your default search engine in Chrome once again.

Your New Search Engine in Action

Once the custom search engine is in place, this is what your search queries should look like when you want to search a site directly from the Chrome address bar:

<keyword> <search query>

In our example, that will look something like:

muo android problems

Here are a few more examples:

  • YouTube: yt gangnam style
  • Dictionary: dict floccinaucinihilipilification
  • Imgur: img grumpy cat
  • Gmail: gm invoice
  • Google Contacts: addr ben stegner

Custom Search Engine Ideas

Apart from the search engine ideas that are probably bubbling up in your head right now, the following suggestions we found on the web will also come in handy. You can create a custom search engine to:

  • Search your tweets.
  • Check if a website is down.
  • Jump to specific websites.
  • Open region-specific versions of Google.
  • Search Unsplash for wallpapers.
  • Look for apps in the Google Play Store or Apple’s App Stores.
  • View cached version of webpages.

A Quick Way to Faster Browsing

As you might’ve guessed, using custom search engines in Chrome can improve your browsing experience tremendously. Of course, that’s only scratching the surface of what Chrome can do. Our power tips for Chrome users will show you so much else that’s possible! If you’re a Chrome newbie, our easy guide to Google Chrome can help you find your bearings.

Read the full article: Custom Search Engines in Google Chrome: Essential Tips and Tricks


Read Full Article

26 Awesome Uses for a Raspberry Pi

How to Set Up and Use Your Amazon Fire TV Stick

5 Common PC Gaming Problems (And How to Fix Them)


Playing games on a PC provides you with a lot more freedom than on a console. But because PCs are more complex and lack standardized components like consoles, graphical glitches in games (or performance problems) are common.

Most of the common PC gaming problems you’ll experience fall into a few general categories. In this article we look at some of the biggest PC gaming problems you might run into, and show you how to fix them.

1. Artifacts and Visual Glitches

The term “artifacts” refers to heavy distortion of visual media. With video games, this manifests as all sorts of graphical weirdness. You might see missing or deformed geometry, wonky textures, flickering elements, and similar.

Because your video card is the component responsible for processing visuals and sending them to your screen, these issues are typically rooted in your GPU. You should make sure that your graphic card drivers are up to date—see our guide to updating Windows drivers for help doing this.

If you still experience graphic glitches in games after confirming you have the latest drivers, you may have an issue with heat in your system. Clean your PC if you haven’t in a while; too much dust will build up excess heat, which harms your video card and other components. Make sure your PC has adequate ventilation, too. In case you’ve overclocked your GPU, consider rolling it back to normal.

You can use PC diagnostic tools like HWMonitor to monitor graphics card heat. There’s no exact operating temperature you should look for, but in general, an idle card is about 30-40 degrees Celsius. While playing a game, something in the range of 60 to 85 degrees Celsius is normal. Running above 90 or 100 Celsius is too hot.

Finally, you can stress test your GPU to check for problems. If you see artifacts and other visual strangeness during the test, your video card is likely failing.

2. Extreme Online Lag

Lag refers to a delay between you taking action in an online game and the server’s reaction to what you did. If you’ve ever sworn you shot right at an opponent in an online shooter, only to have him skip across the bullets while they hit the wall behind him, you’ve experienced lag.

The quality of your internet connection will affect how much lag you experience. Because of this, when you experience lag, you should make sure to close any bandwidth-intensive tasks that are running on your network. Stop all downloads and video streams, and make sure you aren’t running any torrents.

Lag is more of an issue on an unstable internet connection. If you’re playing online via Wi-Fi, you should consider switching to an Ethernet connection. Have a look at the best powerline adapters if wiring in directly isn’t an option.

Note that the game you’re playing can affect lag as well. If the game uses a peer-to-peer (P2P) setup, like some Call of Duty games, your experience will be affected if another player has a poor connection. In games with dedicated servers, though, only your connection will suffer.

Network Ping

When troubleshooting lag, you should be aware of your ping. This is a value, in milliseconds, that indicates how long it takes your actions to go to the server and back to your device. As you’d expect, a higher ping results in delayed inputs.

Most games let you view your ping in real-time, which you can use to gauge the health of your connection. Generally, you’ll notice lag with anything over 100. If your ping is 50 or under, you’re in a pretty good spot.

Keep in mind that location plays a huge deal in determining ping. If you’re in the US and playing a game on EU servers, you’ll experience much higher ping because your inputs have to travel a greater distance. This is why it’s best to select servers that are as close to you as possible.

3. Freezing/Hanging

When games don’t run smoothly, it’s a huge pain. If you regularly experience sudden freezes in offline games where the game has to “catch up,” the chances are that at least one component of your system is a bottleneck.

You can take a few quick steps to troubleshoot this game hanging problem. If possible, drop the graphics to a lower setting so that the game isn’t as resource-intensive. Close other programs running on your PC so they’re not using up your RAM and CPU power. Make sure you have some free disk space so your game has room to breathe.

If these fixes don’t solve the freezing, you should review your current PC hardware and make sure that it meets the specifications of the game you’re playing. You may need to upgrade if your system isn’t up to snuff. For instance, an SSD will provide far better load times than an old HDD, and you may need more RAM to keep a game running smoothly.

Check out the upgrades that will improve your system performance the most to get an idea of what you need.

4. Screen Tearing

We covered general visual artifact issues earlier, but screen tearing is a special case. This visual problem occurs when your screen shows multiple frames from a game at one time, split into two or more parts that don’t align correctly.

Unlike many PC gaming issues, this isn’t really the fault of any one component. Screen tearing occurs because the feed that your video card sends to your monitor does not sync up properly with the display’s refresh rate. In effect, your card submits a new frame before your monitor has finished showing you the last one, so you see a broken image containing both.

Most games include a feature called V-sync (vertical synchronization) to combat this. Enabling it prevents the video card from updating your display until the monitor finishes the current refresh cycle. While this helps prevent screen tearing, it can also introduce some input lag. Input lag is different than network lag, and refers to a delay between your control inputs and the game recognizing them.

Thus, whether you decide to use V-sync depends on what type of game you’re playing. In a multiplayer game where every instant counts, you should probably keep it off. But in a slow-paced single-player game, using V-sync will make your display look as beautiful as possible.

5. Games Crashing

Visual and performance issues are frustrating, but at least they don’t prevent you from playing the game. Unlike games that continually crash. When games crash, it’s extremely annoying because you can lose progress. If a game crashes frequently, you might not even be able to play it.

Some of the advice we’ve touched on above applies to games crashing too. Make sure that you have the latest video drivers installed and that your system meets the recommended requirements to play the game. Restart your PC to make sure it’s not a temporary problem.

From there, you can jump into some other troubleshooting steps. Disable your antivirus and other software that might interfere with a game’s proper operation. You should also try running the game as an administrator, which can sometimes clear up crashing issues.

Next, reinstall the game to confirm all files installed correctly. At that point, it’s worth Googling the specific game to see if other people have had issues. In some cases, you may have to attempt a specific workaround for that title.

Why Is My Game Glitching? Now You Know

In this article we’ve looked at some common PC gaming problems and how to go about solving them. If you have successfully resolved the issues you can now get back to enjoying your favorite games without issues.

Note that these are all general categories of problems; you may also run into glitches specific to a certain title. Perhaps it’s a visual issue or something that impedes your progress. In these cases, the bug will hopefully get patched out in a future update of the specific game.

Even if you’re not having any of the above problems, it’s always a good idea to make use your PC is running at optimal level. Here’s how to optimize your PC for gaming with a few vital tweaks.

Read the full article: 5 Common PC Gaming Problems (And How to Fix Them)


Read Full Article

The 8 Best PC Cases of 2019

Jabra Elite 85h: The New King of Noise Cancelling Headphones

Where Do Screenshots and Photos Go on a Mac?


screenshots-photos-mac

You have plenty of reasons to take screenshots of your Mac desktop. Demonstrating bugs, showing friends and relatives how to use software, or remembering certain workflows are just a few possible motivations. While your workflow might change, the methods stay the same.

Whatever the reason you’re taking them, managing screenshots can be tough. Where do screenshots go on Mac computers? Can you change that setting? And what about video captures? That’s what we’re here to answer.

How to Take Screenshots and Capture Video on Mac

In case you’re not familiar with taking a screenshot on a Mac, it’s easy.

To capture the whole screen, press Cmd + Shift + 3. If you want to capture just a portion of the screen, press Cmd + Shift + 4. Then you can drag your mouse cursor to capture a set area. For more info, we have a walkthrough of how to take screenshots on your Mac.

Taking a screenshot on macOS

If you have a MacBook Pro with the Touch Bar, this is one case where it’s actually useful. Press Cmd + Shift + 4, then the Touch Bar will give you a few options. You can capture an area of the screen, a single window, or your entire screen, just by pressing different buttons on the Touch Bar.

If you find this handy, we have a whole list of tips on how to make your Touch Bar more useful.

Screenshot options on the MacBook Pro Touch Bar

Capturing video is similarly easy. Press Cmd+ Shift + 5, and you’ll see a list of options much like to the Touch Bar options above. For video, the two icons you need to know about are the two rightmost ones. The button furthest to the right will record a portion of your screen, while the button to the left of it records the entire screen.

You can also use the built-in QuickTime app to record your screen.

Where Do Screenshots Go on Mac?

No matter how you take a screenshot using the built-in macOS options, it saves to the same place. By default, Mac screenshots save to the desktop. You may find this overly messy, but fortunately, you can change this location.

Screenshots on Mac desktop

Changing the Mac screenshot location was once difficult, but as of macOS Mojave, it’s relatively easy. Press Cmd + Shift + 5, then click the Options menu on the far right. At the top of this menu, you’ll see options for where screenshots are saved.

By default, Desktop is checked. However, different folders, the Preview app, Mail, Messages, or even the Clipboard are some of the other options.

You can also change it to any directory of your choosing by Other Location at the bottom of this menu setting. In the popup dialog, simply pick the folder you’d like as your new Mac screenshot location.

Where Do Video Captures Go on Mac?

Video captures made using Cmd + Shift + 5 save to the desktop by default as well. You can change this using the same methods as above.

Unfortunately, you can only choose one default save location. You can’t choose one directory for screenshots and another for video captures.

Where Are Photos Stored on Mac?

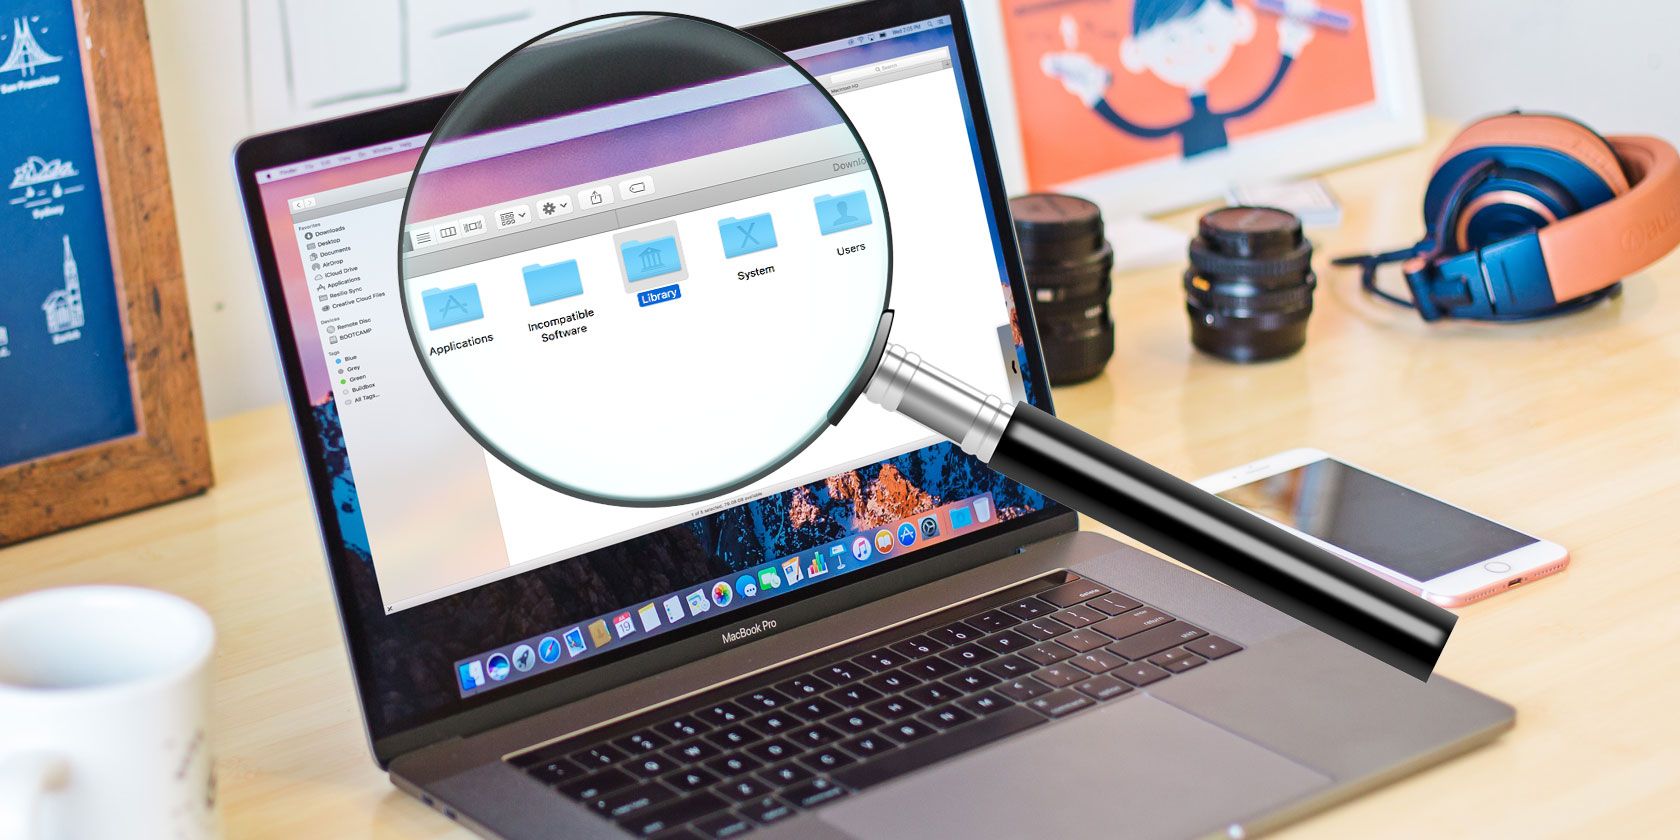
Photos are an entirely different story. Unless you’ve changed your settings so it works otherwise, the macOS Photos app handles this for you, storing photos in its own library. Accessing this is easy, once you know where to look.

By default, your photo library is stored in your home directory, inside the Pictures folder. Accessing it is a little strange though. Inside the Pictures folder, you’ll see an icon named Photos Library. To access your photos, right-click on this and choose Show Package Contents, then open the Masters folder.

Showing macOS Photos Library contents

This is where your photos are stored. They’re organized by year, month, and day. Inside these folders, you’ll find your photos as either JPG or HEIC files.

You can change where the photo library is stored, but not how the photos are stored. To change the photo library location, first make sure to quit the Photos app. Then hold down the Option key while you launch the Photos app.

A screen will pop up asking you whether you want to choose an existing Photo library or open a new one. Here you can create a new Library and change it to any location you prefer. To move your existing library, move it in Finder, then open it using this method.

Choosing location for macOS Photos Library

Managing Screenshots and Captures: The Simple Way

Using Stacks on the macOS Mojave desktop

If you’re annoyed by the clutter caused by dozens of screenshots and video captures on your desktop, there’s a simple way to organize them. This only works if you’re running macOS Mojave or later, thanks to a feature called Stacks.

To get started, right-click on your desktop and click on Use Stacks to enable the feature. This feature simply groups files together by various criteria. You can organize by date or by tag, but in this case, you’ll want to choose Group Stacks By > Kind. This will group your screenshots in one stack and your video captures in another.

This only works on the desktop, so if you’re storing your photos elsewhere, you’ll need another option.

Managing Screenshots and Captures: The Better Way

If you’re not storing your photos on the desktop or you want more control, you should turn to a third-party app. You could use a photo manager like Adobe Lightroom, but that may be overkill for screenshots. Besides, when it comes to screen capture, Mac users have plenty of options.

You might want to try an app like Capto. This app doesn’t just help you organize and manage your screenshots and captures, but also handles capturing. This is handy if you aren’t happy with the options built into macOS. When it comes to organization, the app automatically arranges screenshots for you using customizable criteria.

Screenshot of Capto app

In addition to capturing and organizing videos and images, Capto has built-in editing features. If you’re planning to make screencast videos or simply take a lot of screenshots, this app may be worth checking out.

Capto isn’t expensive. It costs $30 for a single license, or $75 for a family pack. If you’re a student or educator, you can get the app for a discounted $20. It’s also available via Setapp, which offers several Mac apps for a monthly subscription of $10.

Other Tips for Mac Screenshots and Video Capture

While we’ve mainly stuck to built-in methods to capture your screen, they’re not your only option. Aside from Capto, we’ve covered other ways to record your Mac screen as well.

And this is only the beginning. If you want to go deeper, you can also use your computer to capture the screen on other devices. For an example, take a look at our guide to using your Mac to capture the screen of an Android device.

Read the full article: Where Do Screenshots and Photos Go on a Mac?


Read Full Article

The 7 Best Truly Free Antivirus Software for Mac


best-free-antivirus-mac

There’s a constant debate of whether or not Macs can get viruses. If you’re still wondering: “Do I need antivirus for my Mac?” The answer is yes.

Although Macs are less likely to become a victim of a virus, it’s important to stay on the safe side. You don’t have to go overboard with the antivirus tool that you choose. In fact, you have many free options that you should consider. Here are some of the best free antivirus for Mac—don’t worry, they don’t come with any gimmicks!

1. Avast Security

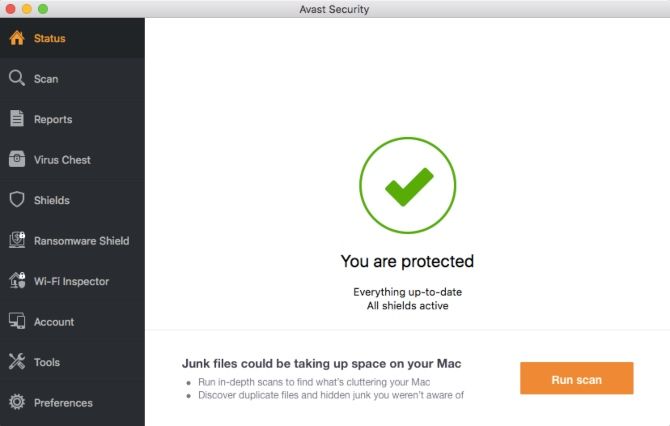
Avast Mac Free Antivirus

Avast’s free antivirus for Mac is considered one of the best options for Mac users. It comes loaded with features that constantly work to block any ransomware, viruses, or malware that compromise your Mac’s security.

When browsing the web, Avast Security will let you know when you come across a potentially dangerous site, and will also keep out any web trackers. Avast even prevents malicious emails and lets you know if there are any security holes in your Wi-Fi connection.

Since Avast Security is completely free on its own, it withholds some extra features for the paid Premium plan. Just be careful when you install the Free plan. Avast will try to throw in some costly extra features during installation that you probably don’t want.

2. Bitdefender Virus Scanner

Bitdefender Free Mac Antivirus

Bitdefender doesn’t come with many bells and whistles, but it’s still a viable option as a free antivirus software for Mac. This antivirus is especially great for scanning specific files or apps. It also allows you to omit files, making for a speedy scanning process. If it does happen to find a threat, Bitdefender will quarantine or remove it.

Bitdefender doesn’t run by itself, so you’ll need to manually prompt Bitdefender to perform scans. Fortunately, virus signatures are automatically updated every hour to ensure that you have the latest protection.

The only downside to Bitdefender is that it lacks the tools to protect your Mac online. For protection against dangerous websites or tricky phishing emails, you’ll have to look into a more well-rounded antivirus software instead.

3. Avira Free Antivirus for Mac

Avira Mac Free Antivirus

Avira doesn’t just think about the security of your Mac, but it considers the security of Windows-users as well—this makes it one of the best free antivirus programs for both Mac and Windows. It detects malware that can damage a Mac or Windows computer. This way, you don’t accidentally pass on any malware to any PC-using friends.

Despite the fact that Avira is free, it still has tons of useful features. The real-time scanner is capable of scanning your entire computer or just specific files. If you want a more hands-off approach, you can even schedule the scanner to run at certain times.

The full system scan can take a long time and tends to slow down your computer. You’ll have to perform less-involved quick scans if you want to keep your Mac’s performance up.

4. Sophos Home Free

Sophia Home Free Mac Antivirus

By default, Sophos’ Home Free plan comes with a 30-day trial of Sophos’ Home Premium. You don’t have to buy the Premium version once the trial ends, but you’ll lose a couple of Premium features you might’ve gotten used to. Either way, you can still get by with just the Free plan.

Sophos Home constantly keeps tabs on the status of your Mac. It searches and detects any ransomware, malware, viruses, Trojans, worms, bots, and more that can harm your computer.

Sophos Home also comes outfitted with parental controls that allow you to prevent your children from accessing certain websites. You can have up to three devices (both Mac or Windows) on the Free plan, ensuring that everyone in your family has protection.

5. AVG

AVG Mac Free Antivirus

AVG’s free protection is powerful enough to secure your Mac from malware, and protect you when you’re online. It can also prevent you from acquiring and passing on any PC or Android viruses. AVG automatically updates its virus database, so you’ll always have the most effective security.

That said, you won’t need to open AVG on a daily basis. It runs in the background, and covertly deflects any threats, such as malicious emails, websites, and downloads.

If you’re looking for any parental controls or webcam blockers, the free version of AVG won’t have it. It just offers scanning and detection features, which is just good enough for basic security needs. Unfortunately, the full system scan does cause your computer to perform slowly, and you can expect it to take several minutes (or hours) to complete.

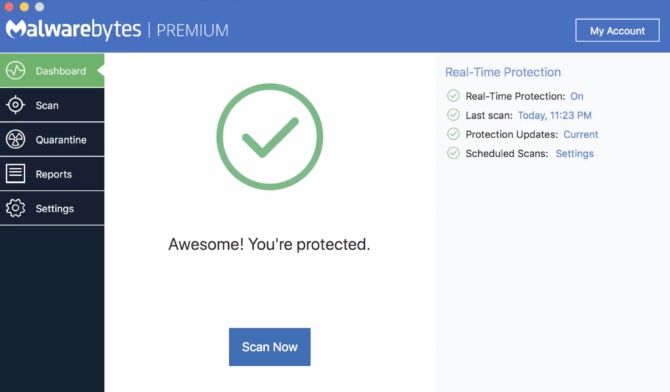
6. Malwarebytes

Malwarebytes Mac Free Antivirus

Malwarebytes promises to scan a typical Mac in just under 30 seconds. If it finds anything suspicious, it’ll provide you with a list of potential threats. You can either choose to have Malwarebytes ignore it, or place the files into quarantine and delete them.

The Free version of Malwarebytes can help you detect malware threats quickly, but it doesn’t offer enough protection to use on its own. You’ll also get a 14-day trial of Malwarebytes Premium, so you’ll have to pay if you want access to all of its features in the future. By itself, the Free plan is just a bare-bones antivirus software—it simply identifies and erases any malicious threats.

7. Comodo Antivirus

Comodo Mac Free Antivirus

Komodo offers an easy-to-use interface and free protection for your Mac. Checking a file or app for viruses is as simple as dragging and dropping it into Comodo. It comes with a quick scan that finishes in minutes, and a total system scan that might take an hour or two to complete. The scheduler lets you pick and choose the times you want to perform scans so your computer won’t get bogged down at the wrong time.

Like some of the other antiviruses on this list, Comodo also stays up-to-date on the latest virus signatures to protect you from all types of viruses. Just remember that Comodo doesn’t automatically protect you online. You’ll have to download the free browser extension Comodo Online Security if you want to block any dangerous websites.

Finding the Best Free Antivirus for Mac

Many Mac users think that their device is resistant to viruses, however, that’s just not the case. Even if your Mac is less likely to contract a virus, it’s still possible for you to pass along malware to Windows and Android users. It doesn’t hurt to install a free antivirus for your Mac to prevent any security breaches.

If you’re looking to protect your Windows PC as well, check out our list of the best antivirus for Windows 10.

Read the full article: The 7 Best Truly Free Antivirus Software for Mac


Read Full Article

First News Memory


First News Memory