Fancy a look at Chrome OS without spending money on a new computer? Wondering if a cloud operating system might improve the Raspberry Pi’s performance as a productivity tool? Wonder no more—it’s possible to install Chrome OS on the $50 computer and find out how well it runs.
Why Install Chrome OS on the Raspberry Pi?
Various operating systems are available for the Raspberry Pi. While the default option is favored by many, a wealth of Linux-only Raspbian alternatives.

But Chrome OS offers something different: cloud computing. The relatively low specification of the Raspberry Pi makes it ideal for Chrome OS. The operating system is designed to run most of its software as web apps, relying on servers for the processing.
If your Raspberry Pi is set up with an Ethernet or wireless internet connection, you’ll benefit from this computing dynamic. This could enable you to set up your Raspberry Pi as a productive yet low budget desktop PC!
Another reason to install Chrome OS on the Raspberry Pi is that it is easy to use. Google has spent years polishing and perfecting the operating system. These changes have been felt in the official release as well as the open source Chromium OS.
The Open Source Chrome OS
While Google manages and releases Chrome OS, the operating system is based on an open source project, Chromium OS. This has been released on various devices, and thanks to the FydeOS project can be installed on the Pi.
Note that several other versions of Chromium OS have been released on the Raspberry Pi. These are now discontinued; there is every chance that FydeOS might be abandoned in future. As such, you may prefer to download and build from the original source code available at www.chromium.org.
For this tutorial, we’re going to use the preconfigured code available in FydeOS.
Grab These to Install Chrome OS on Raspberry Pi
To install and run Chrome OS on a Raspberry Pi computer, you’ll need:
- A Raspberry Pi 3 or 3B+ (there is no working image for the Pi Zero, or for the Raspberry Pi 4)
- At least 8GB microSD card
- 7-Zip from 7-zip.org
- Etcher from www.balena.io/etcher/
- FydeOS Chromium image from GitHub
- A desktop PC
Along with a mouse, keyboard, HDMI cable, and spare display, you’ll be ready to get started with Chrome OS.
Prepare Your SD Card for Chrome OS
The downloaded IMG file is compressed in XZ format, so you’ll need to expand this with a suitable tool. 7-Zip is your best option on Windows; XZ can be expanded natively on Linux systems.
Next, the IMG file needs to be written to the SD card. The simplest option here is the excellent Etcher tool, which will also format your SD card. Download, install, and run Etcher, then click Select image to browse for the Chromium IMG file.

Following this, confirm that the microSD card is detected by Etcher. If not, reinsert the media in your PCs SD card reader and wait until it shows up.
Finally, click Flash to write the data. A few minutes later, Chrome OS will be installed on the microSD card, ready to boot.
Booting Chrome OS on the Raspberry Pi
After safely removing the microSD card from your PC it will be ready to boot in your Raspberry Pi.
The first boot may take a while to complete. You’ll then be prompted to complete the set-up steps. If you’ve used a Chromebook or Android device, you’ll recognize this. It’s basically a case of inputting (or creating) your Google account details.
Once logged in, you’ll see a bare desktop, ready to be configured. You’ll find the launcher in the bottom-left corner and the notifications in the bottom-right. Everything should feel in some way familiar.
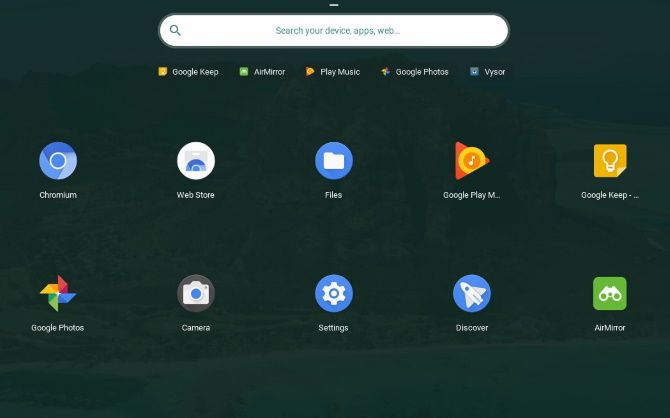
You will notice that Chrome OS on the Raspberry Pi does not quite resemble the version seen on a Chromebook. For example, the Launcher icon on the Shelf is a circle, rather than a 3×3 grid. This is largely cosmetic, however, and makes no difference to the functionality of the OS.
Wondering what your first step should be? Right-click the desktop and select Set wallpaper.

With a stunning background set, you’ll be ready for anything!
Will Chrome OS Software Run on the Raspberry Pi?
Various apps will come pre-installed with the Raspberry Pi version of Chrome OS, as they would with the main release. For example, when I signed in with my usual Google account, I had the Photos app, Google Keep, and more.

This shouldn’t come as much of a surprise. The Chrome OS is based on Linux and supports primarily web applications. “Web apps” are platform-agnostic, relying on a web browser to run.
Almost all Chrome OS apps will run on the Raspberry Pi—none have been found so far that don’t. Looking for suggestions beyond the usual Chrome OS options? Try our list of essential apps for your new Chromebook.
Does It Feel Like a $50 Chromebook?
Chromebooks are affordable computers, typically in the $150-$1500 price range. Installing Chromium OS on the Raspberry Pi with FydeOS gives you the opportunity to build your own Chromebook.

What’s more, you’re likely to only need to spend $50 for a new Raspberry Pi. While it won’t be as fast as the top end Chromebooks, Chromium OS on the Raspberry Pi is certainly on par with the cheaper Chromebook devices.
Once you’ve installed all your preferred productivity apps for Chrome OS, you’ll be ready to go. Need help? Try our Chrome OS cheat sheet for tips.
A Budget Productivity Pi With Chrome OS
The Chromebook range of computers and Chrome OS have been the biggest challenge to Microsoft and Apple over the past decade. Could they really replace standard desktop and laptop computers?
It remains difficult to tell. But you can certainly find out if Chrome OS is something you’re interested in. Simply follow the steps above to install the parent operating system, Chromium OS, on your Raspberry Pi with FydeOS.
Don’t want to use Raspbian but like the Raspberry Pi? Check our list of other operating systems for the Raspberry Pi.
Read the full article: How to Use Chrome OS on a Raspberry Pi
Read Full Article
No comments:
Post a Comment