Windows contains plenty of files and folders that you don’t really need. Between hidden caches, old files that waste space space, and files you can delete to actually solve problems, knowing what’s safe to remove can be challenging.
Let’s step through some Windows files and folders that are totally safe to remove and why you might want to erase them. Note that some of these folders are in protected locations, so take care when deleting them.
The Best Way to Clean Windows Folders: Disk Cleanup
Before we look at several Windows files and folders that you can safely remove, you should know that manually deleting them isn’t the best way to go about it.
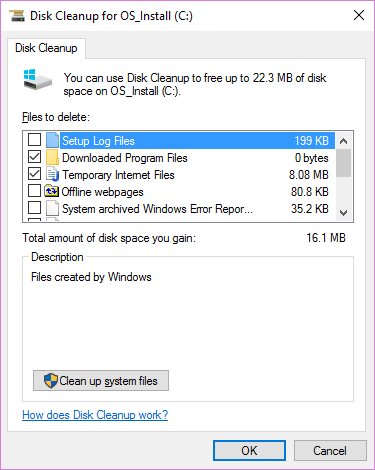
Aside from wasting time doing this yourself when you could automate the process, it’s safer to let the Disk Cleanup tool do these cleanings for you. This avoids accidentally deleting files that you need or messing with the wrong folders.
The Windows Disk Cleanup tool helps you reclaim disk space on your computer and is simple to use. You can open it by searching for Disk Cleanup in the Start Menu. Let it scan, and you’ll see several categories of files you can erase. For more options, choose Clean up system files to gain administrator permissions.
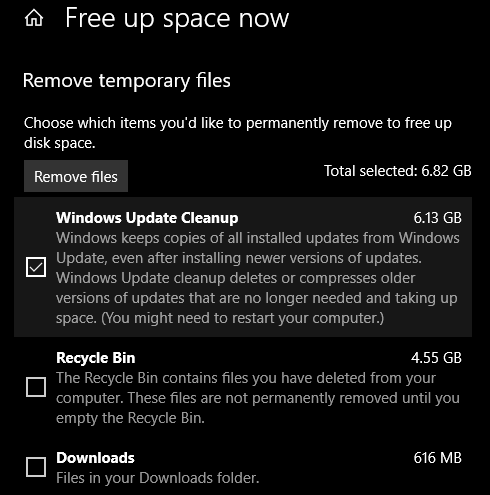
If you find this too old-school, you can browse to Settings > System > Storage to try Windows 10’s newer storage cleanup tool. Click Free up space now to use it.
What to Delete From Disk Cleanup
This isn’t a full guide to the Disk Cleanup tool, so we’re not going to look at every option it offers. However, the following several options are low-hanging fruit (make sure to select Clean up system files to see them all):
- Windows Update Cleanup: This erases old copies of Windows Update files. These are safe to delete in most cases, but you should keep them for troubleshooting if you run into update-related issues.
- Windows upgrade log files: Similarly, these are data files that Windows Update keeps to help you dig into problems around it. You can erase these if you haven’t had errors related to Windows update.
- Language resource files: If you’ve previously downloaded another language or keyboard layout that you don’t use, this will let you easily erase it.
- Recycle Bin: While you can empty the Recycle Bin through its window, you can also do it easily here.
- Temporary files: As their name suggests, temporary files aren’t used for anything in the long-term, so you can erase them without worry.
1. The Hibernation File
Location: C:\hiberfil.sys
Hibernation mode on your PC is similar to sleep mode, except the system saves all your open work to the hard drive and then shuts down. You can remove the battery from your laptop and stay in hibernation for a week, then start back up and be right where you left off.
Of course, this takes up space, which is what the hibernation file is for.
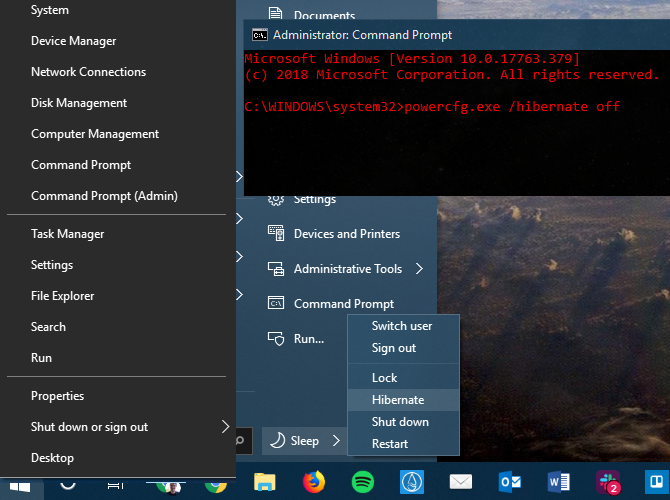
Depending on your hard drive size, the hibernation file is likely several gigabytes or more. If you don’t use hibernation and want to disable it, you can easily do so via the Command Prompt. Note that you shouldn’t just delete hiberfil.sys, as Windows will recreate it again.
Right-click on the Start Button to open the Power User menu, then open a Command Prompt (Admin) or Windows PowerShell (Admin) window. Type the following command to disable hibernation:
powercfg.exe /hibernate off
That’s all it takes to disable hibernation. Windows should delete hiberfil.sys on its own when you do this; feel free to delete it if not. Note that disabling hibernate mode will also prevent your computer from using fast startup on Windows 10. However, this isn’t much of a loss, as this feature is known to cause boot problems.
2. Windows Temp Folder
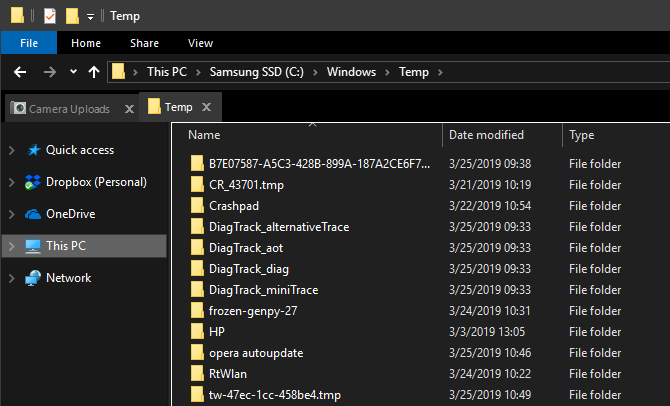
Location: C:\Windows\Temp
As you’d guess from the name, Windows temporary files aren’t important beyond their initial use. The files and folders inside contain info that Windows used at one time but doesn’t need anymore.
Aside from cleaning via Disk Cleanup. you can visit this folder and delete its contents by pressing Ctrl + A to select everything and then hit Delete. Windows might give you an error about a couple of items when you do this—just ignore those and clear everything else.
3. Recycle Bin
Location: shell:RecycleBinFolder
Technically, the Recycle Bin isn’t really a folder. And while it might be obvious to some, we’re including this in case some readers aren’t aware.
Whenever you delete a file on your system, Windows sends it to the Recycle Bin. This is a special place where deleted files are kept until you permanently delete or restore them. If you don’t remember to empty the bin regularly, there could be several gigabytes of old data still in there.
You can access the Recycle Bin through the shortcut on your desktop. If you don’t have one, type shell:RecycleBinFolder into the File Explorer’s navigation bar. Once here, you’ll see everything you’ve deleted recently.
You can right-click on individual items and choose Delete to permanently erase them or Restore to send the file back to its original location. On the Ribbon above, you’ll see buttons to Empty Recycle Bin and Restore all items.
To tweak the way the Recycle Bin works, click Recycle Bin Properties on the Ribbon. Here, you can change the maximum size of the bin, or select Don’t move files to the Recycle Bin.
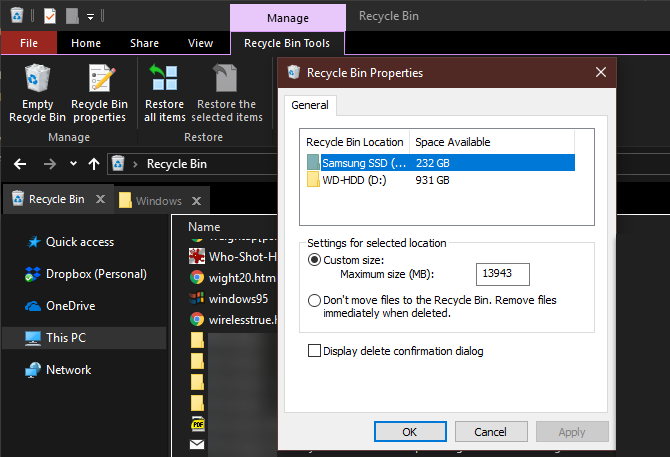
With this option, Windows skips the bin and permanently removes items when you delete them. We don’t recommend this because the Recycle Bin gives you a second chance in case of a mistake.
4. Windows.old Folder
Location: C:\Windows.old
Whenever you upgrade your version of Windows, the system keeps a copy of your old files called Windows.old. This folder essentially holds everything that made up your old installation, kept around in case something didn’t transfer correctly.
If necessary, you could use this folder to roll back to a previous version of Windows. You can also open the folder and grab a few stray files if you need.
Windows automatically removes this folder after a short time, but you can remove it yourself if you’re crunched for space. It won’t delete if you try to go through the File Explorer, so type Disk Cleanup into the Start Menu and launch the tool as described earlier.
Click Clean up system files at the bottom of the window and let the utility do another scan. Once that’s done, look for the Previous Windows installation(s) and delete it using this tool.
Obviously, removing these files makes it harder to recover data in case of an issue. After perming a Windows upgrade (even just to the latest version of Windows 10) we advise you to hold onto this folder until you’re sure everything is working properly.
5. Downloaded Program Files
Location: C:\Windows\Downloaded Program Files
This folder’s name is a bit confusing. It actually holds files used by Internet Explorer’s ActiveX controls and Java applets, so that if you use the same feature on a website you don’t have to download it twice.
In effect, this folder is useless. ActiveX is an extremely outdated technology that’s full of security holes, and Java is rarely used in today’s web. ActiveX is exclusive to Internet Explorer and you’ll probably only encounter it on ancient corporate websites now.
Most home users don’t use IE anymore, let alone ActiveX. Your Downloaded Program Files folder might already be empty, but feel free to clean out its contents if it’s not.
6. LiveKernelReports
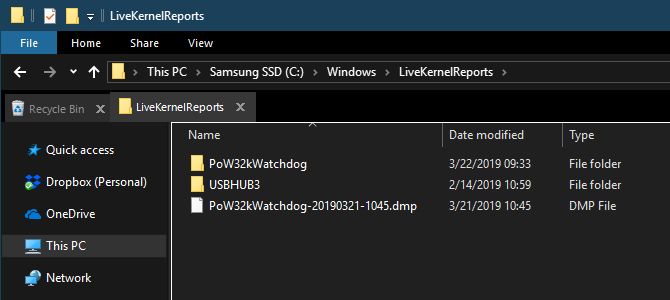
Location: C:\Windows\LiveKernelReports
The LiveKernelReports folder is another directory which likely comes up when you’re scanning for large files on your computer. This folder is home to dump files, which are ongoing information logs that Windows keeps. If your computer runs into an issue, you can analyze the contents of these files to start troubleshooting your problem.
Any huge files ending with the DMP file extension in this folder are safe to delete. Like the above locations, we recommend using Disk Cleanup instead of deleting the file yourself.
When Windows crashes or you have other major computer problems, don’t delete these dump files right away. You can use a program like WhoCrashed to get more info from them.
7. Rempl Folder
Location: C:\Program Files\rempl
While the Rempl folder isn’t large, you might be surprised when you see it appear on your system. It contains several small files, and you might even notice a few Task Manager processes connected to it.
This folder is connected to Windows 10 update delivery. It includes “reliability improvements” to help make Windows 10 updates go smoothly and iron out compatibility issues.
So can you delete the Rempl folder? There are seemingly no adverse effects from doing so. However, since it only takes up a few megabytes and can make Windows upgrades less frustrating, it’s best to keep it around.
Which Windows Folders Do You Erase?
It takes a bit of looking around, but Windows holds plenty of files and folders that aren’t needed. Remember that your computer does a pretty good job of keeping itself clean, so you don’t have to obsessively remove the contents of these folders unless you’re really low on disk space.
Running the Disk Cleanup tool once or twice a month should do enough to keep the cruft away. You have bigger issues to worry about than micromanaging your PC’s temporary files. Speaking of which, check out great tools to automate repetitive Windows tasks.
Read the full article: 7 Windows Files and Folders You Can Delete to Free Up Space
Read Full Article
No comments:
Post a Comment