
One of the most difficult parts of any job search is jumping on top of new job postings fast enough.
In a competitive job market, sometimes the early bird gets the job. Had you applied earlier, that job might have been yours. Automating your job applications with Google Forms might help to give you an edge.
Job Hunting Efficiently
There’s a lot of work that goes into job hunting. You need to get your resume up to speed. You’ve got to get a portfolio website in order.
Then there’s the job search. There are dozens of job boards online, and every day you discover a long list of new opportunities.

The following guide will walk you through automating your initial query letter so that applying to job postings doesn’t become a full-time job.
Here is the automated flow that your new system will handle for you, once it’s set up.
- You fill out a short Google form with relevant information from the job ad
- The form triggers an automation that fills out the email using the information from your form
- The automation attaches your resume and sends the form to the recruiter or HR person
Sounds like a real time saver, right? Let’s get started.
Job Query Google Form
Visit Google Forms, and start a new form by clicking on the “+” icon to create a blank form.
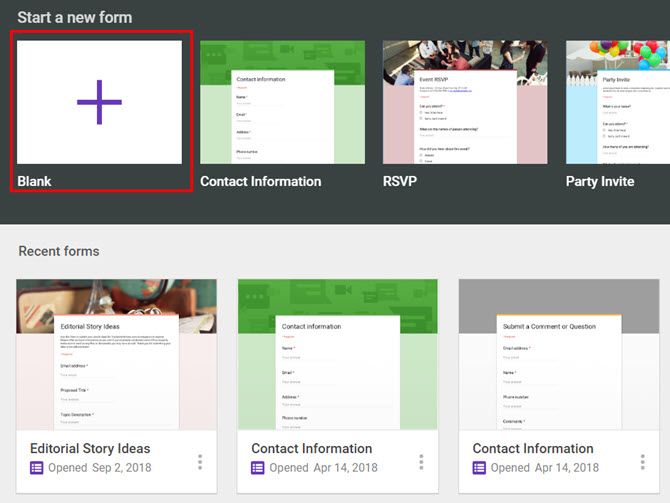
Since this form is just for you, it doesn’t have to be pretty. A blank form will do.
Title the form “My Job Application”, then follow these steps to set up all the fields.
- Short answer with the description Email Recipient
- Short answer with the description Recipient Name
- Short answer with the description My Full Name
- Paragraph with the description My Address
- Short answer with the description My Phone Number
- Short answer with the description My Email Address
- Short answer with the description The Job Title
- Paragraph with the description Why I’m a Good Fit
- Paragraph with the description Relevant Experience
- Date with the description Date of Application
Save this form with the name “My Job Application”.
At the upper right corner of the form window, click on the eye icon to preview your form. Fill out the form, and click Submit.
Go back to the editor window, click on Responses, and then click on the Google Sheets icon to create a new Google sheet with your responses.
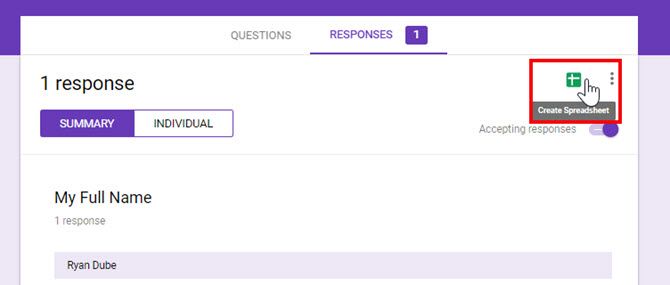
It will ask you what to name the file. Give it any name you like.
Finally, open up the sheet and make a note of which column is assigned each data point.

For example, above column A is “Timestamp”, column B is “Email Recipient”, and so on. You’ll need this information later.
Click on File, Share, and make a note of the URL link to the spreadsheet. You’ll need this later in this article as well.
Create and Share Your Resume
With every job application you send, you’ll need to include your resume.
If you don’t have one yet, one excellent quick way to set one up is to use one of the resume templates that are available in Google Docs under Start a new document.
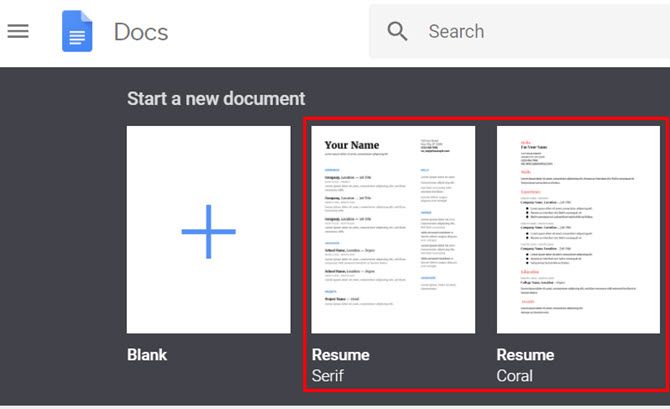
Or if you prefer, there are plenty of resume templates in Microsoft Word, or web services that’ll help you create an impressive CV.
Once you’ve uploaded the document or created it in Google Docs, right-click on the file and click Share.
Click on the Advanced link in the lower right corner of the window.
On the next window, click on Change beside the Private setting.
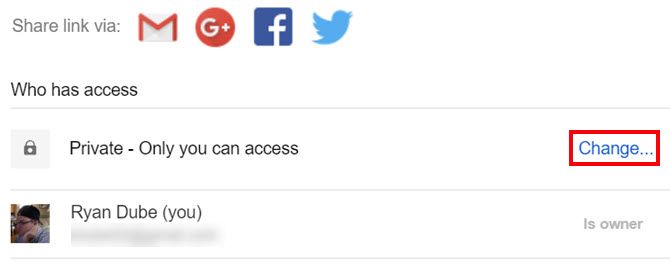
Change the privacy setting to “On – Anyone with the link“.
Now the HR person who receives your automated email will have full access to view or download your resume.
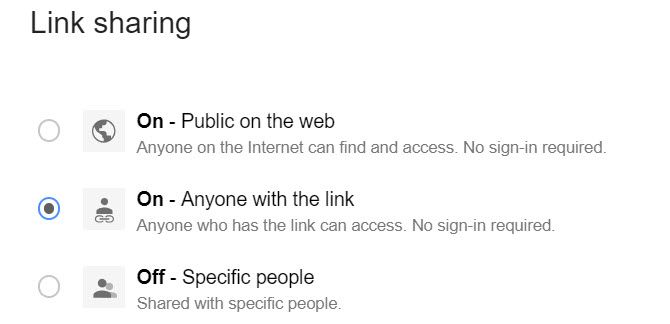
On the previous screen, remember to copy the share link to your file and save it to use later on in this process.
Now that your input form is ready, and your resume is uploaded and ready to get sent out to recruiters, you can automate your job application process!
IFTTT Form to Email
The next step is to use the Google Form as a trigger to send your job application email.
If you don’t have one yet, create an IFTTT account. When you open your account, click on the dropdown by your username and select New Applet.
Click on the this IFTTT link, search for sheets, and select Google Sheets. Log into the Google Drive account you want to use here.
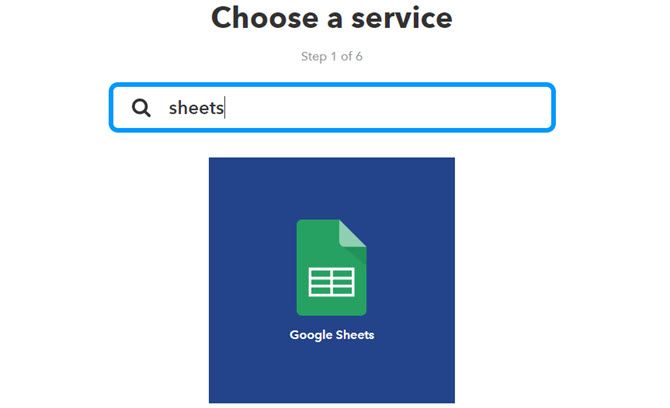
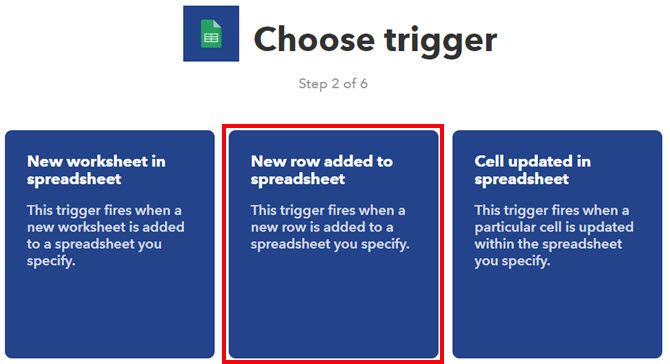
On the next screen, select New row added to spreadsheet.
This will trigger your IFTTT automation every time you fill out the form and it adds a new row to your application spreadsheet.
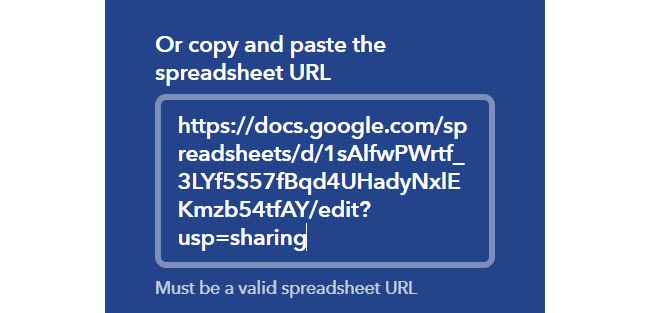
Next, fill out the form using the URL share link that you saved when you created the Google Forms spreadsheet above.
Next, click on the that IFTTT link. Search for Gmail, and choose Send an email as the action.
Note: You don’t have to use Gmail for this step. Any other email service that’s integrated with IFTTT, like Office 365 email, will work as well. You just need to authenticate the account to your IFTTT service.
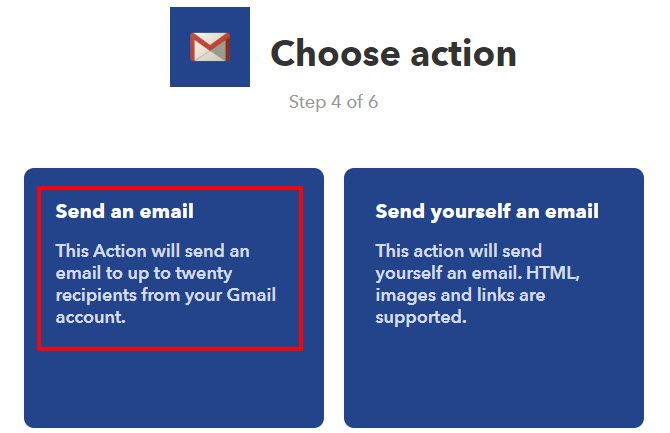
This next step is where you’re going to carefully customize the email that goes out to the recruiter or HR person.
Customize the Application Email
First, click on Add ingredient below the To address field. Then select the column from the spreadsheet that correlates with the recipient email.
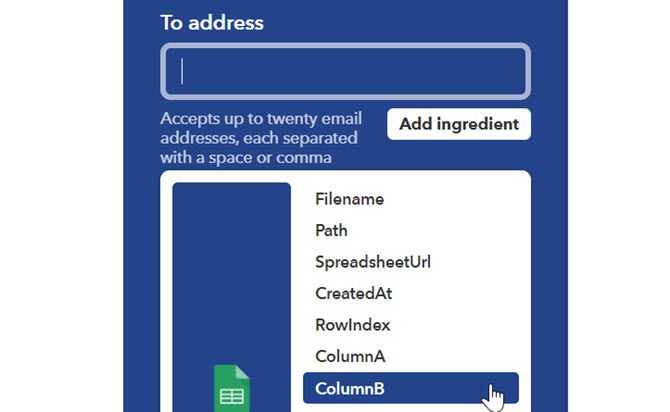
You can leave the CC address and BCC address fields blank.
Next, clear the Subject field, and then click on Add ingredient.
This field will be a combination of static text and dynamic input from your form. In the field, type something like “My application for position of “.
Then click on Add ingredient. Choose the column from your spreadsheet that you used for The Job Title.
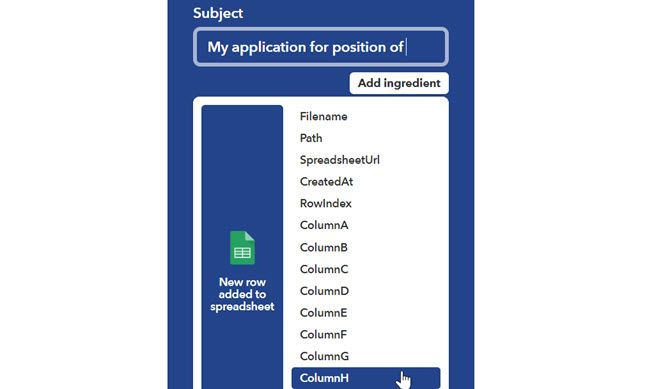
It’s time to craft the body of your email in a way that sounds natural.
Clear the Body field, and then type up your application letter. Throughout the text, insert ingredients from your spreadsheet as needed.
Here is an example of what that letter might look like once all of the ingredients from the sheet are inserted.
Dear ,
<p>My name is , and I'm very excited to be applying to the position of .</p>
<p>I have a great deal of experience in this field, including .</p>
<p>I'm a perfect fit for this role because .</p>
<p>Please don't hesitate to contact me at . Or you can email me at . I'm very much looking forward to speaking with you soon!</p>
<p>Best Regards,<br>
<br>
<br>
<br>
</p>
Note: Make sure to use HTML formatting tags as shown above so that paragraphs are formatted properly in the email!
At the bottom of the form, you’ll see a field for Attachment URL. This is where you should paste the link to your resume.
Click on the Create Action button, and then Finish. You’re done!
Your Automated Job Application System
You’re ready to test your new automated job application system!
Just launch the form and fill it out, but use your own address as the recipient email address. Fill out the form with all the data you normally would if you were applying for a job.
Once you submit the form, in just a minute or two you should receive a nicely formatted email that looks something like this.
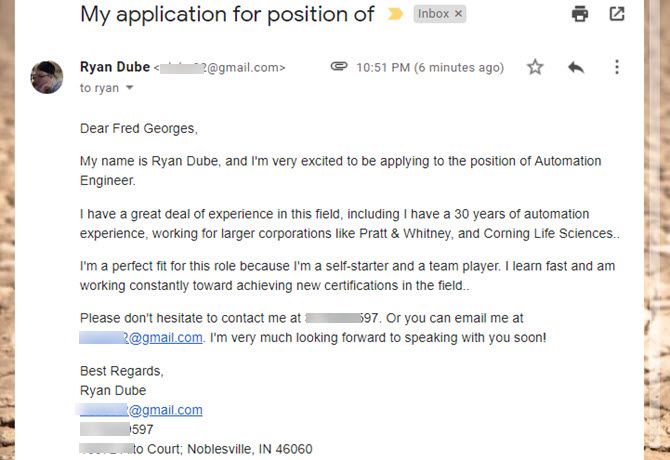
To Fred Georges, Mr. Recruiter, it appears as though you’ve taken the time to craft a professional letter about the exact position he advertised for.
He doesn’t need to know that you spent barely 10 minutes filling out a few fields in a form!
If you wanted to save time, you could even remove your name and contact details from the form and use static text in IFTTT, so you can fill out even fewer fields. However, if your contact info ever changes, you’ll have to redesign the form.
Start the Job Search Now
Now that you’ve automated the application process, you can spend more time looking for those choice jobs out there!
Speaking of which, there are a number of really good job search engines on the web you may want to explore as well, to boost your odds of landing your dream job.
Read the full article: How to Automate Job Applications Using Google Forms
Read Full Article
No comments:
Post a Comment