Playlists are a core component of Spotify. Not only does the music streaming service have curated collections of songs to suit specific moods, you can also make playlists of your favorite songs too.
However, managing your Spotify playlists isn’t as simple or straightforward as it could be, so we’ve put together a list of tips to help. Note that most of these tips pertain mainly to Spotify’s desktop apps.
Using these tips, along with our in-depth guide to Spotify, means you should enjoy the music streaming service more than you ever did before.
1. Move or Delete Playlist Songs in Bulk
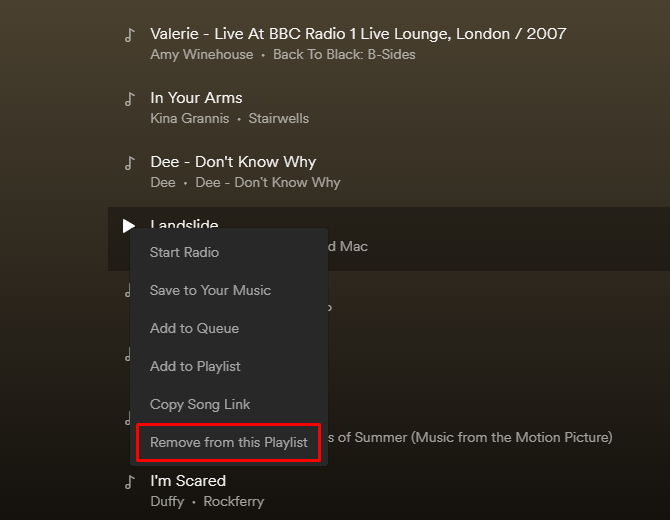
There may be times when you want to get rid of songs you no longer like. It’s also convenient to be able to move them around a playlist in batches.
To accomplish this, hold down Ctrl—or Cmd on a Mac—to select multiple songs. Then, drag and drop them to move them. Otherwise, right-click on one chosen track and click Remove From This Playlist.
You can also work with several songs listed consecutively on a playlist. Click the first one, then hold down Shift while you select the last one. That action highlights all tracks between the two. After that, delete or move the block of songs using the steps above.
2. Import an iTunes Playlist Into Spotify
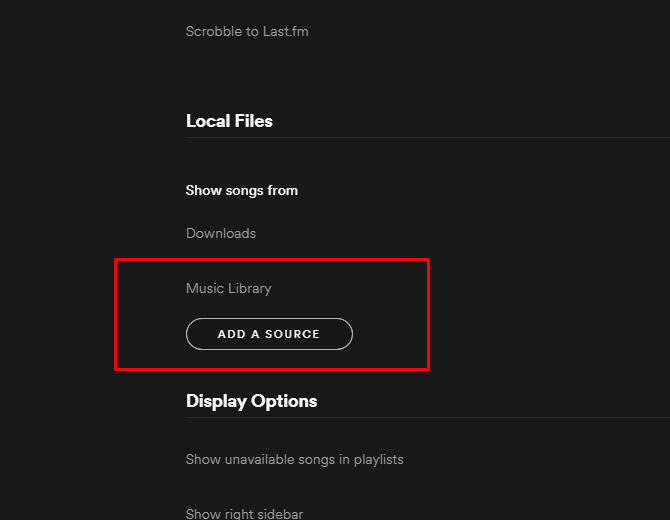
When using the Spotify desktop app, you can transfer iTunes playlists to Spotify by importing them. First, copy the desired iTunes songs and put them in a desktop folder. Then, launch Spotify and go to Preferences, then Settings. From there, choose Add a Source.
From the file window, choose the folder of iTunes songs from your desktop and click Open. Notice the folder showing in the Spotify source list? Uncheck every other source besides the newly imported folder. While in Spotify, choose File, then New Playlist.
Look in the left-hand pane of Spotify and select the Local Files option. All of your songs recently copied from iTunes and imported into Spotify are there. Select all of them with the Ctrl + A command if you’re using Windows, or Cmd + A if you’re a Mac user. Then paste them into the new playlist. Finally, re-check all of the items in the Spotify source list.
3. Identify the Current Playlist
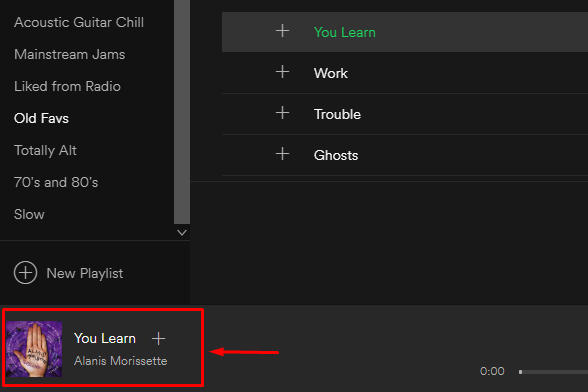
Sometimes, you might hear a tune on Spotify and want to know which playlist features that song. When using the Spotify desktop app, click on the mini album art in the bottom left-hand corner.
Be careful to only click in the bottom half of that picture and not on the upward arrow icon—which only makes the playlist image larger. Clicking in the appropriate section of the playlist image opens that list in Spotify’s main pane, allowing further perusal.
4. Duplicate a Playlist
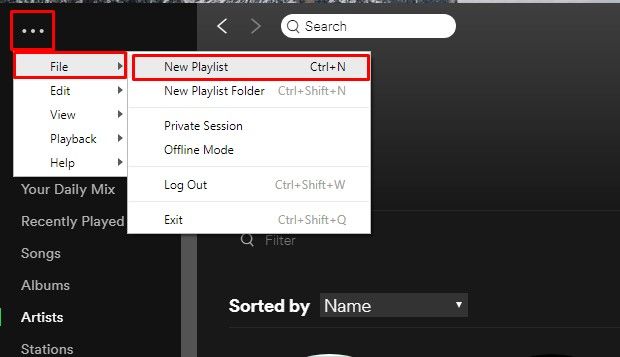
You can customize your Spotify experience even more by duplicating your playlists. Doing this moves the most recently created one to the top of Spotify’s left-hand panel, which is handy if you want to make that playlist easy to find. Then, you can either delete the original playlist to avoid excess clutter in Spotify, or keep it around if you plan to make significant changes to the duplicate playlist.
To duplicate a playlist, go to File, then New Playlist on the desktop app. Then, find the playlist to duplicate. Click the first song title to select (but not play) the track.
Press Ctrl + A in Windows, or Cmd + A in Mac to select all songs. Finally, click and drag the highlighted songs to the new playlist in the left pane.
5. Quickly Put All Songs Into One Playlist
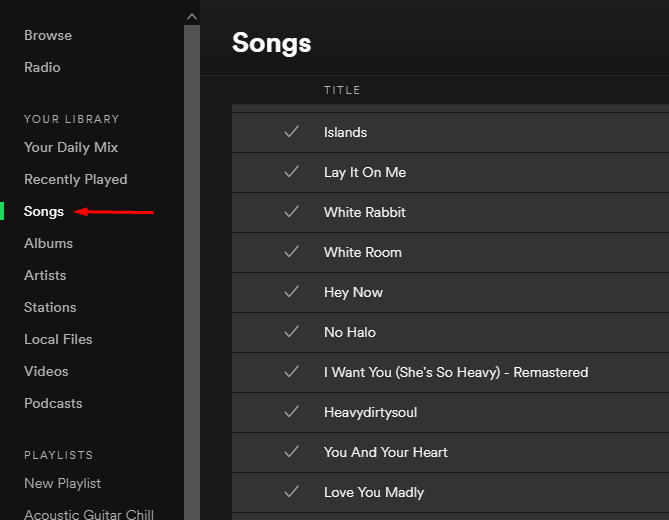
Most people segment Spotify songs into multiple playlists. However, you can also add all of them into one massive list.
In the Spotify desktop app, go to File, then New Playlist. Next, choose Songs from the Your Music section of the left pane. Click on one track in that section to highlight it. Press the Ctrl + A command in Windows or Cmd + A in Mac to select all songs after that. Finally, drag all of them, while you still have them selected, to your new playlist.
6. Transfer a Playlist to Someone Else
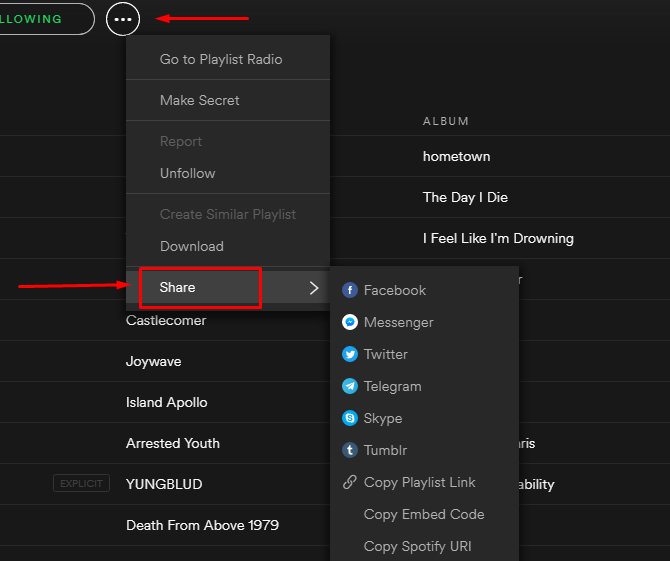
Spotify’s Family plan allows up to six household members to get Premium for $14.99/month. And if you have Spotify Family, there’s an easy way for members of a family account to share playlists. It simply requires each person to have WhatsApp or an email account.
First, go to Spotify’s left-hand pane and choose the playlist to share. Click the three-dots icon and select Share. Next, pick either WhatsApp or an email account to send it to the recipient. Once the person gets the playlist, they can use the Download toggle switch associated with the playlist to transfer the songs to their account.
7. Drag Single Songs to Different Parts of Playlists
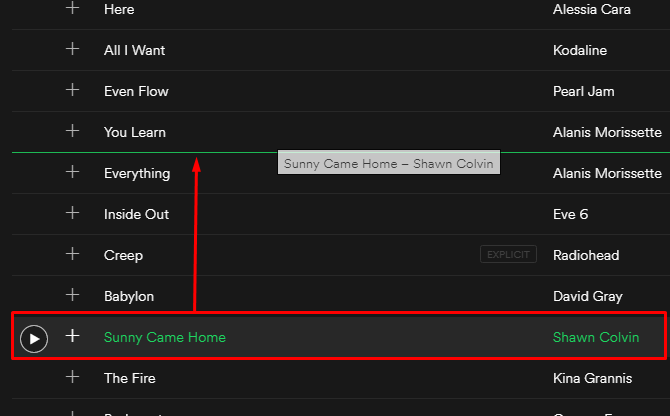
Amongst the many helpful Spotify tips in this post, you’v learned how to move or delete songs in bulk. However, it’s also possible to move individual songs. By doing that, you can group them by artist, genre, album, or other shared characteristics.
From the Spotify desktop app, click on one song in a playlist to select it. Then, click and drag up or down. Watch for a neon green line that appears. It indicates you can insert the song and rearrange the playlist order. The song you move always appears below the green line in the playlist. Release the mouse or trackpad button when the song is where you want it.
8. Edit a Playlist’s Image
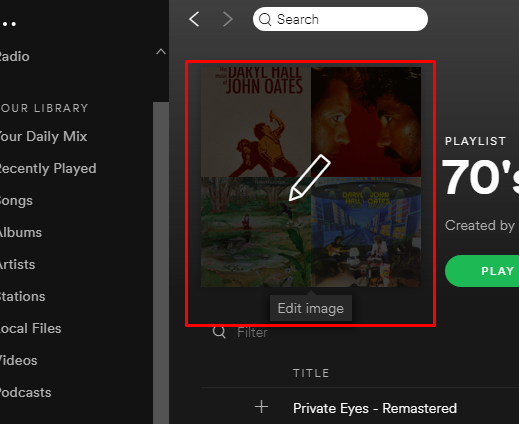
The picture associated with a playlist is often an album cover or a band group shot. It may also include other relevant imagery. You might see the image of a waterfall on a nature songs playlist, for example. However, it’s easy to change that image to anything you wish.
Hover your cursor over the existing playlist image and click the Pencil icon. Doing that opens up an Edit Playlist Details box. Click the Choose Image button on the picture on the left. Then, pick a file from your computer and click Open to confirm the selection. Finally, click the green Save button in the Edit Playlist Details box.
If you want to make your Spotify playlists look amazing you can even create your own artwork.
How Do You Manage Your Spotify Playlists?
These simple but effective tips should help you manage your Spotify playlists without any hassle. So, if you have family or friends who regularly use Spotify, consider sharing these tips with them too.
And if you want to learn more about the Premium version of Spotify you should check out our article detailing everything you need to know about Spotify Premium.
Read Full Article
No comments:
Post a Comment