30 June 2020

How to Add Options in Google Forms Questions from Google Sheets


A school is trying to create a Google Form where students can register their details. The form would have a drop-down of countries, the names of class teachers as a multiple choice question and a checkbox style question where students can pick one or more subjects.

It is easy to create such a form inside Google Forms - here’s a sample form - but there are two issues:

  1. There’s too much data to type. For instance, the country down-down alone has a list of 250 countries and it would take some work for the form editor to manually type each choice in the question.
  2. The question choices in the form may change with time. In the previous example, some teachers may move out, new teachers may join in and the drop-down list in the form has to be updated manually every time there’s a change in the staff.

Auto-Populate Questions in Google Forms with Google Sheets

As with everything else in the world of Google Forms and Google Sheets, we can easily automate the process of adding question choices in Google Forms in bulk with the help of, you guessed it right, Google Apps Script.

The idea is simple. We’ll have a Google Sheet that will be the data source and have all the answer choices for various questions in the Google Form.

The app will read the data from this Google Sheet and auto-populate the choices in the form with one click. You can even create a time-trigger that runs every hour, day or month to dynamically update your form using the most current data available in the spreadsheet.

Add Options in Dropdown Lists & Multiple Choice Questions

Create a Google Spreadsheet and add the question titles in the first row of the sheet, one per column. Next, write down all the options or choices that should be available per question.

Here’s how your spreadsheet structure would look like:

Google Form Answers in Google sheets

The important thing to note here is that your column headings in the spreadsheet should exactly match the form field labels of the Google Form. The Google Script can bulk add answers in multiple-choice questions with a single answer, drop-down lists and checkbox with multiple options.

Bulk Add Question Choices with Google Script

Open the Google Sheet that has the question choices, go to the Tools menu and choose Script Editor. Replace the default code in the script editor with the Google Script below. Please watch the video tutorial to know in more detail how this code works.

/**
 * Auto-populate Question options in Google Forms
 * from values in Google Spreadsheet
 *
 * Written by Amit Agarwal (MIT License)
 *
 **/

const populateGoogleForms = () => {
  const GOOGLE_SHEET_NAME = '<<Put the name of Google sheet here>>';
  const GOOGLE_FORM_ID = '<<Put your Google Form ID here>>';

  const ss = SpreadsheetApp.getActiveSpreadsheet();

  const [header, ...data] = ss
    .getSheetByName(GOOGLE_SHEET_NAME)
    .getDataRange()
    .getDisplayValues();

  const choices = {};
  header.forEach((title, i) => {
    choices[title] = data.map((d) => d[i]).filter((e) => e);
  });

  FormApp.openById(GOOGLE_FORM_ID)
    .getItems()
    .map((item) => ({
      item,
      values: choices[item.getTitle()],
    }))
    .filter((values) => values)
    .forEach(({ item, values }) => {
      switch (item.getType()) {
        case FormApp.ItemType.CHECKBOX:
          item.asCheckboxItem().setChoiceValues(values);
          break;
        case FormApp.ItemType.LIST:
          item.asListItem().setChoiceValues(values);
          break;
        case FormApp.ItemType.MULTIPLE_CHOICE:
          item.asMultipleChoiceItem().setChoiceValues(values);
          break;
        default:
        // ignore item
      }
    });
  ss.toast('Google Form Updated !!');
};

You need to replace the GOOGLE_SHEET_NAME and the GOOGLE_FORM_ID with your own values. Go to the Run menu inside the Script editor, choose populateGoogleForms function and it should instantly choices for all the specified questions in the Google Form.

Dynamically Update Answers in Google Forms

Going forward, whenever you need to update the answer choices in Google Forms, you can simply update the values inside the spreadsheet and run the same auto-populate function from the Script editor.

Or, to make things even more simple, you can add a button on the spreadsheet page that, when clicked, will automatically update the answers in Google Forms for you.

Go to the Insert menu in Google Sheets, choose drawing and pick any shape. You can also add overlay text to the shape. Once the shape is placed on the spreadsheet canvas, click the menu, choose assign script and type populateGoogleForms.

Bulk Import Button in Google Sheets

That’s it. You can click this button to update your Google Forms right within Google sheets. Do note that the script will not append choices, it will replace all existing choices with the ones that are available in your Google Sheet.

Also see: Send Pre-filled Google Forms via Email


TikTok goes down in India, its biggest overseas market


A growing number of internet service providers in India have started to block their subscribers from accessing TikTok a day after New Delhi banned the popular short-video app and 58 other services in the world’s second largest internet market over security and privacy concerns.

Many users on Airtel, Vodafone and other service providers reported Tuesday afternoon (local time) that TikTok app on their phone was no longer accessible. Opening TikTok app, users said, showed they were no longer connected to the internet.

For many others, opening TikTok app promoted an error message that said the popular app was complying with the Indian government’s order and could no longer offer its service. Opening TikTok website in India prompts a similar message.

Earlier on Tuesday, TikTok app became unavailable for download on Apple’s App Store and Google Play Store in India. Two people familiar with the matter told TechCrunch that ByteDance, the developer of TikTok, had voluntarily pulled the app from the app stores.

The vast majority of other apps including Alibaba Group’s UC Browser and UC News as well as e-commerce service Club Factory that India blocked on Monday evening remain available for download on the marquee app stores, suggesting that Google and Apple are yet to comply with New Delhi’s direction.

TikTok, which has amassed over 200 million users in India, identifies Asia’s third-largest economy as its biggest overseas market. Nikhil Gandhi, who oversees TikTok’s operations in India, said the firm was “in the process” of complying with India’s order and was looking forward to engage with lawmakers in the nation to assuage their concerns.

This is the first time that India, the world’s second largest internet market with nearly half of its 1.3 billion population online, has ordered to ban so many foreign apps. New Delhi said nation’s Computer Emergency Response Team had received many “representations from citizens regarding security of data and breach of privacy impacting upon public order issues. […] The compilation of these data, its mining and profiling by elements hostile to national security and defence of India.”

The surprising announcement created confusion as to how the Indian government was planning to go about “blocking” these services in India. Things are becoming clearer now.

TikTok, which was blocked in India for a week last year but was accessible to users who had already installed the app on their smartphones, said last year in a court filing that it was losing more than $500,000 a day. Reuters reported on Tuesday that ByteDance had planned to invest $1 billion in India to expand the reach of TikTok, a plan that now appears derailed.

Zhao Lijian, a spokesperson for Chinese Foreign Ministry, told reporters in a briefing on Tuesday that “Indian government has a responsibility to uphold the legal rights of international investors including those from China.”


Read Full Article

Facebook launches Avatars, its Bitmoji competitor, in India


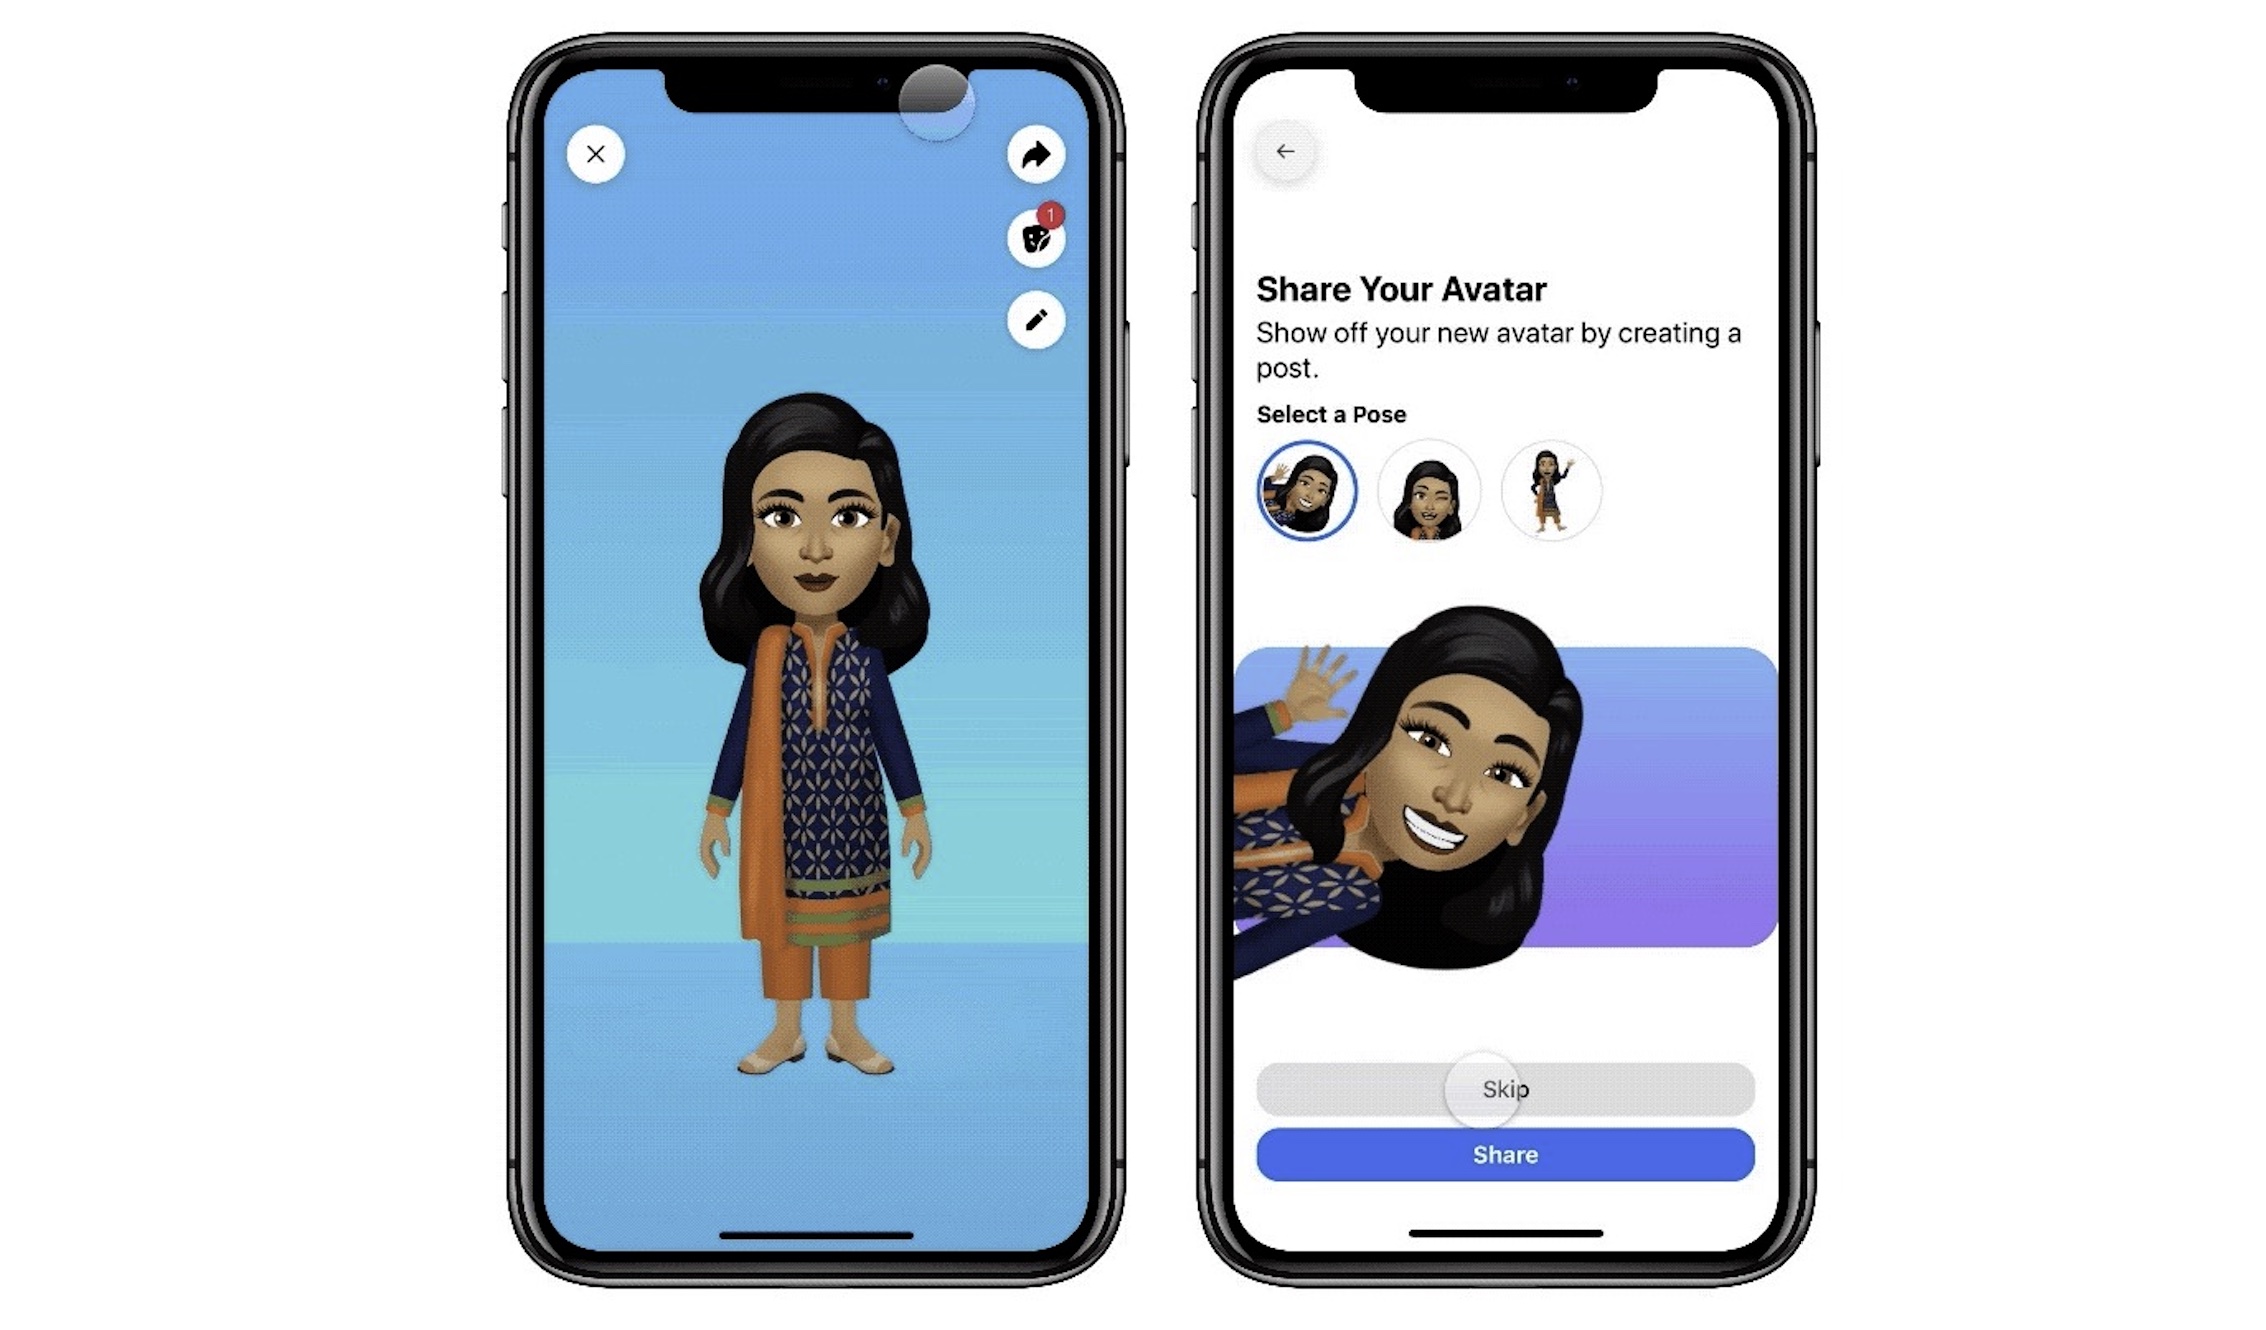
Facebook Avatars, which lets users customize a virtual lookalike of themselves for use as stickers in chat and comments, is now available in India, the social juggernaut’s biggest market by users account.

The American firm said Tuesday it had launched Avatars to India as more social interaction moves online amid a nationwide lockdown in the world’s second largest internet market. The company said Avatars supports a variety of faces, hairstyles, outfits that are customized for users in India.

Avatars’ launch comes to India at the height of a backlash against Chinese apps in the country — some of which have posed serious competition to Facebook’s ever-growing tentacles in Asia’s third-largest economy. On Monday evening, New Delhi ordered to ban TikTok and nearly 60 other apps developed by Chinese firms.

The social giant’s Avatars, a clone of Snapchat’s popular Bitmoji, was first unveiled last year. The feature, which Facebook sees as an expression tool, aims at turning engagements on the social service fun, youthful, visually communicative, and “more light-hearted.”

Users can create their avatar from the sticker tray in the comment section of a News Feed post or in Messenger. Facebook has expanded Avatars, initially available to users in Australia and New Zealand, to Europe and the U.S. in recent weeks.

Scores of companies including Chinese smartphone maker Xiaomi have attempted to replicate Bitmoji in recent years — though no one has expanded it like Snapchat.

Earlier this year, Snapchat introduced Bitmoji TV, a series of 4-minute comedy cartoons with users’ avatars. At the time, Snapchat said that about 70% of its daily active users, or 147 million of its 210 million users, had created their own Bitmojis.

Snapchat is preparing to launch the Spectacles, its AR glasses, in India. The California-headquartered firm has so far struggled to gain ground in India, where it had about 30 million monthly active users last month, according to mobile insights firm App Annie, data of which an industry executive shared with TechCrunch. Facebook has amassed over 350 million users in India and its instant messaging service WhatsApp has more than 400 million users in the country.


Read Full Article

6 Apps to Read or Listen to the Best Free Short Stories Online


Reading Short Stories

A lot of people want to cultivate the habit of reading regularly. Start small with the best free short stories on these websites and apps, and work your way upwards.

Short stories are a gateway drug to the world of literature. In fact, most respected authors have a collection of short stories that are, at times, more entertaining than their larger works. Even for amateur writers, novels might be too daunting but short stories are more doable.

So the internet now has a storehouse of great short stories, from famous and unknown writers, that these apps have curated for your reading pleasure.

1. Storypony (Web): Community of Varied Short Stories

Storypony is a community to read and write free short stories across categories

Storypony is a community for short story writers and readers. Each story has a maximum of 10,000 words, with most being around five to fifteen minute reads. The editors are particular about only accepting finished works and not chapter-by-chapter stories, so as a reader, you know you aren’t going to be left on a cliffhanger.

As you might expect, Storypony categorizes the short stories in genres like crime, drama, humor, fantasy, adventure, mystery, and so on. You can browse the most-voted, most-viewed, or most-recent submissions in any category, or go through the trending stories in all submissions.

Each story has its own comments page to discuss it with the author. Many of these short-story websites focus more on building a community, which eventually leads to a mutual admiration society. So far, Storypony seems like it hasn’t devolved into that, and the articles are picked on merit.

2. Bungo Search (Web): Filter Project Gutenberg by Time Taken to Read

Filter short stories on Project Gutenberg by time taken to read at Bungo Search

Some of the world’s greatest authors have written incredible short stories, including the likes of O. Henry, Sir Arthur Conan Doyle, and Edgar Allen Poe. After the copyright period expires on these, you can read them for free on Project Gutenberg. Bungo Search is a new web app to filter titles on Project Gutenberg by reading time.

The length of the short story is up to you, with the options being 5 minutes, 10 minutes, 30 minutes, one hour, two hours, or three hours. This reading time is based on the average person reading 300 words per minute. To choose the title, Bungo Search gives you the name of the short story and the author’s name, along with an excerpt of the beginning and its popularity on Project Gutenberg.

Bungo Search also adds the NGSL percentage, an excellent tool for those trying to learn English by reading. NGSL, or New General Service List, is a collection of 2800 words seen as an integral core of the English language. The higher the NGSL percentage of a story, the more easily you’ll pick up the language. For experienced English readers, a high NGSL usage also means that you’ll read the story quickly, without looking up words in the dictionary constantly.

3. The Short Story Project (Web, Android, iOS): Classic and Translated Short Stories

The Short Story project has a fantastic collection of translated classic short stories from different languages and regions

The Short Story Project finds little pieces of fiction worth reading from myriad sources: original publications, translated works from other languages, and a retelling of the classics. The mobile apps are especially great at collecting the pieces you want to read.

Translation is a central focus of The Short Story Project, which in itself opens up the world to so many more stories. Through categories like Latin, Arabic, German, Russian, and Israeli literature, you’ll come across fiction that breaks barriers. Yes, it’s available to read in English, and while the language might not be perfect all the time, it’s good enough to enjoy the new flavor of different worlds.

Each short story has an estimated reading time and a short description before you dive in. The project features audio retellings of classic English short stories too. Some of the stories and features are behind a paywall, but the bulk of free offerings on The Short Story Project are enough to enjoy it.

Download: The Short Story Project for Android | iOS (Free)

4. 1001 Classic Short Stories & Tales (Podcast): Soothing Narrations of the Classics

Jon Hagadorn's podcast offers a soothing narration of 1001 Classic short stories and tales

Narrator and podcast specialist Jon Hagadorn has a free podcast full of classic short stories and tales. Hagadorn, known for his “1001 Stories” podcast series on horror, history, and other genres, brings the classics to life with his inimitable narration style.

Hagadorn’s voice is the selling point of this podcast. He doesn’t have the deep voice you’ve come to expect from movie trailers or audiobook narrations. Nor does he act out different characters or situations to add flavor. It’s a humble retelling in a clear and endearing voice, which puts the story in the forefront. And after all, you’re here for the story, right?

The 1001 Classic Short Stories & Tales podcast releases a new episode every week. So far in its 200-episode run, it has already covered Agatha Christie, H. P. Lovecraft, Anton Chekov, Bram Stoker, and other literary giants. It’s a soothing podcast to listen to before you doze off.

Subscribe: 1001 Classic Short Stories & Tales podcast on Apple | Stitcher | PlayerFM | Megaphone RSS Feed

5. Short Story Award (Web): The Best Contemporary Short Stories

The Sunday Times Short Story Award is a great way to discover contemporary authors and the best short stories in the 2010s

The Sunday Times Short Story Award, ongoing since 2010, offers a massive prize of 30,000 British pounds to the best short story of the year. All stories are under 6,000 words, and surprisingly, many of them are available for free online.

The Short Story Award makes you work for it though. It’s easy to browse all nominations dating back to 2010. But you won’t find an easy link to go read any nominated story. Instead, you’ll have to type the author and story title in Google and find a free place to read it at. The 2020 and 2019 list’s stories aren’t all free, but go back a few years, and you’ll find that those stories are now freely available online.

The award is a nice way to find new authors spinning short stories that are relevant for current times. While it’s great to read the classics, some contemporary literature is going to be a future generation’s classic, so why wait to read it?

6. Shortly (Android, iOS): Curated Short Stories From Reddit

Reddit’s r/writingprompts community is an excellent place to discover new short stories every day. Shortly takes the best stories from that forum and turns it into a pleasurable reading experience.

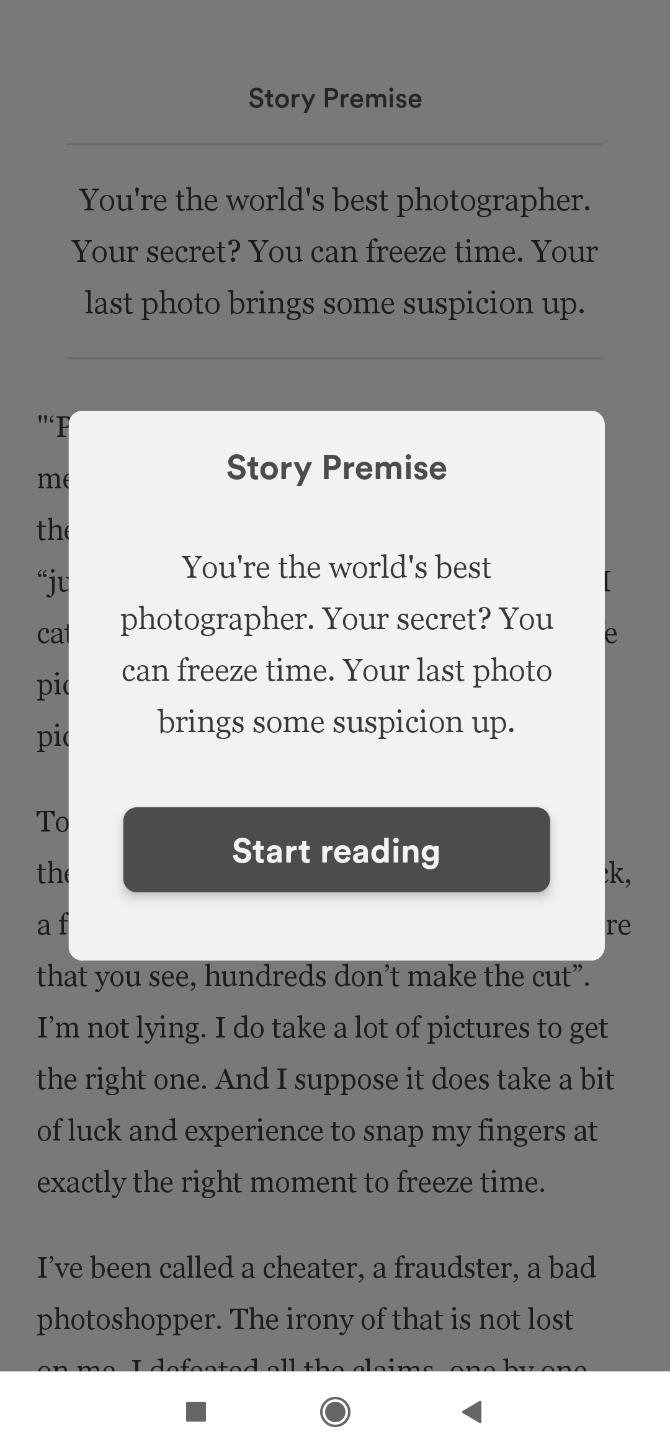
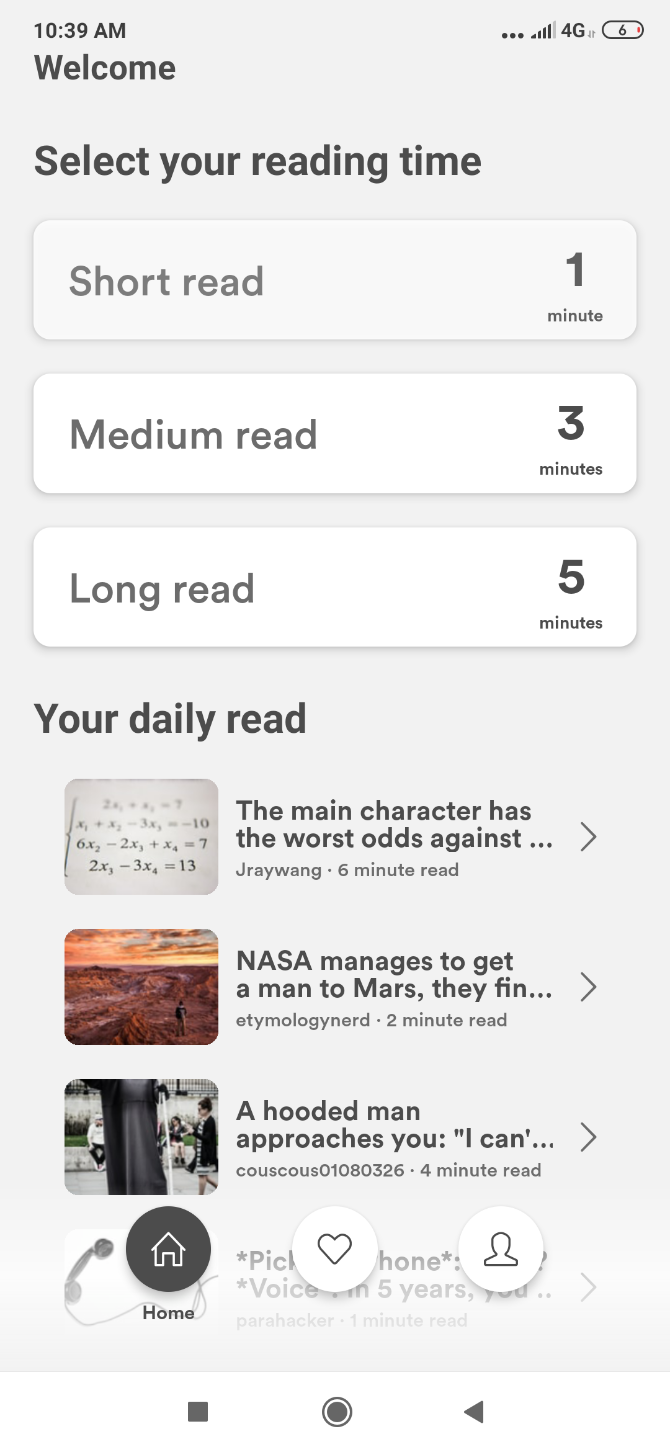
You can sort stories on Shortly by reading time, namely one minute, three minutes, or five minutes. It’s a gorgeous reading interface too. We’ve talked in more detail about Shortly in previous articles like apps to discover Reddit’s best posts and recommendations.

Download: Shortly for Android | iOS (Free)

Read More Free Short Stories

If you enjoy fanfiction, you’ll find websites catering to your favorite franchise, whether it’s Star Wars, the Marvel Cinematic Universe, or anything else. There are even people who turn short stories into tweets or tell fiction over text messages.

When it comes to free short stories, this is only the tip of the iceberg, folks. Try a few of these other free apps to read quick, short stories, and then do a Google search to find your niche.

Read the full article: 6 Apps to Read or Listen to the Best Free Short Stories Online


7 WhatsApp Web Tips and Tricks All Users Should Know


whatsapp-web-tricks

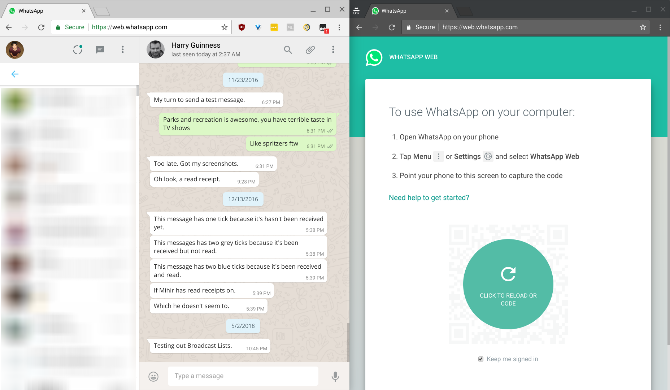
WhatsApp Web is the easy way to use WhatsApp on any computer in the world, as long as you have your phone to sign in. Once you know how to use WhatsApp Web on your PC, these tips and tricks will make WhatsApp Web even better.

Now that you know the basics of using WhatsApp Web, including what it can and can’t do, it’s time to enhance WhatsApp Web with some simple tips and tricks…

1. Learn WhatsApp Web’s Keyboard Shortcuts

keyboard shortcuts for WhatsApp Web

In order to take full advantage of using WhatsApp Web on your computer, you need to learn some keyboard shortcuts. These can make you a typing ninja who does everything a bit faster. Here’s a list of keyboard shortcuts that work in WhatsApp Web:

  • Ctrl + N: Start new chat
  • Ctrl + Shift + ]: Next chat
  • Ctrl + Shift + [: Previous chat
  • Ctrl + E: Archive chat
  • Ctrl + Shift + M: Mute chat
  • Ctrl + Backspace: Delete chat
  • Ctrl + Shift + U: Mark as unread
  • Ctrl + Shift + N: Create new group
  • Ctrl + P: Open profile status

Apart from these, you can also employ all of the universal Windows keyboard shortcuts, such as Ctrl + Shift + Equals to zoom and enlarge text. The same goes for Mac keyboard shortcuts too, of course.

2. Type and Search Emojis With a Keyboard

Instant messaging feels incomplete without emojis. But it takes forever to change from the keyboard to the mouse, click the emoji icon next to the text box, and then find the right emoji. There’s a faster WhatsApp Web trick for keyboard warriors.

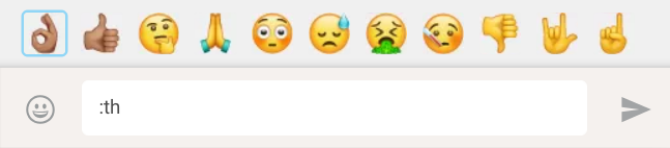
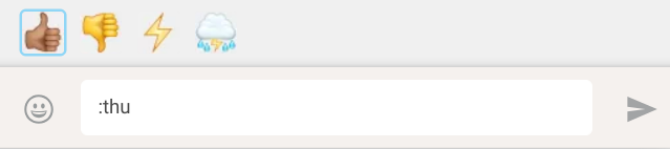
While in the regular text box, type colon (Shift + ;/: Key) followed by the first two letters of the emotion you want to express. You will get a prompt of matching emojis that change with each letter you type.

:th will show this:

add emojis quickly in WhatsApp Web

:thu will show this:

type a colon followed by letters to see emoji previews in WhatsApp Web

Use the keyboard’s arrow keys to switch back and forth between the emojis displayed. Press Enter to accept.

You can also access the emojis, stickers, and GIFs button by pressing Shift+Tab when in any chat window. This will highlight the emoji icon, so press Enter to bring up the emojis, stickers, and GIFs menu. Press Tab and Shift+Tab to cycle through the three choices. Navigate within their menu with the arrow keys.

It’s a much faster way to type, and it will help if you familiarize yourself with the emoji to English dictionary.

3. Auto-Change Emoticons to Emojis (or Not)

Whatsapp Web auto-changes a set of text emoticons to emojis as a great keyboard shortcut

Some emojis don’t need the colon-and-type trick above because one of the best features of WhatsApp Web is to auto-convert them from the classic text emoticons. A helpful redditor extracted the full list of auto-converted emoticons, pictured above.

Again, learning these WhatsApp Web shortcuts for the keyboard will make your typing much faster if you practice them regularly.

That said, this auto-conversion can be annoying for some people, so there’s an easy fix to keep them as emoticons. All you need is a userscript called WhatsApp Emoticon Preserver.

  1. Install Tampermonkey, a cross-platform userscript manager, on your browser of choice.
  2. Go to WhatsApp Emoticon Preserver.
  3. Click the blue Install button.
  4. Refresh the WhatsApp Web tab in your browser.

Please note, this will show emoticon characters on your screen, but the recipient will still see them as emojis.

4. Use Multiple WhatsApp Accounts on the Same PC

How to use multiple WhatsApp Web accounts on your computer at the same time

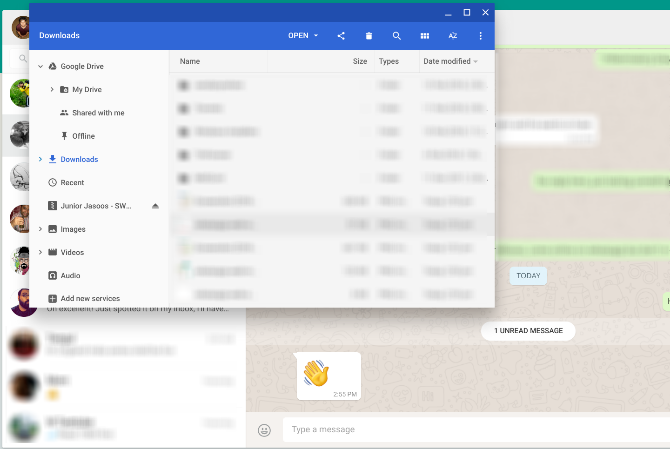
Some people have two phones with separate WhatsApp accounts, or maybe you use a dual-SIM phone with multiple WhatsApp apps. If you want to run two WhatsApp Web accounts on your computer, you can’t just open two tabs in Chrome and sign in separately.

The best WhatsApp Web trick to use multiple accounts is to open an incognito window or different browser. So if you have one account signed into Chrome, start a new window in Incognito Mode, or fire up a second browser and go to WhatsApp Web through that. Log in as you normally would, using your other account to read the QR code.

In Incognito Mode, you can use WhatsApp Web for an hour before it automatically logs you out.

5. Read Messages Without Blue Tick Notifications

Use this WhatsApp Web trick to read messages without the blue ticks to notify the other user

As long as you have those blue tick marks enabled, people can see the exact time you read their text. You can switch off Read Receipts on your phone if you want to disable this, but there’s a cool WhatsApp Web trick to get around this.

If you are talking with someone on WhatsApp and want to read their messages without them getting a read receipt, here’s what you do:

  1. Open the chat in your WhatsApp Web window.
  2. Open a Notepad file (or any other window), and change its size so that you can see the full WhatsApp Web chat in the background.
  3. Click in the Notepad file and keep your cursor there. This is the critical step, as the computer thinks you are working in a different window.
  4. Messages will load in the background chat window, which you can see, without being marked as read with the blue ticks. Right now, they will be double grey ticks, meaning the messages are received by you, but not read.
  5. When you’re OK with marking them as read, click the WhatsApp Web chat window and those ticks will instantly turn blue.

The limitation of this method is that you can only read the content of one chat at a time. But how often do you really need to use this WhatsApp Web trick anyway?

6. Get WAToolkit Extension for Message Previews

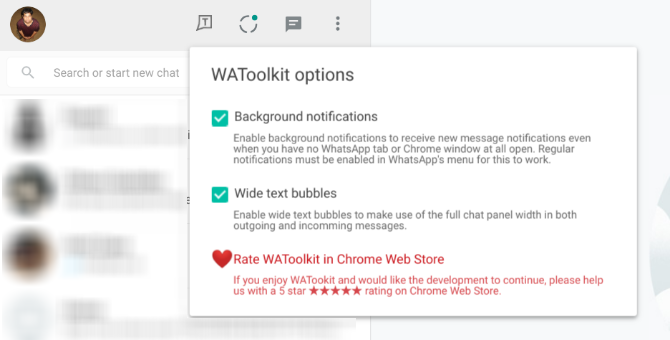
WAToolkit is a Chrome Extension that makes up for missing WhatsApp Web features

In WAToolkit, Chrome users have an excellent extension to add extra features to WhatsApp Web. It adds two cool tricks to built-in WhatsApp Web features, including one that lets you again read conversations without triggering the Read Receipt.

  1. Background Notifications: When you get a new message in WhatsApp, you no longer need to switch to the WhatsApp Web tab to read it. The WAToolkit icon’s badge shows how many unread messages you have. Hover over the icon and you’ll be able to preview the messages, without registering them as having been read in your main chat.
  2. Full-Width Chat Bubbles: By default, WhatsApp doesn’t stretch a person’s chat bubble across the full width of the chat window. That’s why you get multi-line texts when it would easily fit in a single line of your wide desktop window. WAToolkit fixes this by changing the text bubbles to full-width.

Remember, you can also use Google Chrome extensions in Opera and other browsers.

Download: WAToolkit for Chrome (Free)

7. Enable Dark Mode for WhatsApp Web

Dark WhatsApp Web extension for Chrome enables and disables Dark Mode for WhatsApp Web in one click

Dark Mode is a hidden WhatsApp Web feature that the company hasn’t yet launched to the public. You will find articles online about how to change the code in a browser tab to enable Dark Mode, and it’s not too hard, but might seem daunting for some.

But the easier way is to download the Dark WhatsApp Web extension. It’s a neat WhatsApp Web shortcut to implement exactly what the code changes bring about, but without all that hassle. With one click, you can switch Dark Mode on and off in WhatsApp Web.

Download: Dark WhatsApp Web for Chrome (Free)

You Can Also Use WhatsApp Web on Apple Devices

All of these tips and tricks require you to use WhatsApp Web on a desktop computer, ideally through the Google Chrome web browser.

However, you can also trick your Apple devices into working with WhatsApp Web, so here’s how to use WhatsApp Web on your iPad.

Read the full article: 7 WhatsApp Web Tips and Tricks All Users Should Know


Read Full Article

How to Get Someone Off Your Best Friends List on Snapchat


hide-friends-snapchat

Snapchat is the go-to social media platform for many people between the ages of 13 and 25. Although Snapchat has stolen some of its glory in recent years.

The app lists your contacts in the Send To function, and right at the top, you’ll find your “Best Friends”. But what does Best Friends mean on Snapchat? Can anyone else see who you’re friends with? And how can you get someone off your Best Friends list on Snapchat?

In this article, we explain all of this and more, helping you figure out Snapchat’s Best Friends feature once and for all.

How Does Snapchat’s “Best Friends” Work?

Your Best Friends list on Snapchat keeps track of the people you chat with most often. It appears at the top of your main friends list, making those users more accessible when you’re sending a new snap.

But how does Snapchat calculate who your Best Friends are? It’s pretty simple.

You may have noticed that every user has a Snap Score—a measure of the total number of Snaps sent and received since joining. A similar score is assigned to individual conversations between you and your friends. The more you chat with a particular person, the higher your friendship score becomes.

To determine your Best Friends list, Snapchat analyzes these scores and lists the friends you chat with the most, in order of your friendship score.

What Do Snapchat’s “Friend Emojis” Mean?

hearts emoticon snapchat mean Best Friends

How can you tell who your Snapchat Best Friends are? Most importantly, they’ll appear at the top of your Send To screen. You can also click on your profile (the circle to the top-left of your interface), then My Friends, and your Best Friends are listed at the top.

When you swipe to your Chat screen, you’ll see your contacts listed alongside emojis. These show your Best Friends too.

Here’s what some of them mean:

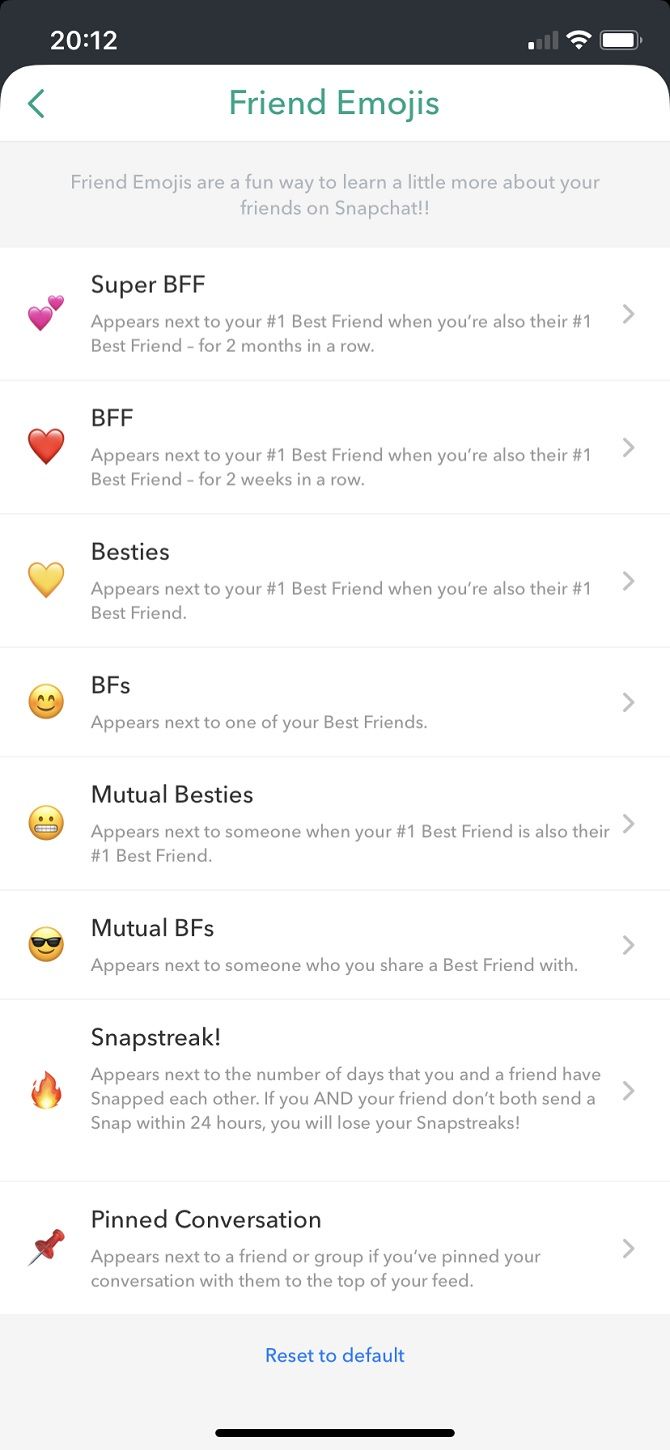
  • Baby: You’re new friends.
  • Double pink heart: This is your #1 Best Friend; you’ve also been their #1 Best Friend for at least two months.
  • Red heart: You’ve been each other’s #1 Best Friend for two weeks.
  • Gold heart: You’re each other’s #1 Best Friend, albeit for fewer than two weeks.
  • Smile: Your Best Friends, though not your #1 Best Friend.
  • Fire: This appears when you’re on a “Snapstreak,” along with the number of consecutive days you’ve snapped each other. Learn about Snapstreaks and how to get a lost one back.

Emojis are also used by contacts in Snaps and Chats. If you use the service, you need to understand the meanings of Snapchat emojis.

Best Friends on Snapchat: Your Questions Answered

Before we show you how to get someone off your Best Friends list, let’s cover some of the related questions you may have about the feature.

Can Other Users See Your Best Friends List on Snapchat?

You might be concerned about privacy and want to know how to hide Best Friends on Snapchat. But don’t worry: no one else can see who you’re friends with on the app.

Others used to be able to see Best Friends lists. For instance, a smirking emoji showed when you’re someone’s Best Friend, but they’re not one of yours.

Fortunately, Snapchat saw the light and deleted this feature. Beware: the “Oops” and “Smiling-Face-With-Sunglasses” smileys still indicate shared Best Friends.

How Many Best Friends Can You Have on Snapchat?

You can have up to eight Best Friends.

Some only have one or two. Others converse with so many people, the Best Friends emojis shift between contacts daily.

How Can You Make Someone Your Best Friend on Snapchat?

You can’t specifically “set” someone as your Best Friend. Snapchat’s algorithm works by analyzing who you converse with most.

If you want someone to be your Best Friend on Snapchat, send them lots of Snaps and Chats! Of course, you should make sure the feeling’s mutual—there’s little point in bombarding someone with Snaps if it’s just going to annoy them.

And while one user might be your Best Friend, that doesn’t mean you’re necessarily theirs.

How To Remove Snapchat Best Friends

Remember, only you can see who your Best Friends are anyway. Nonetheless, you might still want to remove Best Friends from your Snapchat. It can be easy, but it depends on how frequently you Snap or Chat to them. You used to be able to block someone and then add them again, but this method no longer works.

You have three options.

How to Delete Friends on Snapchat

The first is to remove that friend entirely. This might be because of a break-up, and you don’t want to be reminded of them every time you open the platform.

Open the Chat function, to the left of your camera interface. Then click on the vertical ellipsis at the top-right of your screen, and tap either Remove Friend or Block.

Remove Friend is a temporary option: it’s easy to undo and they can still message you. Block is more permanent—this option will remove them from your Best Friends list, and indeed the app overall.

That user will no longer be able to see your Snap Score, so may presume they’ve been removed or blocked. And here’s how to tell if someone blocked you on Snapchat.

How to Get Rid of Your Best Friends on Snapchat

This isn’t ideal, but since Snapchat removed the loophole that let you block then add users again, it’s the only way. You’ve got to use the algorithm to your own advantage.

How? You need to send fewer Snaps and Chats to the person you don’t want listed as a Best Friend any more. Prioritize someone else.

So how long do the Best Friend emojis last on Snapchat? This depends largely on how many contacts you have and how many you talk to frequently.

If you know very few people on Snapchat, sending one Snap might mean they instantly become your Best Friend. If you know lots of people and have numerous Snapstreaks going, you’ll probably have many Best Friends.

How to Hide Best Friends on Snapchat

The third option disguises who your Best Friends are. Let’s posit that someone you know often checks your smartphone and wants to know who you’re regularly in contact with. You should really implement better security, but perhaps you don’t want to lock someone out of your phone completely.

There’s nothing you can do to hide Best Friends on the Send To screen, but you can mask it on the Chat screen (which someone else is most likely to check).

You can hide who your Best Friends are by changing the related emoji.

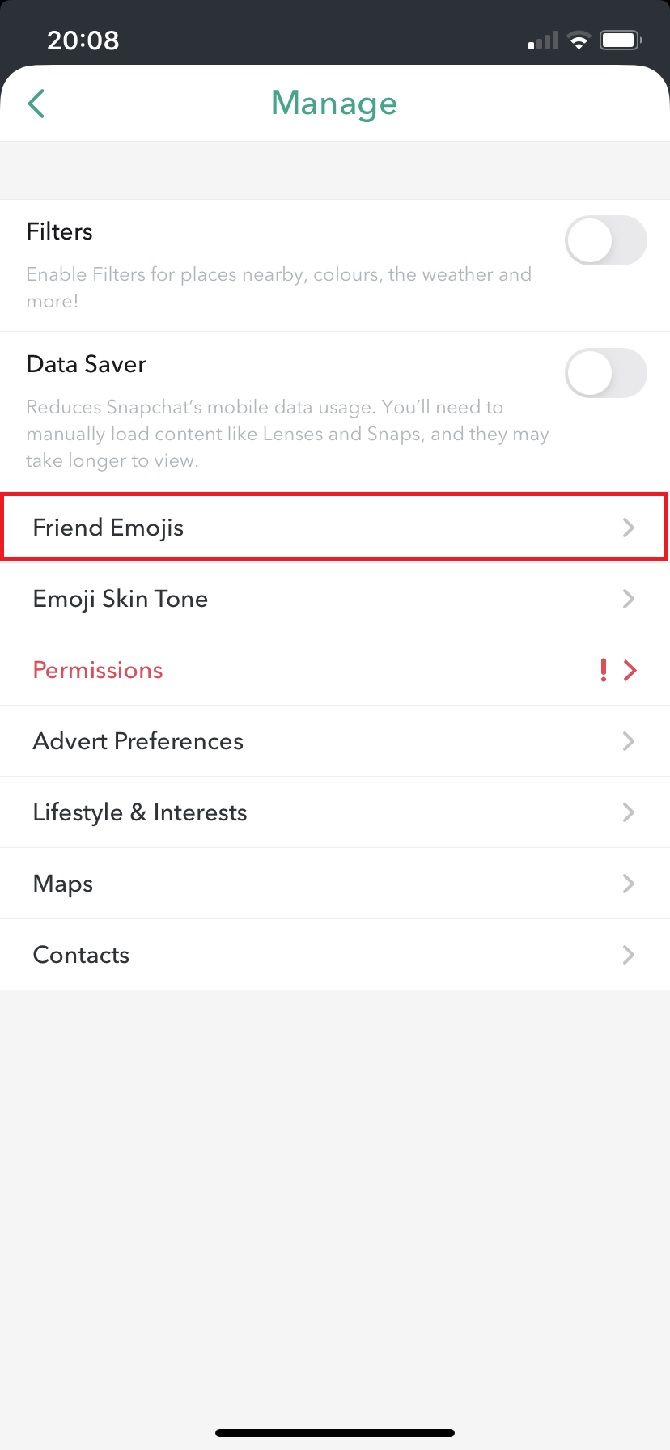
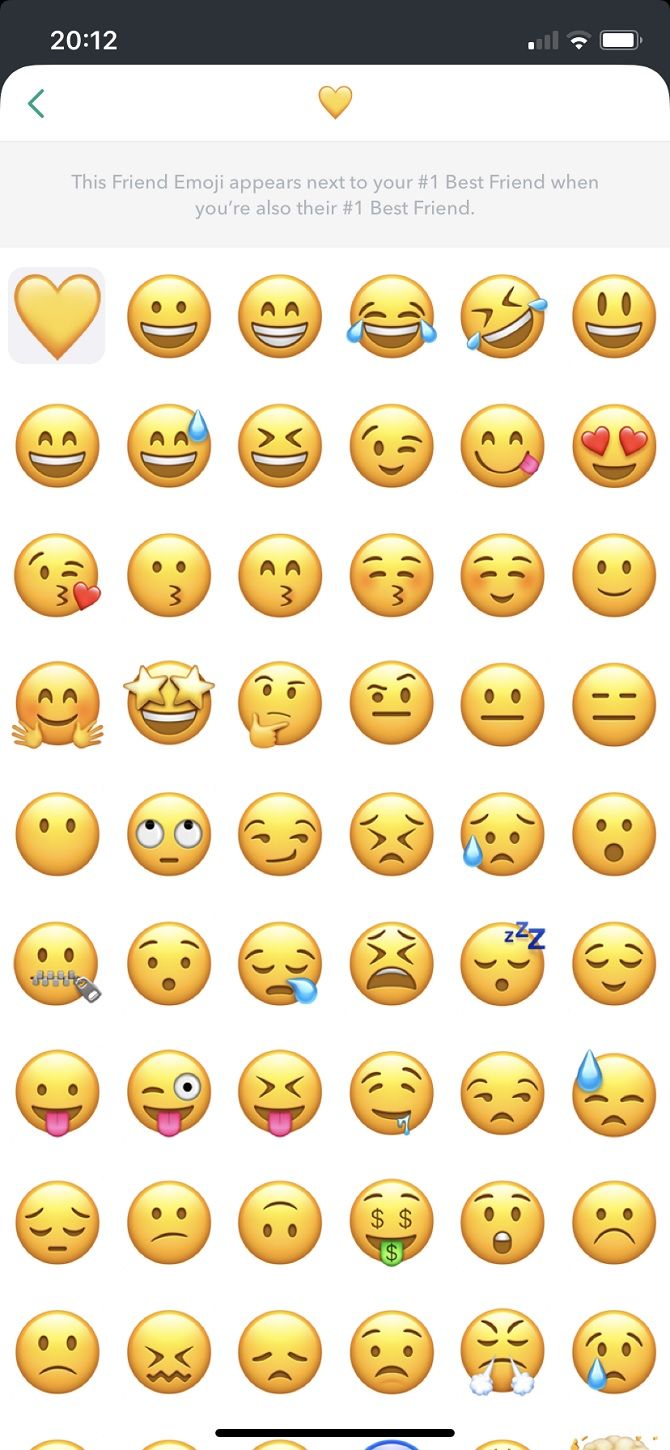
Open your profile then click the cog icon in the top-right. iOS users should go to Manage > Friend Emojis then click on whichever field you want to toggle. These include Super BFF, BFF, Besties, and BFs. You can change the emoji to whatever you want, as long as two fields don’t share the same one.

Android users can do this by clicking on Customize Emojis, also found after clicking on the cog icon.

Don’t Worry About Being Best Friends on Snapchat

Knowing you’re not someone’s Best Friend on Snapchat shouldn’t concern you. Maybe you just don’t talk enough on the app, but that doesn’t mean you’re not good friends in real life. After all, Snapchat’s Best Friends feature doesn’t account for SMS, messaging platforms, or face-to-face conversations.

Nonetheless, plenty of people take Snapchat seriously. So, if you use the service, you should at least learn some common Snapchat terms, to familiarize yourself with the lingo.

Read the full article: How to Get Someone Off Your Best Friends List on Snapchat


Read Full Article

4 Lord of the Rings Apps for Exploring Tolkien’s Middle-Earth


J.R.R. Tolkien’s Middle-Earth has been home to some of the most cherished fantasy novels in history. It’s a setting that has drawn in fans for decades, both old and new alike. The Hobbit and Lord of the Rings being the most popular (and accessible) of his books.

You can explore the world of hobbits, dwarves, and elves online with ease. You can also immerse yourself in the lore, language, and characters that make Tolkien’s world so special. Here are some of the best Tolkien apps for fans of Lord of the Rings and The Hobbit.

1. LotR Quiz

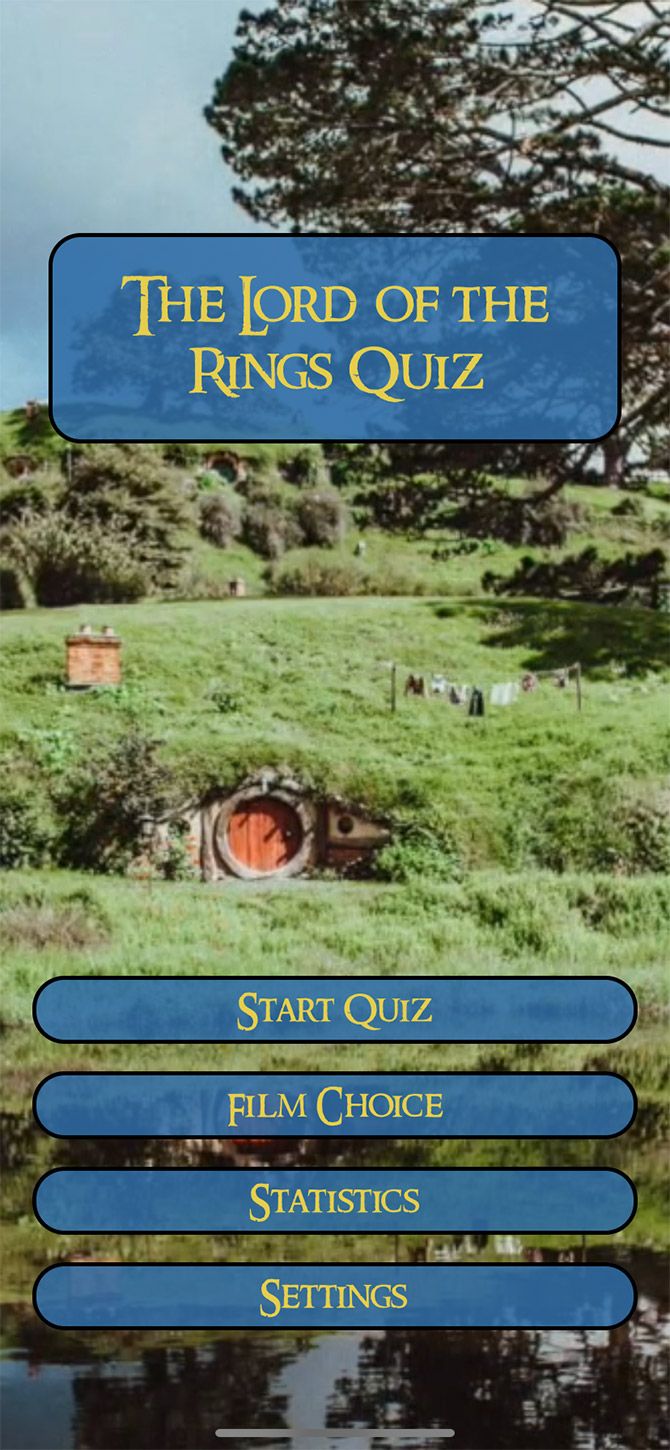
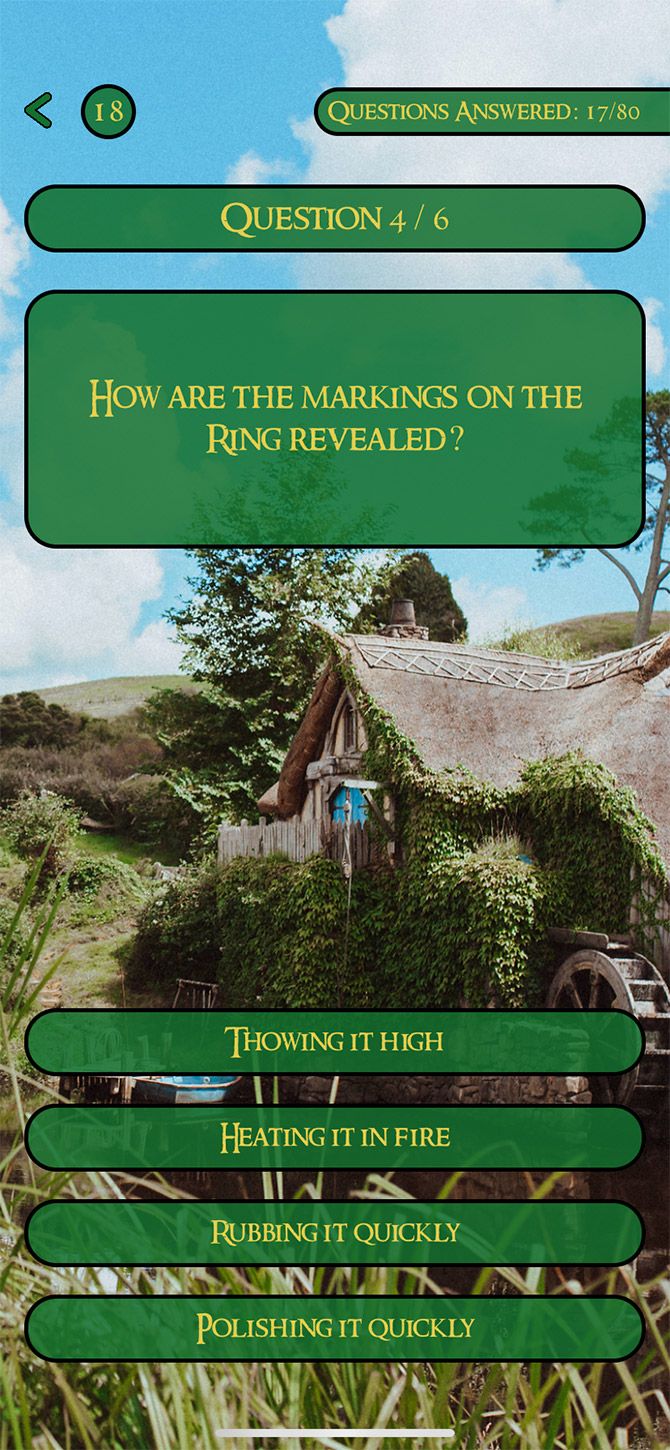
Looking for a party app that you can use with your fellow Lord of the Rings fans? Then you need to download LotR Quiz (LotR being shorthand for “Lord of the Rings”), a free Tolkien app that is perfect for this sort of get-together.

Simple to use, straightforward in its purpose, and fun to complete, this LotR app sets out to test you on your knowledge of the Lord of the Rings film adaptations by Peter Jackson. You can be tested on all of the films at once, or tested on each film individually.

After you open up the app:

  • You will be asked which film you want to be quizzed on.
  • Once you choose a movie, the app will immediately begin testing you on that film.
  • If you choose the right answer, the button you tapped turns green. If you choose the wrong answer, the button turns red.
  • The quiz is broken up into “sections” to make it more manageable.
  • There are a lot of questions per quiz, and answering each one is timed. If you don’t answer before the clock counts down, the quiz will mark your score as “0” and move on to the next question.
  • Once you’re done the quiz, the app will show you your final score and add that tally to your overall statistics section.

In general, the number of questions and attention to detail in this Lord of the Rings app are fantastic. As a Tolkien fan, I can happily report that the app seems to be designed by someone who has in-depth knowledge of the series.

Unfortunately, LotR Quiz is only available on iOS. However, if you want an Android alternative, you can always check out Fanquiz for Lord of the Rings, which boasts some decent reviews.

Download: LotR Quiz on iOS (Free)

2. ElvenSpeak

Elves are among the most enchanting of Tolkien’s fantastical creatures. Often depicted as superhuman in their abilities, in possession of a beautiful and magical language, and blessed by long life, it’s no wonder than many fans of fantasy have become obsessed with these pointy-eared protagonists.

If you count yourself among their fans, you may want to learn the elves’ language. Which is exactly what the app ElvenSpeak lets you do… to a point.

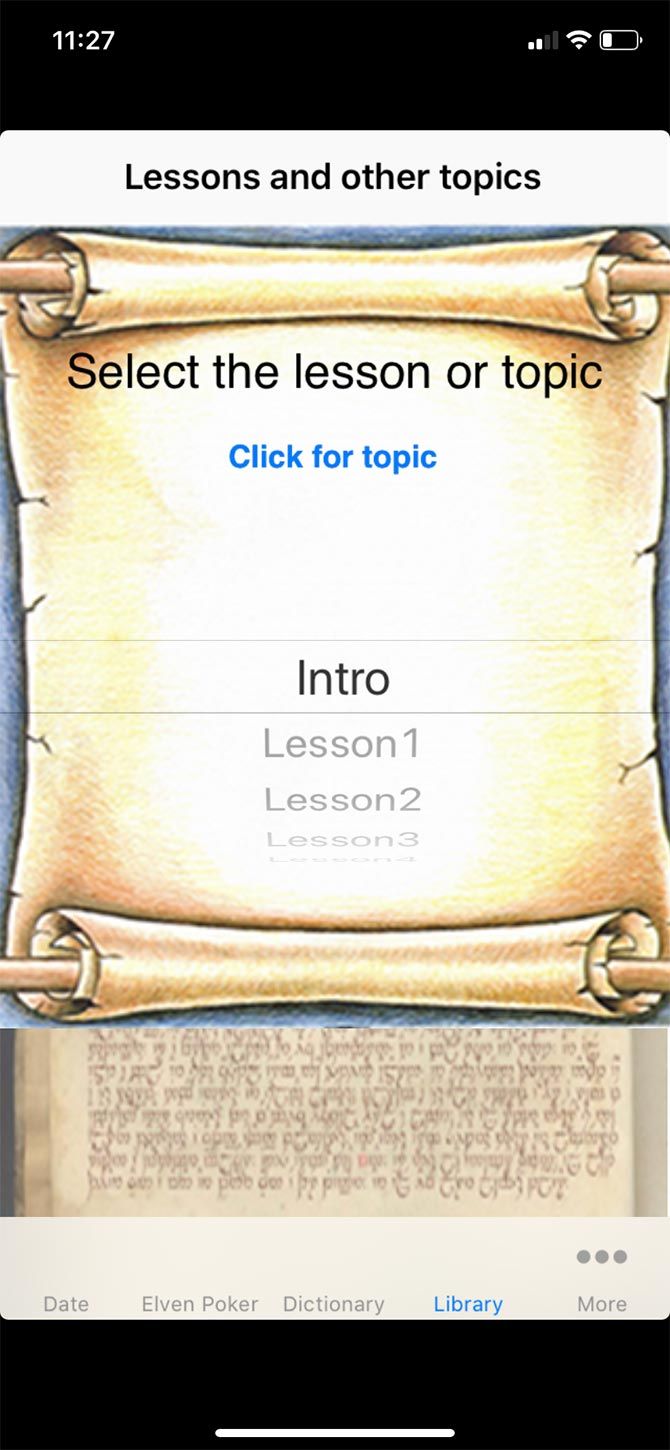
While this Tolkien app includes a date converter and 20-odd lessons that can help you learn how to speak elvish, don’t take it too seriously. ElvenSpeak is not a dedicated language-learning app like Duolingo. Instead, it’s a casual tool to help fans dig deeper into Middle-Earth lore so that they can express their enjoyment of it.

Some downsides to this app:

  • ElvenSpeak is only available for iOS.
  • The Elven Poker, Dictionary, Flash, and Writings sections of the app are inaccessible/only available for ElvenSpeakPro subscribers. While ElvenSpeak offers in-game ads for a paid version of the app, that paid version no longer seems to be available in the app store.
  • As such, it’s pretty clear that this app hasn’t been updated in some time, so there are lots of bugs for certain features. Therefore, use ElvenSpeak at your own risk.

Overall, we’re not too impressed with ElvenSpeak, but if you’re a diehard Tolkien fanatic who wants a quick Middle-Earth date converter on your iPhone, you should give it a shot.

Additionally, there’s Elfic – Elvish Translator and Sindarin dictionary (+Phrasebook). Both of these apps are Lord of the Rings Android extensions that help you learn Elvish.

Download: ElvenSpeak on iOS (Free)

3. Middle-Earth Guidebook NZ

The fact that the Lord of the Rings trilogy was filmed in New Zealand is no secret. In fact, the presence of this blockbuster ended up being a huge advantage to the tourist economy of that country.

The free Middle-Earth Guidebook NZ app makes the exploration of these filming locations even easier. Basically, this app harnesses the power of Google Maps to give you a guided tour of each “Middle-Earth” destination.

If you zoom in on the app’s main map:

  • You can click on the different location markers.
  • Each marker designates a particular spot where one of the three movies was filmed.
  • When you click on these location markers, an “info” card will pop up. This card will give you the location’s real-life name, the movie location’s name, and a screenshot.

Additionally, if you tap on the info card again, you’ll be taken to a second screen. On this second screen, you can find even more information. Here, you’ll see:

  • A close-up Google Map view of the area.
  • A screenshot of the location from the movie.
  • A YouTube clip from that location in the movie (if available).
  • Links to Middle-Earth related tours in that region (if available).

Overall, this Tolkien app is a neat travel companion for anyone planning a Middle-Earth inspired trip to New Zealand. The main downside? It’s only available for iOS.

Download: Middle-Earth Guidebook NZ on iOS (Free)

4. The Lord of the Rings: Journeys in Middle-Earth

LotR Mobile Game Journeys in Middle Earth

For those of you who are into both board games and LotR mobile games, Journeys in Middle-Earth is where it’s at.

This Lord of the Rings mobile game is a companion app for a board game of the same name. So right up front, we should stress that while this app is fantastic to look at, it’s only there to “dictate the setup of each encounter, track your party’s inventory and skills, and resolve combat.” You need the board game for the full thing to work.

When you first download the app and open it, you can choose to:

  • Start a new game.
  • Load an old game.
  • Adjust your voice or music settings.
  • Access a quick link for the board game’s rules.

You can also:

  • Select a difficulty level when setting up a new game.
  • Specify your heroes, items, and party name to use in the game.
  • Specify which board game collection you’re using through the app.

Then, you just start playing.

Overall, this Lord of the Rings game app is a great one to use alongside the board game itself. However, because of its aforementioned reliance on the game, Journeys in Middle-Earth will be a rather niche download. If you don’t have the board game, you can buy Journeys in Middle-Earth on Amazon.

Download: The Lord of the Rings: Journeys in Middle-Earth on Android | iOS (Free, with in-app purchases available)

These Tolkien Apps Whisk You Away to Middle-Earth

J.R.R. Tolkien’s Middle-Earth is still as popular as ever, which explains the number of Tolkien apps available on Google Play and the Apple App store. None of these apps are complex or flashy. However, they do give you something fun to do when you’re traveling, or having a Lord of the Rings- or The Hobbit-themed party with fellow Tolkien fans.

Middle-Earth is far from the only fantasy world worth exploring though, so whether or not you’re a fan of J.R.R. Tolkien, check out the best 3D printables for tabletop fantasy RPGs.

Read the full article: 4 Lord of the Rings Apps for Exploring Tolkien’s Middle-Earth


Read Full Article

You Can Now Delete Your Google Data Automatically


You can now force Google to automatically delete your data after a set period of time. This should save you from having to delete said data manually as and when you remember. What’s more, the auto-delete feature will be enabled by default for new users.

At the time of writing, Google’s auto-delete controls are available for your Web & App Activity, your Location History, and your YouTube History. All three now have an auto-delete option that can be enabled on the Activity Controls page of your Google account.

Google Will Now Automatically Delete Your Data

Auto-delete controls were first introduced in May 2019. In a post on The Keyword, Google explained that your data helps “make Google products more useful for you”. So to encourage you to keep providing that data, it’s happy to auto-delete it after a set period.

It should be noted that you don’t have to give Google your data in the first place. Just move the sliders to the left on the Activity Controls page to stop Google saving your activity. However, doing so will prevent Google from being able to personalize your experience.

This is where the auto-delete option comes in. The feature means you can let Google save your activities across its services (and offer a personalized experience) while knowing that after either 3 months or 18 months (it’s your choice), Google will delete that data.

How to Auto-Delete Your Google Data

To have Google auto-delete your activity data, log into your Google account and visit the Activity Controls page. To find this manually, click on your profile, then click Manage Your Google Account > Data & Personalization > Manage Your Activity Controls.

You should see the Auto-delete option under Web & App Activity, Location History, and YouTube History. So just click on it, and choose to “Auto-delete activity older than 3 months” or “Auto-delete activity older than 18 months”.

Previously, the only option you had was to manually delete your data. Now, with the new auto-delete controls, you can have Google delete your data without you having to lift a finger. And new users will have auto-delete enabled by default.

Be Aware of How Your Data Is Being Used

Everyone should be more aware of how the data they generate while online is being used. These auto-delete controls—which sees Google trying to bridge the gap between personalization and privacy—suggest the company is taking people’s concerns seriously.

Even if you’re not concerned about how companies such as Google are using your data, there’s always a chance that data will escape into the wider world. So, with that in mind, here are some simple ways to protect your data from hackers.

Read the full article: You Can Now Delete Your Google Data Automatically


Read Full Article

7 Audacity Tips for Better Audio Editing on a Budget


audacity

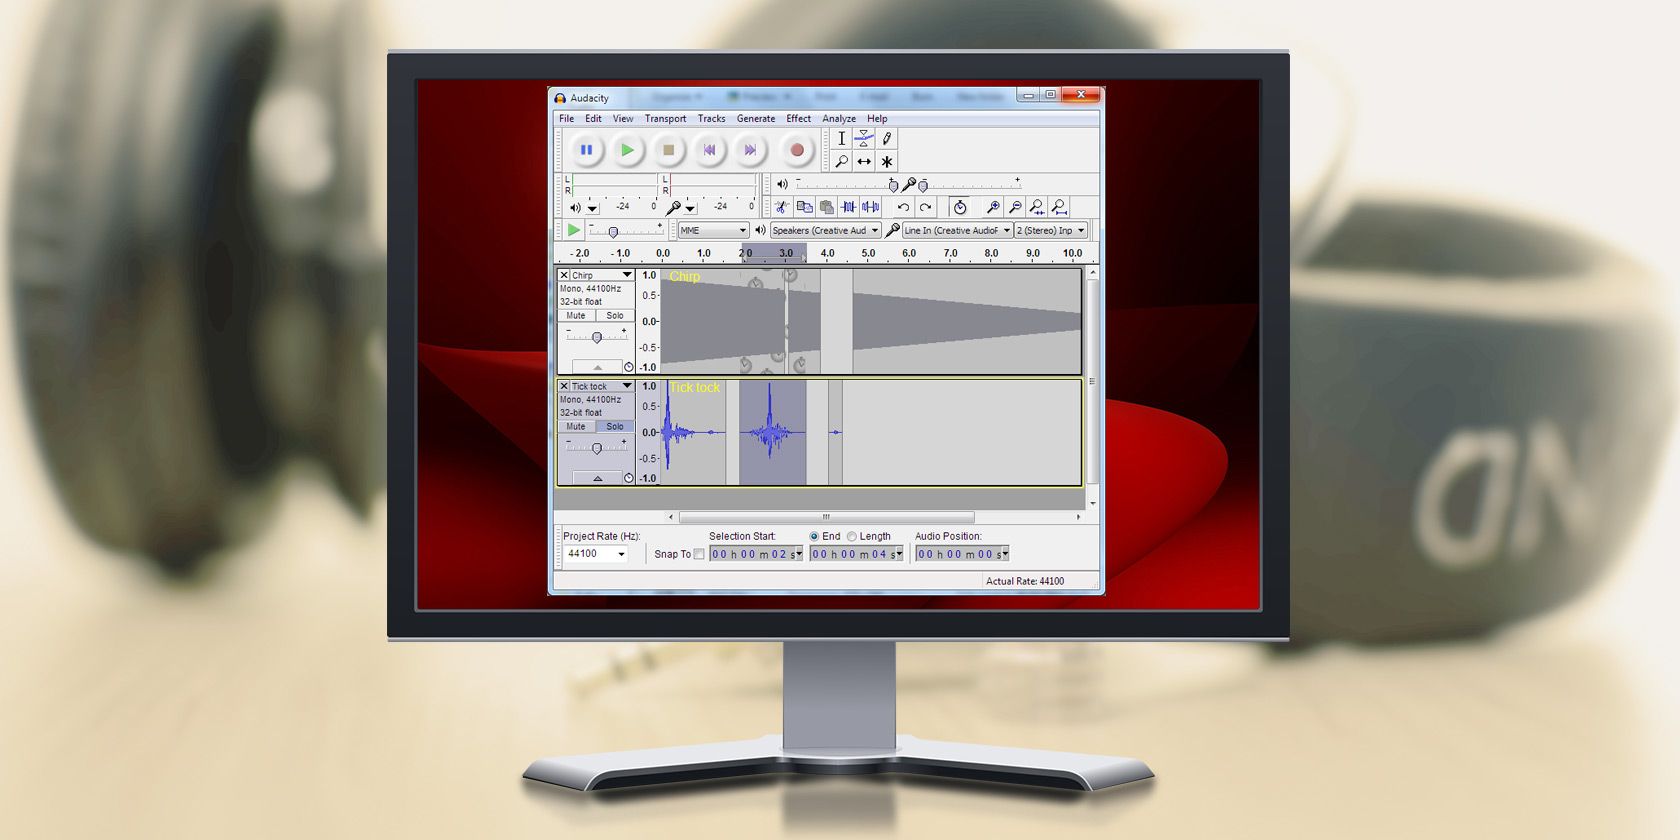
Audacity is a great tool for editing audio, whether you record directly into Audacity or download samples from elsewhere. You can use Audacity to record interviews, edit podcasts, and even produce music.

Knowing a few editing tips can make Audacity a lot easier to use for simple tasks like touching up your recordings or trimming out silence. So, here, we show you the best Audacity tips to use when you’re editing audio.

1. How to Cut Audio in Audacity

Audacity window showing section cut out of audio track

One of the first edits you usually need to make to an audio file is cutting out the sections you don’t want to keep. This could include the silence at the beginning or end of a recording, or a section you don’t like in the middle.

All you need to do to get started is click and drag across a selection of audio in Audacity. If you can’t select any audio, press F1 to make sure you’re using the Selection Tool.

Then press the Ctrl + X (or Cmd + X on a Mac) to cut it. Alternatively, press the Delete key to delete the selected audio.

After you cut audio, Audacity automatically closes the gap you created to eliminate any silence. It does this by moving the next audio file to play immediately after the edit point. To cut audio while keeping the silence it creates, press Ctrl + Alt + X instead (or Cmd + Option + X on a Mac).

2. How to Move Audio in Audacity

Audio moved across two tracks in Audacity

Audacity offers lots of different ways to move audio files around, although none of them are as intuitive as what you find in other free music production software.

The simplest way to move audio files in Audacity is using the Time Shift Tool. Press F5 to switch to this tool, then click and drag on an audio file to move it left or right. You can’t make one audio clip overlap another using this tool; you can only move it up to the edge of each file.

To make two audio files overlap each other, go to Tracks > Add New and move them onto separate tracks.

Alternatively, follow the instructions in our first Audacity editing tip to cut out some audio. Then use the Selection Tool to select a new position in the timeline and press Ctrl + V (or Cmd + V on a Mac) to paste that audio in the new position.

To move an entire audio clip, double-click it with the Selection Tool, then cut and paste it in a new location.

3. How to Remove Silence in Audacity

Truncate Silence window from Audacity

When you’re editing voice recordings, there are likely to be lots of sections of silence that you need to remove. Rather than using the steps above to manually cut silence from your audio recordings, Audacity offers a tool to automate the process instead.

We don’t recommend this tool for musical tracks though, because it changes the timing of the performance. Although it is particularly handy if you’re using Audacity to record interviews.

Use the Selection tool to click and drag over the section of audio that contains all of the pieces of silence you want to remove. Double-click on a clip to select the entire audio file.

Then go to Effect > Truncate Silence from the menu bar. Tweak the settings in the popup window to make sure Audacity only removes silence from your audio.

The Threshold determines the quietest piece of audio Audacity will keep. The Duration sets the length of time Audacity will wait before removing silence. Use the lower half of the window to choose how much silence remains after Audacity removes it: either a set period of time or a percentage of its original length.

4. How to Remove Background Noise in Audacity

Noise Reduction window in Audacity

If you recorded in a loud environment, you might hear a lot of background noise in your audio files. Fortunately, Audacity includes an editing tool you can use to make your recorded audio sound better by filtering out background noise.

This tool works best for consistent sources of sound, like air conditioning or white noise. It’s less effective at removing irregular sounds, like traffic or conversation.

To get started, find a section of audio that only contains the background noise. Then use the Selection Tool to highlight this section and go to Effect > Noise Reduction. In the popup window that appears, click Get Noise Profile.

Now that Audacity knows what the noise sounds like you can try to filter it out. To do so, select the rest of your audio track and go to Effect > Noise Reduction again. This time, use the lower section of the window to choose how much reduction you want to apply.

Be careful not to use too much Noise Reduction, since it can deteriorate the quality of your audio.

5. How to Amplify Audio in Audacity

Envelope tool in Audacity

Although it’s always best to record audio as loudly as possible—without distorting it—there are still times when you might find yourself working with a quiet audio file. Audacity makes it quick and easy to change the volume of your files.

Select an audio file and go to Effect > Normalize to amplify it as much as possible without causing distortion.

Alternatively, press F5 to select the Envelope Tool, then click and drag vertically on an audio file to dynamically adjust its amplitude. You can also click at different points in a file to create new nodes, then drag those nodes to gradually change the volume of an audio file over time.

It’s best to use this tool conservatively. If you need to make a lot of changes to make your audio a consistent volume, use the Compress effect instead. This automatically raises the volume of the quietest parts of an audio file without letting the rest get too loud.

6. How to Rip Audio From Video in Audacity

FFmpeg Library download button from Audacity preferences

Ripping the audio from a video file is quick and easy in Audacity. The only requirement is that you install the FFmpeg library, which allows Audacity to work with common video files. You can find a link to install this library from the Audacity preferences.

In Windows, go to File > Preferences from the menu bar (on a Mac, go to Audacity > Preferences). In the Preferences window, select Libraries, then click Download next to where it says FFmpeg Library.

This opens a page on the Audacity Manual website with instructions to install the FFmpeg Library for Windows and Mac. Follow the necessary links to install the plugin.

After installing the FFmpeg Library, go to File > Open in Audacity and select a video file to import the audio from. Your ripped audio should appear in its own channel in Audacity.

7. How to Mix and Master Audio in Audacity

Volume and Pan faders for mixing in Audacity

After you finish editing in Audacity, you should mix all of the tracks together to create a good balance between them. To mix in Audacity, use the two sliders at the left of each track to adjust the Volume and Pan.

Generally speaking, keep bass-heavy and lead instruments panned to the center, then adjust the volume sliders so you can hear each track clearly.

When mixing, you also want to add effects to your tracks to make them sound better together. To do so, select an audio region, then open the Effect menu and choose an effect to apply. The best effects to use when mixing in Audacity include:

  • Graphic EQ: alter the tone by adjusting the bass, treble, and mid-range frequencies
  • Compressor: reduce the dynamic range to make the quietest sections more audible
  • Reverb: create a sense of space by adding a “room” sound

Audacity doesn’t provide an output channel, so if you want to master your project you need to export the mix first. After exporting, import your mixed audio file into a new Audacity project, then apply effects to the audio file as a whole.

When mastering, your aim is to make subtle adjustments to the entire mix. If you need to change a single track, return to the mix stage and export it again. As a final mastering step, use Audacity’s Limiter effect to make your project louder without distorting it.

Creative Uses for Audacity

With these Audacity editing tips, you should be well on your way to creating professional sounding music or recordings with Audacity. It might not look like much, but Audacity is a powerful piece of software you can use for a range of different projects.

Take a look at our list of creative uses for Audacity to get inspiration on how to use your new skills. There are plenty of project ideas to get you started with Audacity, including music production, podcasts, and even audiobooks.

Read the full article: 7 Audacity Tips for Better Audio Editing on a Budget


Read Full Article

How to Use Instagram on Your PC With 4K Stogram


instagram-pc

Accessing your Instagram account on a desktop computer is a bit clunky. Further, your image download options are limited, and you have no option to restore the data.

A desktop Instagram app like 4K Stogram is a smart solution to this. Here’s how you can use it to download Instagram photos to your PC in bulk based on hashtag, username, or location.

Download Your Instagram Photos to Any Computer

To get started with the free edition of 4K Stogram, grab a copy and install it on your computer. It’s available for Windows, macOS, and Ubuntu.

Once it’s up and running, you can start searching by username, hashtags, or location. However, it’s smarter to log into your account if you have one.

Access Instagram on your PC with 4K Stogram

To do this, click the profile icon, then choose Login. Alternatively, go to Tools > Login. Input your credentials and a moment later, your Instagram posts will appear in the grid.

You can browse through these, right-click to get more options (such as Browse on Instagram and sharing options), and browse on your PC. You can also view Instagram photos and videos from within 4K Stogram. Note that they will open in your computer’s corresponding default media apps.

Check the Preferences menu (either Tools > Preferences or found by clicking your profile) to confirm the Output Folder. By default, this is a subfolder in the system images library—for example, on Windows it appear in the Pictures directory. Change it here if necessary.

Set your download folder for Instagram images

To save the photos in your Instagram account, you must use the premium version of 4K Stogram. This is available in Personal and Professional licenses; you can upgrade after trying out the free version.

Backing up your Instagram account is simple. With the account logged into 4K Stogram, click File > Export Posts. This will save a CSV file that includes the account name and file path to the downloaded images and videos.

You’ll find the images and MP4 videos download to the default output folder. 4K Stogram saves files in the same resolution as they were uploaded in, with filenames corresponding to the date and time.

Download Instagram images to your PC with 4K Stogram

Downloading occurs in the background—your OS will inform you when the download completes.

Browse Instagram By Hashtag, Username, or Location

Whether you have an Instagram account or not, you can browse the service from your desktop with 4K Stogram.

Searching for Users, Hashtags, and Locations is simple. Just enter the search term, find the account or hashtag, select it, and click Subscribe. For easier searching with a search term, use the filter box (magnifying glass icon).

To find, say, all the posts from the official LEGO account, enter “Lego”, select the account, then click Subscribe. Recent posts will show in the field below the search bar. Click the right-arrow to find more.

Backup images from other accounts with 4K Stogram

Again, you can download images to your PC using the Export Posts option.

What Else Can You Do With 4K Stogram?

With 4K Stogram you can also:

  • Browse your friends’ feeds and download their photos and videos
  • Download photos from private accounts that you’re friends with

The premium version of 4K Stogram adds the ability to download Instagram Stories, comments, and metadata. It’s also ad-free for an uninterrupted Instagram browsing and backup experience on your PC.

Enjoy Instagram on Your PC With 4K Stogram

4K Stogram is easy to use and gets you as close to a full Instagram experience as possible on your computer. With a smart, intuitive user interface, you’ll have the images you’re looking for saved in just a few minutes.

Read the full article: How to Use Instagram on Your PC With 4K Stogram


Read Full Article