13 December 2019

Reliance Industries acquires a majority stake in SaaS startup NowFloats for $20M


Reliance Industries, one of India’s largest industrial houses, has acquired a majority stake in NowFloats, an Indian startup that helps businesses and individuals build online presence without any web developing skills.

In a regulatory filing on Thursday, Reliance Strategic Business Ventures Limited said (PDF) it has acquired an 85% stake in NowFloats for 1.4 billion Indian rupees ($20 million).

Seven-and-a-half-year old, Hyderabad-headquartered NowFloats operates an eponymous platform that allows individuals and businesses to easily build an online presence. Using NowFloats’ services, a mom and pop store, for instance, can build a website, publish their catalog, as well as engage with their customers on WhatsApp.

The startup, which has raised about 12 million in equity financing prior to today’s announcement, claims to have helped over 300,000 participating retail partners. NowFloats counts Blume Ventures, Omidyar Network, Iron Pillar, IIFL Wealth Management, and Hyderabad Angels among its investors.

Last year, NowFloats acquired LookUp, an India-based chat service that connects consumers to local business — and is backed by Vinod Khosla’s personal fund Khosla Impact, Twitter co-founder Biz Stone, Narayana Murthy’s Catamaran Ventures and Global Founders Capital.

Reliance Strategic Business Ventures Limited, a wholly-owned subsidiary of Reliance Industries, said that it would invest up to 750 million Indian rupees ($10.6 million) of additional capital into the startup, and raise its stake to about 89.66%, if NowFloats achieves certain unspecified goals by the end of next year.

In a statement, Reliance Industries said the investment will “further enable the group’s digital and new commerce initiatives.” NowFloats is the latest acquisition Reliance has made in the country this year. In August, the conglomerate said it was buying a majority stake in Google-backed Fynd for $42.3 million. In April, it bought a majority stake in Haptik in a deal worth $100 million.

There are about 60 million small and medium-sized businesses in India. Like hundreds of millions of Indians, many in small towns and cities, who have come online in recent years thanks to world’s cheapest mobile data plans and inexpensive Android smartphones, businesses are increasingly building online presence as well.

But vast majority of them are still offline, a fact that has created immense opportunities for startups — and VCs looking into this space — and major technology giants. New Delhi-based BharatPe, which helps merchants accept online payments and provides them with working capital, raised $50 million in August. Khatabook and OkCredit, two digital bookkeeping apps for merchants, have also raised significant amount of money this year.

In recent years, Google has also looked into the space. It has launched tools — and offered guidance — to help neighborhood stores establish some presence on the web. In September, the company announced that its Google Pay service, which is used by more than 67 million users in India, will now enable businesses to accept digital payments and reach their customers online.


Read Full Article

Aukey’s Aipower Wearbuds Combine True Wireless Earbuds with a Wrist-worn Fitness Tracker


True Wireless Earbuds almost all follow the lead of Apple’s AirPods and come in their own charging case. And if you want to use a fitness tracker, you’ll need to find space on your wrist as well.

But, what if you could combine wireless earbuds with a fitness tracker so that you only need to carry one device with you? That’s the premise of the newly announced Aipower Wearbuds.

Aipower Wearbuds

Aipower Wearbuds

Aipower, a subsidiary of the popular electronics manufacturer Aukey, has designed a device that sits comfortably on your wrist but combines true wireless earbuds with a wearable fitness tracker. The company has effectively removed the need for a separate charging case for your earbuds.

When you leave home, all you need is the Wearbuds strapped to your wrist and your smartphone. You can use each earbud independently of one another, and both have touch-sensitive controls.

The earbuds come with IPX6 water resistance and have a battery life of up to 5.5 hours. Given the apparent novelty of this device, you may be worried about sound quality; fortunately, this isn’t an issue.

The Wearbuds come equipped with graphene-augmented drivers and tuned casing, alongside Qualcomm’s smart audio chipset to ensure a high-quality audio experience.

Aipower Wearbuds Fitness Tracker

The wrist-based fitness tracker has a unique design as it needs to house the earbuds. However, its profile and shape are not that dissimilar to other smartwatches or fitness trackers. Although, it will sit slightly higher above your wrist.

If you are a fitness enthusiast, you may prefer to opt for a more specialized device. That said, the Wearbuds’ fitness tracker will be suitable for most users and is IPX5-rated for water resistance.

The tracker gathers fitness data and displays it in the Aipower mobile app, and only takes 90 minutes to recharge. Using the Wearbuds, you can track your sleep, steps, calories burnt, and heart rate. The device can also mirror notifications from your smartphone, too.

Aipower Wearbuds Availability

After a successful Kickstarter campaign, Aipower has begun selling the Wearbuds via their website. They are available in white, black, mint, or coral. You can pre-order the Wearbuds for $149 direct from Aipower. During the pre-order period, Aipower aims to ship the Wearbuds within one month.

Read the full article: Aukey’s Aipower Wearbuds Combine True Wireless Earbuds with a Wrist-worn Fitness Tracker


Read Full Article

The 5 Best Routers and Modems for Comcast Xfinity


routers-modems-budget

Are you looking for the best Comcast Xfinity modem or router? Home networking devices are notoriously difficult to understand. We’ll help you decode Comcast’s jargon and find the best router or modem for the Xfinity cable broadband service.

What’s the Best Wireless Router or Modem for Comcast Xfinity?

The best router is one that can fully use your subscription plan’s maximum speeds while providing reliable coverage throughout your home. Numerous technologies that can achieve this. However, not new tech is not always cost-effective.

There are three product types you should avoid: mesh routers, routers that can’t use custom firmware (DD-WRT), and modems with telephone compatibility.

Mesh routers are the newest home networking technology. They have the advantage of being able to extend superfast speeds at great distances. On the downside, for what they do, they are overpriced. Most consumers are better off buying a Wi-Fi extender instead. At most, I recommend buying a Mesh-compatible router or an inexpensive Wi-Fi extender rather than a complete Mesh system.

Avoid buying a modem-router combination unit. They’re less secure, and users cannot upgrade their firmware to Tomato or DD-WRT. Firmware like DD-WRT extends the lifespan of your device while also improving performance, security, and allowing for VPN server installations.

The Best Comcast Xfinity Routers

All routers work with Comcast, but some will not deliver the speeds guaranteed by your subscription tier. Here are the best routers available for Comcast Xfinity users.

Fastest Router: Asus ROG Rapture AX11000 Wi-Fi 6 Router

Asus ROG Rapture GT-AX11000 Wi-Fi 6 Router Asus ROG Rapture GT-AX11000 Wi-Fi 6 Router Buy Now On Amazon $369.21

The Asus ROG Rapture AX11000 comes in two forms: Wi-Fi 5 and Wi-Fi 6. Consumers with fast internet speeds will want to buy a Wi-Fi 6 router as it can hit extremely fast speeds. Wi-Fi 6 routers are today’s fastest wireless standard and can max out the fastest of Comcast Xfinity’s service plans.

On the downside, almost no wireless consumer devices fully support the standard as yet. So if you buy a Wi-Fi 6 router, you won’t be able to use its blistering speed without a Wi-Fi 6-compatible wireless card. It also allows for the use of Mesh Network devices, which function as Wi-Fi extenders. The Rapture also costs more than most routers on the market, and its antennas aren’t upgradable.

All Wi-Fi 6 routers lack Tomato or DD-WRT custom firmware compatibility. However, even with its shortcomings (which all Wi-Fi 6 routers suffer from), if you subscribe to one of Comcast Xfinity’s premium plans and need a fast wireless router, the Rapture may be for you.

Who Should Buy It?

  • If you subscribe to Comcast’s Gigabit Pro plan
  • Those with Wi-Fi 6 devices
  • If you own a lot of smart devices that are all simultaneously connected to the internet
  • VPN users

Who Shouldn’t Buy It?

  • If you’re on a budget
  • For those needing custom firmware like DD-WRT or Tomato

Best Value: TP-Link Archer C7 AC1750 Wi-Fi 5 Router

The TP-Link Archer C7 AC1750 is one of the fastest Wi-Fi 5 routers on the market. It also includes the option to install DD-WRT or Tomato, and VPN-compatibility. The Archer C7 series is renowned for its performance, range, and customization options. There are no other routers with the C7’s reputation for excellence and value.

That said, TP-Link has manufactured a not-as-good derivative of the C-series, known as the A-series. If you see the A7 model, I’d suggest not buying it, as it’s incompatible with custom firmware, like DD-WRT. Unfortunately, it is physically identical to the C7.

Who Should Buy It?

  • Everyone except those on the Gigabit Pro plan
  • Those looking for near-best Wi-Fi 5 speeds
  • Homes with lots of connected devices
  • Those looking for good range and signal reliability
  • People who want DD-WRT or Tomato compatibility

Who Shouldn’t Buy It?

  • Anyone using Wi-Fi 6 devices
  • Those who want great customer service

Best Cable Modems for Comcast Xfinity

Unfortunately, Comcast does not update its list of compatible modems. However, all of the devices on this list were confirmed to work on Comcast’s network through customer service representatives.

For the most part, modems differ mostly in their price and the following three characteristics: speed, Network Attached Storage (NAS) compatibility, and digital telephone capabilities.

Best Modem for Xfinity’s Gigabit Pro Plan: Netgear Nighthawk CM1200

Netgear Nighthawk CM1200 Netgear Nighthawk CM1200 Buy Now On Amazon $179.99

If you’re into 4K video, gaming, or transferring large amounts of data, the Netgear Nighthawk CM1200 modem achieves a whopping 2Gbps download speed.This means it’s one of the few modems officially recommended by Comcast that can fully utilize its Gigabit Pro plan, which has a download speed of 2Gbps. The CM1200 is overkill in that it can hit transfer speeds up to 6Gbps.

It’s pricey compared to Comcast’s other modems, like the Motorola MB8600 or Arris SB8200. However, none of these come close to the performance of the Netgear CM1200. With 32 downstream channels and eight upstream channels, it’s the best modem you can buy for Comcast.

Unfortunately, the CM1200 lacks a dedicated RJ11 phone jack, which means it cannot be used with Comcast’s Digital Voice service. However, the CM1200 Voice includes RJ11 phone jacks for telephone service. The CM1200’s two Ethernet ports are for Link Aggregation, which allows two Ethernet sources to boost a single computer’s internet speeds. These ports cannot be used independently of one another.

Who Should Buy It?

  • People using the Gigabit Pro plan

Who Shouldn’t Buy It?

  • People on any plan other than Gigabit Pro
  • Comcast Digital Voice customers
  • If you’re on a budget
  • If you need two separate Ethernet ports

Best for Comcast Digital Voice: Arris Surfboard SBV2402

Arris Surfboard SBV2402 Arris Surfboard SBV2402 Buy Now On Amazon $104.99

The Arris Surfboard SBV2402 provides a phone line jack for use with Comcast’s digital phone lines. It’s also one of the fastest lower-tier modems you can buy for Xfinity, hitting DOCSIS 3.0 speeds of 400Mbps, which makes it capable of handling the Blast! Pro plan.

Unfortunately, Comcast doesn’t offer any tier of service between 275Mbps and 500Mbps so while this is the fastest modem in its

The Surfboard SV2402 is one of the best modems for those who subscribe to Comcast’s low or midrange plans and have one of their Digital Voice subscriptions.

Who Should Buy It?

  • Digital Voice subscribers with speeds up to its Performance Pro (175Mbps)
  • Subscribers to Comcast’s Digital Voice internet telephone service

Who Shouldn’t Buy It?

  • Subscribers to Comcast’s Blast! Pro, Gigabit, and Gigabit Pro plans
  • If you need two or more Ethernet ports on the modem

Best Cheap Cable Modem: Netgear CM500

Netgear CM500 Netgear CM500 Buy Now On Amazon $61.30

The Netgear CM500 is the cheapest Comcast-compatible cable modem you could buy that covers the widest range of plans. There are cheaper modems available, but these are limited to the first two tiers of service, which are relatively slow and overpriced plans.

The CM500 includes DOCSIS 3.0 support, which means it can fully utilize the speeds of the Performance Starter, Performance Plus, and the Performance Pro. Those using the Blast! Pro plan should consider the Netgear CM700 modem. Unfortunately, there is a large price jump between the CM700 and the CM1000 series.

Who Should Buy It?

  • Subscribers to the Performance Starter, Performance Plus, and Performance Pro plans

Who Shouldn’t Buy It?

  • Comcast Digital Voice subscribers
  • Those with Blast! Pro and faster subscriptions

The Best Routers and Modems for Xfinity

In many cases, the router you already own may be the best choice. However, if you don’t own your router and modem, you need to buy it. It’ll save you a lot of money in the long run.

Comcast’s rental fees are around $15 per month. The average cheap router and modem combined cost about $120. That means within the first year you make your money back. The second year represents pure savings.

However, before you run off and buy a new device, consider attempting to improve the performance of your current router with a few simple tweaks.

Read the full article: The 5 Best Routers and Modems for Comcast Xfinity


Read Full Article

The Quickest Way to Install Windows Software: The Command Prompt


cmd-install-soft

Installing apps on Windows is a time-consuming process. The user has to go through a series of steps to patch the software—search for the recent version of an app, download the installer file, manually install the app (next, next several times), and uncheck unwanted bundleware or ads.

The problem does not end here. Software installers in Windows have entirely different ways of setting up apps, registry, and configurations. With so many combinations, many people don’t want to go through the hassle of updating dozen or more apps. We’ll show you how to install software using the command prompt.

Solution: Chocolatey (Package Manager)

A package manager is a collection of tools to automate the entire process of installing, configuring, and updating apps. The package consists of software binaries, configuration files, and metadata. The metadata, in turn, has all the details of an app (name, description, version number, and more) and the list of dependencies to make it work properly.

Although there are many package managers for Windows, none of them has the simplicity and security of Chocolatey. With few bits of code, you can deploy the app in every system and also track or manage updates of that software over time.

Here are some reasons why we prefer Chocolatey:

  • It has the largest online database of Windows packages. As of now, there are 11,166 community-maintained packages. You can even install packages from NuGet and MyGet.
  • Package submissions go through a rigorous moderation review process, including package validation, verification, virus scanning with VirusTotal, and more. For an organization, the use of the community package repository is optional.
  • Chocolatey works with over 20+ installer technologies for Windows. It knows how to set up an app, registry, manage files and configuration, or any combination.
  • Chocolatey can even work with installed apps. It can take over existing application files in the Programs directory and also handle uninstalls. However, it depends on the packaging and software installer used.

Installing Chocolatey in Windows 10

Chocolatey installation is quick and intuitive. You don’t need a thorough knowledge of the Command Prompt or PowerShell. However, you must fulfill the basic system requirements and have the patience to install a few scripts.

System Requirements

  • Windows 7+/Windows Server 2003+ and above
  • PowerShell v2+ and above
  • .NET framework 4+ (the installation will try to install .NET 4.0 if you don’t have it installed)
  • Free space for Chocolatey CLI and another 1GB+ or more for installing packages

PowerShell Method

Press Win + X and select Windows PowerShell (Admin). At first, you must ensure Get-ExecutionPolicy is not restricted.

Type in Get-ExecutionPolicy, if it returns Restricted then that means you cannot install any script. To bypass it, type in Set-ExecutionPolicy AllSigned and “Y” to confirm the change.

bypass execution policy in PowerShell

Copy-and-paste the command

Set-ExecutionPolicy Bypass -Scope Process -Force; iex 
((New-Object 
System.Net.WebClient).DownloadString('https://chocolatey.org/install.ps1'))

Press Enter.

install chocolatey through PowerShell

Within a few moments, Chocolatey will get installed and create a new folder in Program Data. All the packages go to \chocolatey\lib (though there may be an exceptions for .MSI installers).

You can also set up a custom installation path for packages like Python, Ruby, or Node.

chocolatey installation folder

Once Chocolatey gets installed, restart the PowerShell and type in choco /? to see the list of commands.

invoke choco help to get the list of commands

Command Prompt Method

If you use the command prompt, press Win + X and choose Command Prompt (Admin). Then, copy-and-paste the command

@"%SystemRoot%\System32\WindowsPowerShell\v1.0\powershell.exe"
-NoProfile -InputFormat None -ExecutionPolicy Bypass -Command "iex
((New-Object
System.Net.WebClient).DownloadString('https://chocolatey.org/install.ps1'))"
&& SET "PATH=%PATH%;%ALLUSERSPROFILE%\chocolatey\bin"

Press Enter.

install chocolatey through command prompt

Chocolatey will get installed on your system in a few seconds. Restart the prompt and type in choco /? to see the list of commands.

Chocolatey Packages

Chocolatey packages are modified .nupkg files. It is a compiled zip file carrying the package metadata (including version information, dependencies, and distribution rights). If you delete the metadata specific to chocolatey, the package file is similar to NuGet.

The interesting part of Chocolatey is the community repository of packages known as the community package repository. Every package submitted to the database undergoes a rigorous moderation process before it goes live.

On the left side, you’ll see the links to the package maintainer, validation check button in colors green, red, and yellow, and instructions to install the app. Under the Install section, you’ll see the command instructions to install Google Chrome.

chocolatey package in detail

In the same section, there are instructions to upgrade and uninstall the app. The Version History menu lists all the versions, including their changelog. And there is a section on Virus Scan Results, in case you’re not confident of installing a particular app.

details of a particular package

How to Install Software Using Command Prompt or PowerShell

You probably have a list of frequently used apps you install on Windows. Instead of having to visit a website and using an installer, launch PowerShell and type in the syntax

choco install [app name]

“choco” is the short name of Chocolatey. Whenever you install, upgrade, or uninstall any app, you must prefix it with “choco.” The second prefix is the actual command. Since we’re installing the app, we’ll use the prefix “install.” The third prefix is the software name.

Navigate to the chocolatey package site and search for the app. Notice the command line instruction to install that app.

installing app through chocolatey

For example, to install Gimp, type in

choco install gimp

This will download and install the app to your system, without requiring any action on your part. You’ll see the progress information in the console itself. In a few cases, your app might show windows, but that’s perfectly normal.

Chocolatey will take care of all the installation steps automatically. Once your app gets installed, you’ll find it in the Start menu.

installing gimp through chocolatey

Search Your Package

You can even search for a particular package with syntax

choco search [app name]

For example, if you wish to install 7-zip, type in

choco search 7-zip

When you press Enter, chocolatey will search for every app with the word “zip” in its database. If it’s there, you’ll find it in the results. Searching for a particular app requires a bit of practice. Use the repository package website whenever you need any help.

use the chocolatey search for a particular package

Upgrading a Package

To upgrade an app, type in

choco upgrade [app name]

List of Outdated Packages

It’s also possible to see the list of all outdated apps. To make this work, you must install apps through Chocolatey. Type in

choco outdated

outdated chocolatey packages

Uninstall a Package

If you don’t find an app useful, you can uninstall it through Chocolatey. Type in

choco uninstall [app name]

In most cases, the commands mentioned above are all you will ever need. But chocolatey has many more functions. Visit the command references page for more details.

Install Your Next App With the Command Prompt

Many people still find it a hassle to update their apps. Chocolatey lets you install a dozen or more apps with just a few keystrokes. You can easily manage your apps without any security concerns or bundleware.

Modern OS’es provide you automated installer packages and commands that install many bits of software at once. But have you ever thought what is happening behind the scene when you run that installer? If this interests you, read this piece to find out how does software installation works on Windows, macOS, and Linux.

Read the full article: The Quickest Way to Install Windows Software: The Command Prompt


Read Full Article

How to Disable Touchscreen Input on Android and iPhone


disable-touch-input

As display technologies improve, so has touchscreen sensitivity. But touchscreen displays are prone to accidental taps. Since almost all mobile devices now use a touchscreen instead of physical keys, senior citizens and kids might find themselves causing accidental inputs often.

Unlock the free "iPhone and iPad Shortcuts" cheat sheet now!

This will sign you up to our newsletter

Enter your Email

But did you know you can temporarily disable touchscreen controls on your mobile device? Before we dive in, let’s consider some scenarios where disabling touchscreen controls on Android or iPhone makes sense.

Why You Might Lock Your Touchscreen

Unintentionally interacting with your phone is frustrating. It’s also something that happens to everyone from time to time. Examples include:

  • While watching a video, an accidental touch pauses or exits
  • When you’re listening to music, the track pauses or skips
  • Disrupting the GPS display when your phone is mounted on the dashboard for a map-guided journey
  • Kids messing around with phone settings instead of watching a video or playing a game
  • Recording video is paused or stopped
  • Ghost touch issues

These last two points are worth further exploration.

Some phones (like the OnePlus One and Moto G4 Plus) have been plagued by ghost touch problems in the past. This is a touchscreen problem wherein the screen responds to touches you’re not actually making. Such problems can make your smartphone experience quite annoying.

One temporary solution is to block touch interaction for a selected area of the screen. While you’d still need to fix the faulty screen eventually, it’s a good short-term fix. You can continue to use other methods to navigate your phone.

With the increasing number of waterproof phones in the market, it’s tempting to film underwater. But usually, there’s a certain amount of ghost touching involved as water comes into contact with the screen.

Even if you’re simply making videos in the rain, accidental touches can cause pauses or even end the recording. It’d be great if you could disable the touchscreen so you can record video flawlessly.

Lock Your Android Phone to a Single App

If you find yourself struggling with the app-related problems mentioned above, disabling the touchscreen temporarily can help. However, there’s a better solution rather than having to disable the touchscreen entirely. Screen Pinning, a feature introduced in Android Lollipop, lets you lock your phone to a single app.

For instance, you can “pin” the YouTube Kids app. Your kids will be able to navigate around inside this app, but they won’t be able to switch to other apps.

Here’s how to enable the Screen Pinning feature in Android:

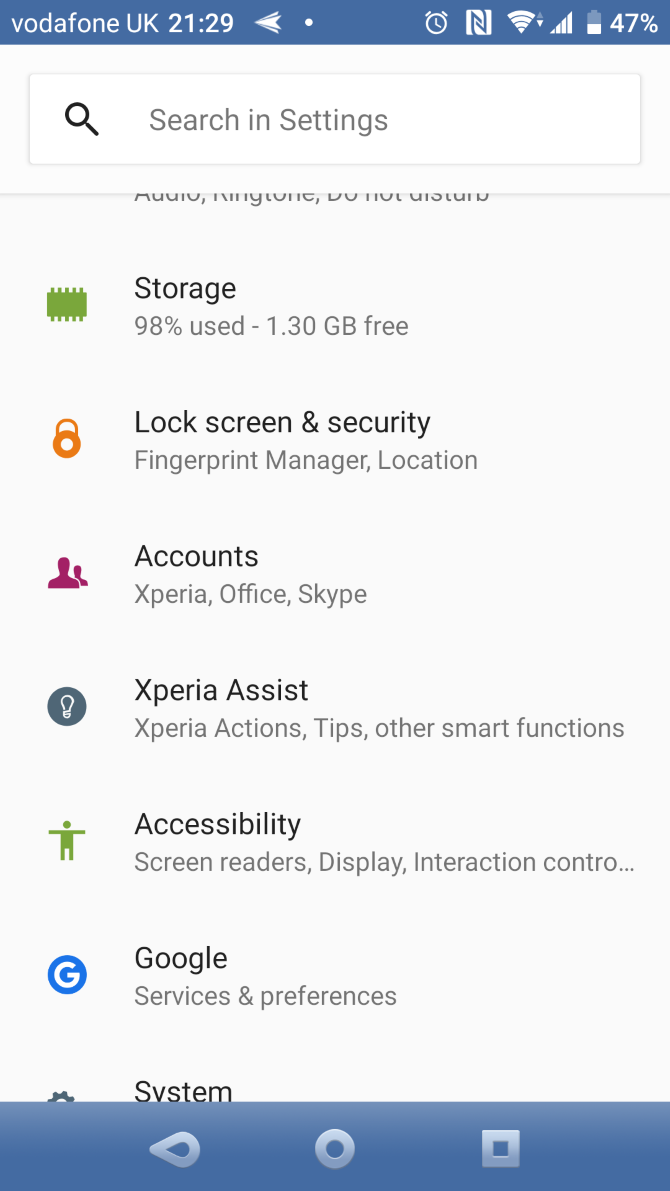
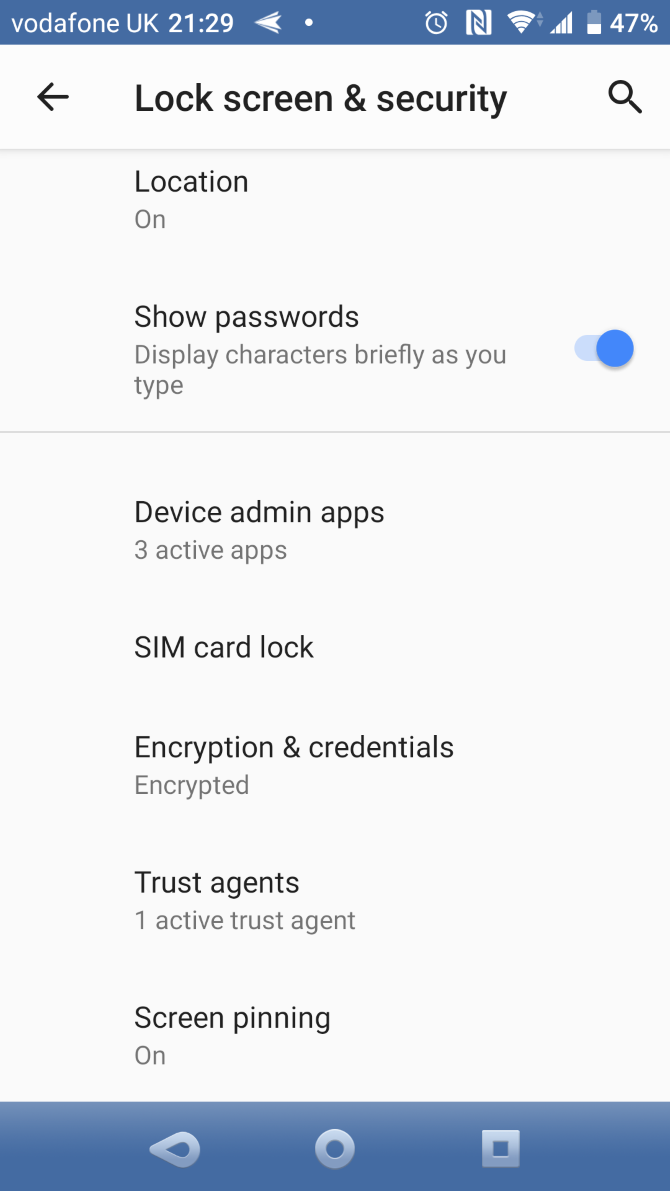
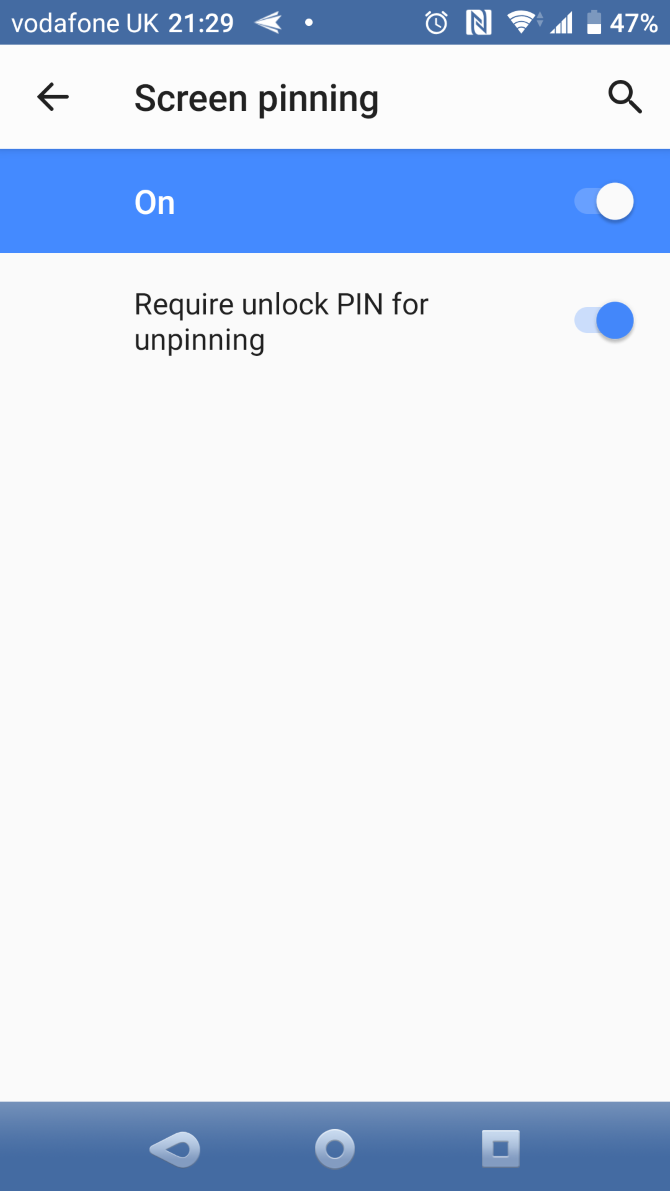
  1. Open Settings > Lock screen & security > Advanced > Screen pinning. In Android 9 Pie and above, this section is called Security instead of Lock screen & security.
  2. Tap On.
  3. Enable Require unlock PIN for unpinning. While turning this on isn’t mandatory, it makes sure that only you (and not your kids) can unpin a particular app.

Using Screen Pinning on Android

Once enabled, here’s how to use it on Android 8.1 and earlier:

  1. Open the app you want to pin.
  2. Tap Overview/Recent apps button.
  3. Swipe up on the Recent card and tap the Pin icon at the bottom-right.

If you have Android 9 or newer, use these steps instead:

  1. First, open the app you want to pin.
  2. Open the app switcher, which will depend on your method of navigation.
    1. If you use the classic three-button navigation, tap the square Recents button.
    2. If you use the newer two-button navigation or Android 10’s revised gestures, swipe up from the bottom from the screen and hold for a moment to show your recent apps.
  3. Tap the icon at the top of the app you want to lock, and choose Pin.

To unpin an app with three or two-button navigation, just hold the Back button on your device for about five seconds. If you have Android 10’s new gesture navigation enabled, swipe up and hold for a moment instead. You’ll have to enter your unlock PIN, after which the app will unpin.

While this feature works fine for a few instances, it’s not the solution to the other problems discussed above. For example, it doesn’t help with the ghost touch problem. For such problems, you’ll need to actually disable your touchscreen.

How to Disable Touchscreen Input on Android

Touch Lock is a free app that lets you lock the touchscreen on Android. It also lets you temporarily disable both soft keys and hardware keys, essentially bringing the iPhone’s Guided Access feature to Android.

The app shows a five-second advertisement after every unlock, which you can remove with a $1.99 in-app purchase.

Download: Touch Lock (Free, in-app purchases available)

Once you download and open the app, here’s how to enable it:

  1. Swipe left to advance to the next step in the setup wizard.
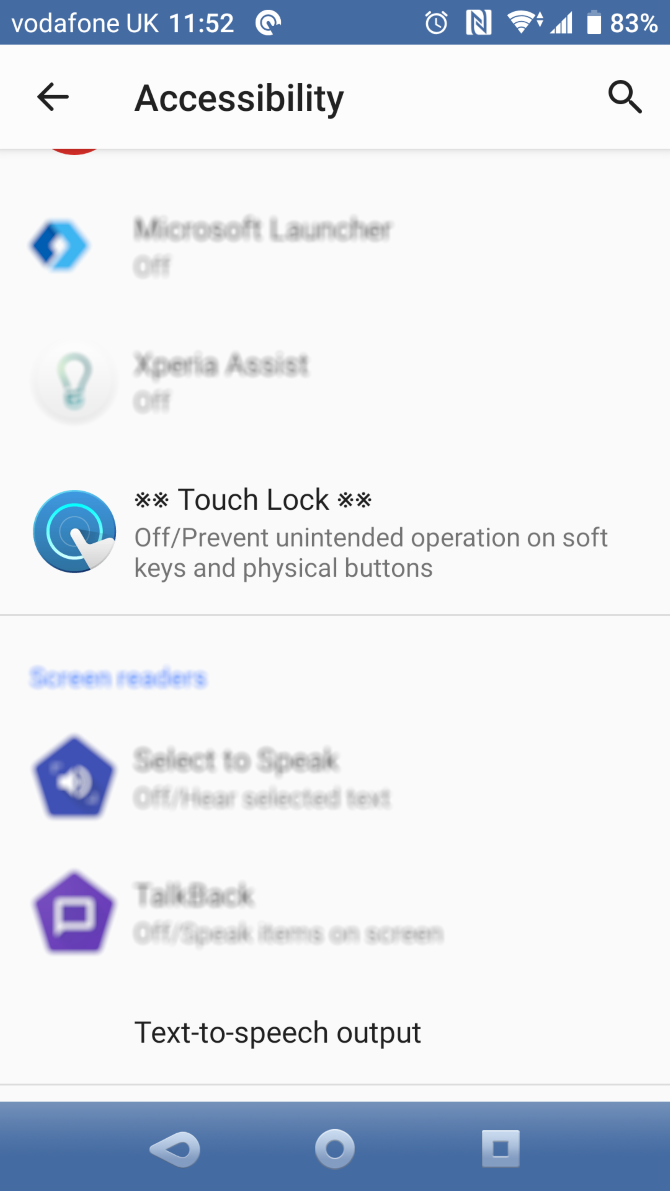
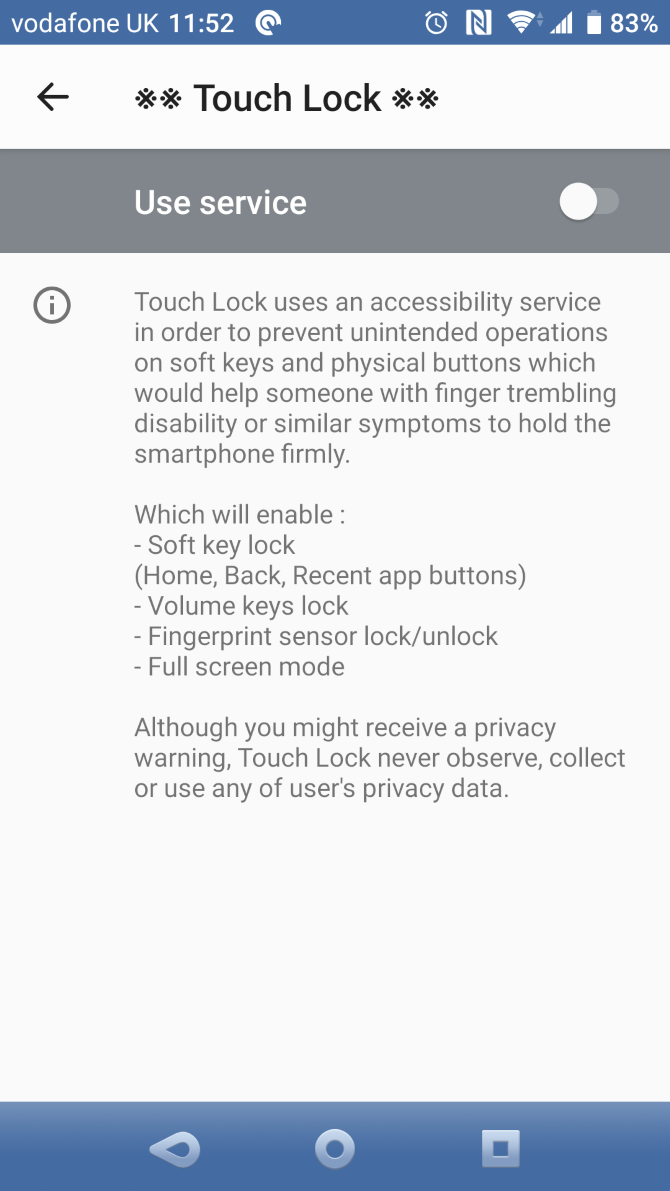
  2. Tap on Enable Now. This will open Android’s Accessibility Settings. Here, find Touch Lock and tap Use service.
  3. Click OK to confirm the observation requests, then Back to return to the app.

It is worth noting that this app observes all entered text, which might include personal and financial details. As such, you may opt to disable the app beforehand, or even avoid it altogether.

Once enabled, pull down the notification panel and tap on the lock icon. Now, the touchscreen and buttons should be locked. To unlock it, double-tap on the translucent icon at the top-right of the screen.

You can configure the number of taps required to unlock the touchscreen in the app settings. You’ll also find options to automatically unlock when receiving a call, show an unlock hint, and keep the screen on.

Disable Touchscreen Input on iPhone

The iPhone comes with built-in functionality to disable touchscreen input temporarily. Dubbed Guided Access, this feature lets you disable certain areas of the screen and even lock down physical buttons. Here’s how to enable Guided Access:

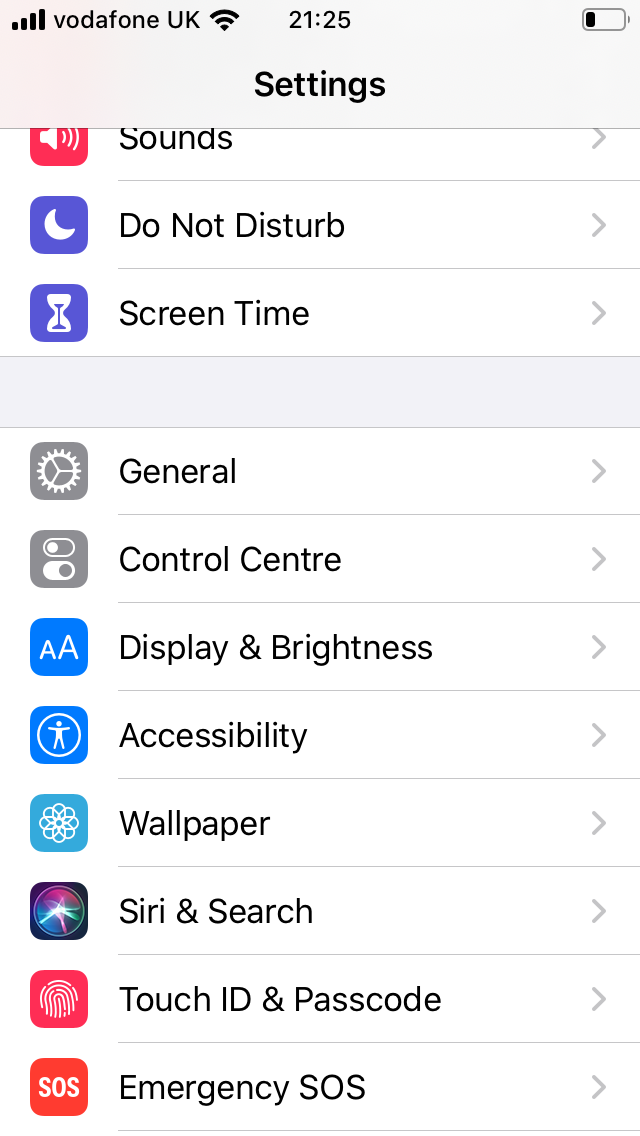
  1. Open Settings > Accessibility > Guided Access.
  2. Enable Guided Access.
  3. Tap on Passcode Settings to set a Passcode and Touch/Face ID used to end Guided Access.
  4. Finally, enable Accessibility Shortcut. This lets you triple-click the Home button to enter Guided Access anytime.

Once enabled, here’s how to use it:

  1. Open the app you’d like to lock down.
  2. Triple-click the Home button to enter Guided Access.
  3. Circle the areas on the screen you would like to disable. If you’d like to disable touch on the entire screen, draw around the complete screen area.
  4. Tap on Options in the bottom-left corner to disable the Power or Volume buttons.
  5. Select Done.
  6. Finally, tap on Start at the top of the screen to start Guided Access.

The disabled areas of the screen will appear grayed out and will not respond to any touches.

To exit Guided Access, triple-click the Home button. Enter the correct passcode or scan with Touch/Face ID to exit. Our full iPhone Guided Access tutorial explains this handy iOS accessibility feature in more detail.

Locking Your Phone’s Screen Is Easy

Whether you want to prevent accidental interruptions while recording video, or avoid misuse by a mischievous child, disabling your touchscreen temporarily helps.

It’s possible on Android natively or via an app, as well as on iPhone thanks to the Guided Access feature. In short, you should be able to lock your touchscreen on Android or iPhone with little effort.

Don’t forget that locking your whole phone it important too. Here’s what you need to know about protecting your phone with a PIN or fingerprint.

Read the full article: How to Disable Touchscreen Input on Android and iPhone


Read Full Article

Gmail Now Lets You Attach Emails to Emails


The days of forwarding multiple emails onto the same people are over. At least for Gmail users. This is because Gmail now lets you attach emails to emails. Which means you can send multiple emails onto other people without the need to forward them on one at a time.

Why Forward Emails When You Can Attach Them?

Everyone has forwarded emails onto other people. It’s standard procedure when it comes to emailing. However, while forwarding a single email onto someone is simple and effective, things can get messy when you want to forward multiple emails.

This is a problem in need of a solution, and Google’s solution to this is to allow you to attach emails to emails. And it really is as simple as it sounds. Google explains the new feature allowing you to attach emails to emails on the G Suite Updates Blog.

How to Send Emails as Attachments Using Gmail

There are two ways to attach emails to an email in Gmail. First, you can drag and drop multiple emails into a new thread. Start by composing your new email. Then select the emails you want to attach from your inbox. Then drag and drop them into the new email.

Alternatively, you can scroll through your inbox first, selecting the emails you want to forward as attachments. Then click the three-dot menu at the top of your inbox and select “Forward as attachment”. You can then compose your email around the attachments.

You can attach as many emails as you want, which will prove useful when forwarding multiple emails on a single topic. Say, for example, when someone joins a new company. Any emails you attach become .eml files, which will open in a new window.

Learn More From Our Beginner’s Guide to Gmail

The option to send emails as attachments is rolling out gradually. You’ll know you have access to the feature when you see the “Forward as attachment” option in the three-dot menu at the top of your inbox. You can then attach emails to your heart’s content.

Whether you’ve only just switched to Gmail or are a longtime user looking for tips, be sure to read our beginner’s guide to Gmail. This details how to create a Gmail account, the basics of Gmail, and some of the more advanced features worth checking out.

Read the full article: Gmail Now Lets You Attach Emails to Emails


Read Full Article

Why Robolinux Is the Best Linux for Windows Users


robolinux-windows-switchers

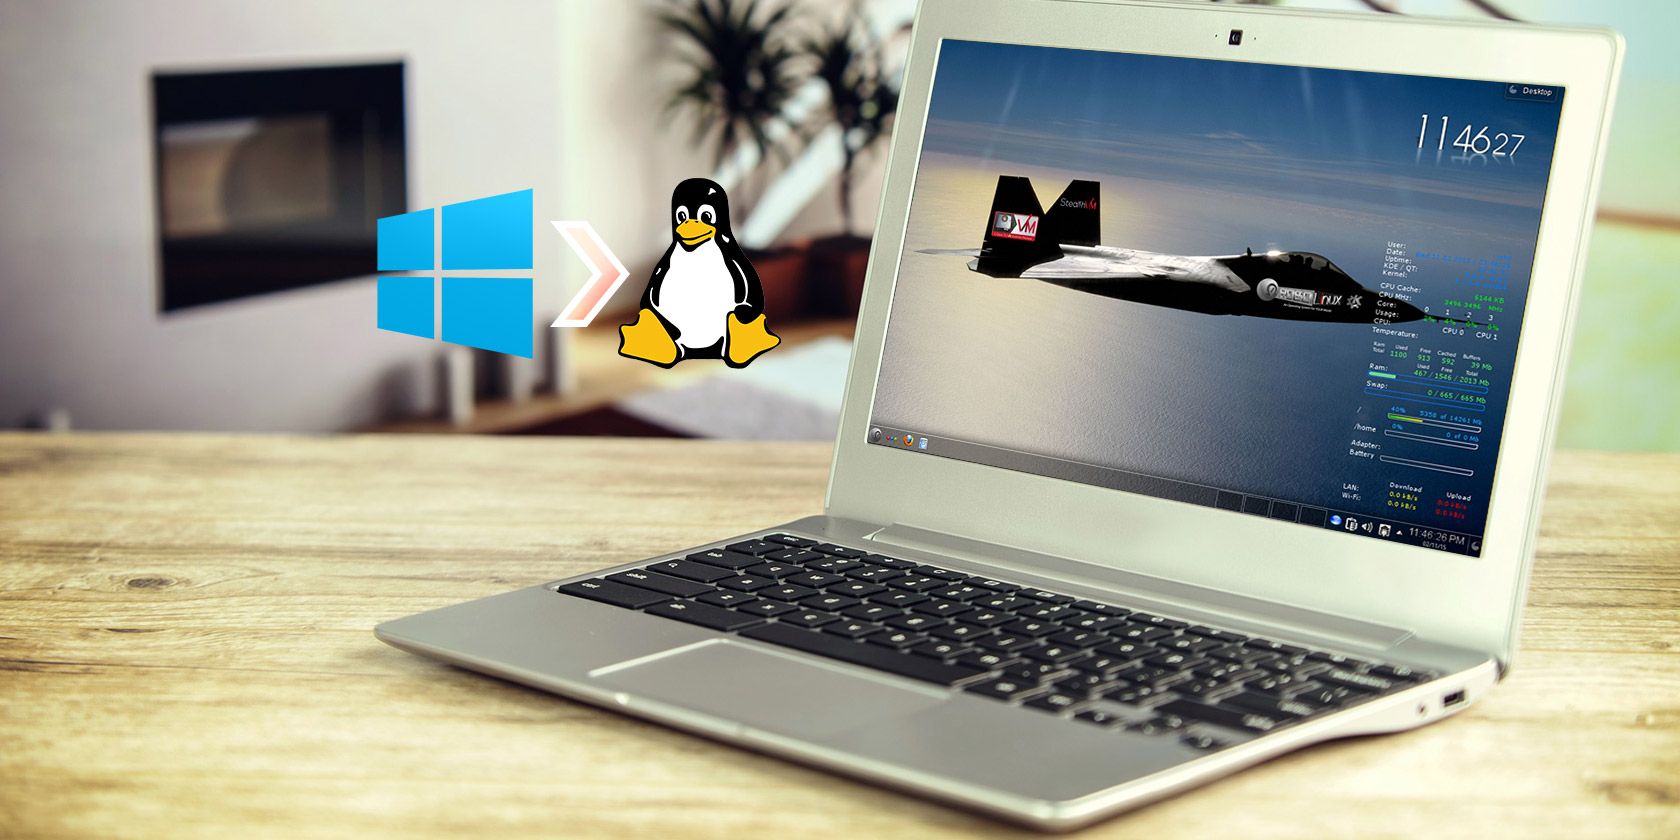
Most versions of Linux that cater to Window users do so by providing a familiar interface. You get an app menu in the bottom left, a taskbar across the bottom, a system tray in the bottom right, and buttons where you expect them.

Robolinux does this, too, but it goes further by aiming to be the best Linux distro to run Windows applications. Software helps you import your existing C: drive and reinstall Windows apps on your new Linux desktop. That might just make Robolinux the best version of Linux for Windows users.

A Linux Distro That Runs Windows Programs

Robolinux, a Debian-based operating system, places a heavy emphasis on Windows and Linux integration. The technology behind this is nothing new: Wine can already help you run Windows programs on Linux, for example.

Still, support varies greatly. As such, running Windows in a virtual machine (VM) offers the best compatibility. Because the virtual machine method runs programs natively on Windows, apps are more likely to work.

Within Stealth VM, the default virtual machine in Robolinux, there are options to install various versions of Windows. These one-click Windows installers make Robolinux a Linux distro that runs Windows programs and entire Windows desktops with little hassle.

How to Install RoboLinux

Robolinux Live menu

Robolinux is simple to install on a hard drive, bootable media such as a live CD, or even a virtual machine.

Head over to the Robolinux downloads page and select your preferred version. You’ll find Robolinux Raptor LTS iterations with different desktop environments including Cinnamon, MATE, Xfce, LXDE, and GNOME. Many of these different interfaces, such as Cinnamon, have layouts that resemble Windows.

With your ISO downloaded, you’ll need to mount it to bootable media such as a flash drive or hard drive. Alternatively, you may install the ISO in a virtual machine. Use a program such as Etcher to burn your image file. In your burning program, select the Robolinux ISO file. Then, pick your desired medium such as flash drive or DVD. Mount the image file.

Once that’s complete, pop your live CD into your PC and power it on. Depending on your machine, you may need to change your BIOS boot order so that the live CD boots before the hard disk drive. When Robolinux loads, you may need to sign in using the username “live” while leaving the password blank.

You can now try out and evaluate Robolinux before installing on your HDD.

Download: Robolinux
Download: Etcher (Optional)

Hands-On With Robolinux

The Robolinux MATE desktop is one of the best Linux distros for Windows

Immediately, Robolinux provides a user-friendly environment which makes getting started with Linux simple.

There’s a start menu, task bar, and a smattering of default apps. Bundled in the Robolinux default installation, you’ll find the Stealth VM virtual machine, and C: Drive to VM program for simple migration of a Windows C: Drive to a virtual machine.

You’ll still need to install these programs by hand, but they’re loaded in just a few clicks. Plus, in the start menu under Installers you’ll find options to load programs such as BleachBit, Clam Antivirus, and Steam for Linux.

This isn’t a locked-down operating system. Rather, Robolinux boasts immense customization options. For instance, you can change desktop environments and set various sound effects which trigger when performing tasks like opening folders.

As for experienced Linux users, if you’ve used Debian or one of its derivatives (such as Ubuntu), you’ll know your way around Robolinux.

Linux for Windows Users

Robolinux app menu

The main appeal of Robolinux is its uncomplicated user experience. Additionally, included applications such as Stealth VM make installing Windows (or other operating systems) within Robolinux instinctive.

While there’s nothing in Robolinux that can’t be installed in other Linux distros, the big draw is the comprehensive feature set. When initially booting into Robolinux, there’s even a virtual machine ready, waiting for a fresh copy of Windows.

As noted above, some software such as C: Drive to VM does not come pre-installed. Instead, you download it using the installers section of the start menu.

How to Set Up a Windows VM in Robolinux

Robolinux virtualization lets you run Windows in Linux

Configuring a Windows virtual machine in Robolinux is pretty simple. In the start menu, the favorites bar shows options for Windows XP, Windows 7, and Windows 10 VMs in 32-bit and 64-bit flavors. These are also found under the Stealth VM entry of the start menu.

Click your desired virtual machine type, and you’re prompted to download Stealth VM. Download the tar.bz2. Don’t extract it. Instead, under the start menu select Robolinux Stealth VM installer.

Picking this installs Stealth VM. You’ll then be able to load any virtual machine option from the list. This of course requires an officially licensed version of Windows. If you need a copy of Windows XP, you can download this for free and legally from Microsoft.

The process is pretty easy, and though Stealth VM needs a bit of set up after installing Robolinux, it’s actually quite smooth and far simpler than a command line installation. Which, of course, isn’t terribly difficult. But it’s refreshing to just push a few buttons and have a free, quality VM at your disposal.

Alternatively, you can always install Wine and a frontend such as PlayOnLinux or Vineyard if you’d rather eschew the virtual machine route.

Final Thoughts on Robolinux for Windows Users

Boasting stability, ease of use from installation to everyday use, and a bevy of bundled software options, Robolinux is a superb operating system. Notably, Robolinux places an emphasis on integrating Windows with Linux through its included Stealth VM virtual machine.

While much of what Robolinux promises is achievable using almost any Linux distro and a virtual machine, Robolinux features a VM in its default software. Thus, the process of installing a VM, migrating a C drive, and other tasks involved in migrating from Windows are streamlined.

It’s not that Robolinux accomplishes what other Linux distros can’t—rather it simplifies the work of it. Although Robolinux opts for Debian stable over bleeding edge, this fosters a more reliable system environment. For more Linux distros, check out our exploration of the best Linux operating systems for every kind of user.

Read the full article: Why Robolinux Is the Best Linux for Windows Users


Read Full Article

How to Test Your Home Network Speed (And Decipher the Results)


home-router-setup

Do you ever ask yourself how all your devices utilize your home network? Over time, you’re adding new devices, but you don’t know how this impacts your network in turn.

That’s why you need to test your home network speed. In the past, you could skirt by just testing your internet connection. But a typical home utilized less technology back then.

You can conduct your own internal network speed test using one simple program: LAN Speed Test. With easy-to-read results, you can finally check your home network speed whenever you want.

Install LAN Speed Test

Before you can test your home network speed, you’ll need the LAN Speed Test program. Totusoft provides the base version of the LAN Speed Test for free but also offers a licensed option.

If you pay the extra amount, you can register the software for both your macOS and Windows computers. There are also several subtle data management perks as well as functionality-based ones. These mostly apply to more advanced users that want to challenge their network or dig deep on their data research.

For the purpose of a quick test, the lite free version does great.

Download: LAN Speed Test (Free, $10.00 for the full license)

Set Up Network Sharing and Use Your Public Folder

Once you have LAN Speed Test installed, you’ll need a pair of networked computers to complete the test. The simplest set-up involves using the Public folder as your testing ground. To do this, you need to have network sharing turned on before you can access the Public folder.

If you’ve never tried network sharing before, look at how to easily share files between Mac and Windows for a quick run-down.

When you open LAN Speed Test for the first time, you want to set the right folder for the test. Click Start Test or select the ellipsis next to the Folder pull-down menu to select your folder. From there, you can navigate to the Public folder depending on your system type.

For macOS, navigate to Macintosh HD > Users > [username] > Public.  For Windows, simply navigate to C:\Users\Public.

Perform Your Home Network Speed Test

After you’ve made it to your shared folder, you’ll want to adjust the packet size to set-up your test. The packet refers to the test file you’re sending off to the shared folder.

Totusoft recommends starting with a packet size of 1MB for a quick test. But you can always scale up the packet size in repeat tests.

In simpler terms, you’re essentially deciding between creating a short or prolonged test of your network’s transfer speeds. As you adjust the file size, the duration of the home network test will vary. It can last from a few seconds to hours depending on your packet size.

A screenshot of the home tab on LAN Speed Test
Image Credit: Totusoft

For licensed users, you can also send off more than one packet. With the added packets, you have more incentive to vary the minimum and maximum values. The added option isn’t mandatory, but it can create a more realistic testing scenario.

Regardless, if any of this information seems too confusing, just think of writing as your upload speed and reading as your download speed over your home network. Totusoft also offers online help documents for the more nuanced details of the program.

The terminology can be jarring at first. Just remember it’s all about how to test your network speed at home.

Figure Out What Matters in Your Report

After the writing and reading progress with the packet finishes, LAN Speed Test provides you with a two-column breakdown of each.

A screenshot of the default results view for LAN Speed Test
Image Credit: Totusoft

Depending on your needs, you can utilize different aspects of the test results. However, for the majority, you’re just going to want to focus on the final test result of Mbps and MBps.

Mbps stands for megabits-per-second and refers to your home network’s download and update speeds. Just don’t confuse Mbps with MBps which refers to megabytes per second. Megabytes would refer to the file size or the amount of data transferred.

Use Your Report Information

With those notes in mind, you must be wondering what exactly you can do with those numbers. Mbps provides your download and upload speeds for your network, so you can easily use this test to check if anything seems off with your speed.

If you’re running into issues with your speeds seeming oddly low, you should look into things that might be slowing down your home Wi-Fi network.

A screenshot of LAN Speed Test's results in chart form
Image Credit: Totusoft

You can also use the MBps value to determine the amount of time it would take to transfer any file. For example, if I have an upload rate of 54.26MBps, it would take me 2.7644 seconds to write a 150MB file. You simply divide the size of the file you want to transfer by your upload rate.

Regardless, you can project the effectiveness of your setup after the home network speed test. If your rate falls below the promised speed rates, and it consistently underperforms then you might need to consider replacing your router. Sometimes a router simply can’t handle the increased traffic load, so an upgrade can bring new speed peaks.

Staying in touch with your network’s state can save a lot of hassle and headache if you can determine a cause when anything goes awry.

The Usefulness of an Internal Network Speed Test

Knowing the exact state of your network can help you plan out precisely what your home can handle.

Whether streaming video or transferring files between two computers, you need to be in touch with your numbers—especially if you don’t want there to be a loss in quality.

LAN Speed Test provides a free option that does the major math for you and gives you either a quick or in-depth view of your home network speed. But if you’re still running into network issues, consider looking into these diagnostic tricks and simple fixes for network problems.

Read the full article: How to Test Your Home Network Speed (And Decipher the Results)


Read Full Article

7 Reasons Why You Should Replace Your ISP’s Router


When you sign up with an Internet Service Provider (ISP), they usually send you a modem and a router. At first, it’s convenient that you don’t need to buy your own, but sticking with your ISP’s hardware does have its disadvantages.

So, why should you buy your own router, and what advantages do they bring?

1. Buying a Router Can Be Cheaper in the Long Run

When you sign up to an ISP’s service, they’ll often give you a router as part of the package. Sometimes this router comes as part of the package, and there’s not much you can do about it.

Sometimes, however, the ISP will ask you if you’d like to rent its approved router. This rental becomes an added cost on your monthly bill.

If you already have a router, you don’t need to rent out the ISP’s model. While the upfront cost of buying your own router is more, the long-term costs of an ISP router vs. your own router will save you money.

2. Your ISP’s Router May Have a Weak Wi-Fi Signal

Don’t get us wrong; some ISPs produce powerful routers with a Wi-Fi signal that covers the entire household. Some, however, have feeble Wi-Fi strengths or download speeds that make using the internet a chore.

Your best bet is to check the specs of the router that your ISP sent you, then compare it to the speed of your internet plan. If the router can’t move as much data, you’ll benefit from a better device.

You can also use Wi-Fi signal measuring tools to check how strong the signal is. If you’re getting a weak signal and moving the router around doesn’t fix it, you should try getting a more powerful router.

Some routers are also made to provide better Wi-Fi in difficult places. The Amplifi HD system, for example, uses high-density mesh points throughout your house to eliminate dead spots.

If you live in a house with lots of signal-stopping walls, something like this can provide a speed boost. Features like tri-band Wi-Fi can also keep speeds up when you’re using multiple devices.

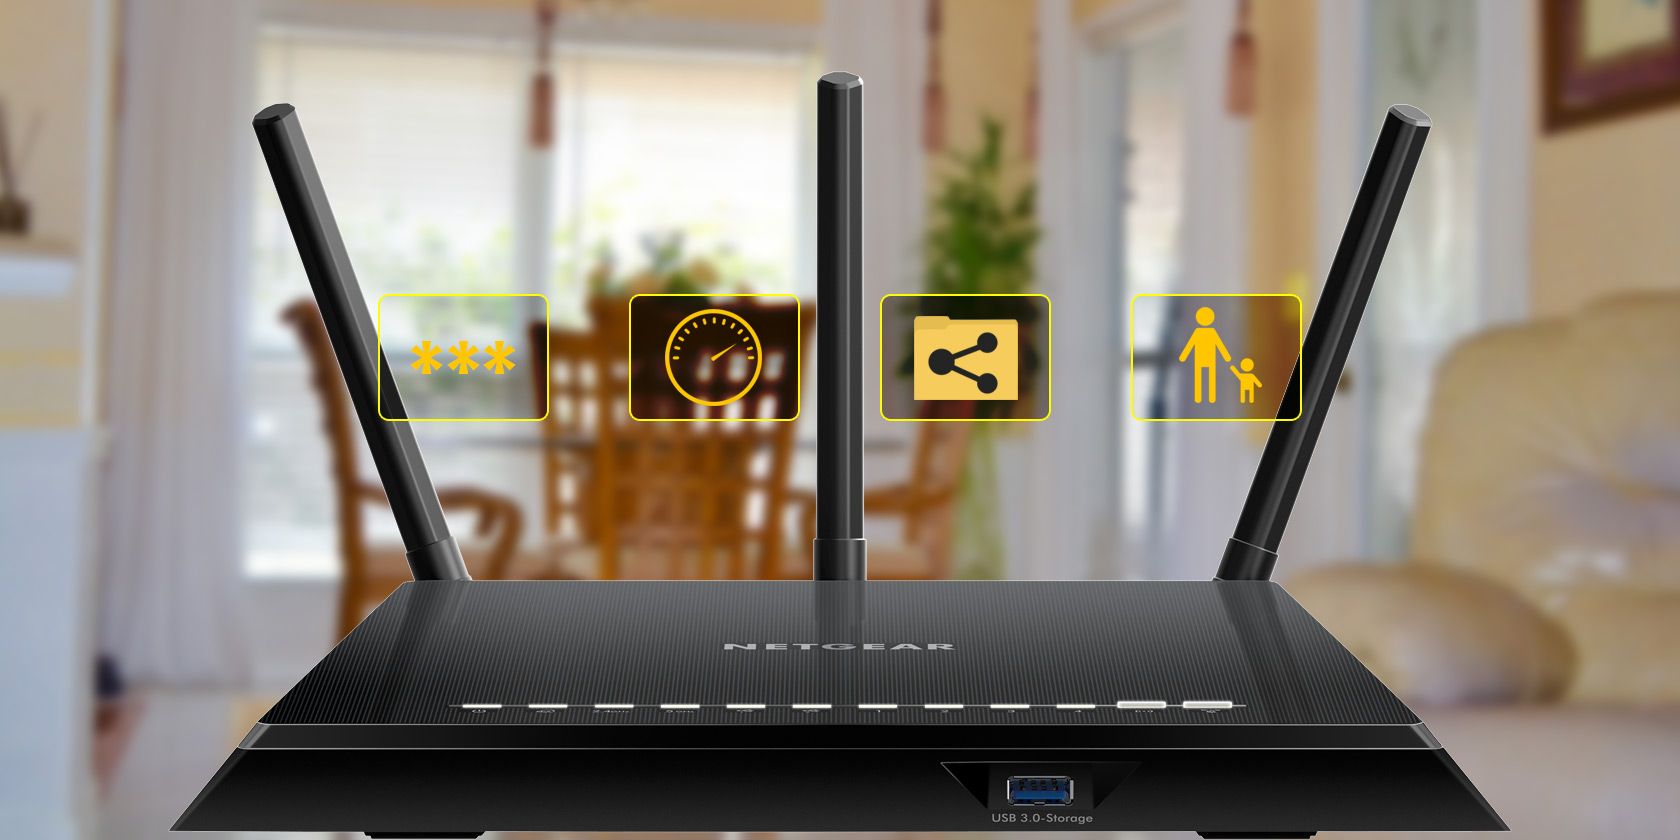
3. Opt for Routers With Better Parental Controls

Storebought routers have great options for parental controls. While parental apps on a computer do work, parental controls on the router itself are more effective and harder to crack. While some ISP routers support parental controls, you’re not likely to get as many options as you are if you buy your own.

Netgear routers, for example, come with a free app that lets you adjust the control settings directly from your phone. You can also set up specific times where some sites are blocked, but others are allowed.

4. Storebought Routers Have Better Guest Network Tools

Most routers can create guest networks. With a click, you give Wi-Fi access to guests with a custom password, without giving away your private network’s one. This feature is useful for keeping people off of your network, where all your files and devices may be stored.

You can also turn the guest network off when it’s not in use, in case you’re worried about hackers. Guest networks don’t let users see what else is attached to the network, access other devices, and sometimes keep guests from even seeing each other.

Guest networks provide a lot of conveniences and added security, but not all ISP routers support them. As such, if you’re considering an ISP router vs. storebought routers, it’s best to go with the latter.

5. Storebought Routers Have Better Bandwidth Prioritization

Quality of service (QoS) lets you choose apps or devices that get priority bandwidth. You could use these settings to make sure that Netflix on your Roku gets priority for streaming, for example.

Some routers also give you more advanced capabilities related to QoS so you can customize how it treats different types of traffic. If you’re using several devices at the same time, you can ensure that your router is making the right decisions on data transmission.

You’ll probably need to do some research to find how to configure QoS best, but if you do it well, you can significantly improve the quality of your Wi-Fi.

6. Third-Party Firmware Works Better

You probably don’t give a lot of thought to your router’s firmware. However, if you want to get the best performance from your router, you can upgrade or even change the firmware. Installing DD-WRT, for example, can open up more options than your standard firmware.

Having freedom over your router’s settings allows you to fine-tune its performance. There are plenty of ways to improve the speed of your router, and having control of its firmware helps you get the best from your equipment.

You can’t choose a firmware on an ISP-provided router. Even upgrading your router to the latest firmware is hard when your ISP is slow with updates.

7. Storebought Routers Are More Secure and Stable

When you purchase a router directly from a manufacturer, they have control over the firmware and don’t have a specific affiliation toward a particular ISP. This means the company can keep your router secure via updates and should work on any ISP you choose.

This isn’t always true for an ISP’s router. For one, the ISP may not be the one producing the router in the first place; they may delegate that task to another company. If a flaw appears in your router’s security, the ISP has to get in touch with the router’s manufacturer to fix it.

Similarly, the router will be built to work with its ISP, but isn’t guaranteed to work well outside of its default settings. The Register reported on how Sky customers had their routers bricked after a firmware update. It only affected those that used a custom DNS server, which shows how users face problems if they stray off the ISP’s intended path.

Which Routers Are Better Than ISP Equipment?

We’ve made an excellent case for grabbing a new router instead of settling for what your ISP gives you. However, now the question remains: if your ISP’s router isn’t good enough, what is? There are plenty of routers out there, and not all of them are winners.

Before you hit the store to find something better, be sure to read our picks for the best modem/router combo for every budget.

Do I Have to Use the Router Provided by My ISP?

If you want to replace your ISP’s equipment, you may wonder if your ISP forces you to use their router. The answer is no, but sometimes sticking to your ISP’s router will make things easier. It’s up to you to weigh the benefits of buying a router with the ease of using the ISP’s tools.

These days, some ISPs will provide a modem/router combo when you sign up. All you need to do is plug in the router, and you’re set.

When replacing this kind of router, you also need a modem alongside it. Some ISP routers will allow their routers to be put in “modem mode,” so you can connect it to a router of your choice. Otherwise, you’ll need to get your own.

You can also opt for a modem/router combo of your own. Just be sure the router fits the requirements of your ISP, else it may not function as intended.

Getting the Best From Your Router

ISPs are keen to give you a router to set you up, but they’re not always your best option. Now you know the pros and cons of an ISP router vs. an aftermarket router and whether or not you should buy a router.

Don’t throw out your ISP’s router, though; there are ways to reuse an old router and give it a second life.

Read the full article: 7 Reasons Why You Should Replace Your ISP’s Router


Read Full Article

4 Google Scripts That Make Google Sheets More Powerful


google-sheets-more-powerful

Google Sheets is part of the Google Suite and is by far one of the most powerful free tools at your disposal. It lets you track, analyze, or log just about anything you could imagine. What makes it even more powerful is using Google Scripts to enhance the capabilities of Google Sheets.

Coding in Google Sheets might sound a little intimidating. You may think at first that anything with the word “scripts” in it requires advanced programming knowledge. That actually isn’t the case.

Let’s take a look at some pretty cool Google Sheets scripts examples that can boost your productivity.

What Are Google Sheets Scripts?

Google Sheets Scripts are pieces of code you can write inside your Google Sheets that can power up your sheets. Google Sheets Scripts are written in JavaScript, and given that JavaScript is becoming more and more popular you may already be familiar with it.

Writing Google Scripts is very similar to writing VBA in Microsoft Excel to create programs. Scripts in your Google Sheets are powered by the Google Apps Script, which also works with other Google services. Here are four scripts that really demonstrate the power of Google Sheets scripting.

1. Create Your Own Custom Functions

One of the easiest ways of creating a Google Script can greatly enhance your Google Sheets experience is by creating custom functions. Google Sheets already offers a long list of functions. You can see the most common ones by clicking on the Menu > Functions icon.

Sheets Custom Function

Clicking on More functions shows you a long list of math, statistical, financial, text, engineering, and other functions. However, Google Scripts gives you the flexibility to create your very own personalized formulas.

For example, say you often import information from a digital thermostat at your job, but the thermostat is set for Celsius. You could create your own custom formula to convert Celsius to Fahrenheit, so with one click, you could automatically convert all of those imported values.

To create your first custom function, you’ll need to open up the Script editor. To do this, click Tools > Script Editor.

Script Editor

You will see the project screen, where you can write your JavaScript code.

Script Editor

Here, replace what’s in this window with your own custom function. The function name is the same as the name that you’ll start typing into a cell in Google Sheets after the “=” symbol in order to invoke your formula. A function to convert Celsius to Fahrenheit would look something like this:

function CSTOFH (input) {
  return input * 1.8 + 32;
}

Paste the function above into the code window, and then select File > Save, name the project something like “CelsiusConverter” and click OK.

That’s all there is to it! Now, all you have to do to use your new function is type the “=” sign followed by your function, with the input number to convert:

Sheets Function

Press Enter to see the result.

Sheets Function Result

That’s all there is to it. You can quickly see how you can write just about any custom formula that you need to fit your Google Sheet.

2. Auto-Generate Charts

In other articles, we’ve shown you how to do things like log data from your home Wi-Fi cameras to a Google spreadsheet, or maybe you’re using Google Sheets with a team and other people are entering data for you.

Let’s say you’re working on a sheet with new data every month. You would like to automatically create a chart using the data in the spreadsheet. You can accomplish this by creating a function that will create a new chart for you, based on the data in the current spreadsheet you have open.

In this scenario, you’re a teacher and at the end of the year you have a spreadsheet for each student with the list of monthly exam scores:

Sheets Exam Scores

What you would like to do is run a single function on this sheet that would generate a chart in seconds. Here is what that script looks like:

function GradeChart()
{ var spreadsheet = SpreadsheetApp.getActiveSpreadsheet(); var sheet = spreadsheet.getSheets()[0]; var gradechart = sheet.newChart() .setChartType(Charts.ChartType.LINE) .addRange(sheet.getRange('A1:B11')) .setPosition(5, 5, 0, 0) .build(); sheet.insertChart(gradechart); }

Now, open each of your student’s spreadsheets and click on the Run icon in the menu in Google Scripts to auto-generate the chart.

Scripts Run Icon

Whenever you click on the run icon, it’ll run the script that you’ve created on the “active” spreadsheet (the one you have open in your current browser tab).

Sheets Generated Chart

For reports that you have to generate frequently, like weekly or monthly, this kind of auto-generated chart function can really save you a lot of time.

3. Create Custom Menus

What if you don’t want to have the script open to auto-generate that chart? What if you’d like the convenience of having that function right at your fingertips in the menu system, right inside of Google Sheets? Well, you can do that too.

In order to create a custom menu, you need to tell the spreadsheet to add your new menu item every time it opens. You do this by creating an onOpen() function in the Script editor window above the Gradechart function you just created:

function onOpen() {
  var spreadsheet = SpreadsheetApp.getActive();
  var menuItems = [
    { name: 'Create Grade Chart...', functionName: 'GradeChart' }
  ];
  spreadsheet.addMenu('Charts', menuItems);
}

Save the script, and then reload your spreadsheet. You’ll discover that now your new Menu item shows up with the name you defined it as in your script. Click on the menu and you’ll see the menu item for your function.

Sheets Custom Function

Click on the menu item and it’ll run the function just like it did when you pressed the “run” icon from inside of the Google Scripts editor!

4. Send Automated Reports

The last script example we’re showing you is a script that will send email from inside of Google Sheets.

The way this may come in handy is if you are managing a large team of people and you have multiple emails to send on the same topic.

Maybe you’ve done a performance review with individual team members and logged your review comments for each person in a Google Spreadsheet.

Would it be nice to just run a single script and have those comments automatically emailed out to the 50 or 60 employees all at the same time without you having to manually create all of those individual emails? That’s the power of Google Scripting.

Similar to how you created the scripts above, you’ll create a script by going into the Script editor and creating a function called sendEmails(), like this:

function sendEmails() {
  var sheet = SpreadsheetApp.getActiveSheet();
  var startRow = 2; // First row of data to process
  var numRows = 7; // Number of rows to process
  var dataRange = sheet.getRange(startRow, 1, numRows, 3)
  var data = dataRange.getValues();
  for (i in data) {
    var row = data[i];
    var emailAddress = row[1]; // Second column
    var message = row[2]; // Third column
    var subject = "My review notes";
    MailApp.sendEmail(emailAddress, subject, message);
  }
}

So let’s say you have your spreadsheet organized as shown here.

Sheets Sample Data

The script above will work all the way through each row in the spreadsheet, and send out an email to the address in the second column with the message that you’ve typed into the third column.

The sendEmail function in Google Scripts is by far one of the most powerful functions in Google Scripts because it opens up a whole world of email automation that will save you time.

This script shows you the real power of Google Apps Scripting, combining Gmail with Google Sheets Scripts to automate a task. While you’ve seen scripts that work on Google Sheets, the best thing to take away is the power of scripting across the whole Google Suite.

Automation Is the Secret to Productivity Success

What all of these automation Google Scripts should show you is that with just a few simple lines of code, Google Scripts has the power to partially or fully automate Google Sheets.

These functions can be set up to run on a schedule, or you can run them manually whenever you want to trigger them. Google scripts can automate boring tasks like sending emails or sending invoices from Google Sheets. Looking for more? Check out these 3 Google Scripts to automate your documents.

Read the full article: 4 Google Scripts That Make Google Sheets More Powerful


Read Full Article

Is Groupon Safe and Does It Really Save Money?


groupon-cautious

Of all local deal websites, Groupon remains the most popular. But you just have to wonder, is Groupon legit and will it always save you money?

There’s no doubt that many people have saved an impressive amount of money by using Groupon. However, there are also some real dangers involved if you aren’t experienced with the service. So, what is Groupon and how can you avoid scams or bad deals? These Groupon tips will help you make better buys on the marketplace.

What Is Groupon?

If you’ve never shopped on the Groupon website before and don’t know how it works, it becomes a lot harder to spot red flags associated with bad deals. Not only is Groupon a great website for online coupons and promotional codes, but it also helps you score discounts with local businesses and services.

You can buy Groupons for restaurants, hotels, automotive services, activities, products, personal services, home services, spas, and much more. When you buy a Groupon, you buy a specific product or service at a discounted price. While most of Groupon’s offers give you a great deal, you have to be careful about the Groupons you choose.

How to Spot Potential Fraud

You can’t trust every single deal you see on Groupon, but you shouldn’t let that scare you off from using Groupon altogether. Identifying these red flags can help you avoid a Groupon scam.

Low Number of Buyers

Groupon will display the number of buyers on a popular deal. When you go to the deal’s page, you’ll see small text that says something like “1,000+ bought” above the Buy button. The number of buyers displayed can range anywhere from 10 to 25,000 and beyond.

Smaller businesses might not have thousands of buyers, and that’s okay. If at least 10 people have bought a specific Groupon, you can have confidence that it’s a legitimate deal. If the deal doesn’t have any buyers listed, you’re taking a risk by purchasing it.

Amateur Website

Always visit the website of the business to make sure it’s a legit website. You’ll often see the site name listed in the “About” section of the deal page—otherwise, Google the company. If the site looks like it was thrown together in five minutes, don’t splurge on the deal.

Little Contact Information

When you scroll down the page of a Groupon deal, you’ll usually see the company’s contact information. This includes the business’ address, phone number, and hours. If you don’t see any contact details, then the deal likely isn’t trustworthy.

A Complicated Fine Print

Every Groupon has a “Fine Print” section towards the bottom of the page that you should make sure to read very carefully. Even if the business is legit, sometimes this section can reveal conditions about the deal that the title or description left out. Avoid these deceiving deals at all costs!

Bad Groupon Reviews

Each business on Groupon comes with a rating from one to five stars. You’ll also get to check out what customers say about the business under the “Customer Reviews” section on the deal’s page. A slew of negative reviews and a low star rating are signs that you shouldn’t trust that Groupon.

How to Identify a Bad Groupon Deal

Is Groupon reliable when it comes to its deals? The good news is that fraudulent listings on Groupon are very rare, and when the site learns about them, they are quick to shut them down. Beyond the few fraudulent listings, is a much more prevalent problem: some deals are structured in a way so that the deal isn’t really as good as you’d think.

Split Groupons

Groupon Restaurant Split Deal

You’ll sometimes come across restaurants that split deals into multiple Groupons. At first glance, these deals seem amazing. However, they’re more inconvenient than helpful.

This type of Groupon limits your ability to get the full 50% discount advertised in the Groupon. Instead, you can only spend $8 of the $24 Groupon at a time, on any given day.

This means if you take your family to the restaurant and spend $30, you can only use an $8 Groupon. In other words, you’re only getting the discount off a small portion of your purchase. To make matters worse, you have to go back and make two more purchases to use your remaining Groupons. The only way to make the best of a deal like this is to only purchase $8 worth of food at any given time.

The Hotel Room Bait-and-Switch

Groupon Hotel Deal Price Example

Hotels often advertise very steep discounts off of their rooms on the main Groupon ad. However, Groupon isn’t always the best way to find cheap hotel rooms.

When you click and review the hotel deal details, you’ll discover that the discount only applies if you’re traveling alone and only need one bed. You can still book a room with extra beds, but that cost will dramatically increase when you do.

Hotel Groupon Deal Calendar Prices

The Groupon deal usually only applies to the specific days of the week—Fridays and weekends still have sky-high prices. If you schedule the room for the weekend and book it through Groupon, say goodbye to those cheap prices that were advertised on the main Groupon listing!

Home and Personal Services Are Limited

Groupon Personal Services Fine Print

In the Home Services and Personal Services categories of Groupon, you really need to read the “Fine Print” section on each deal.

Unfortunately, the Home Services and Personal Service sections are some of the most tightly controlled discounts with many little details buried in the deal’s conditions. For example, some deals might require that you live in a specific area, and may exclude services you initially expected. To avoid any confusion, just read the “Fine Print” details with a very fine-tooth comb.

Skip Out on the Products

Groupon Product Example Price

You also need to use caution when shopping for products in the Goods section of Groupon. In this category, you can buy anything from electronics, clothes, kitchen tools, pet supplies, and even jewelry.

Before you make the purchase, you should compare prices with other sellers. In the photo above, you’ll see Groupon selling an Anker 4-Port USB 3.0 Hub. Simply using a price comparison tool proves that Groupon doesn’t have the best deal—Amazon sells the same product for an even cheaper price.

Groupon Amazon Product Price Comparison

That said, you can still find some decent discounts on products. Just check with other online marketplaces to find the best price.

Use Groupon With Care

Groupon is one of the best resources to get awesome deals, but not every “deal” is amazing. When it comes down to determining your question, “Is Groupon safe?” the answer is most of the time.

There’s always the possibility that the business isn’t honest when listing deals, so do your due diligence before buying. You can also get a better deal elsewhere, so shop around. But if you do spot a killer deal on Groupon and the business looks legit, by all means, jump on it.

Groupon has its fair share of problems, but so do many other online marketplaces. In fact, you should keep an eye out for these eBay scams before placing your next bid.

Read the full article: Is Groupon Safe and Does It Really Save Money?


Read Full Article