SpotHero, the Chicago-based company that has developed an on-demand parking app, has raised $50 million in a Series D round led by Macquarie Capital.
Union Grove Venture Partners participated in the round, along with existing investors including Insight Venture Partners, Global Founders Capital, OCA Ventures, AutoTech Ventures and others, according to the company. SpotHero has raised $118 million to date.
SpotHero said Thursday that this new capital will be used to grow into new markets and expand in its existing ones, build out its digital platform and strengthen partnerships with mobility companies.
SpotHero, which has operations in San Francisco, New York, Washington, D.C. and Seattle, initially set out to develop software that connects everyday drivers to parking spots in thousands of garages across North America.
SpotHero has expanded its focus in the eight years since its founding. The company has added other services as urban density has increased and on-street parking has become more jumbled and confused thanks to an increase in traffic, ride-hailing and on-demand delivery services that take up valuable curb space. It has locked in more than 900 distribution partnerships and integrations including Google Assistant, for voice-enabled parking and Waze in-app navigation to parking. Other partners include Hertz and car2go for fleet parking, WeWork, for commuter parking and Moovit, for multi-modal parking.
Most recently, SpotHero launched a new service dubbed “SpotHero for Fleets” that targets shared mobility and on-demand services.
The service aims to be a one-stop shop for car-sharing and commercial fleets to handle all that goes into ensuring there is access and the right number of designated parking areas on any given day within SpotHero’s large network of 6,500 garages across 300 cities. That means everything from managing the relationships between garage owners and the fleet companies to proper signage so car-sharing customers can find the vehicles, as well as flexible plans that account for seasonal demands on businesses.
Under the new service, customers are able to source and secure parking inventory in high-traffic areas across multiple cities and pay per use across multiple parking facilities on one invoice to streamline payments.
The company has signed on car-sharing companies and other commercial fleets, although it’s not naming them yet.
Making the VR experience simple and portable was the main goal of the Oculus Quest, and it definitely accomplishes that. But going from things in the room tracking your headset to your headset tracking things in the room was a complex process. I talked with Facebook CTO Mike Schroepfer (“Schrep”) about the journey from “outside-in” to “inside-out.”
When you move your head and hands around with a VR headset and controllers, some part of the system has to track exactly where those things are at all times. There are two ways this is generally attempted.
One approach is to have sensors in the room you’re in, watching the devices and their embedded LEDs closely — looking from the outside in. The other is to have the sensors on the headset itself, which watches for signals in the room — looking from the inside out.
Both have their merits, but if you want a system to be wireless, your best bet is inside-out, since you don’t have to wirelessly send signals between the headset and the computer doing the actual position tracking, which can add hated latency to the experience.
Facebook and Oculus set a goal a few years back to achieve not just inside-out tracking, but make it as good or better than the wired systems that run on high-end PCs. And it would have to run anywhere, not just in a set scene with boundaries set by beacons or something, and do so within seconds of putting it on. The result is the impressive Quest headset, which succeeded with flying colors at this task (though it’s not much of a leap in others).
What’s impressive about it isn’t just that it can track objects around it and translate that to an accurate 3D position of itself, but that it can do so in real time on a chip with a fraction of the power of an ordinary computer.
“I’m unaware of any system that’s anywhere near this level of performance,” said Schroepfer. “In the early days there were a lot of debates about whether it would even work or not.”
Our hope is that for the long run, for most consumer applications, it’s going to all be inside-out tracking.
The term for what the headset does is simultaneous localization and mapping, or SLAM. It basically means building a map of your environment in 3D while also figuring out where you are in that map. Naturally robots have been doing this for some time, but they generally use specialized hardware like lidar, and have a more powerful processor at their disposal. All the new headsets would have are ordinary cameras.
“In a warehouse, I can make sure my lighting is right, I can put fiducials on the wall, which are markers that can help reset things if I get errors — that’s like a dramatic simplification of the problem, you know?” Schroepfer pointed out. “I’m not asking you to put fiducials up on your walls. We don’t make you put QR codes or precisely positioned GPS coordinates around your house.
“It’s never seen your living room before, and it just has to work. And in a relatively constrained computing environment — we’ve got a mobile CPU in this thing. And most of that mobile CPU is going to the content, too. The robot isn’t playing Beat Saber at the same time it’s cruising though the warehouse.”
It’s a difficult problem in multiple dimensions, then, which is why the team has been working on it for years. Ultimately several factors came together. One was simply that mobile chips became powerful enough that something like this is even possible. But Facebook can’t really take credit for that.
More important was the ongoing work in computer vision that Facebook’s AI division has been doing under the eye of Yann Lecun and others there. Machine learning models frontload a lot of the processing necessary for computer vision problems, and the resulting inference engines are lighter weight, if not necessarily well understood. Putting efficient, edge-oriented machine learning to work inched this problem closer to having a possible solution.
Most of the labor, however, went into the complex interactions of the multiple systems that interact in real time to do the SLAM work.
“I wish I could tell you it’s just this really clever formula, but there’s lots of bits to get this to work,” Schroepfer said. “For example, you have an IMU on the system, an inertial measurement unit, and that runs at a very high frequency, maybe 1000 Hz, much higher than the rest of the system [i.e. the sensors, not the processor]. But it has a lot of error. And then we run the tracker and mapper on separate threads. And actually we multi-threaded the mapper, because it’s the most expensive part [i.e. computationally]. Multi-threaded programming is a pain to begin with, but you do it across these three, and then they share data in interesting ways to make it quick.”
Schroepfer caught himself here; “I’d have to spend like three hours to take you through all the grungy bits.”
Part of the process was also extensive testing, for which they used a commercial motion tracking rig as ground truth. They’d track a user playing with the headset and controllers, and using the OptiTrack setup measure the precise motions made.
Testing with the OptiTrack system.
To see how the algorithms and sensing system performed, they’d basically play back the data from that session to a simulated version of it: video of what the camera saw, data from the IMU, and any other relevant metrics. If the simulation was close to the ground truth they’d collected externally, good. If it wasn’t, the machine learning system would adjust its parameters and they’d run the simulation again. Over time the smaller, more efficient system drew closer and closer to producing the same tracking data the OptiTrack rig had recorded.
Ultimately it needed to be as good or better than the standard Rift headset. Years after the original, no one would buy a headset that was a step down in any way, no matter how much cheaper it was.
“It’s one thing to say, well my error rate compared to ground truth is whatever, but how does it actually manifest in terms of the whole experience?” said Schroepfer. “As we got towards the end of development, we actually had a couple passionate Beat Saber players on the team, and they would play on the Rift and on the Quest. And the goal was, the same person should be able to get the same high score or better. That was a good way to reset our micro-metrics and say, well this is what we actually need to achieve the end experience that people want.”
the computer vision team here, they’re pretty bullish on cameras with really powerful algorithms behind them being the solution to many problems.
It doesn’t hurt that it’s cheaper, too. Lidar is expensive enough that even auto manufacturers are careful how they implement it, and time-of-flight or structured-light approaches like Kinect also bring the cost up. Yet they massively simplify the problem, being 3D sensing tools to begin with.
“What we said was, can we get just as good without that? Because it will dramatically reduce the long term cost of this product,” he said. “When you’re talking to the computer vision team here, they’re pretty bullish on cameras with really powerful algorithms behind them being the solution to many problems. So our hope is that for the long run, for most consumer applications, it’s going to all be inside-out tracking.”
I pointed out that VR is not considered by all to be a healthy industry, and that technological solutions may not do much to solve a more multi-layered problem.
Schroepfer replied that there are basically three problems facing VR adoption: cost, friction, and content. Cost is self-explanatory, but it would be wrong to say it’s gotten a lot cheaper over the years. Playstation VR established a low-cost entry early on but “real” VR has remained expensive. Friction is how difficult it is to get from “open the box” to “play a game,” and historically has been a sticking point for VR. Oculus Quest addresses both these issues quite well, being at $400 and as our review noted very easy to just pick up and use. All that computer vision work wasn’t for nothing.
Content is still thin on the ground, though. There have been some hits, like Superhot and Beat Saber, but nothing to really draw crowds to the platform (if it can be called that).
“What we’re seeing is, as we get these headsets out, and in developers hands that people come up with all sorts of creative ideas. I think we’re in the early stages — these platforms take some time to marinate,” Schroepfer admitted. “I think everyone should be patient, it’s going to take a while. But this is the way we’re approaching it, we’re just going to keep plugging away, building better content, better experiences, better headsets as fast as we can.”
The dessert naming scheme was one of the best-loved legacies from Google past (though some were notably better than others). Every time the company got ready to release a new version of the mobile operating system, speculation would mount about which sweet foodstuff on which the company would ultimately settle. But while P offered confections a plenty, Q has been far less straightforward.
Quiche was questionable, at best — ditto for quesadillas and quinoa. With that giant question mark waiting for it with the next release, the company’s opted instead to abandon the beloved naming scheme. Of course, Google’s reasoning is far more diplomatic than, “we couldn’t think of anything that started with ‘Q.’”
Instead, it says that the desserts simply weren’t universal enough for the 2.5 billion active devices it has deployed around the world.
[W]e’ve heard feedback over the years that the names weren’t always understood by everyone in the global community. For example, L and R are not distinguishable when spoken in some languages.
So when some people heard us say Android Lollipop out loud, it wasn’t intuitively clear that it referred to the version after KitKat. It’s even harder for new Android users, who are unfamiliar with the naming convention, to understand if their phone is running the latest version. We also know that pies are not a dessert in some places, and that marshmallows, while delicious, are not a popular treat in many parts of the world.
Of course, universality is an unclear concept in the online age. And hey, look at Apple, which has gone far more regional with its California-themed desktop OSes. Honestly, however, it may be better to avoid the letter Q altogether in the current political environment. It’s just too bad the company had to take Raisinettes, Skittles and Twizzlers with it.
Also new is a slight rebrand of Android itself, with the text shifting from Android Green to black. “It’s a small change, but we found the green was hard to read, especially for people with visual impairments,” the company writes. “The logo is often paired with colors that can make it hard to see—so we came up with a new set of color combinations that improve contrast. “
The dessert naming scheme was one of the best-loved legacies from Google past. Every time the company got ready to release a new version of the mobile operating system, speculation would mount about which sweet foodstuff on which the company would ultimately settle. But while P offered confections a plenty, Q has been far less straightforward.
Quiche was questionable, at best — ditto for quesadillas and quinoa. With that giant question mark waiting for it with the next release, the company’s opted instead to abandon the beloved naming scheme. Of course, Google’s reasoning is far more diplomatic than, “we couldn’t think of anything that started with ‘Q.’”
Instead, it says that the desserts simply weren’t universal enough for the 2.5 billion active devices it has deployed around the world.
[W]e’ve heard feedback over the years that the names weren’t always understood by everyone in the global community. For example, L and R are not distinguishable when spoken in some languages.
So when some people heard us say Android Lollipop out loud, it wasn’t intuitively clear that it referred to the version after KitKat. It’s even harder for new Android users, who are unfamiliar with the naming convention, to understand if their phone is running the latest version. We also know that pies are not a dessert in some places, and that marshmallows, while delicious, are not a popular treat in many parts of the world.
Google today announced a new long-term initiative that, if fully realized, will make it harder for online marketers and advertisers to track you across the web. This new proposal follows the company’s plans to change how cookies in Chrome work and to make it easier for users to block tracking cookies.
Today’s proposal for a new open standard extends this by looking at how Chrome can close the loopholes that the digital advertising ecosystem can use to circumvent that. And soon, that may mean that your browser will feature new options that give you more control over how much you share without losing your anonymity.
Over the course of the last few months, Google started talking about a ‘Privacy Sandbox’ which would allow for a certain degree of personalization while still protecting a user’s privacy.
“We have a great reputation on security. […] I feel the way we earned that reputation was by really moving the web forward,” Justin Schuh, Google’s engineering director for Chrome security and privacy told me. “We provide a lot of benefits, worked on a lot of different fronts. What we’re trying to do today is basically do the same thing for privacy: have the same kind of big, bold vision for how we think privacy should work on the web, how we should make browsers and the web more private by default.”
Here is the technical side of what Google is proposing today: to prevent the kind of fingerprinting that makes your machine uniquely identifiable as yours, Google is proposing the idea of a privacy budget. With this, a browser could allow websites to make enough API calls to get enough information about you to group your into a larger cohort but not to the point where you give up your anonymity. Once a site has exhausted this budget, the browser stops responding to any further calls.
Some browsers also already implement a very restrictive form of cookie blocking. Google argues that this has unintended consequences and that there needs to be an agreed-upon set of standards. “The other browser vendors, for the most part, we think really are committed to an open web,” said Schuh, who also stressed that Google wants this to be an open standard and develop it in collaboration with other players in the web ecosystem.
“There’s definitely been a lot of not intentional misinformation but just incorrect data about how sites monetize and how publishers are actually funded,” Schuh stressed. Indeed, Google today notes that its research has shown that publishers lose an average of 52 percent of their advertising revenue when their readers block cookies. That number is even higher for news sites.
In addition, blocking all third-party cookies is not a viable solution according to Google because developers will find ways around this restriction by relying on fingerprinting a user’s machine instead. Yet while you can opt out of cookies and delete them from your browser, you can’t opt out of being fingerprinted since there’s no data stored on your machine (unless you regularly change the configuration of your laptop, the fonts you have installed and other identifiable traits that make your laptop uniquely yours).
What Google basically wants to do here is change the incentive structure for the advertising ecosystem. Instead of trying to circumvent a browser’s cookie and fingerprinting restrictions, the privacy budget, in combination with the industry’s work on federated learning and differential privacy, this is meant to give advertisers the tools they need without hurting publishers, while still respecting the users’ privacy. That’s not an easy switch and something that, as Google freely acknowledges, will take years.
“It’s going to be a multi-year journey,” said Schuh. “What I can say is that I have very high confidence that we will be able to change the incentive structures with this. So we are committed to taking very strong measures to preserve user privacy, we are committed to combating abuses of user privacy. […] But as we’re doing that, we have to move the platform forward and make the platform inherently provide much more robust privacy protections.”
Most of the big tech companies now understand that they have a responsibility to help their users retain their privacy online. Yet at the same time, personalized advertising relies on knowing as much as possible about a given user and Google itself makes the vast majority of its income from its various ad services. It sounds like this should create some tension inside the company. Schuh, however, argued that Google’s ad side and the Chrome team have their independence. “At the end of the day, we’re a web browser, we are concerned about our users base. We are going to make the decisions that are most in their interest so we have to weigh how all of this fits in,” said Schuh. He also noted that the ad side has a very strong commitment to user transparency and user control — and that if users don’t trust the ads ecosystem, that’s a problem, too.
For the time being, though, there’s nothing here for you to try out or any bits being shipped in the Chrome browser. For now, this is simply a proposal and an effort on the Chrome team’s part to start a conversation. We should expect the company to start experimenting with some of these ideas in the near future, though.
Just like with its proposed changes to how advertisers and sites use cookies, this is very much a long-term project for the company. Some users will argue that Google could take more drastic measures and simply use its tech prowess to stop the ad ecosystem from tracking you through cookies, fingerprinting and whatever else the adtech boffins will dream up next. If Google’s numbers are correct, though, that would definitely hurt publishers and few publications are in a position to handle a 50 percent drop in revenue. I can see why Google doesn’t want to do this alone, but it does have the market position to be more aggressive in pushing for these changes.
Apple, which doesn’t have any vested interest in the advertising business, has already made this more drastic move with the latest release of Safari. Its browser now blocks a number of tracking technologies, including fingerprinting, without making any concessions to advertisers. The results of this for publishers is in line with Google’s cookie study.
As far as the rest of Chrome’s competitors, Firefox has started to add anti-fingerprinting techniques as well. Upstart Brave, too, has added fingerprinting protection for all third-party content, while Microsoft’s new Edge currently focuses on cookies for tracking prevention.
By trying to find a middle path, Chrome runs the risk of falling behind as users look for browsers that protect their privacy today — especially now that there are compelling alternatives again.
Apple is getting ready for its usual fall iPhone launch event, which is rumored to be happening September 10, though the event hasn’t been officially confirmed this year. A new report from Bloomberg offers a preview of the lineup of hardware products it’s looking to debut this year. There are new iPhones, of course, including a new iPhone Pro model that replaces the XS line and adds a third, wider angle rear camera (which has been rumored previously), and a refreshed iPhone XR at the entry level that will also get a second, optical zoom camera.
These new iPhone Pros would pack a lot of other updates besides, though they’ll look visually similar beyond the changed camera module. They’ll offer wireless charging for AirPods with the Qi-enabled wireless charging case, for instance, for a quick top-up when you’re the road, and they’ll also get new matte finishes on some models vs. the glossy look common to all iPhone models today. Updated Face ID will offer unlocking at more angles, and they’ll pack “dramatically” better water resistance, as well as improved shatter resistance to shrive drops.
Also new this year, though not necessarily debuting at the same event, will be a new MacBook Pro with a display size somewhere over 16-inches, which Bloomberg reports will still manage to be similar overall in physical footprint to the current 15-inch MacBook Pros, thanks to a new bezel. There are also plans to roll out new AirPods, with a higher price tag but also added water resistance and noise cancelling features that the current AirPods lack.
On the iPad side, Apple will refresh its iPad Pro this year, with updated versions of the 11-inch and 12.9-inch models that will get spec bumps, plus better cameras, but otherwise remain the same in terms of form factor. The entry-level iPad will also get an update, with a screen size increase from 9.7-inches to 10.2-inches, which could mean that it also slims down its bezel and does away with the dedicated Home button, though the Bloomberg doesn’t make mention of how it will actually change to accommodate the larger display size.
Other planned updates in the report include details about the iPhone to follow in 2020, which it says will a rear-facing 3D camera, as well as 5G network support. The HomePod will also apparently get a sequel next year – a smaller version that will likely be a lot more affordable vs. the current $300 speaker.
Ubisoft is giving For Honor away for free on PC. If you’re interested in grabbing For Honor for free, you have until August 27 to do so. This is only the standard edition of the game, but it’s free so you should probably stop complaining.
What Is For Honor?
For Honor is an action adventure game played from a third-person perspective. You take on the role of a historical soldier, such as a knight or samurai, and fight your way through hordes of enemies. There’s a single-player campaign and a multiplayer mode.
For Honor was released in 2017, and available on PC, PS4, and Xbox One. It has already been made available on PlayStation Plus, and given away for free on the Epic Games Store. And now it’s available for free on PC from Uplay.
How to Play For Honor for Free
To nab a free copy of Standard Edition of For Honor for PC, just download the game from Uplay between now and August 27, 2019. If you’re new to Uplay, head to the Ubisoft website and sign up for a Uplay account first.
Visit the UPLAY Store to grab the PC Standard Edition of #ForHonor for free. Only available until August 27th.
Once you’ve downloaded For Honor it will be yours to keep forever. For Honor is currently in Year 3, Season 3, and Ubisoft obviously hopes you’ll spend money on the game. Still, there’s no need to spend a penny unless you get really invested in For Honor.
It should be noted that there’s some confusion over when this offer runs out. While some regional versions of the Ubisoft website are saying For Honor is free until August 27, the US site states For Honor is free until August 29. Our advice is to claim is ASAP.
For Honor Tips and Tricks
If you do decide to download For Honor for free, be sure to check out our For Honor tips and tricks to help you get started. They’re from 2017, so may be a little out of date, but they should still help you make a solid start in what is an epic game.
Google Go is now available to download around the world. Google’s lightweight search app has previously only been available to certain users in certain countries, but Google is now inviting everyone to start using this lightweight alternative to the Google app.
What Is Google Go?
In 2017, Google Launched Google Go. The lightweight app arrived as part of a suite of apps designed to appeal to users in emerging markets. The overall vision of Android Go was (and still is) to cater to “the next billion users”.
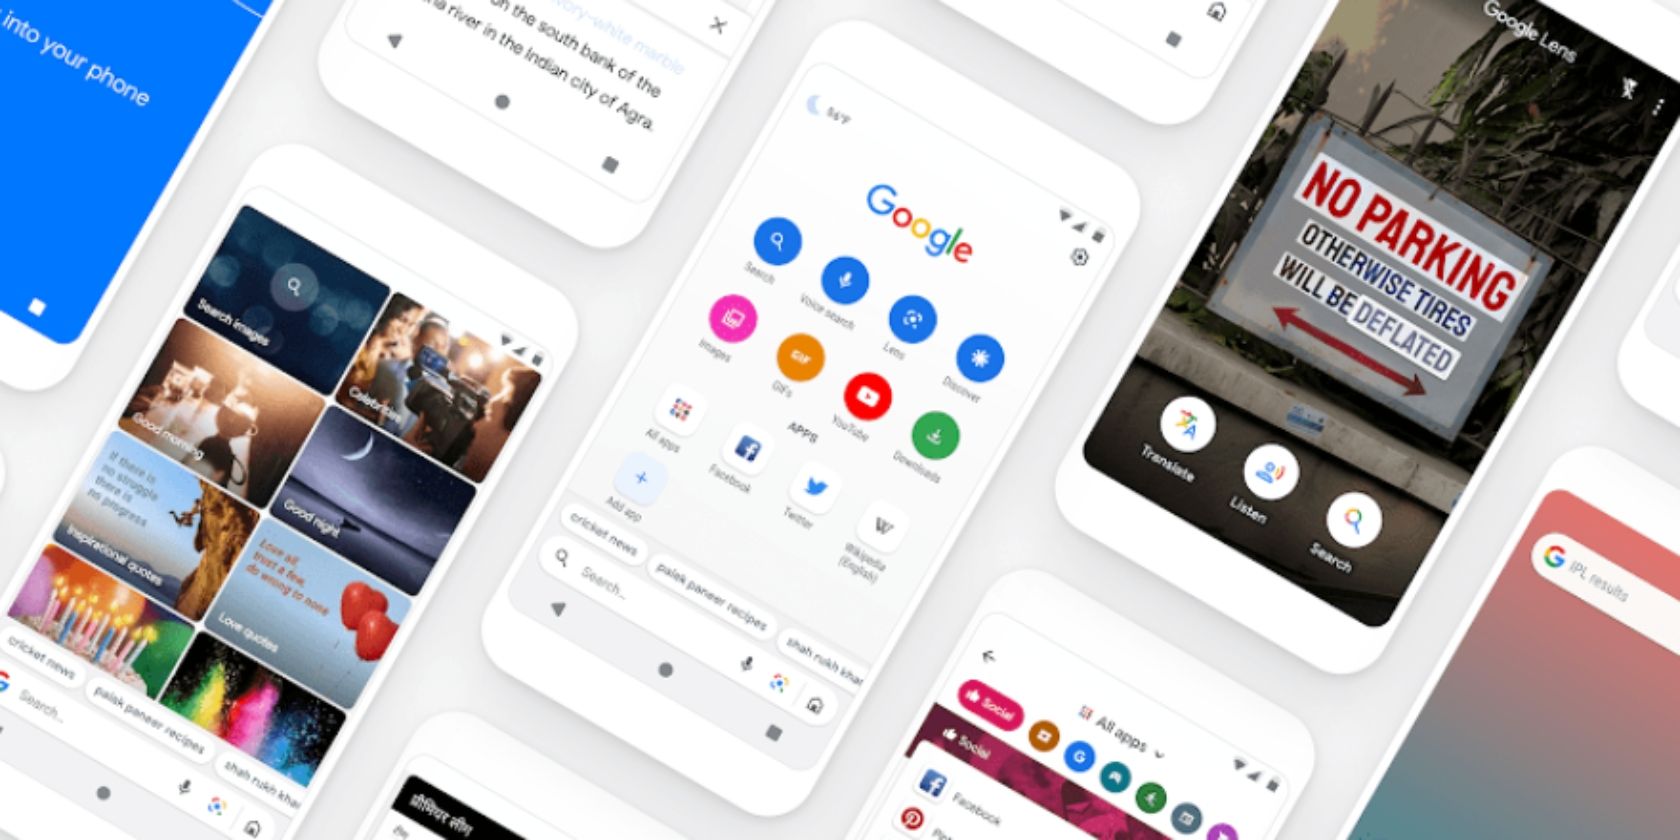
Google Go is a lightweight app designed to “access information, both online and in the world around you”. Google Go weighs in at just 7MB (therefore using less storage on your device) and keeps on working even when you have an unreliable connection.
What Does Google Go Do?
Since launch, Google Go has only been available in a few countries and on Android Go handsets. But now, as announced in this post on The Keyword, Google Go is available to download from the Play Store worldwide.
Google Go is now accessible to all Android users (using Lollipop or later) around the world. It’s Google realizing that even people with the latest and greatest smartphones, oodles of storage space, and super reliable internet connections may want to use Google Go.
Starting today, our lightweight search app #GoogleGo will be available globally on the @GooglePlay store. As demo'd at #io19, Lens in #GoogleGo can help translate and search the words you see around you, and even read them aloud.https://t.co/rAjR34KznM
Google Go is essentially a lightweight version of the standard Google app. It’s smaller, uses less RAM, and less mobile data. If you go offline it will also store your search queries until your internet connection is restored, letting you pick up where you left off.
While Google Go is less powerful than the standard Google app, you can still access Google Lens, allowing you to identify objects in the real world. As a bonus, Google Go can read websites out loud to you using a mix of AI and language processing.
Google Go is a worthy substitute for the standard Google app. Which makes it a must-have for anyone with an underpowered phone or spotty internet connection. And if you’re keen to save storage space, you should add Google Go to the best lite Android apps.
Turn on Bluetooth in Windows and enjoy the gadgets that you can connect to. These days, you’d be hard-pressed to find a tech gadget that doesn’t support Bluetooth connectivity. It’s in everything from streaming boxes and speakers to cars and phones.
Ergo, using Bluetooth on Windows is also more useful than ever. It lets you integrate your computer into your wider tech ecosystem. If you want to know how to turn on Bluetooth on Windows 10, or if you’re not sure why your Bluetooth is not working on Windows 10, keep reading.
How to Turn on Bluetooth on Windows 10
Windows 10 works like any other Bluetooth device. Before you can pair your machine with another Bluetooth-enabled gadget, you first need to make your computer discoverable.
If you want to turn on Bluetooth on Windows, you have two options available to you.
1. Turn On Bluetooth Using the Action Centre
You can toggle Bluetooth on and off by using the appropriate tile in the Windows Action Center.
To access the Action Center, click on the icon that looks like a speech bubble on the far right-hand side of the taskbar. You may need to click on Expand to reveal the full list of tiles if Bluetooth isn’t visible immediately.
Click on the Bluetooth icon, and the tile will turn blue to indicate that it’s enabled. The tile will also display either a Not Connected message, or the name of the device that your computer has hooked up with.
2. Turn On Bluetooth Using the Settings Menu
You can also turn on Bluetooth on Windows 10 by using the Settings menu. To do so, follow the simple step-by-step instructions below:
Open the Start menu.
Click on the Settings icon on the left-hand side of the menu.
Go to Devices > Bluetooth and other devices.
Locate the Bluetooth toggle.
Slide it into the On position.
Regardless of which approach you use to enable Bluetooth in Windows, you will see a Bluetooth icon appear in the taskbar once it’s turned on. You can use it to quickly access the Bluetooth settings, to send files, and to pair new devices.
If you’d prefer the icon to show in the main taskbar rather than in the “overflow” section, head to Settings > Home > Personalization > Taskbar, then scroll down to Notification area and click on Select which icons appear on the taskbar.
(Note: Remember that in order to connect a Windows 10 with another device via Bluetooth, you also need to enable Bluetooth connectivity on the other device. The process for doing so varies considerably, depending on the gadget you’re using. Refer to the device manufacturer’s literature for further guidance.)
How to Pair a Bluetooth Device on Windows 10
Once you have turned on Bluetooth on both Windows and the device you want to connect to, it’s time to make the pairing.
You only need to undertake the pairing procedure on one of the two devices. Because this article is Windows-based, we’re only going to look at how to perform the task on Windows.
To make a Bluetooth pairing on Windows, follow the steps below:
Open the Settings menu.
Go do Devices > Bluetooth and other devices.
Click on Add Bluetooth or other device at the top of the right-hand panel.
A new menu Window will open. Select the first option from the list—titled Bluetooth. Windows 10 will automatically start searching for nearby devices that it can connect with. Allow up to 30 seconds for the scan to complete and for Windows to discover all the available options.
To connect with a device, click on its name. If it is the first time that you’ve connected to the device, you might have to undergo a verification procedure. This involves making sure than a PIN code on your Windows machine matches the PIN code displayed on the device you’re trying to connect with.
Assuming the PIN codes match, click on Connect. If you take too long to press the button, the PIN code will expire, and you will have to restart the process. You might also need to hit the Pair button on the device you’re connecting with.
(Note: You can also right-click on the Bluetooth icon in the taskbar and choose Add a Bluetooth device from the context menu. It will leave you looking at the same Add a Device screen as you see when using the Settings menu approach.)
How to Remove a Bluetooth Device on Windows 10
Now you know how to turn on Bluetooth Windows 10 and pair your computer with an external device. However, it’s also important to understand how to cancel an existing Bluetooth connection.
Managing your list of paired devices is prudent. If you let the list get too large, you’ll lose track of which devices you use and potentially open yourself up to Bluetooth-based security vulnerabilities.
To cancel an unused Bluetooth pairing, you need to head back to the Windows Settings menu.
Open the Settings app.
Navigate to Devices > Bluetooth and other devices.
In the right-hand panel, scroll down through the list of Bluetooth connections until you find the one you want to remove.
Click on the device’s name to highlight it.
Hit the Remove device button.
Agree to the on-screen confirmation.
If you ever want to reconnect to the device in the future, you will need to make a new connection.
Turn On Bluetooth on Windows: Advanced Settings
There are a couple of advanced Bluetooth settings on Windows 10 that you should be aware of.
To see them, head to Start > Settings > Devices > Bluetooth and other devices, scroll to the bottom of the page, and click on More Bluetooth Options. A new window will open.
Select the Options tab, and you’ll see Bluetooth settings you can tweak:
Allow Bluetooth devices to find this PC: If you want to leave your Bluetooth connection active, but don’t want new devices to see it (for example, if you’re using your computer in a public area), untick the checkbox.
Alert me when a new Bluetooth device wants to connect: You need to leave this option enabled if you’re undertaking the pairing process from an external third-party gadget.
Show the Bluetooth icon in the notification area: If you leave Bluetooth turned on all the time, you might want to disable this option, so the Bluetooth icon doesn’t clutter up your taskbar.
Bluetooth Not Working on Windows 10: Troubleshooting
If your Windows 10 Bluetooth is not working, there are a few possible causes you’ll need to investigate. Perhaps you need to update or reinstall your Bluetooth driver for Windows, maybe the Bluetooth service is not running, or perhaps the other device is merely out of range.
If you have a car with push-button ignition, there’s a new gadget coming along that should have you feeling quite excited: KETO allows you to unlock your car with your smartphone, making it easier than ever to jump in and start rolling.
KETO Features
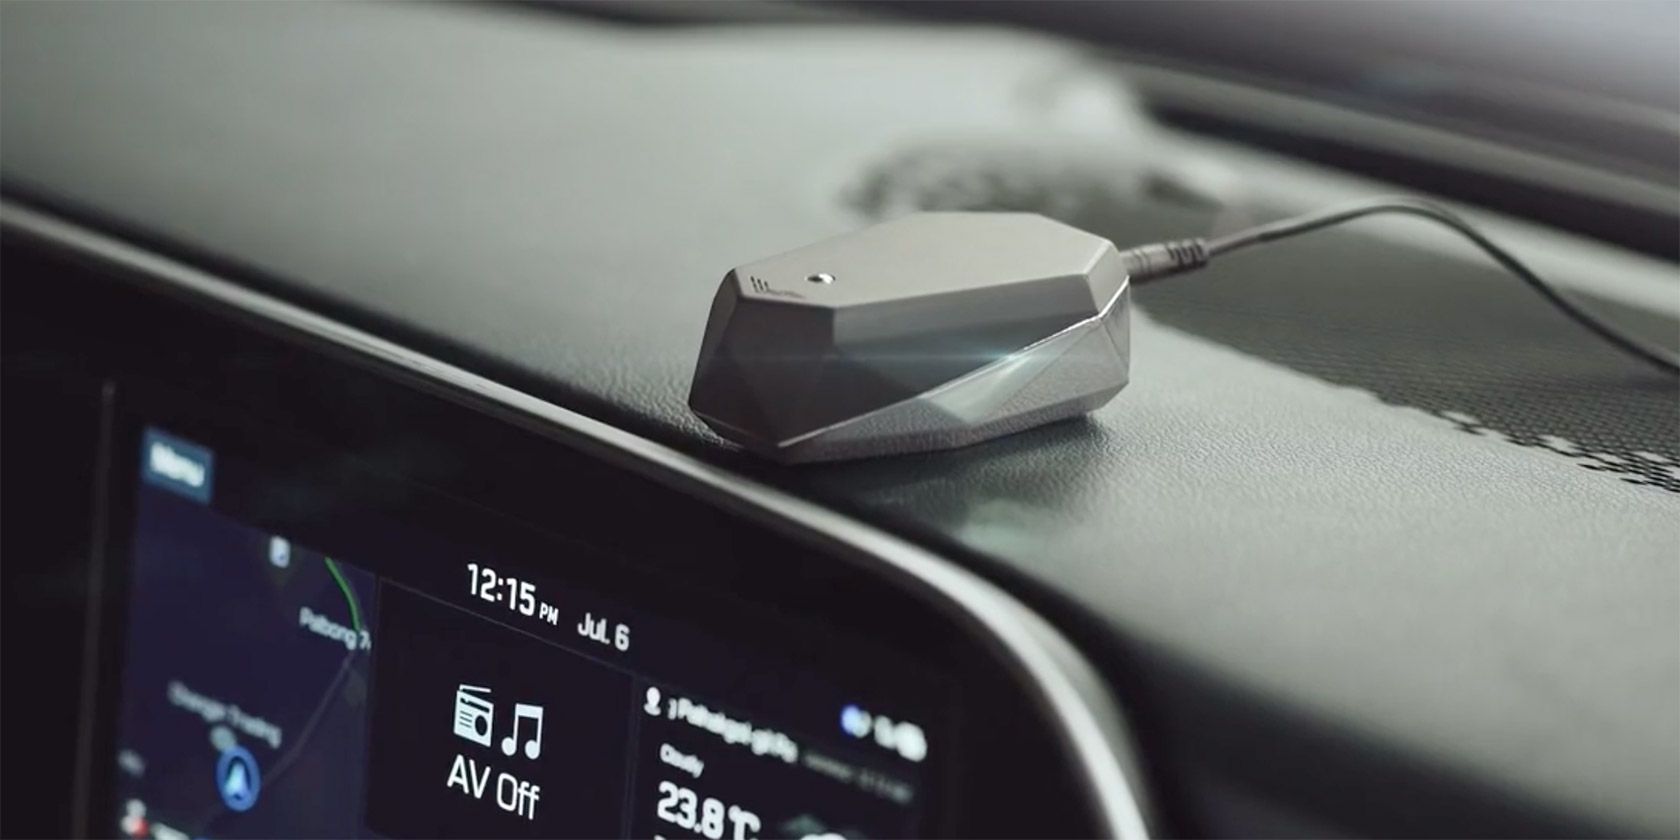
The main thing that makes KETO interesting is that it promises to actually replace your car key, not just work along with it. That means you actually have one less thing to carry with you. The device uses Bluetooth Low Energy to authenticate your device with your car. To add another layer of security, it also uses inaudible soundwave technology to make sure that only the correct device is in the car.
Like a smart key, the car will only start when it detects your phone in it, which is quite cool. But you can also use the app to allow others to drive your car. This can all be done remotely, so you can simply grant access to a friend or family member from wherever you are. You can set a certain time limit or manually shut off access when the other person is done with your car.
The biggest concern I had when I first heard about KETO was installation—if you need to take your car to a mechanic to get it up and running, then it’s probably not worth it. Thankfully, the team behind the device promise easy DIY installation that anyone can do. You just need to place to key module from your smart key in the device, attach that to the main module, and place that in your car. From there, you set the app up for full control.
An important thing to remember is that you do need to have a car with a smart key and push-button ignition in order for KETO to do its thing. If your car uses a traditional key (one where you need to put a physical key in the ignition), then KETO won’t work with your car.
KETO Price and Availability
ONEKEY, the company behind KETO, is seeking funding for its exciting new device on Kickstarter. The project just launched and has already exceeded its goal. If you’re interested in preordering a KETO device for yourself, you’ll need to pledge $119. The team plans to deliver the devices to backers in December 2019.
As with all Kickstarter campaigns, there are risks involved and backing this project, and there’s no guarantee that the devices will be delivered on time (or at all, in rare cases).
Learning game development is a long process. For beginners, the combination of having to learn programming, asset manipulation and a whole new editor is overwhelming.
Unity (sometimes known as Unity3D) is one of the industry standard game development platforms. There is a large community of online teachers for the platform, but Unity Learn is the new official way of learning how to make games with the software.
Let’s look at what Unity Learn is and what sets it aside from other tutorials.
What Is Unity Learn?
The Unity game engine is entering its 14th year and since release has been aimed at democratizing game development. Over the years, Unity has provided tools to learn every element of the platform.
Many software tools have documentation, but require prior knowledge to use. This can be impenetrable to beginners. Unity make courses and tutorials aimed at explaining new concepts in a way anyone can understand.
Unity Learn is a platform which combines all of these learning resources with new courses and task based learning to help users of all skill levels to improve their knowledge.
How Do I Use Unity Learn?
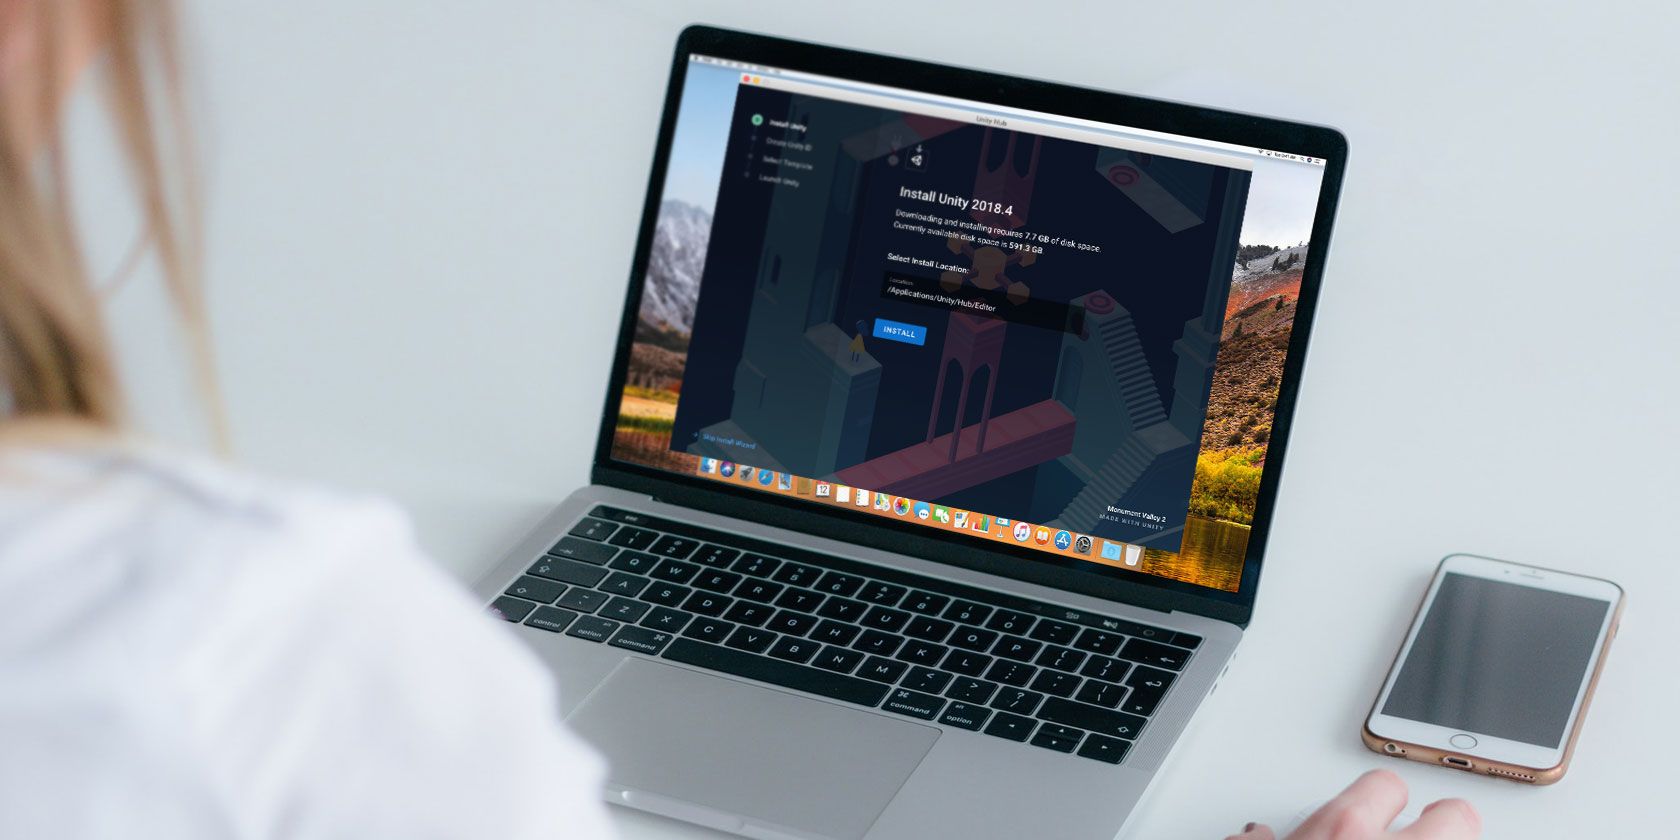
You can access learning materials directly from the Unity Hub by clicking on the Learn tab. This opens up a list of specially designed tutorials for learning how to use Unity.
These differ from other tutorials in that they are designed by Unity and built into the editor. The vanilla editor provides a vast amount of windows and options to get lost in. Unity Learn projects highlight exactly what you are learning about and guide you through simple concepts, building as you go.
What Are the Benefits of Unity Learn?
Aside from Unity’s developers likely knowing their own software pretty well, this kind of custom learning experience is perfect for novice game developers.
Rather than having to learn several difficult concepts at once, you can learn how each part of Unity interacts. This can help later when trying to track down why things might not be working the way you want them to!
The Unity Forums have also been a great place to discuss and learn from other users. Specific forum spaces for new learners are perfect for discussing courses, helping each other out with problems, and getting to know the community surrounding Unity.
What About Complete Unity Sample Projects?
There are a wealth of free to download example projects available for Unity. Being able to pick apart projects can give great insight on how everything fits together, and how to structure your own.
Alongside interactive tutorials, Unity gives full example projects complete with assets, available in the Learn tab of the Unity Hub.
These projects typically are simple, well documented, game examples. They also feature written and video tutorials, covering all the elements required to make a game.
What’s Already Available on Unity Learn?
Currently, Unity Learn mostly covers beginner projects on a wide variety of topics. Alongside the complete projects and interactive tutorials, there are more traditional written and video courses for learning all facets of game design and development.
The pre-existing Unity tutorials feature in the new platform. This is a good thing, as the video tutorials that were already available are excellent. Typically shorter than the long project tutorials, they cover specific elements of the Unity editor and code library.
Track Your Progress With a Unity Account
By signing in to the Unity Learn website using your Unity account, you can track what you are currently working on, and cue up projects in the order you wish to complete them.
Learning isn’t always a straight road; being able to veer onto another subject before picking up where you left off is great for learning new concepts.
As the wealth of material increases on Unity Learn, this tracking will likely get ever more important. As time goes by, knowing which projects you’ve already completed can save time, and help you refresh those core principles.
Unity Learn Isn’t Just for Beginners
While much of the current material on Unity Learn is for beginners, it features tutorials for more seasoned developers too.
Tutorials covering VR game development are available, a subject which requires some previous understanding. Higher level concepts like profiling, performance, and best practices also feature.
Given how many changes are coming to Unity in the coming year, the Learn platform will be essential to everyone. The new Entity Component System (ECS), leverages a new multi-threaded data oriented approach to design. These concepts are mind-bending to even seasoned developers, and represent a change at the core of the Unity Engine.
It seems highly likely that Unity will tackle these dense subjects, with similar style tutorials covering core concepts on the Unity Learn platform.
What About Other Tutorials for Unity Game Development?
For almost as long as Unity has been in development, there have been community tutorials covering how to use it. Today, written and YouTube tutorials can teach you every element of creating game art, programming, using the unity editor, animation, and more. Is Unity trying to take back the role of teacher from the community?
Given Unity’s open attitude to the community and championing of teachers, this seems totally unlikely. Unity has supported multiple teachers, promoting their work, and at times officially sponsoring them to create content.
Notable YouTube channels like Brackeys and Sebastian Lague feature on Unity Learn. Brackeys is often listed among the best teachers for all elements of Unity game design, and Unity frequently sponsors his teaching videos.
Unity Learn goes alongside what is already available and their friendly stance with the Unity community doesn’t look like it’s going anywhere soon!
Start Learning Game Development With Unity
Unity Learn is a great way to start game development, and there are a wealth of external Unity tutorials , some of which Unity recommend.
Of course, Unity is not the only option for making your own games. There are many free game development tools to choose from!
Our verdict of the Vankyo MatrixPad Z4:
With a low price and low spec, the Vankyo MatrixPad Z4 promises much but ultimately fails to undercut the Amazon HD 10. Poor responsiveness from the touch screen and disappoint performance mean that you probably wouldn't buy it for a child, either.510
Looking for a new tablet, but don’t have a huge budget? You might be inclined to buy an affordable Amazon Fire tablet, but did you know that alternatives are available?
The Vankyo MatrixPad Z4, a 10-inch tablet that you can buy for under $100. But is it worth it, or are you better off spending just a bit more?
What’s in the Box?
Packaged in a bulky box, the Vankyo MatrixPad Z4 ships with a USB cable, mains adapter, user guide, and quick-start leaflet.
The tablet is secured in place by a pair of foam inserts; beneath this, you’ll find the adapter and cable. With so little in the box, however, it’s clear that Vankyo has not thought through the packaging. It looks great, sure, but a 10-inch tablet doesn’t need a box as big as this. Perhaps bundling a keyboard, dock, or case might justify the size, but without them, it seems wasteful.
Given the minimal packaging of its immediate competitors, this is disappointing. For some perspective here, you can buy a new laptop in a box just twice the size.
Vankyo MatrixPad Z4 Device Specification
With a 10.1-inch 1280×800 IPS display, the MatrixPad Z4 weighs just 1.08 pounds, measuring 9.84 x 6.73 x 0.35 inches. With a thick bezel and cheap plastic chassis, its appearance is in stark contrast other tablets you may have seen recently.
It’s easy to hold, with the micro-USB port, microSD slot, volume rocker, and power button grouped along the top edge in landscape. A single Lithium-ion battery delivers up to eight hours of battery, although it can be run from the mains. You should get a couple of days of standby time from a full charge.
A 64-bit 1.5Ghz quad-core CPU runs with 2GB of DDR3 RAM and 32GB of built-in storage, expandable up to 128GB. There’s also a MALI-G31 GPU. With 802.11b/g/n wireless networking and Bluetooth LE, you’ve got the connectivity you need for networking and peripherals.
The rear camera, meanwhile, has 8MP resolution, compared to the front 2MP cam for video calling.
What Can You Do With It?
The system spec of the MatrixPad Z4 means that you should be able to enjoy most tablet-style activities: video streaming, gaming, social networking, reading, even productivity tasks.
Well, that’s the theory. Sadly, it doesn’t work out too well for video streaming. We tested the MatrixPad Z4 with Amazon Prime Video, and an episode of The Thin Blue Line. This 1990s UK comedy starring Rowan Atkinson (Mr Bean) is available only in standard definition. Unfortunately, while streaming to the MatrixPad Z4 within a few feet of the router delivered good video, the audio was out of sync. This was repeated on other Amazon Prime Video content, with the same result.
Additionally, the audio quality of the tablet’s speakers is substandard. Headphones are recommended!
It’s worth adding that testing for similar issues with YouTube resulted in videos that were correctly synced. However, given the prominence of Amazon Prime Video, poor quality playback is a disappointment.
Android Pie Without the Bloat
Running Android 9.0 “Pie”, the Vankyo MatrixPad Z4 comes without any bloatware whatsoever. A rarity in the Android tablet market, this is a stock Android experience, the operating system presented as Google intended.
Importantly, this is an approved device, which means that it also includes Google Play. Some cheaper tablet manufacturers have struggled to meet Google’s requirements for including the app store. That’s not the case with the MatrixPad Z4, giving you access to the entire library of Android apps (where compatible).
So, while you’ll inevitably install many pointless apps on the tablet, the MatrixPad Z4 certainly doesn’t come with any preinstalled.
Using the Vankyo MatrixPad Z4
Setting up the tablet under Android 9.0 Pie is straightforward if a little slow to respond. The reason?
Well, it’s the touchscreen display, which despite being visually adequate, feels cheap. Rather than a glass display like other tablets (including similarly priced Amazon Fire tablets and Huawei MediaPads), it’s plastic.
At least, that’s how it feels. My first tablet, back in 2010, was a budget Advent Vega running Android 2.2. Perfectly useable, but it was let down by a cheap, “plastic-y” display. Almost 10 years later, I don’t think it’s unreasonable to expect key components in low-cost devices to be better.
This has several shortcomings, not least from feeling “dirty” to use compared to the Gorilla Glass of other devices. Displays of this type are also easier to scratch, necessitating the rapid deployment of a screen protector.
It isn’t just the display that feels cheap to use though; it’s regularly unresponsive to gestures.
There is also a feeling that the plastic chassis isn’t particularly hardwearing, along with some curious design choices. For example, while the tablet uses micro-USB rather than the increasingly common USB-C. Meanwhile, the microSD slot curiously has no cover to protect you from card loss, or from dust and grit entering the tablet.
Connecting to Wi-Fi should be straightforward, but during the initial setup it wasn’t possible to enter the passkey. While resolved later on, when the tablet wakes it defaults to connecting to a networked printer rather than the router. Nothing that can’t be fixed with a few taps, but another frustration to add to the list.
Stock Android (With an Annoying User Interface)
While Vankyo heralds its adoption of stock Android, without any bloat, it has nevertheless included two annoying customizations.
The first is the addition of three additional buttons to the usual trio of Back/Home/Recents. Vankyo has added volume up, volume down, and screenshot buttons. It looks a mess, is confusing if you’re used to using Android… and the volume control responds to adjustment poorly. The same is true of the hardware volume rocker, I should note.
With many feedback options for button presses, it’s somewhat remarkable that Vankyo chose an error noise for launching apps. This is the second annoyance, another thing that leaves you thinking “they needed more time with this.”
The lighter, cheaper feel isn’t something I personally enjoy. It might make the MatrixPad Z4 more suitable for a child–but for business or other intensive use, it’s unsuitable. There is some concern over the chassis, too, which seems to radiate quite a bit of heat even when the tab isn’t doing much. This suggests poor thermal dispersion, along with inadequate hardware.
Benchmarking the Vankyo MatrixPad Z4
To get an idea of the performance you can expect from the Vankyo MatrixPad Z4, we used Antutu Benchmark. Available free from Google Play, Antutu is a respected name in desktop and mobile benchmarking.
As you can see from the results, the tablet performs poorly. Whether standard use or support for HTML5, the Vankyo MatrixPad Z4 functions like a machine from several years ago. Indeed, it is placed lower than the Google Nexus 5 phone from 2013.
By any standards, this is poor performance in 2019.
How Does the Vankyo MatrixPad Z4 Compare to the Amazon Fire HD 10?
Competing directly with the 10-inch Amazon Fire HD 10 seems an ambitious move from Vankyo. Most of its products are budget projectors or display devices and they seem to be well-received. The MatrixPad Z4, however, just can’t match its intended rival.
A better display, processor, battery, and general software and hardware support are available from Amazon. The Vankyo MatrixPad Z4 is an adequate tablet, but if you’re looking for a cheap alternative to the Amazon Fire HD 10 to fulfill the same tasks, you’ll be disappointed.
You’ll get better media playback performance from the Amazon Fire HD 10, better app support, and overall better experience.
Is the Vankyo MatrixPad Z4 Suitable for Kids?
The delicate display and budget chassis mean you’ll need a screen protector and case before unleashing a child on this tablet.
Given the intended use, you might prefer a budget tablet to a more expensive alternative. However, the Vankyo MatrixPad Z4 feels like it might break at almost any moment. Tablets for children, especially pre-school, at least need to be hardy. They should also be responsive, something which this slate simply isn’t.
This makes it far less suitable for children than you might like. It could do the job in the car if secured on a headrest, perhaps, but for the rough-and-tumble of a child’s standard activity… you’ll need to look elsewhere.
Usable, Affordable Tablet With a Budget Feel
There is so much about Vankyo’s MatrixPad Z4 that harks to the past. Its unusual touch display, the surprising customization of the Android UI buttons, the out-of-sync video playback. Games play slower than they should; volume control is laggy, whether using hardware or software buttons. And the speakers are awful.
Tablets should be enjoyable to use; in many ways, you should forget that there is hardware doing the work. It should be effortless, and seamless. The Vankyo’s MatrixPad Z4 doesn’t manage this. At best, it’s frustrating to use.
Need a 10.1-inch tablet to browse the web, read, and do some social networking and online shopping? You could do worse than the Vankyo MatrixPad Z4. But for gaming, media streaming, and hardcore mobile productivity, spend an extra $50 and get an Amazon tablet instead.
Using a VPN (Virtual Private Network) is a great way to maintain your privacy online. However, there are several different ways to set up a VPN. In this article we’ll show you how to set up a VPN in several different ways, some easy, some more complex.
1. How to Set Up a VPN Using Third-Party Software
The quickest and easiest solution if you’re wondering how to create a VPN is to use the software that comes with your VPN subscription.
When you purchase a personal VPN service from a company like ExpressVPN or CyberGhost, you’ll get a link to download its software. Usually you visit your VPN provider’s website and it will have links to download the software for all of your devices, including your desktop.
You download and install the VPN software as you would any other piece of software. Once installation is complete you enter your VPN username and password and you can start using the VPN.
The software differs between companies but most will have options to select a server from locations around the world, to connect to and disconnect from a server, to toggle automatic connections on or off, and other features including a kill switch.
2. How to Set Up a VPN at Home Using a Router With VPN Support
If you have lots of people in your home using your network, it can be a hassle to install VPN software on every single one of their devices. Instead, you can set up a VPN at home by installing software directly onto your router.
There are several reasons to set up a VPN on your router, and the main advantage of this method is that any traffic that passes over your network will be encrypted by your VPN, no matter what device you use. This will even protect Internet of Things (IoT) devices. Your VPN is always on and you won’t need to configure it.
The easiest way to get VPN software on your router is by purchasing one of the best VPN routers which have software support for VPNs. TRENDnet routers, for example, allow you to configure VPN connections within their software.
To use your home VPN, log into your router by entering its IP address into your web browser. Find the option saying VPN or similar and add in your VPN username and password. You should be able to enable the VPN across your whole network from here.
3. How to Set Up a VPN by Installing VPN Software on Your Wi-Fi Router
What if you already have a router you’re happy with and you don’t want to buy a new one to set up your VPN? In that case, you can still install VPN software onto compatible routers. However, it will require a little more work.
Both of these options are open source and can add all sorts of new capabilities to your router. This includes monitoring bandwidth usage, increased wireless coverage, and better security. But let’s take a look at how to use the software to add a VPN to your router.
Upgrade Your Router’s Firmware
First, check if your particular router model is supported by DD-WRT or supported by Tomato. If it is, you can go ahead and download the right firmware for your router from the relevant website. Now make sure your computer is connected to your router via Ethernet cable rather than Wi-Fi, so you can still connect to the router once you change the settings.
Open up the web interface to your router. If you know your router’s IP address already, just type it in. If you don’t know it, use the ipconfig command to view your IP address. Log in to your router using your username and password.
You should find a menu option saying Administration or something similar, depending on your particular router. Choose this option and look for an option that says Upgrade Firmware or Upload Firmware. Use this option to upload the new firmware you just downloaded.
Once the firmware upgrade is complete, you’ll need to restart your router. To be certain the old settings are cleared, turn off your router and wait for 30 seconds before turning it on again.
When the router restarts, go back to the web interface by typing the IP address into your browser again. You should set a username and password, and your new software is ready to use.
Set Up a VPN on an Upgraded Router
You’ll need to know your VPN provider’s settings to use the VPN on your upgraded firmware. You can usually find these settings on your VPN provider’s website. For example, here is ExpressVPN’s instructions for setting up Linksys routers.
In your router firmware, go to VPN Tunneling in Tomato or Services > VPN on DD-WRT. Turn on OpenVPN Client and add the information you got from your VPN provider. Now, save your changes and your VPN should be up and running for your whole network.
4. How to Set Up Your Own Custom VPN Server
Finally, if you’re really dedicated and you want more control over your VPN, you could create your own VPN server. You can create a VPN on Windows if you have an old PC you’re not using any more, or you could use a Raspberry Pi. You can install software called OpenVPN to create your own VPN server.
The downside to this method is that the device will need to be on all the time for your VPN to function. The upside is that you don’t have to pay a subscription to a VPN provider and you know that you are in complete control of your data.
To create a VPN server you’ll need to download the OpenVPN software and install it on your chosen device. There’s an installer available for Windows users, but if you’re using a Raspberry Pi and having difficulties with installation, you can try an installer script like PiVPN.
Then, you can configure your VPN by following the instructions on the OpenVPN website.
Alternatively, another option is to use a software bundle for VPN hosting such as Algo VPN hosted on a Virtual Machine on a cloud provider like DigitalOcean.
How to Set Up a VPN at Home
These methods will let you set up your own VPN at home. The easiest way is to pay for a VPN subscription and use the software from your VPN provider to access the VPN. If you want more control, you could try installing a VPN on your router or even hosting your own VPN server.
If you are in an executive role, you may need to write business requirements. You should opt for a business requirement template if you want to create an impression and do it in double-quick time.
A business requirements document (BRD) is an important document that gets a lot of attention. It holds the details necessary for projects of all types and needs specific information.
So rather than try to create this crucial document from scratch, use one of these helpful BRD templates for Microsoft Word.
Table-Structured Requirements Document Templates
For a clean, clear, and effective business requirements document, use one of these table-structured templates. This type of format makes the document simple to read and easy to create. In addition, it allows those viewing the document to be able to jump to certain sections faster.
Clicking on the links below will allow you to download and save the templates for free.
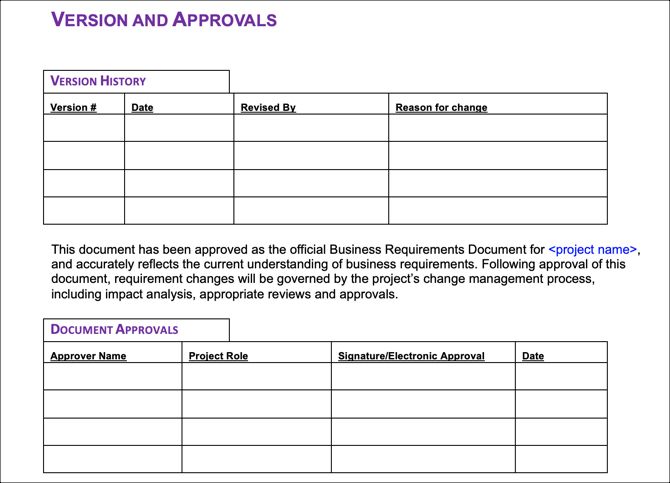
This first BRD template from Template Lab starts with two tables right after the title page; one for version history and the other for document approvals. This is handy because you can see if you have the most recent version and that’s it’s already been approved.
Additional tables in the template include project details, document resources, a glossary of terms, stakeholders, assumptions, and use case sections. You’ll also see a linked table of contents which makes jumping to the section you need a breeze.
The business requirements table offers reference columns for requirement type, ID number, use case, and comments along with the features and functions. All of this makes this template a terrific option.
This next business requirements document template is very similar to the one above. But what it also offers is a template guideline to assist you with completing the document. Once you begin writing your document, just save a different version that includes the guidelines for future reference or simply remove them.
The template offers those useful version history and document approval tables right at the beginning. It also has a linked table of contents, use case sections, and tables for resources, terms, stakeholders, and assumptions.
The business requirements table is sectioned nicely for the user, reporting, security, scalability, and other related requirements. This makes it easy to enter the features and functions in their respective spots. Because of the guideline section, if this is your first go at writing a BRD, this might be the template for you.
Text-Structured Business Requirements Document Templates
Your project may not need a completely table-formatted business requirements document. If this is the case, then these next two templates are text-structured instead. While they include a table here and there, the overall format is freeform text.
With just three tables at the start of the document for document history, definitions and abbreviations, and references, the rest of the template lets you write without limitations.
You’ll start by composing the executive summary, move onto background and context, describe the timing and phases, and include helpful imagery. The requirements section is structured using bullet points. And the standards and guidelines section uses a numbered list structure.
The template closes with one final table for precedence and priority of the features using high, medium, and low. What’s nice about this text-structured template is that each area is written with examples. This makes it another good choice if you’re writing a BRD for the first time.
This next text-based template is more for simpler projects rather than those with many requirements. It gives you a table at the beginning for document revisions and then goes right into a linked table of contents and then the introduction, document overview, and glossary of terms; all freeform.
The template gives you plenty of room in its sections for business constraints, assumptions and dependencies, and requirements for future phases. The intent of this BRD template is to provide requirements via process diagrams that you can easily insert from another application.
Again, this is a nice template for more basic projects and those where requirements are necessary by a process.
Table and Text-Structured Requirements Document Templates
One of the most common types of business requirements documents you’ll see includes a mixture of tables and text. This is appropriate for any size or type of project and gives you flexibility along with a solid structure.
This template from TechWhirl is not only useful with both text and tables but is an attractive and professional business requirements document option. You’ll start with the document revisions and approvals tables, but then write your project summary with objectives and background using an outline format.
There are spots for diagrams if you’d like to include them, and you can add short descriptions surrounding them for context. You will find that all business requirements are set up with requirements numbers, priority, description, rationale, use case reference, and impacted stakeholders. The template is sectioned off for base functionality and then security, reporting, and audit requirements.
You’ll like this BRD template as it gives you the neatness of tables with the flexibility of freeform text.
Another good combination template for your business requirements document is this final option. You have tables right where you need them and exactly what you need them for with plenty of space for your text as well.
The template offers a linked table of contents and sections for an introduction, purpose, and project overview. Just some of the table sections for requirements include functions and features, data capture and storage, hardware and software, and testing and training. This makes it ideal for an IT project.
You also have an acceptance criteria matrix and issues log to finish off the document. For text and tables, this template makes a terrific BRD.
The Most Valuable Template You Can Use
There are many templates available for Microsoft Word that can help you perform your work faster.
But if there is just one template that is beyond valuable in business and for projects, it’s a business requirements document template. Hopefully one of these works out perfectly for you.
The barrier of entry to make apps and websites has lowered, and people with less programming skill can now develop software. What changed?
Low-code design tools allow people to create complex programs with less coding experience. Today you’ll learn what low-code is, how it works, and whether you should use it for your projects.
What Is Low-Code?
Low-code is a language or environment that helps those with little coding experience to create and develop software. Rather than complex back-end code and libraries, low-code uses visual templates and drag-and-drop frameworks which open up development to non-software developers.
For a simple metaphor: Flat-pack furniture removes the need for the tools and knowledge required to build furniture from scratch. Instead, it uses prepared parts, designed to work with simple tools and clear instructions.
Low-code does the same for software development.
Why Is Low-Code Important?
Creating a piece of software requires careful design. A program needs to work well for users and developers alike, and applications are constantly changing. Alongside adding new features to a platform, everything else must remain updated and compatible to provide a good experience for users.
Updating and changing software is often an arduous process. Ideas and designs must pass through an IT department already tasked with upkeep of the software, and progress can be slow. Most software uses similar patterns, and creating them from scratch for every project wastes a lot of time.
Using low-code can solve some of these problems. Anything that updates often can operate on low-code principles. A good layer of low-code actions can allow non-developers to update existing code without the risk of breaking anything and without too much prior knowledge.
Is Low-Code New?
While low-code is a term that has cropped up more in recent years, it has been around for longer than you’d think.
Most companies that use custom software have incorporated some form of low-code or even no-code layers into their operations. Everything from simple inventory management to front-end design for customer service is improved by low-code.
Low-code is a more common term now. Frameworks have appeared that allow small businesses and lone traders to create low-code platforms to help with their daily tasks. Similarly, low-code can allow less experienced entrepreneurs to develop simple apps alone without needing to hire an IT department.
Low-Code vs. No-Code
If you’ve seen the term low-code, you’ve probably also seen no-code. Perhaps unsurprisingly, the difference lies in how much code the user must know to use each.
Low-code requires users to familiarize themselves with a small amount of code and fit it together, so it works with the greater code-base underneath. While not an entirely accurate comparison, you can think of this like performing mathematical operations on cells in Microsoft Excel.
No-code completely removes the need for code and is a purely visual, user interface-based form of code and design. Website builders like Squarespace are a perfect example of this type of platform.
How Much Code Do I Need to Know?
Different low-code frameworks provide different levels of abstraction. A common way to utilize low-code is to use a framework that provides a database and authentication service for user data. This saves having to understand how to set up a REST API from scratch.
The designer will only need to create a user page using HTML and CSS and connect it to the low-code service provider of their choice.
Other custom low-code implementations may provide an almost visual design tool for creating systems within your app. These tools typically feature items you can drag and drop, and connect to create actions expressed in code behind the scenes.
Low-Code Platform Examples
Low-code providers mostly offer a similar service. Let’s look at two popular companies offering low-code solutions.
A well-known example of a low-code platform is Google’s App Creator. While you will still need to understand enough HTML and CSS to customize your app, the platform handles most other aspects for you. A visual drag-and-drop designer replaces traditional development.
App Creator doesn’t only help with designing and creating apps. It also provides analytical tools to help monitor their use and manage administrative rights.
Typically, tools like App Creator are used to create internal systems for businesses and to link existing apps like employee information and calendar entries.
OutSystems provides the same service as App Creator, but is a little more mature. Designed for enterprise use, it too boasts a drag-and-drop creation tool.
Rather than focusing purely on giving a front-end user interface design tool, or taking care of back-end database and data manipulation tasks, OutSystems claims to be an all-in-one solution.
This means that if you wanted to design an app that required a front-end for the public and your company, along with a robust back-end database, you could do much of the work without needing to code it yourself. This would free up time and resources to employ software developers and designers for the critical parts of your project.
Is Low-Code Right for Me? Should I Use It?
Using low-code can future-proof your project. Incorporating a pre-existing framework can make your life easier, even if you are a solo developer.
That said, no-code platforms are improving all the time, and many believe they will supersede low-code in time. On top of this, if you are already a software developer and understand your programs inside-out, why bother? It would be an extra layer of extraction you may never need.
Is This the End of Coding?
It might be easy to get caught up in the hype of low-code and no-code and think they make traditional developer roles are less important. However, nothing could be further from the truth. The demand for developers has never been higher.
Low-code isn’t always beginner-friendly, and many tools aim to make life easier for seasoned developers. This means while they can save time, they aren’t always easier to understand. For some non-developers, low-code won’t help at all.
At its core, the concept of low-code is to help development, not replace developers.
The Future of Coding and Programming
Alongside software developers, low-code platforms are also an excellent tool for people working in UX design, allowing fast progression from mockup to working build.
But while low-code is a great tool to help with development, there has still never been a better time to teach yourself how to code. Check out the best YouTube channels to help you learn programming if you’d like to try it yourself.