05 August 2020

16 Essential iPhone Keyboard, Text, and Other Shortcuts


superuseful-iphone-shortcuts

The iPhone is successful because it’s easy to use. But there are still plenty of advanced tips and tricks you can use with your iPhone as well. Many of the tasks you use your iPhone for every day are much easier using cool shortcuts in iOS.

These iPhone shortcuts cover everything from typing on the keyboard to browsing Safari. You’re bound to find one or two hidden iPhone tricks below you haven’t heard of before; let’s take a look.

1. Emergency SOS Shortcut

Emergency SOS option on iPhone

Perhaps the most important iPhone trick to learn is the Emergency SOS shortcut. If you find yourself in need of emergency services, press and hold the Side button on your iPhone along with either Volume button for a few seconds to activate the SOS shortcut. Head to Settings > Emergency SOS to turn on a shortcut that lets you click Side quickly five times to do the same.

Once activated, an alarm sounds and your iPhone gives you three seconds to cancel it before calling emergency services. When you end the call, it gives you another 10 seconds to cancel before notifying your emergency contacts. And after that, it displays your iPhone medical ID for anyone who may need it.

2. Taking a Screenshot

If your iPhone has a Home button, take a screenshot by pressing the Sleep/Wake and Home buttons at the same time. Without a Home button (on the iPhone X and later), press the Side and Volume Up buttons at the same time instead.

A preview of your screenshot appears in the bottom-left corner. Tap it to view the screenshot in full size. This also gives quick access to editing tools in case you want to crop or annotate your screenshot before saving it.

The preview doesn’t show up in subsequent screenshots. So you can take a series of screenshots without worrying about the preview appearing in the final images.

3. Access Wireless Services in Control Center

Control Center in iOS showing wireless options

Control Center is the quickest way to access the most commonly used settings on your iPhone. Open Control Center by swiping down from the top-right corner of the screen (or swiping up from the bottom of the screen if your iPhone has a Home button).

In the top-left corner are toggles for Airplane Mode, Wi-Fi, and Bluetooth. Tap and hold on this panel to show AirDrop and Personal Hotspot options as well. Then tap and hold again to choose your Wi-Fi, Bluetooth, or AirDrop connections.

The Wi-Fi and Bluetooth toggles only disable those features temporarily, so you don’t need to worry about accidentally using all your cellular data if you forget to turn Wi-Fi back on. To turn these features off permanently, open the Settings app and select Wi-Fi or Bluetooth at the top of the screen.

4. Use AirPlay in Control Center

The top-right panel of Control Center shows playback controls for music, podcasts, videos, or other media playing on your iPhone. Tap and hold this panel to expand the controls, showing a volume control and AirPlay options.

If you have other AirPlay devices on your network—like an Apple TV or HomePod—select them from this screen to quickly switch playback to those devices.

5. More Display and Volume Options in Control Center

iOS Control Center Screen Options

Control Center also features handy sliders for Brightness and Volume. Tap and hold on either of these sliders to see more shortcuts. Expanding the Brightness slider lets you toggle Night Shift, Dark Mode, and True Tone on or off.

If you have AirPods Pro, expanding the Volume slider lets you choose the noise cancellation mode to use with them.

6. Even More Shortcuts in Control Center

The bottom of Control Center has rows of icons for extra shortcuts, like Calculator and Timer. A cool iPhone trick not everyone knows is that you can tap and hold some of these icons to jump to certain functionality inside these apps.

Use this to quickly set a Timer, adjust the Flashlight brightness, copy your last Calculator result, or access Camera functions like selfie mode and video.

7. Scroll to the Top

When you want to return to the top of a web page, list, note, or any other kind of scrolling content, tap the time at the top of the screen to shoot back up to the top. This is by far the quickest way to return to the start of whatever you’re looking at.

For more precise control, use the scroll bar. To do so, scroll a little bit to make the scroll bar appear at the right edge of the screen, then drag and drop the bar to your desired location.

8. Start Using Spotlight

iOS Spotlight Search

One of the most useful iPhone tips and tricks not everyone takes advantage of is to start using Spotlight. Swipe down from the middle of the Home Screen to reveal a search bar you can use to find almost anything on your iPhone.

This is the quickest way to open apps, check contact details, find an email, or even search the web. You can also use Spotlight to convert currencies and perform quick calculations; try typing type “70*25” for example.

9. Undo Your Last Action

Shake your iPhone vigorously to undo an action. This iPhone shortcut is most useful when you’re typing and make a mistake. But you can also use this trick in apps like Mail to undo actions such as archiving or moving messages.

If shaking your iPhone feels too dramatic, swipe left with three fingers to undo instead. Then you can swipe right with three fingers to redo.

10. Typing and Keyboard Shortcuts

iPhone keyboard being used as a cursor

Use this iPhone keyboard shortcut to accurately control your cursor. Simply tap and hold on the space bar, then slide your finger around to move the cursor. It’s super-accurate, and a real life-changer when you consider how tedious cursor manipulation once was.

The iOS keyboard is pretty great in that it also puts special characters, accents, and symbols within easy reach. Tap and hold a key to see variations of that character appear, like accented letters and useful punctuation symbols.

Check out our full list of iPhone keyboard shortcuts for more typing tricks like these.

11. Text Replacement Shortcuts

Text replacement on your iPhone allows you to create your own text-based shortcuts for longer words or phrases. That means you can type a predetermined shortcut and your iPhone expands it into longer text. A great use for text replacement is to create an expansion for your email address.

These typing shortcuts can save huge amounts of time over the long run. You can also create replacements for your home address, phone number, or common phrases you use.

Go to Settings > General > Keyboards > Text Replacement to create replacements.

12. Safari Navigation Shortcuts

Your iPhone offers plenty of cool Safari tricks to master. Not least is the ability to swipe left and right from either edge of the screen to go forward and backward through your browsing history. You can also tap and hold the Forward and Backward arrows to view your history in a popup list.

To quickly add a bookmark or save a site to your Safari reading list, tap and hold the Bookmarks button. You can also hold the Tabs icon to close all tabs or open a private browsing session.

13. Preview Websites in Safari

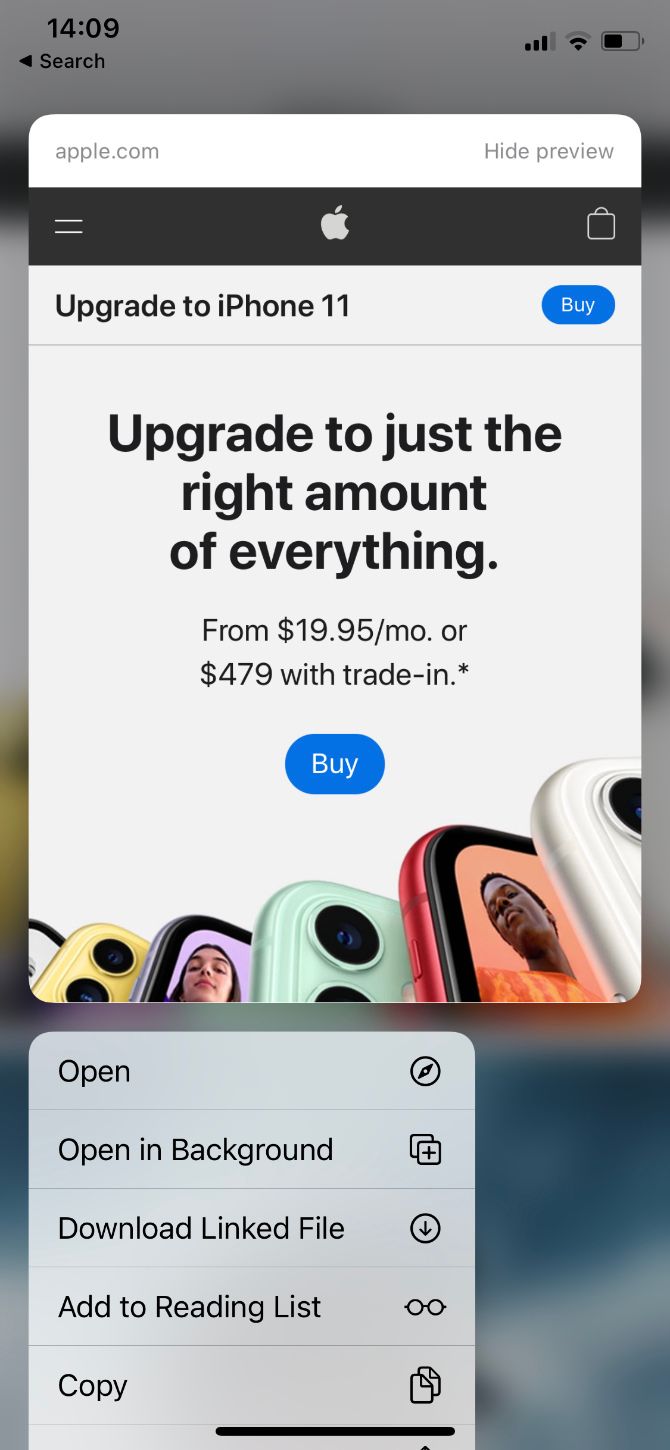
Open a popup preview of links by tapping and holding on them in Safari. You can use this to check out a page quickly without leaving the one you’re already on. From the popup preview, you can also download a linked file, open the window in a new tab, or share it with someone else using a quick action menu.

If you’re a heavy Safari user on your iPhone, make sure you familiarize yourself with all the best Safari tips and tricks.

14. Use Reachability With Larger Screens

Reachability is a great solution if you find it hard to use your iPhone with one hand. This cool iPhone shortcut brings the top half of your screen down so you can reach it without needing to stretch too far.

To activate Reachability, swipe down from the bottom of your iPhone screen (or double-tap the Home button if your iPhone has one). To stop using Reachability, tap the arrow at the top of the screen to make everything shift up again.

15. Take Photos While Recording Video

The iPhone is well-known for the great photos and videos it captures. But have you ever wanted to take a photo while you’re recording a video? Fret not, as iOS lets you do both at the same time.

Launch the Camera app and start recording a video. As you record, tap the white Camera button that appears to snap a photo at the same time.

Keep in mind that this camera shortcut uses your iPhone’s video sensors, so it might not be the same quality as a standard photo. It also doesn’t create a Live Photo, despite the fact that it came from a video. That said, the photos should still turn out pretty well.

16. Easy Access to Low Power Mode

iPhone Low Power Mode

If you plan on going a long time without a source of power, you should activate Low Power Mode on your iPhone. This saves battery by reducing or disabling automatic features and reducing your screen brightness. You might need to do some tasks manually, but extending your juice is worth the tradeoff.

Turn Low Power Mode on or off by going to Settings > Battery > Low Power Mode. You can also add a Low Power Mode to Control Center for even quicker access. Go to Settings > Control Center > Low Power Mode to do so.

Go Even Further With Widgets and Siri Shortcuts

These iPhone tips and tricks are handy, but by no means the be-all and end-all of productivity on iOS. You should also organize your apps and save yourself even more time with a few custom Siri Shortcuts.

Siri Shortcuts let you speed up common tasks by chaining actions together, then launching them all from a single button. It’s like macOS’s Automator app, but for your iPhone. Check out our Siri Shortcuts beginner’s guide to learn more about making the most of this great feature.

Read the full article: 16 Essential iPhone Keyboard, Text, and Other Shortcuts


Read Full Article

Don’t Buy a Pico Projector Until You’ve Seen The Nebra AnyBeam


nebra anybeam pico projector
Our verdict of the Nebra AnyBeam:
Laser technology makes this the best Pico projector you'll find. With no built-in features, it does one job and does it well. But consider if you really need a pico projector, or just want a budget home projector, as you're paying for the portability and convenience.
910

Normally, I wouldn’t touch Pico projectors with a tiny 6-inch barge pole, which is about the size of image they can comfortably project. But the Nebra AnyBeam has impressed me. Tiny, fanless, noiseless, and low-powered, the Nebra Anybeam eschews traditional DLP technology in favor of a laser and MEMS scanner. Does this make it the only Pico projector worth buying? We think so. Read on to find out why.

At the end of this review, we’ve got a Nebra AnyBeam to give away to one lucky reader. Be sure to watch the review video for some bonus entries in the competition.

Nebra Anybeam Specifications

  • Brightness: 30 ANSI lumens (~150 lumens equivalent DLP)
  • Contrast: 80,000:1
  • Resolution: 720P@60Hz
  • Dimensions: 4 x 2.3 x 0.8 inches (10.5 x 6 x 2 cm)
  • Weight: 4.7oz (132g)
  • Throw Ratio: 0.76:1
  • Power Consumption: ~3W, from micro-USB port
  • Connectivity: HDMI in (v1.4), 3.5mm Audio out
  • Other features: 1W speaker. 1/4-20 UNC tripod mounting point.

After a successful Kickstarter last year, the Nebra Anybeam is now available exclusively from Pi-Supply.com for £229 (~$300), shipping internationally from the UK.

In the box, you’ll find the Nebra AnyBeam, and …. nothing else. There’s no power adapter, no micro-USB cable, no HDMI cable, no stand. Since you’re probably a bit of a geek anyway if you’re buying this, I think it’s a wholly ethical decision to not include yet more cabling and e-waste.

pocket sized nebra anybeam laser projector

There’s no internal battery on the Nebra AnyBeam either, so it must be powered from the micro-USB port. Connect a phone charger, or use a battery, with at least 1.5A output capability. Again, this is a good thing. Batteries are often the first thing to fail on these types of devices. With such low power consumption, you’ll have no problem running this all day from a small battery pack.

The Nebra AnyBeam uses a laser and MEMS scanner to create the image. This results in a pin-sharp image, with lower power consumption, and consequently less heat generated.

nebra anybeam projecting

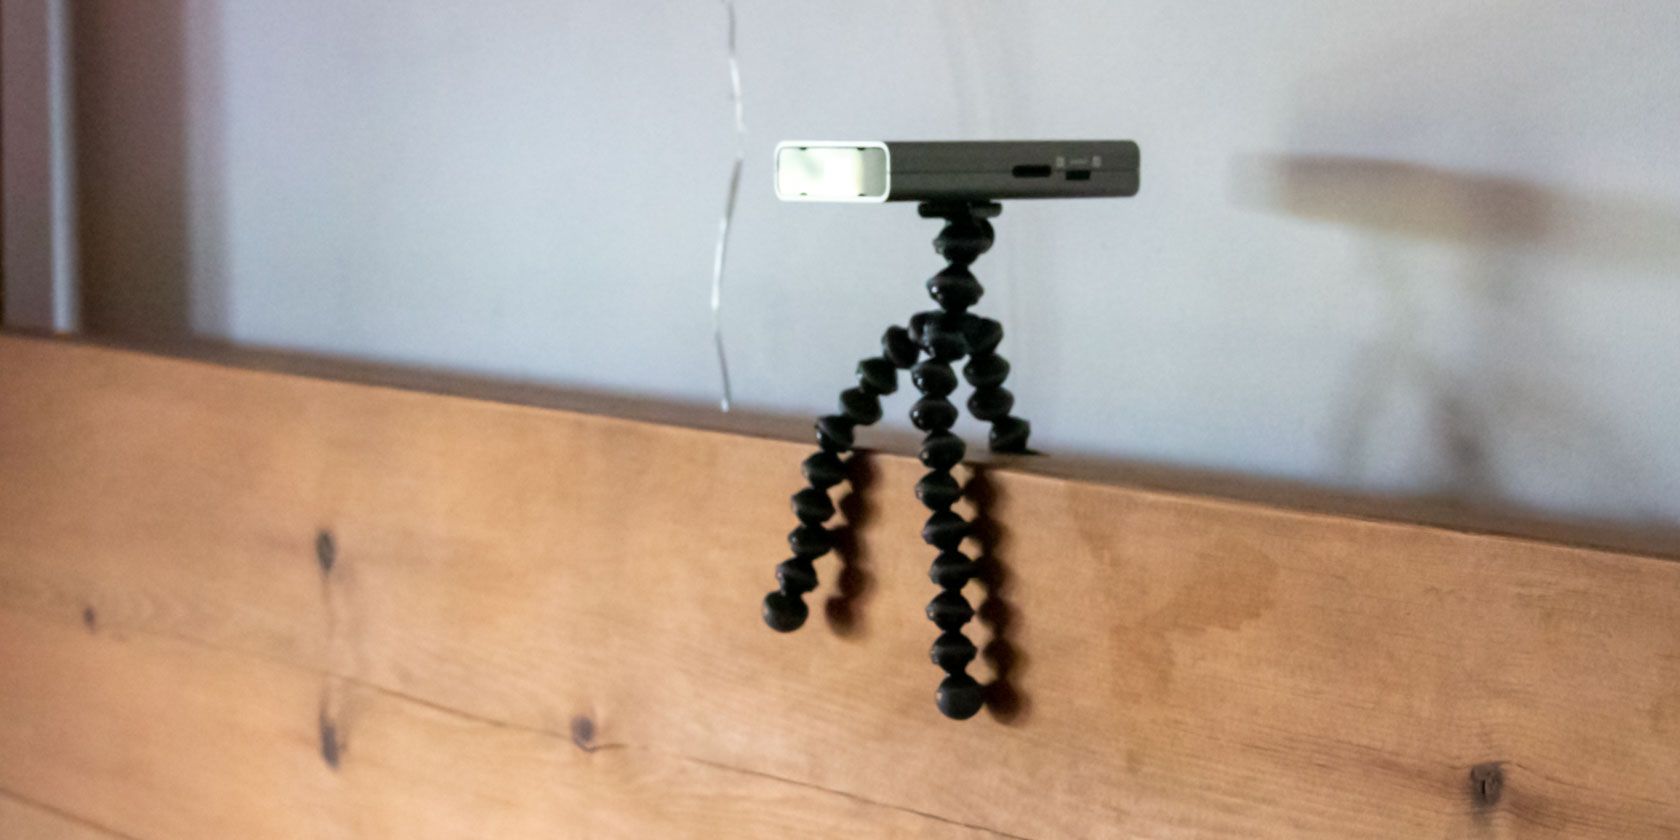
On the underside is a tripod mounting point, though no suitable mount is included in the package. I tested using a GorillaPod flexible mini-tripod, but anything compatible with 1/4-20 UNC is fine. The flexibility of mounting options makes this great for all purposes, particularly digital signage where large projectors on the ceiling might be unsightly.

Using the Nebra AnyBeam

I love how simple the Nebra AnyBeam is. There’s no complex menu systems to navigate, there’s no built-in Wi-Fi to connect to, there are no Miracast features to be frustrated with. There’s no micro-SD card slot for local playback, which is good since any device with that feature rarely understand modern codecs. It’s simply an output device, which is exactly what a projector should be.

Plug in a full-size HDMI cable (v1.4 compatible); then power the Nebra Anybeam on by plugging in a micro-USB cable. There is no power switch. If a compatible HDMI signal is found, the Nebra Anybeam will start projecting. That’s it.

nebra anybeam power and hdmi input
Plug in micro-USB power, and full-size HDMI 1.4 cable. That’s it.

A single combined push switch and toggle on the side of the device controls the volume and menu operation. Hold it down for three seconds to access the settings menu. Realistically you’ll only need to do this to adjust the keystone if you’re projecting from an angle. There is a sharpness adjustment, but this is more to fine-tune the factory settings. In everyday use, the laser projection stays sharp at all reasonable distances and doesn’t need to refocus. This also means it can project onto curved surfaces without sacrificing focus (though your image will be warped).

nebra anybeam keystone adjustment

Otherwise, the toggle switch controls the volume. Even on full, the volume is muffled, quiet, and intolerable for more than five minutes. It’ll do in a pinch, but you really should connect an external portable speaker for best results.

I tested using a Nintendo Switch and Amazon Fire TV stick, both of which were fine. I did have some issues with my Macbook Pro, though this was more likely due to the cheap HDMI adapter I was using.

nebra anybeam nintendo switch
Note, your Switch will need to be docked to enabled HDMI output

How Good is The Projection?

One thing I really appreciate from projector manufacturers is honesty about the brightness. In this case, Nebra is upfront about the fact that it’s 30 ANSI lumens. ANSI is a standardized way of measuring brightness, compared to flux or just “lumens”, which sellers can simply make up their own testing regimes for.

30 ANSI lumens really isn’t a lot, but it’s average for pico projectors. Nebra claims this is equivalent to about 150 lumens in a typical DLP projector, and that seems fair. My mid-range home cinema projector is around 3000 ANSI lumens, so it’s obviously a fraction of the brightness you’d get from a full-size projector. Still, for the size and power requirements, it’s impressive.

daytime nebra anytime
This would obviously have been improved on a white wall, but this is about the size possible during the day.

In the real world, this equates to night-time use if you want large screen sizes. During the day, you can comfortably project up to about 20 inches before you lose visibility. At night, I was able to push it to about 80 inches before I felt the definition and brightness were too poor. The projection screen I normally use is 110 inches maximum, but at that point, 720p resolution is just too blurry, even for a laser projector.

nebra anybeam massive projection test
110 inches felt too big, losing a lot of clarity.

To get a 78-inch screen required placing the Nebra AnyBeam 102 inches away, from which we can calculate a throw ratio of 0.76. This is a little disappointing and means that those with very small spaces will be unable to achieve the largest projection sizes.

78 inches was much more watchable.

Should You Buy The Nebra AnyBeam?

No doubt, the Nebra Anybeam is the best pico projector yet. The lack of built-in bells and whistles is a good thing, as there’s less software to be frustrated with and fewer hardware components that can break. You needn’t worry about a small internal battery expiring, because it doesn’t have one. Bring your own battery. It’s just an output device–and a good one at that.

But before you purchase the Nebra Anybeam, do consider if you really need an ultra-portable projector. Don’t buy it just because it seems like a cheap projector. At £229/$300, you could buy a budget home projector that would be brighter, capable of projecting a bigger screen, and may have a better built-in speaker. It certainly wouldn’t fit in your pocket though.

Enter the Competition!

Nebra AnyBeam Projector Giveaway

Read the full article: Don’t Buy a Pico Projector Until You’ve Seen The Nebra AnyBeam


Read Full Article
7 Fixes for the “Windows Was Unable to Complete the Format” Error


unable-format-error

Trying to format a removable drive and seeing a “Windows was unable to complete the format” error? You’ll probably feel stuck, as this leaves you with an unusable device.

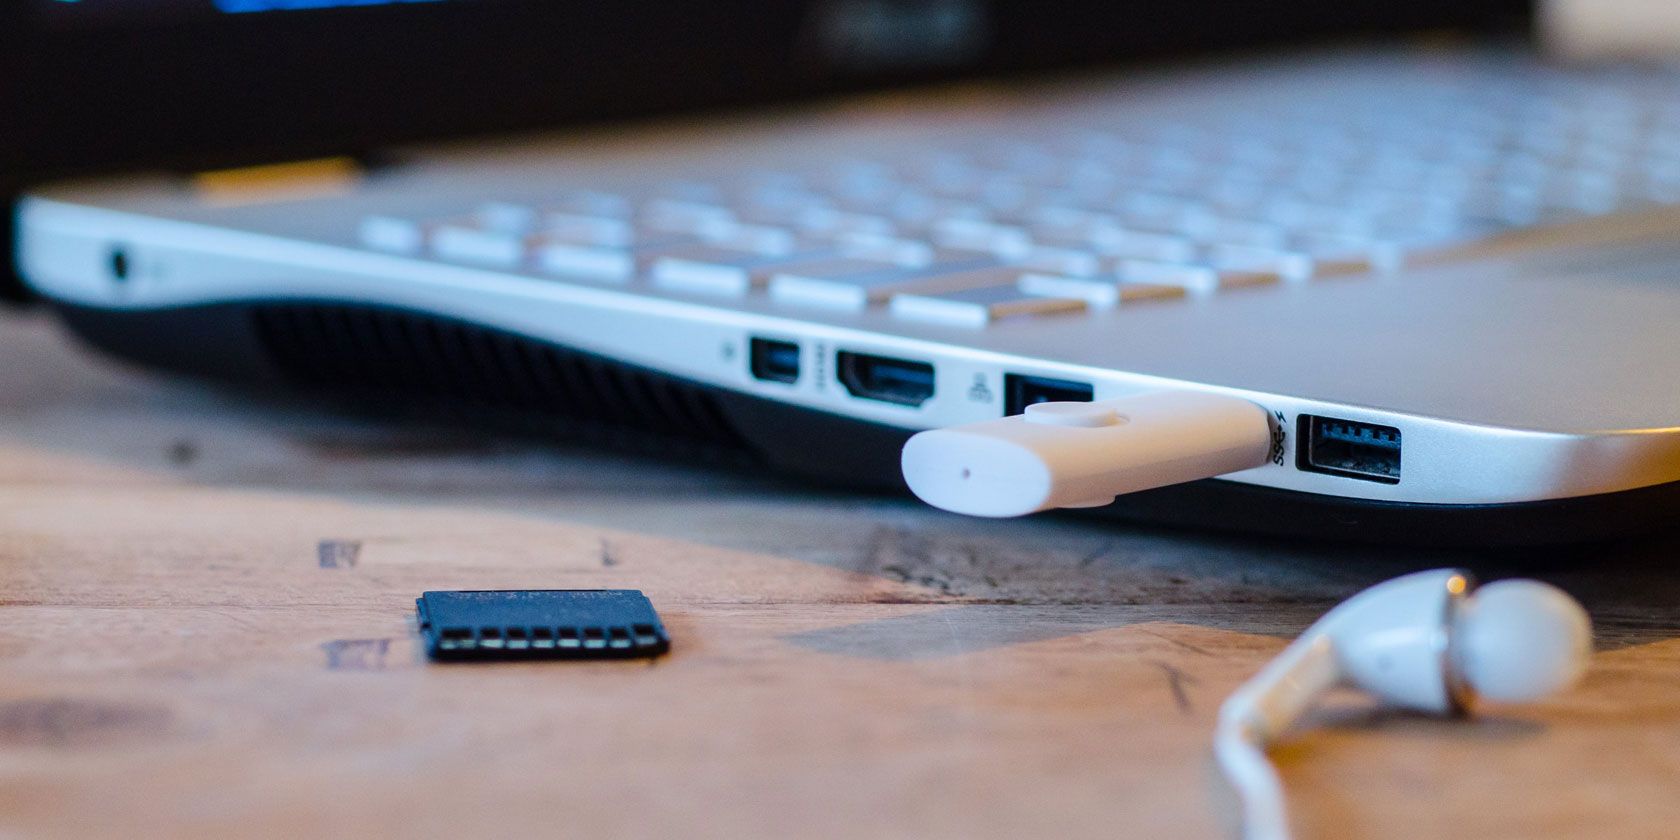
Whether you see this format error with a USB flash drive, SD card, or similar, we’ll show you what to do when Windows can’t format a drive.

First: How to Format a Drive in Windows

To make sure we’re starting on the same page, let’s quickly review how to format a removable drive in Windows 10. Remember that this process will destroy everything currently on the drive!

Open a File Explorer window and browse to This PC to see all the drives connected to your computer. On that page, find your removable drive, right-click on it, and choose Format.

This will bring up the basic Windows format menu. If you’re not sure which options to pick, read the above guide for tips or hit the Restore device defaults button to use what the device came with. Click Start to format the drive.

Windows 10 Format USB Drive

If you try this multiple times and keep getting a “Windows was unable to complete the format” message, continue onto troubleshooting.

1. Try Formatting Through Disk Management

For advanced disk needs, Windows provides the Disk Management tool, which has more options than This PC. Thus, it should be your first stop when a standard format doesn’t work.

Press Win + X or right-click on the Start button to open a list of shortcuts, then click Disk Management to access it. You’ll see a list of volumes attached to your computer at the top, as well as a visual representation of them at the bottom.

replace hard drive - windows disk management

If you see RAW next to the size of the drive at the bottom (and under File System in the top panel), this means that Windows doesn’t recognize the drive’s file system. In some cases, this shows that the drive is formatted with a macOS or Linux file system that Windows can’t use.

Right-click on your USB drive (make sure you select the right one) and choose Format. You’ll see an interface similar to what you used earlier. Pick a Volume label, specify the File system (FAT32 is best for smaller devices or ones that you plan to use across platforms) and leave the Allocation unit size as Default.

Disk Management Format

If you leave Perform a quick format checked, Windows won’t check the disk for bad sectors. We’ll cover this in a later troubleshooting step, but you can feel free to uncheck it now and see if Windows finds any issues. Just keep in mind that this takes much longer to complete.

Delete and Recreate the Volume

Should this fail to work, you can instead try the Delete Volume option in the drive’s right-click menu. Deleting the volume will erase everything Windows has assigned to the disk, leaving only unallocated space.

You’ll thus then need to create a new volume by right-clicking, choosing New Simple Volume, and walking through the steps (which are similar to the other formatting methods).

Windows 10 New Volume

2. Remove Write Protection on the Drive

Write protection, as its name suggests, prevents any system from adding new data to a drive. The most common reason for this is a physical switch on the drive itself, especially with SD cards. Look at your drive and make sure any sliders or switches are not in the locked or read only position.

SD Card Lock Switch

After checking this, you should also remove software write protection on your drive. To do this, press Win + R to open the Run dialog and enter diskpart. Confirm the UAC prompt that appears, then you’ll see a Command Prompt interface.

At this, enter list disk and hit Enter. You’ll see a list of disks and should be able to identify your removable drive by its size. Enter select disk X to make changes to the right device.

Once you see confirmation that you’ve selected the right disk, enter attributes disk to see information about it. If you see Yes next to Current Read-only State, then the disk has write protection.

Windows Diskpart

To remove this, enter attributes disk clear readonly. Windows then display a message that the attributes were removed successfully; enter the exit command to leave the window.

Now that there’s no write protection, try formatting your disk again.

3. Use the SD Memory Card Formatter

If you’re unable to format an SD card in Windows, the fix might be to use a specific utility instead of the Windows tool. The SD Association recommends using its SD Memory Card Formatter instead of what your operating system provides. Give it a download if you’re specifically having trouble with an SD card.

The tool is simple and looks similar to the options you tried above. Make sure you have the right card selected in the dropdown menu at the top. Use Overwrite format to obliterate the current contents of the card for best results and give it a name in the Volume label field.

SD Card Formatter Windows

4. Scan the Drive for Errors

Sometimes, you’ll run into formatting errors because the drive has bad sectors or similar issues. At this point, it’s worth checking the drive to see if something is wrong with it.

To do this, open This PC again. Right-click on your removable drive and choose Properties. On the resulting menu, switch to the Tools tab and click the Check button under Error checking. Choose Repair drive to run a scan on the drive, then wait for it to complete and try again.

Windows Repair USB Drive

If you think your device is damaged, find out how to recover data from a corrupted drive.

5. Use a Third-Party Formatting Tool

If you’re still unable to format your disk, a third-party tool could solve your problem. Often, such tools use different formatting methods than Windows, and may bypass any problems Windows has with your disk.

Check out our favorite free Windows partition managers for several apps that can do this.

6. Scan for Malware

While it’s most likely not the cause of your problem, it’s worth running a scan for malware if you still can’t format a drive. Some malware can interfere with normal file system operation, including formatting drives.

We recommend running a scan with the free version of Malwarebytes and seeing if that finds any infections. Then try the format again.

7. Try Formatting on Another OS

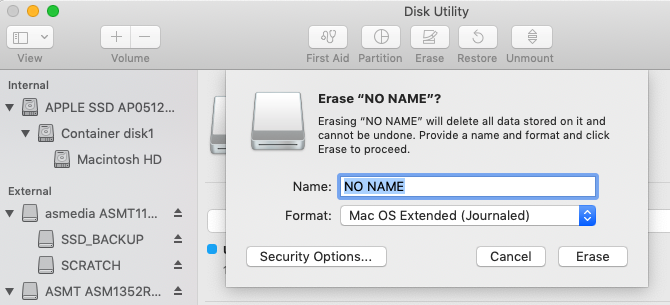
How to erase a flash drive from Disk Utility on a Mac

Before you give up on the drive, there’s one more way you can try to isolate the problem. If you have access to a machine running macOS or Linux, try using those operating systems to format your external drive.

While you’ll need to reformat the drive again for use with Windows, it helps to figure out if the issue lies with your hardware or Windows. If your drive formats fine on a Mac, there’s some kind of problem with Windows.

See how to format USB drives on macOS for instructions on this.

Still Can’t Format? Time to Replace Your Drive

If you’ve walked through all the above steps and still get a format error, chances are that your drive is dead. Unfortunately, flash drives and SD cards have a finite number of uses; cheap or old drives are more susceptible to giving out. This is also the case if your drive has suffered physical damage.

Hopefully, you had any important data on the drive backed up. The good news is that you can buy a fast flash drive as a replacement for not much money.

Read the full article: 7 Fixes for the “Windows Was Unable to Complete the Format” Error


Read Full Article
The 5 Best Dog Training Apps for Android and iPhone


dog-training-apps

Training your dog is a fun and exciting experience, but it’s not always easy. Depending on your dog’s age, breed, and personality, you might find yourself struggling to get your dog to behave. It’s a long learning process for both you and your dog.

If you’re struggling to get your dog to sit, stay, or even stop pulling on the leash, you might want to reevaluate your training methods. Try out these fantastic dog training apps for Android or iPhone, and you’re bound to see much better results.

1. Dogo Dog Training & Clicker

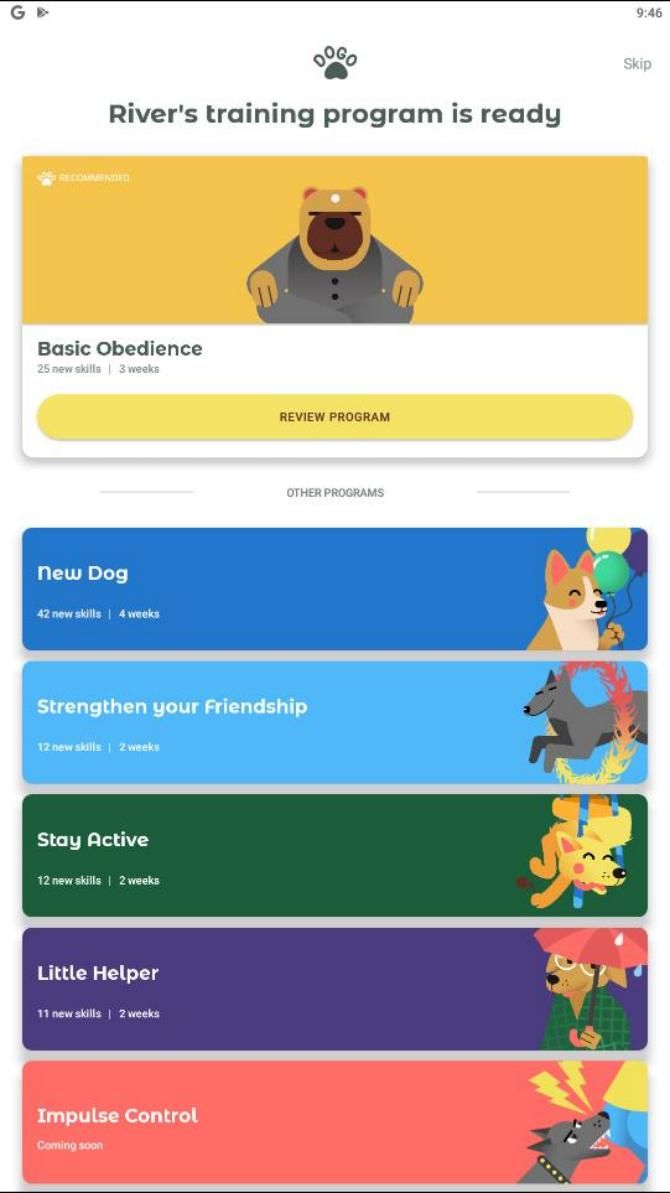
Dogo’s Dog Training & Clicker App is an all-in-one training program that comes with a built-in clicker. Once you open the app, you’ll have to answer a series of questions about your dog. These questions are used to figure out which training program is best for your dog’s needs.

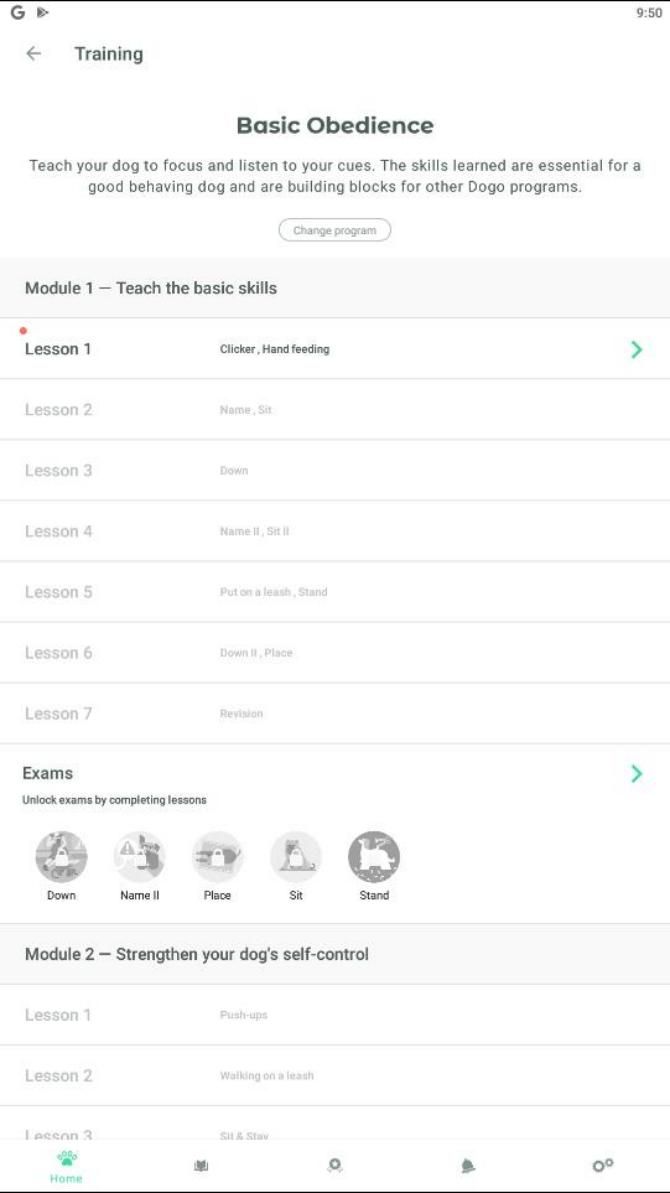
The app offers five dog training programs: New Dog, Basic Obedience, Stay Active, Strengthen Your Friendship, and Little Helper. If you’re just looking for the basics of training, you’ll want to complete the New Dog and Basic Obedience courses. These programs help your dog learn essential commands, tricks, potty training, and how to walk on a leash; the other courses are best for more advanced training.

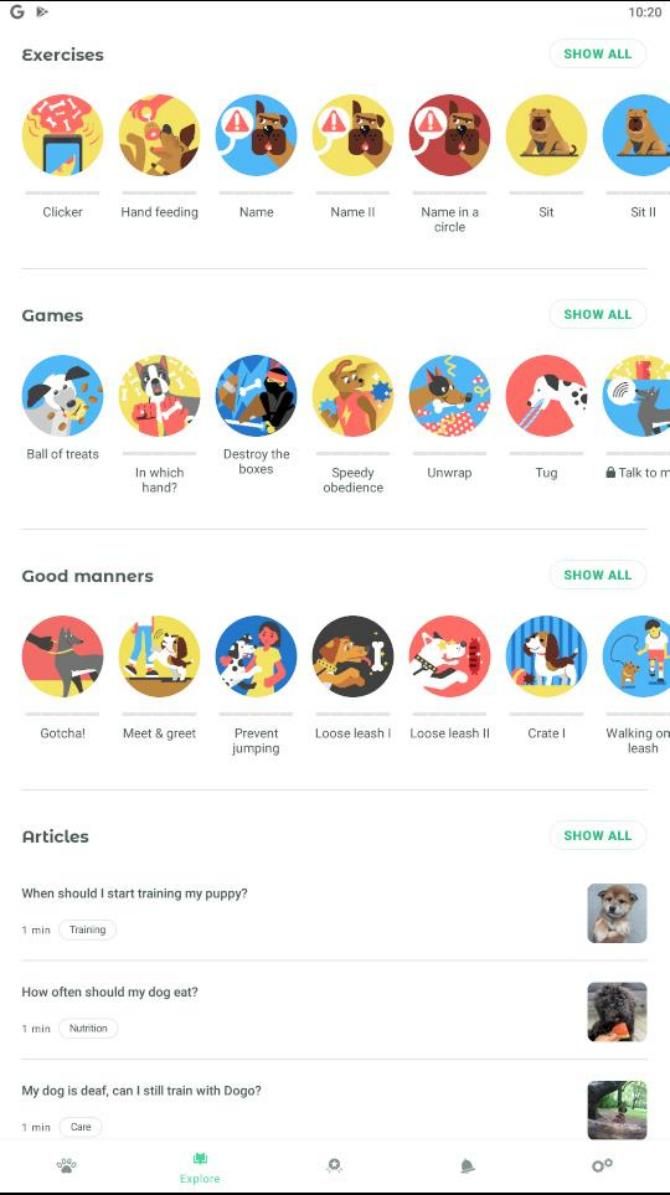
Aside from courses, the app also has many fun and interactive features. It comes with several games you can try with your dog, as well as an Instagram-like community that you can use to share pictures of your furry friend.

Download: Dog Training & Clicker App by Dogo for Android | iOS (Free, subscription available)

2. Puppr

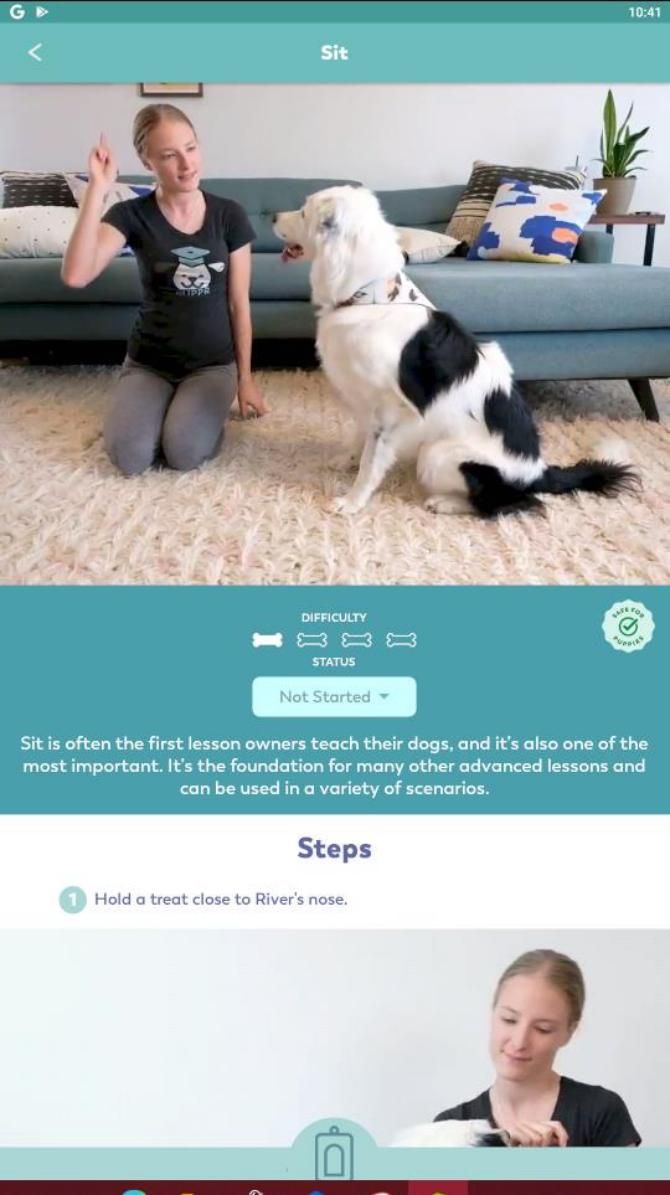
Puppr comes packed with over 70 awesome dog training lessons. These programs can teach your dog just about everything it needs to know, and much more.

After you finish teaching your dog how to sit, lay down, and stay, you can move on to the advanced techniques. Not only does the app help you teach your dog how to put away its toys, but it even provides a jump roping lesson. Puppr is a fantastic app for any dog owner who wants to teach their dog the basics as well as some really cool tricks.

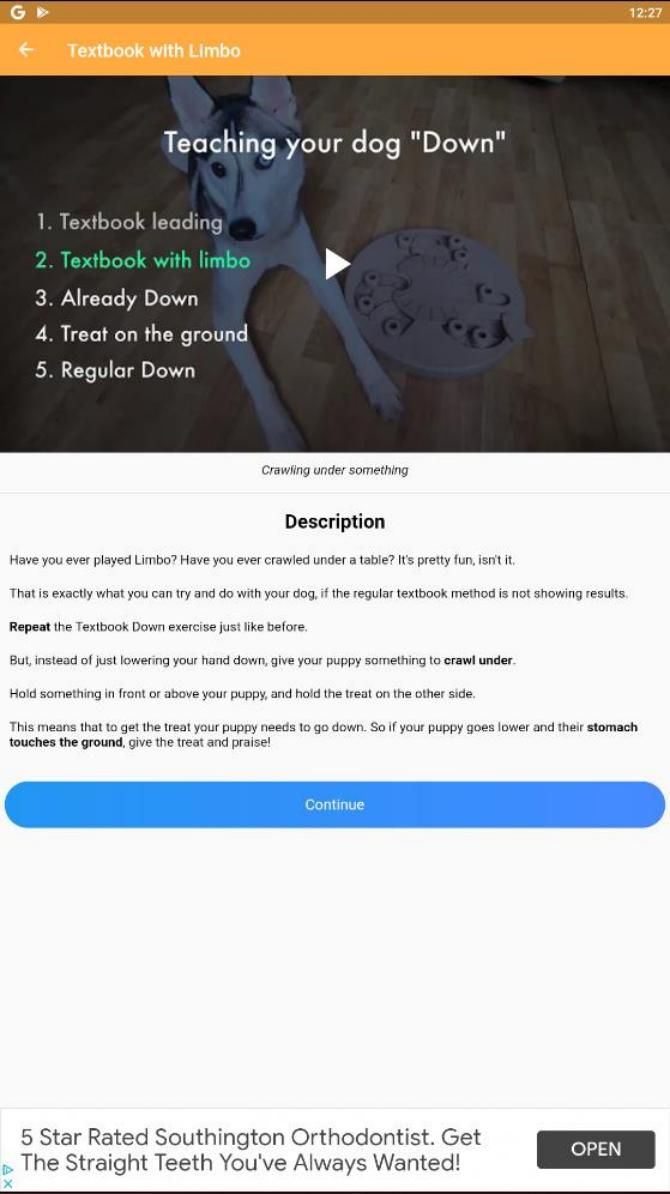
You’ll notice that each lesson comes with short videos featuring professional trainer Sara Carson. This makes it even easier to visualize every step. Although Puppr offers basic lessons for free, you’ll have to purchase additional lesson packs to get the most out of your training sessions.

Download: Puppr for Android | iOS (Free, in-app purchases available)

3. Pupford

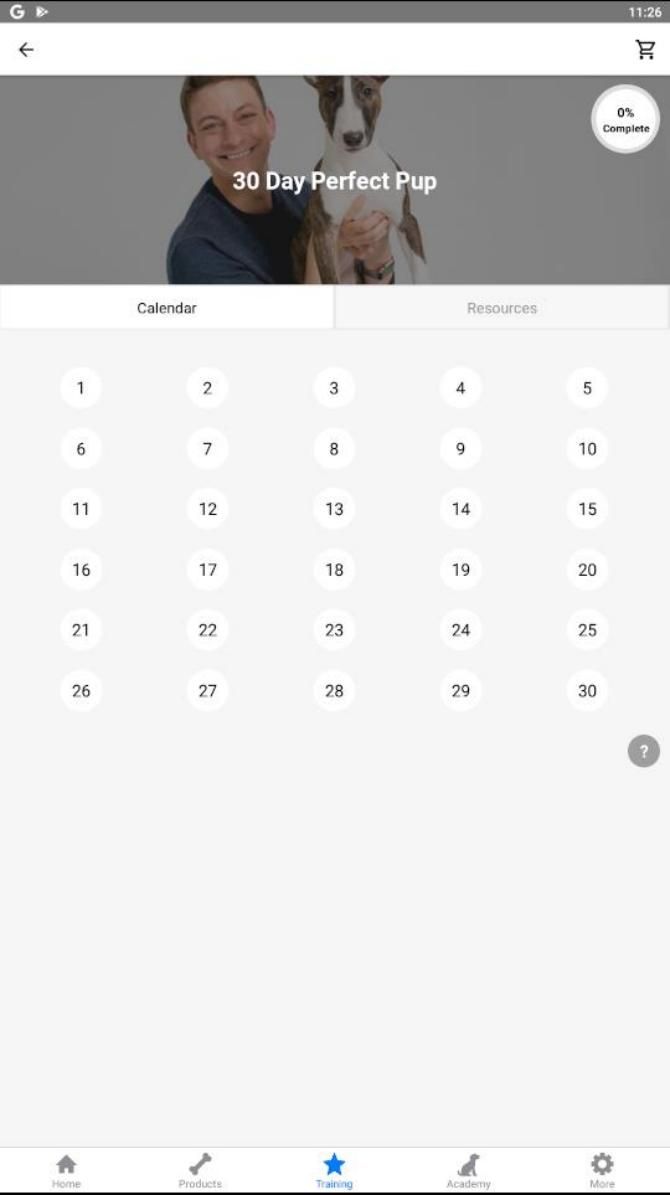
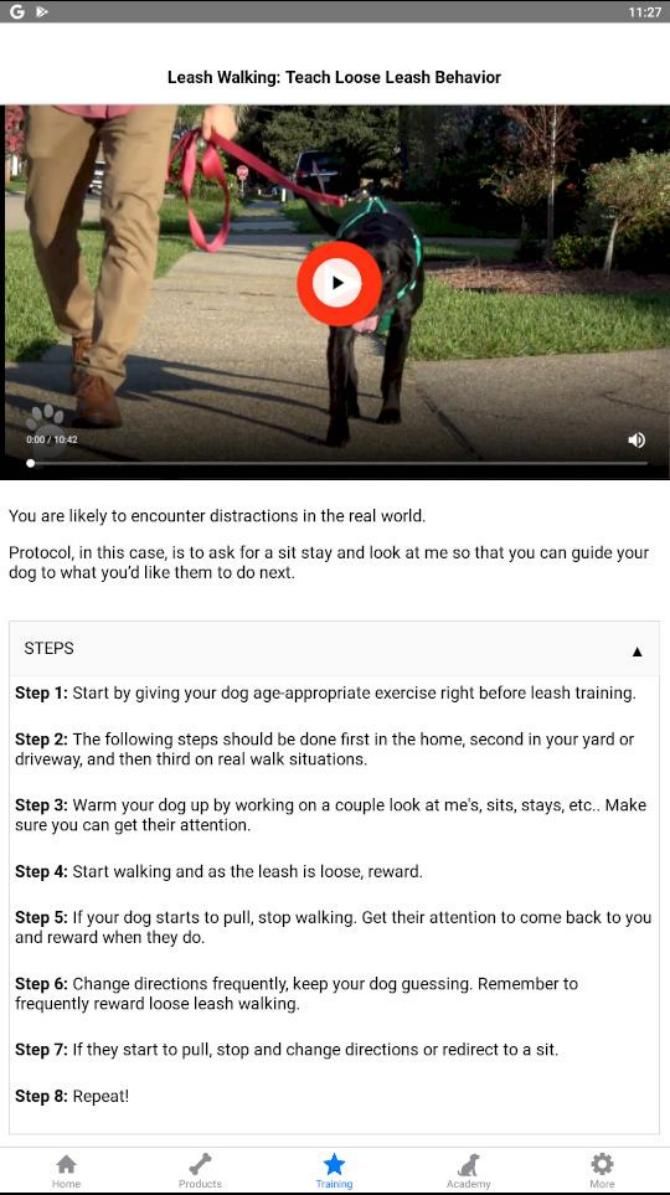
Pupford provides you with a 30-day training program taught by Zak George, a famous dog trainer. Each training session comes with a helpful video, as well as written step-by-step instructions. Some lessons include crate training, leash walking, teaching your dog to lay down, and more.

During the 30 days of training, you’ll sometimes have to complete the same lessons multiple days in a row—this helps reinforce your dog’s understanding. When you’re finished with the 30 days, you can always try out Pupford’s behavior-specific training sessions. These lessons help curb your dog’s bad habits, like biting and jumping.

You’ll have to subscribe if you want unlimited access to additional training programs. For $10/month, you can unlock every premium course, or you can pay just $20 to access a single premium course. Despite the premium add-ons, you can still use the app for free to cover the basics of training.

Pupford also contains various promotions for certain pet treats, but you can always stick to buying your own treats from your favorite online pet shops for pet supplies.

Download: Pupford for Android | iOS (Free, in-app purchases available)

4. GoodPup

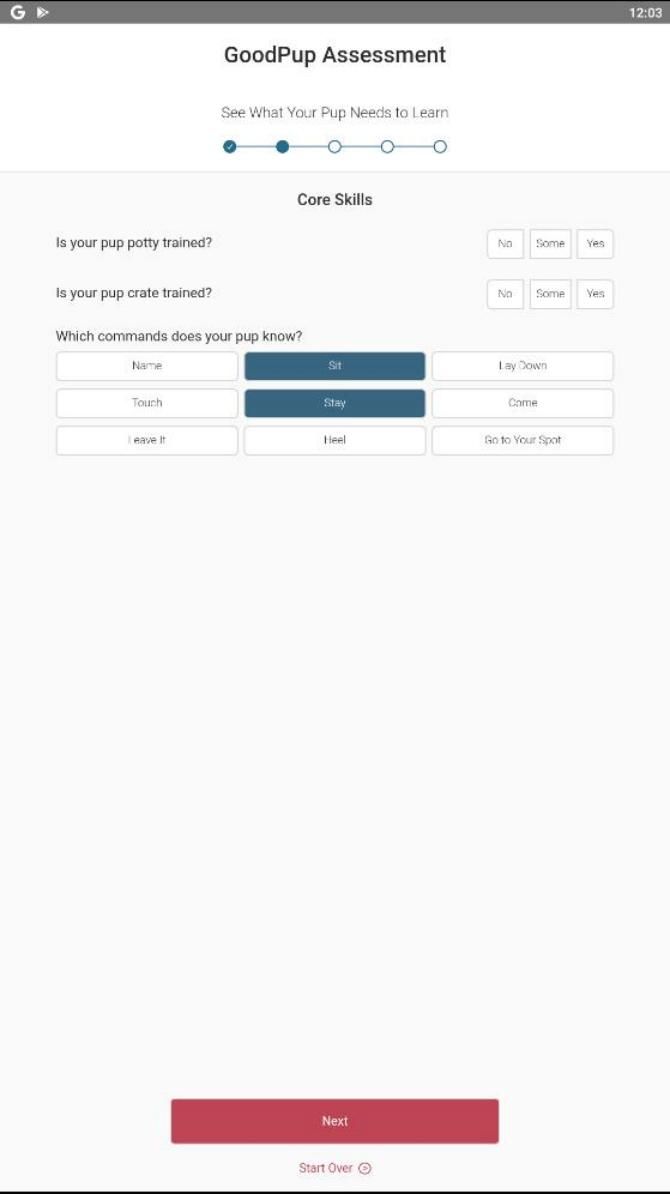
If you feel that you can’t handle dog training on your own, you might want to look into GoodPup. This app sets you up with a personal dog trainer who you’ll get to talk with via weekly video chats. In case you have any questions during the rest of the week, you can use the app’s built-in text chat to talk with your trainer.

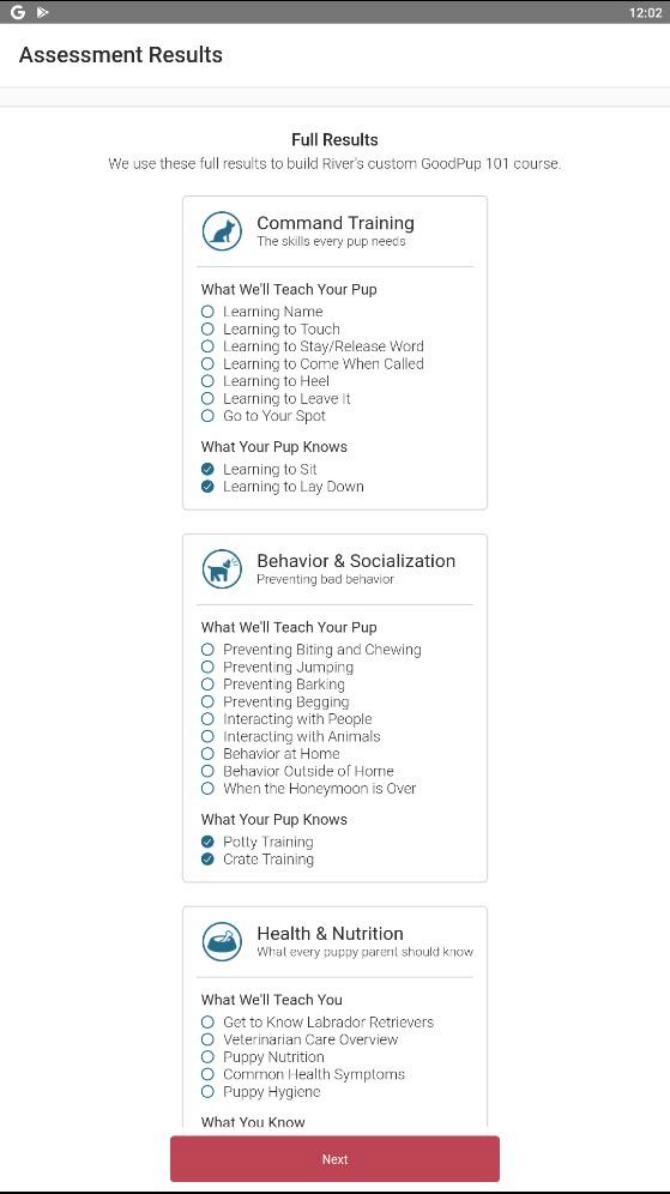
GoodPup tailors training sessions to your dog’s needs. When you first install the app, GoodPup will ask you several questions about your dog’s age, the commands it knows, and what specific behavioral problems it has. Answering these prompts helps GoodPup create a custom course for your dog.

When you’re finished answering questions, you’ll get to look over the custom course generated by GoodPup. Depending on your dog’s training experience, your course might contain lessons on the eight basic commands, potty and crate training, or socialization skills.

While the app download is free, you’ll have to pay a subscription of $30/week for the training sessions.

Download: GoodPup for Android | iOS (Free, subscription required)

5. Pocket Puppy School

Pocket Puppy School comes in handy for anyone who wants a refresher course on dog-owning and training. It’s especially great for those who are planning to adopt a puppy—and if you are, make sure to adopt from one of these ethical sites for puppy adoption.

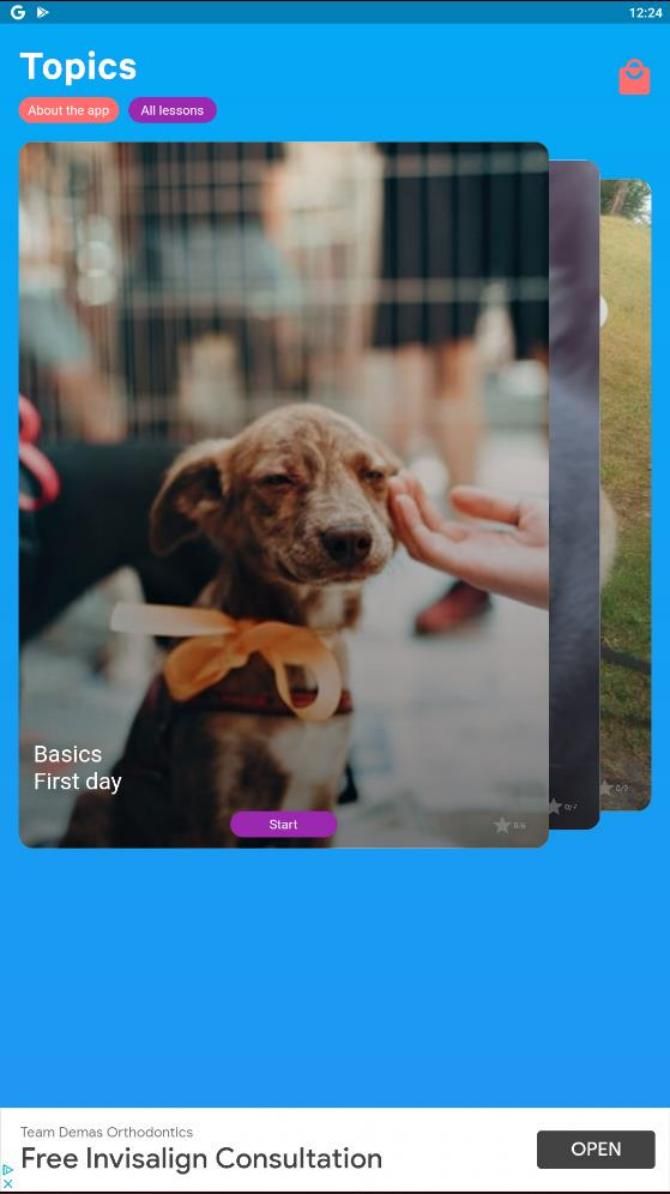
Upon opening the app, you’re greeted with a carousel of information and courses that you can easily swipe through. You’ll want to start by reading the introduction to dog-owning, which is filled with engaging information helpful for first-time owners. Other lessons include basic commands, potty training, simple tricks, and more. The app developers are always adding new content, so you can expect more lessons in the future.

In order to unlock the next lesson, you’ll have to wait another day. However, you can get around this waiting period by watching a short ad. You might get tired of watching promotions, but at least you don’t have to pay to unlock any extra content!

Download: Pocket Puppy School for Android (Free)

Better Dgog Training Means Better Behavior

When you follow the training instructions in any of the above apps, your dog just might surprise you. Before you know it, your pup will know all the essential commands along with some clever tricks.

If you’re leaving your pet home alone for the first time, it’s normal to be nervous. After all, who knows what your mischievous furball might get into? For some peace of mind, you might want to consider installing one of these handy pet cameras to keep an eye on your dog’s behavior.

Read the full article: The 5 Best Dog Training Apps for Android and iPhone


Read Full Article
MacKeeper Has Cleaned Up Its Act, but Should You Use It?


makeeper-cleanup

Few programs in the Mac world have a reputation quite as bad as MacKeeper. But now it’s back, with a new look and a cleaned-up image.

So is it time to reconsider this controversial software? Let’s take a look.

What Is MacKeeper?

If you’ve heard of MacKeeper, chances are that what you’ve heard was negative. You may have learned of the aggressive advertising and scareware tactics that tried to get people to pay to fix problems they didn’t have. There was also the data breach that exposed information on some 13 million of its users.

This got so bad that other antivirus products started flagging up MacKeeper as a PUP—potentially unwanted program.

Now MacKeeper is on its way back. There’s a new management team in place, the company has cleaned up its advertising (and the affiliates blamed for ruining its reputation), and the program is now notarized by Apple.

So whereas once you might have steered clear of MacKeeper, is it now worth installing?

What MacKeeper Does

MacKeeper is an all-in-one performance and security solution for Mac. It’s split into four modules: cleaning, performance, security, and privacy. There are three tools in each section, and most are free.

mackeeper homepage

An optional subscription gets you antivirus protection and a VPN. And as it’s aimed at less tech-savvy users, you also get tech support via online or live chat as part of the premium plan.

When you launch MacKeeper for the first time, it scans your Mac, running through parts of each of the modules and highlighting elements to fix. If you haven’t paid up by this stage, it will warn you that your Mac is unprotected and vulnerable. However, there’s no obligation to subscribe.

mackeeper first scan

MacKeeper runs through a basic scan every day and alerts you to any major problems.

You can also access all of its individual utilities separately. Here’s a closer look at what they do.

Cleaning and Performance

The Cleaning and Performance modules include a set of tools for tuning up your Mac. They are effectively software solutions to hardware problems.

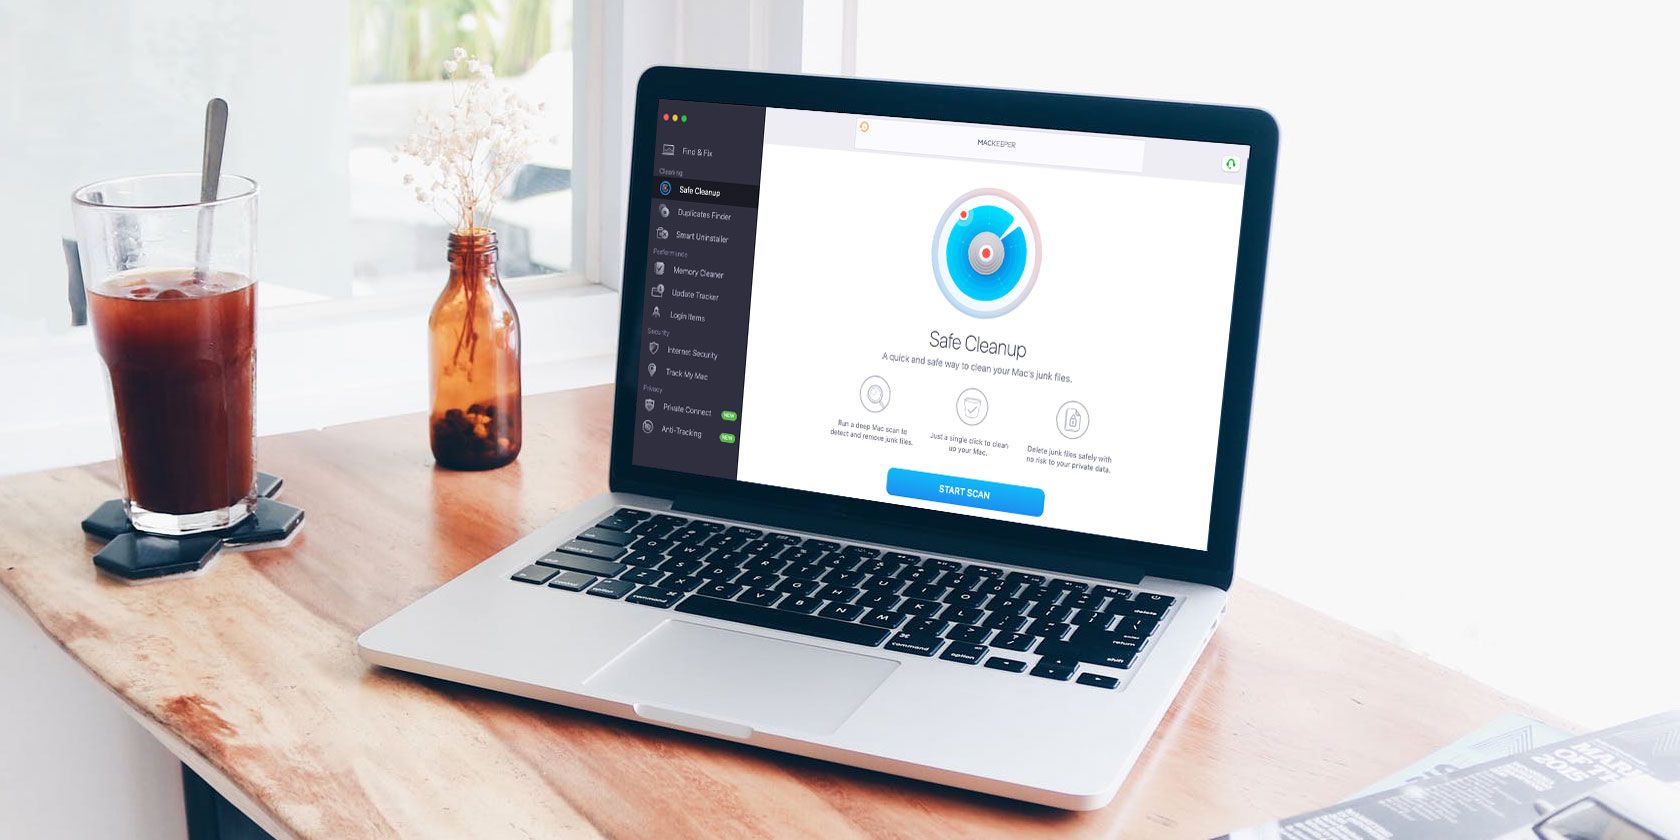
In the cleaning section you get Safe Cleanup, which searches for unwanted data like language files, logs, and caches. There’s also Duplicates Finder, which tracks down multiple copies of the same file. Smart Uninstaller can cleanly remove apps, as well as delete the files left over from your previous uninstalls.

mackeeper smart uninstaller

The benefits are modest, though. Between them, these tools offered to reclaim around 2.8GB of space on our drive. Excluding caches, which macOS usually takes care of on its own, this fell to around 800MB. For reference, MacKeeper itself used around 240MB with everything set up and installed.

These utilities are okay for the rare spring clean, but if you need to use them regularly, you’ve got bigger problems. Buy an external drive for your Mac instead to permanently increase your storage.

In the Performance module, there’s the Memory Cleaner. This attempts to free up RAM by shutting down background apps, but achieves the same result as a reboot. In any case, macOS handles memory well enough without the need for third-party apps.

mackeeper memory cleaner

Login Items also repeats something already in macOS: the ability to control what launches when you boot your Mac.

The tool lets you see some system processes that launch (as well as apps), yet offers no meaningful guidance on what you should or shouldn’t disable. There’s a reason Apple keeps this hidden.

The best of the bunch was Update Tracker. This finds updates to the programs you’ve installed from outside the App Store. It worked with most—but not all—of our apps, finding 16 available updates.

Security

Security is what MacKeeper is best-known for. The main part of the Security module is Antivirus, which you must pay to activate.

Strangely, real-time protection is not enabled by default. Given that the app is aimed at more casual users, this seems like something that they could easily overlook. As well as real-time scanning, you can do a full scan, or a custom scan to check single files or folders.

mackeeper antivirus

It’s hard to judge the efficacy of antivirus software until you get infected. Plus, the jury’s still out on whether Macs even need antivirus software.

A full scan took around an hour and, unsurprisingly, turned up no issues. Unfortunately, services like AV Test don’t yet have independent tests of MacKeeper’s antivirus capabilities, so it’s hard to judge exactly how effective it is.

The other security tools are Adware Cleaner, which scans for adware and other malware. This also does real-time scanning. Again, you have to activate it, this time through a setting tucked away in Preferences.

mackeeper adware scan

There’s also a copy of the Find My feature installed on every Mac, which MacKeeper calls Track My Mac. To justify its existence, it has one extra feature: it will take a photo of anyone who tries and fails to log in to your computer.

You have to install and activate this separately, a process which involves granting MacKeeper permission to track your location and use your camera.

We had problems with it. At first it struggled to find our location, and later wouldn’t work at all, prompting a full reinstall of MacKeeper to get it going again. We’ll stick with Apple’s version.

Privacy

The final module is Privacy. This offers StopAd, which installs ad-blocking extensions to Safari or Chrome. It also includes ID Theft Guard, which monitors email addresses for potential data breaches.

Theft Guard shows if your addresses have been involved in breaches and how, including listing any compromised passwords. You can add as many email addresses as you like, but have to verify them to prove that they’re yours.

mackeeper id theft guard

The main part of the Privacy module is a VPN called Private Connect. It’s a no-frills service—you get hundreds of servers to pick from across dozens of locations, but can’t use any advanced features like a kill switch, for example.

During testing we didn’t experience any dropped connections, but we noticed a small impact on performance. Choosing the Best Server option, we hit an average speed of 36Mbps and a ping rate of 57ms, compared to 47Mbps and 18ms with it turned off.

Connecting to New York from the UK, we averaged 25.73Mbps, with a ping rate of 159ms. That’s still fast enough for Netflix, though.

mackeeper vpn

While more serious users like to research their VPNs, and might find that info on the MacKeeper service (including a logging policy) is a little scarce, it’s a good choice for more casual users.

How to Uninstall MacKeeper

Whenever a program has a questionable reputation, one of the main concerns is how easy it is to uninstall.

Dragging MacKeeper to the Trash doesn’t quite do the job. It leaves a few traces elsewhere, including a sizeable footprint in the /Library/Application Support/MacKeeper folder.

We’d recommend using a free tool like AppCleaner to make sure you get it all removed.

Should You Use MacKeeper?

The good news is that MacKeeper’s dodgy days appear to be behind it. However, that’s not the same as saying it’s worth installing. The free tools mostly fall into three groups, and don’t offer much value.

First are the ones that duplicate features already in macOS. Second are tools that don’t really do anything. And finally, other features have countless smaller alternatives freely available in the Mac App Store or elsewhere. (There are lots of ways to uninstall apps on a Mac, for example.)

Update Tracker was the most useful for us and lacks free competition. But if you don’t intend to pay, you’re better off finding and downloading smaller alternative apps as and when you need them.

As you’d expect, the paid components—the VPN and antivirus tools—are the best parts of MacKeeper. But there’s no shortage of alternatives to these, either. And there’s no getting away from the fact that MacKeeper is at the pricier end of the market.

mackeeper prices

MacKeeper costs $19.95 a month, or $143.40 for a year. By comparison, equivalent subscriptions to the anti-malware service Malwarebytes and the VPN Private Internet Access would cost $79.91 for 12 months’ use.

You could also just use free Mac antivirus software instead.

Essential Mac Utilities

Bloated, all-in-one packages are a bit of an old-fashioned concept. It’s usually easier to use small utilities to solve specific problems, or to learn how to do it yourself. Our guide on how to free up disk space on macOS will get you started.

And remember, there’s a limit to how much software can do. Always keep an eye out for the signs that it’s time to replace your Mac.

Read the full article: MacKeeper Has Cleaned Up Its Act, but Should You Use It?


Read Full Article