07 July 2020

5 Personal & Financial Tools for Freelancers Anywhere to Achieve Success


Tools for Freelancers

What do you need to have a successful freelance career? Start with these helpful resources for independent contractors and freelancers to make the most of the gig economy.

You can be your own boss with unparalleled freedom. But that elbowroom comes with its own challenges. You need to know the right tools to stay productive and hit deadlines. You need to manage finances and find job opportunities for freelance gigs.

Millions of people across the world have become successful freelancers. They’re sharing their hard-won wisdom through these tools and resources.

1. We Freelancing (Web): Curated List of Freelance Apps, Books, and Podcasts

We Freelancing is a curated list of books, podcasts, articles, apps, and other resources for freelancers

The best independent professionals have a common mantra: keep learning. We Freelancing has a variety of freelance-oriented resources for beginners and veterans.

Jess Eddy has curated a list of books, articles, and podcasts that teaches you about how to work independently. All these resources are something she has checked out herself, and there’s a nice variety of ideas that will help you build a career. Many of the podcasts are ongoing, so you can keep learning every week.

As with most such curated lists, We Freelancing also has a section of digital apps and tools. You’ll find free resources for time-tracking, invoicing, self-promotion, freelance job boards, and more. Finally, you’ll also get rate calculators. The collection features some of the essential apps and sites every freelance professional should check out.

2. The Freelancer Toolkit (Web): Legal, Insurance, and Other Resources for Freelance

The Freelancer Toolkit by Twine for legal, insurance, financial, and other resources

Job listings website Twine has put together a neat toolkit for freelance professionals, whether you use Twine or not. It includes country-wise breakdown for topics like finance, law, and insurance.

Freelance laws change according to the country you’re in, and can even change according to the state. Twine’s freelancer toolkit is excellent to find out how you can protect yourself legally, apply for insurance (since a company isn’t going to do it for you), and handle business administration and finances.

Using the website is straightforward. You’ll first have to choose whether you’re working in the US, UK, or the rest of the world. Then, select categories like banking, legal, work, accounting, news, productivity, environment, education, business administration, insurance, or creative.

3. FYI Templates (Web): Free Freelance Templates for Docs, Spreadsheets, and Other Apps

FYI offers free templates freelancers need for different apps and different situations, like invoicing, contracts, agreements, etc

As an independent professional, you can use all the help you can get. FYI offers a collection of free templates for a variety of scenarios you’ll come across, and for any type of app you like to use. Find templates for Airtable, Github, Google Docs, Google Sheets, Microsoft Office, Notion, Pandadoc, and Trello.

These are user-made, free-to-use templates that FYI has curated for freelancers. You’ll find invoices, payment agreements, to-do lists, and habit trackers. There are contracts for standard freelancing, consultancy, marketing, and others. You’ll also get marketing proposals, pitch decks, scope of work agreements, and other documents that you need to use with different clients.

Click any template to open it directly in the app it’s for. You can filter the templates by category or app, and even suggest other useful ready-to-use resources you’ve found online.

4. Freelance Taxation (Web): How Taxes Work for Freelancer Professionals in the US

Susan Lee explains the ins and outs of taxation and financial planning for freelancers

When you go to work and have to buy lunch, is that a business meal? What about when you go out with friends but discuss a bit of business, does that qualify and can you deduct it from your taxes? Freelance Taxation answers all the common questions about taxes and finances for freelancers, and busts some myths.

Taxes are complicated when you’re self-employed or an independent contractor. If you’re working in USA, professional financial planner Susan Lee’s website has most of the tax information you’d need to know.

Lee has planned finances for freelancers and artists in New York City for over 20 years. Her experience and essential knowledge is now available in simple terms. As a freelancer, you’ll often wonder what are deductible expenses for you, or what you can claim as a “business meal.” All her claims are linked to government resources.

The website mainly offers advice on managing expenses, deductible expenses, and managing finances. There’s a separate section for useful books and websites, and please check the New York State and City freelance links if you fall under that because they’re a bit different from the other states.

5. Going Freelance (Web): Free Online Course on How to Build a Personal Brand

Learn how to build a personal brand for freelance success in this free online e-course at Skillshare, by the founders of Working Not Working

One of the most repeated pieces of advice you’ll find from successful freelancers is that you need to build your personal brand. What does that really mean, and how does one go about doing it? Skillshare offers a free online e-course to teach that.

Clairse Wasserman and Justin Gignac, co-founders of creative company Working Not Working, break down what you need to do to be a successful freelance professional. They’ll take you through the steps of creating side-projects, business fundamentals, and personal portfolios.

Pay attention to the two mini-sessions on marketing yourself and authentic networking for personal brand building. Do watch the entire course. It is only 51 minutes long, and it’s remarkable that they’re sharing deep insights for free.

Apply for the Freelancers Relief Fund

A quick note for US-based freelance professionals. The Freelancers Union has put together a relief fund for those independent workers facing a threat to their livelihood, due to the effects of COVID-19. There’s a potential total of $1000 in financial assistance per household, if you qualify for their requirements. Applications are currently closed, but keep an eye on it.

Best Freelance Job Listings and Boards

So once you are ready to take on the freelance world with the above resources, how do you go about landing a gig? You look through online job listings, of course. Whether you want to work remotely or locally, it’s best to hit job boards catering to your skills.

On the internet, there are a few types of freelance jobs that get more attention than others. To increase your chances, find out which are the best freelance jobs and job listing boards for each of them.

Read the full article: 5 Personal & Financial Tools for Freelancers Anywhere to Achieve Success


Read Full Article

The Best Way to Give a Keynote Presentation Over Zoom or Skype


presentation-video-conference

When working remotely, you may need to deliver a Keynote presentation over Zoom, Skype, or other video conferencing apps. This is daunting at first—especially if you aren’t tech savvy—but there are two simple methods you can use to do it.

Keynote Live is the best option, which lets you share your presentation slides with anyone online. If that isn’t available, you can share your Mac screen over Zoom or Skype instead. We’ll explain each of these methods in more detail below.

Share Your Presentation Online With Keynote Live

Keynote Live waiting page in Safari

Keynote Live is a tool that lets you share your presentation online with up to 100 people at once. Invited members can tune in to watch your presentation from any device: iPhone, iPad, Mac, Windows PC, or other mobile devices. All they need to do is click the link you send them and open it in Keynote or a web browser.

Using Keynote Live, you can view the Presenter Display to keep an eye on your current slide, next slide, and Presenter Notes while only showing your current slide to people watching.

Presenter Display in Keynote

Unfortunately, Keynote Live doesn’t let you share audio with your audience. The best way to use it is to start a group call using Zoom, Skype, or other video conference apps, then direct everyone to view your presentation in a separate window.

That way, people can still listen to you over the conference call while viewing the slides in Keynote Live.

Here’s how to use Keynote Live in three simple steps.

Step 1. Invite People to Your Keynote Live Presentation

Open your presentation in Keynote and make sure your slides are ready to go. Then click the Keynote Live button in the toolbar; it looks like a laptop with two waves coming out of it.

Keynote Live button

In the popup window that appears, click Invite Viewers and send a link to your contacts over Mail, Messages, or AirDrop. Alternatively, choose to Copy Link from the dropdown menu and paste it into the chat in your Zoom or Skype call.

If needed, add a password to your presentation to keep it private. Click More Options and enable the Require Password box to do so. Make sure you give the password to everyone who needs it, alongside the invitation link.

Keynote Live Invite Viewers option

After sharing the link for your Keynote presentation, click Play Later so you can wait for everyone to get ready before starting the presentation. This gives you time to start your conference call, invite more members, or make any final adjustments to your slides.

Step 2. Start a Conference Call Over Zoom or Skype

Since Keynote Live doesn’t let you share audio, you still need to start a call in Zoom, Skype, or any other conferencing app for people to hear you. Make sure everyone is attending your conference call before directing them to Keynote Live to watch the presentation.

Ask people to click the link in the invite you sent them or copy a new link into the chat box for Zoom or Skype. To copy a new link, click the Keynote Live button in Keynote, then click Invite Viewers > Copy Link.

Before starting the presentation, you may want to turn off your camera in the video conferencing app. This way, people can’t watch you while you’re presenting, prompting them to switch to the Keynote Live window instead.

Step 3. Start Presenting in Keynote Live

When you return to the Keynote app, you should notice the Play button has turned green. The number next to the button tells you how many people are currently waiting for your Keynote Live presentation to begin.

To start your presentation, click the Play button and choose to Play on Keynote Live.

Keynote takes a moment to load the slideshow. During this time, it uploads your slides to the cloud to reduce delays for those watching.

Keynote Play button with Keynote Live option

When the presentation starts, press the X key to switch between Presenter Display and Audience Display. In Presenter Display, you can view your current slide, next slide, Presenter Notes, and the number of viewers. Anyone viewing your presentation only sees the current slide.

Use the Left and Right arrows to navigate through your slides, or press Esc to exit.

After finishing your presentation, click the Keynote Live button and Turn Off Keynote Live. Then finish up your call in the video conferencing app.

Share Your Keynote Screen Using Zoom or Skype

If Keynote Live isn’t available to use, you can still deliver your Keynote presentation by sharing your screen over Skype or Zoom. This method isn’t as elegant as Keynote Live, but it’s a better option if you don’t want to use Keynote in fullscreen presentation mode.

Depending on the options in your video conferencing app, you can choose to share a portion of your screen, a particular app window, or your entire computer screen.

It’s best to share a portion of your screen, which means you can still view your next slide and Presenter Notes. Zoom allows you to do this, but Skype doesn’t. Instead, you need to share your entire Keynote window to deliver a presentation using Skype.

How to Share a Portion of Your Screen Using Zoom

Open your Keynote presentation and go to Keynote > Preferences in the menu bar.

From the Slideshow tab, enable the option to Allow Mission Control, Dashboard and others to use the screen. This lets you switch between apps after starting your presentation.

Now go to Play > Rehearse Slideshow from the menu bar. Press X to enable Presenter Display, which shows your current slide, next slide, and Presenter Notes.

With Keynote ready, open Zoom and start your video conference call.

Click Share Screen at the bottom of the Zoom window, then go to Advanced > Portion of Screen. Click Share to start sharing a portion of your screen.

Zoom Screen Sharing options

If prompted, open the System Preferences on your Mac and go Security & Privacy > Privacy.

In the sidebar, click Screen Recording, then enable the option to allow Zoom to record your screen. You may need to restart Zoom and start sharing your screen again.

When you start sharing your screen, return to Keynote and resize the sharing box to match your Current Slide. This is what people will see in your video conference call. Click a blank space in Keynote, then use the Left and Right arrows to navigate through your presentation.

Keynote Presentation with Screen Sharing square

When you’re finished, click Stop Share at the top of the screen and end your Zoom call.

How to Share Your Keynote Window Using Skype

Skype and Keynote don’t work particularly well together. Although Skype lets you share your Keynote window over a video call, this stops working the moment you enter fullscreen presentation mode.

Instead, you can only share your Keynote screen from the edit view. This means your Keynote transitions and animations won’t work. It also means other people will be able to see your Presenter Notes unless you read them in a separate app.

If you plan to do this, we suggest you hide the Format window by clicking the paintbrush icon to minimize clutter on the screen. You should also adjust the zoom level to make your Keynote slides fill as much of the window as possible.

Keynote window without Format window

Now start your Skype call and click the two overlapping squares to share your screen.

Open the Share Screen dropdown menu and choose to Share Application Window, then select Keynote from the list of available apps.

Share Application Window in Skype

If prompted, open the System Preferences on your Mac and go Security & Privacy > Privacy.

In the sidebar, click Screen Recording, then enable the option to allow Skype to record your screen. You may need to restart Skype and start sharing your screen again.

Don’t enter presentation mode in Keynote. Use the navigation bar or the Up and Down arrows to switch between your slides instead. If you launch your full presentation, the people in your call won’t be able to see it.

More Tools for Online Presentation

Keynote is an excellent app for creating stylish presentations with minimal effort. But it isn’t the best option for online presentations. While it’s possible to share your slides over Keynote Live, screen sharing options in the app itself are rather limited.

Fortunately, there are a wealth of other online presentation apps you can use to step up your game. Each of these apps offers better tools for delivering a presentation over Zoom, Skype, and other video conferencing apps than what you find in Keynote.

Read the full article: The Best Way to Give a Keynote Presentation Over Zoom or Skype


Improve Your Emotional Intelligence and Self-Awareness With This $35 Course Bundle


Being able to understand both yourself and other people is valuable in all walks of life. These skills come naturally to some people, but everyone can improve. The Emotional Intelligence & Decision-Making Bundle helps you develop your own mental abilities, with 13 hours of eye-opening classes. You can get the bundle now for just $34.99 at MakeUseOf Deals.

Improve Your EQ

We often think of highly successful people as having a high IQ. While some probably do, far more have a high EQ, or emotional quotient. This means they read the room and understand social signals better than most people. Research shows that people in this category earn $29,000 more on average each year than the rest of us.

If you would like to improve your EQ, this course bundle is the place to start. It includes 10 insightful courses that cover a range of mental techniques that can be applied in everyday life.

The learning begins with an introduction to the main concepts of emotional intelligence. This includes tips on recognizing your own emotions and seeing similar feelings in other people.

The training then branches out, covering a wide variety of topics: conflict management, behavioral styles, personality types, collaboration, decision-making, and more. The courses have an average rating of 4.4 stars, and lifetime access is included.

10 Courses for $34.99

You would normally pay $990 for this training, but you can grab all 10 courses now for just $34.99.

Read the full article: Improve Your Emotional Intelligence and Self-Awareness With This $35 Course Bundle


5 Personal & Financial Tools for Freelancers Anywhere to Achieve Success


Tools for Freelancers

What do you need to have a successful freelance career? Start with these helpful resources for independent contractors and freelancers to make the most of the gig economy.

You can be your own boss with unparalleled freedom. But that elbowroom comes with its own challenges. You need to know the right tools to stay productive and hit deadlines. You need to manage finances and find job opportunities for freelance gigs.

Millions of people across the world have become successful freelancers. They’re sharing their hard-won wisdom through these tools and resources.

1. We Freelancing (Web): Curated List of Freelance Apps, Books, and Podcasts

We Freelancing is a curated list of books, podcasts, articles, apps, and other resources for freelancers

The best independent professionals have a common mantra: keep learning. We Freelancing has a variety of freelance-oriented resources for beginners and veterans.

Jess Eddy has curated a list of books, articles, and podcasts that teaches you about how to work independently. All these resources are something she has checked out herself, and there’s a nice variety of ideas that will help you build a career. Many of the podcasts are ongoing, so you can keep learning every week.

As with most such curated lists, We Freelancing also has a section of digital apps and tools. You’ll find free resources for time-tracking, invoicing, self-promotion, freelance job boards, and more. Finally, you’ll also get rate calculators. The collection features some of the essential apps and sites every freelance professional should check out.

2. The Freelancer Toolkit (Web): Legal, Insurance, and Other Resources for Freelance

The Freelancer Toolkit by Twine for legal, insurance, financial, and other resources

Job listings website Twine has put together a neat toolkit for freelance professionals, whether you use Twine or not. It includes country-wise breakdown for topics like finance, law, and insurance.

Freelance laws change according to the country you’re in, and can even change according to the state. Twine’s freelancer toolkit is excellent to find out how you can protect yourself legally, apply for insurance (since a company isn’t going to do it for you), and handle business administration and finances.

Using the website is straightforward. You’ll first have to choose whether you’re working in the US, UK, or the rest of the world. Then, select categories like banking, legal, work, accounting, news, productivity, environment, education, business administration, insurance, or creative.

3. FYI Templates (Web): Free Freelance Templates for Docs, Spreadsheets, and Other Apps

FYI offers free templates freelancers need for different apps and different situations, like invoicing, contracts, agreements, etc

As an independent professional, you can use all the help you can get. FYI offers a collection of free templates for a variety of scenarios you’ll come across, and for any type of app you like to use. Find templates for Airtable, Github, Google Docs, Google Sheets, Microsoft Office, Notion, Pandadoc, and Trello.

These are user-made, free-to-use templates that FYI has curated for freelancers. You’ll find invoices, payment agreements, to-do lists, and habit trackers. There are contracts for standard freelancing, consultancy, marketing, and others. You’ll also get marketing proposals, pitch decks, scope of work agreements, and other documents that you need to use with different clients.

Click any template to open it directly in the app it’s for. You can filter the templates by category or app, and even suggest other useful ready-to-use resources you’ve found online.

4. Freelance Taxation (Web): How Taxes Work for Freelancer Professionals in the US

Susan Lee explains the ins and outs of taxation and financial planning for freelancers

When you go to work and have to buy lunch, is that a business meal? What about when you go out with friends but discuss a bit of business, does that qualify and can you deduct it from your taxes? Freelance Taxation answers all the common questions about taxes and finances for freelancers, and busts some myths.

Taxes are complicated when you’re self-employed or an independent contractor. If you’re working in USA, professional financial planner Susan Lee’s website has most of the tax information you’d need to know.

Lee has planned finances for freelancers and artists in New York City for over 20 years. Her experience and essential knowledge is now available in simple terms. As a freelancer, you’ll often wonder what are deductible expenses for you, or what you can claim as a “business meal.” All her claims are linked to government resources.

The website mainly offers advice on managing expenses, deductible expenses, and managing finances. There’s a separate section for useful books and websites, and please check the New York State and City freelance links if you fall under that because they’re a bit different from the other states.

5. Going Freelance (Web): Free Online Course on How to Build a Personal Brand

Learn how to build a personal brand for freelance success in this free online e-course at Skillshare, by the founders of Working Not Working

One of the most repeated pieces of advice you’ll find from successful freelancers is that you need to build your personal brand. What does that really mean, and how does one go about doing it? Skillshare offers a free online e-course to teach that.

Clairse Wasserman and Justin Gignac, co-founders of creative company Working Not Working, break down what you need to do to be a successful freelance professional. They’ll take you through the steps of creating side-projects, business fundamentals, and personal portfolios.

Pay attention to the two mini-sessions on marketing yourself and authentic networking for personal brand building. Do watch the entire course. It is only 51 minutes long, and it’s remarkable that they’re sharing deep insights for free.

Apply for the Freelancers Relief Fund

A quick note for US-based freelance professionals. The Freelancers Union has put together a relief fund for those independent workers facing a threat to their livelihood, due to the effects of COVID-19. There’s a potential total of $1000 in financial assistance per household, if you qualify for their requirements. Applications are currently closed, but keep an eye on it.

Best Freelance Job Listings and Boards

So once you are ready to take on the freelance world with the above resources, how do you go about landing a gig? You look through online job listings, of course. Whether you want to work remotely or locally, it’s best to hit job boards catering to your skills.

On the internet, there are a few types of freelance jobs that get more attention than others. To increase your chances, find out which are the best freelance jobs and job listing boards for each of them.

Read the full article: 5 Personal & Financial Tools for Freelancers Anywhere to Achieve Success


How to Do More With Windows 10 Using PowerToys


windows-powertoys

PowerToys are a collection of free utilities for Windows 10 power users. It aims to streamline the Windows experience for greater productivity. PowerToys first launched for Windows 95, then Windows XP, and is now back as an open-source project for Windows 10.

PowerToys lets you bulk rename files, batch resize images, quick launch applications, and more. We’re going to show you how to download PowerToys and how to use the tools it offers.

What Are PowerToys?

PowerToys are a series of free tools that are designed to improve the functionality of the Windows operating system.

PowerToys for Windows 95 was the first version and included 15 components such as:

  • CDAutoPlay to use AutoPlay on non-audio CDs
  • Desktop menu to open desktop items from a taskbar menu
  • Quick res to quickly change screen resolution

The second version of PowerToys was for Windows XP. Rather than being available in a single package, these were separate downloads. Various components were discontinued over its lifetime, but there were 20 components overall such as:

  • Alt-Tab Replacement Task Switcher to show live window previous when switching with Alt-Tab
  • Power Calculator for advanced and complex expressions
  • Webcam Timershot to take webcam pictures at specific intervals

Later operating systems such as Windows Vista, Windows 7, and Windows 8 didn’t receive official support for PowerToys.

In September 2019, Microsoft released the first version of PowerToys for Windows 10 to the public. These utilities are available in a single package. Although designed for power users, they can be used by anyone thanks to the easy interface.

The utilities included in PowerToys for Windows 10 are:

  1. FancyZones
  2. File Explorer Preview
  3. Image Resizer
  4. Keyboard Manager
  5. PowerRename
  6. PowerToys Run
  7. Shortcut Guide

We’ll explore each of these in detail below.

How to Get PowerToys for Windows 10

PowerToys banner

PowerToys for Windows 10 is an open-source project. As such, information about the project can be found on the PowerToys GitHub page.

To download PowerToys, go to the GitHub releases page. This lists all the iterations of the project as it is being continually updated.

The entry at the top will be the newest and will have a “Latest release” tag. Look at the list of Assets for that entry and you will see a file named PowerToysSetup-0.18.2-x64.msi or similar.

Download and run this file to install PowerToys for your system. PowerToys also needs .NET Core 3.1 Desktop Runtime to run, but this is included in the installer.

What Are Windows 10 PowerToys and How to Use Them

PowerToys Windows 10

Once you have downloaded PowerToys, launch it from the Start menu. To view its settings, find the icon in the taskbar and double click it. The settings interface is very easy to use and looks like the rest of Windows 10.

On the first launch, you should toggle Always run as administrator on, then click Restart as administrator.

Also, toggle Download updates automatically (except on metered connections) to the on position so that you don’t need to manually download new versions from GitHub.

By default, all the tools are enabled. You can use the menu on the left to edit the settings for each tool and disable those you don’t need.

1. FancyZones

powertoys fancyzones

In Windows 10, if you click and drag a window to the side or corner of the screen then it will resize according to a basic grid layout.

With FancyZones, you can create advanced layouts for resizing lots of windows.

Head to the FancyZones section in PowerToys and click Launch Zones Editor. Here you can choose the window layout from some defaults, or click the Custom tab to build your own.

Then, when dragging a window, hold the Shift key to see the zones and drag your window into a section to automatically resize it.

You can edit lots of settings for FancyZones within PowerToys, including removing the requirement of holding Shift, so familiarize yourself with them to take full advantage of this utility.

2. File Explorer Preview

powertoys file explorer preview

File Explorer has a preview pane so that you can view the contents of some file types, like documents and spreadsheets, without opening them.

If you don’t see this when you click a file, go to the View tab on File Explorer and click Preview pane to enable it.

With File Explorer Preview in PowerToys, this functionality is now extended to SVG image files and Markdown documents.

3. Image Resizer

powertools image resizer

You can batch resize images on Mac, and now you can do the same on Windows 10.

Simply open File Explorer and select the images you want to resize, right click, and click Resize pictures.

This opens a window where you can select the new image size, along with options like resizing the original (rather than creating copies) and ignoring the orientation of pictures. When ready, click Resize.

Within PowerToys settings, you can edit the default size presets and add your own. You can also change the encoding settings and how the newly resized images are named.

4. Keyboard Manager

powertools remap keyboard

With Keyboard Manager, you can create your own keyboard shortcuts or remap existing ones. This is managed within the PowerToys settings, within the Keyboard Manager section.

For example, you could use uncommon keys to control your media playback or browser navigation. Alternatively, you could do something like changing the shortcut Ctrl + C (which normally copies text) to be paste instead.

There are two sections: Remap keyboard to remap a single key to another key, and Remap shortcuts to remap a shortcut to another shortcut.

Click Remap a key or Remap a shortcut. Click the plus icon to add a remapping. The left side is the existing key or shortcut, while the right is what you want to remap it to. Use the trash icon to remove any remapping. When done, click OK.

5. PowerRename

powertoys powerrename

It can be difficult for the average user to bulk rename files and folders in Windows 10 without using PowerShell. With the PowerRename utility, it’s now a breeze.

In File Explorer, select the files or folders that you wish to rename. Right click and click PowerRename.

This opens a window where you can choose what term to Search for and what to Replace with. There are also helpful options like case sensitive renaming, exclude folders, item extension only, and more.

6. PowerToys Run

powertoys run

PowerToys Run is a search tool for quickly launching applications, files, and folders. You can also use it to switch to things you have open.

By default, press Alt + Space to open it (you can customize this in the PowerToys settings). Then simply start typing to find something on your computer. Use the Up and Down keys to move between results and Enter to launch.

If you wish, use the icons next to each result to Launch As Administrator or Open containing folder.

7. Shortcut Guide

powertoys shortcut guide

Windows 10 is packed full of helpful shortcuts. With Shortcut Guide, you can hold down the Windows key to bring up a screen to remind yourself of some.

Within PowerToys settings, you can change the press duration (900ms by default) and the screen’s opacity and color scheme.

Become a Windows 10 Master

PowerToys is still in active development, so the existing tools could change and new utilities could be added over time. Some of them may even become part of the default Windows 10 operating system.

If you want to be the ultimate Windows 10 user, here are loads of tips and tutorials to master Windows 10.

Read the full article: How to Do More With Windows 10 Using PowerToys


Motorola announces €349 5G phone for Europe, promises a sub-$500 model for US this year


Last year Qualcomm announced the Snapdragon 765, promising to usher in an era of low-cost 5G devices. Motorola, naturally, was more than happy to take advantage of the technology. While the company has been flirting with premium devices (with mixed results), budget devices will almost certainly be the company’s bread and butter for the foreseeable future.

Today the Lenovo brand announced the launch of the Moto G 5G. Set for release tomorrow in Europe, the device is most notable for its €349 ($395) starting price, which puts it well below the market average, as 5G continues to be the realm of the flagship for many competitors.

The device has a number of other features on-board worth noting, including a 21:9 6.7-inch display with a 90Hz refresh rate and a quad-camera set up on the rear. That second bit includes a 48-megapixel main camera with quad pixel tech to allow for more light in shots, an ultra-wide lens, a dedicated macro lens for closeups and a depth-sensing camera.

The macro lens is still fairly rare on smartphones, with Motorola really being the one company that has included the tech on multiple models. For most, it’s probably more a nice curiosity, though there are certainly occasions that call for it. Speaking of curiosities, there’s also a dual-selfie camera on the front, which includes a 16-megapixel main and a wide-angle to cram more people into shots.

Honestly, it’s shaping up to be a pretty interesting product, as far as budget handsets go. There’s also a healthy 5,000 mAh battery, which should go a ways toward keeping the phone alive even with the demands of 5G and the 90 Hz display. The base-level version comes with 4GB of RAM and 64GB of storage, and another  €50 will get you 6GB of RAM and 128GB of storage. It’s also coming to Saudi Arabia and the UAE in “coming months.”

Meanwhile, Motorola’s also promising to deliver on a sub-$500 5G handset for the North American market at some time in the fall, adding to the Moto 5G Mod for the Z line as a method for accessing the next-gen wireless tech with its devices.


Read Full Article

How to Block Gambling Transactions?


As human beings, we have nature to take risks making us feel excited and thrilled. These feelings push us to engage in various activities especially when they can provide potential rewards. In gambling, people have a wide choice to trigger an adrenaline rush with different gambling activities. Despite loads of fun provided by this popular […]

The post How to Block Gambling Transactions? appeared first on ALL TECH BUZZ.


Gamstop UK Scheme: Why do Operators Need it?


Apart from the Football League, the United Kingdom is also popular to be the best place to enjoy remote gambling. This state stands head and shoulders above all the rest of the countries regarding the online gambling market. In fact, the UK online gambling legislation is supervised by the authority body called the United Kingdom […]

The post Gamstop UK Scheme: Why do Operators Need it? appeared first on ALL TECH BUZZ.


Signs of a Trustworthy Gaming Operator for Kiwis


Globally popular for its indigenous Maori culture and its national rugby team commonly known as All Blacks, New Zealand is a country where gambling has become the national entertainment. After the legalization of the gambling area in this nation, the Kiwis have adopted a new pastime despite the prohibition of remote interactive gambling. They can, […]

The post Signs of a Trustworthy Gaming Operator for Kiwis appeared first on ALL TECH BUZZ.


Software Developing Services in Devs Data


Apps have become important parts of human life right now. Many kinds of software and applications are made for various kinds of devices. These are developed for different functions, starting from entertainment, work, health, and other aspects. Of course, these require good concepts and plans. These are important to get the blueprint of the app. […]

The post Software Developing Services in Devs Data appeared first on ALL TECH BUZZ.


Google Docs, Sheets, and Slides Now Support Dark Mode


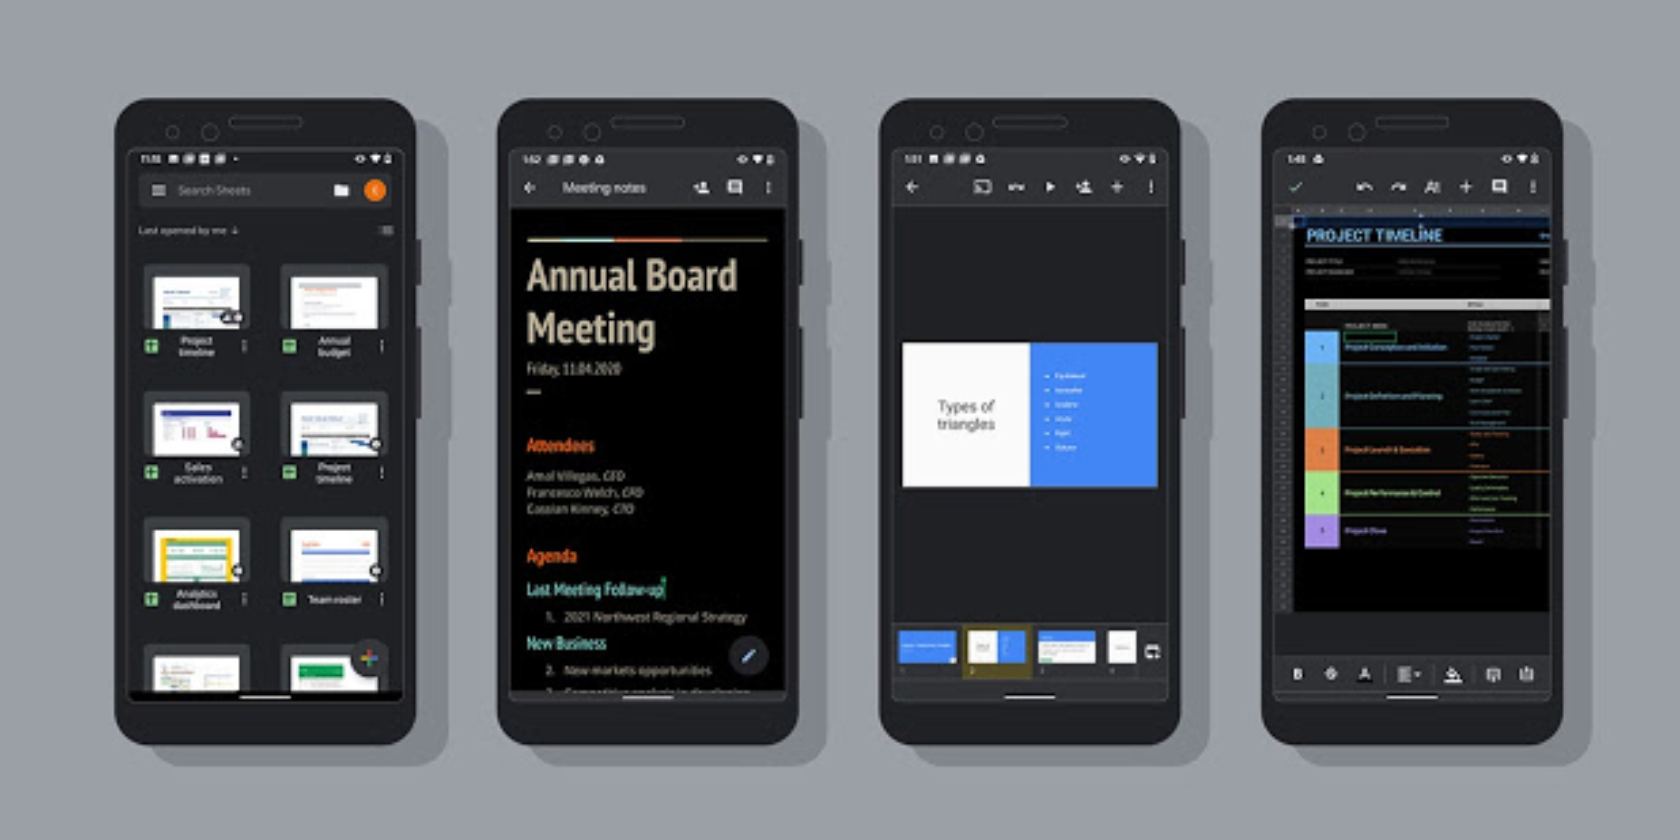
You can now use a dark theme on Google Docs, Google Sheets, and Google Slides. At least on Android. These apps will respect your Android system settings, enabling dark mode by default, but you can also enable or disable dark mode for each app manually.

How to Use Dark Mode on Google Docs, Sheets, and Slides

Like many other apps, Google Docs, Slides, and Sheets will automatically use your Android theme settings. This means that if you have the dark theme enabled on Android (10 or later) dark mode will automatically be enabled on Docs, Slides, and Sheets.

However, if you a. are using an earlier version of Android, b. don’t have dark theme enabled on Android 10 or later, or c. want to change the individual display settings for Google Docs, Slides, or Sheets, you can. Here’s how…

Just open the Google Docs, Slides, or Sheets app on your Android device. In the top-left corner, tap the Menu (three horizontal lines). Tap Settings > Choose Theme, and then select from Dark, Light, or System Default.

If you’re using the dark theme you can also preview a document in the light theme to see how it will look for others. To do so, open the app, then open the document or sheet you want to preview. In the top-right, click More, then tap View in Light Mode.

Other Android Apps That Look Great in Dark Mode

Dark mode is currently only available on Google Docs, Sheets, and Slides on Android devices, and rolling out over the next couple of weeks. Anyone using these apps on their iPhone or iPad are stuck with the light theme. At least for the time being.

While dark modes and dark themes were once considered a bit of a novelty, most apps now support them in some way. And with Android 10 and later offering a universal dark theme you can toggle on and off, there are a host of Android apps you can use in dark mode.

Read the full article: Google Docs, Sheets, and Slides Now Support Dark Mode


Read Full Article

Binary vs. Source Packages: Which Should You Use?


Regardless of the package manager you use, there are two broad ways of installing programs on Linux. You either use a pre-built package, or you compile the program yourself. These days, the former usually wins out by default, but there are times when you may want to consider compiling from the source coude.

What Are Binary Packages?

deb package format

Installing programs on Linux is usually quite different from the traditional way of installing software on Windows. Rather than downloading an installer off a vendor’s website, the files come from a repository of programs that is usually tailored to your Linux distribution. You access this repository using a Linux package manager or a Linux app store.

The files that make up the programs in these repositories come in an archive format. This bundles everything into a single file for easy access and distribution. Debian, for example, uses the DEB format to store and distribute programs. These bundles are called binary packages.

You need a special program to extract these files and install them onto your computer, typically your package manager or app store. These tools also perform other useful functions, such as keeping track of what files you have installed, and managing software updates.

Where Do Packages Come From?

All software consists of lines of text known as source code, written in specific programming languages, such as C or C++. You generally can’t just bundle this source code into an archive and call it a package. These lines need to be translated into a language your computer can understand and execute.

This process is called compiling, the end result creating binaries that your computer can run. The difference between packages and software is that software binaries are stored together inside a package, along with other things such as configuration files.

What Is Installing “From Source”?

emacs makefile

Installing a program “from source” means installing a program without using a package manager. You compile the source code and copy the binaries to your computer instead.

Most of the time, you can download a project’s source code from hosting services such as GitHub, GitLab, or Bitbucket. Larger programs might even host source code on a personal website. The code will usually be zipped up in an archive format (also known as a source package).

A special set of tools help automate the building process. On Linux desktops, this often comes in the form of a command line program called make. Source code written in different languages need specific compilers and commands to change them into binaries. The make program automates this process.

For this automation to work, programs provide make with a makefile that tells it what to do and compile. These days, it’s usually automatically generated by special software such as CMake. This is where you come in. From here, you can specify exactly what features you want compiled into your software.

Building “From Source” Example

For example, the command below generates a configuration file for the Calligra Office Suite using CMake. The file created tells the make program to only compile the Writer component of Calligra.

cmake -DPRODUCTSET=WORDS -DCMAKE_INSTALL_PREFIX=$HOME/kde/inst5 $HOME/kde/src/calligra

Having done this, all a person has to do is run the make tool to compile and copy the results onto their computer. This is done in the following way:

make
make install

While this is the general pattern for compiling programs, there are many other ways to install source packages. Gentoo Linux, for example, has a built-in way of handling this, making the process much faster and easier. But building binary packages takes a few more steps than just the above commands.

Benefits of Using Binary Packages

If you’re using Linux, someone more than likely pre-compiled the software you have installed. This has become much more common than using source packages. But why?

Binary Versions are Easier to Manage

deb package format

Binary packages contain much more than just compiled installation files. They also store information that makes it easy for your package manager to keep track of all your programs. For example, DEB files (the package format for Debian and Debian derivatives) also contain important information such as what other software the program needs to run, and its current version.

This makes packages much easier to install, as you don’t need to worry about what other files you need to successfully make a program run. Your package manager can read that information from the package itself and downloads all the necessary dependencies automatically.

When installing programs from source, unless you compile the code into a binary package of its own, you will be in charge of managing that software. You will need to keep in mind what other programs you need to make it work, and install them yourself.

Binary Versions Have Improved Stability

The people who maintain repositories for your package manager tend to test binaries for problems and do their best to fix those that appear. This can lead to improved stability of programs, something a person who installed from source might miss out on.

Plus packages usually must adhere to a strict set of rules to help ensure they will run on your system. Both Debian and Ubuntu have a policy manual for example, as do many other Linux distributions.

Some programs also rely on different versions of the same software dependency to run. Package repositories do their best to resolve these conflicts so you don’t have to worry about this.

Benefits of Compiling Source Packages

Installing programs from source isn’t something that everyone needs to do, as it’s generally easier to maintain your PC if you stick with binary packages. Even so, there are still some advantages to using this slightly more involved way of installing programs.

Source Code Offers Latest Software

One disadvantage of making programs more reliable is that it takes time to improve and fix. As a result, this can lead to you using older versions of software. For people who want the latest and greatest, they might even prefer a bit of instability in exchange for it.

While there are Linux operating systems which cater for this need without compiling programs, they do have a few drawbacks. For example, software that doesn’t frequently release set package versions is harder to keep up to date in a repository, than installing from source.

This is because binary packages are usually made from official releases of programs. As such, changes between these versions are usually not taken into account. By compiling your own software from source, you can benefit immediately from these changes.

It’s also possible that your Linux operating system doesn’t have the software you want pre-made for you. If that’s the case, installing it from source is your only option.

You Can Pick and Choose

ffmpeg features

Another benefit to using source packages is that you gain more control over the programs that you install. When installing from a binary repository, you’re restricted in the ways you can customize your packages.

For example, look at FFmpeg, the command-line-based audio and video converter. By default, it comes with a huge number of features, some of which you might never even touch. For instance, JACK audio support is available in FFmpeg, even though this software is usually used in production environments only.

Compiling FFmpeg allows you to remove the things you don’t want from it, leaving it lighter and tailored to your needs. And the same applies to other heavyweight programs.

When resources are scarce, removing features can be a great way of lightening the load. It’s no wonder that Chrome OS, found on many low-end computers, is based off Gentoo Linux. Gentoo, being source-based, compiles a lot of its software, potentially making these systems run much lighter.

Why Not Install With Both?

While you probably won’t want to compile packages on a daily basis, it’s something useful to keep in mind. That said, with new universal package formats available from sites such as the Snap Store and Flathub, you’re less likely to need to build from source to get the latest software.

Read the full article: Binary vs. Source Packages: Which Should You Use?


Read Full Article

How to Use Evernote as a Bullet Journal


evernote-as-bullet-journal

Say goodbye to pricey, restrictive store-bought planners. Why struggle with those when you can design your own daily journal based productivity system with a custom set of tools?

Let’s explore one such hybrid system that’s easy to adapt. It combines a digital notebook, Evernote, with a system called the Bullet Journal. No coding experience required whatsoever!

What Is the Bullet Journal?

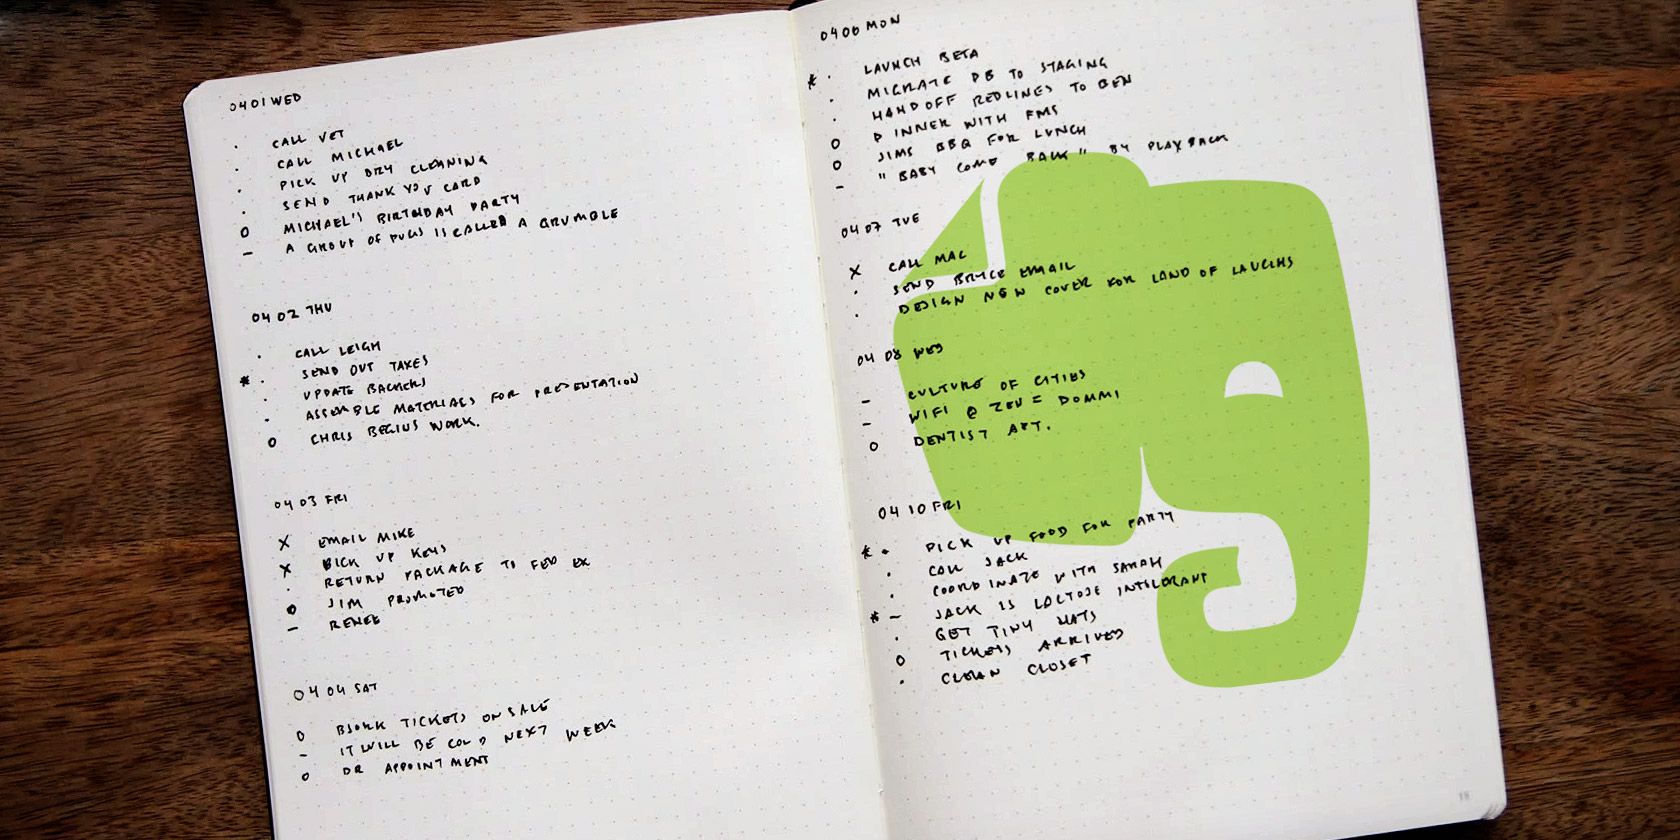
The Bullet Journal, described as an “analog system for the digital age,” is the brainchild of Ryder Carroll, a digital product designer. It gives you a highly customizable way to organize your life or any part of it using pen and paper. (A bullet journal can work as a meal planner, editorial calendar, fitness tracker, and more.)

Essentially, with a bullet journal (aka bujo) you set up daily, weekly, and monthly calendars in a plain notebook. You’re free to alter or omit journal elements that don’t appeal to you. What’s more, with a little creativity, you can digitize your bullet journal in any number of ways. The digital version will be neater, searchable, and convenient for capturing tasks. And you’re less likely to forget it at home!

It’s easy to digitize a bullet journal using an online notebook like Evernote. That’s precisely our focus below. We’ll introduce you to Bullet Journaling and explore how to create a bullet journal in Evernote.

How Does a Bullet Journal Work?

The Get Started section on the Bullet Journal site explains the whole process of creating a bullet journal, but let’s look at it in brief here too.

BuJo Essentials: Modules

Any bullet journal has a simple organizational system. The basic framework contains four main sections or modules:

  • Index
  • Future Log
  • Monthly Log
  • Daily Log

Depending on your personal needs, you can use only certain modules, mix and match them, create custom modules, and get as creative as you want to!

The Index is your contents page. It tells you where in your journal you can find specific sections.

The Future Log is a list of tasks or events that you can schedule months in advance. The screenshot below shows the recommended layout for the Future Log. Note that there are various symbols used to categorize the items listed. We’ll get to these symbols later.

Bullet Journal Future Log

The Monthly Log is a list of tasks or events tied to a specific date within that month or tied to the month as a whole. The suggested layout consists of two pages facing each other:

  • One page lists the month’s dates one after the other.
  • The second page holds the list of tasks you have planned for that month.

The Daily Log drills down even further. Here you can list tasks and events as they relate to specific days of the week. These are the items you are likely to list at the beginning of the week or at the start of each day. We recommend making these lists each evening before you go to bed, in preparation for the next day.

Adding Journal Entries

Once you have your bullet journal modules in place, it’s time to fill them up with rapid logging as you go about your day. Rapid logging consists of several components, that fall into a hierarchical structure:

Topics and Page Numbers: Think of the topic as your header. The header depends on the module you are using.

Bullets and Signifiers: Within each page, you can use short sentences to log tasks, events, and notes. The Bullet Journal uses a series of hand-drawn symbols or bullets to signify each type of logged item.

• = Task

X = Task Complete

> = Task Migrated (In other words, you moved the task to another day. At the end of each week or month, you can review your tasks, and see if there’s anything that you haven’t completed and move it to the next month. Using the “migrated” symbol is a good way to keep track of how much you’re actually getting done compared to what you planned to do.)

< = Task Scheduled

O = Event

= Notes (These indicate pieces of information you want to remember but ones don’t have the urgency of a task or event.)

As the nature of your tasks changes (migrated, scheduled, done) you can change the symbol on the same list. If a task is no longer relevant, feel free to cross it out.

Add further context to your bullets with signifiers:

* = Priority
! = Inspiration
eye icon = Requires research or discovery

These are the basic building blocks of the Bullet Journal system. Feel free to tweak the system as you need. If you prefer a grid for your Monthly Log, there’s no reason not to create one:

Bullet Journal 010

As you can see from the screenshot above by Taz + Belly, the Bullet Journal lends itself well to a blog post scheduling system.

Using Evernote as a Bullet Journal

Create a new notebook called Bullet Journal in Evernote.

Turn Modules Into Notes

We recommend setting up an individual note for each module listed above: Future Log, Monthly Log (one note per month), and Daily Log (one note per week.) The Index module is unnecessary since Evernote is well organized and has a good search mechanism.

The Future Log is easy to replicate by separating each month with a line.

Bullet Journal Future Log in Evernote

With the Monthly Log, it would probably be easier to use the dates and leave out the days of the week. This way you can use Evernote templates in your bullet journal to create a new log for each month. You could also create a table to make it a little bit more organized. The first column would be for events and tasks tied to a specific date and the second column could be for overall planning for the entire month:

Bullet Journal Monthly Log in Evernote

The Daily Log, like the Future Log, is easy to replicate. Be sure to include the date at the beginning of the week in your note title.

Bullet Journal Daily Log in Evernote

Replicate Bullets

It’s no hardship to replicate the hand-drawn bullets used in the traditional Bullet Journal.

To begin with, copy and paste this symbol to use as the primary bullet: •. As the nature of the task or event changes, you can delete the original bullet and use the > and < symbols, or a capital O as required. When you want to cross out an item, use strikethrough, or delete the item itself.

The only symbol that will be impossible to match is the eye. We recommend using the letter i or any suitable easy-to-type special character as an alternative. Formatting with color “codes” is another option of course.

You could also use the checkbox feature on Evernote for new tasks if you prefer.

Add Tags and Saved Searches For Easy Filtering

Evernote notes filtered by tag

Tags: Another organization tool that Evernote brings to the table is tags. With the tagging system, it’s easy to search for specific types of notes.

You can tag items with, say, the name of the month they belong to in your journal. That way you can pull up all the notes from one specific month if you need to. Once you’ve finished all the tasks on a specific note, you can also tag that note as complete. Conversely, you can mark notes with unfinished or open tasks as incomplete.

With Evernote’s advanced search feature, you could also limit your search to a certain range of dates. This can help you get an idea of your two-week forecast, for example.

Saved Searches: Once you’ve established your search parameters, save your searches for quick access. Just go to Edit > Find > Save Search (on desktop.)

Bullet Journaling on Your Phone

Do you want to stick to bullet journaling, but minus an Evernote journal? Consider switching to one of these alternative apps that make bullet journaling effortless. And remember, you don’t have to stick with your desktop or laptop to set up a bullet journal. You’ll find nice note-taking apps to create beautiful bullet journal spreads from your phone too!

Read the full article: How to Use Evernote as a Bullet Journal


Read Full Article