10 June 2020

Where to Score Cheap Movie Rentals and Discounts: The 5 Best Options


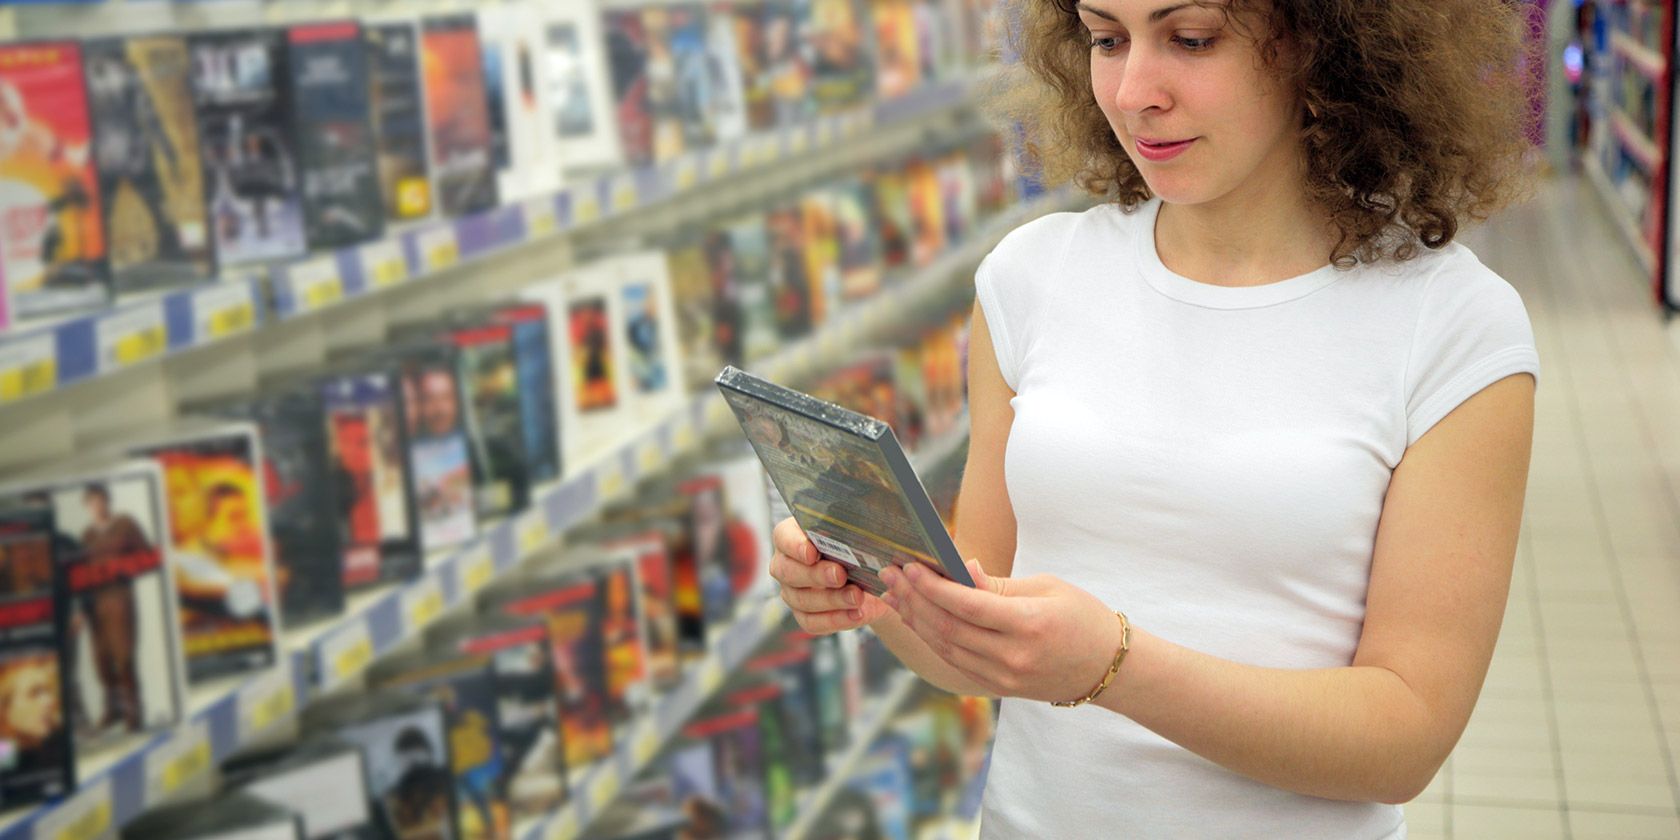
buy-rent-movies

While it’s very convenient to buy or rent movies online, if you’re not careful, it can become an expensive habit.

If you’re used to digital rentals, the thought of getting movies offline might seem like a return to the bad old days when there was a Blockbuster on every corner. However, if you’re looking for the most cost-efficient ways to watch movies, offline is the way to go.

So, in this article, we list the various ways to buy or rent movies cheaply offline. Allowing you to save money.

Why Buying Movies Offline Is Cheaper

There are many ways to get movies for cheap without being stuck with digital copies:

  • On online auction sites like eBay, people sell entire collections of DVDs for dirt cheap.
  • At offline real-world sales, you can often find movie collections for next to nothing.
  • Libraries offer free movies with your free membership.
  • You can often buy movies at retail stores cheaper than you can rent them online.

Note that by “offline movies,” we mean renting or purchasing the movies on DVD or Blu-ray. While you might purchase the movies online, the difference is that you aren’t buying a digital copy that you stream over the internet—the movie is watchable offline.

Let’s look at various options to help you build your movie collection on the cheap.

1. Buy Movies From Bargain Bins

store-discounts

Even though video rental stores are (mostly) gone, plenty of physical businesses still sell movies. Stores like Walmart, Target, and Best Buy all sell DVDs and Blu-rays. While you’ll find the latest releases at full price, most of them have discount bins full of movies that are on sale for just a few dollars each.

In these bins, you can often buy a movie for less than the price of the digital rental. That represents a large savings if you decide to watch the movie again down the road, plus you can easily bring it to a friend’s house or let them borrow it.

The benefits of buying discounted discs include:

  • Instead of renting, you actually own the movie and can watch as often as you like.
  • There are lots of stores in every town that have a steady supply of movies for sale.
  • The quality of discounted physical movies is often better than discounted movies from digital sources.
  • You might find a new favorite “so bad it’s good” movie in the bin.

2. Borrow Movies From the Library

Rack of movies at the library
Image Credit: Radu Bercan/Shutterstock

Of course, free is even better than cheap. If you’re in search of a no-cost movie rental, your local library is worth a visit.

Most libraries have a collection of movies, ranging from children’s movies and documentaries to classics and blockbusters. Libraries receive donations all the time, so the selection often changes. Stop by your local library and you might be able to grab a few titles on your watchlist for free.

The benefits of borrowing from a library:

  • You can usually keep several movies for a few weeks at a time.
  • The offerings are varied, making it a great option if you’re not picky about what you want to watch.
  • If you’re out of town, some libraries allow you to pay a small fee to get a library card there.

3. Rent Movies From Redbox

Redbox Online DVD Ordering

While Redbox now offers on-demand movie streaming, the company got its start with offline rentals and still supports them. In the US, you’ll find Redbox rental kiosks outside grocery stores, supermarkets, convenience stores, and similar locations.

Simply browse through the list of movies, choose one you’d like to rent, and grab the disc from the machine. It costs $1.80/night for a DVD or $2/night for a Blu-ray, with some 4K Blu-ray discs available as well.

As long as you return it to any Redbox location before 9pm the next day, you’ll only pay for one day’s rental. If you need it for longer, simply drop it off when you’re able to. Using the Redbox website, you can browse the available movies and then “reserve” one in a local kiosk so you can pick it up even faster.

If you’re diligent about returning the movie right away, Redbox is the cheapest way to watch new releases without having to pay a fortune for the privilege.

The benefits of renting from Redbox:

  • Get the latest releases at the cheapest price.
  • No membership fees required.
  • A broad selection that updates frequently.
  • Blu-ray quality doesn’t cost much more.

As an alternative, DVD Netflix represents good value for money too if you don’t want to go out to rent the movies yourself.

4. Buy Cheap Movie Bundles on eBay

eBay Lot of DVDs

People often sell huge lots of movies on eBay after having a spring clean or wanting to downsize a DVD collection. Because of this, it’s easy to find huge boxes of assorted movies at a low cost per movie.

Whether you want to participate in an auction or just buy it now, buying movies in bulk like this is a great way to add to your collection.

Of course, this method isn’t perfect. Big lots might have duplicates, ancient movies, or strange titles you don’t care about. However, aside from a few stinkers, most bundles should provide you with a ton of movies to watch at a lower price than renting online.

When shopping for box lots of DVDs on eBay, always zoom into the photo and scan the titles included. Make sure you’re interested in at least some and there aren’t too many duplicates. Keep an eye on shipping costs, which can make the purchase less of a bargain.

And if you can’t afford to buy hundreds of movies at once, look for some smaller DVD lots. You can usually find a few dozen movies in a bundle and still get a good deal.

The benefits of buying on eBay:

  • Buying in bulk results in a low cost per movie.
  • You might find some rare or hidden gem movies included in a collection.
  • Enjoy the fun of the “grab bag” as you sort through the bundle.

5. Visit Auctions and Yard Sales

yard-sale
Image Credit: Paul McKinnon/Shutterstock

Of course, instead of waiting for people to sell their movie collections on eBay, you could always get the same (or better) deals at psychical auctions or yard sales.

AuctionZip is a great site to find local estate auctions near you in the US or Canada. You’ll also probably find listings in your local newspaper or in regional Facebook groups.

Auctions aren’t just for rich people. Most auctions near you will likely be reasonably priced estate sales, where you’ll find the entire contents of a household going up for sale in boxed lots.

The auction listing usually lists the kind of items available. For movies, you’ll want to search ads that contain words like “entertainment” or “media.” Alternatively, you can just show up on the day of the auction and browse through the boxes during the “preview” part.

There’s no obligation for you to stay and buy anything. If you see a big box of DVDs, buy a bidder card, wait until the box comes up, and start bidding! The odds are pretty good that you’ll get the box of movies for cheap.

Yard sales are another great way to buy movies in person. When the weather is nice, you’ll probably find dozens of yard sales going on in your community, and DVDs are a common item for people to sell in yard sales.

These movies are often far cheaper than you could find at an auction or on eBay. Usually the folks running the yard sale are getting rid of the movies because they’ve already watched them and want to make room for more. You may be able to barter on a whole box of them for less than a dollar per DVD.

Whether you just want to grab a couple of individual movies that catch your eye, or boost your physical collection by picking up a huge haul, yard sales are a great resource.

The benefits of buying at auctions or yard sales:

  • Enjoy the fun of the hunt.
  • Get large collections of movies at a low cost.
  • You’re giving the money to someone in your local community instead of a giant retailer.
  • Enjoy talking about the movies with their former owners.

It’s Cheaper to Buy or Rent Movies Offline

We’ve looked at some of the cheapest places to rent or buy movies. As long as you still have a DVD or Blu-ray player, these methods (plus a little patience) allow you to watch tons of films at a far lower cost than renting or buying digitally. And in most cases, they’re yours to keep and watch as many times as you want.

Of course, compared to all these options, renting movies online is extremely convenient. It’s up to your preferences whether spending $5+ on an easy movie rental is better than bothering with the trip to Redbox or hunting on eBay.

If you decide to stick with digital rentals, have a look at the best places to rent movies online to find the best value. And if you don’t want to spend any money at all, here are the best free movie streaming sites to check out.

Image Credit: Pavel L Photo and Video/Shutterstock

Read the full article: Where to Score Cheap Movie Rentals and Discounts: The 5 Best Options


Read Full Article

How to Change Your PSN Name


In 2006, Sony launched the PlayStation Network (PSN). People signed up in droves, and everyone chose a PSN name as their online ID. However, many people didn’t realize that this would be permanent, as Sony refused to let you change your PSN name.

In October 2018, Sony announced that it was finally going to let you change your PSN name. The option was initially launched in beta as part of the PlayStation Preview Program, but now everyone can change their PSN name, either on a PS4 or the web.

How to Change Your PSN Name

To change your PSN name on your PS4:

  1. Go to Settings.
  2. Select Account Management > Account Information > Profile > Online ID.
  3. Enter a new PSN name of your choosing (or one of the suggestions).
  4. Follow the onscreen prompts to complete the change.

To change your PSN name on a web browser:

  1. Sign into your PlayStation Network account and select PSN Profile.
  2. Select the Edit button next to your Online ID.
  3. Enter a new PSN name of your choosing.
  4. Follow the onscreen prompts to complete the change.

Changing your PSN name doesn’t mean you lose your old one. And you can revert back to an old PSN name by contacting PlayStation Support. You can also display your old PSN name next to your new PSN name for 30 days to help your friends notice the change.

Unfortunately, changing your PSN name comes with some risks. While games released after April 1, 2018 support the feature, older titles do not. And some may cause critical issues. Sony recommends checking this list of tested games before changing your PSN name.

Be Sure to Choose Your New PSN Name Wisely

You can change your PSN name once for free, but after that, all subsequent name changes will cost you money. PlayStation Plus subscribers will pay $4.99, while everyone else will pay $9.99. So it would be a good idea to get your PSN name change right the first time.

This is long overdue, as Xbox owners have been able to change their gamertags for a while now. Still, it gives all of you PS4 owners who chose terrible PSN names when you were young a chance to start over. And you can then play the best PS4 exclusives.

Read the full article: How to Change Your PSN Name


Read Full Article

4 Touch Screen Test Apps to Check Your Android Touchscreen


If you feel your Android’s touchscreen isn’t working properly, why not put it to the test with a touch test app? These apps help you identify and diagnose any issues your touchscreen may have, with each of them taking their own approach.

Let’s explore the best touchscreen test apps for troubleshooting your display.

1. Touch Screen Test

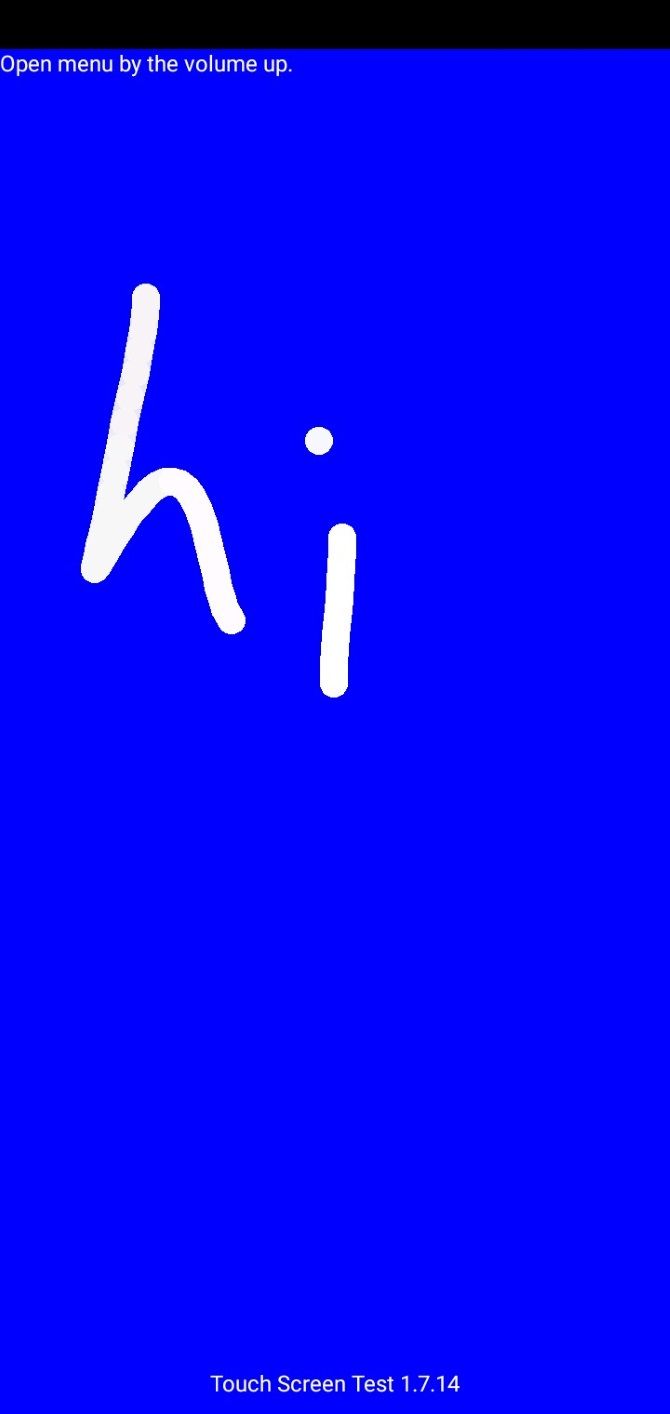
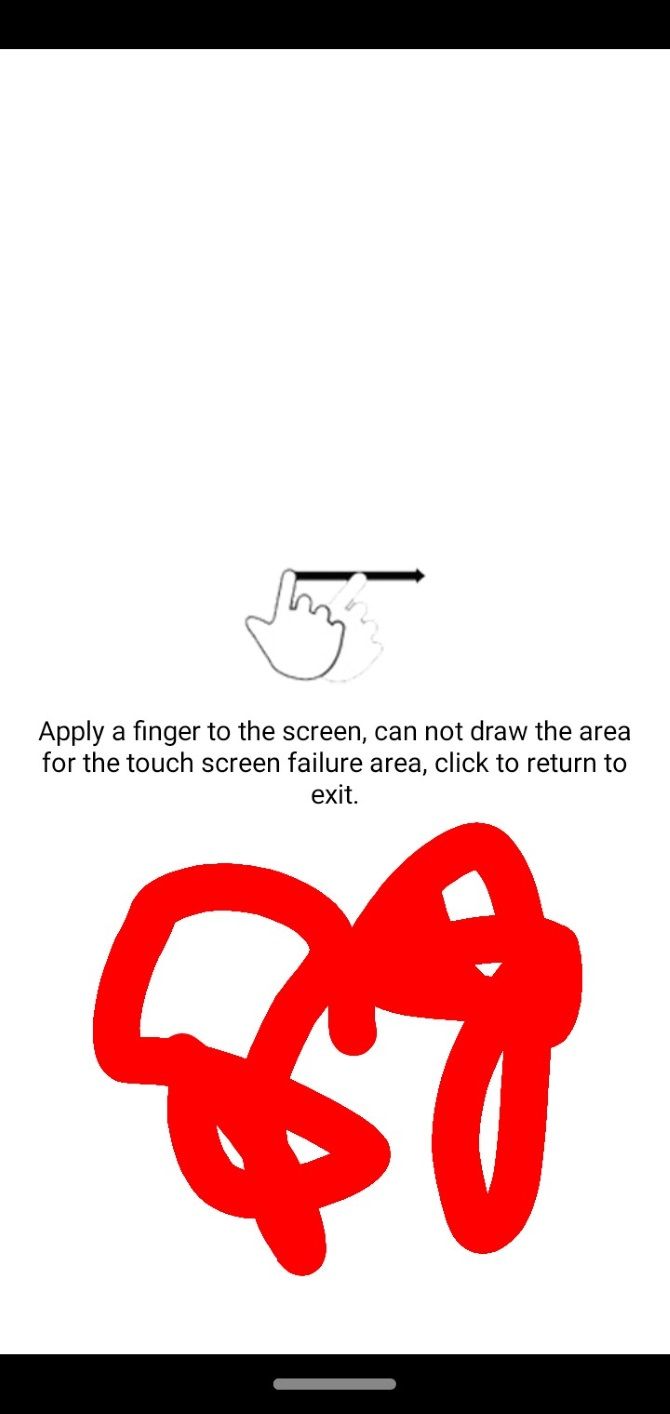
To start, let’s look at a touch test Android app that covers the basics of finding “dead zones” on your screen. Touch Screen Test has no flashy features or banner ads; all it is is a blank canvas that you can draw a line on with your finger.

If you can’t draw in a specific area, it tells you that the touch capabilities there have been damaged. Due to the app’s simplicity, it’s a great choice if you don’t need a feature-packed testing suite.

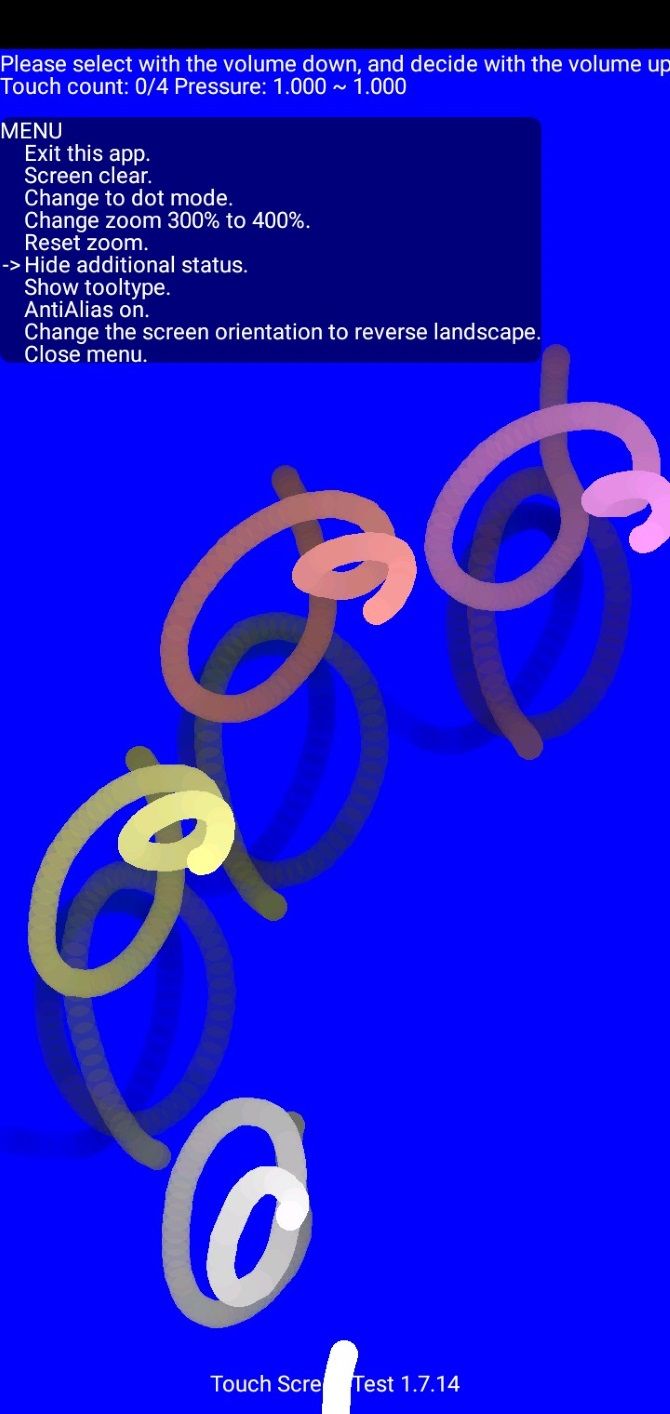
Because the app is wholly devoted to testing the touchscreen, you can’t navigate the in-app menu with your finger. Instead, you have to press the Volume Up button on your phone to make it appear. Once it’s on the screen, you can cycle through the menu with Volume Down, then press Volume Up to select an option. It’s not very intuitive, but it’s necessary to let you test the screen while the menu is open.

From the menu, you’ll find a useful selection of options to toggle and change. It lets you alternate between drawing dots or lines to better diagnose a dead spot. You can make the line bigger or smaller, plus show further information such as how many fingers the touchscreen detects.

Speaking of which, the app also comes with multiple finger detection. Each finger gets its own unique color, which is great for testing multi-finger gestures as well as making colorful designs on the canvas!

Download: Touch Screen Test (Free)

2. MultiTouch Tester

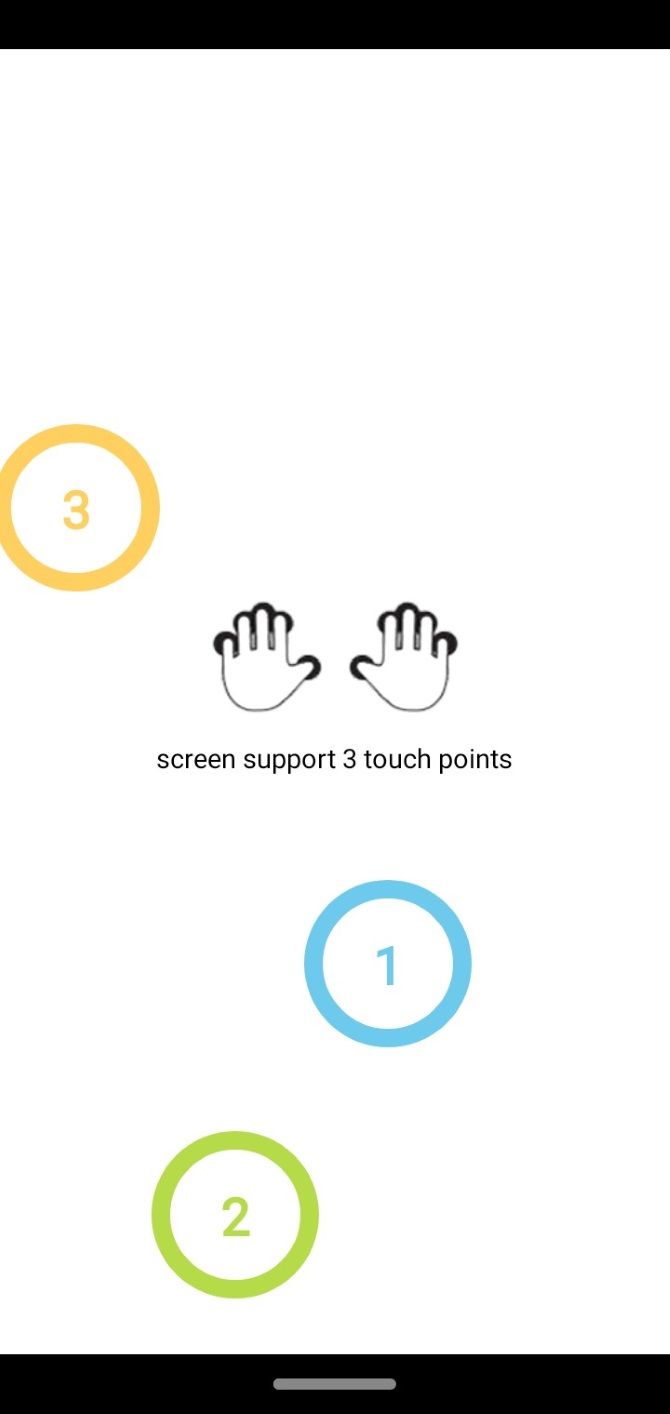
If you’re not looking for dead zones on your screen, but you are interested in how many fingers your screen can register, try MultiTouch Tester. This app is one of the simplest Android multi-touch screen test apps available, with no drawing tools or additional features. It lets you know how many fingers your phone can handle at once.

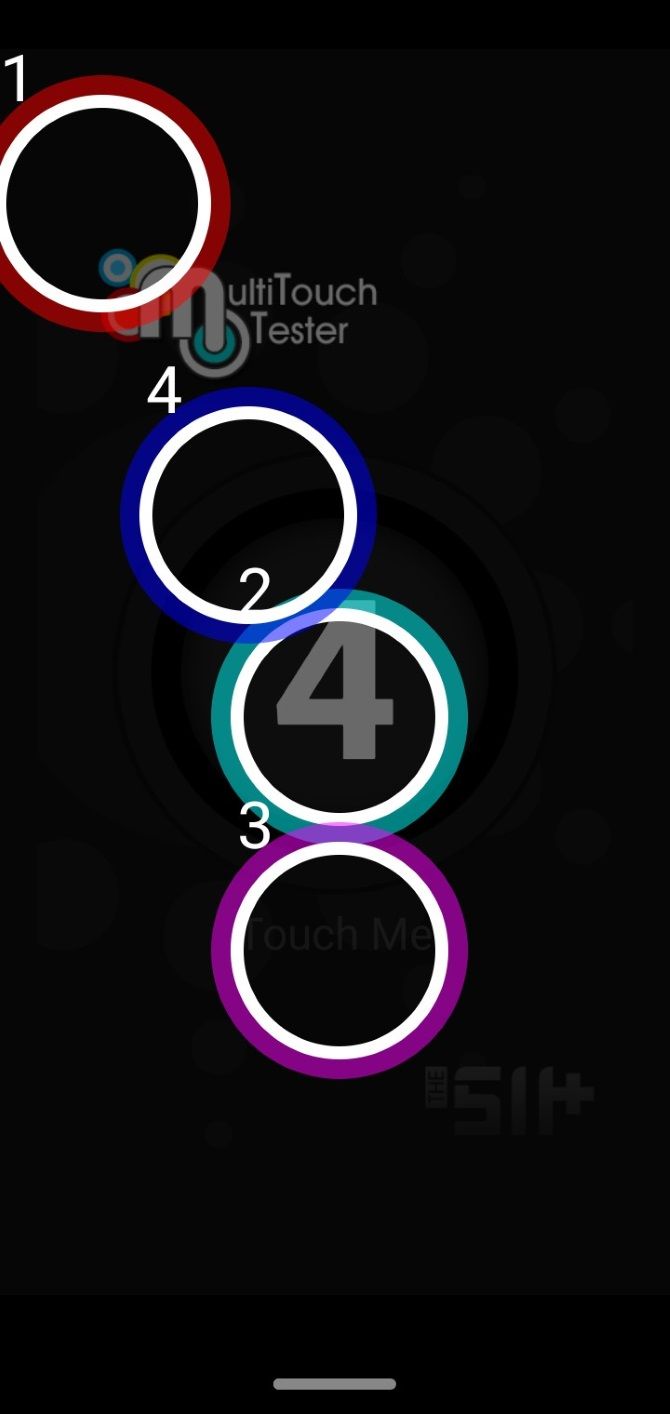
As you place multiple fingers on the screen at a time, MultiTouch Tester will number each one and give them a unique color. It will also keep track of how many fingers in total are registered on the screen. When you release your fingers, the app will still remember the highest number it detected.

Download: MultiTouch Tester (Free)

3. Screen Test Pro

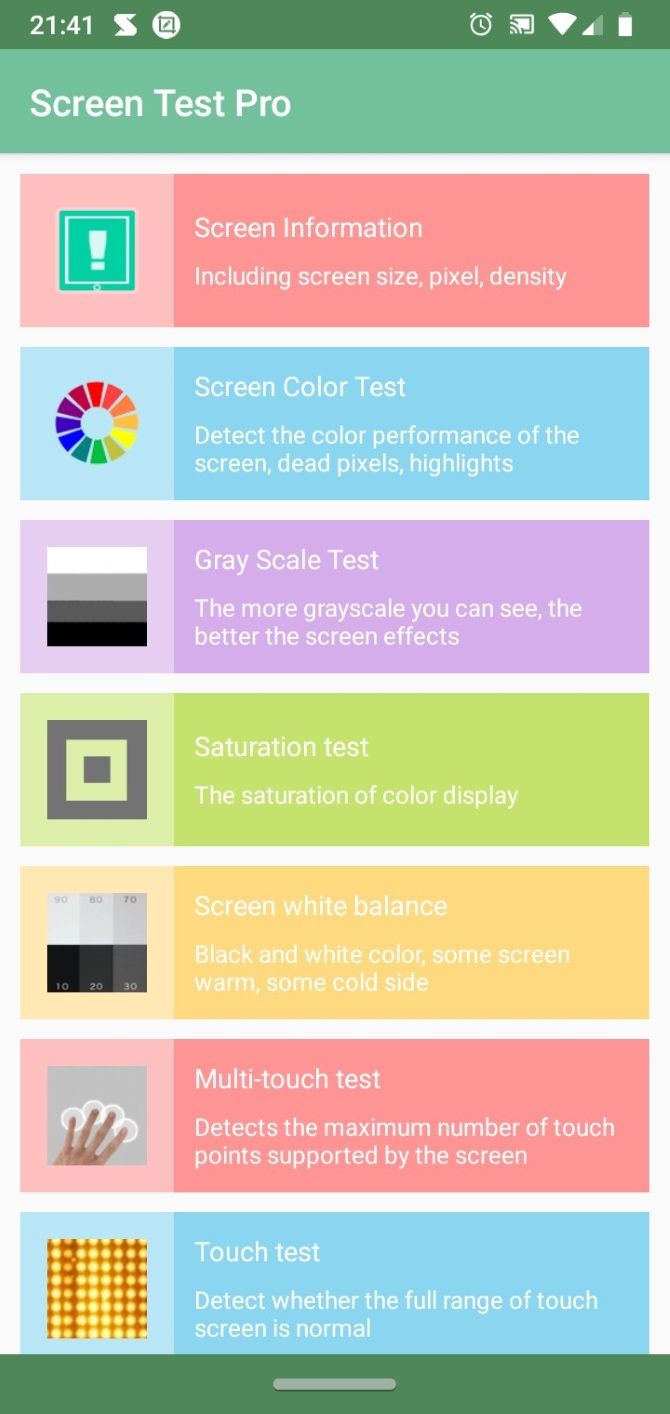
Fancy something a little more feature-filled? Then be sure to give Screen Test Pro a try. It comes with a lot of great features that make it a one-stop-shop for all your screen testing needs.

To start, Screen Test Pro takes the two touch checkers covered above and puts them into one app. It contains a line-drawing feature and a multiple finger tester, both of which do the job quite well.

It also comes with a pressure tester that can check whether your phone knows if you’re tapping softly or not. If your phone doesn’t have this feature, your taps will only show a result of 1 when you touch the screen, no matter how hard you do it. More advanced devices, however, will show values between 0 and 1 depending on how strong you press down. The higher the number, the more pressure your phone detects.

Screen Test Pro doesn’t stop there, however. It has multiple tools for testing your screen’s capability to display color and saturation. There’s a pixel counter tool, a “breathing light” tool to test the smoothness of color transitions, and a screen leak tester. The latter checks if your phone can raise the backlight without causing light to leak in from the sides.

Screen Test Pro is a great one-stop shop for testing your display, but there are apps that perform the same job for your overall phone health. If you’re interested, be sure to check out some apps that check if your Android phone is working properly.

Download: Screen Test Pro (Free)

4. Touchscreen Test

Not to be confused with the first entry above, Touchscreen Test is worthy of a mention because of how it assesses your screen. While other testers let you draw a pattern to find the dead spots, Touchscreen Test uses a unique method that gives you a clear indicator of where the troublesome areas are.

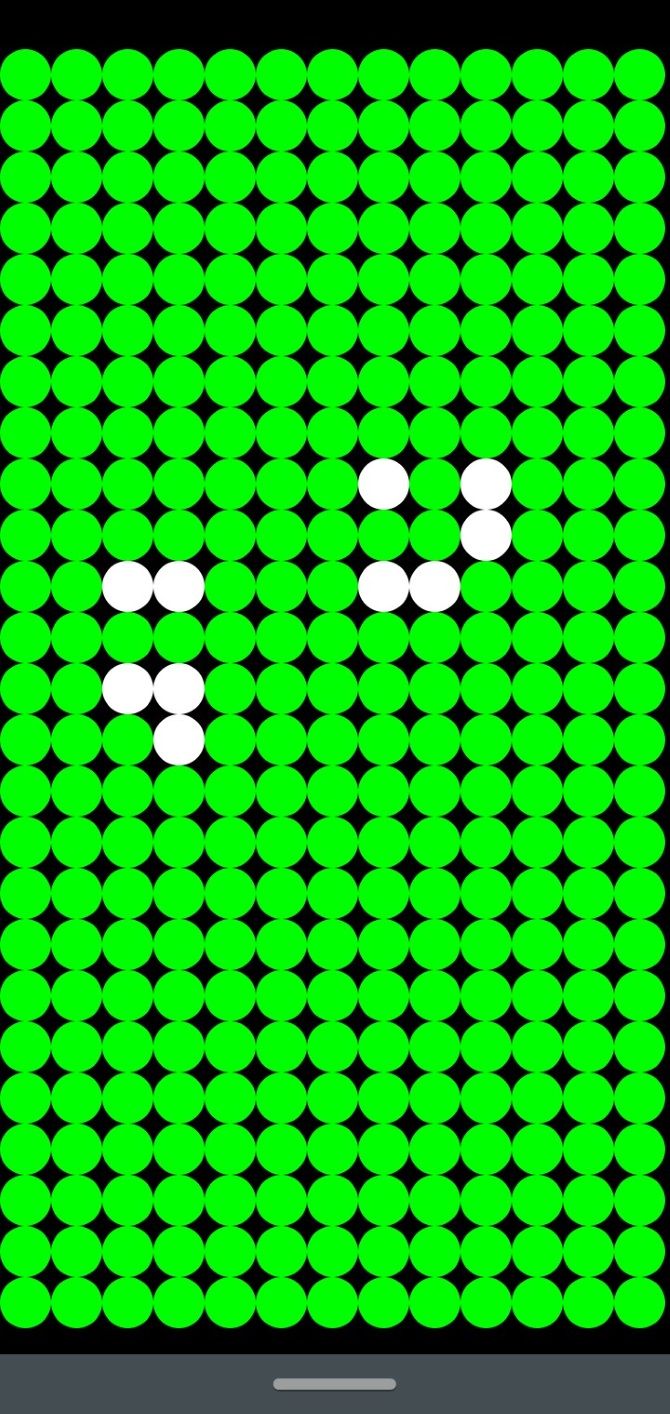
Once you boot up the app, you’ll see a blank grid. When you touch a spot on the grid, it lights up green and stays that way. You can continue touching dots on the grid to fill them in. If you find a dead spot, you’ll know because the dot won’t light up. At this point, you can work your way around that area and see how far the dead spot reaches.

After you’ve run your finger across the entire screen, you’ll be left with a grid where green dots show normal functionality and blank dots show a dead zone. You can then use this grid as a map for your phone’s dead zones, which you can either plan to work around or give to a specialist if take your phone for repairs.

Download: Touchscreen Test (Free)

Performing a Touchscreen Health Check

When you think something’s wrong with your touchscreen, it’s worth giving it a screen touch test to see if it’s working properly. Fortunately, there are plenty of apps available you can download and use to test whether your phone really is malfunctioning or if it’s just your imagination.

If you do discover that your phone’s touch controls aren’t working properly, try these fixes for faulty Android touchscreens and see if they fix it.

Read the full article: 4 Touch Screen Test Apps to Check Your Android Touchscreen


Read Full Article

Star Trek vs. Star Wars: Which Is More Technologically Advanced?


startrek-wars

There are three topics that should never be discussed at the dinner table: religion, politics, and the relative merits of Star Trek vs. Star Wars.

While any debate around the two great science fiction franchises tends to get passionate, we’re going to approach the subject as logically as Spock would. We aren’t going to talk about which canon is better—it’s obviously Star Trek—but instead, we’re going to focus on whose cannons are better.

Let’s take a look at the technology of Star Trek vs. Star Wars and decide which is better…

Space Rules

Han and Chewy going into lightspeed

Before diving deep into this debate, it’s important to set a few ground rules.

We aren’t experts as far as either series is concerned. Instead, we’re going to rely on the work of far more enlightened minds: forum users. Star Trek vs. Star Wars debates have taken place over countless forums for years, so there’s plenty of material to dive into.

Generally, what was considered canon before Disney acquired Lucasfilm and before J.J. Abrams rebooted Star Trek is going to be admissible here as well.

Also, what is shown is going to be favored over what is said. On Quora, Rom Lokken explains that a Star Wars Star Destroyer is reported as being able to generate power equal to one percent of the Sun’s energy output. This is ridiculously inconsistent with the actual observed performance of Star Destroyers in the films.

“For those crying foul,” Lokken writes, “a Star Destroyer that needs that much power (to create the abilities displayed) would represent the most fantastic inefficiency ever conceived.”

One major complication is that, while Star Trek writers at least attempted to create plausible explanations for the technology, Star Wars does what it wants by throwing in random technobabble. When taken alongside the Force, it’s easy to see why some fans consider Star Wars to be an epic space fantasy rather than a science fiction tale.

With all that in mind, let’s dig in.

Androids and Droids

C-3PO linked up to a computer

Star Trek and Star Wars both feature great robot characters: C-3PO, R2-D2, and Data are all fan-favorites. C-3PO is a yellowish droid who talks a lot, while Data is a yellowish android who talks a lot. So far, pretty similar. But unfortunately for C-3PO, his tech just isn’t up to scratch.

C-3PO was pieced together from junk parts by a crazy kid, whereas Data was carefully designed and created by a mad scientist. Data also has the advantage of being “fully functional,” hyper-intelligent, and an integral part of the Enterprise crew. C-3PO gets in the way, while R2-D2 is little more than a gun sight on wheels.

Sure, either of these robots can do chores for you, but let’s face it, Data would do a better job every time.

Star Trek: 1
Star Wars: 0

Medical Facilities

Luke prosthetic hand in Star Wars

This one’s another simple call. If the Skywalkers lived in the United Federation of Planets they wouldn’t need to worry so much about losing their limbs. Yes, they’re able to get them replaced with cybernetics, but Bones would probably be able to reattach the originals.

Some of you may like the idea of bionic upgrades, but we’d prefer to keep our real arms and legs.

Everything short of instant death—don’t wear a red shirt!—seems to be curable on the Enterprise. With technology like tricorders that can instantly diagnose almost all ailments, Star Trek takes this one with ease.

Star Trek: 2
Star Wars: 0

Ships and Engines

USS Enterprise in space

This one is interesting. Warp speed on Star Trek ships uses a matter/antimatter reactor versus Star Wars ships which use comparatively lower-tech fusion and fission reactors. Looks like another easy victory for Star Trek, no? Perhaps not.

The issue is in the actual performance of the drives. ST-v-SW.net places the fastest speed achieved by a ship in the Star Trek universe at around 21,000 times the speed of light, with slower ships maxing out at around 9,000 times lightspeed. However, most ships probably cruise at something around 2,000 times the speed of light.

In the Star Wars canon, the fastest ships come in at around 16,500 times lightspeed, which is slower than Star Trek ships. But the typical cruising speed is around 11,000 times the speed of light, which is much faster.

So, although the fastest Star Trek ships may be capable of greater warp speeds than Star Wars ships, the average cruising speed of the Federation is slower.

Outside of lightspeed drives, Star Wars loses its edge. The Empire’s Star Destroyers are shown to be ponderous beasts, slow to maneuver in real space, unlike the USS Enterprise and other Federation ships, which are practically capable of pirouetting on a dime.

Therefore, we’re going to call this one a tie. Star Trek gets points for the more advanced drives, faster warp speeds, and maneuverability. While Star Wars takes it for average speed, which would be more important most of the time.

Things are heating up.

Star Trek: 3
Star Wars: 1

Photon vs. Proton Torpedoes

Photon torpedo from Star Trek

Weapons are another controversial topic. Boba Fett’s ship, Slave 1, is described as having 64,000-gigawatt lasers and 190 megaton missiles. In contrast, the puny Enterprise-D only has a 3.6-gigawatt main gun and 64 megaton missiles. This is where Rom Lokken’s rule from earlier kicks in.

“Some of the energy readings suggested for Star Wars laser weapons would instantaneously vaporize any unshielded craft, not to mention the atmosphere in between them, in rather spectacular fashion,” he explains. “Nothing in the physical behavior of these weapons supports these values.”

With that established, the case becomes a lot more clear-cut. In his Quora article, Lokken devotes several paragraphs to explaining all the ways in which Star Trek weapons are superior to Star Wars weapons.

“Weapon tech is also no contest. Photon torpedoes travel at warp speed. This means they are unblockable by SW vessels whose reaction time is such that skilled humans can provide superior guidance as compared to their computers (thus their manual firing). Photon torpedoes are matter/antimatter devices whose yields have been described as being able to wipe out cities with a single torpedo. Proton torpedoes are sub-light (and slow) missiles that can destroy city blocks.”

Lokken is equally decisive on the subject of lasers.

“Without going into the difficult discussion around energy outputs of beam weapons. ST beams are computer controlled, use the vastly superior Trek sensors and computer systems and have output that has been described as being capable of destroying the entire surface of a planet. Turbo lasers (save and except the Death Star) have limited firing arcs and while incredibly numerous are dramatically limited by poor fire control and range.”

We have to give it to Star Trek again.

Star Trek: 4
Star Wars: 1

Sensors, Shields, Replicators, and Transporters

Holodeck in Star Trek

When we started working this article, we thought the Star Wars franchise would put up more of a fight. Instead, we’re combining sensors, shields, transporters, and replicators into a single category to avoid an absolute massacre. All four technologies broadly deal with detecting or manipulating energy. In every case, Star Trek wins out.

The sensors on the Enterprise are orders of magnitude better than anything in the Star Wars universe. Starfleet sensors can scan ships trillions of kilometers away, while ST-v-SW.net concludes that Star Wars scanners seem to be limited to a few hundred thousand kilometers.

Star Trek scanners can read the DNA of opposing crews, while the best offered by Star Wars could only determine that Yoda wasn’t a Wookie.

Although shields are a huge part of the USS Enterprise’s capabilities, Star Destroyers in the Star Wars universe don’t have anything comparable. An X-Wing wouldn’t be able to get through a Starfleet ship’s shields, but can easily get close enough to the Death Star to destroy it.

Star Trek society is post-scarcity. Replicators mean you can create anything anywhere. Poverty and hunger don’t exist in a meaningful way anymore. The opposite is true in the Republic and, later, the Empire. Slavery, hunger, and poverty are all seen in Star Wars, making this another easy win for Star Trek.

Transporters in Star Trek are actually very similar technology to replicators and, once again, Star Wars has nothing of the kind. Kirk and his crew can beam anywhere they want on a whim, while Han Solo is stuck slogging along in his rust bucket.

This is another very easy win for Star Trek. Especially as there are so many Star Trek-inspired home gadgets resulting from all that impressive technology.

Star Trek: 5
Star Wars: 1

The Force

Yoda using the Force

The Force is one of those aspects that really takes Star Wars away from being science fiction. Its pseudo-religious undertones and unexplained properties make it very difficult to compare with anything in Star Trek.

Take lightsabers, which only a Jedi can use as they’re reliant on a person’s ability to use the Force. Are they technology? Or are they just magic swords? If they’re technology, then they earn Star Wars a point for having cooler close-combat gear than Star Trek.

But if they’re magic, we’re inclined to dock the series a half-point because it hardly counts as a technological advancement. It doesn’t make a lot of difference to the end result here since Star Trek is already so far ahead, so let’s give Star Wars a point for the Force.

Star Trek: 5
Star Wars : 2

So, Star Trek vs. Star Wars… Who Wins?

When looking at just the technology of Star Wars vs. Star Trek, it’s really no competition. With over double the points, Star Trek takes the trophy. Live long and prosper.

This is the bit where you get to tell us how wrong we are. Of course, we had to skip over lots of different technology from both Star Wars and Star Trek. But there’s only so much we can discuss in a single article and comparing the two series is definitely an art rather than a science.

If you want to revisit each franchise and compare them for yourself, take a look at our breakdown of the different ways to watch the Star Wars movies for the best possible experience.

Read the full article: Star Trek vs. Star Wars: Which Is More Technologically Advanced?


Read Full Article

Creative Outlier Gold: True Wireless Earbuds with Killer Battery Life


Creative Outlier Gold True Wireless In-Ear Headphones with Case, focus on earbud
Our verdict of the Creative Outlier Gold True Wireless In-Ear Headphones:
Pleasant design, comfortable to wear, reasonably easy to operate, sweat proof, great sound quality, and an impressive battery life. If those are the features you're looking for in a pair of true wireless earphones, but don't want to break the bank, we can highly recommend Creative's Outlier Gold in-ears.
910

Key features of truly wireless earbuds include ease-of-use and long battery life. If you want to wear them for many hours, they should also fit well and be reasonably comfortable. For us, the Creative Outlier Gold headphones ticked all the boxes. Let’s see, whether this package will convince you, too.

First Impressions

The Outlier Gold Charging Case

The Creative Outlier Gold true wireless headphones come in a compact case, crafted from black plastic and champagne gold aluminum. The case’s USB-C charging port and status lights sit on the left side.

Creative Outlier Gold charging case closed with left earbud charging and right earbud in background

Gently pushing the case’s right side makes the charging tray slide out to the left. You’ll find the earbuds nestled into the tray, firmly held in place by small magnets. Opening the case is the first smooth experience you’ll have with these headphones.

Creative Outlier Gold open charging case with earbuds next to it

The Outlier Gold Earbuds

The earphones feature the same black and champagne gold color scheme as the case. Each earbud sports an RGB ring light that indicates its pairing, playback, or battery status. Unlike the Creative SXFI AIR, you can’t customize the light’s colors, nor can you turn them off and rely on audio cues alone, which would conserve battery life.

Creative Outlier Gold earbuds next to charging case

Further examination reveals that both earbuds carry a microphone, which means you can use either of the two individually to take calls. When you’re using both while taking a call, only the primary earbud will record your voice, but you’ll hear stereo audio.

Wearing the Outlier Gold

Initially, we were concerned these earbuds might not fit right or feel uncomfortable. But the Outlier Gold earphones actually provided a great fit, and we enjoyed wearing them for many hours. They come with silicone tips in multiple sizes and once you pop on the right tip size, the earbuds will fit perfectly. We ended up preferring the compact shape over the longer design of, for example, the Apple AirPods. Those of you wearing earrings will find the compact shape to be more comfortable and safer than designs that cover or go near your earlobes.

Operating the Outlier Gold Earbuds

Each earbud contains a single multifunction button. But to turn the earbuds on or off, you don’t need this button at all; simply take them out of their case or put them back in. To conserve battery life, the earphones turn off automatically after five minutes without a Bluetooth connection. To turn them back on without the case, press and hold the multifunction button of the main unit (the one you paired first) until you see a flashing blue LED; after about three seconds.

The single button doesn’t just work in favor of the design, it’s also easy to operate. The multifunction button controls are straightforward and the small manual that comes with these earphones, as well as this Creative Outlier Gold FAQ page, will put you on the right track should you struggle to figure it out. Sometimes, after messing around with the buttons a little too much, we found ourselves caught in a connected-disconnected-connected loop. Briefly putting the earbuds back into the charging case provided a quick reset.

Creative Outlier Gold charging case with one earbud charging and the other connecting

Pushing the Outlier Gold’s buttons wasn’t a good experience at first. What worked best for us was supporting the earbud with the index finger from the backside, while using the thumb to press the multifunction button on the opposite side. A single finger push works, too, but for us it felt uncomfortable and occasionally shifted the earbud. A slightly more responsive button would have made this design perfect.

You might think that touch controls would have made a world of difference here. But try to imagine what it sounds like when you slide across or double-tap something that’s firmly wedged into your ear canal. Let’s say we’re delighted that Creative went with a button; it’s an elegant, functional, and reasonably pleasant solution for this form factor.

A Closer Look

Our first impressions were solid. Now let’s see what else these headphones have to offer.

Creative Outlier Gold Specifications

  • Design: in-ear headphones
  • Color: champagne gold
  • Drivers: 5.6 mm graphene driver diaphragm
  • Frequency Response: 20-20,000 Hz
  • Connectivity
    • earbuds: Bluetooth 5.0
    • charging case: USB-C
  • Operating range: up to 33 ft (10 m)
  • Microphone: built-in, omnidirectional, sensitivity -42 dBV/Pa
  • Weight
    • earbuds: 0.18 oz (5 g) x 2
    • charging case: 1.90 oz (54 g)
  • Battery Life
    • per charge: 14 hours
    • with charging case: up to 39 hours
  • Charging time
    • earbuds: 2 hours in charging case
    • charging case: 3.5 hours
  • Water resistance: IPX5, sweatproof
  • Price: under $100
Creative Outlier Gold Earbuds Creative Outlier Gold Earbuds Buy Now On Amazon $94.78

Bluetooth

The Outlier Gold feature Bluetooth 5.0 at an operating frequency of 2.4 GHz and three standard Bluetooth profiles:

  1. HFP: The Hands-Free Profile lets your earbuds handle two-way wireless conversations.
  2. A2DP: The Advanced Audio Distribution Profile enables wireless stereo streaming from your device’s Bluetooth connection to your earbuds. This is a must if you want to use your headphones for listening to music.
  3. AVRCP: The Audio/Video Remote Control Profile is the Bluetooth protocol that lets you control media playback and volume from your earphones.

More importantly, if you want to stream music from your Android or iPhone, you’ll appreciate that the Outlier Gold can handle both the aptX and AAC high-quality Bluetooth codecs. Qualcomm’s aptX supports a higher bit rate than the SBC codec and achieves CD-like performance. AAC, which is favored by Apple, uses a lower bit rate, but overall delivers comparable performance to aptX.

Battery Life

Battery life of 14 hours per charge and up to 39 hours when recharged from the case is outstanding. What powers this superior battery life is one 80 mAh rechargeable battery in each of the earbuds and a 450 mAh rechargeable battery in the charging case.

Note that your mileage will vary depending on volume, distance from streaming source, or when using the microphone. Outside of perfect testing conditions, we experienced a slightly lower battery life, but we could reproduce the quoted charging times. With intense use at higher volumes, you can expect around 11-12 hours per charge.

Software Super X-Fi

The Creative Outlier Gold headphones support Creative’s Super X-Fi technology. Super X-Fi is an AI-powered software that creates an immersive 3D listening experience from regular audio tracks. We’ve previously explained how it works and shown you how to create your own SXFI profile in our Creative SXFI AIR review.

Creative Outlier Gold closed charging case with earbuds next to it

When you put on a pair of headphones, you essentially shrink the space the audio signal travels from the source to your ears. The sound won’t bounce off of surfaces and thus can’t pick up that characteristic 3D feeling. Instead, it sounds like it’s all in your head and with earbuds, it literally is. Creative’s Super X-Fi technology can emulate that 3D sound character using software.

The Outlier Gold feature Software Super X-Fi, a processing technology that requires Creative’s SXFI App (AndroidiOS) and audio files downloaded to your phone. Unfortunately, you won’t be able to enjoy this feature if you mainly use streaming services like YouTube, Spotify, or Netflix; downloads on these services are not supported. In this case, you might want to get the SXFI AMP or the SXFI AIR headphones. If you routinely listen to local podcast or music files, however, it could make this experience a lot more pleasant.

Sound Quality

While battery life and easy handling are key for earbuds, you’ll also want them to sound good. To test the sound quality and performance, we followed AudioCheck’s headphones and earphones testing routine, developed by Dr. Ir. Stéphane Pigeon. It’s a set of free tests that you can use with any pair of headphones. The tests are best used to verify a product’s sound quality with your own ears and to make sure the headphones you’re buying are wired correctly.

Keep in mind that these audio tests can’t replace specialized audio equipment because they are highly subjective. Your own hearing abilities, which in part depend on your age, as well as personal preferences, impact how you experience sound quality.

In the frequency response test, we couldn’t hear frequencies above 11 kHz, i.e. on the treble end of the spectrum. With other headphones, we were able to hear frequencies up to 17 kHz. What this means is that you might not hear the full spectrum of higher harmonics and thus audio might sound less bright. On the bass end of the spectrum, our hearing dropped out at around 30 Hz, but depending on your hearing abilities, you can expect to notice sounds as low as 20 Hz.

The earbuds sounded great on all other tests. Most importantly, we enjoyed the sound while listening to music and podcasts. The Outlier Gold headphones deliver a solid performance across the full audio spectrum.

On audio calls, the sound quality was clear both for us and on the receiving end. As mentioned previously, you will hear stereo sound, but only the microphone of the main earbud will record your voice.

Our Creative Outlier Gold Verdict

You won’t find a better pair of earbuds in the sub-$100 price range. You’ll love the Outlier Gold’s comfortable, yet secure fit, the design is both functional and appealing, and the sound is more than satisfying.

Creative Outlier Gold charging case with one earbud charging and the other connecting

We subtracted one point for a few minor items: the larger size compared to other earbuds of this form factor, the always-on LED light, and the fairly push resistant multifunction button.

If you intend to use the Outlier Gold headphones for your workouts, you’ll appreciate their IPX5 sweatproof rating and lightweight design. Audiophiles interested in Super X-Fi can get a taste of it using the software, but I wouldn’t let this factor into your buying decision. More importantly, Bluetooth 5.0 with AptX and AAC codecs ensures good sound quality.

The killer feature of the Creative Outlier Gold is their incredible battery life. And with true wireless earbuds, that should be one of your top priorities.

Creative Outlier Gold Earbuds Creative Outlier Gold Earbuds Buy Now On Amazon $94.78

Enter the Competition!

Creative Outlier Gold Wireless Earbuds

Read the full article: Creative Outlier Gold: True Wireless Earbuds with Killer Battery Life


Read Full Article

How to Lock Down Windows User Accounts


lock-windows-user

You might use an administrator account for yourself on your PC, but maybe you don’t trust other people with that kind of access.

Whether you want to keep an eye on your children’s computer usage or need to simplify a computer for a loved one, blocking off parts of Windows is useful. Even if you lock your PC when you’re not using it, the access that other user accounts have could be a problem.

Let’s take a look at different ways to lock down user accounts in Windows 10.

Use Standard Accounts and UAC

The simplest way to restrict an account’s permissions is to make it a standard account. These limited accounts can run software and change settings that don’t affect other users, but they don’t have total control.

For instance, a standard account can’t install software, modify internet connection settings, or change the system time.

To change an account’s permissions, visit Settings > Accounts.

On the Family & other users tab, click an account name under Other users, then hit the Change account type button. This lets you choose between Administrator and Standard User.

Windows Change Account Type

If you need to create a new account, click Add someone else to this PC. Walkthrough the steps to sign in with a Microsoft account (if you want) and when prompted for the account type, choose Standard User.

When discussing user accounts, you should be aware of User Account Control (UAC), a Windows feature that lets you run programs as an administrator only when needed. With a Standard account, UAC requires you to enter an administrator password to take admin actions, like installing software or changing system-wide settings.

Administrators, meanwhile, only need to confirm a prompt to do so. This means you should make sure to lock your computer when you aren’t using it. Review our explanation of UAC and admin rights for more information.

Take Advantage of Microsoft’s Family Group

Standard accounts are great when you don’t want other people messing around with your PC’s settings. But they don’t account for the unique challenge of keeping kids safe when using a computer. For that, you should try Microsoft’s “family group” feature in Windows 10.

To start, head back to Settings > Accounts > Family & other users. You can set up a new child account on your PC, but it’s a bit easier if you click Manage family settings online to open the Microsoft Family Safety page. Sign in with your Microsoft account to continue.

If this is your first time setting this up, click the Create a family group button. You’ll then see a prompt to add a user to your family.

Select Member and enter the email address or mobile number tied to your child’s Microsoft account. Complete the CAPTCHA, then click Send invite.

If your child doesn’t have a Microsoft account, click the Create one for them link at the bottom. You can create a new Microsoft account using their existing email address, or make them a new @outlook.com account.

Microsoft New Family Member

Your child will receive an email with an invitation to join your family group. They must accept this before the family settings will take effect, so make sure they do so. After they accept it and sign into the computer with their Microsoft account, you can start using the family group options for them.

While the family feature also lets you manage your children on Xbox One and Android, we’ll focus on Windows 10 devices here.

Managing Your Family Group Members

Once your child’s account is accepted into your family group, you can change various options about how their account works. Visit the Microsoft Family Management page to configure this.

There, you’ll see each member of your family listed. Choose Activity under their name to see the apps your child has used, what websites they’ve visited, web searches they’ve performed, and their screen time.

Along the top, you’ll see the following items to manage these:

  • Screen time: It allows you to choose how much time the person can spend on the computer, plus what hours are allowed for use. You can set a Time limit of anywhere from 30 minutes to 12 hours. It also lets you set limits for each day of the week. So for example, you could allow two hours of time on Fridays but only allow use from 7am to 10pm.

Windows 10 Screen Time Family

  • App and game limits: If you’d like to get more specific with your limits, use this panel to select specific apps and/or games to restrict. You can see how often your children use apps on average, then use similar settings to the above menu to pick how much time they can spend and when they’re allowed to use the apps.
  • Content restrictions: This page lets you choose your child’s age to automatically allow content appropriate for their age group. For example, a 14-year-old will be able to watch PG-13 movies and play video games rated Teen or lower.
    • You can also choose specific apps and games to always allow or always block, including alternative web browsers.
    • Finally, you can block inappropriate websites in Microsoft Edge with a slider. Turning this on blocks other browsers, and you can always allow specific websites if you like. For more control, you can restrict access to only an approved list of sites.
  • Spending: Here you can require your approval for the child to buy items in the Microsoft Store, as well as emailing you when they buy something. You can also put money in your child’s account to allow them to buy content of their choice.
  • Find your child: If your child has an Android device, you can install the Microsoft Launcher app to see where they are here.

Utilize Group Policy Tweaks

Group Policy is a tool in Pro editions of Windows that lets you control all sorts of account aspects. While it’s intended for corporate use, you can make lots of awesome tweaks with Group Policy, too.

The required tool isn’t officially available in Home versions of Windows, but you can use a workaround to install the Group Policy Editor on Windows Home to get it on those editions.

To access the Group Policy editor, press Win + R to open the Run dialog and type in gpedit.msc. Then you’ll need to navigate to the item you want to change; double-click to change its status from Not Configured to Enabled or Disabled. Check out some of these tweaks to lock down Windows:

  • Computer Configuration > Administrative Templates > Windows Components > Windows Installer and enable Turn off Windows Installer to prevent anyone from installing software.
  • User Configuration > Administrative Templates > Control Panel, then use Hide specified Control Panel items to remove some entries, Show only specified Control Panel items to create a restricted list, or Prohibit access to Control Panel and PC settings to remove them entirely.

Group Policy Lock Control Panel

  • User Configuration > Administrative Templates > System contains Prevent access to the command prompt and Prevent access to registry editing tools so savvy users can’t use them as workarounds. Also, Don’t run / Run only specified Windows applications lets you control what software the user can run.
  • User Configuration > Administrative Templates > System > Ctrl + Alt + Del Options lets you remove the user’s ability to change their password, open the Task Manager, log off, or lock the PC.
  • User Configuration > Administrative Templates > Windows Components > File Explorer can Prevent access to drives from My Computer if you don’t want an account poking around in the file system.
  • Computer Configuration > Windows Settings > Security Settings > Account Policies > Password Policy holds several options that let you restrict passwords. Set Maximum password age to force users to change their passwords, and Minimum password length so people can’t use short passwords. Password must meet complexity requirements forces passwords to contain at least six characters and contain a mix of letters, numbers, and symbols.

The Group Policy Editor supports many more tweaks, but the ones listed above let you lock down major Windows features.

Allow Microsoft Store Apps Only

The majority of apps on your PC are probably from outside the Microsoft Store. However, if you’d like to lock down an account by blocking it from installing software, you can enable a setting in Windows to only allow software installs from the Microsoft Store.

You’ll find this under Settings > Apps > Apps & features. At the top, change the dropdown box to The Microsoft Store only to prevent install of apps from other sources. Combined with the Group Policy edit above to block access to the Settings app, this should keep your PC free of unwanted software.

Microsoft Store Apps Only Windows 10

Compared to traditional desktop software, Store apps don’t require as many permissions and are thus safer for your computer. Take a look at our comparison of Store and desktop apps for more info.

Try Lockdown Software Tools

If none of the above did the job for you, you might need to turn to software that locks down your Windows PC further. For another option, check out deep freeze tools, which reset your PC to a base snapshot every time you reboot.

FrontFace Lockdown

FrontFace Lockdown

This app is meant to lock down a PC that’s acting as a kiosk. Since it collects common lockdown options all in one place, you can still use it to secure your own PC.

The Welcome tab on the left lets you pick from two preset profiles: Digital Signage Player PC and Interactive Kiosk Terminal. They contain settings so you can leave a computer out on a table for the public and not worry about people messing with it.

If you’d rather customize these settings on your own, check the Startup & Shutdown, Continuous Operation, and Protection & Security tabs on the left.

You can set a program to automatically start when an account logs on, shut down the PC at a given time, disable access to the Task Manager, and even hide System Tray icons. Some of these changes will affect the entire machine, while others apply to only one user account.

FrontFace provides a great way to beef up a restricted profile, especially if you don’t want to track down all the settings individually.

Download: FrontFace Lockdown (Free)

Install-Block

Install-Block Windows Example

This tool lets you require a password to run apps that you specify. You can also choose keywords (like “install” and “setup”), then the app will auto-detect any windows that use those words and block them. It also lets you easily block certain Windows features, just like the Group Policy editor.

The app offers a free trial with a generic password, preventing it from offering any actual security. The full version is $19.95 if you decide it’s worth buying.

Download: Install-Block (Free trial, $19.95)

How Do You Lock Down Your PC?

These options let you restrict your computer to pretty much any level you’d like. Whether you want to keep inexperienced users from installing software or want to protect your kids as they use a computer, you can do it with these tools.

The above tools should be enough in many cases. For more resources for parents, though, have a look at the best parental control apps for Windows.

Image Credits: Rawpixel.com/Shutterstock

Read the full article: How to Lock Down Windows User Accounts


Read Full Article
The 7 Best Android Apps to Add Special Effects to Videos


add-effects-video-android

Want to take your smartphone videos to the next level? A great start is adding some effects to your videos.

The Google Play Store has a number of apps available to led you add all sorts of effects. You don’t need a full suite of editing software like Adobe Photoshop; you can add reverb, echo, and other cool effects with just a few taps.

Let’s look at some of the best Android apps for easily adding effects to Android videos.

1. Glitch Video Effects

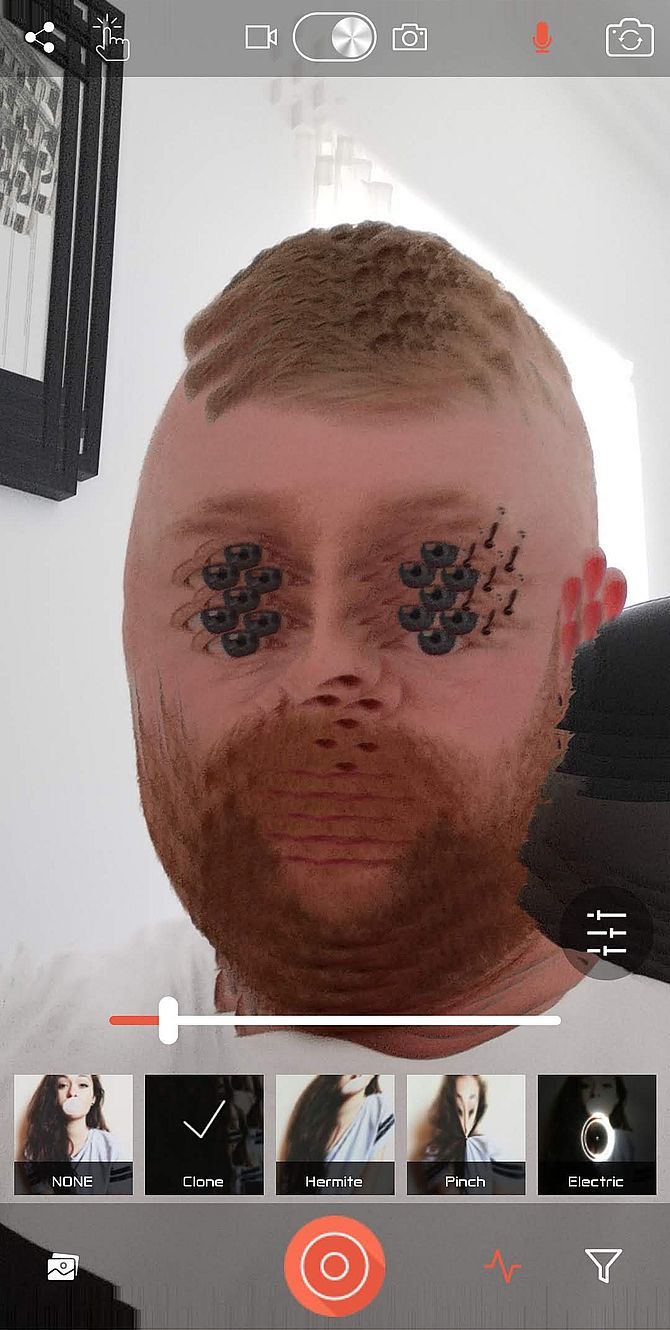
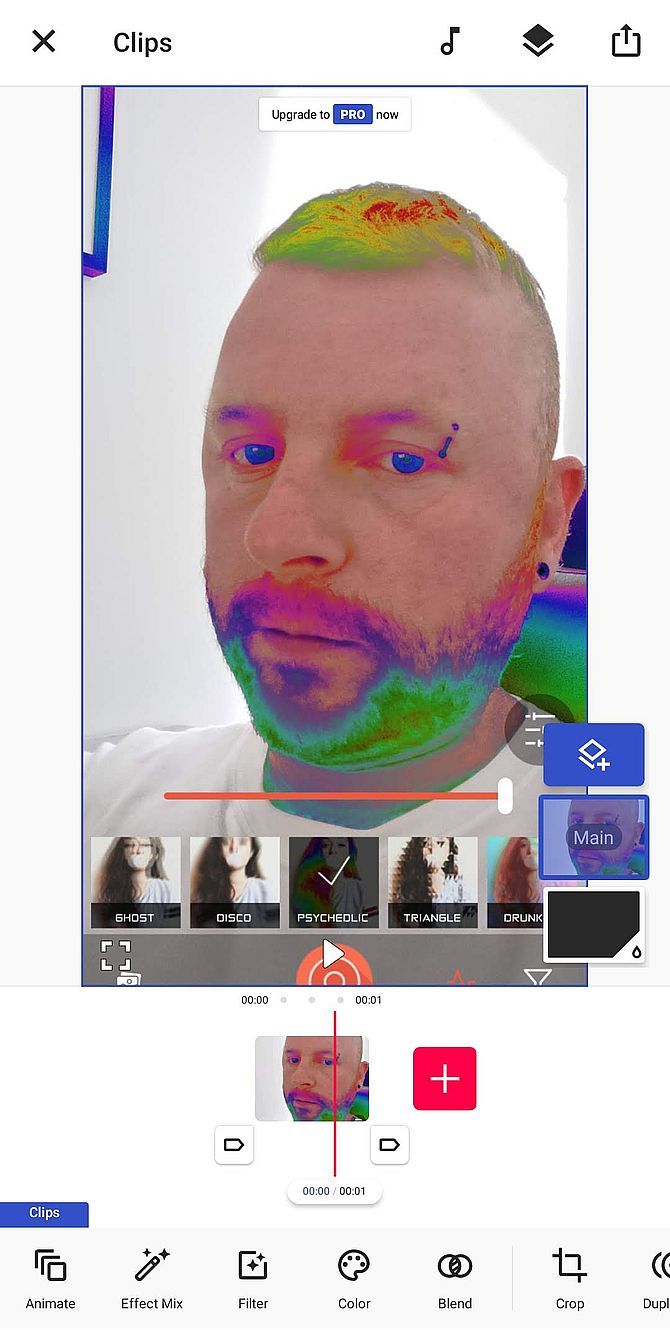
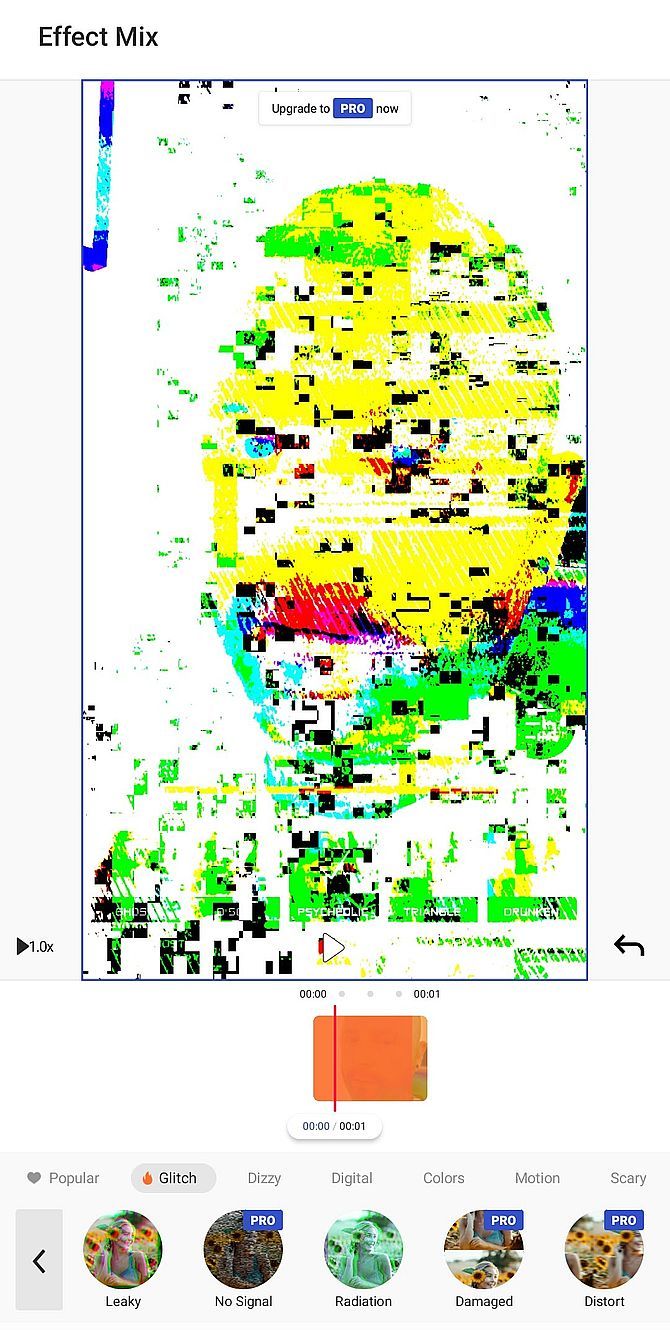
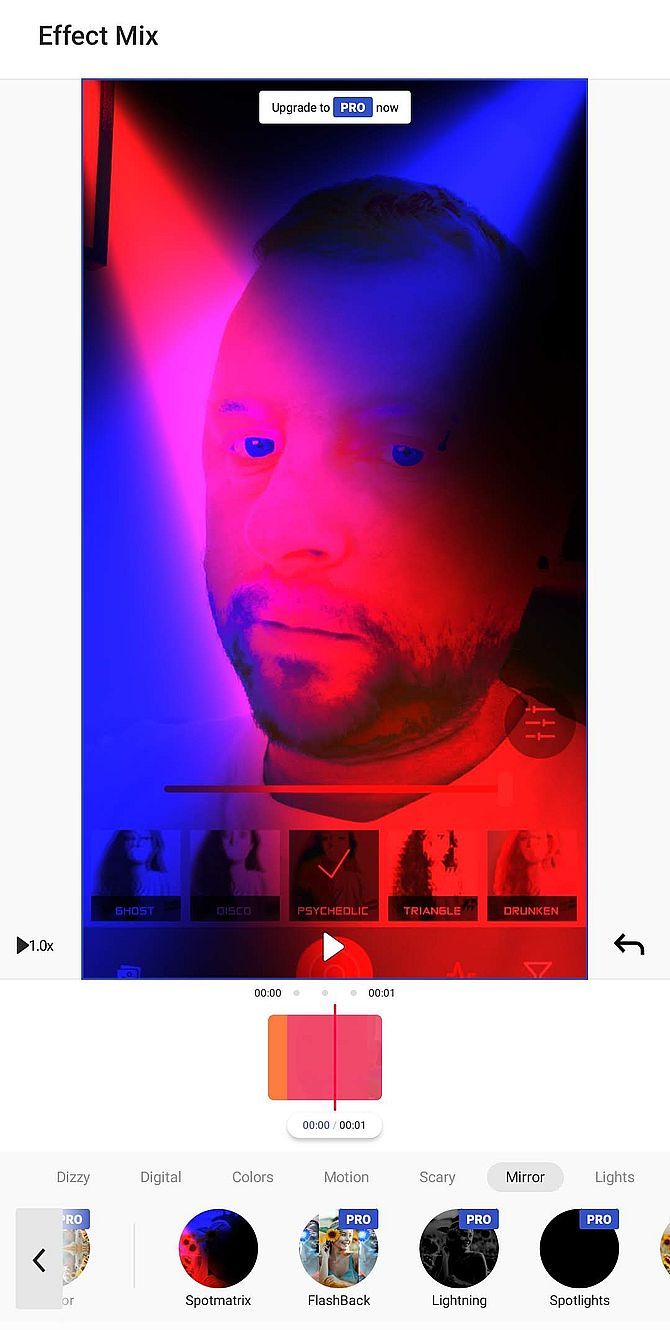
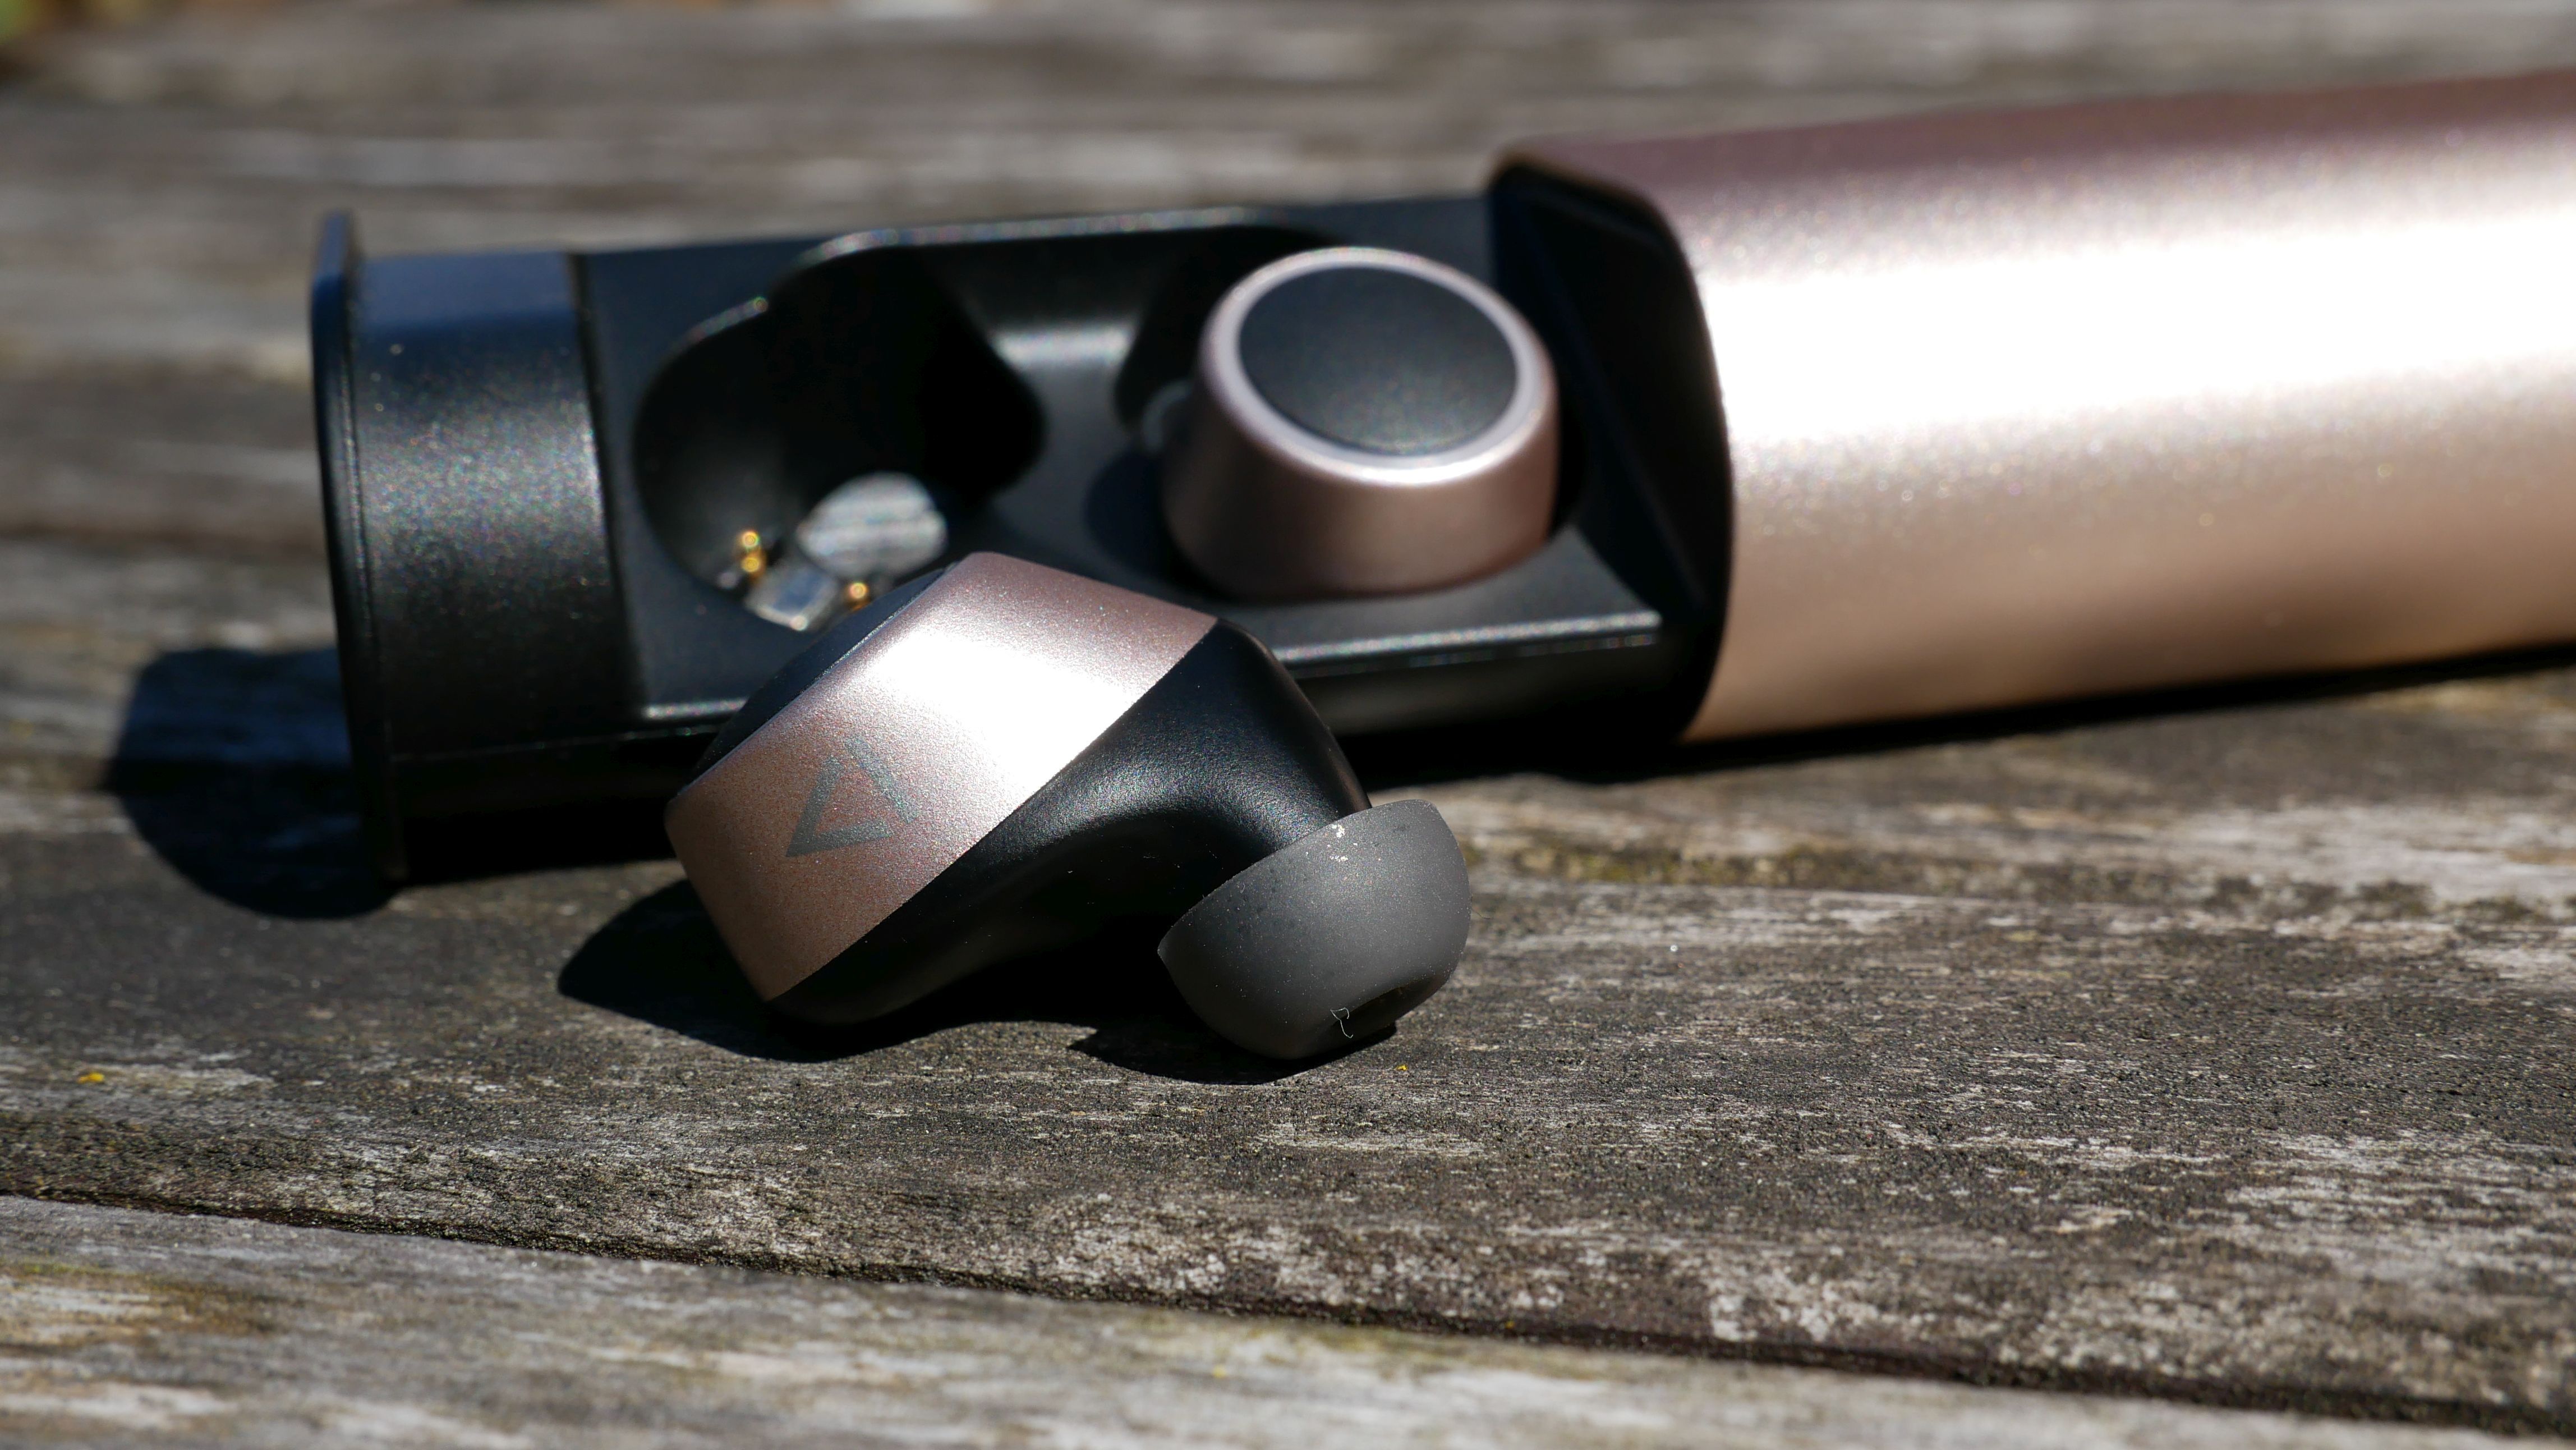
If you want to add a wide range of effects to your videos, then Glitch Video Effects is a great option. Aside from video effects, it can add cool effects to photos, too. Handily, Glitch Video Effects lets you record videos (or take photos) in-app. You can share your creations instantly via a share button.

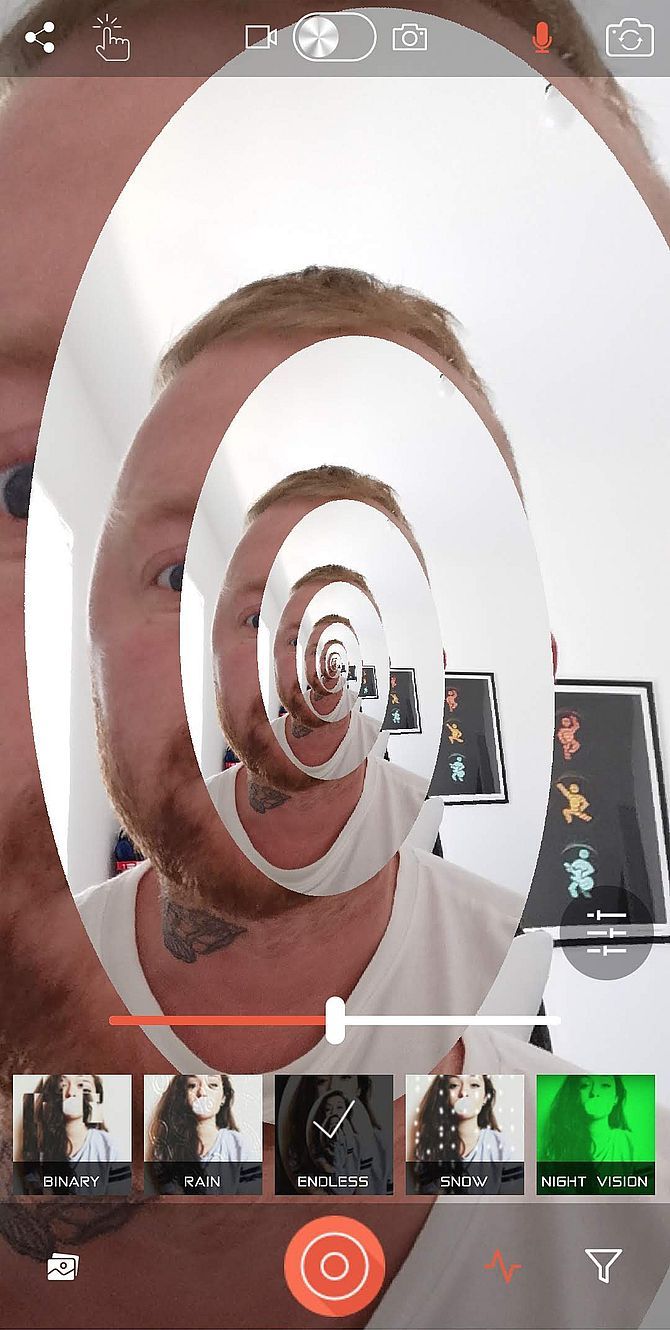
Glitch is a feature-rich app for effects. You can toggle a “screen tap mode,” which applies the chosen effect just by touching anywhere on the screen. The app features more than 50 effects, as well as filters on the source material for even more zany effects. You can then save your videos and photos to your phone for use later.

If you want to add more than one effect, you can. Simply load up a video with an effect already added, then add more.

Download: Glitch Video Effects (Free, in-app purchases available)

2. Adobe Premiere Rush

You’ve probably heard of Adobe’s Premiere video editing software. As the name suggests, it’s for creating and editing movie footage. The full app is pretty complicated, though, especially if you’re new to adding effects to videos.

Premiere Rush is a lighter version of the app designed for quick edits. Simply drop your videos into the editing pane and you can add music and effects. The app also supports adding text balloons to your videos, as you might’ve seen YouTube video creators do. This is why we’ve named it as one of the best video editing tools for YouTube.

The app also has a range of effects to add to your videos, as you’d hope for. These are accessible via Adobe Premiere Rush’s side menu. You can add text, change colors, and add filters, all of which will make your videos look a bit more professional.

Download: Adobe Premiere Rush (Free trial, subscription required)

3. VivaCut

VivaCut is a powerful video editor that’s an excellent option for getting your Tik Tok videos up to scratch. You can use the app to add cool effects to your videos and help them stand out.

Once you’ve recorded your video, you can import it into the VivaCut app and get busy adding effects. The app offers a wide range to choose from. One cool feature is a VHS filter, which gives your videos a retro look. You can add transitions between scenes, and even blend videos together to get some really neat effects.

One of our favorite tools is the chroma key feature. This allows you to record a green-screen video and then layer it over your chosen background. This can make you look like you are anywhere, and is limited only by your imagination!

Download: VivaCut (Free, in-app purchases available)

4. VideoShow

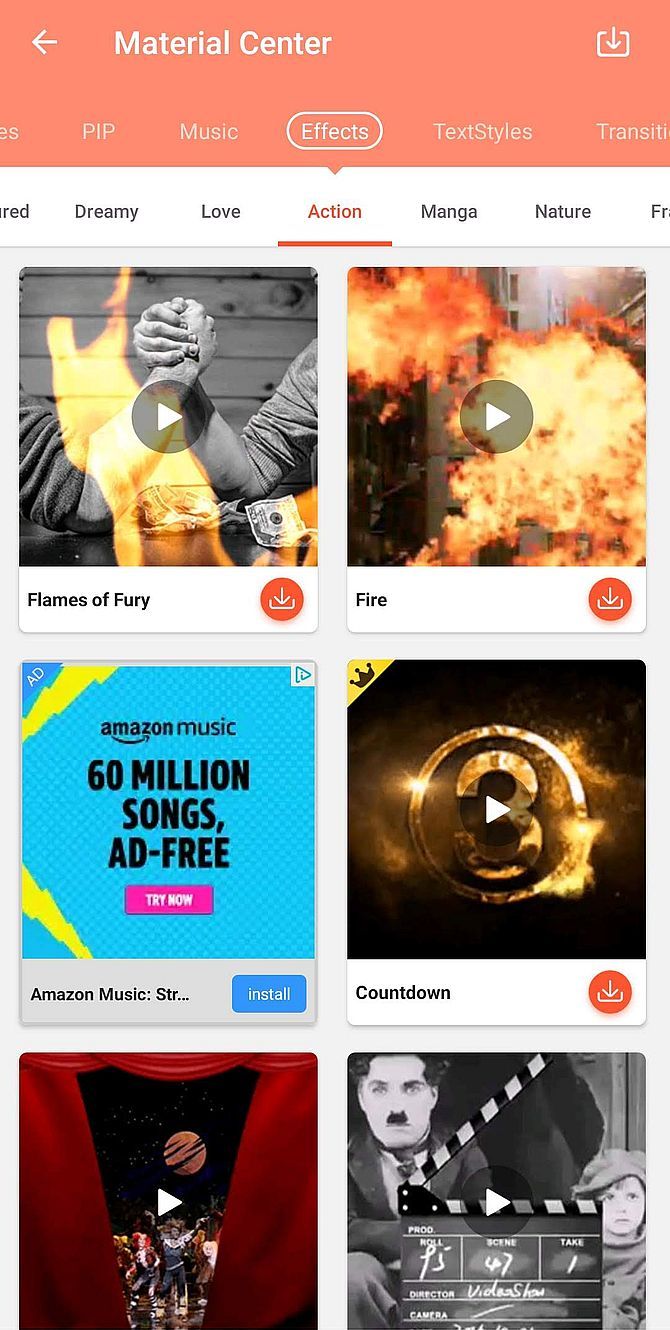
If you want to add snowflakes, rain, or fire to your videos, VideoShow is a great place to start. It’s an all-in-one video editor that has a range of cool features to help you add effects to videos.

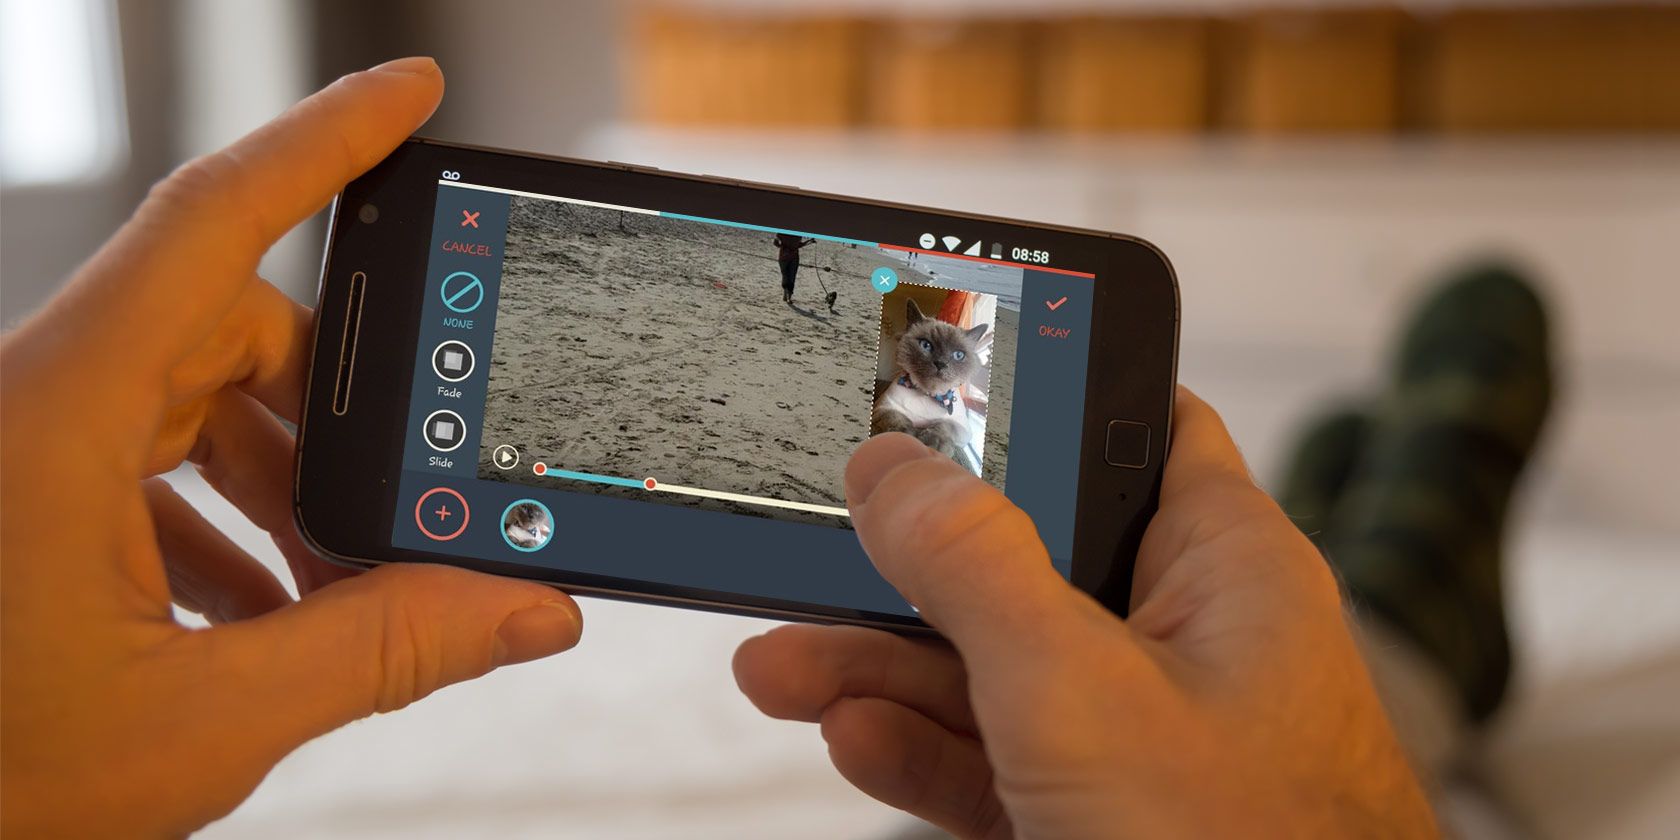
You can use VideoShow to edit your videos down to an appropriate length. Once you’ve trimmed it, you can start adding the effects. This is a simple as a tap on the FX menu. With that open, you can view all of the cool effects available.

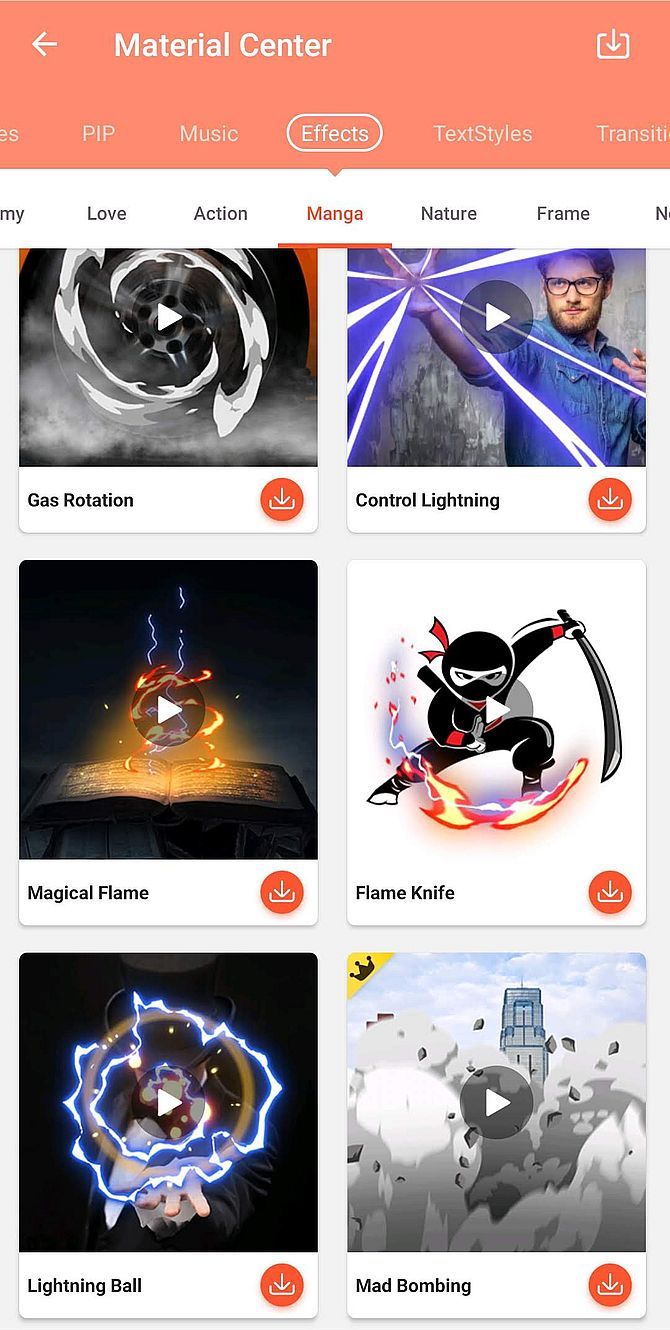
The list of options is far too long to go into here. However, you can select from manga-style effects, add neon lights to your videos, or even add cool action elements. Take a closer look to add music, sound effects, text, GIFs, and so much more. VideoShow is a great app if you want a ton of options.

Download: VideoShow (Free, in-app purchases available)

5. ActionDirector Video Editor

While ActionDirector might not offer a huge range of effects to add, it’s still one of the best quick video editing apps available. It’s easy to use, the interface is simple, and you can still add effects to videos—just not many of them.

What makes ActionDirector such a great app is its ability to shoot in 4K. This is great if you’re putting together videos with high detail or a lot going on. For videos with lots of action, you might want to slow down or speed up certain elements; that’s possible with ActionDirector.

This is thus a great app if you want to record your friends on skateboards or free-running, for example. Slowing down the frames means you can catch your pals performing sweet tricks, then give it a cinematic look and feel.

Download: ActionDirector Video Editor (Free, in-app purchases available)

6. Funimate Video Editor

Funimate Video Editor is perfect for beginners, thanks to its simple interface and reduced feature set. You won’t make the next Hollywood blockbuster with it, but if you just want to add some little effects to your video clips, this is a great place to start.

With Funimate, you can import existing videos and add effects. It’s a really easy app to understand, so you don’t have to worry about complex options when starting out. It has multi-layer editing so you can add depth to your creations. This, along with the ability to utilize color effects, text, and music makes this app ideal for making little social videos.

The best part is the ability to edit on the go. Just snapped your friends on a shopping date? Make a cool video and pop it on Instagram for everyone to see!

Download: Funimate Video Editor (Free, in-app purchases)

7. InShot

InShot is a great app that’s ideal for creating videos for your social media feeds. It has basic video timeline editing, which allows you to add effects to your video at specific moments. You can also switch the effects off in the same way.

It includes a range of effects to add to your videos. These include a mosaic effect, VHS filters, color filters, and much more. Additionally, InShot optimizes your saved videos for use on social media. That way, you know that your videos will fit within the restrictive frames present on Instagram and similar apps.

InShot is fun to use and can give your videos that extra touch to make them stand out against others.

Download: InShot (Free, in-app purchases available)

The Best Video Effects App For You

Whether you want to snip, clip, and chop your videos, or just add some simple text to your moving images, there are plenty of Android apps to add effects to your videos. All of the apps above are simple to use and are great for beginners and pros alike.

If you want to delve more into actually editing the videos, take a look at the best video editors for Android.

Read the full article: The 7 Best Android Apps to Add Special Effects to Videos


Read Full Article

What’s the Difference Between Linux Distributions If They’re All Linux?


When you’re looking for a new Linux distro to install, you notice two things: the name, and the desktop environment.

A quick browse shows obvious differences between Ubuntu, Fedora, Linux Mint, Debian, openSUSE, and many other variants of Linux. But why are there so many Linux distributions and what is the difference between them?

The 5 Key Differences Between Linux Distributions

Looking for a new Linux distro? At some point you’ll have wondered why there are so many different distributions, especially if they’re all Linux anyway.

You may know that Windows 10 has multiple editions, but they aren’t marketed as entirely separate operating systems. Meanwhile, macOS has a single variant (at least for the desktop). So why are there so many different Linux distributions?
Development of Linux distributions is thanks to various collaborative and yet disparate groups. Over the years since the Linux Kernel was first released, this approach has led to the creation of different distros.

At the core, it is Linux. But you will notice some differences between Linux versions, specifically:

  • Desktop Environments
  • Package managers
  • Display servers
  • Goals and aims
  • Open source philosophy

But how much do these differences really matter?

1. Desktop Environments

Most distributions seem to differ simply based on which desktop environment they use.

For example, Ubuntu offers several desktop environments depending on which flavor you choose. You can have:

  • Ubuntu (the main version includes the GNOME desktop)
  • Kubuntu (KDE)
  • Lubuntu (LXQt)
  • Ubuntu Budgie (with the Budgie desktop)
  • Ubuntu MATE (the classic Ubuntu desktop)
  • Xubuntu (Xfce)

Other distros have a more modest selection of desktops available, however, often offered as “spins” that contain different desktop environments. An example distribution that does this is Fedora. Meanwhile, you’ll find the macOS-inspired Pantheon desktop on Elementary OS.

Check our guide to the best Linux desktop environments to learn more about these differences.

2. Package Managers and Other Technologies

The people behind each Linux distribution can choose what software they include, such as file managers and package managers.

Distribution leaders have these options because each category of Linux software can have multiple applications.

For example, several file managers are available for Linux, such Nautilus and Konqueror, each offering a different way to browse files.

Another example is Linux package managers. Various methods for installing software are included with each Linux distribution, but they have an underlying package manager.

On Debian-based distros such as Ubuntu and Linux Mint, dpkg is the choice, accessed via the apt dependency resolver. For CentOS, RPM is the package manager, subject to commands using yum.

3. Different Display Servers on Linux

Under the hood on Linux you’ll find a selection of tools, applications, processes, and servers that determine how it runs.

A key example of this is the display server. This software coordinates data between the computer hardware and the display, enabling the user to interact with the graphical user interface (GUI).

Historically, the X.Org Server has been most commonly used. Various alternatives are available, however, such as Mir, and SurfaceFlinger which is used on Android (which uses the Linux Kernel). The Wayland display server is seen as the future on Linux, with most popular distros adopting it.

4. Goals and Aims

Some distributions exist because they like some aspects of an existing distro but wish to replace some software packages. Meanwhile, Linux distributions can differ in their aims. For example, Linux Mint is based on Ubuntu, but contains different system tools, desktop environment, and a minty-green theme. Its primary aim is to provide a simple stepping on point for Windows and macOS users to start using Linux.

Similarly, Debian aims to provide an extremely stable distribution (and therefore contains older software).

Beyond the realm of universal distributions, some Linux projects have specific purposes. For example, gaming distros like Steam OS, or multimedia distros like Fedora Design Suite.

5. Open Source vs. Proprietary Philosophy

While GNU/Linux is perhaps the most famous open source project, not all distros are 100 percent open source.

Project leaders have differing stances on open source, which can be a deciding factor for open source purists.

As an example, Ubuntu doesn’t have an issue with including proprietary software in its repositories. You’ll find the Steam gaming client is easily available, while graphics drivers from AMD and Nvidia can be installed. Fedora, conversely, has a strong open source policy that prevents it from including any proprietary software in its repositories.

Of course, at the end of the day you can do whatever you want with your chosen Linux distro. Regardless of the distribution project’s policies, there is no block on what you install.

In short, while many Linux distributions might have lofty aims of open source compliance, not all are open source.

What All Distros Have in Common: the Linux Kernel

Despite these differences, all Linux distributions are still considered to be Linux: but why?

They all have at least one thing in common: the Linux kernel. This piece of software is the core of the operating system, bridging the software that you interact with (e.g. the browser) with the underlying hardware that does all the work. It also includes many device drivers to provide support for whatever hardware you may be sporting.

That’s why it’s important to keep the kernel updated or to compile the kernel yourself if you have special requirements. Developers around the world contribute to the kernel, along with its creator, Linus Torvalds.

Use Linux’s Differences to Choose the Right Distro for You

Knowing how distributions differ from each other can contribute to making or breaking your Linux experience.

Not all distributions are meant for everyone, so choose the one that is most geared towards you and your preferences. There’s absolutely nothing wrong with giving any distribution a try to get a good idea of what it’s about.

Not sure where to start? Check our round up of the best Linux operating systems.

Read the full article: What’s the Difference Between Linux Distributions If They’re All Linux?


09 June 2020

Decrypted: DEA spying on protesters, DDoS attacks, Signal downloads spike


This week saw protests spread across the world sparked by the murder of George Floyd, an unarmed Black man, killed by a white police officer in Minneapolis last month.

The U.S. hasn’t seen protests like this in a generation, with millions taking to the streets each day to lend their voice and support. But they were met with heavily armored police, drones watching from above, and “covert” surveillance by the federal government.

That’s exactly why cybersecurity and privacy is more important than ever, not least to protect law-abiding protesters demonstrating against police brutality and institutionalized, systemic racism. It’s also prompted those working in cybersecurity — many of which are former law enforcement themselves — to check their own privilege and confront the racism from within their ranks and lend their knowledge to their fellow citizens.


THE BIG PICTURE

DEA allowed ‘covert surveillance’ of protesters

The Justice Department has granted the Drug Enforcement Administration, typically tasked with enforcing federal drug-related laws, the authority to conduct “covert surveillance” on protesters across the U.S., effectively turning the civilian law enforcement division into a domestic intelligence agency.

The DEA is one of the most tech-savvy government agencies in the federal government, with access to “stingray” cell site simulators to track and locate phones, a secret program that allows the agency access to billions of domestic phone records, and facial recognition technology.

Lawmakers decried the Justice Department’s move to allow the DEA to spy on protesters, calling on the government to “immediately rescind” the order, describing it as “antithetical” to Americans’ right to peacefully assembly.


Read Full Article