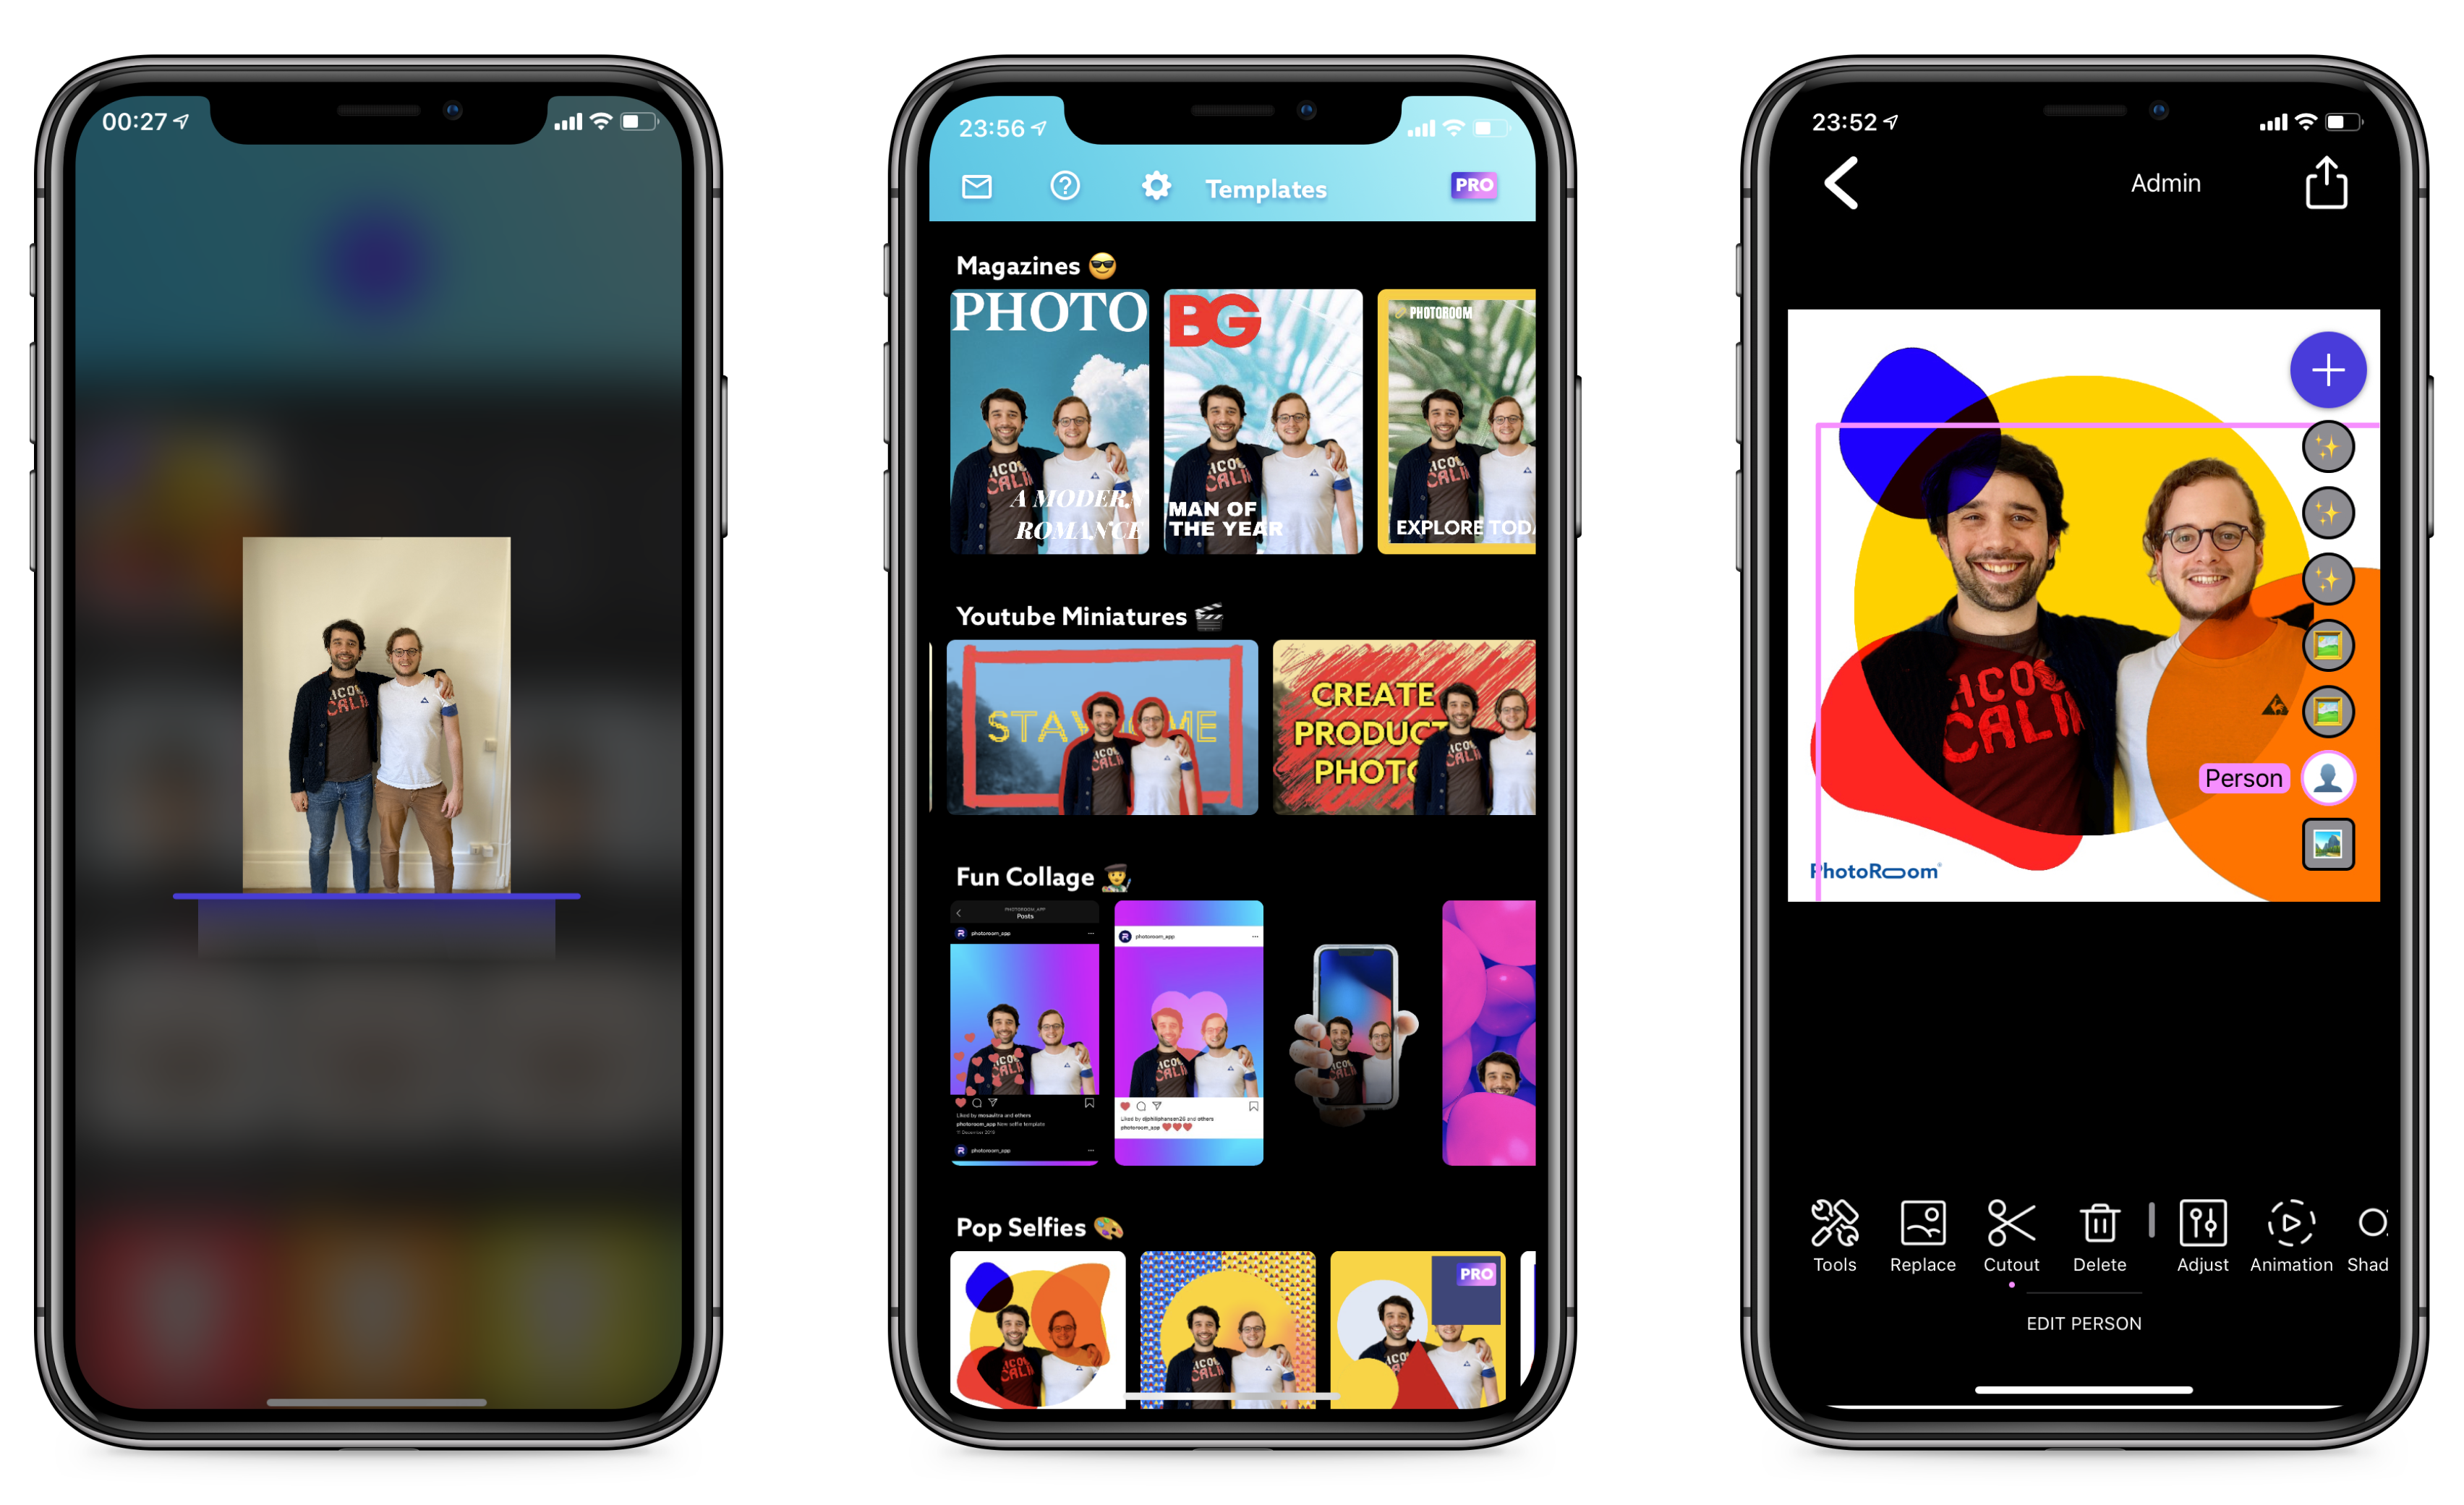
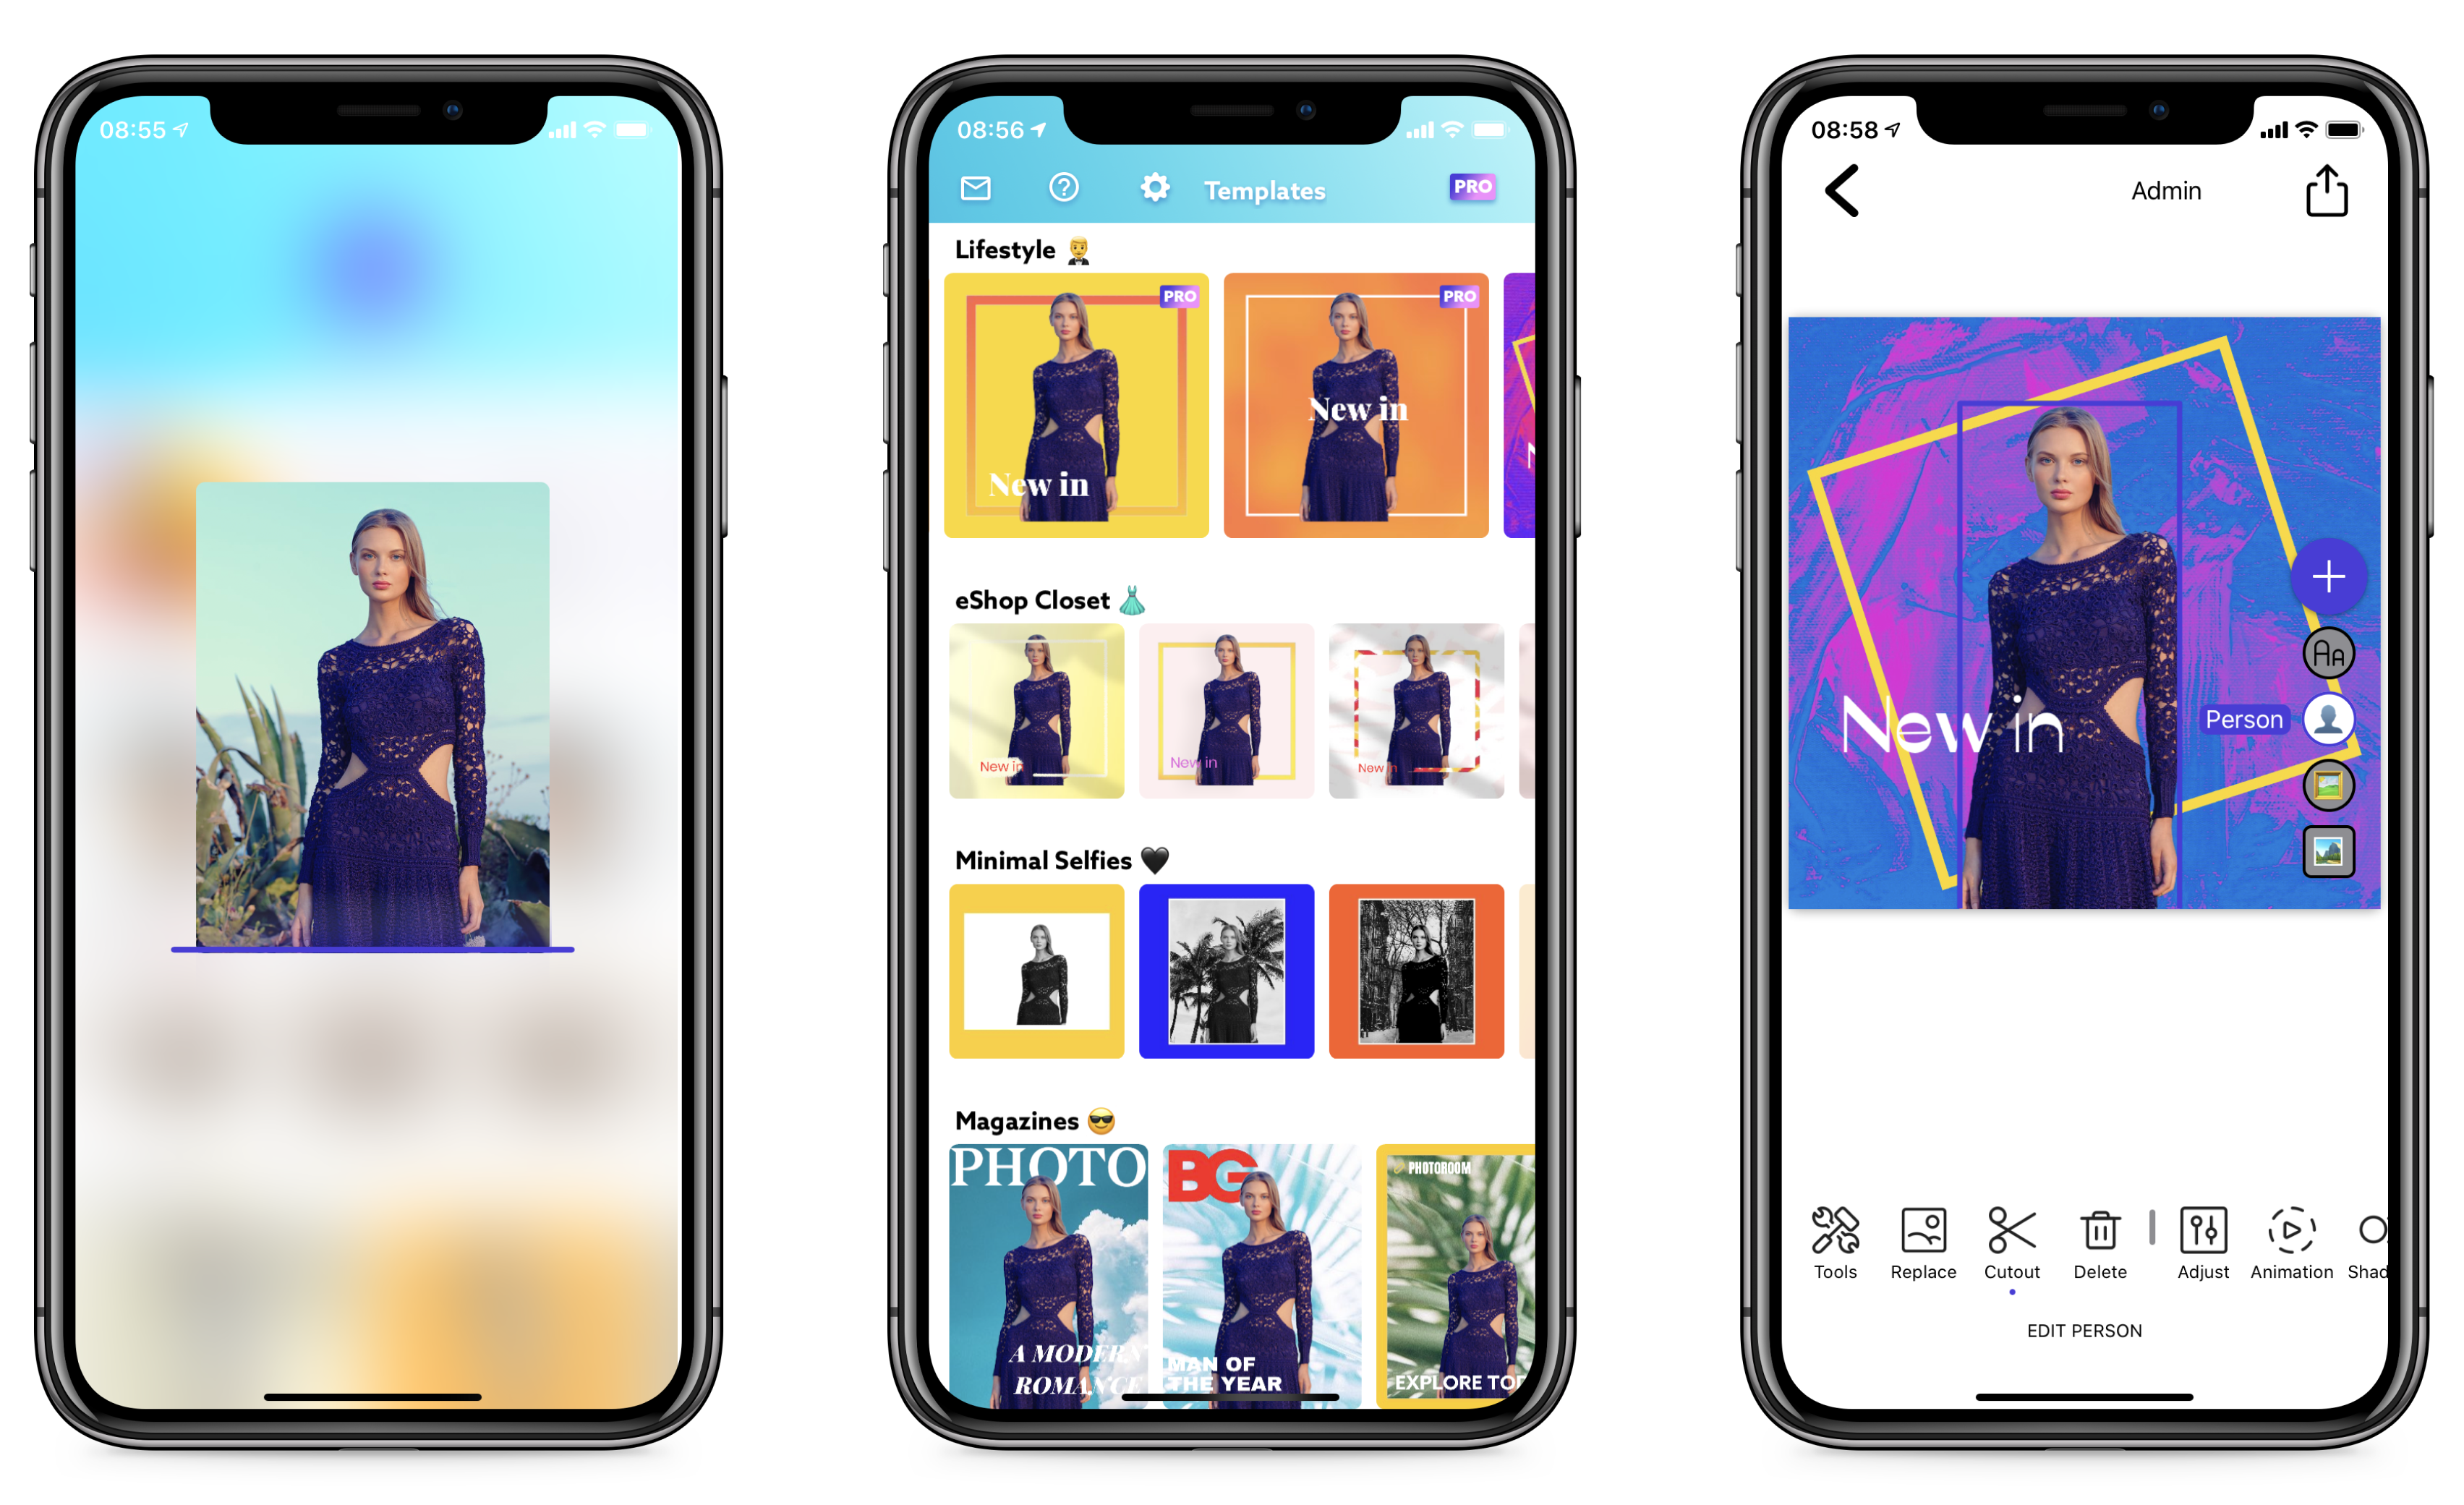
Meet PhotoRoom, a French startup that has been working on a utility photography mobile app. The concept is extremely simple, which is probably the reason why it has attracted a ton of downloads over the past few months.
After selecting a photo, PhotoRoom removes the background from that photo and lets you select another background. When you’re done tweaking your photo, you can save the photo and open it in another app.
“My original vision comes from my time when I was working at GoPro,” co-founder and CEO Matthieu Rouif told me. “I often had to remove the background from images and when the designer was out of office, I would spend a ton of time doing it manually.”
And it turns out many people have been looking for a simple app that lets them go in and out as quickly as possible with an edited photo in their camera roll.
For instance, people selling clothes and other items on peer-to-peer e-commerce platforms have been using PhotoRoom to improve their photos. PhotoRoom is often recommended in online discussions or YouTube tutorials about optimizing your Poshmark or Depop listings.
Downloads really started to take off around February. PhotoRoom now has 300,000 monthly active users. The app is only available on iOS for now. And if you’re a professional using it regularly, you can pay for a subscription ($9.49 per month or $46.99 per year) to remove the watermark and unlock more features.
“Subscriptions are what works best on mobile for photo and video apps,” Rouif said.
Behind the scene, PhotoRoom uses machine learning models to identify objects on a photo. And the vision goes beyond removing backgrounds.
Photoshop, the clear leader in photo editing, has been designed decades ago. There’s a steep learning curve if you want to use it professionally. It’s hard to understand layers, layer masks, channels, etc.
PhotoRoom wants to build a mobile-first photo-editing app that doesn’t lazily borrow Photoshop’s metaphors and interface elements. “What would be Photoshop if you could understand what’s on the photo,” Rouif said.
While the app relies heavily on templates, you can tweak your images by adding objects, moving them around, adding some shadow and editing elements individually. Image composition is 100% up to the user.
Like VSCO, Darkroom, PicsArt, Filmic Pro and Halide, PhotoRoom belongs to a group of prosumer apps that are tackling photo and video editing from different ways. A generation of users who grew up using visual social networks are now pushing the limits of those apps — they look simple when you first use them, but they offer a ton of depth when you learn what you can do with them. And they prove that smartphones can be great computers, beyond content consumption.
Rouif was the head of product at Stupeflix, a powerful video editing app that was acquired by GoPro back in 2016. PhotoRoom is just getting started as there are only four people working on the app, including two interns.
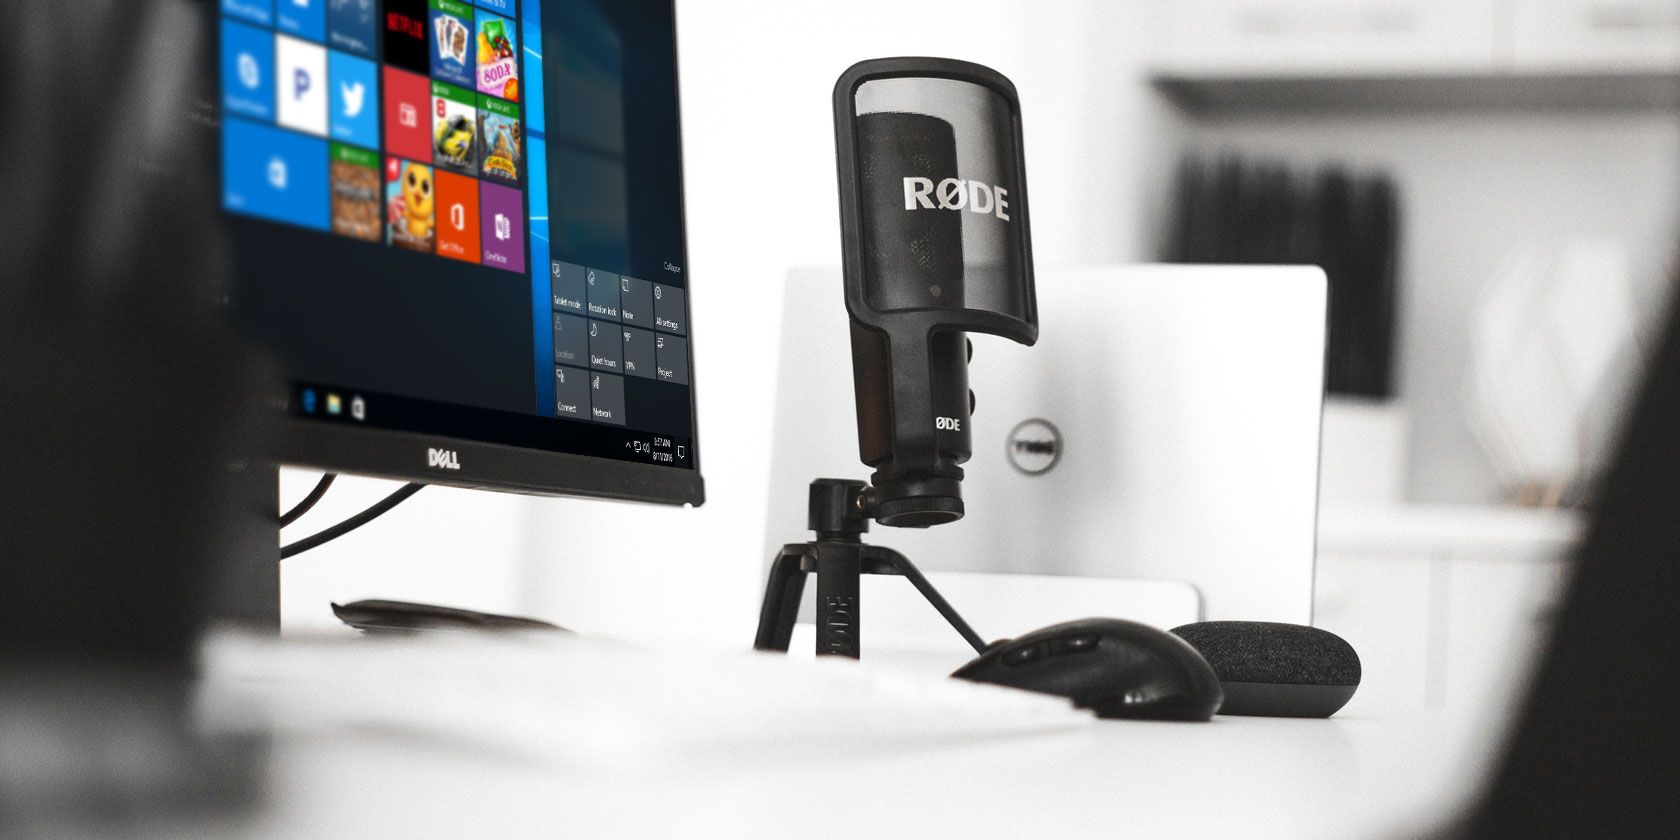
A lot of Windows sound issues involve the sound output from your speakers. But what if you’re having problems with sound input; how do you fix the microphone?
Whether you’re using a headset microphone to chat in games or recording with a USB mic, we’ll share some tips to fix a lack of input or unreliable mic issues. These will help whether your mic is cutting out or isn’t recognized in the first place.
Check Windows’ Sound Settings
Before you start troubleshooting, restart your computer. You might have a temporary issue that a simple reboot will fix.
After that, your first stop for microphone troubleshooting should be the sound settings in Windows. Access these by navigating to Settings > System > Sound.
Here, under Input, open the dropdown box under Choose your input device. Select the mic you want to use; other available inputs, like your laptop or webcam’s built-in mic, will also show here.
Once you’ve picked the right mic, speak into it and you should see the Test your microphone bar move up and down. If it doesn’t, click the Troubleshoot button below and Windows will attempt to find and fix problems with your mic.
Click the Device properties link to rename the input to make it easier to find in the future. You can also check the Disable box to keep that mic from showing up, or change the Volume to adjust how loud the mic is.
At the bottom of the Sound page, you’ll find the App volume and device preferences menu. This allows you to choose a different output and input device for your open apps. Have a look here and make sure you don’t have the wrong mic selected for the app you’re using.
Troubleshoot Microphone Hardware
Moving on, you should look at your audio hardware setup, especially if you can’t get any input from your microphone at all or didn’t see it listed in the menu above.
If you use a USB mic, try plugging it into another USB port on your PC. Don’t use a USB hub—plug your mic directly into a slot on your PC. If the mic works in another USB port, the first one is likely dead or has an issue. For analog mics, make sure you have the cable plugged into the pink line-in port on your PC.
For all mics, confirm that all cables are fully inserted and that nothing is loose, including the cable for your headset mic if it’s removable, and any extensions. You should also check for fraying cables, as damaged cords can cause problems.
If your microphone has a physical mute toggle, make sure you haven’t enabled it by mistake. Look for a slider or button on your headset, cord, or front of the mic.
Should you still have no mic input after double-checking the above, try plugging your mic into another computer. If it doesn’t work on the other PC, your microphone hardware may be faulty.
Finally, don’t forget to check for updated drivers for your microphone. Most headsets and microphones work out of the box in Windows, but some may require specific drivers for best performance.
Search Google for your device’s name and look for a Downloads section on the manufacturer’s website to find the driver. Updating your existing sound card drivers is important too.
Confirm That Apps Can Access Your Microphone
Windows 10 has a Privacy menu where you can block apps from accessing sensitive data like your camera and microphone. It’s possible that you’ve blocked an app from accessing your microphone here.
Head to Settings > Privacy to take a look. On the left sidebar, choose Microphone under App permissions. Make sure the slider under Allow apps to access your microphone is enabled, or no apps can use it. Take a look through the list of apps to confirm the one you want to use has access.
This first slider and list is only for Store apps, however. Scroll down further and you’ll reach a section titled Allow desktop apps to access your microphone. Double-check that the slider under this header is turned on.
While you can’t toggle mic access for individual desktop apps, you can see when they last accessed your mic. This can help you figure out if the app is detecting your mic properly.
Review Your List of Recording Devices
If your mic is still not working properly, you should next review your list of available input devices. You can do this by clicking Manage sound devices on the same Settings page as above, but it’s a little easier to do using the Control Panel.
Enter control panel in the Start menu to open it, and change Category in the upper-right to Small icons if necessary. When you see the full list of choices, choose Sound.
Here, switch to the Recording tab, which shows all the microphones connected to your PC. Right-click anywhere and confirm both Show Disabled Devices and Show Disconnected Devices are checked.
Look through the list and make sure that your primary mic isn’t disabled (right-click and choose Enable if so). When you speak into a mic, you’ll also see its bar light up to confirm it’s working.
Mic Levels and Exclusive Mode
Double-click on your mic in the Recording panel and you can edit a few options. If you didn’t change the mic’s name earlier in Settings, you can change it now on the General tab. On the Levels tab, you can adjust the input volume (and boost, on supported mics). Try raising this if it seems too low, or lowering it if your mic clips.
Depending on your mic and computer, you may see additional tabs on this page. These contain enhancements like background noise suppression and similar, which you can try if you want.
Finally, on the Advanced tab, uncheck both boxes under Exclusive Mode. The Allow applications to take exclusive control of this device box means that one app can “lock” your microphone so nothing else can use it. Disabling this can solve a lot of mic problems. You can also adjust the Default Format in the dropdown box to select the input quality.
Once you’re done making changes, head back to the Recording tab. Right-click any inputs you don’t use and choose Disable to reduce clutter in input menus. Finally, right-click your main mic and choose Set as Default Device so apps use it by default.
Record Yourself to Troubleshoot
At this point, if your mic is still cutting out in a specific game or app, you should determine whether it’s an issue with your device or the app. To do this, you’ll need to record a short clip of audio.
Windows 10’s built-in Voice Recorder app is suitable for a quick test. Alternatively, Audacity gives you a lot more options and monitors for a deeper analysis.
Simply open either app and record yourself for a minute—speak the alphabet a few times, count to 50, or similar. Then play it back and see if it cuts out or otherwise sounds unclear at any point.
If it sounds clear in Audacity, continue with troubleshooting. But if the recording cuts out here, double-check your hardware if you haven’t already. Your problem likely lies with one of the above steps.
Disable Xbox Game Bar and DVR
Windows 10’s Game Bar can record clips and screenshots of your game. While this is neat, it’s also known to cause mic issues in some games.
Head to Settings > Gaming > Game bar and disable Record game clips, screenshots, and broadcast using Game bar. Then move to the Captures tab and disable Record in the background while I’m playing a game and Record audio when I record a game.
By now, you’ve essentially ruled out a hardware issue with your microphone, and are pretty sure the problems are tied to one app. Thus, you should dig around in the settings of your game (or other software) to see if you can tweak the mic options there.
Make sure the game is using your primary microphone. Most video games have an option to reduce your mic input volume. Try dropping this a bit, as your input may be clipping and causing it to cut out. Increase it if others say your input is too quiet.
Finally, if the game has a microphone test option, see how your voice sounds. If it’s clear in the test but cuts out in-game, the cause could be a network issue. Perhaps the game’s voice chat uses a port that your router has blocked.
If your mic issue only occurs in-game, consider using a third-party program like Discord for voice chat instead of relying on the game.
Troubleshoot Mic in Zoom, Skype, or Similar Apps
It’s particularly frustrating when an app like Zoom has an issue with your mic. If you’ve walked through all the above steps, the issue probably lies somewhere in the app’s audio settings.
With Zoom, click the Gear icon on the right side to open its settings, then switch to the Audio tab. Under Microphone, you should see the Input Level move when you speak. Click Test Mic to record yourself briefly and see how it sounds. Use the dropdown box to swap your mic input to another device if needed.
Finally, make sure you aren’t muted in a call. Most chat apps give you an option to mute your microphone at the bottom of the screen, which can lead to you thinking your mic isn’t working if you forget you’re muted.
It’s annoying to hear everything you say again with a delay. And while mic echo is often a problem on someone else’s end, there are a few ways to reduce echo problems.
First, if at all possible, use a headset on calls. Most echo is caused by your microphone picking up audio from your computer’s speakers, which happens much more easily when using your laptop’s built-in microphone and speakers. Using headphones greatly reduces the chance of your microphone picking up that sound.
Make sure that your microphone sensitivity isn’t set too high, as discussed above. Even with headphones, a sensitive mic may pick up some sound that comes through the headset.
If you hear everything you say in your headphones, even when you’re not in a video call, you probably have a specific Windows setting turned on. Go back to the Recording tab in the Sound panel, double-click your input device, and switch to the Listen tab.
If you have Listen to this device checked, you’ll hear everything from that microphone in the select output device. This can be useful in certain circumstances, but in most cases will just drive you crazy. Uncheck the box and hit OK to stop that.
Your Mic Problems, Solved
Hopefully, one of these tips solved your Windows microphone issues. These problems can sometimes be difficult to nail down, since microphones, games, apps, and settings vary so much in each use case.
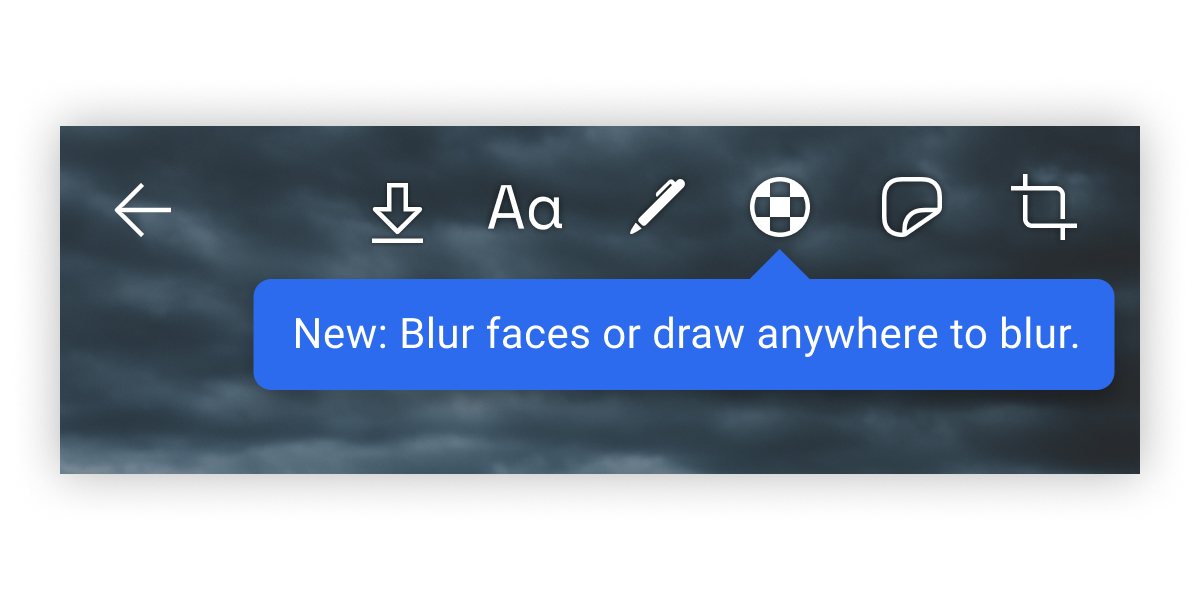
Signal, which uses end-to-end encryption on all messages, has added a new tool to its secure messaging app. The feature lets you blur faces (or anything other identifying features) in photos, making it more difficult for individuals to be identified.
This is in response to the current protests taking place across the US and beyond. And while Signal itself suggests covering your face before heading out onto the street, its blur tool offers an extra layer of protection when sharing photos online.
How to Blur Faces in Photos Using Signal
To blur your photos using Signal, first, open the app on your phone. Then, head to any of your current chats and tap the Camera icon. Select an image from your gallery, and tap the Blur icon (which looks like a soccer ball for some reason).
Tap the Blur Faces toggle on to have Signal automatically blur the faces from the photo. If Signal misses a face (or you want to blur something else out of the image) use the Blur Brush to do so. Finally, save the photo to your gallery.
All of the processing happens locally, meaning the original, uncensored images never leave your device. It’s important to note, however, that there are ways to unmask people in blurred images, and Signal cannot guarantee this will safeguard your identity.
You can read more about Signal’s new blur tool, including Signal’s reasons for releasing it, in a post on The Signal Blog. The feature is available in the latest version of Signal for Android and iOS (rolling out right now), so if you can’t yet see it, update the app.
Because our phones have so much personal information, most people are horrified at the thought of someone fiddling with their phone. Even worse is what could happen if you lose your smartphone completely.
Thankfully, modern devices come with multiple security options. Protecting your device while out and about is easy. But what about when you’re safely at home? Manually unlocking your phone each time you want to use it is a pain.
Android Smart Lock lets you keep your phone unlocked at all times, under certain circumstances. But can you keep your phone unlocked when connected to your home Wi-Fi network? Let’s take a look.
What Is Android Smart Lock?
Android Smart Lock first hit devices with Android 5.0 Lollipop. The Smart Lock feature allows you to specify certain circumstances where the device’s lock screen security will remain off.
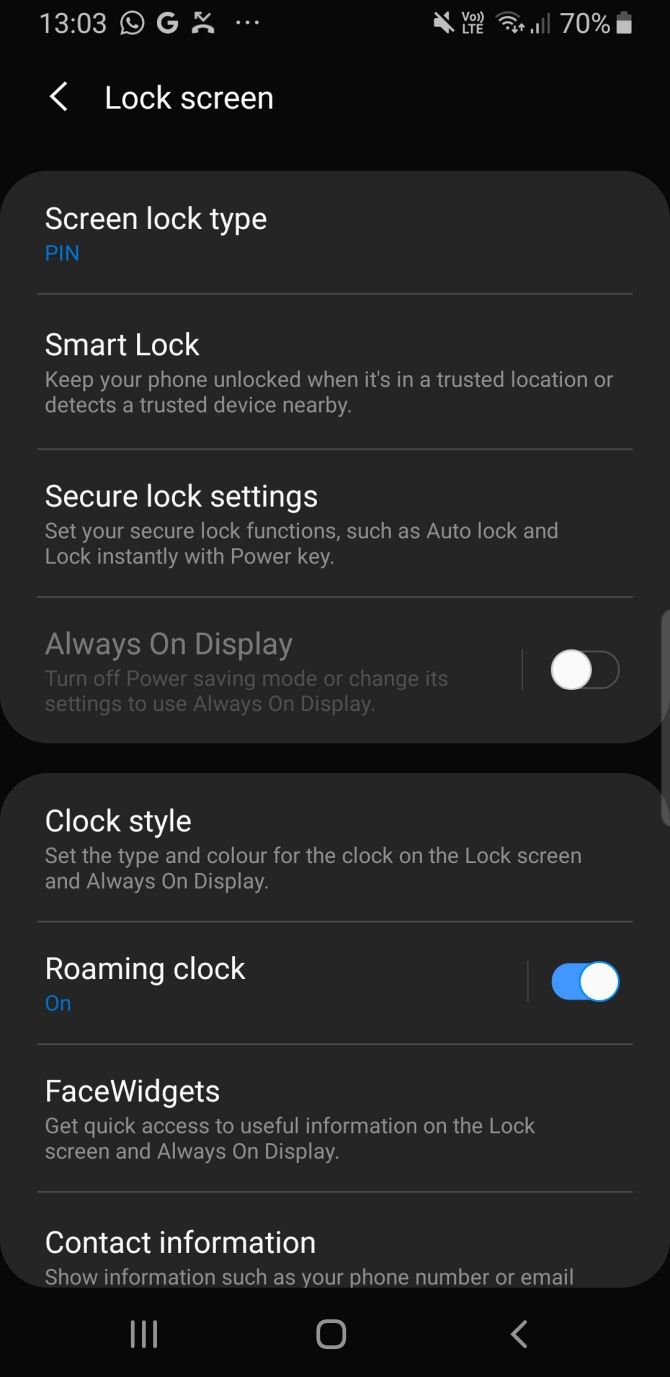
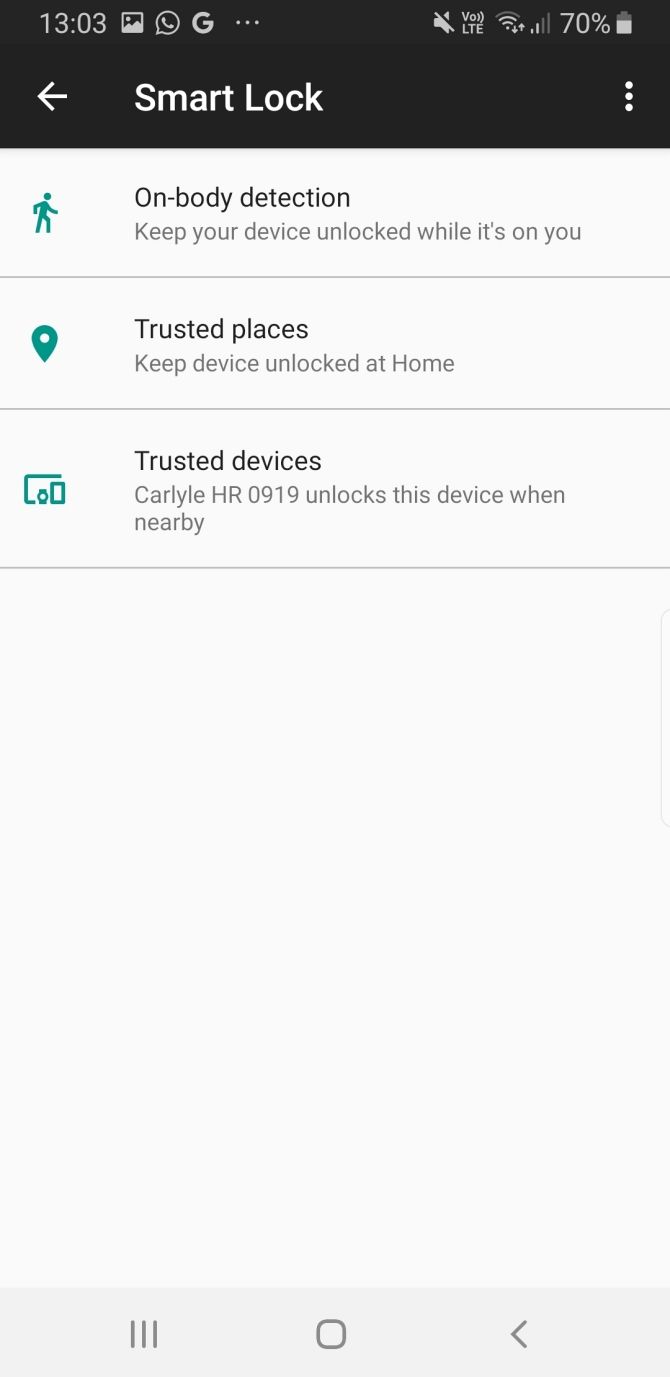
You can enable and configure these options by heading to Settings > Security > Smart Lock (this may differ slightly depending on your device). Enter your PIN, then you can select the Smart Lock option you want.
It’s possible to use multiple Smart Lock methods in conjunction, too. Here’s how they work.
On-Body Detection
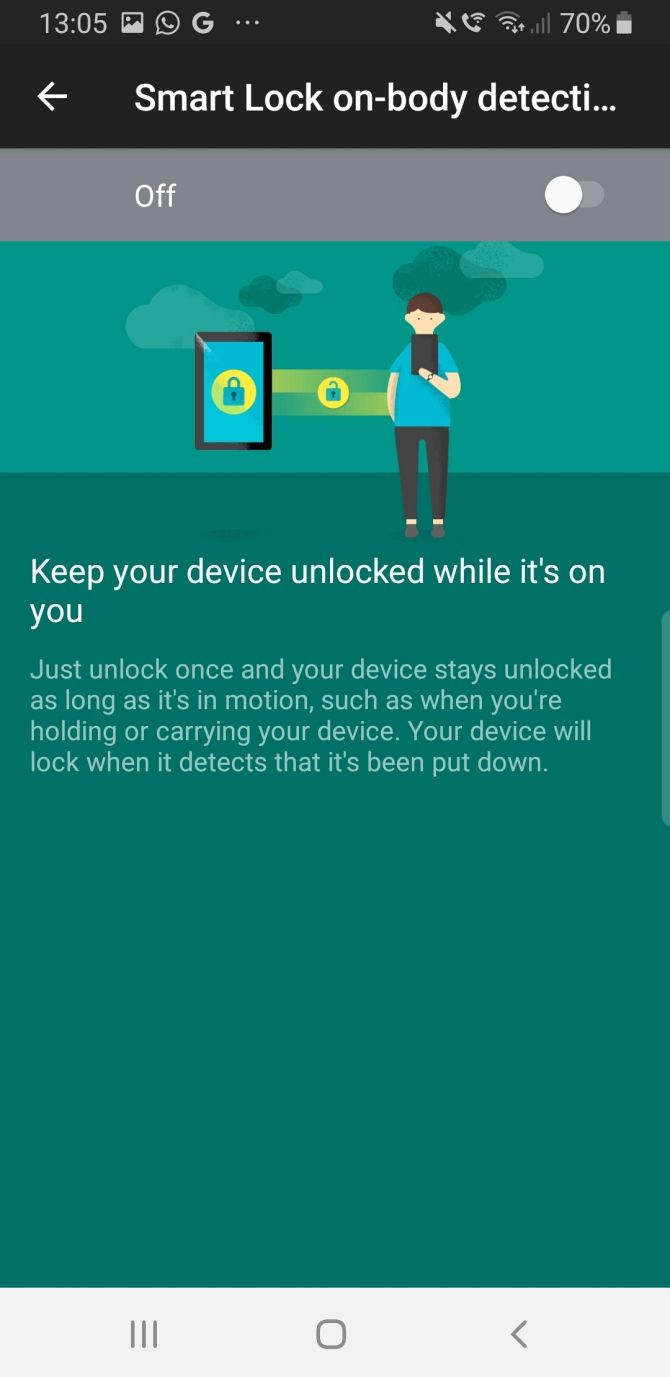
With this option, after unlocking it once, your Android device will remain unlocked as long as it detects motion, such as you holding or carrying the device. Your phone will lock automatically again when put down.
On-body detection poses some security issues. The lock mechanism doesn’t always activate immediately after you put the device down. Furthermore, it can sometimes take longer if you are in a car, train, bus, or other forms of transportation.
Trusted Places
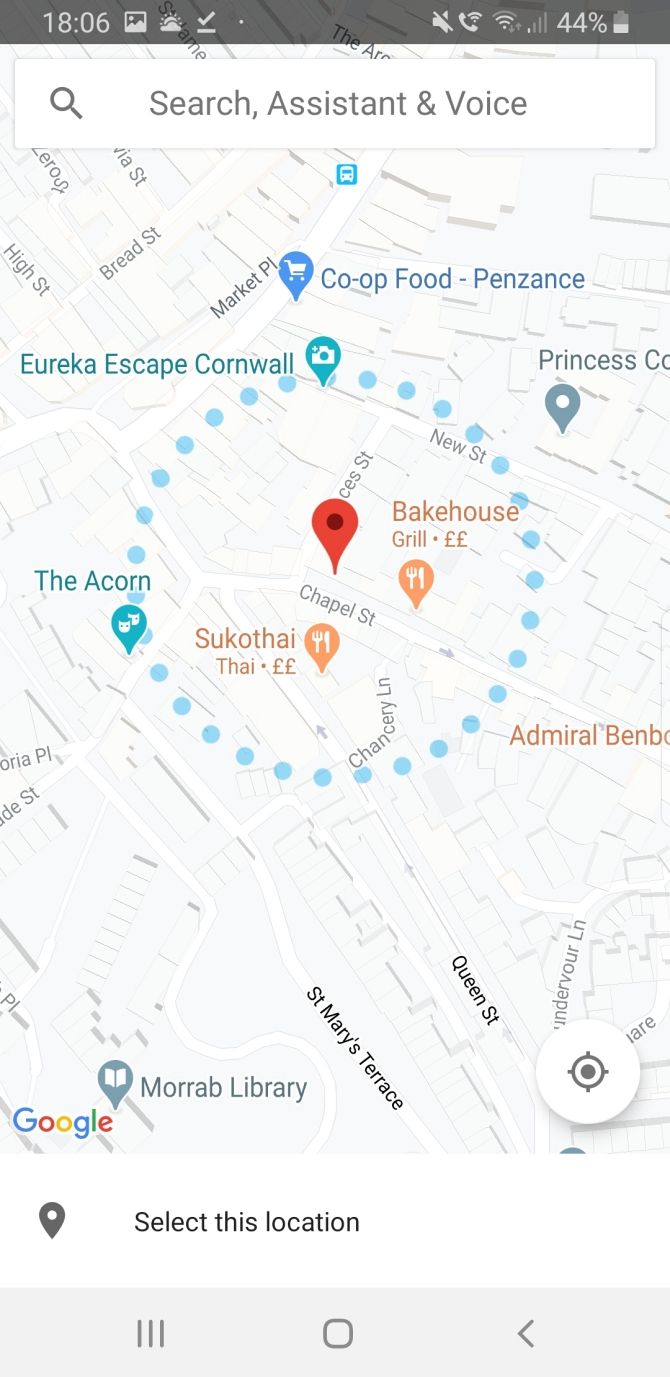
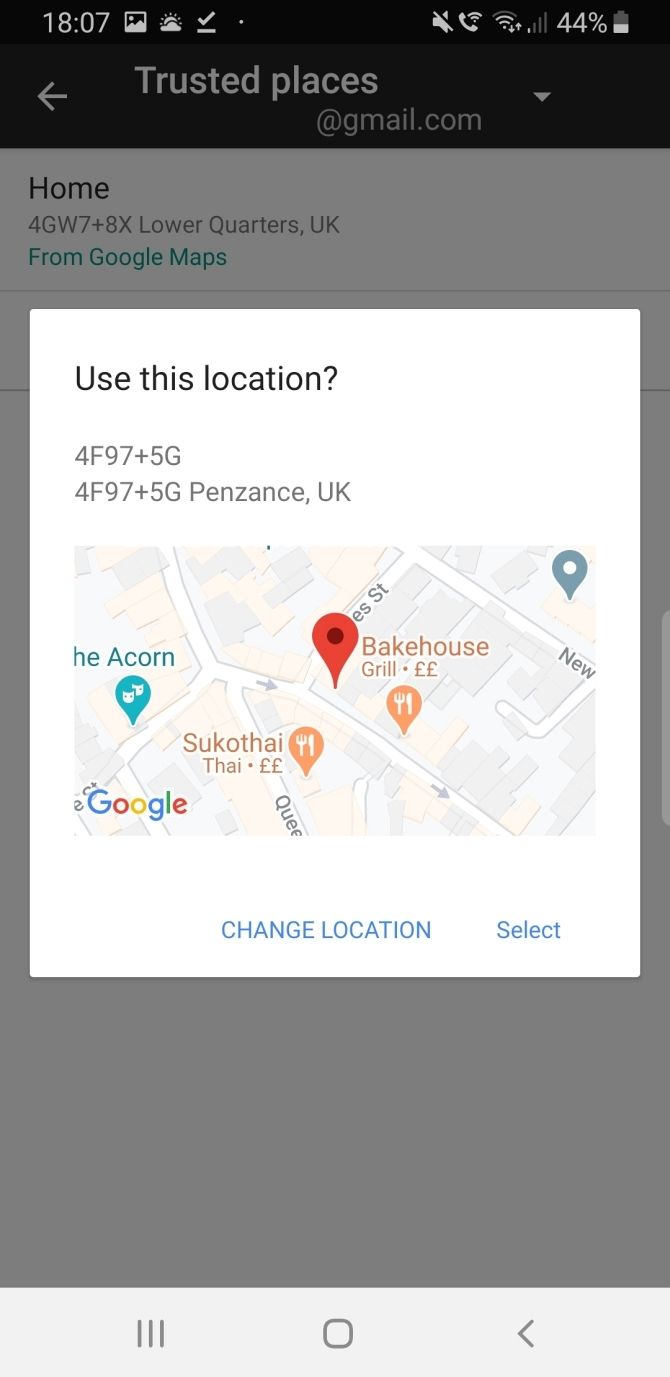
Use this option and your Android device will remain unlocked while in the vicinity of a specific location. Once you enable Trusted Places, your device will detect its location using GPS. If the signal shows you are within the range of a specified location, it will unlock.
There are three Trusted Places modes:
High Accuracy: Uses your phone’s GPS, Wi-Fi connection, provider network, and more to maintain an accurate location.
Battery Saving: Trusted Places will use less power-intensive location tracking tools, such as your Wi-Fi connection or mobile network.
Device Only: Uses only GPS to update the location of your device.
Trusted Places is a handy unlocking tool. Like the other options, though, it has limitations. For example, if you live in an apartment building, Trusted Places finds it extremely difficult to differentiate between your apartment and your neighbors’ residences. Since the GPS location is almost the same and the range for the unlocking can cover multiple apartments, your device might stay unlocked outside your home.
Although Trusted Places can take your Wi-Fi connection into account, you cannot tell your phone to stay unlocked when it connects to a certain network. However, there are workarounds for this that allow you to unlock your phone when connected to a Wi-Fi network. We’ll cover more on these in a moment.
Trusted Devices
You can keep your Android device unlocked if it has a connection to a separate trusted device. For example, you could set your smartwatch, in-car Bluetooth speakers, or fitness tracker as a trusted device. Then, while the two devices share a connection, the Android phone will remain unlocked.
Trusted Devices uses a Bluetooth connection to check Smart Lock status. If the Bluetooth connection between your devices drops for any reason, Smart Lock will disable, and your device will lock.
Voice Match
On certain Android devices, if you use Google Assistant, you can use the Voice Match option to keep your Android phone unlocked. Smart Lock recognizes the tone and inflections of your voice to create a unique unlocking tool.
If you switch on Voice Match, “OK Google” becomes the unlock tool. Check out our guide on how to use Google Assistant to lock and unlock your phone, plus the handy video walkthrough. Unfortunately, Google removed this option in Android 8 Oreo and above, but it still works on older devices.
How to Unlock Your Phone When Connected to Wi-Fi
One glaring Android Smart Lock omission is the option to keep your device unlocked when you connect to a specific Wi-Fi network. You can work around this issue with the Automate app; here’s how to keep your Android device unlocked when connected to Wi-Fi.
Automate is a user-friendly Android automation app. You can it for our intended purpose of staying unlocked on Wi-Fi. First, download the Automate app.
Now, open Automate. Given the nature of the service (it automates everything on your device), you must accept the permissions.
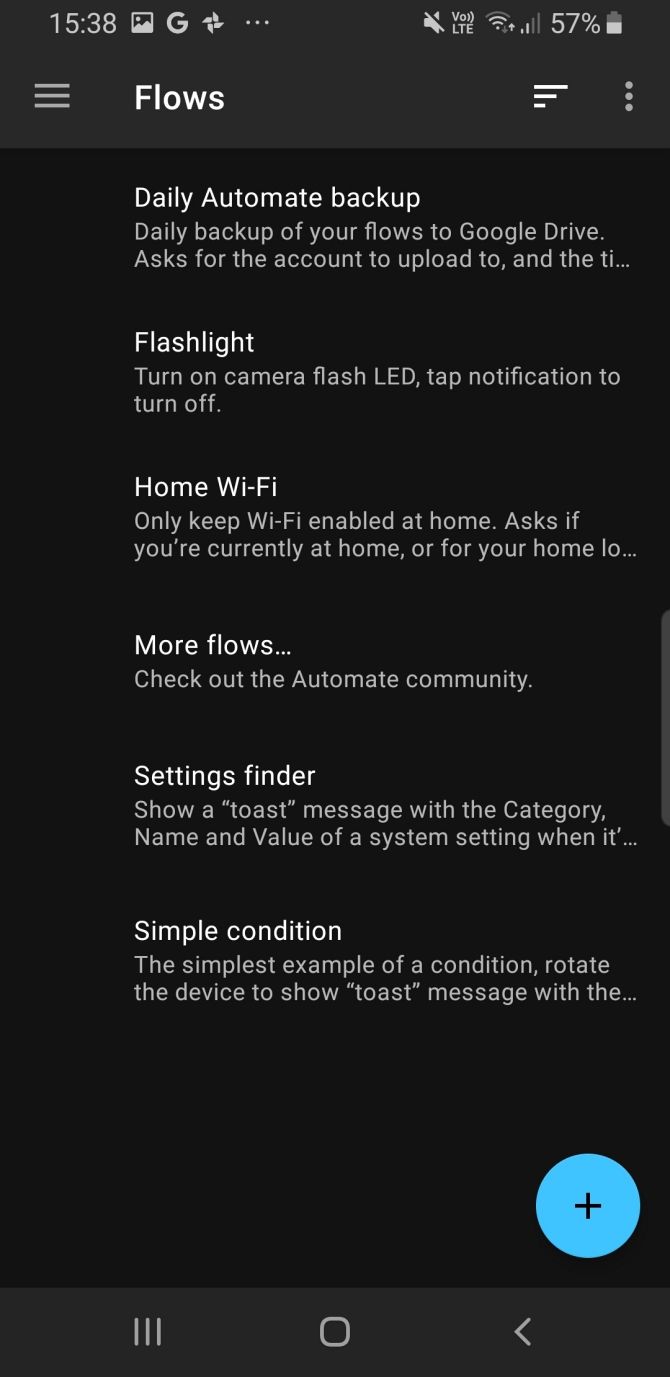
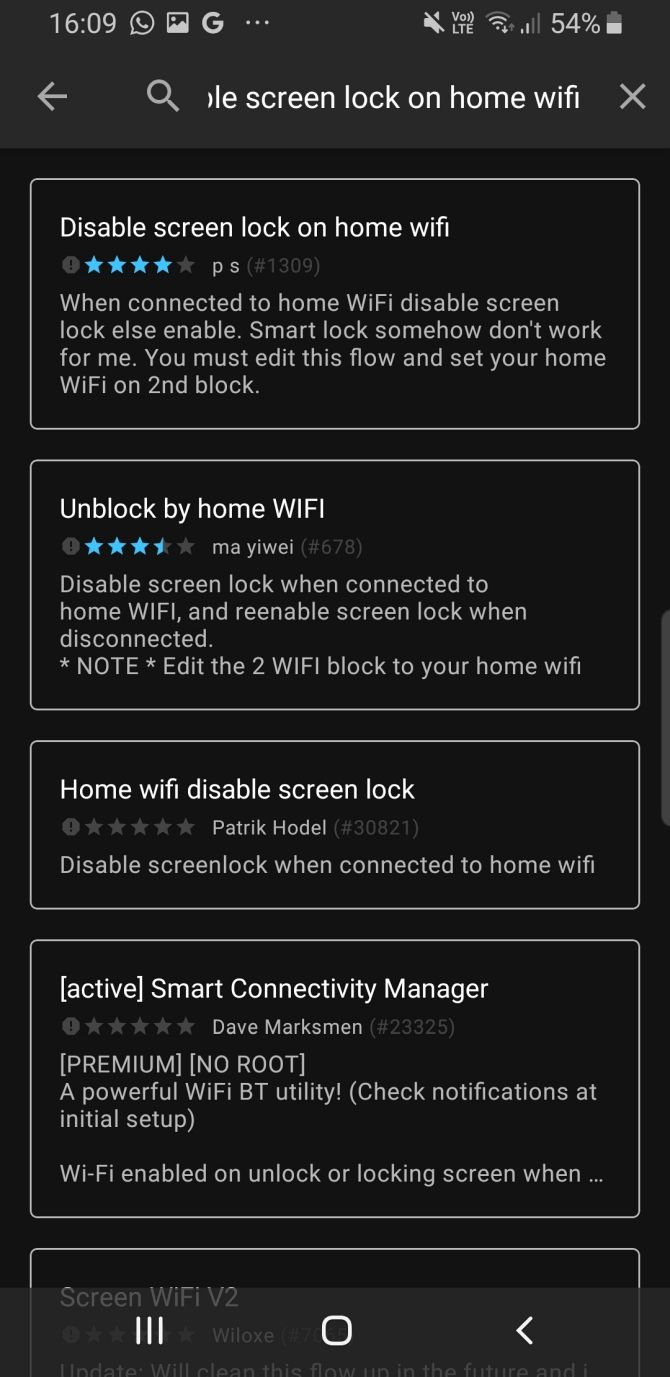
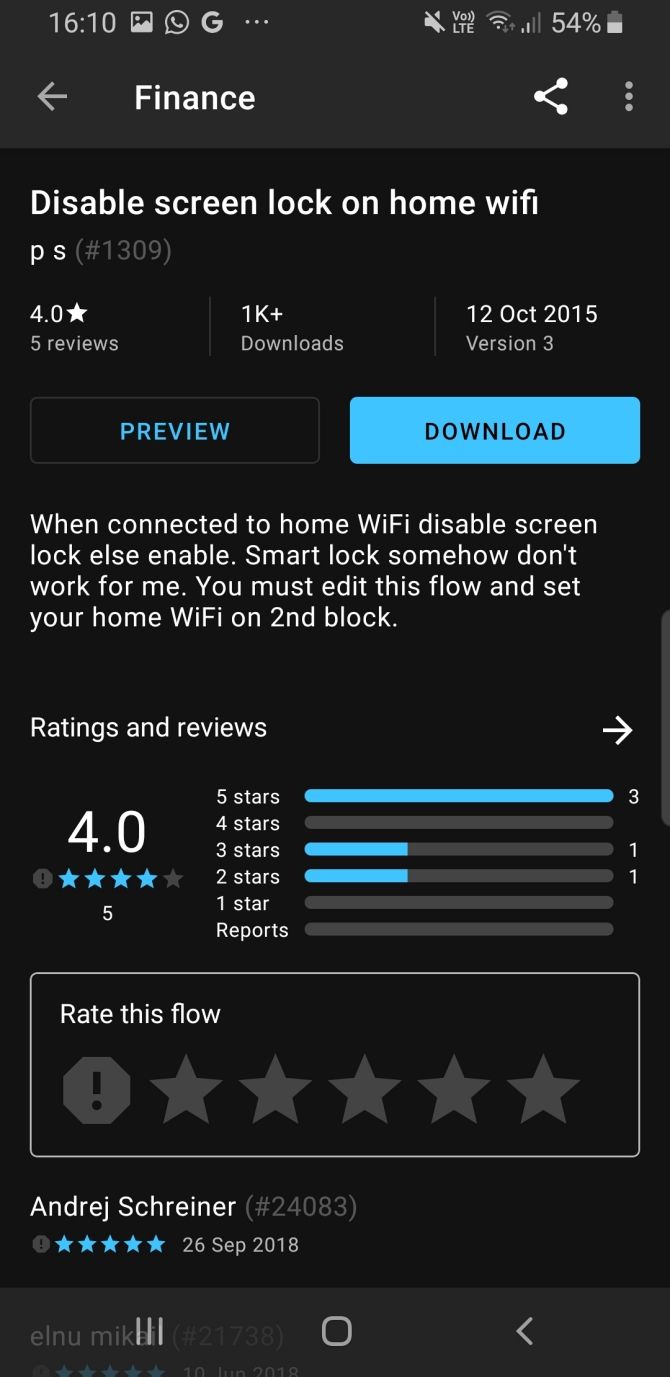
Select More Flows from the options, then search for disable screen lock on home wifi. The version you want is the creation of user p s, as you can see in the below image. Select Download, then head back to the Automate homepage.
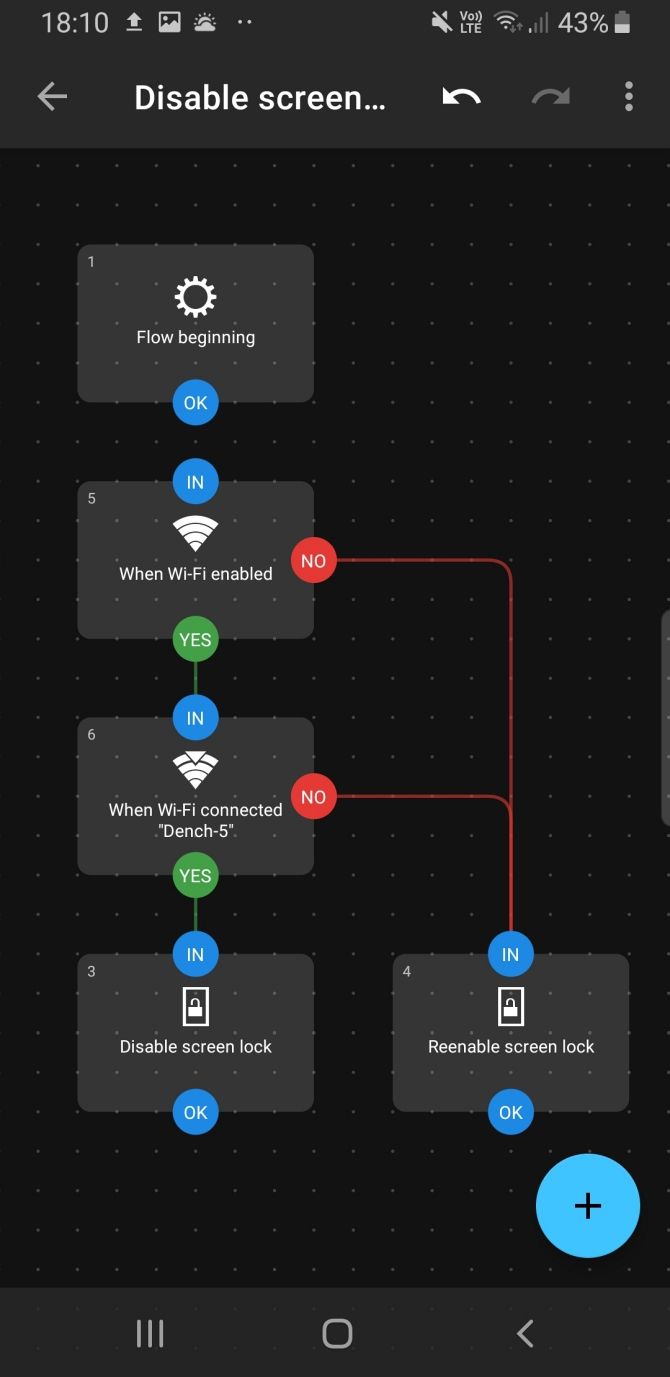
Next, select the Disable screen lock on home wifi flow from the list, tap the blue pen icon in the bottom-right, then hit the circuits icon just above. This opens the Automate flow edit screen.
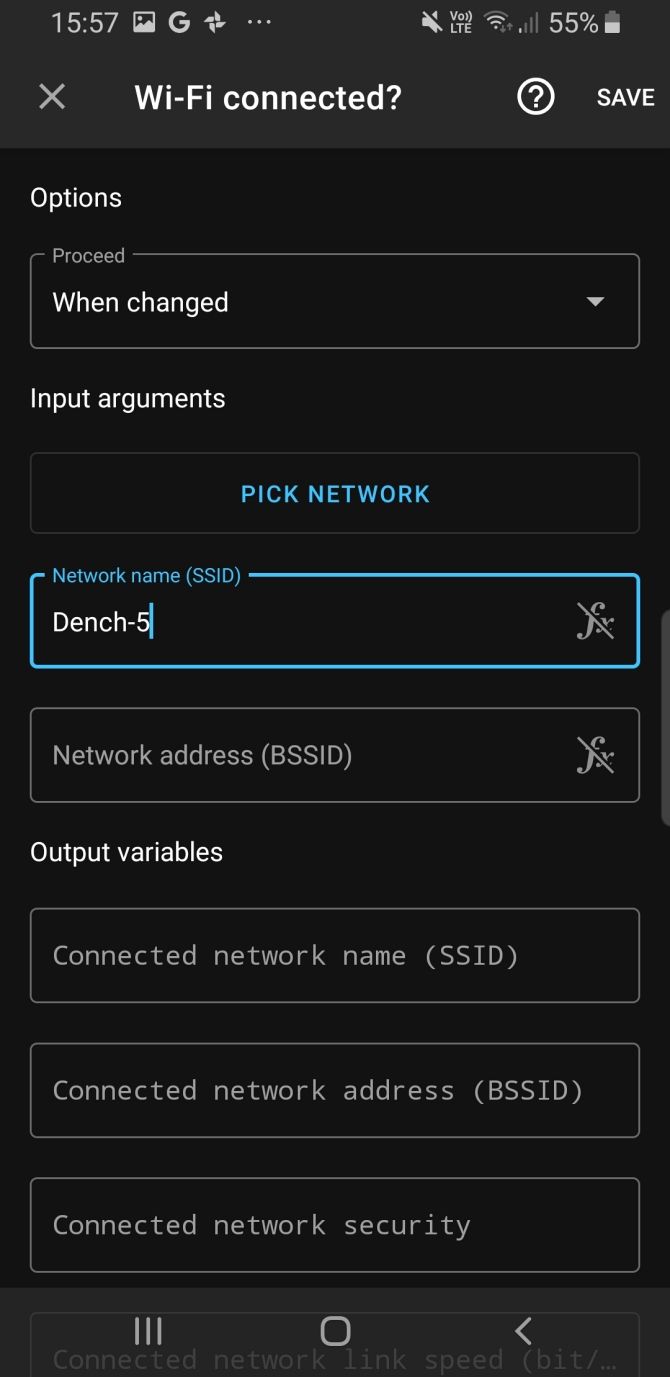
Tap the third box on the left, When Wi-Fi connected. Input the Wi-Fi network’s SSID in the box. Alternatively, select Pick Network, then select the Wi-Fi network from the list.
Now, you can Start the Automate flow, and your device will remain unlocked while connected to the Wi-Fi network you specified.
If there’s another Wi-Fi network you want to stay unlocked on, you can duplicate the Automate flow by tapping the three-dot menu and selecting Duplicate. Then in the duplicated flow, switch out the Wi-Fi network SSID for another one.
Is Smart Lock Secure?
Android’s Smart Lock is a handy tool in the eternal battle between security and convenience. Using Smart Lock is a security compromise, but is it one worth making? That depends on the situation.
When you’re at home, why not keep your device unlocked? Finding your phone suddenly locked is infuriating at times. Think about if you’re cooking from a recipe or following a DIY tutorial. You glance away for a moment, only to find you need to unlock your device at a critical moment.
The key is finding the correct Smart Lock use that suits you. Unlocking your device when you connect to your home Wi-Fi is a great option for most people.
Now that you know how to unlock your device automatically when you join a Wi-Fi connection, you can consider automating other tasks on Android. Automate is a great free app with countless community-made automation flows.
That said, Automate isn’t the only Android task automation tool. Tasker is a paid automation app that is much more powerful than Automate. Check out these Tasker tricks you can use to automate more on your Android phone.
A lot of Windows sound issues involve the sound output from your speakers. But what if you’re having problems with sound input; how do you fix the microphone?
Whether you’re using a headset microphone to chat in games or recording with a USB mic, we’ll share some tips to fix a lack of input or unreliable mic issues. These will help whether your mic is cutting out or isn’t recognized in the first place.
Check Windows’ Sound Settings
Before you start troubleshooting, restart your computer. You might have a temporary issue that a simple reboot will fix.
After that, your first stop for microphone troubleshooting should be the sound settings in Windows. Access these by navigating to Settings > System > Sound.
Here, under Input, open the dropdown box under Choose your input device. Select the mic you want to use; other available inputs, like your laptop or webcam’s built-in mic, will also show here.
Once you’ve picked the right mic, speak into it and you should see the Test your microphone bar move up and down. If it doesn’t, click the Troubleshoot button below and Windows will attempt to find and fix problems with your mic.
Click the Device properties link to rename the input to make it easier to find in the future. You can also check the Disable box to keep that mic from showing up, or change the Volume to adjust how loud the mic is.
At the bottom of the Sound page, you’ll find the App volume and device preferences menu. This allows you to choose a different output and input device for your open apps. Have a look here and make sure you don’t have the wrong mic selected for the app you’re using.
Troubleshoot Microphone Hardware
Moving on, you should look at your audio hardware setup, especially if you can’t get any input from your microphone at all or didn’t see it listed in the menu above.
If you use a USB mic, try plugging it into another USB port on your PC. Don’t use a USB hub—plug your mic directly into a slot on your PC. If the mic works in another USB port, the first one is likely dead or has an issue. For analog mics, make sure you have the cable plugged into the pink line-in port on your PC.
For all mics, confirm that all cables are fully inserted and that nothing is loose, including the cable for your headset mic if it’s removable, and any extensions. You should also check for fraying cables, as damaged cords can cause problems.
If your microphone has a physical mute toggle, make sure you haven’t enabled it by mistake. Look for a slider or button on your headset, cord, or front of the mic.
Should you still have no mic input after double-checking the above, try plugging your mic into another computer. If it doesn’t work on the other PC, your microphone hardware may be faulty.
Finally, don’t forget to check for updated drivers for your microphone. Most headsets and microphones work out of the box in Windows, but some may require specific drivers for best performance.
Search Google for your device’s name and look for a Downloads section on the manufacturer’s website to find the driver. Updating your existing sound card drivers is important too.
Confirm That Apps Can Access Your Microphone
Windows 10 has a Privacy menu where you can block apps from accessing sensitive data like your camera and microphone. It’s possible that you’ve blocked an app from accessing your microphone here.
Head to Settings > Privacy to take a look. On the left sidebar, choose Microphone under App permissions. Make sure the slider under Allow apps to access your microphone is enabled, or no apps can use it. Take a look through the list of apps to confirm the one you want to use has access.
This first slider and list is only for Store apps, however. Scroll down further and you’ll reach a section titled Allow desktop apps to access your microphone. Double-check that the slider under this header is turned on.
While you can’t toggle mic access for individual desktop apps, you can see when they last accessed your mic. This can help you figure out if the app is detecting your mic properly.
Review Your List of Recording Devices
If your mic is still not working properly, you should next review your list of available input devices. You can do this by clicking Manage sound devices on the same Settings page as above, but it’s a little easier to do using the Control Panel.
Enter control panel in the Start menu to open it, and change Category in the upper-right to Small icons if necessary. When you see the full list of choices, choose Sound.
Here, switch to the Recording tab, which shows all the microphones connected to your PC. Right-click anywhere and confirm both Show Disabled Devices and Show Disconnected Devices are checked.
Look through the list and make sure that your primary mic isn’t disabled (right-click and choose Enable if so). When you speak into a mic, you’ll also see its bar light up to confirm it’s working.
Mic Levels and Exclusive Mode
Double-click on your mic in the Recording panel and you can edit a few options. If you didn’t change the mic’s name earlier in Settings, you can change it now on the General tab. On the Levels tab, you can adjust the input volume (and boost, on supported mics). Try raising this if it seems too low, or lowering it if your mic clips.
Depending on your mic and computer, you may see additional tabs on this page. These contain enhancements like background noise suppression and similar, which you can try if you want.
Finally, on the Advanced tab, uncheck both boxes under Exclusive Mode. The Allow applications to take exclusive control of this device box means that one app can “lock” your microphone so nothing else can use it. Disabling this can solve a lot of mic problems. You can also adjust the Default Format in the dropdown box to select the input quality.
Once you’re done making changes, head back to the Recording tab. Right-click any inputs you don’t use and choose Disable to reduce clutter in input menus. Finally, right-click your main mic and choose Set as Default Device so apps use it by default.
Record Yourself to Troubleshoot
At this point, if your mic is still cutting out in a specific game or app, you should determine whether it’s an issue with your device or the app. To do this, you’ll need to record a short clip of audio.
Windows 10’s built-in Voice Recorder app is suitable for a quick test. Alternatively, Audacity gives you a lot more options and monitors for a deeper analysis.
Simply open either app and record yourself for a minute—speak the alphabet a few times, count to 50, or similar. Then play it back and see if it cuts out or otherwise sounds unclear at any point.
If it sounds clear in Audacity, continue with troubleshooting. But if the recording cuts out here, double-check your hardware if you haven’t already. Your problem likely lies with one of the above steps.
Disable Xbox Game Bar and DVR
Windows 10’s Game Bar can record clips and screenshots of your game. While this is neat, it’s also known to cause mic issues in some games.
Head to Settings > Gaming > Game bar and disable Record game clips, screenshots, and broadcast using Game bar. Then move to the Captures tab and disable Record in the background while I’m playing a game and Record audio when I record a game.
By now, you’ve essentially ruled out a hardware issue with your microphone, and are pretty sure the problems are tied to one app. Thus, you should dig around in the settings of your game (or other software) to see if you can tweak the mic options there.
Make sure the game is using your primary microphone. Most video games have an option to reduce your mic input volume. Try dropping this a bit, as your input may be clipping and causing it to cut out. Increase it if others say your input is too quiet.
Finally, if the game has a microphone test option, see how your voice sounds. If it’s clear in the test but cuts out in-game, the cause could be a network issue. Perhaps the game’s voice chat uses a port that your router has blocked.
If your mic issue only occurs in-game, consider using a third-party program like Discord for voice chat instead of relying on the game.
Troubleshoot Mic in Zoom, Skype, or Similar Apps
It’s particularly frustrating when an app like Zoom has an issue with your mic. If you’ve walked through all the above steps, the issue probably lies somewhere in the app’s audio settings.
With Zoom, click the Gear icon on the right side to open its settings, then switch to the Audio tab. Under Microphone, you should see the Input Level move when you speak. Click Test Mic to record yourself briefly and see how it sounds. Use the dropdown box to swap your mic input to another device if needed.
Finally, make sure you aren’t muted in a call. Most chat apps give you an option to mute your microphone at the bottom of the screen, which can lead to you thinking your mic isn’t working if you forget you’re muted.
It’s annoying to hear everything you say again with a delay. And while mic echo is often a problem on someone else’s end, there are a few ways to reduce echo problems.
First, if at all possible, use a headset on calls. Most echo is caused by your microphone picking up audio from your computer’s speakers, which happens much more easily when using your laptop’s built-in microphone and speakers. Using headphones greatly reduces the chance of your microphone picking up that sound.
Make sure that your microphone sensitivity isn’t set too high, as discussed above. Even with headphones, a sensitive mic may pick up some sound that comes through the headset.
If you hear everything you say in your headphones, even when you’re not in a video call, you probably have a specific Windows setting turned on. Go back to the Recording tab in the Sound panel, double-click your input device, and switch to the Listen tab.
If you have Listen to this device checked, you’ll hear everything from that microphone in the select output device. This can be useful in certain circumstances, but in most cases will just drive you crazy. Uncheck the box and hit OK to stop that.
Your Mic Problems, Solved
Hopefully, one of these tips solved your Windows microphone issues. These problems can sometimes be difficult to nail down, since microphones, games, apps, and settings vary so much in each use case.
Apps like Signal are proving invaluable in these days of unrest, and anything we can do to simplify and secure the way we share sensitive information is welcome. To that end Signal has added the ability to blur faces in photos sent via the app, making it easy to protect someone’s identity without leaving any trace on other, less secure apps.
After noting Signal’s support of the protests occurring all over the world right now against police brutality, the company’s founder Moxie Marlinspike writes in a blog post that “We’ve also been working to figure out additional ways we can support everyone in the street right now. One immediate thing seems clear: 2020 is a pretty good year to cover your face.”
Fortunately there are perfectly good tools out there both to find faces in photographs and to blur imagery (presumably irreversibly, given Signal’s past attention to detail in these matters, but the company has not returned request for comment). Put them together and boom, a new feature that lets you blur all the faces in a photo with a single tap.
This is helpful for the many users of Signal who use it to send sensitive information, including photos where someone might rather not be identifiable. Normally one would blur the face in another photo editor app, which is simple enough but not necessarily secure. Some editing apps, for instance, host computation-intensive processes on cloud infrastructure and may retain a copy of a photo being edited there — and who knows what their privacy or law enforcement policy may be?
If it’s sensitive at all, it’s better to keep everything on your phone and in apps you trust. And Signal is among the few apps trusted by the justifiably paranoid.
All face detection and blurring takes place on your phone, Marlinspike wrote. But he warned that the face detection isn’t 100 percent reliable, so be ready to manually draw or expand blur regions in case someone isn’t detected.
The new feature should appear in the latest versions of the app as soon as those are approved by Google and Apple.
Lastly Marlinspike wrote that the company is planning “distributing versatile face coverings to the community free of charge”; the picture shows a neck gaiter like those sold for warmth and face protection. Something to look forward to, then.
Facebook will soon add labels to news outlets owned or otherwise controlled by a government, marking that information as, if not necessarily false or unreliable, at least worth considering the origin of. Those so labeled will also be banned from buying ads starting this summer.
The company announced its plan to do this a few months ago as one part of its ongoing “election integrity efforts,” along with such things as requiring a confirmed owner for pages and banning anti-voting ads.
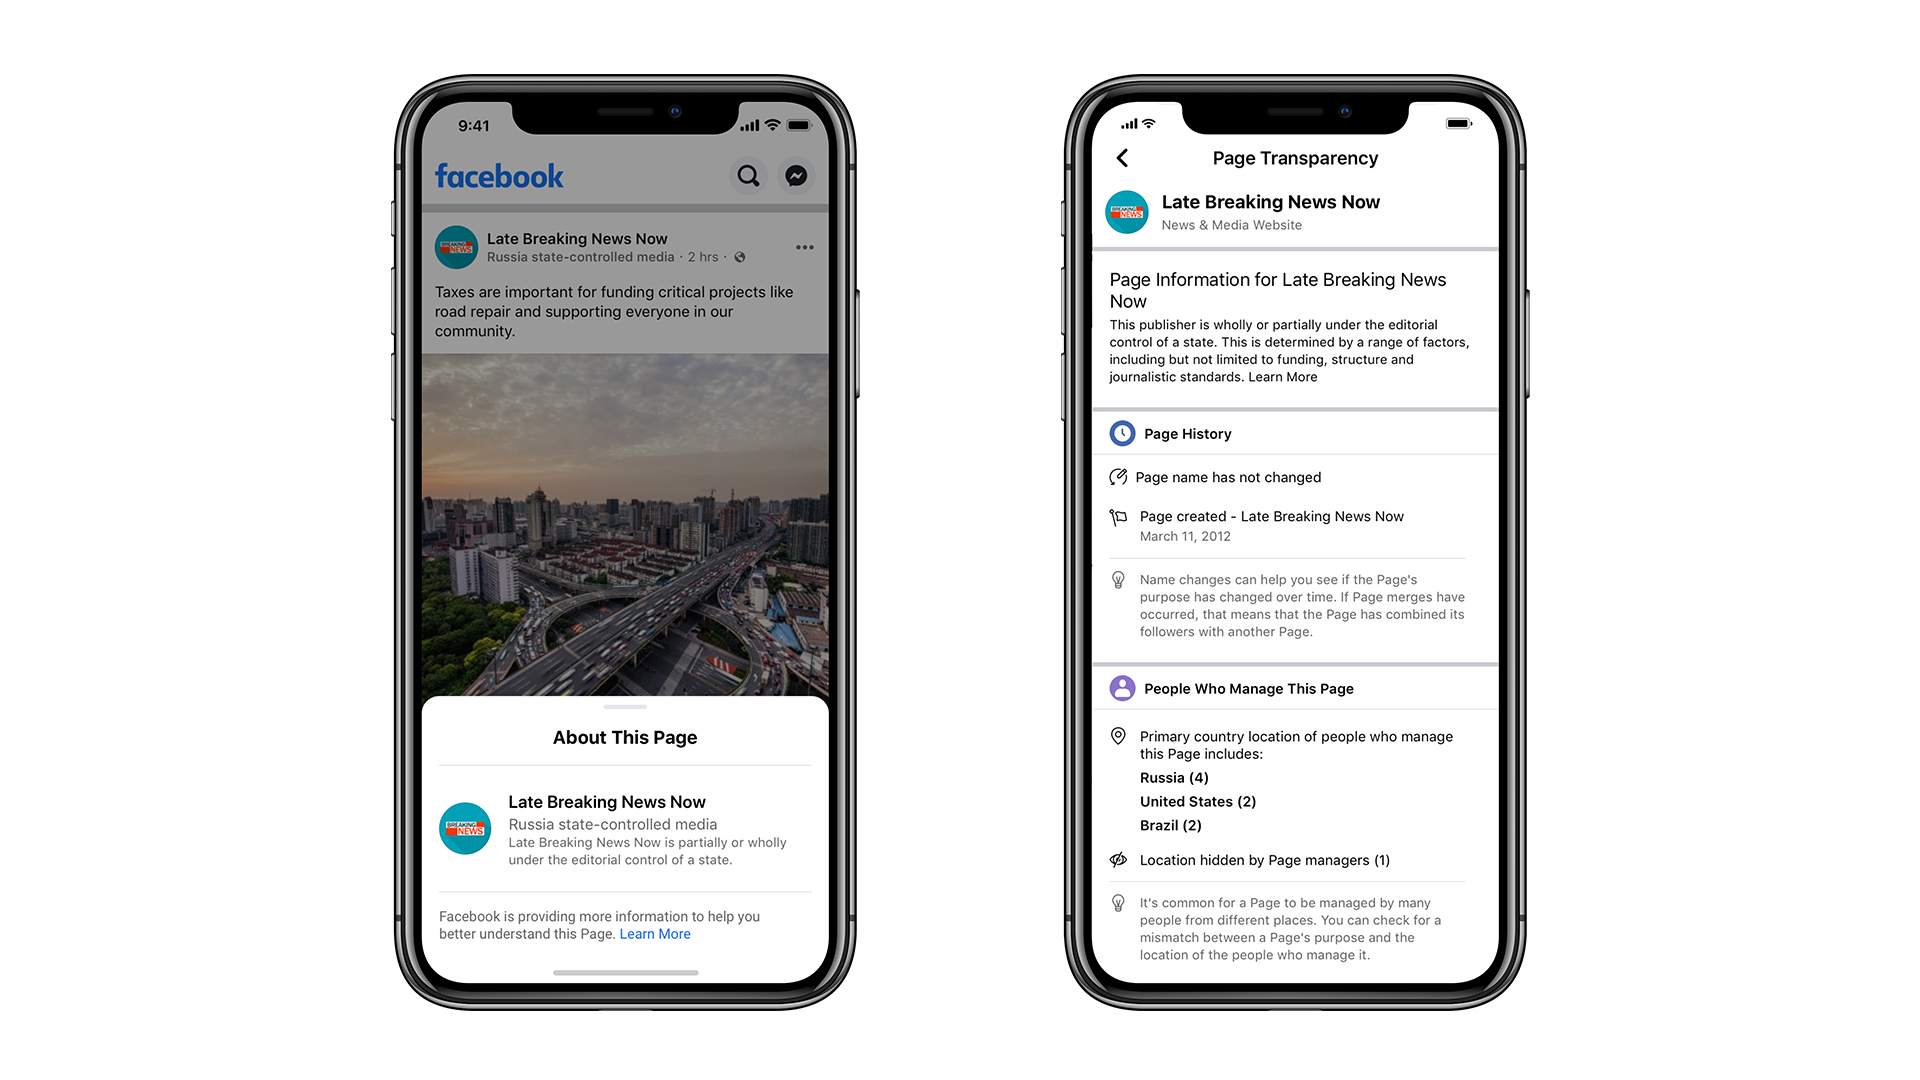
Under the new policy, which should roll out to all users over the next week, news organizations “that may be under the influence of a government” will have a subtle but clear label as such, as will their posts. You can see what one of those labels looks like in the top image, and here’s how it would look in the “about” and details pages:
The warning reads: “This publisher is wholly or partially under the editorial control of a state. This is determined by a range of factors, including but not limited to funding, structure and journalistic standards.”
These organizations have immense reach even outside the countries they’re based in: Oxford’s Computational Propaganda Project has tracked this engagement and the strategies used to accomplish it closely in an ongoing series of papers.
The process of identifying state-run news is not quite as straightforward is it may seem. Certainly there are many openly state-run news organizations in many countries, like China Daily, Sputnik and so on. But governments may be pulling the strings behind far more, either by funding (or defunding) them, interfering with or directing editorial coverage, or operating a whole news organization via unacknowledged means.
Facebook turned to experts to analyze and classify the many news organizations on the platform, which seems to have clearly advised that there are many factors that should be considered. As a result, Facebook bases its “state-controlled” label based on official statements, ownership structure and stakeholders, editorial leadership and guidelines, policies and oversight, and last but not least the state of media freedom in the host country. Outlets can appeal the label if they think it has been applied in error.
Notably the label will not be applied to news posts or organizations that merely reference or base their reporting on state-controlled media. Nor is the information published by these labeled organizations subject to special scrutiny or fact-checking.
“Nevertheless,” writes the company’s cybersecurity policy head Nathaniel Gleicher in a blog post, “later this summer we will begin blocking ads from these outlets in the US out of an abundance of caution to provide an extra layer of protection against various types of foreign influence in the public debate ahead of the November 2020 election in the US.”
Outside the U.S. those ads will not be blocked but they will be labeled.

 #photoroom