17 April 2020

How to Connect Any Phone or Tablet to Your TV Using USB


connect-smartphone-tablet-tv

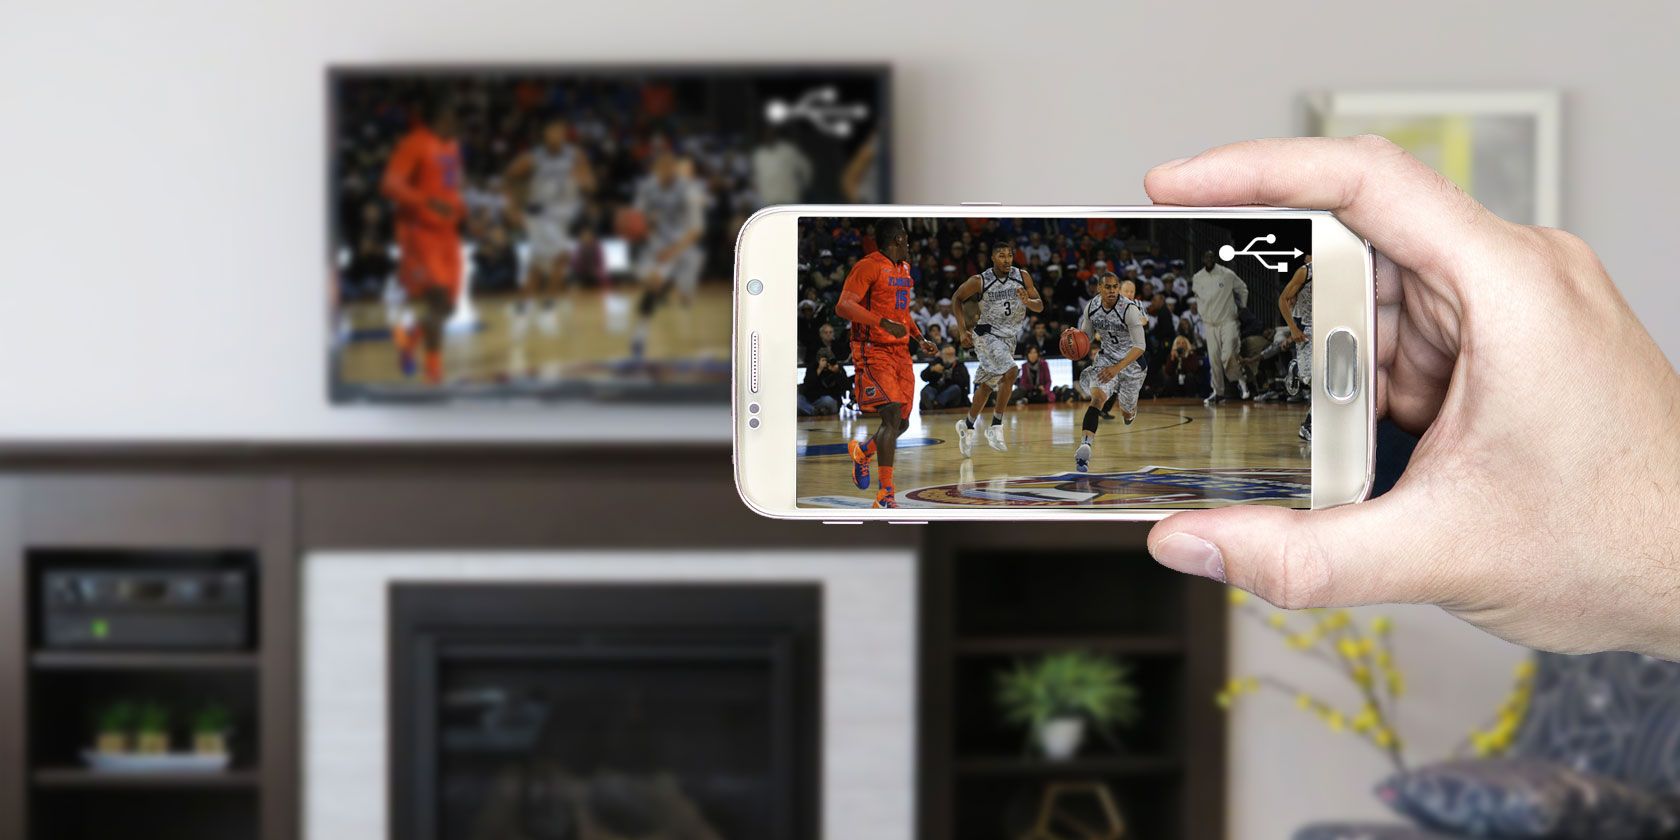
Connecting a phone to your TV isn’t as simple as you might think. Whether you want to enjoy Netflix, share photos, or use it for home working, hooking up a cable between your phone and TV can be tricky.

But it’s not impossible—it’s all a matter of selecting the right cable.

Here’s what you need to know about how to connect an Android or iOS phone or tablet to a TV using a USB cable.

Why Use USB to Connect Phones, Tablets, and TVs?

With the ease and prevalence of casting to mirror a phone screen wirelessly, you might be curious why you should use a USB to TV connection for your phone.

If you hook a phone to your TV with a hardwired connection, you benefit from a low-latency signal. For instance, if you plan to mirror your phone to a television for gaming, you’ll want a USB connection rather than a wireless configuration. This vastly reduces lag.

Plus, for situations where you lack Wi-Fi or have a weak wireless signal, you’ll need a wired connection instead.

To connect your phone or tablet to a TV, you can use one of the following methods:

  • Android:
    • USB-C cable with DisplayPort
    • USB cable with MHL (Mobile High-Definition Link)
    • USB cable with SlimPort
  • iPhone/iPad
    • Lightning cable (iPhone and iPad)

Which option you use depends on your specific device and operating system. Although all methods are similar, the process differs for connecting an iPhone versus an Android device.

Similarly, your connection method varies depending on your needs. Simply viewing photos on a compatible television requires your charging cable and mobile device. But for screen mirroring, you’ll need a USB adapter.

How to Connect Android Phones and Tablets to TVs With USB

You have two options for connecting Android phones and tablets to your TV:

  1. USB-C cable with DisplayPort support
  2. USB cable with MHL
  3. USB cable with Slimport

We’ll look at each below.

1. Connect Your Phone to a HDMI TV Using USB Type-C

The most recent Android smartphones feature a USB Type-C port. Also known as USB-C, this is a cylinder-shaped input that replaces micro-USB and is used for charging and data transfer.

Including support for the DisplayPort standard, USB-C can be used to mirror your phone or tablet’s display to a TV.

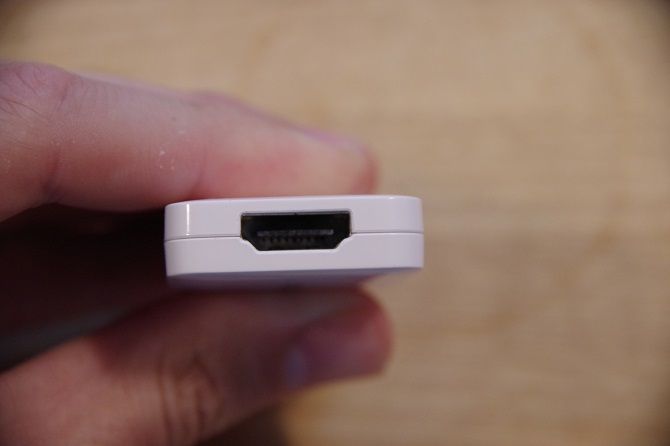
Simply connect the USB-C cable to Android, then connect this to a suitable docking station or USB-C to HDMI adaptor.

USB C HUB Adapter USB C HUB Adapter Buy Now On Amazon $23.99

2. Connecting Phone to TV Using USB With MHL

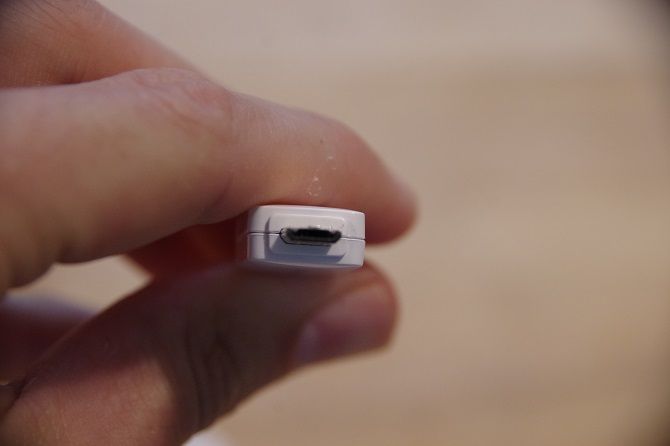
MHL is one of the most common solutions for connecting a phone to a HDMI TV with a micro-USB cable. This technology allows MHL-compatible devices such as smartphones and tablets to connect to televisions and projectors.

You can browse a list of MHL-enabled devices on the official MHL website.

To use Mobile High-Definition Link, you will need

  • MHL-enabled phone
  • USB to HDMI MHL adapter or cable
  • HDMI cable
  • Power cable

Although this is the general setup, the specific cable you’ll need varies. Google MHL cable [your device name] to find a list of compatible cables.

For a USB to TV connection using MHL, first hook up your phone via an MHL adapter. The adapter will require power either from a USB port on the cable or an external source.
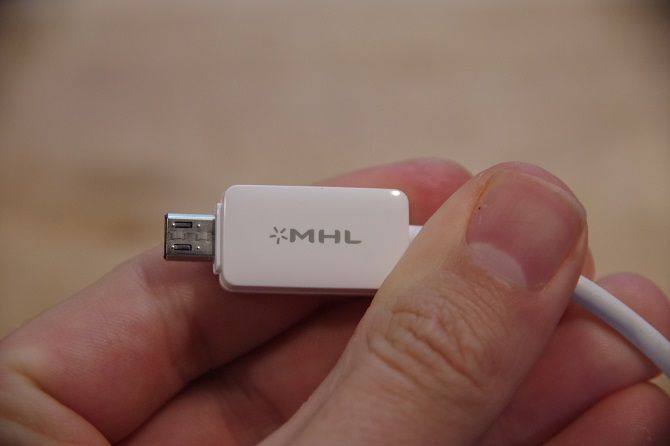
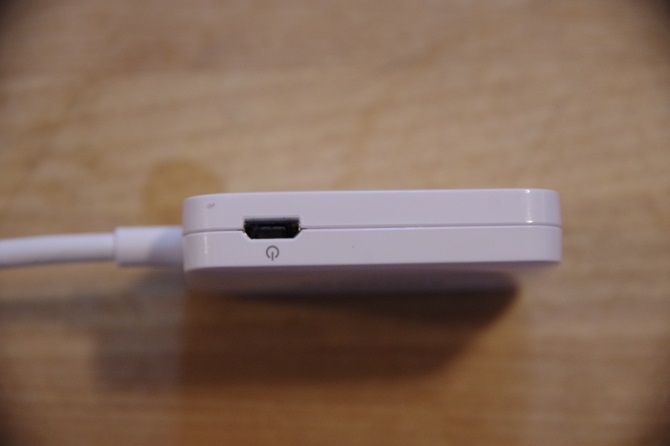
Although MHL initially required a power connection, MHL 2.0 makes this non-essential. Still, since MHL does draw power from the mobile device, it’s wise to connect a power cable.

Next, connect your phone to your television with the MHL cable. After that, you should see your phone screen on your TV; it’s plug-and-play.

Overall, Mobile High-Definition Link is one of the best solutions for connecting an Android phone to a TV using a USB cable.

3. Connecting Phone to TV Using USB SlimPort

If you have an older phone, you might connect your phone to a TV with a SlimPort cable. While similar to MHL, SlimPort offers different outputs, but uses the micro-USB connection.

Whereas MHL is limited to HDMI, SlimPort outputs to HDMI, DVI, DisplayPort, and VGA. This makes it better suited to a variety of displays, including older monitors and TVs with no digital inputs.

Unlike MHL, SlimPort does not draw power from mobile devices.

You’ll need the following to connect a phone to your TV using a SlimPort adapter:

Begin by plugging the SlimPort adapter into your phone. Then, attach the SlimPort adapter to your display using the proper cable. You should then be able to view your phone’s screen on a TV. Like MHL, it’s plug-and-play.

Can You Connect an iPhone or iPad to TV With USB?

As iPhones and iPads don’t have USB, you can’t use this as a connection method. But you can connect them to a TV using a cable.

If you own an iPhone 5 or newer, it will have a Lightning connector. To connect your iPhone to a TV you’ll need the Lightning digital AV adapter for HDMI outputs, or the Lightning to VGA adapter if you have a VGA display. Buy the cable that fits your TV.

Older iOS devices with the old 30-pin port instead use the 30-pin VGA adapter.

You can connect an iPad to your TV through the same means. Again, you’ll most likely need a Lightning cable for this. Only the iPad 3 and earlier use a 30-pin cable. All other iPads, including every iPad Mini and iPad Pro, use a Lightning cable.

Once you’ve plugged in your adapter, simply hook up the video output to your display. Then, your phone screen will mirror to the TV. Apple’s official Lightning adapters contain an additional Lightning port for charging while viewing content on a second screen.

USB to TV: Connecting as a Storage Device

While the most common use case for connecting a phone to a TV using USB is for screen mirroring, there’s another option. Instead of screen mirroring, you can also simply view files like pictures on a TV.

However, this will require a compatible monitor, TV, or projector. Most modern displays should accept USB storage.

Of the various USB to TV connection options, this is the easiest. Since it only requires a phone, USB cable, and TV with a USB input, it’s simple to set up. Which specific cable you need depends on your phone.

On an iPhone or iPad, use a Lightning cable (or 30-pin for older devices). Alternately, Android users need a micro-USB or USB-C cable. The USB cable that came with your phone or tablet should work fine.

USB to TV: Connecting to View Photos

Modern Android devices don’t support USB Mass Storage, so your TV won’t view your device as a true external drive.

This assumes that your TV or monitor features a USB input capable of displaying files from a connected storage device.

Simply connect your cable to your phone, then to the TV. With the standard USB end of the cable connected to your display, change the input on your TV to USB.

On Android, it’s likely you’ll need to change your USB settings to Transfer files or Transfer photos (PTP). To do this, drag down your notifications from the top of the screen when connected. In the menu, tap the USB is charging this device notification to change it.
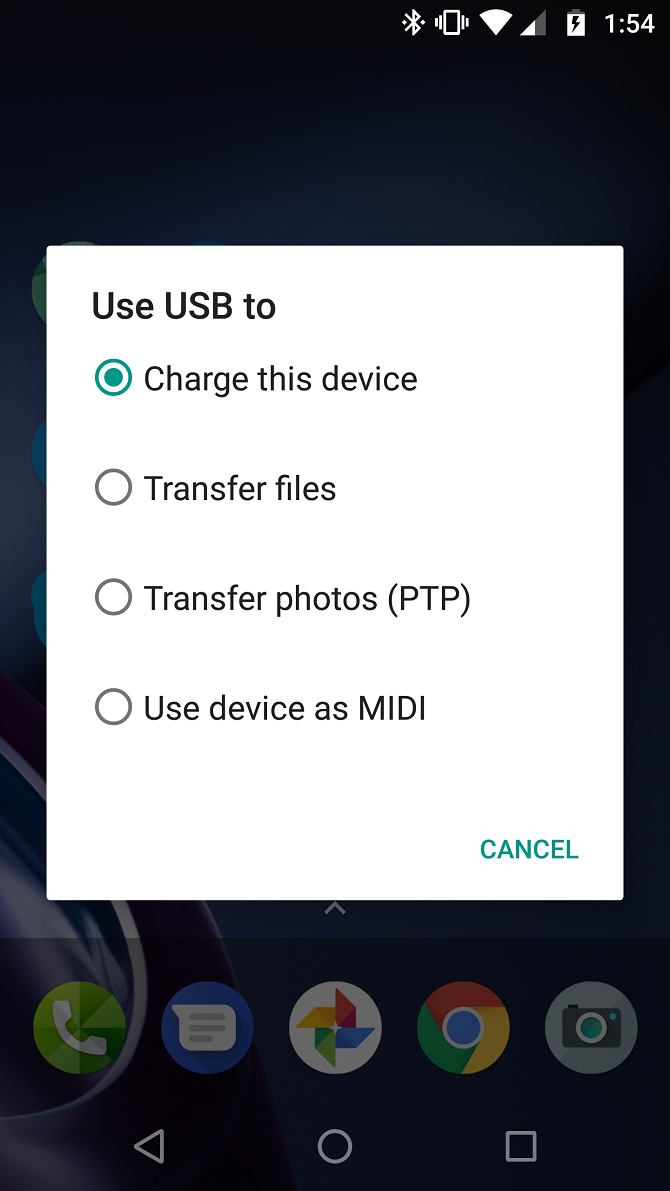
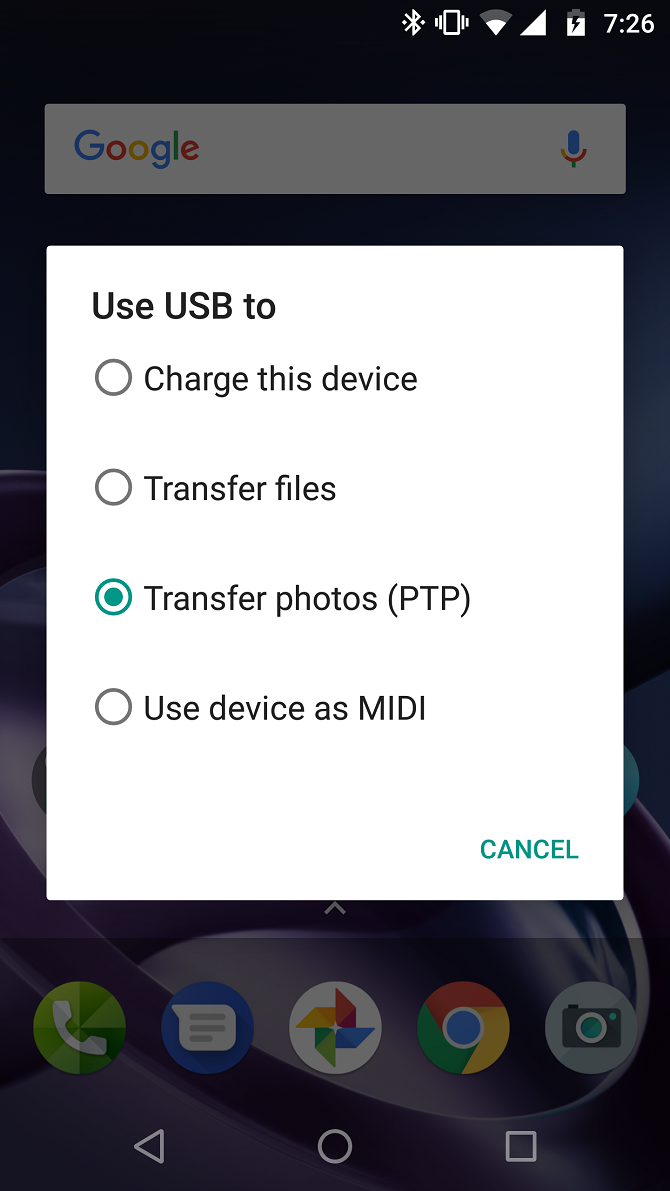
Note that this doesn’t work with all TVs. In some cases, the USB ports are purely for firmware updates.

Use Samsung DeX to Connect Your Samsung Phone to a TV

Among the most popular Android devices available, you’ll find Samsung flagship handsets. These feature connectivity with televisions and monitors. For pure screen mirroring, you’ll need a USB-C to HDMI cable.

To connect a Samsung Galaxy S8/S8+/Note 8 and later to your TV, merely hook up a USB-C to HDMI adapter. Plug the USB-C male into the USB-C charging port on your Samsung Galaxy device. Then run the HDMI cable into your TV.

QGeeM USB C to HDMI Adapter QGeeM USB C to HDMI Adapter Buy Now On Amazon $15.99

However, Samsung Galaxy S8, S9, and Note 8/9 devices also include DeX. Bridging the gap between mobile and desktop, DeX offers a desktop experience run from your handset. You can run all the same Android apps, however, access your phone’s gallery, and basically get everything on the big screen
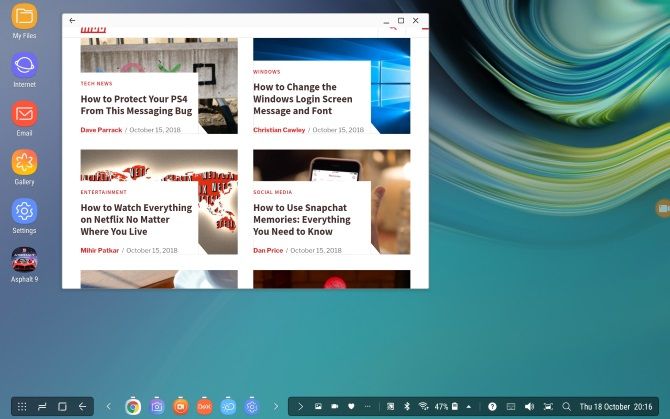
Use Samsung DeX to get Android apps on a big display

Since this is proprietary technology, the method for connecting a DeX-enabled Samsung phone to a TV differs from standard hookups.

For the entire Galaxy S8 and Note 8 line up, as well as S9 and S9+, you’ll need a dock to use DeX.

However, the Note 9 doesn’t require a dock. Instead, the Note 9 enters DeX mode with merely a USB-C to HDMI cable. That’s far more useful than a dedicated dock.

If using a dock, you will also need a power cable for powering the dock and charging your device. To find out more, see our guide to using DeX to turn your phone or tablet into a computer.

Connect Phones, Tablets, and TVs With USB: Success!

While a USB to TV connection varies by device, connection type, and display inputs, it’s thankfully simple to set up. However, don’t forget that wireless casting is usually more convenient.

Regardless of whether you’re using an Android, iPhone, or a Samsung device running DeX, there’s a way to connect your phone or tablet to a TV for viewing on a larger screen.

For more, check out our master list of ways to cast your screen.

Read the full article: How to Connect Any Phone or Tablet to Your TV Using USB


Read Full Article

How to Hide Files, Folders, and Drives in Windows 10


hide-files-folders-drives-windows

If you share your computer with others, you may want to hide certain files and folders so that people don’t go nosing into your files. The main reason to hide a folder in Windows 10 is privacy. If you have sensitive data that you don’t want anyone to see, hiding your files and folders is a great and easy option to boost your security.

Here’s how you can hide any file or folder on Windows 10.

1. Hide Individual Files/Folders On Windows 10 Using the Command Line

A simple way to hide a file or folder is to change its attributes using the attrib command on the command line. Unsure about using the Windows 10 Command Prompt? Here are our top tips for getting started with the Command Prompt.

Let’s say you want to hide the Sample.mp4 file in the ToHide folder as shown below.

tohide sample folder

Open the Command Prompt by pressing Windows key + R to open the Run dialog box. Then, type cmd.exe in the Open box and click OK.

At the prompt, type the following command. Replace the path and file name with the path and file name for the file you want to hide.

attrib C:\Users\Lori\Documents\ToHide\Sample.mp4 +s +h

The +s and +h are the attributes you set for the file. The +s attribute is the System file attribute and indicates the file is for use by the operating system and is not normally displayed in a directory listing. The +h is the Hidden file attribute and indicates the file will not be displayed in a directory listing by default.

The attributes in the command are not case sensitive, so you can use either lowercase or uppercase.

When you open the folder in File Explorer that contains the hidden file or folder, it will not be visible. Even going to View > Show/hide and checking the Hidden items box will not show the hidden file or folder.

windows hidden items explorer option

You can also hide a folder using the attrib command in the following way. Again, replace the path and the folder name with your own.

attrib C:\Users\Lori\Documents\ToHide\AnotherFolder +s +h

To unhide a file or folder, use the same attrib command, replacing the “+” with “” in front of the “s” and “h” attributes.

attrib C:\Users\Lori\Documents\ToHide\Sample.mp4 -s -h

To learn more about the attrib command, type attrib /? at the command prompt and press Enter.

2. Hide Windows 10 Folders Using File Explorer

Using File Explorer to hide a folder is like using the attrib command described in the previous section, but it’s less secure. Anyone who knows about showing and hiding hidden files in File Explorer can access your files. But if you’re trying to hide data from other family members who are not as tech-savvy as you are, this can work just fine. Hiding files and folders isn’t the only trick the File Explorer has up its sleeve, either. Check out the best File Explorer tricks and tips to take control of your file management.

You can set the Hidden attribute for the selected files or folder in File Explorer. But, first, you need to make sure files and folders with the Hidden attribute do not show in File Explorer. To do this, go to View tab > Options and select Change folder and search options.

windows explorer change folder and search

On the View tab, select Don’t show hidden files, folders, or drives under Advanced settings and click OK.

windows explorer toggle hidden files

To hide one or more files or folders, select the files or folders, right-click on them, and select Properties.

On the General tab on the Properties dialog box, check the Hidden box in the Attributes section. To prevent the files or folders from appearing in Windows search results, click Advanced.

Then, uncheck the boxes in the File attributes section of the Advanced Attributes dialog box and click OK.

windows advanced file attributes

To unhide the files or folder, go back to the Properties dialog box for the files or folders in question, and uncheck the Hidden box in the Attributes section.

3. Hide Entire Drives on Windows 10 Using the Registry Editor

This method hides an entire drive instead of just selected files or folders on the drive.

Note: This procedure involves changing the registry. Before you begin, I strongly suggest you back up your registry. You should also check out our tips for not accidentally messing up the Windows registry.

If you’re not comfortable using the Windows registry or are unsure as to what the Windows Registry even is, you can find another method for hiding an entire drive in the Hide Entire Drives Using the Disk Management Utility section below.

To begin, open the Registry Editor by pressing Windows key+R to open the Run dialog box. Then, type regedit in the Open box and click OK.

Navigate to the following key in the left pane.

HKEY_LOCAL_MACHINE\Software\Microsoft\Windows\CurrentVersion\Policies\Explorer

Right-click on the Explorer key and go to New > DWORD (32-bit) Value.

windows registry create dword

Name the new value NoDrives and then double-click on it.

On the Edit DWORD (32-bit) Value dialog box, select Decimal as the Base. Then, enter a number that corresponds to the drive or drives, you want to hide. To find out which number to use, see the table below the following image.

windows registry edit dword

Find the letter for the drive you want to hide in the table below. Enter the number associated with that drive letter in the Value data box for the NoDrives value in the registry. In our example, I entered 64 to hide my G: drive.

If you want to hide more than one drive, add the numbers for all the drive letters you want to hide and enter the total in the Value data box.

how to hide files folders drives in windows 10

After you restart your computer, you will not see the drive in File Explorer.

To show the drive again, go back into the Registry Editor and delete the NoDrives value under the HKEY_LOCAL_MACHINE\Software\Microsoft\Windows\CurrentVersion\Policies\Explorer key and restart your computer again.

4. Hide Entire Drives Using the Disk Management Utility

If you’d rather not edit the registry, you can hide an entire drive using the Disk Management utility. This utility shows you all the internal and external drives connected to your computer.

Press Windows key + R to open the Run dialog box. Then, type diskmgmt.msc in the Open box and click OK.

Right-click the drive you want to hide (in the top or bottom section) and select Change Drive Letter and Paths.

windows disk management change drive letter

On the Change Drive Letter and Paths dialog box, select the drive letter, click Remove, and then click OK.

disk management change drive letter

A warning dialog box displays telling you that some programs rely on drive letters and may not work if you remove the drive letter. If you’re sure you want to hide the drive, click Yes to remove the drive letter.

how to hide files folders drives in windows 10

The letter is removed from the drive in the Disk Management Utility.

Once you close and reopen File Explorer, the drive will not be visible and will not be included in Windows search results.

To make the drive visible again, go back into the Disk Management utility and open the Change Drive Letter and Paths dialog box for the hidden drive. Then, click Add.

Make sure Assign the following drive letter is selected (it should be by default). Select the drive letter you want to assign to it from the dropdown list, and click OK.

assign drive letter hidden drive

You must close and reopen File Explorer to see the drive again.

5. Hide Folders in Windows 10 Using Third-Party Software

All the methods mentioned above are not as secure as hiding AND password protecting files and folders. Here are some third-party software options for you to consider.

FileFriend

In FileFriend, use the JPK tab to hide files or folders in a JPEG image and add a password to protect the hidden files. FileFriend also allows you to enter text that you want to hide in the image directly in the program, without having to create a text file to hide in the image (using the JTX tab).

how to hide files folders drives in windows 10

Other features of FileFriend include splitting or joining files and encrypting files and folders.

Download: FileFriend for Windows (Free)

Secret Disk

Secret Disk allows you to create a virtual drive, or repository, that’s invisible and password protected. Another layer of security is added with a PIN that’s required to open the Secret Disk program.

When the repository is visible, it displays with a drive letter in File Explorer. You can copy files and folders to it, and work with it in any program, just like any other drive. Then, you can hide the repository again and it becomes invisible.

how to hide files folders drives in windows 10

Secret Disk does not need to format your hard drive or make any other changes to your system. It also does not encrypt any files or folders. It just limits access to them by hiding, and password-protecting, the repository.

The Basic version of Secret Disk is free. The PRO version will set you back $14.95 for its added features, including the ability to have more than one repository and choosing the drive letter for each repository.

The repository password and the PIN for opening the program are optional in the PRO version, although these are good features to leave enabled. To upgrade, click the handy PRO version button in the program.

Download: Secret Disk for Windows (Free)

Easy File Locker

Easy File Locker is an easy to use freeware utility that allows you to hide and lock files and folders from other people and from programs. The locked files and folders are protected from opening, modifying, deleting, moving, renaming, or copying. All files and subfolders in a locked folder are protected.

Set a password to open the program by going to System > Set Password. You don’t have to set a password, but, if you don’t, anyone will be able to open the program, turn off the protection for your files and folders, and have access to them.

how to hide files folders drives in windows 10

Use the Add File and Add Folder buttons to add files and folders to Easy File Locker. Double-click on a file or folder in the list to change its permissions (Accessible, Writable, Deletable, Visible).

Protect the selected files and folders using the Start Protection button. Make the files and folder visible again by clicking the Stop Protection button.

Download: Easy File Locker for Windows (Free)

My Lockbox

My Lockbox allows you to hide and password-protect almost any folder on your computer.

While you’re installing My Lockbox, you’ll be asked for the location of the folder you want to hide and protect. When the installation is finished, that folder is automatically hidden and locked.

Two icons are added to your desktop. The My Lockbox icon allows you to quickly unlock and open your protected folder. For more options, use the My Lockbox Control Panel icon. Once you enter your password, the following window displays:

how to hide files folders drives in windows 10

Use Set folder to change the folder you want to protect and Remove to permanently unlock the protected folder and remove it from the program. The Open button automatically unlocks and opens the protected folder. Lock and Unlock the folder using the buttons on the left. Click Advanced for more options and other settings.

The freeware version of My Lockbox allows you to hide and protect one folder with an unlimited number of subfolders.

You can upgrade to the Professional edition if you need to protect more than one folder. However, you can put all the files and folders you want to hide and protect into one folder and use the free version if you don’t mind looking at the bright orange ad for My Lockbox PRO.

Download: My Lockbox for Windows (Free)

Windows 10 File Hiding Methods That Didn’t Work

In addition to the methods covered above, I also tried the two methods below and failed to get them to work. For the sake of completeness, you can check them out below. Please leave us a comment in case you had more luck than I did!

Hide Windows 10 Files/Folders in a JPEG Image

I tested the method of hiding files in a JPEG image using the command line and found success when adding a RAR file to a JPEG image using the following command:

copy /b C:\Path\To\File\OriginalImage.jpg + FilesToHide.rar C:\Path\To\File\NewImageWithHiddenFiles.jpg

how to hide files folders drives in windows 10

However, I could not extract the files once they were added to the JPEG image file, even using a variety of file extraction programs, such as 7-Zip, WinRAR, and PeaZip.

Hiding a file or folder in a JPEG image is possible using the free tool FileFriend, which is discussed in the Hide a Folder on Windows Using Third-Party Software section above.

Hide Folders in Windows 10 by Redirecting to the Control Panel

There is another method you can try that attempts to hide a folder by redirecting it to the Control Panel. You basically create two batch files, one that locks the folder and one that unlocks it. When the folder is locked, opening it takes you to the Control Panel.

However, I tested this on Windows 7, 8, and 10 and could not get it to work. The lock batch file successfully renamed the folder. But I could open it and view the contents anyway.

If you want to test it yourself, create a folder called Users or Fonts (or something else related to the Control Panel) and put the files you want to hide into it. Then, create a new text file and copy and paste the following line into it.

Replace Users with the name of your folder. Save this file as lock.bat.

ren Users Users.{21EC2020-3AEA-1069-A2DD-08002B30309D}

Then, create another new text file and copy and paste the following line into it. Again, replace Users with the name of your folder. Save this file as key.bat.

ren Users.{21EC2020-3AEA-1069-A2DD-08002B30309D} Users

Both batch files should be in the same folder as the folder you’re hiding (not in the folder). Double-click the lock.bat file to redirect the folder to the Control Panel, hiding the contents of the folder. To unlock the folder, double-click the key.bat file. You should not leave the key.bat file with the folder you’re hiding. Only copy it there to unlock the folder. Then, remove it.

Please let us know if this works for you in the comments below.

You Can Hide Any File or Folder In Windows 10

Hiding files and folders with no password protection should not lull you into a false sense of security. You should not use these methods (except the third-party tools with password protection) to protect very private and sensitive files and folders.

These methods are ways to make your information not obvious to anyone looking over your shoulder or briefly using your computer while you watch.

Hiding your files and folders in Windows 10 isn’t the only option you have for protection. You can also encrypt files and folders using an encryption tool, like VeraCrypt. Alternatively, you can encrypt your entire drive using Bitlocker.

Read the full article: How to Hide Files, Folders, and Drives in Windows 10


Read Full Article
A Beginner’s Guide to Google Duo and Google Allo


google-allo-duo

Google has so many apps and services that it’s tough to keep track of them all. While Hangouts was once its premier messaging app, in 2016, the company added two new messaging apps in the form of Google Duo and Google Allo.

Google Allo is no longer with us, illustrating Google’s tendency to kill off apps not long after they launch. However, Google Duo is very much still a thing.

In this article, we explain how to use Google Duo, and detail what Google Allo was before its demise.

What Is Google Duo?

Google Duo is a straightforward video calling app that serves as the closest alternative to FaceTime for Android. While Hangouts supports video calling as well, Google Duo has replaced it as the default video chat app on Android.

Another important difference is that while Hangouts is tied to your Google account, Duo uses your phone number. This makes signing into Duo simple, as you don’t have to know someone’s email address to reach them. If they’re in your contacts and use Duo, that’s all you need to call them.

Duo is available for Android and iOS, as well as a web app, at no cost.

Download: Google Duo for Android | iOS (Free)
Visit: Google Duo for Web (Free)

How Does Google Duo Work?

Using the Google Duo app is simple: just tap on any of your contacts to start a call. You can also make audio-only calls if you’d prefer not to show your face. If you use Google’s Phone, Contacts, or Messages apps on Android, it’s easy to call contacts with Duo using shortcuts in those apps. Plus, you can ask Google Assistant to call someone for you.

The only real standout feature of Duo is “Knock Knock,” which lets you see a live preview of the person calling you before you accept the call. Google says this is “[t]o make calls feel more like an invitation rather than an interruption” and gives you an idea of what someone is up to before you start talking.

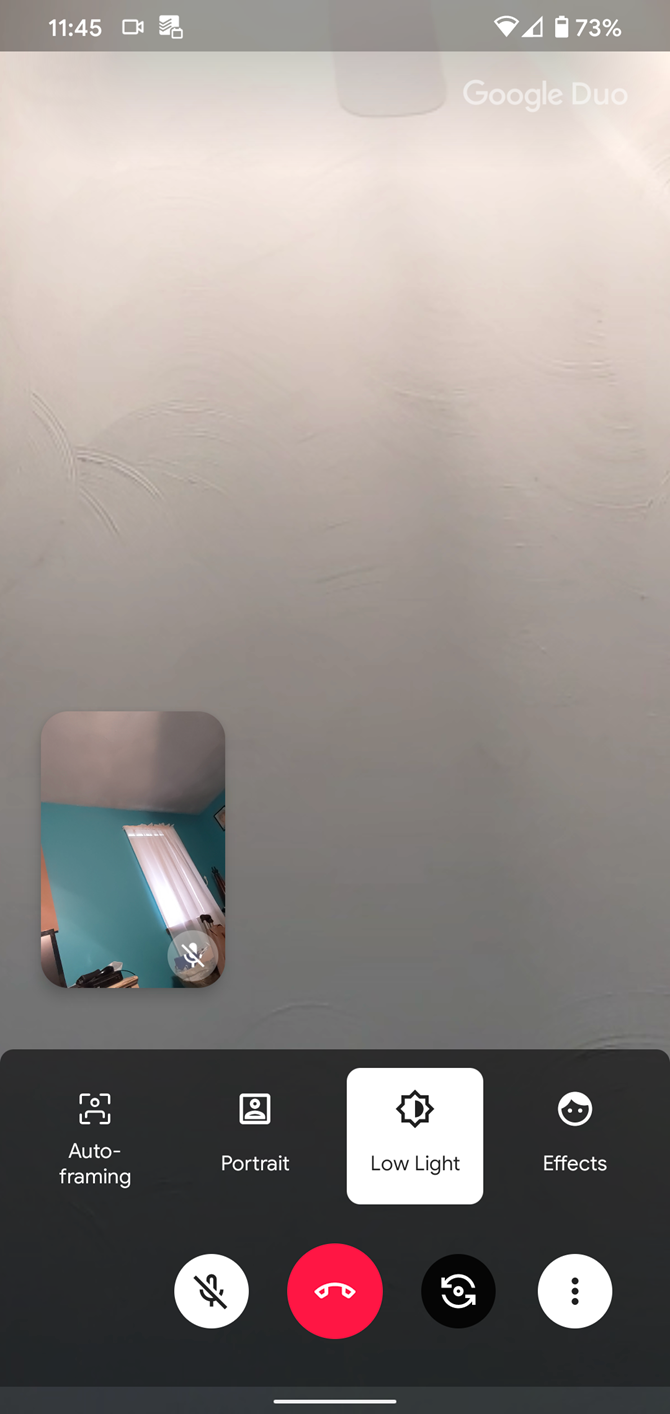
Finally, Google Duo features a low-light mode to help improve call conditions when it’s dark.

That’s really all there is to it; Google didn’t add many frills to Duo. It’s optimized for low-quality networks and switches between Wi-Fi and mobile data automatically, so you shouldn’t experience many interruptions. It also protects calls with end-to-end encryption.

How to Use Google Duo: Getting Started

To begin, download the Google Duo app for Android or iOS, or visit the Google Duo web app. After opening it, you’ll need to provide your phone number, then you’ll receive a verification code via SMS. Grant the app permission to access your contacts, microphone, and camera, then you’re all set to go.

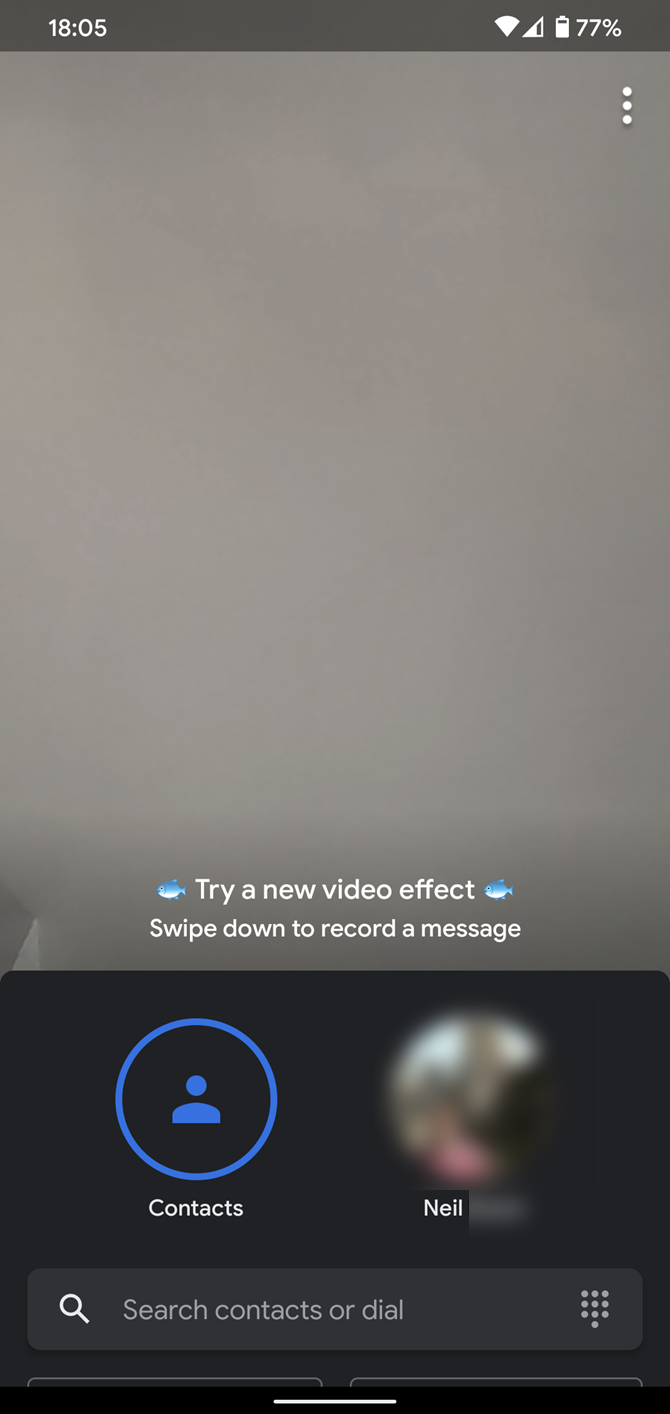
On Duo’s homepage, you’ll see a live preview of your phone’s front camera and suggested contacts. Tap the Search contacts box to find someone you want to call, or dial their number manually with the keypad icon.

If you prefer, you can scroll through the list of your contacts that are on Duo instead. You’ll see who has Duo installed first; tap one to start a call. If you scroll past those who already use Duo, you’ll see an Invite to Duo section where you can send your friends a message asking them to download the app.

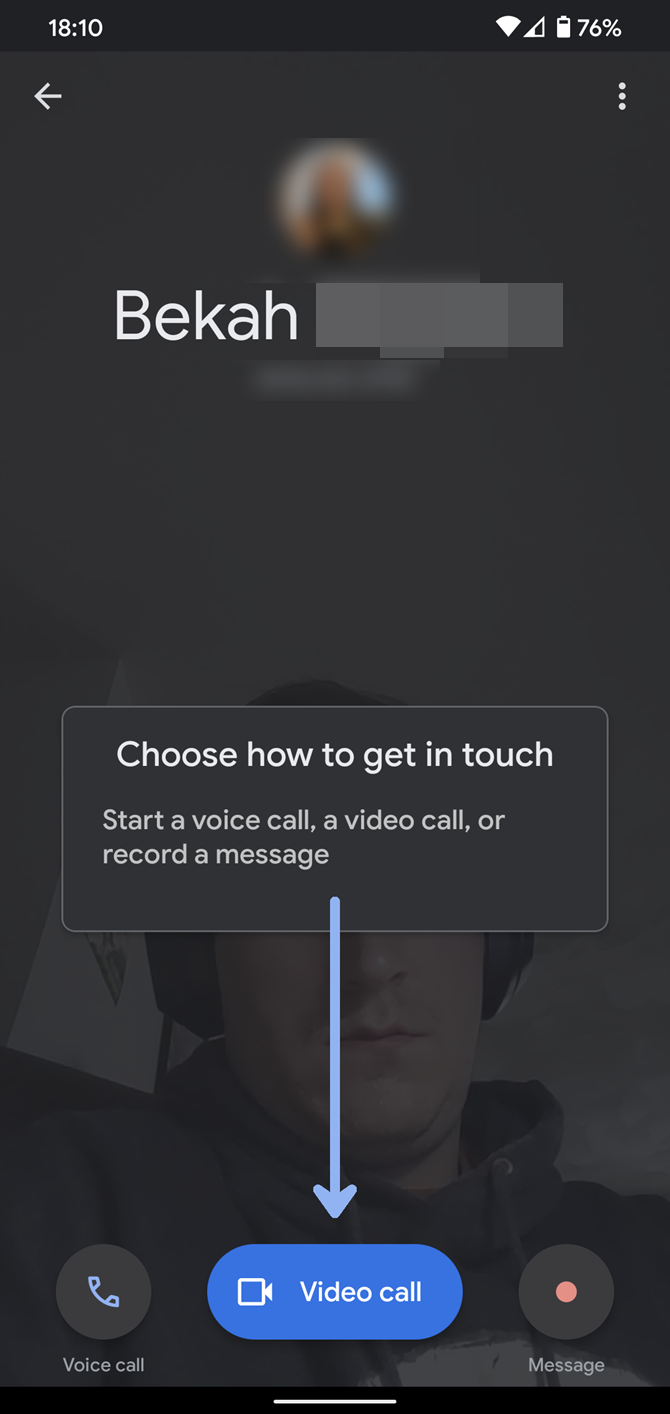
When you tap a contact to start a call, you’ll see three options. Video call is the default and the main feature of Duo. However, you also have the option of a Voice call or Message. This is great if you don’t want to show your face, or just want to record a quick note for the other person. Notes can be video, voice, or text-based.

Once you make a selection, you’ll call them. If they don’t pick up, you’ll have the option to leave a message.

How to Use Duo: Groups and Calling

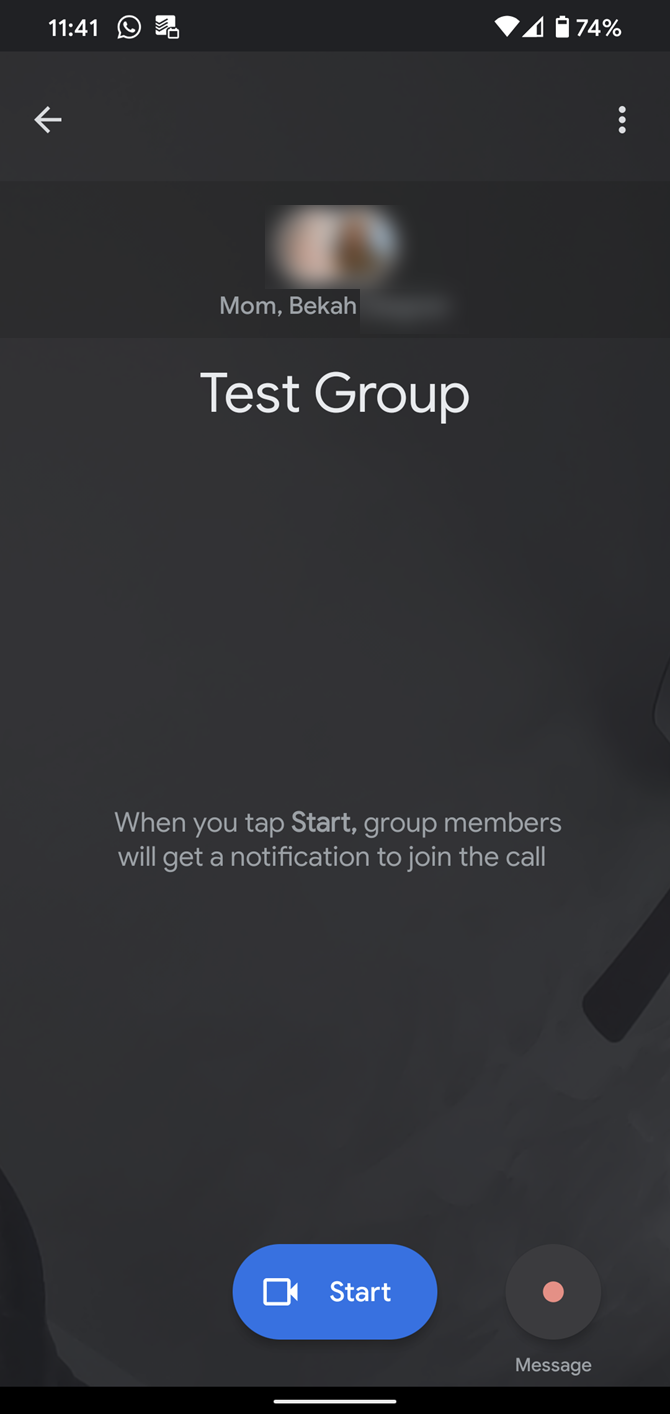
In addition to one-to-one calls, Duo also supports group calling for up to 12 people. To use this, tap Create group above your list of contacts. Add up to 11 people, then you can start a video call with all of them.

When you create the group, Duo asks you to give the group a name to save it. After you do this, you’ll see the group appear in your list of contacts in Duo. This lets you easily start a new group chat with the same people in the future.

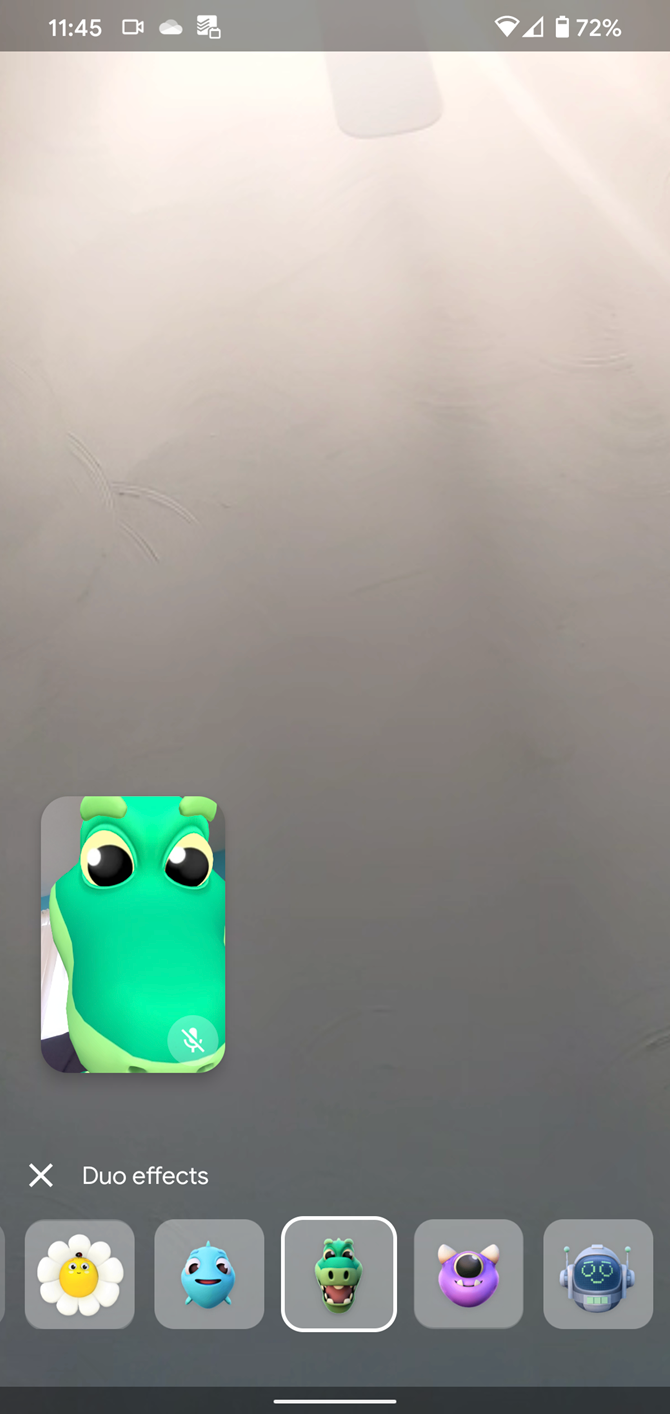
When you receive a Duo call, swipe up to answer it or swipe down to decline. During a call, like most video chat apps, you’ll see a Mute button to mute your own microphone. The Camera button swaps between your front and rear cameras. And you can use the Effects to turn yourself into various animals and creatures.

Duo has a few other neat tricks available during a call, but they’re unfortunately only available on the Pixel 4 at the time of writing. Tap Auto-framing and your camera will attempt to keep you centered in the video. Portrait, like the portrait mode in many camera apps, will blur your background to help you stand out.

Changing Duo Options

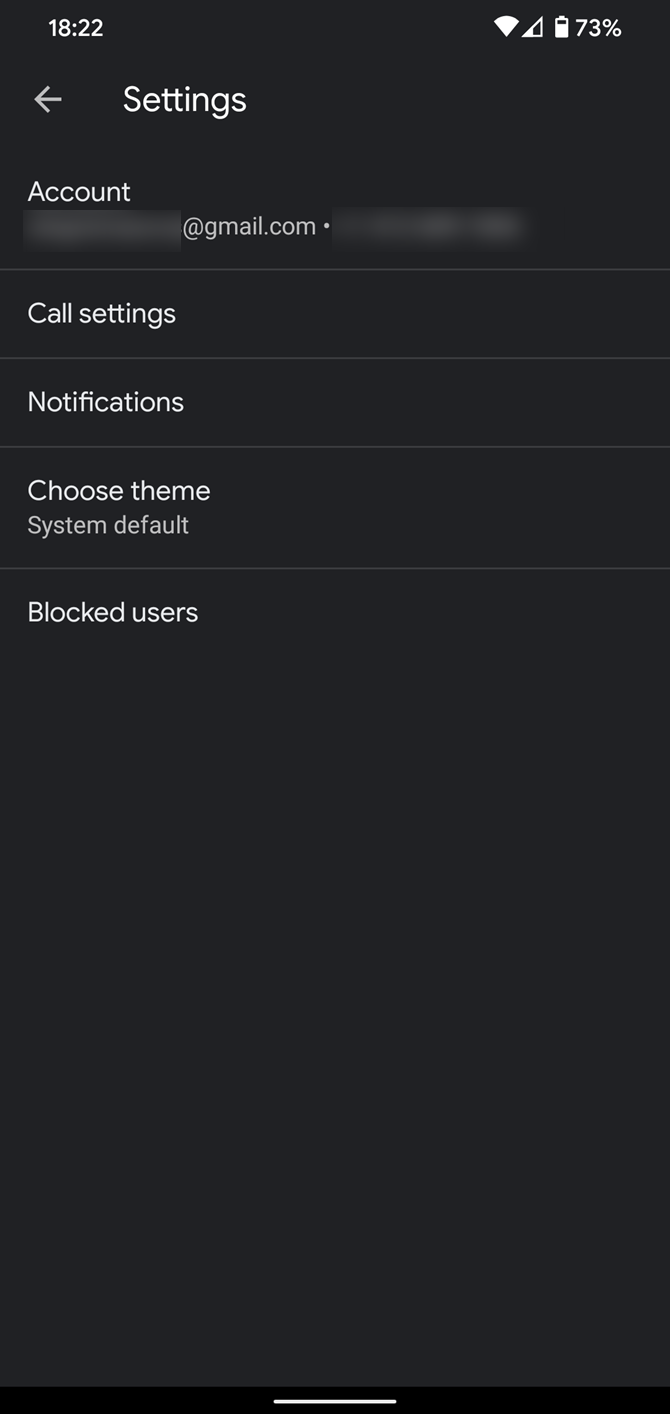
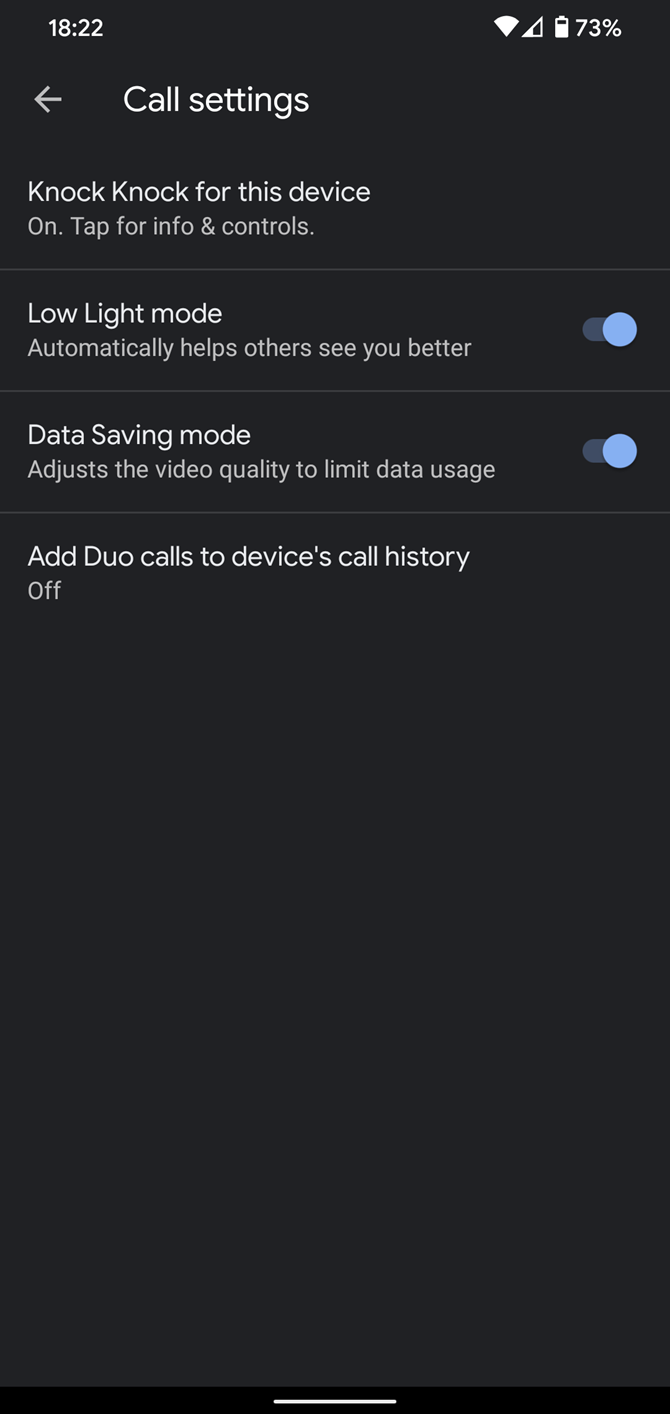
On Duo’s homepage, tap the three-dot Menu button to access a few options. Select Call settings to disable the Knock Knock, Low Light, or Data Saving modes. Tap Blocked users to block numbers from calling you in Duo.

Finally, choose Account and you can remove Duo from your Google account.

What Was Google Allo?

Shortly after Google released Duo in late 2016, the company followed with a smart messaging app called Allo. Unfortunately, in March 2019, the company discontinued Google Allo.

One of the big draws of Allo was the Smart Reply feature. The app learned the way you talk over time, then showed bubbles at the bottom of the screen with suggested responses.

Another standout feature of Allo was the Google Assistant integration. At the time, this was a big deal, as Google Assistant debuted in Allo before it was available on all Android and iOS devices as it is now. By typing @google, you could ask the Assistant for directions, information, and other details that you and your chat partner would both see.

Aside from these major features, Allo allowed you to adjust the size of your messages to “whisper” or “shout” through text. While it had an Incognito chat feature for private notifications, encrypted chat, and the ability to have messages expire after a set time, Allo came under fire for its poor privacy practices. Experts recommended avoiding it, as Google stored all messages exchanged on the service.

Google now recommends using the Google Messages app on Android as an alternative. However, this is an SMS app, not an instant messaging solution. So we recommend free chat apps like Telegram or WhatsApp, which most of your friends probably use already.

Google Allo Is Gone, But Google Duo Still Rocks

Google Duo is a handy video calling app because it’s simple to use and works across multiple platforms. Android users likely have it installed by default, and those with an iPhone can set it up easily to chat with Android owners.

While Allo didn’t last, it did introduce the world to Google Assistant. And here’s everything you need to know about Google Assistant.

Read the full article: A Beginner’s Guide to Google Duo and Google Allo


Read Full Article

Media software maker Plex launches new subscriber-only apps for music and server management


Media software maker Plex has released two new projects today from its internal R&D group, Plex Labs. One is an updated take on the classic Winamp player it calls Plexamp, and another is a dedicated app for Plex server administration. The projects are meant to appeal largely to Plex power users who take full advantage of Plex’s software suite, which has grown over time from being only a home media solution to a one-stop shop for everything from live TV to streaming audio.

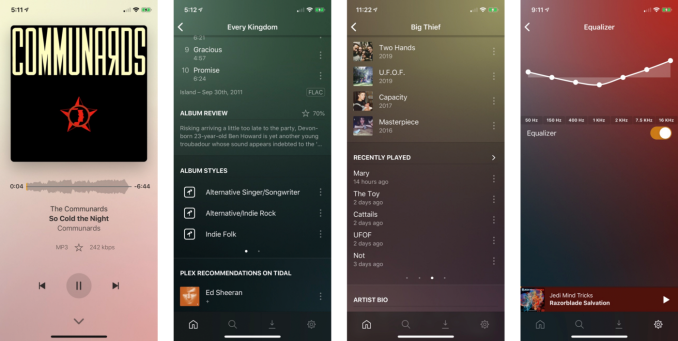
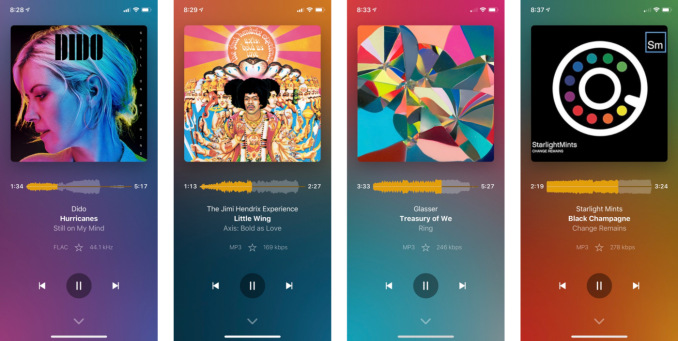
The first of the new apps, Plexamp, is actually a revamp of the first Plex Labs project to ever be released. In December 2017, Plex introduced its own music player, whose name Plexamp is a nod to the lost-lost Winamp player it aimed to replace. The project, like others from Plex Labs, was built by Plex employees in their spare time.

The goal with the original Plexamp was to offer a small desktop player that could handle any music format. The app let you use media keys for playing, pausing and skipping tracks and it worked offline when the Plex server ran on your laptop. It also offered visualizations to accompany your music that pulled from the album art.

While the original app ran on Mac or Windows, the new release works across five platforms, including now iOS, Android and Linux.

The app itself has been completely redone, as well — rewritten from scratch, in fact. And it’s tied into to Plex’s subscription service, Plex Pass — meaning you’ll need to have a subscription in order to use it.

The company explains the original version of Plexamp had issues around portability and licensing; it didn’t have an easy way to add functionality; and it was built with React, which tied it to the web.

To create the new Plexamp (version 3.0), Plex built an audio player library called TREBLE on top of a low-level commercial audio engine. TREBLE has been shipping in Plex’s commercial applications, but this release brings it to Plexamp. The addition helped make the app portable across almost all desktop and mobile platforms, as was it being rewritten in React Native.

The new app provides features Plex Pass music listeners want, like gapless playback, high-quality resampling, Sweet Fades (Plex’s ‘smart’ alternative to crossfades) soft transitions, and pre-caching. Plex also added a few more effects, including one for voice boosting spoken word audio and another for silence compression.

But the app really sells itself to longtime Plex users, as Plexamp lets you go back to see your own “top personal charts” for what you’ve listened to the most in years past. (Sort of a like Plex version of Apple Music’s Replay playlists).

Plexamp 3.0 also introduces a feature that lets you build your own mixes by picking a set of artists. Plus it offers a more expansive list of stations, supports offline listening, and improves its search functionality. The new Recent Searches area, for example, will save your search results from across servers, as well as TIDAL and podcasts. And a new Recent Plays feature shows you the music you consciously chose to play, again including across all servers and TIDAL.

There are some little touches, too, that show the personal care that went into the app’s design — like the way Plexamp uses album art and a process called “UltraBlur” to give each artist and alum page its own look. Or how there are options for light and dark — and lighter and darker — themes.

The other big new release from Plex Labs is the new Plex Dash app.

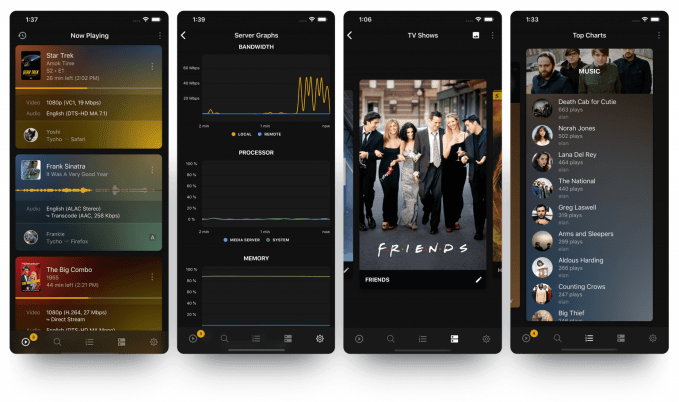
This mobile and tablet app lets you keep a close eye on your personal media server, including a way to see all playbacks even across multiple servers, plus other administrative features.

With Plex Dash, you can edit your artwork, scan for new media, fix incorrect matches, check on server resource usage, tweak library settings, and view server logs live.

Plex suggests you run on the iPad you have mounted in the wall — like in your fancy media room I guess — but for us poorer folks, it runs on your smartphone too.

It’s a power user tool, but one that will be welcomed for those fully immersed in a Plex-run home media setup. (And also a good way to respond to criticism that Plex is too focused today on its streaming and TV options, and not its core home media software customer base.)

Plex Dash also requires a Plex Pass subscription and runs on iOS and Android.

The apps launched today are notable as they’re the first to arrive from Plex Labs since the original release of Plexamp in 2017 and because they require a subscription in order to work.

Plex at the end of 2019 said it had 15 million registered households using its service. Though the service is profitable, only a small percentage paid subscribers. New apps with extra features, then, could convince more Plex users to subscribe.


Read Full Article
YouTube Launches a Free Video Builder for Businesses


YouTube has launched a free tool to help businesses market themselves online. Video Builder allows businesses to make short videos without any need for money or experience. Which is perfect timing given the ongoing coronavirus crisis.

Video Builder has been in the works for several months, and been tested by a small group of businesses. However, in light of the COVID-19 crisis, and the way it’s impacting small and medium-sized businesses, YouTube has launched Video Builder publicly.

How YouTube’s Video Builder Works

YouTube announced Video Builder in a post on The Keyword. The company explains that Video Builder means that “any business who needs a video can create one that helps connect with their customers and keep them informed.” Even during a pandemic.

YouTube’s Video Builder essentially animates static assets, including images, text, and logos. You can choose from a variety of layouts, customize the colors and fonts used, and add music from YouTube’s Audio Library. All for free.

You’ll end up with a short YouTube video either six seconds or 15 seconds in length. The video can then be uploaded to YouTube, and shared with customers in an email, embedded on a website, or used in an advertising campaign. Hence the ad-friendly lengths.

If you need more help using Video Builder, check out this Google Ads Help page.

How to Make Your Own YouTube Video

Video Builder is currently available in beta, with interested parties invited to apply for access. Just fill in the Video Builder beta form, which merely requires an email address connected to a Google account, with a Google Ads Customer ID entirely optional.

While Video Builder is likely to be a great tool for businesses, individuals stuck at home may also be keen to start their own YouTube channel. If that describes you, then be sure to check out our article detailing how to make a YouTube video.

Read the full article: YouTube Launches a Free Video Builder for Businesses


Read Full Article

How to Back Up Your Website Through SSH Command Line


multitask-linux-terminal

Backing up your website or blog can be an expensive and arduous task, requiring a variety of plugins, or additional plans from your hosting provider—but it doesn’t have to be, really.

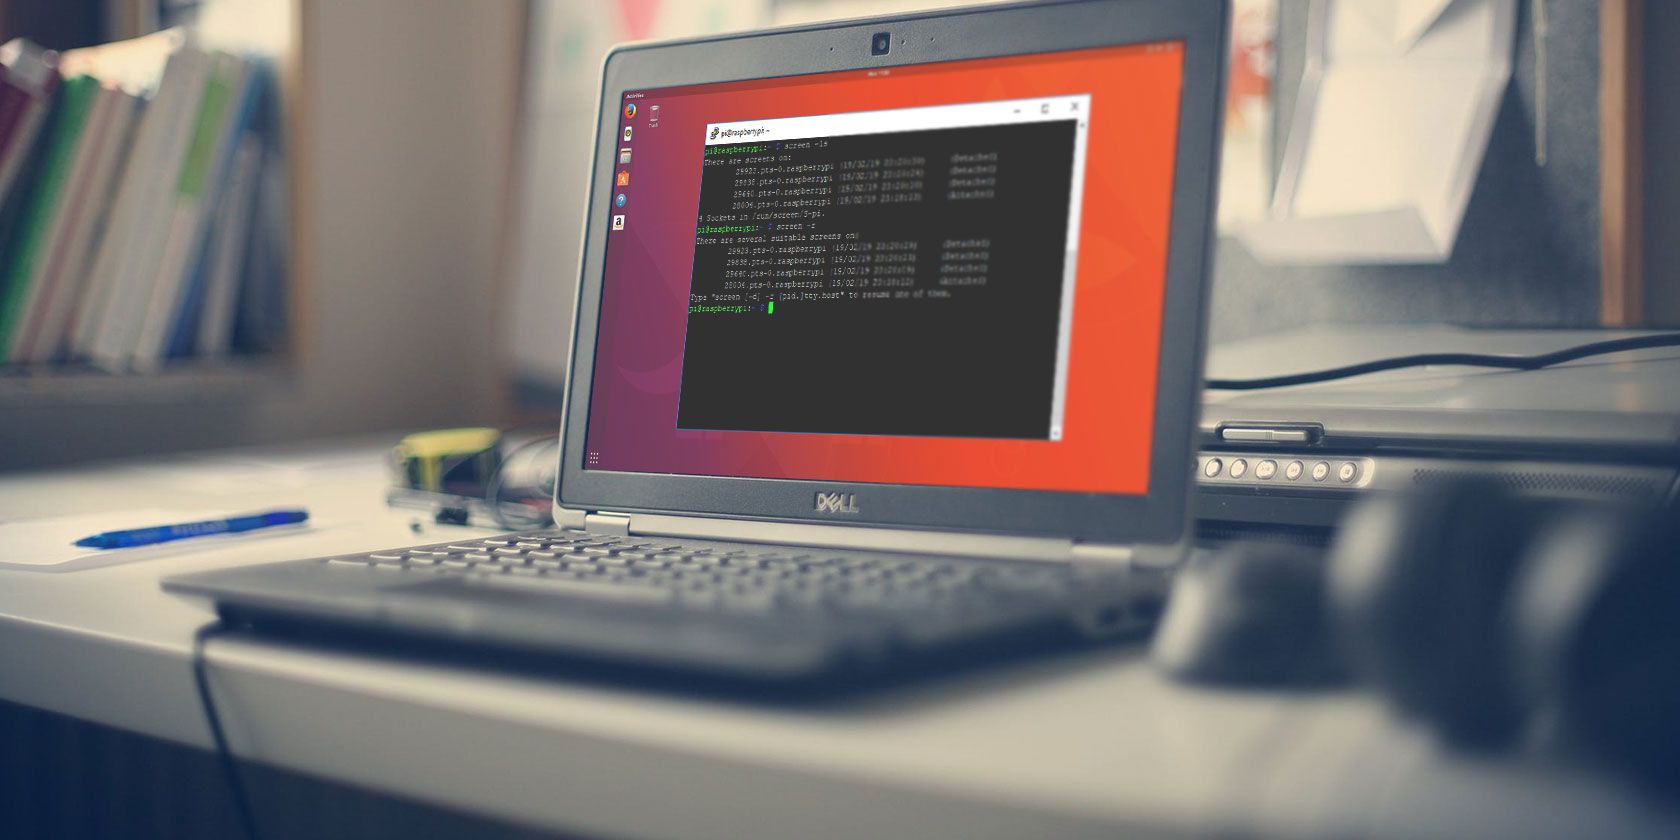
If you have SSH access to your website, then it’s easy to perform various high-level tasks remotely. Here’s how to back up your website using SSH in a command line session.

What Is SSH Command Line?

SSH gives you the ability to talk directly to your webserver. It doesn’t give a pretty interface, or a nice GUI, just a straight-up powerful command line. This can be daunting to some people, but the sheer power, speed, and level of automation it provides can be an absolute lifesaver and makes the process of migrating sites incredibly easy.

Many shared hosts unfortunately don’t allow SSH access to your account by default. However, this is changing, and if you’re using Linux hosting you should have SSH access. If your website is hosted with GoDaddy, SSH should be enabled by default. If not, you can enable SSH in the GoDaddy cPanel interface. Other web hosts will offer a similar feature.

Meanwhile, VPS and dedicated server web hosts will allow SSH. Don’t know the difference? Check our guide to web hosting services to learn more.

How to Use SSH on Your Computer

All three desktop operating systems feature a command line interface with support for SSH.

Simply open the interface and enter the ssh command to use the related tools.

If you haven’t used a command line environment before, some of this might seem difficult. While there is no time to teach you everything about SSH right now, here are a couple of shortcuts:

  1. Use the up and down arrows to cycle through previously entered commands
  2. Press the tab key when your typing in a long filename—if the name is unique enough it should autocomplete

When you’re comfortable with SSH it’s time to start backing up your website.

Log In to Your Website Over SSH

Start by launching your preferred SSH tool and enter the following:

ssh username@yourdomain.com

You also use just the IP address. This is useful if you’re accessing a web server that hasn’t had a URL assigned, or if you’re migrating websites and the URL has moved.

ssh username@YOUR.IP.ADDRESS.HERE

Enter the password when prompted. If you’ve never used SSH before, you might be surprised when typing in your password doesn’t anything on screen.

Don’t worry, that’s for security.

Once logged in, you’ll be presented with a command prompt, like the following:

-bash-3.2:~$

This means everything is fine, so go ahead and continue with these commands.

Start by taking a look around and trying to navigate to your web directory. Type:

ls

To ‘list’ the current files and folders.

cd directoryname

to change to a directory. In this case, I’m going to navigate to the httpd directory, which is the root of my web site. You can then ls again, just to be sure.

Access your website via SSH to backup and restore data

At this point, we’re ready to begin the SSH backup process.

Backing up Your Website Database With SSH

As you will probably be backing up a WordPress install, you will want to back up the database and files.

You’ll need three bits of information to back up your database. Fortunately, if you’re running WordPress, these can all be found in the wp-config.php file:

  1. Database name
  2. Database user
  3. Database password

(If you’re using a different database-driven web application, refer to the set-up documentation for these details.)

Then, issue this simple command, being sure to replace the username, table name, and backup filename where necessary:

mysqldump --add-drop-table -u [username] -p [tablename] > [backupfilename].sql

Hit enter, then enter your password when prompted. Once run, you can then issue another ls command to check that the file has been output. Congratulations, this is all the information in your database as a single SQL file, ready to backup or import elsewhere.

No Access to Database Using SSH

We’ve assumed that your database server is running on the same server on which you are hosting.

However, on GoDaddy, the MySQL database is stored on a remote server to which you don’t have SSH access. In cases like these, you will need to access PHPMyAdmin via the host’s cPanel, beyond the scope of this tutorial.

Backing Up a Website’s Data With SSH

With the database stored as a single file on the server, you can go ahead and backup your site over SSH. First navigate (using cd) to the directory you want to create the backup in. Next, use

tar -vcf yourbackupfilename.tar /directory/path

Backup your website with SSH

Let’s break this down:

  • tar—common Linux compression format, similar to zip but more efficient.
  • -vcf—simple options that say “make a new archive, and tell me what you’re doing”.
  • tar—your chosen name for the archive
  • /directory/path—specify the path to the website directory

An optional single period mark can substitute the file path, instructing the archive to include everything. You could also use * as a catch-all, but this omits hidden files such .htaccess which is essential for WordPress.

Once that’s run, you will have a single TAR file consisting of every file on your site.

At this point, you can connect via FTP and download the site archive.

Restoring Your Website Backup With SSH

Let’s say the worst has happened, and something has gone horribly wrong with your site. You’ve got a TAR file of everything that you backed up last week, so you’d like to restore it.

First off, log in via FTP and upload the backup file into the root directory of your server.

Start by unpacking all the files, the reverse of what we did to back them up:

tar -vxf yourbackupfilename.tar

WARNING: This will overwrite existing files!

The crucial difference here:

-vxf—instructs tar to extract the files instead of creating a new backup.

The last step is to suck your database back in to where it was before. Start by having a blank database setup with the same password and table name as before. If you don’t have this, you’ll need to change your site configuration settings too.

To restore the database, use:

mysql -u [username] -p [tablename] < [databasebackupfilename].sql

SSH Website Backups: Quicker Than Web Consoles and Plugins

While various tools and plugins have been published that help you to make site backups, nothing is quicker than SSH.

If you have SSH access to GoDaddy or whoever you host your site with, you can now backup a website. Interested in knowing more? It’s time to learn how to remotely manage a Linux server with SSH.

Read the full article: How to Back Up Your Website Through SSH Command Line


Read Full Article
The 10 Best Role-Playing Games for Mac


Gaming has come a long way from the time when you couldn’t play mainstream titles on anything other than Windows. And while Windows still enjoys the biggest market share, times are changing.

And we aren’t just talking about indie games here. Triple-AAA games from big studios can now be played on Mac, and many newer games are now being created with Mac playability in mind from the start.

It’s a great time to be alive as a Mac gamer, especially if you’re a fan of RPGs. Want to get started? Here are some of the best role-playing games for Mac.

1. Stardew Valley

Stardew Valley provides a peaceful alternative to the nonstop combat of most RPG games. With its cozy retro-style graphics, you’re in for a charming new take on farming. If you’ve dismissed it for the farming aspects, don’t judge it by that alone.

For classic RPG fans, Stardew Valley offers many of the typical experiences. If you want to crawl dungeons, complete quests, upgrade your gear, and focus your talents to power-up your character then those elements are all there. The hit-and-run style of combat also keeps you on your toes while descending the mines.

Beyond that, you’ll enjoy roleplaying a small-town life with a diverse cast of neighbors. Plus, there’s an endless number of collectibles and secrets to discover. The addition of multiplayer also provides an easy way for friends to help each other’s farms succeed.

Buy: Stardew Valley on GOGSteam

2. Bastion

Bastion is, in a word, beautiful. Not only is it visually striking and immediately recognizable as unique, but everything is elevated to a completely different level by the soundtrack.

There’s nothing revolutionary about the story or the gameplay, but you’ll find yourself forgetting that as the narrator’s smooth voice responds to your progress. Like reading a novel or watching a movie, Bastion is more about the emotional journey than it is about mechanical depth.

Buy: Bastion on GOG | Steam

3. Borderlands 2

Borderlands 2 is an award-winning title for anyone looking for a blend of FPS and RPG. In single-player, you go around completing missions and collecting loot from the enemies you kill. With the main storyline and dozens of sidequests, there’s constant action that will lead to you owning better equipment.

Borderlands 2’s multiplayer also allows you to play with your friends as much or as little as you want. The drop-in and drop-out style makes multiplayer an incredibly relaxed experience. Plus, you can enjoy an increased challenge when teaming up with friends.

Buy: Borderlands 2 on Steam | Mac App Store

4. Into the Breach

Into the Breach offers a strategic alternative to the other titles on this list. Using turn-based combat, you’ll progressively expand your tactics to combat the alien force. There are patterns to each enemy formation and terrain, so you quickly learn without it ever seeming unfair.

As such, this game provides a great option for anyone looking for a challenge without the difficulty curve being too high. With randomly generated scenarios, it also offers excellent replayability. In addition, there are different pilots to choose and different ways to customize your mech squad. Which means you’ll always be thinking of new ways to approach the threat.

Buy: Into the Breach on GOG | Steam

5. Torchlight II

Torchlight II is the perfect game to play when you want something like Diablo III but not as intense. It’s a hack-and-slash adventure that’s surprisingly polished and addictive. In comparison to its predecessor, it’s also improved its character progression as well.

Plus, the added bonus of mod support offers some additional customization for those wanting to experience more of the world.

Buy: Torchlight II on GOG | Steam

6. Undertale

Undertale impresses from its concept alone. You can get through the game without defeating a single monster, or you can play it like any other RPG. If you have ever felt guilty about all those defeated enemies, you can finally experience battles from a pacifist’s approach.

You’ll never be able to complain that you’re just button mashing either. Beyond the novelty of the combat decisions, Undertale offers an engrossing story with lovable characters you want to root for. Every character and monster has weight, so you’ll remember them long after you finish the game.

The one-man soundtrack for the game alone demands a playthrough. You’ve likely heard a few of them even if you’ve never played the game, and Undertale boasts one of the best video game soundtracks for studying or relaxing.

Buy: Undertale on GOG | Steam

7. Darkest Dungeon

Darkest Dungeon is simply incredible. The art style sucks you right in, then the gameplay hooks you and keeps you engaged for hours and hours. It’s the kind of game that you intend to play for only 10 minutes, only to realize that the whole day has gone by and you’re now starving.

As far as squad-based dungeon crawlers go, Darkest Dungeon is one of the best because of how punishing it is. The mechanics are brilliant, showing you the effects and consequences of stress on an adventuring party and the risk/reward of pushing your luck as far as it can go before everything collapses.

Buy: Darkest Dungeon on GOG | Steam

8. Mount and Blade: Warband

Mount and Blade isn’t just an open-world game. It’s a sandbox game that doesn’t even have a main storyline. You choose what you want to do in the game: explore, fight, quest, and more. The way you interact with others in the game has a real impact on the world at large.

The biggest reason to get Warband over the original Mount and Blade is the addition of multiplayer. There are seven different game modes that you can play with up to 64 players and bots. Modes include deathmatch, team deathmatch, conquest, capture the flag, siege, fight and destroy, and straight-up battle.

Buy: Mount and Blade: Warband on GOG | Steam

9. Wildermyth

Do you want to play a tabletop RPG from home? Wildermyth lets you explore a long-narrative campaign while engaging in tactical combat. Plus, the lovely papercraft art further drives home the tabletop feel.

Besides offering a distinct look, your character choices matter. Your characters can take lasting wounds from battle, age, fall in love, and leave a legacy. You have a true hand in their fates and the ongoing narrative.

On top of the character and narrative choices, you’ll find a variety of unique game systems. Wildermyth deserves a lot of praise for its unique use of magic that involves the battle environment.

Buy: Wildermyth on Steam

10. Legend of Grimrock II

Legend of Grimrock was a spiritual successor to the cult classic dungeon crawler Dungeon Master, and many consider it to be the title that revived the classic dungeon crawler genre by faithfully combining old-school gameplay with modern graphics.

Legend of Grimrock II expands on its predecessor with a bigger world, better character development, a higher level of challenge, and improved freedom of progression. If you love crawling through dungeons, don’t skip this one.

Buy: Legend of Grimrock II on GOG | Steam

Enjoy the Best RPG Games for Mac

When compiling the best RPG games for Mac, we found both established studio and indie games alike. With the stream of new titles, you can explore many different kinds of gameplay. Still, if you’re looking to break from the RPG genre, you can try some of the best Mac games to play overall.

After you’ve chosen one of the best role-playing games to play on Mac, you’ll want to savor the experience. So follow these tips to improve your Mac gaming experience to ensure you’re having the best time.

Image Credit: AntonKarlik/Shutterstock

Read the full article: The 10 Best Role-Playing Games for Mac


Read Full Article

The Best Tactical Shooter Games You Need to Play


Most gamers enjoy a first-person shooter (FPS), at least occasionally. From franchise juggernauts like Call of Duty to standalone games like Overwatch, it’s hard to beat the satisfaction and intensity of FPS games.

However, not all shooter games are created equal. Tactical shooter games—which require a high level of aiming skill and teamwork—take the genre up a notch. Often simulating actual military conflicts (which the tactical gaming community has deemed milsims, or military simulations), tactical shooters truly put your FPS skills to the test.

With that in mind, here are the best tactical shooters you can play today.

1. ARMA III

ARMA III is one of the best tactical shooters available, period. This isn’t a regular shooter; it’s more akin to a warfare simulator. With small gameplay tweaks like limited running, fatigue, and even functional rear-view in vehicles, ARMA III attempts to emulate a real-world shooter scenario.

You’ll have to use everything— weaponry, clothing, and player placement—to succeed. That’s especially true for squad matches. Don’t be surprised if you spend more time calculating map cover than shooting your weapon. Furthermore, there is an extensive number of game modes to choose from.

Along with being a great standalone game, ARMA III is host to one of the most dedicated and creative modding communities around. You can delve deep into the incredible creations of the mod creators in-game, and the extensive list of options adds thousands of hours of content to ARMA III.

Buy: ARMA III for Windows (Steam—$39.99)

2. SWAT 4

SWAT 4 (and the SWAT series in general) loves thinking outside the box. More akin to a noir military simulation than a regular shooter, SWAT 4 enters players into a world of hostage situations and suspect apprehensions. Every mission briefing comes equipped with photos, maps, and information that will help you throughout your missions.

Missions range in intensity. Some border on creepy. Luckily, you’ll have a huge arsenal and a ton of SWAT-based military technology to assist you along the way. You have both lethal and non-lethal tactics to consider for this game, so weapon specificity is key.

Buy: SWAT 4 for Windows (GOG.com—$9.99)

3. Squad

Think of Squad as an ARMA and Battlefield homage without the backbreaking learning curve. In fact, many consider Squad the spiritual successor to the grueling Project Reality (which you can check out below).

A slightly simpler but still tactical experience, this shooter provides players with a surprisingly realistic war scenario. Additionally, there’s a reason this game is called Squad. There’s very little to no UI indicators.

If you want to know who’s shooting, you’ll have to rely on your teammates. Communication is the key, so it’s safe to say you’ll need a microphone for this one. If you don’t already have a headset, check out the best wireless gaming headsets for the PC. Alternatively, if you prefer a wired connection, check out the best wired PC gaming headsets.

As a squad leader, your job is to observe enemy team movement rather than “shoot the bad guys.” In Squad, real-time strategic maneuvering and wits outweigh firepower every time, especially given each game plays out across a 16km² map.

Buy: Squad for Windows (Early Access—$39.99)

4. Tom Clancy’s Rainbow Six Siege

Tom Clancy’s Rainbow Six is a hallowed franchise in the tactical shooter realm. Even though Siege released back in 2015, Rainbow Six Siege not only holds up, but it’s also risen to become one of the premier shooting games available today.

Of course, there’s a steady stream of new operators, weapons, maps, and combat tools added to the game, continually updating and refreshing content.

What makes Rainbow Six Siege so great, however, is its insistence on preserving the most important components of the tactical shooter genre.

Those willing and able to traverse a tough learning curve will wonder how all shooting games don’t support lean peak. Then there’s the added map destruction and explosives, meaning enemies can come bursting through walls at any moment.

That’s without mentioning the maps, which are designed specifically to ingrain the player in a real-world battle zone. We can’t recommend this game enough for those who want a shooter where every moment matters. Check out our Rainbow Six Siege tips for beginners for some help on getting started.

Buy: Tom Clancy’s Rainbox Six Siege for Windows (Steam—$20) | PS4 | Xbox One (Both $39.99)

5. Brothers in Arms: Hell’s Highway

Brothers in Arms is a fantastic throwback to the early golden age of shooting games. With decent artificial intelligence for its time, fantastic squad gameplay, and a sincerely heartbreaking storyline, it’s easy to understand why there are some fanatics still waiting for a sequel.

If you’re into squad-based tactical gameplay which requires you to use any and all players at your disposal to complete various tasks, this game is for you.

Don’t be put off by the age of the game, either. You’ll be too busy commanding squadrons to notice.

Buy: Brothers in Arms: Hell’s Highway for Windows (Steam—$9.99) | PS3 ($14.99) | Xbox 360 ($5.99)

6. Escape from Tarkov

Escape from Tarkov is a hardcore, massively multiple tactical survival shooter requiring teamwork, communication, and a bit of luck to “escape.” You’re dropped into one of Escape from Tarkov’s large maps. Your team task is to reach the extraction point, usually on the opposite side of the map, far in the distance.

Between you and your extraction are other online players, as well as AI-controlled characters known as “Scavs” (short for scavengers). You must find the best loot, tool up your team, and get ready for the inevitable gun battles that suddenly blast into your locale, be that PVP or PVE.

The beauty of Escape from Tarkov is the depth and immersion you can quickly build. There are flea markets where you can buy, sell, and barter for weapons. There are special contracts you can take in-game to earn more currency or other special loot.

You can join the game as a Scav with a generic set of gear and attempt to earn and find more loot for your main character, a mode that allows you to explore maps without fear of losing your entire arsenal.

Plus, there is more to come from Escape from Tarkov. The game is still running its closed beta phase, with new features, weapons, bug fixes, and optimizations rolling out all of the time. Joining during the closed beta phase gives you a bunch of extra equipment to start your character with, too.

Buy: Escape from Tarkov for Windows ($45)

7. Tom Clancy’s Rainbow Six 3: Raven Shield

While I’ve praised Rainbow Six above, I’d be remiss if I didn’t mention Rainbow Six 3 specifically. Not only does starting up Rainbow Six 3 provide serious nostalgia flashbacks for those who have played it before, but playing Raven Shield again only adds to the impressiveness of the game.

Much of what makes the Rainbow Six franchise so successful is present in Rainbow Six 3. The weapon customization, methodical gameplay, and one-shot kills all contribute to making Rainbow Six 3 the tactical shooter prototype.

Buy: Tom Clancy’s Rainbow Six 3: Raven Shield for Windows (Steam—$9.99)

8. Insurgency: Sandstorm

The follow up to the 2014 original, Insurgency: Sandstorm picks up and runs with the title. Still featuring hardcore tactical gunplay and extremely lethal weapons, Insurgency: Sandstorm puts an emphasis on moving slowly, silently, and most of all, working as a team. Break off from your squad, and all too often, you’ll be regularly decreasing the respawn count.

You won’t find a kill cam, mini-map, or weapons perks in Insurgency: Sandstorm. The HUD is basic, with no health or armor bar. You can play as a military force or as the insurgents in a fictional war based in the Middle East.

Oh, and you will die. A lot. In continuing with the general realism of the game, it’s frightfully easy to get one-shotted. That’s not to mention that players become fatigued and guns become harder to shoot.

Sandstorm is meant to be slightly less hardcore than the original Insurgency, looking for a blend of hardcore tactical FPS and the more action arcade approach of Call of Duty and other similar titles. The result is engrossing gameplay, incredible sound design (seriously, Sandstorm sounds phenomenal), and one of the best tactical shooters around.

Unfortunately, Insurgency: Sandstorm is currently unavailable on consoles. However, that situation will change in the latter stages of 2020, when Insurgency: Sandstorm hits the PS4 and Xbox One.

Buy: Insurgency: Sandstorm for Windows (Steam—$29.99)

9. Project Reality

Project Reality is a classic hardcore tactical shooter that started life as a mod for Battlefield 2, but is now a standalone game. As mentioned above, Squad is the spiritual successor to Project Reality. Once you take Project Reality for a spin, you’ll understand why.

One major difference between Project Reality and other hardcore shooters is how respawning operates. You cannot respawn on your squad leader, only at permanent spawn points such as the main base or a Forward Operating Base.

In that, the Forward Operating Base is vital for progression in Project Reality as it allows your team to spawn closer to the frontline, rather than having to trek across massive maps, or even from an aircraft carrier or other offshore installation.

Although Project Reality is starting to look a little dated, especially versus more recent hardcore tactical shooters, you’ll find the minimal HUD, easy squad creation, and battlefield deployments worth your time.

And the best part? Project Reality is completely free to play. If you download and play Project Reality, please consider donating to the developers to keep this realistic shooter alive.

Download: Project Reality for Windows (Free)

What Is the Best Tactical Shooter Game Available?

Are you tired of the overtly loud, simplistic first-person shooters? Are arcade mode shooters getting you down?

Then you should try any one of these intense tactical shooters out for yourself. Soon enough, you’ll realize why these are considered some of the best shooter games out there.

However, if you want something with more of an arcade focus, try one of these awesome PC shooters priced under $10.

Read the full article: The Best Tactical Shooter Games You Need to Play


Read Full Article