17 March 2020

7 Useful Google Keep Tips and Features for Better Lists


google-keep-perfect-lists

Google Keep is a great tool for project management, for keeping tabs on your travel plans, and for saving quick voice memos. At its core, it’s a super simple app that can be adapted for a variety of uses. But in its simplest form, Google Keep is great for making lists.

First, what exactly is Google Keep? Google’s multi-platform note-taking app makes it easy to save text, voice, and photo notes on your phone or computer. It has a variety of organization and sharing features, has some impressive OCR features, and takes advantage of location awareness. At a glance, it looks like a digitized version of post-it notes.

So why use Google Keep for your list-making? Here are several reasons.

1. It’s Easy to Create Checklists

When it comes to creating a Google Keep list, the easiest way to do this is by making a checklist. When you create a new note, be sure to do so by hitting the New List button.

Google Keep New List on the web

This will insert one checkbox in your list and as you add more items to the list, more checkboxes will show up. You can also rearrange items on your checklist, and when you check items off, they are still viewable so you can keep track of your progress.

If you’ve started creating a list and realize after the fact that you want to remove the checkboxes, click the More button (three dots) and then Hide Checkboxes.

Google Keep Hide Checkboxes

2. You Can Keep Your Lists Organized

If you don’t take advantage of Google Keep’s organization features, your lists can quickly become an unwieldy mess. Luckily, those features are surprisingly robust and at first glance, you might not realize that these features even exist.

Color Coding: You can color code your list (you’ll just have to keep a note of your color coding scheme) right within Keep. Color coding your lists means the entire background of your note will change to that color. This is extremely useful when looking at your list of notes, so you can see the categories at a glance.

Google Keep Color Code

Labels: You can use Google Keep tags which are called Labels. You can then filter your notes to view only those with a certain label. These labels are viewable in the menu on the left-hand side of the screen. To add a label to a note, open up the note, hit the More button, and select Add label. Then give your label a name or pick an existing one from your list.

Google Keep Add Label Name

Archiving: If your list of lists gets far too long and you need to do some spring cleaning in Google Keep, instead of deleting them, you can archive them. This keeps your Google Keep notes tidy, but also preserves a record of your notes. (And of course, if you label your lists, you can easily search your archived notes.)

Just click the Archive button at the bottom of the note. And to access archived notes, select Archive in the left-hand menu.

3. It’s Integrated With Google

If you’re a fan of Google products, Google Keep fits right in with them. You don’t have to create a new account to use the service — just log in with your Google credentials. You can also copy Google Keep lists to Google Docs. Click the More button and select Copy to Google Docs. Unfortunately, the checklist is converted into a bulleted list, but at least it maintains its hierarchy.

4. It Offers Seamless Cross-Platform Apps

Because Google Keep is multi-platform, it means anyone can use it seamlessly across devices. Google Keep is available as a free app for iOS, Android, Chrome, and as a Chrome extension. And if you aren’t a fan of Chrome, you can use Keep in any browser.

Multi-platform access is something we now expect from our favorite apps. With Google Keep’s collaboration features, it’s essential that users are able to access the service on the most popular platforms. Google Keep’s cross-platform access is particularly seamless in that the interface and experience (with the exception of some features) is near identical on every device.

Download: Google Keep for Android | iOS | Chrome | Chrome Extension (Free)

5. Create Checklists With a Widget

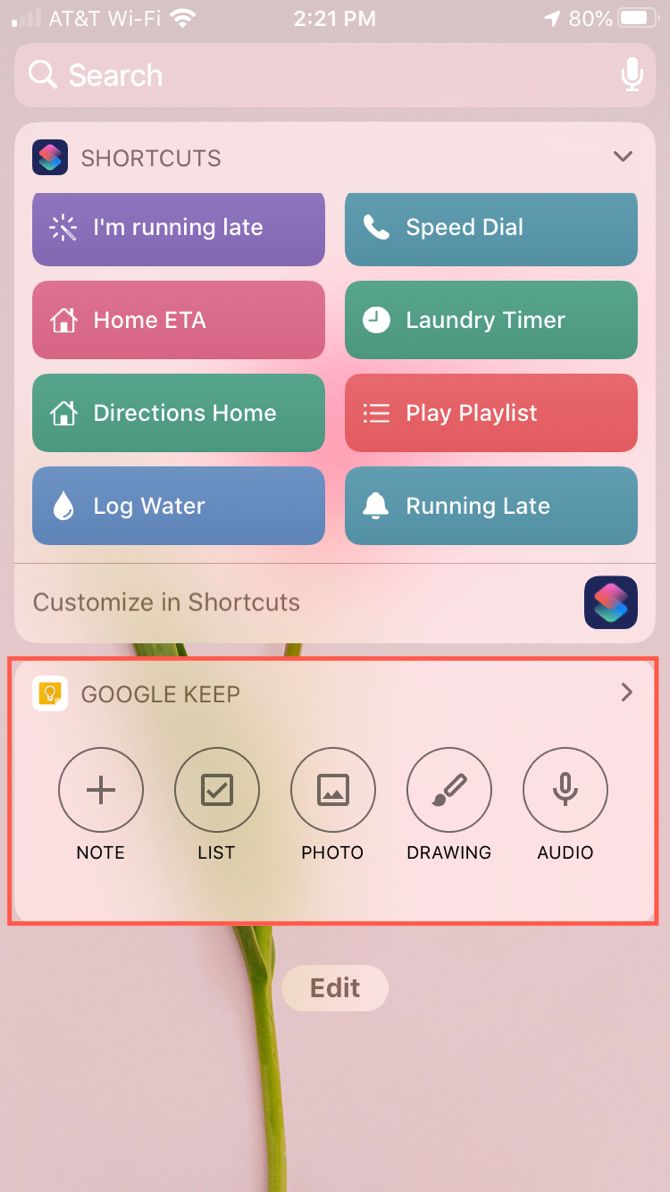
You can use widgets on both Android and iOS, giving you quick access to create a Google Keep list. Android users can add a widget to the home screen making it easy to create a new checklist. And iOS users can add a similar widget to the Today View, which is accessible from the iPhone’s Notification Center.

6. You Can Collaborate With Others

Google Keep is a great app to use by yourself, but its sharing and collaboration features make it a good option for those looking for a way to share lists, notes, and more with family, friends, or colleagues. Because of its seamless, cross-platform user interface, it’s easy to get everyone on board using Google Keep. And because of its simplicity, it’s particularly useful for family members who are technophobic.

The collaboration features are extremely simple too. You can invite people to individual notes. Just open up a note, click the Collaborator icon, and enter the person’s email address.

Google Keep Collaborator Button

You can use this to share a grocery list, prep list for travel, or to-do list for a simple project.

7. Let Google Keep Remind You While Shopping

Google Keep not only includes reminders based on a specific date and time but can even remind you of a certain list at a specific location.

To add a location-based reminder to your note, click or tap the Remind Me button and select Pick Place. You can then allow your browser or phone to detect your location or enter a specific address.

Google Keep Pick Place

This feature is particularly useful when you’re heading to the grocery store and want to make sure that you remember to stick to your shopping list.

Create a Google Keep Checklist for Any Task

As you can see, Google Keep offers terrific features for checklists and regular lists as well. Between the ease-of-use, cross-platform access, collaboration, and more, you can create a Google Keep checklist for about anything.

For more help with Google Keep, take a look at how to make nested lists or use Google Keep to organize your travel plans.

Read the full article: 7 Useful Google Keep Tips and Features for Better Lists


Read Full Article

How to Wipe Your Hard Drive While Leaving the OS Intact


Picture this scenario: you’re selling your computer, so you want to wipe all your personal data—but you also want to leave Windows intact.

Simply deleting your personal files isn’t enough, unfortunately. With the right tools, someone could recover your data. You need to securely wipe the hard drive to make sure no personal data traces remain.

So, how do you wipe a hard drive clean while leaving the operating system intact?

Always Securely Wipe Your Drives Before Selling

You should always wipe your drives before giving away hardware, too. If you don’t wipe your drives, you’re handing personal data to the person purchasing your computer.

The difficulty is that even if you delete your personal data, it still lingers on the hard drive because of how file deletion works in Windows.

You see, when you delete a file, it doesn’t disappear into the ether. The computer marks the area the file occupied as usable, meaning it is available for another file to overwrite it in the future. In turn, this means files you delete using regular methods may remain accessible even if they don’t appear in the File Explorer or otherwise.

If you’re getting rid of a PC and don’t want people to access your sensitive data, you must securely wipe your drive.

The process of “wiping” refers to overwriting all sectors on your hard drive, replacing the content of the drive with zeroes or gibberish data. The process removes any data waiting for deletion, including that which third-party software could recover.

Can You Securely Wipe an SSD?

Before you start obliterating your hard drive, consider what type of drive you have. If you have a magnetic spinning disk hard drive, you can proceed to the secure wipe methods below.

However, if you have an SSD, you need to read our short guide on how to erase an SSD securely.

That is because of the difference in how a magnetic hard drive and a solid-state drive store data. If you use a solid-state drive, Windows will turn on the TRIM feature automatically.

TRIM manages your SSD, making sure files delete properly, ensuring the flash memory wears in an efficient and consistent manner.

Using a drive-wiping tool on an SSD isn’t a great idea. Wiping an SSD will reduce the lifespan of the drive due to the additional wear and tear.

How to Wipe a Hard Drive Without Deleting Windows

There are a few methods you can use to erase your data from the drive while leaving the operating system intact.

1. Use Windows 10 Reset This PC

One of the easiest options for wiping a drive clean and leaving your operating system intact is built into Windows. The Windows Reset this PC option will reinstall Windows 10, deleting your personal data in the process.

Once the process completes, you’ll have a fresh Windows to installation, without any personal data on the drive.

windows 10 reset this pc

Please note: This process will wipe your data. Make sure to back up any important data to a separate location.

How to Reset Windows 10

First up, you need to reset Windows 10.

Press Windows Key + I, type recovery in the search bar, and select Reset this PC.

Next, select Remove everything, then Remove files and clean the drive. The Windows 10 reset function can take a while to complete, but it will make sure there is no chance for anyone to recover data from your drive.

When the warning appears, select Reset and let the process complete.

2. Completely Wipe the Drive, then Reinstall Windows

The second option is to completely wipe your drive of all data, including the operating system, then reinstall Windows. The process is less than ideal and takes some time, but it does leave you with an entirely personal data free-drive, and a fresh installation of Windows 10.

You need two things to complete this process: a copy of DBAN (Darik’s Boot and Nuke), and a copy of Windows 10 to install after wiping the drive.

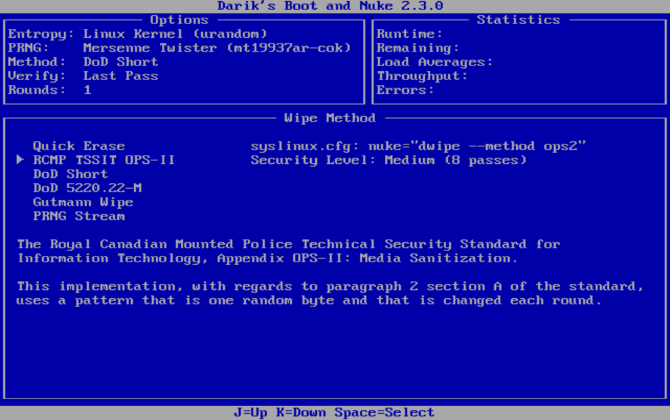
Choose a method to securely wipe your HDD

Please note: This process will delete all data on your drive. It will not be recoverable.

  1. Create Windows Installation Media. First, check out how to create Windows 10 installation media. It covers how to download and use the Windows Media Creation tool, as well as how to install Windows 10 to a bootable USB or DVD.
  2. Burn DBAN to Bootable Media. Once you finish creating your Windows 10 installation media, check out how to completely wipe a drive. The third section covers “How to Totally Wipe a Hard Drive with DBAN,” and will guide you through the media creation process and how to use DBAN to wipe your drive securely.
  3. Reinstall Windows 10. Once the DBAN process completes and your drive is sparkly clean, you can reinstall Windows 10. Follow our guide on how to install Windows 10 from a bootable drive, and you’ll have a fresh installation in no time at all.

As mentioned, this is a lengthy process. It does, however, ensure that there is absolutely no chance of anyone retrieving private data from your old hard drive.

3. Use CCleaner Drive Wipe to Erase Blank Space

Your third option is to use CCleaner’s Drive Wipe option to zero out blank space on your drive. Drive Wipe will permanently delete the links to old file locations on your drive but only runs in free areas. You can copy your data to another drive (or delete it), then delete your data.

  1. Download and install CCleaner.
  2. Once installed, head to Tools > Drive Wiper.
  3. Select Free Space Only, how many passes you want (how many times you want to overwrite the data), and the drive on which you want the process to run.
  4. When you’re ready, press Wipe. The process can take a few minutes.

Using CCleaner is the least effective method for cleaning your drive. The process will sever any links to your old data. However, if you haven’t uninstalled existing programs, application files, program files, and so on, links could remain.

Download: CCleaner for Windows 10 (Free)

Securely Wipe Your Drive Before Selling

You should always wipe your data before you sell or give away your computer. Even if you know the person you’re giving the hardware to, you don’t know what they will do with the computer when they finish using it. Your data could still lurk on the drive for a long time.

Of course, if you are not worried about the operating system remaining intact, you can follow the guide on how to use DBAN without reinstalling the operating system afterward.

Are you wondering about how to clean up your Mac rather than a Windows system? Check out how to erase and restore a Mac to factory settings.

Read the full article: How to Wipe Your Hard Drive While Leaving the OS Intact


Read Full Article
The Best Apps to Read Comics on Your iPad


comics-read-ipad

There are many reasons to buy an iPad, which is why so many people own one. One of the best uses of an iPad is as a digital comic book reader. As nice as it is to hold a printed comic in your hand, the comic book scene is very much alive and kicking on iOS and iPadOS.

In this article, we list the best iPad comic readers to download and use. These will enable you to either build a comic book collection from scratch or read your existing comics. And all on a glorious, high-definition screen which will make the artwork pop like never before.

The Best CBR and CBZ Readers for iPad

If you’re reading this, there’s a strong chance you already own a sizable collection of digital comic books in the CBR or CBZ formats. If that’s the case, you’re probably looking for a way to read them on your iPad.

Here are some of the best iPad comic readers to which you can import your existing comic book collection.

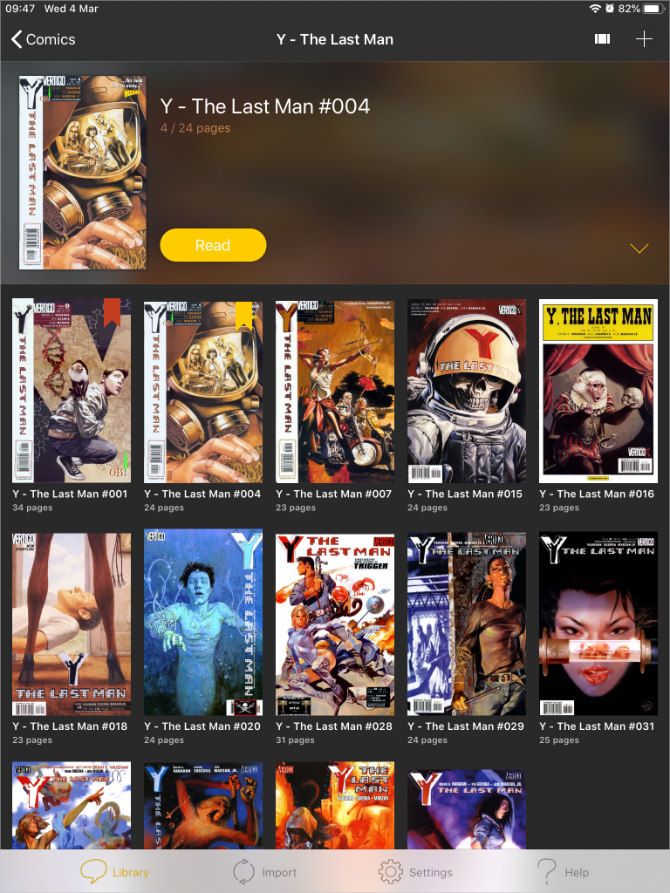
Chunky: The Best Free iPad Comic Reader

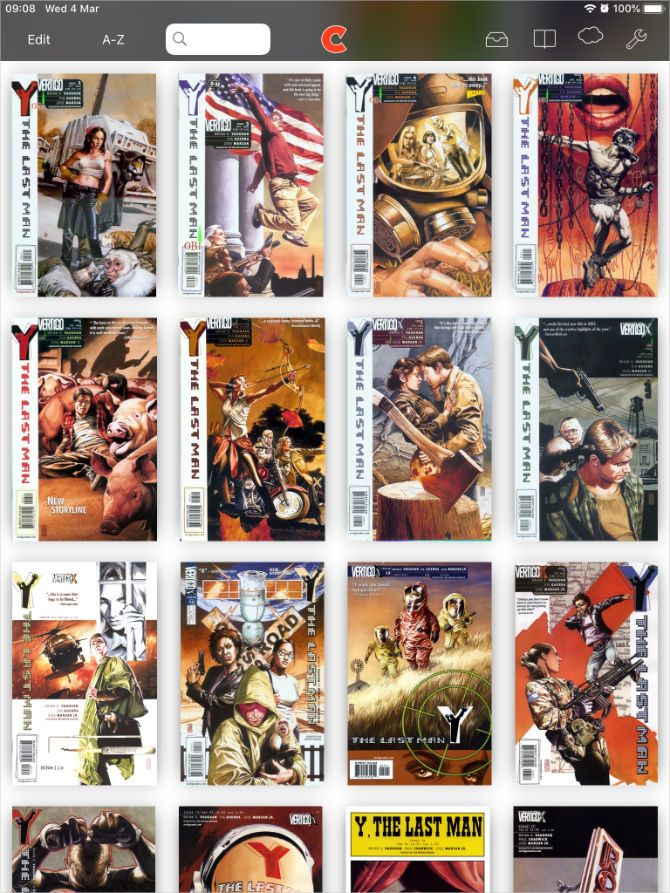
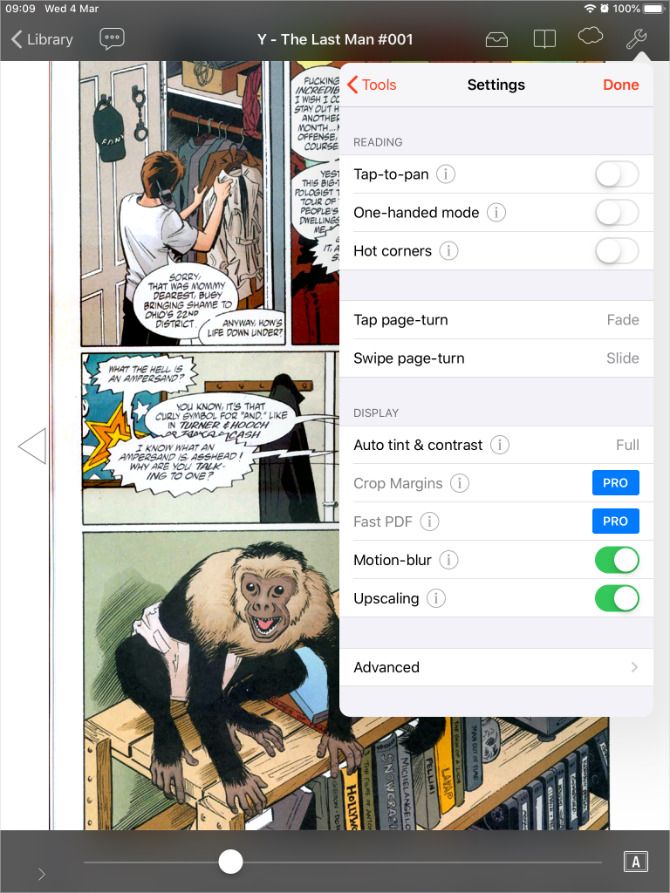
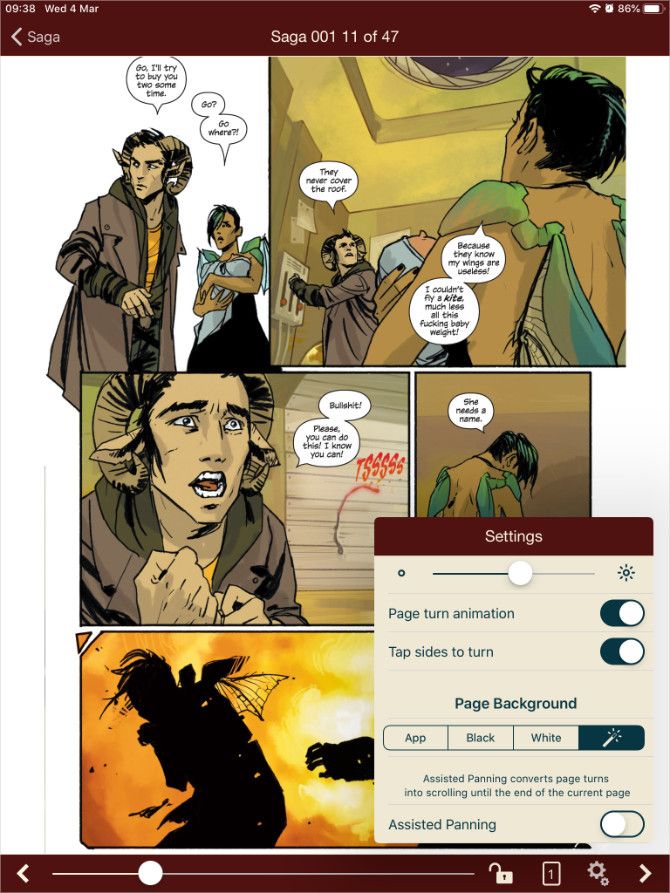
Chunky might be the most popular comic book reader available on the iPad. It’s totally free to install and offers a range of different ways to import your collection. What’s great is that Chunky automatically upscales your comics to improve low-resolution images. You can even turn on auto-contrast to compensate for faded panels and muted colors.

Sync Chunky with iCloud Drive, Dropbox, Google Drive, and other cloud services to import CBR, CBZ, CBT, and PDF files. If that isn’t convenient enough, upgrade to the Pro version to wirelessly download comics from a computer or NAS drive.

The Pro upgrade also gets you access to alternate color schemes and automatically crops the borders off of each page. Even without the upgrade, Chunky offers all you need to organize and enjoy digital comics on your iPad.

Download: Chunky for iPadOS (Free, in-app purchases available)

Panels: A Sleek-Looking App With iCloud Drive Sync

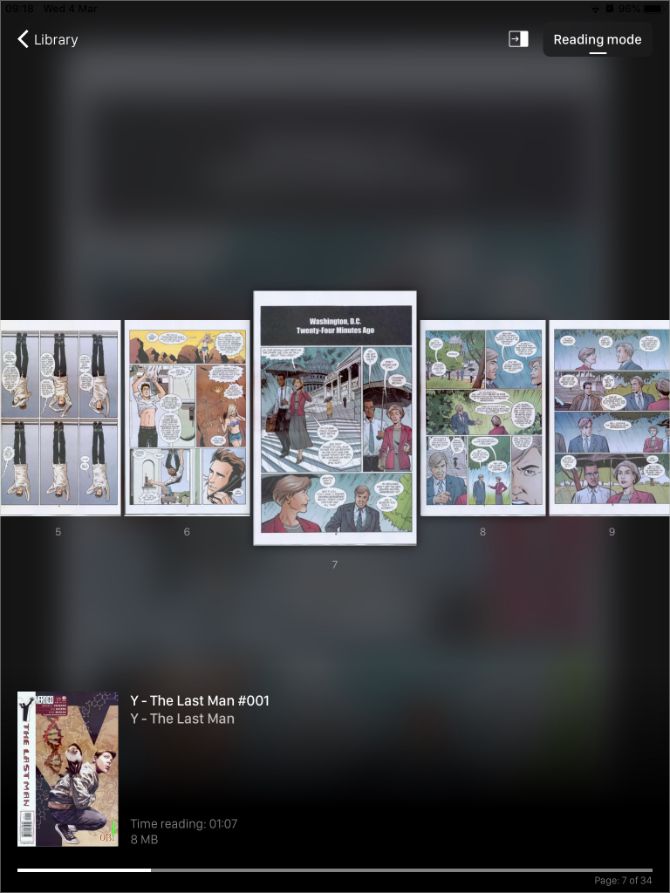
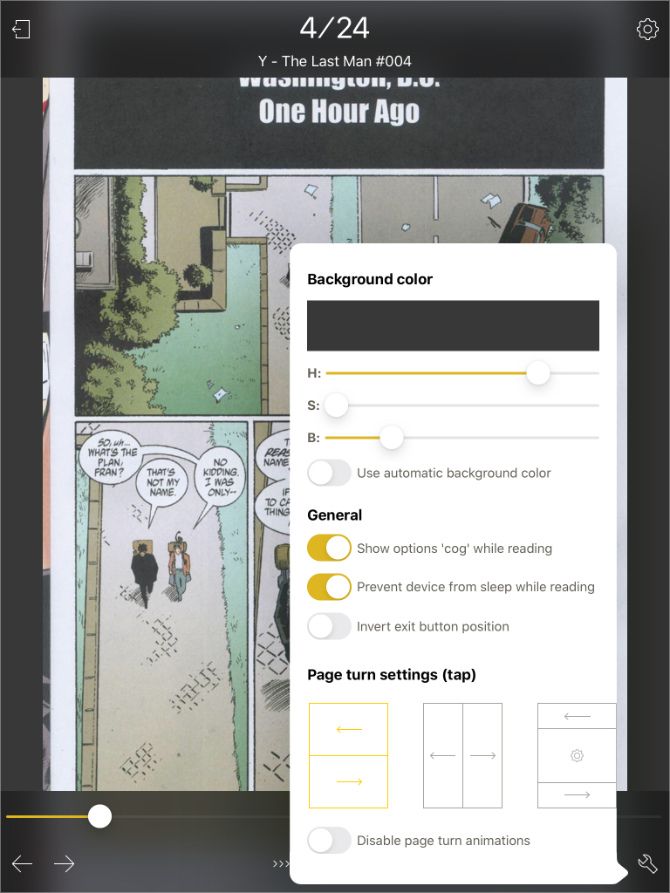
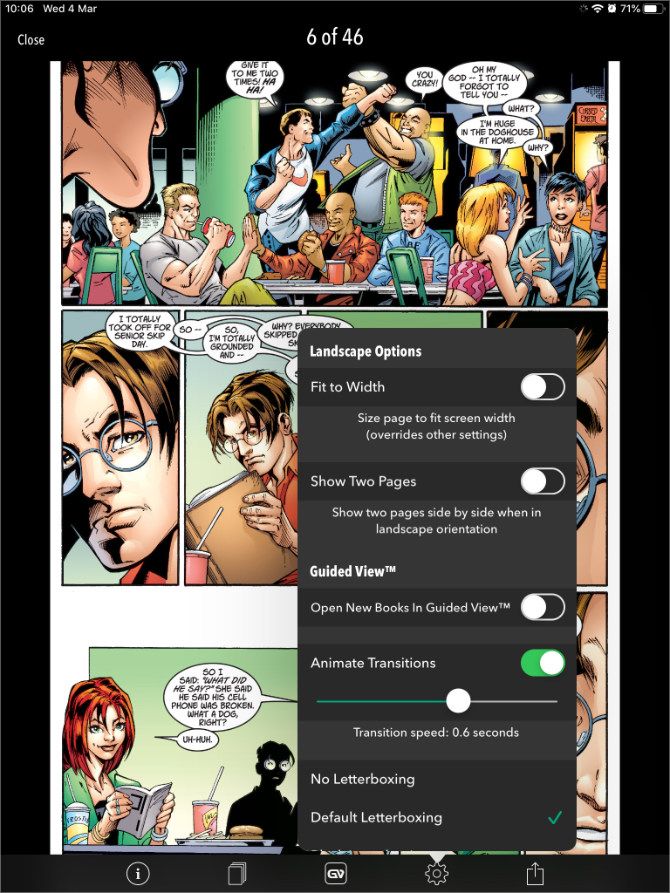
Panels is a sleek new comic reader that uses Google to sync your reading progress across your iPad and iPhone. It works with CBR, CBZ, and PDF files, to cover all of the most common formats, which you can read in horizontal, landscape, or panel-by-panel mode.

The free version of Panels only lets you import your comics using iCloud Drive. But you can upgrade to the Pro version to unlock Dropbox, Google Drive, OneDrive, and web server options.

Even without upgrading, you can still connect your iPad to a computer to transfer comics using iTunes or Finder.

Download: Panels for iPadOS (Free, in-app purchases available)

ComicFlow: The Best Option for Larger Collections

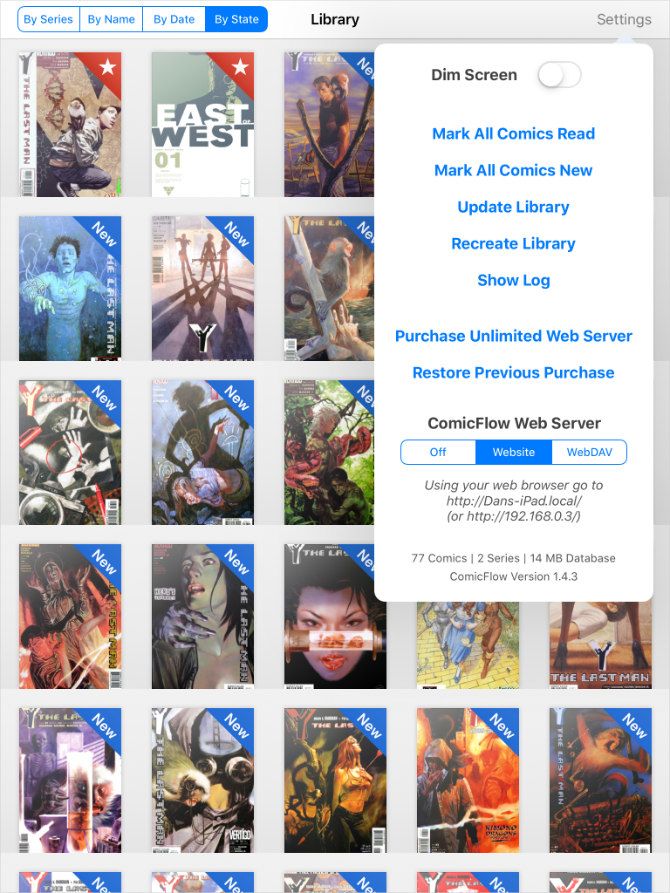
ComicFlow takes a free, simple, and open-source approach to reading digital comics. It allows you to load up your iPad with CBR, CBZ and PDF files with minimal organization. Just put your comics into a folder to treat them as a series. This is a polished and reliable reader, despite the fact that it doesn’t get regular updates.

You can transfer comics via Wi-Fi using a web server or a WebDAV server. Simply drag-and-drop your comics into the server window and wait for them to appear in the comic reader on your iPad.

Unfortunately, ComicFlow limits this feature to 50 transfers. After which you need to upgrade via an in-app purchase. But you can still sync comics for free using iTunes or Finder if you don’t want to upgrade.

Thanks to its focus on simplicity, ComicFlow promises to handle thousands of comics and tens of gigabytes of files. And does so while offering all the features you need to enjoy your collection.

Download: ComicFlow for iPadOS (Free, in-app purchases available)

iComix: A CBR and CBZ Reader to Sync With the Cloud

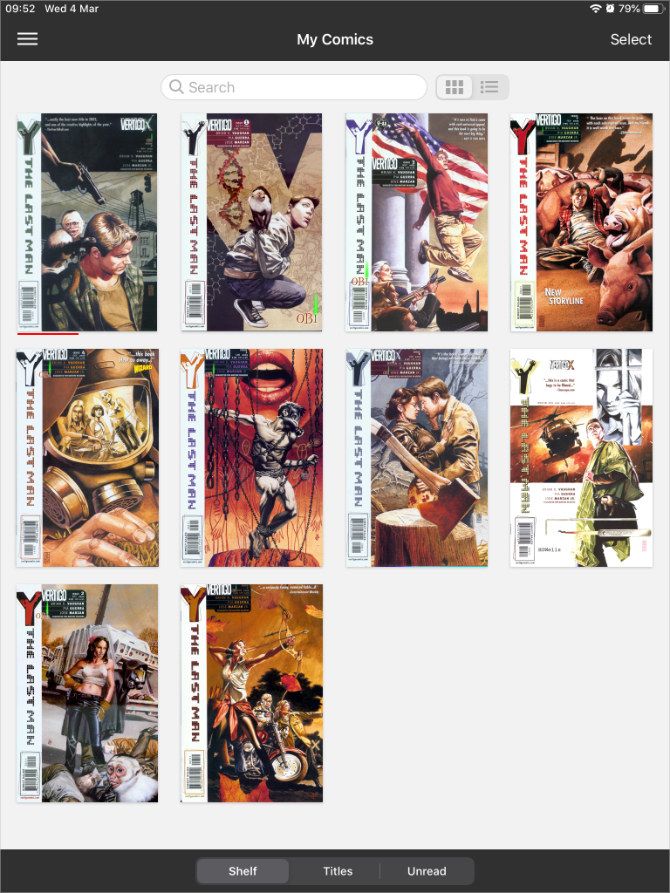
Like ComicFlow, iComix is a free comic reader for your iPad with an emphasis on simplicity. The app offers light and dark themes, with just a few tools for organizing your library.

There’s no handy web server transfer, but you can connect to Dropbox, Google Drive, OneDrive, or Box to import comics instead. If that’s no good, you can also transfer files from a computer using iTunes or Finder.

iComix only supports CBR and CBZ files, so it isn’t the most compatible comic reader available for your iPad. That said, the majority of digital comics are in one of those two formats anyway.

Download: iComix for iPadOS (Free)

YACReader: Get More Features and PC Support

You can think of YACReader—or “Yet Another Comic Reader”—as a paid upgrade to the free options above. It’s great for people who want extra features and compatibility options. YACReader supports CBR, CBZ, PDF, ZIP, RAR, and RAR5 files, so you don’t even need to extract your comic archives before you read them on your iPad.

When it comes to importing comics, you can sync using Dropbox, Google Drive, Box, or OneDrive. Or if that isn’t good enough, plug your iPad into your computer to sync comics using iTunes or Finder instead.

The app really shines when combined with the free YACReader desktop app for Mac, Windows, or Linux. This lets you connect your iPad to your computer and access your collection without leaving the YACReader app.

Download: YACReader for iPadOS ($2.99)

iComics: The Most Compatible iPad Comic Reader

Highly customizable and polished, iComics is another option for those who want even more from their comic readers. As testament to this, iComics supports all of the following comic book file formats: ZIP, CBZ, RAR, CBR, 7ZIP, CB7, TAR, CBT, LZH, LHA, EPUB, and PDF.

You can even read manga comics from right-to-left and you can send individual pages to a printer. iComics also places great emphasis on the reading experience, with smooth scrolling and the option to crop the borders off.

Unfortunately, iComics might let you down with its transfer options. The only option you get is to connect with iTunes or Finder via a cable or to add comics from other apps on your iPad. You do this by going to Share > Open With from the other apps.

Download: iComics for iPadOS ($1.99)

Comic Zeal: A Feature-Rich iPad Comic Reader

A premium product that has been in development since 2010, Comic Zeal is mature and rich in features. Although it may seem bloated to those with few demands from a comic reader. The $4.99 price tag gets you powerful organization tools—perfect for keeping large numbers of comics at your disposal.

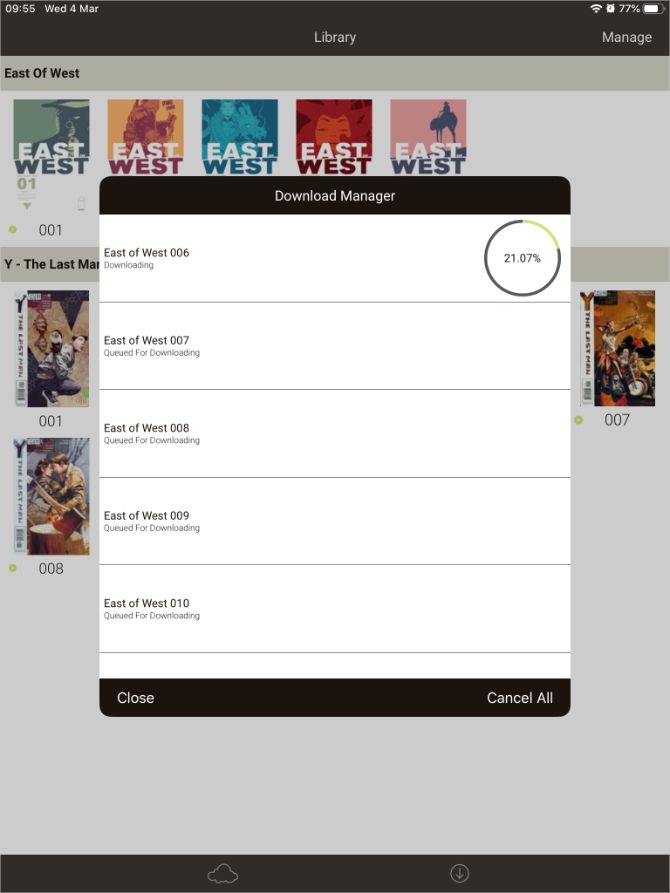
This app includes support for file transfer over Wi-Fi, downloading from cloud services, importing via AirDrop, and good old fashioned iTunes or Finder file transfers. However, to import more than one comic at a time from cloud services, you need to shell out for an extra in-app purchase.

In addition to seemingly endless customization, Comic Zeal also includes a power-user feature called the Slider. This tool makes it easy to organize your collection, create reading lists, reorder comics, and more.

Comic Zeal might be expensive, but it’s packed with features.

Download: Comic Zeal for iPadOS ($4.99, in-app purchases available)

Comic Store and Publisher Apps

If you don’t already own a collection of CBR or CBZ format comics, you might prefer to buy comics directly from a comic reader app on your iPad. The apps below should fit the bill for that.

The following iPad comic readers are all free to download, but you need to buy individual comics to read inside them. Sometimes there are free offers, but for the most part, you’ll need to pay for everything you plan to read.

ComiXology: Buy Individual Comics or Go Unlimited

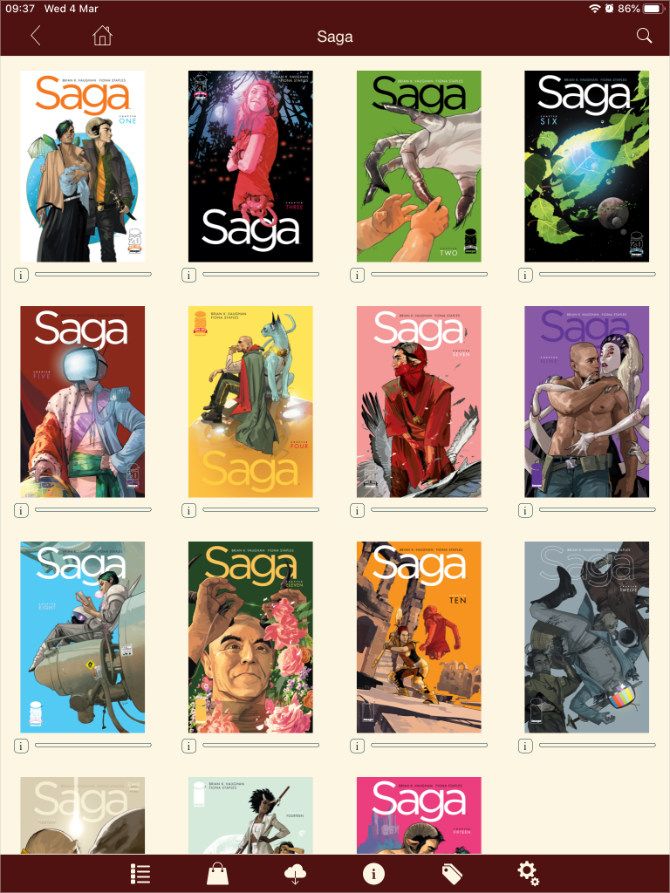
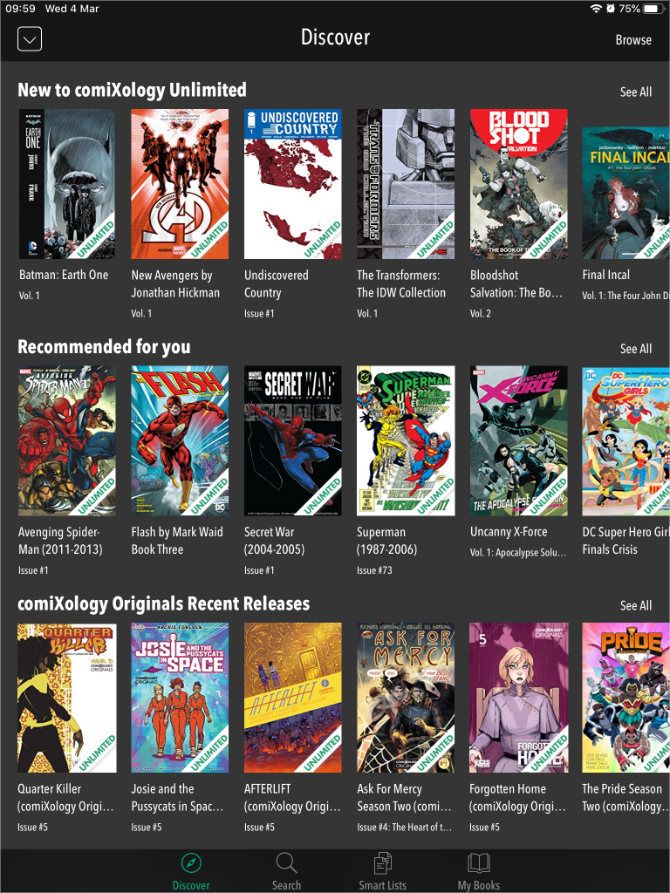
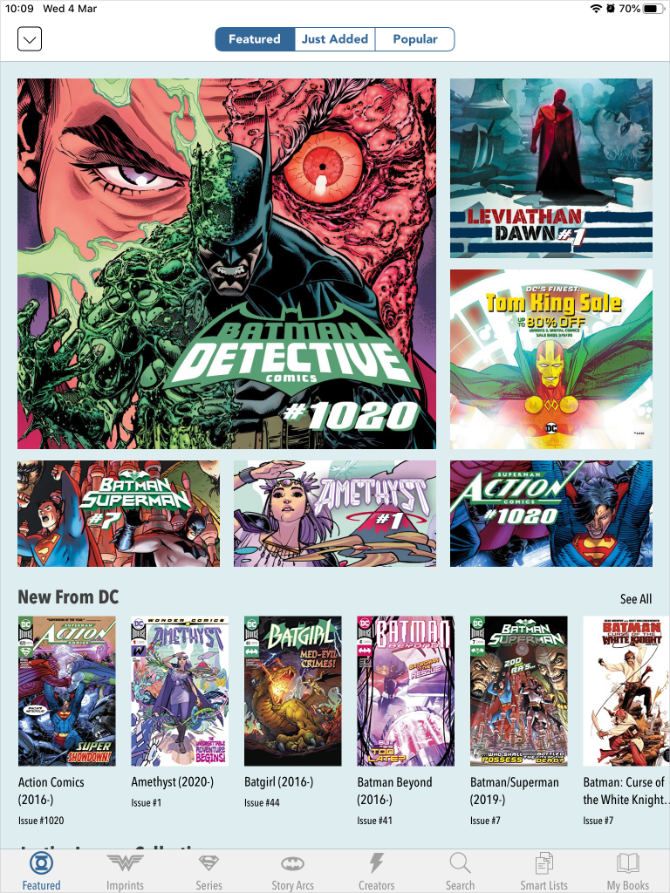
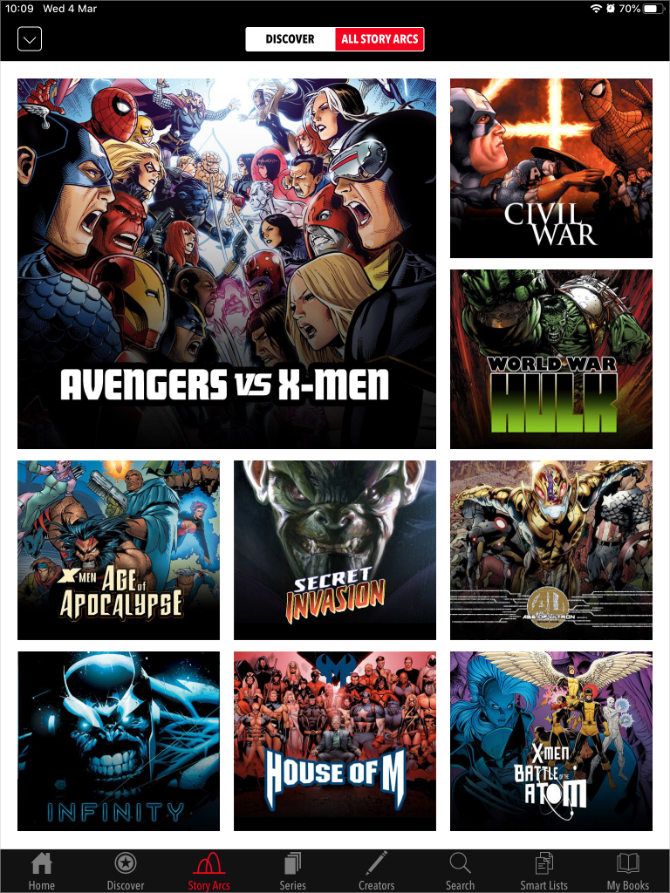
ComiXology is owned by Amazon and is one of the best iPad comic reader apps available. It offers access to comics from Marvel, DC, Image Comics, IDW, Dark Horse, and much more. Although, you might find that the very latest releases aren’t available to buy until a few months after their physical release.

You can install ComiXology as one of the ways to read comics on your Mac as well as on your iPad or iPhone. This makes it easy to sync your digital comic collection across every device. The only problem is you can’t buy comics in the app itself; you need to add them to your Wish List and buy them from the ComiXology website instead.

If that sounds like an inconvenience, consider signing up for comiXology Unlimited instead. This subscription service costs $5.99/month and gets you access to over 20,000 comics from the comiXology library.

Download: ComiXology for iPadOS (Free, in-app purchases available)

Madefire Comics: Discover Animated Comics With Motion Books

Another digital comic book store, Madefire offers access to DC, IDW, Dark Horse, Oni Press, and more publications. The most exciting feature in Madefire’s digital comic reader is its flagship “Motion Books” reading experience. This makes full use of the iPad to bring comics to life with interactivity, sound, and animation.

You can find a lot of free content from the sidebar that includes comics from Blizzard, DC, and IDW, to name a few. But you can also buy well-known series and one-off issues to start building your collection.

Download: Madefire for iPadOS (Free, in-app purchases available)

Comic Book Publishers: Marvel, DC, and more

Most major publishers offer their own apps for reading comics on your iPad. Many of them are extremely competent readers with a built-in store for purchasing new issues. You don’t usually get much in the way of organization options for the library, since the publisher organizes all of the comics for you.

You can get apps from DC, Marvel, Image, Dark Horse, and IDW. But Marvel’s app is probably the most popular. You can also sign up for Marvel’s subscription service, which gets you instant access to tens of thousands of comics, although there’s a separate app for that.

You might want to look at our comparison of Marvel Unlimited vs. ComiXology Unlimited to help choose the best subscription service for you.

If you only read comics from a certain publisher, you’ll probably get a kick out of using their dedicated app. You might even gain access to exclusive issues that aren’t available elsewhere. But most people probably don’t want this limitation because it means splitting your comic collection across a range of different apps.

If you read comics from a lot of different publishers, you should probably build a collection of CBR or CBZ files to use one of the iPad comic readers listed above, or stick to buying comics from a third-party store like ComiXology instead.

Download: Marvel Comics for iPadOS (Free, in-app purchases available)
Download: DC Comics for iPadOS (Free, in-app purchases available)

Where to Find Free Comics to Read Online

Now you know all about the best iPad comic readers, you’re probably looking to expand your comic book collection.

Luckily for you, there are lots of places to read comics online for free. That might mean hunting down giveaways from the big-name publishers or indulging in classic issues that now belong in the public domain. Either way, there’s plenty to sink your teeth into.

Read the full article: The Best Apps to Read Comics on Your iPad


Read Full Article

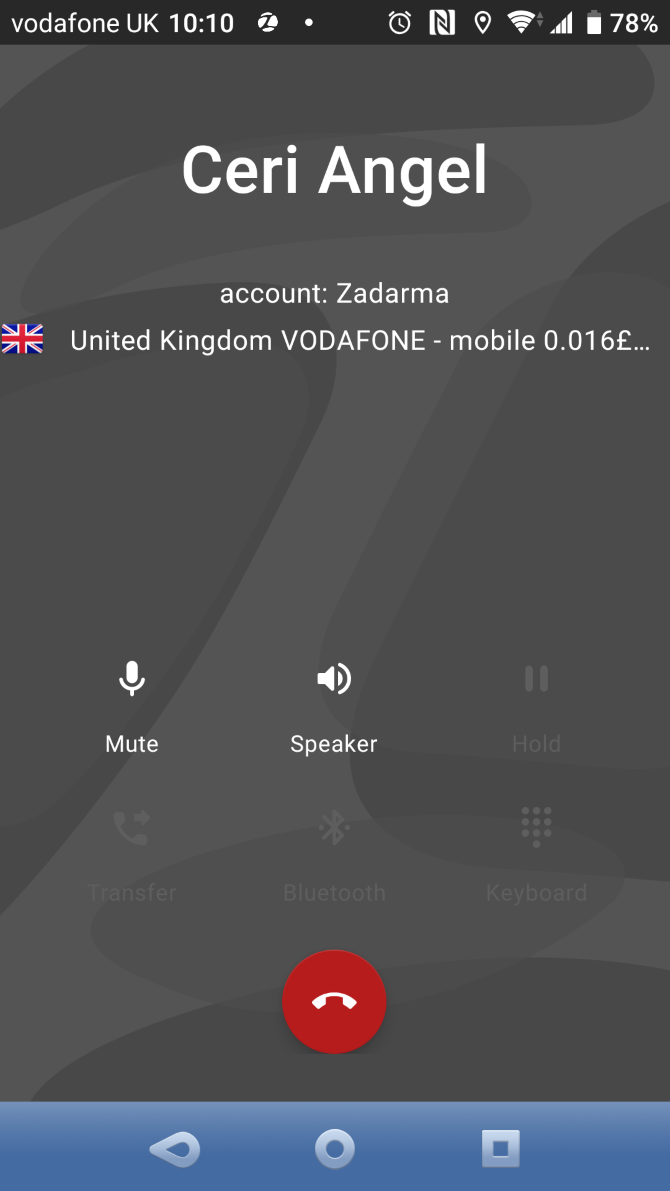
Zadarma: The Affordable VoIP Network for Everyone


zadarma-voip

Whether you freelance, run a small business, or regularly travel, having a reliable and affordable telephone communication system is vital. Over the past two decades, telephone service has become increasingly cheaper thanks to VoIP and PBX. Think of Skype, or any other non-phone voice calling service.

Zadarma makes it simple to access VoIP with free and affordable bundles, plus apps available on most platforms.

What Are VoIP and PBX?

VoIP is Voice over internet Protocol, the way computer-to-computer voice calls have worked for years. These days, VoIP is also the prevalent means for standard calls from landlines.

If you work in an office with other people, there’s a good chance you use VoIP without noticing. This is thanks to PBX, (Private Branch eXchange) which supports VoIP, ISDN (Integrated Services Digital Network), and analog calls.

It’s basically a private telephone network that connects people within an organization while providing access to phone networks beyond. Think of your work phone again—you can typically dial a short number to call a colleague. For calling another business, meanwhile, you need to open an outside line.

Traditionally, this type of setup was expensive. That’s where Zadarma comes in.

Zadarma Offers Free and Paid Options

Zadarma offers three bundles, giving you the opportunity to save money on your telephony. They essentially offer the same features, with paid bundles offering an increase in minutes, storage, and other limits.

How much is Zadarma?

First is the Standard package, available for free (though you must purchase call time, however). Intended for up to four team members, it supports up to 30 internal devices. This bundle provides 200MB of cloud storage for call recording, has three voice recording extensions, and offers free incoming calls. You can port existing numbers in supported countries, while the bundle affords API access to developers and CRM integration.

If the free option isn’t enough, Zadarma also offers two paid plans At $39 per team per month, the Office package is aimed at up to six members, but will work fine for larger teams as well. This boosts some of the options from the freemium package. As such, it allows for 2,000 outgoing minutes, two virtual phone numbers, 10 concurrent calls, 50 maximum internal devices, eight extensions with voice recording, and 2GB of cloud storage.

You can also choose Zadarma’s Corporation option, at $79 a month per team. It supports up to 20 members and offers 4,000 minutes, five virtual numbers, 20 concurrent calls, and up to 100 internal devices. With 20 voice recording extensions and 4GB of cloud storage, this is definitely the right option for established companies or those planning fast expansion.

Ultimately, whether you’re a single user or a small business, the Standard freemium package is the best onboarding option.

(The above pricing is for North American bundles—Zadarma also offers pricing for the EU, Russian Federation, Ukraine, and Kazakhstan.)

The Zadarma User Interface

Placing a call with Zadarma is simple. Businesses with a PBX system can access the service through that, with provided SIP settings authenticated using your account password.

All the Zadarma call tools you need

For personal use, the website and apps are available.

To make a call, first check that there is enough voice credit on your account. The current balance displays in the top-right corner of the my.zadarma.com page, seen once you sign up and log in. Click the balance to visit the payment screen—top-up the balance using Visa, PayPal, or bank transfer. You can also request an invoice for the purchase if necessary.

The main account page lists your outgoing calls, any virtual phone numbers purchased, and the virtual PBX setup. You’ll also find call statistics.

Placing a Call With Zadarma

You have three options available for placing calls using Zadarma:

(You can also use a standard phone on a PBX network.)

All platforms support the use of alternative SIP and VoIP tools, such as LinPhone. This means Zadarma works with macOS, Linux, and even BlackBerry phones.

Making a call with Zadarma is simple. To use the website, log into the user interface, click the phone icon under Outgoing Calls, and enter the number.

Make calls from your PC with Zadarma

On the desktop app, login with your details from the SIP connection settings screen. It’s basic compared to the mobile app, relying on Windows’ default audio devices rather than allowing you to select others. Simply dial the number and make the call.

The Zadarma app for Windows

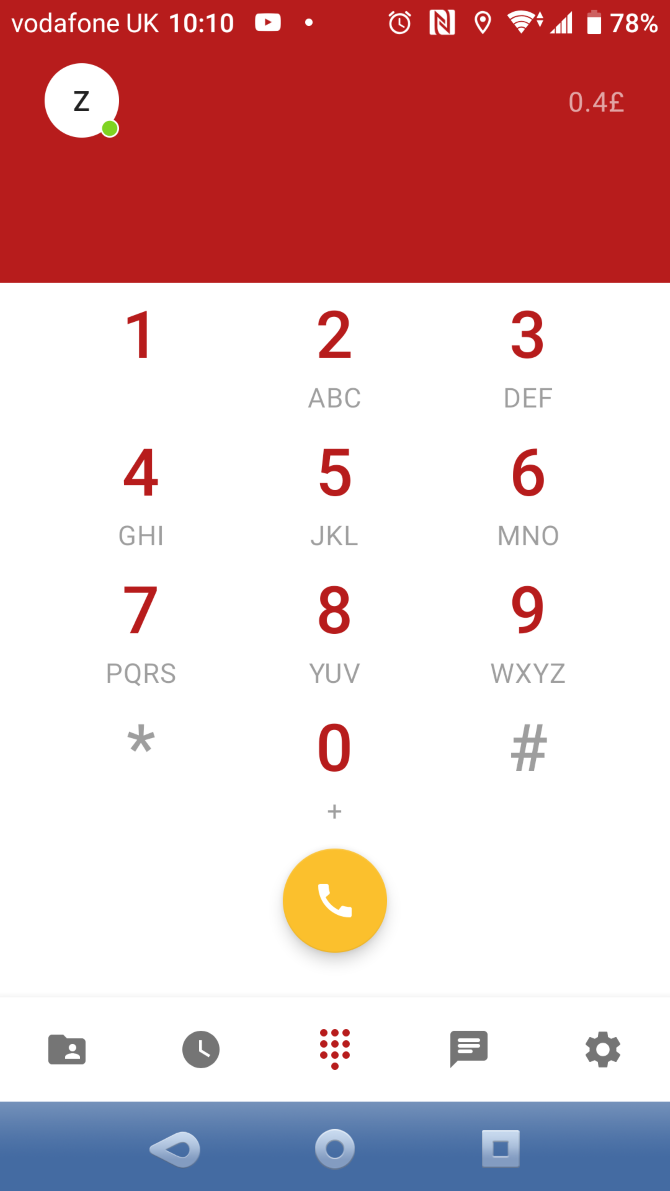
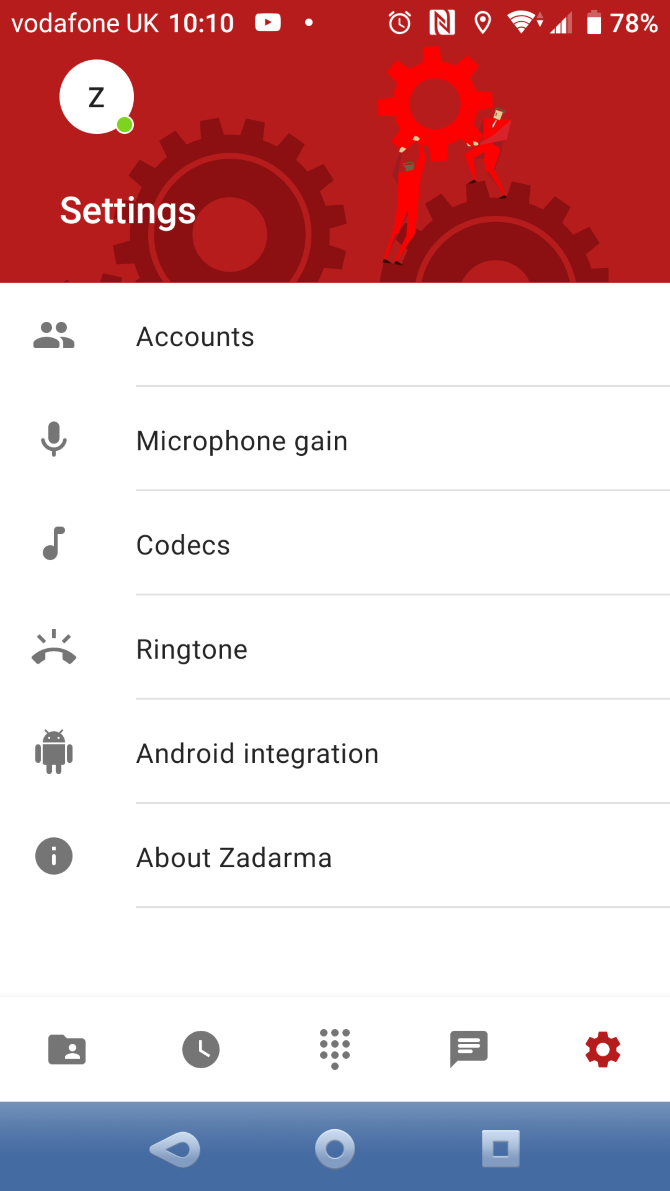
Using the Zadarma mobile app, log in with the SIP details. Simply dial the number to make a call. The app allows you to set a separate ringtone for calls, while text messaging is also supported. It also contains settings for microphone gain and full integration with the mobile OS dialer.

Call quality is good across the board, regardless of which connection option and platform you use.

Zadarma’s VoIP Telephony Features

It’s easy to make calls with Zadarma. As a global presence, it offers virtual numbers in 100 countries. This means you can, for example, lease a UK phone number while running your business in the USA. British users will then appreciate a “local” number appearing on their caller display, rather than an international number.

Meanwhile, Zadarma’s userbase is huge, with 1.5 million registered users based in over 150 countries. The PBX support, cloud PBX, integrations with third-party CRMs and SIP clients, plus features such as call tracking, click-to-call, and CallBack buttons make Zadarma a great choice if you operate a business.

And that’s not to mention Zadarma’s free CRM system, included with all plans. It’s fully integrated with the rest of Zadarma’s features and includes handy features like automatic call routing, one-click calls from your browser, and easy task management across your team.

If you’re just a solo user or are looking for an affordable VoIP/SIP business solution, Zadarma’s freemium option is ideal. All you need to do is sign up, then pay for any virtual numbers you need and the outgoing calls. Everything else we’ve looked at is bundled in, regardless of which package you sign up for.

Zadarma: VoIP for Travelers, Freelancers, Small Businesses, and Beyond

If you’re sitting at home relying on bundled minutes with your network provider, a service like Zadarma is unnecessary. But for regular travelers, freelancers with a need to make regular overseas calls, anyone building a small business, and even enterprise-level organizations, Zadarma could be the affordable, flexible, use-anywhere call solution you’ve been looking for.

A range of apps for Windows, macOS, Android, iOS, and even Linux support make this an excellent alternative to Skype. The PBX integration makes business integration effortless. And coming soon, you can expect to see completely free virtual numbers on the service as well. In short, Zadarma is a smart solution to any VoIP calling requirements.

Read the full article: Zadarma: The Affordable VoIP Network for Everyone


Read Full Article

How to Stop Your Entire Desktop PC or Home Office From Being Stolen


Laptops have all kinds of tracking technologies to recover them after a crime, but how about the humble computer? It’s a good idea to physically secure a desktop computer, as they’re still targets of theft despite not being as portable as a laptop.

Let’s explore how to secure a computer to a desk, as well as how to keep your data safe.

Securing the Computer Case With Locks

A physical lock is the easiest way to secure a desktop computer. The methods we’ll cover will restrict movement, but given that it’s a desktop, you’re probably not moving it much anyway. Choosing from secure movement-reducing solutions is one advantage you have with securing a desktop over a laptop.

Using Locking Kits to Secure Computers

A Kensington lock on a computer

A rudimentary locking system usually consists of a solid metal cable that runs through both the PC and an anchor point. The anchor point can be anything hard or impossible to move, like a desk, the floor, or a wall.

Products such as the Kensington desktop locking kit provide an adhesive anchor you can place anywhere. Though not as sturdy as an anchor built into your desktop or mounting surface, the adhesive is strong enough to deter most thieves.

Using Locking Enclosures to Secure Computers

A computer security case

The final word in PC anti-theft precautions is a locking enclosure. You can get a unit that secures a single small PC tower for general office protection. If you want the full works, you can get full cabinets that can house a whole setup complete with monitor, keyboard, mouse, and printer.

Secure PC cases can be used in conjunction with a cable lock to prevent a thief from stealing the locked enclosure and opening it in privacy. This route is effective but you should plan on spending at least $100 to secure a small PC and several hundred if you want to secure a large tower and multiple components.

Using an Alarm System to Alert Others

PC enclosures work well, but they are expensive and can take hours to install in an unprepared workspace. Alarms are more affordable and stop thieves with the threat of being caught. There are two types of store-bought alarms; self-contained alarms and alarm systems.

How Self-Contained Alarms Work

A self-contained alarm is a small unit with an alarm inside that attaches to a computer (or another device) with adhesive. The alarm then connects to a cord or cable that acts as the trigger.

If the cable is removed, it triggers an armed alarm to go off, alerting anyone in the vicinity. The best examples of these alarms can sound off for hours after they’re activated. Expect to pay around $100 for this type of alarm.

How Computer Alarm Systems Work

An alarm system, on the other hand, builds upon the above model. It still uses a cable and a trigger within your computer to detect theft; however, the cable also routes back to a central alarm box. If the cable connection between the box and the sensor is severed, or the sensor is detached from the desktop, an alarm sounds and sends an alert to the central box.

Once the central box receives an alert, it can perform remote alarm actions. This could include a phone call, a text message or an email, depending on how the system is set up. These systems can cost hundreds or thousands to install.

Build Your Own Alarm System

A third option is a homebuilt alarm that monitors your office or computer. This isn’t the most secure system or the easiest to construct, but it can make for a fun project and may save money if you love tinkering with project boards like Arduino.

Home users are obviously best off with a self-contained alarm. This option is less expensive than a full system and easier to install.  Full alarm systems are better suited for organizations that have thousands of dollars to spend and a security staff that can respond to a remote alarm call.

Using a Webcam Deterrent to Catch Thieves

Businesses, governments and other large organizations protect their computers with security cameras that deter any would-be thieves and identify the ones that actually go through with the theft.

Home users, however, usually can’t afford such a dedicated network of cameras. Fortunately, the humble webcam serves as a surprisingly competent replacement.

The iSpy program interface
You can put your webcam to work using a surveillance utility with motion sensing capability and remote alert features, such as iSpy. Point the webcam towards the most likely point of entry, turn on motion sensing, activate remote alerts, and you’re good to go.

iSpy also has an Agent version which runs like a portable application, so it doesn’t leave any trace on the program list. The regular software, however, is easier to set up and more intuitive to use at the time of writing.

iSpy will automatically send you an alert if it detects movement, alongside a photo of the intruder. This is useful since it prevents unnecessary worry over a false positive. You can even record to a remote location so that your video data is still accessible should your computer disappear.

While this setup is handy for identifying a thief, it’s also great for stopping the theft in the first place. No thief wants to step into a room and see an active camera staring them down, even if it is just a webcam.

iSpy is also fantastic for tracking people using your PC behind your back, so give this program a try if you have nosy workmates or family members.

Using Sticker Deterrents to Warn Criminals

If you can’t use cables or cases, you can try sticker deterrents instead. These don’t physically restrict the thief from stealing a computer, but instead gives them a warning that they can’t re-sell the PC.

For example, STOP stickers stick onto a device, informing everyone that the PC is office property. The sticker has contact details on it to allow people to report the theft. The sticker takes 800 pounds of weight to remove.

If someone does remove it, the sticker leaves behind a permanent tattoo marking the device as stolen and provides a phone number to call.

While this doesn’t stop a thief from taking a computer, it is a cost-effective and easy way to kit out an entire office while providing a deterrent for thieves wanting to fence their stolen goods.

Protecting Your Data In Case of Theft

Unfortunately, while there’s plenty you can do to protect your assets, no security method is perfect. There are always flaws and tricks that thieves can use to get around your method of protection.

If you want to protect the data on your computer, it’s a good idea to encrypt the drive. Then, set up a good backup system to keep your files updated. That way, if someone does take your computer, the only loss the thief causes is hardware-based.

We’ve talked about how to encrypt your drive with BitLocker before. By encrypting your drive, you prevent thieves from reading and stealing the data on it, which is important if you keep sensitive data.

Now we have the data protected from theft, but this still leaves you without any means of recovering data. That’s why it’s also good to have a file backup ready in case of an emergency. Be sure to try one of our recommended online file backup services that sync with Windows devices to ensure you always have your files on-hand.

Protecting Your Equipment From Theft

The theft of a computer can be devastating, whether it’s replacing the hardware or recovering the data lost. Fortunately, there are ways to secure your computer, as well as protect the PC’s data from theft.

Now that your computer is secure, try using this USB drive trick to secure your laptop too.

Read the full article: How to Stop Your Entire Desktop PC or Home Office From Being Stolen


Read Full Article
7 Reasons to Avoid Subscribing to Netflix


avoid-netflix-subscription

While Netflix is certainly an amazing streaming service for many people, it may not be right for you. Just as there are pitfalls to cutting the cord, there are downsides to subscribing to Netflix.

So, before you hop aboard the Netflix hype train, take a moment to consider the problems with the streaming service. Is Netflix worth it? In this article we examine the disadvantages of Netflix.
1. Limited Regional Selections

Of all the drawbacks to Netflix, one is undeniably bad for viewers: The number and quality of movies and TV shows you have access to will depend on where you live.

For example, if you live in the United States, there will inevitably be times when you want to watch something that’s only available on Netflix Canada or Netflix UK. This happens very rarely, but when it does, it’s annoying. We can’t imagine how frustrating it is for people outside of the US wanting to watch Netflix content available exclusively in the United States.

There are, of course, ways to watch everything on Netflix no matter where you live, the most common method being the use of a VPN. Many paid services still work even though Netflix theoretically cracked down on their usage. We recommend CyberGhost or ExpressVPN for VPNs that work with Netflix.

2. An Outdated Library

The other big complaint about Netflix—which has been one of its sore spots ever since the streaming service went live—is that its library is really be up-to-date. These days, only Netflix originals can really be considered timely and trendy.

Due to licensing agreements with TV networks, it doesn’t make sense to let Netflix stream episodes as they’re released on a network (like ABC or CBS) because that would kill any incentive for people to watch the networks themselves.

Netflix’s strength is in binge-watching, which means it’s really good for catching up on TV shows just before the next season begins airing. That’s why a lot of Netflix’s library is about one year in the past. Networks aren’t willing to let Netflix load up its library with recent content.

Why one year, though? Because that’s when full-season DVD sales are still profitable, and that’s also one reason why films are so late to join Netflix’s library. Publishers only start licensing with Netflix when sales of a season, show, or movie have run their course.

3. Internet Requirements

netflix speed of internet

The thing about Netflix (along with any other streaming app) is that the entire service is contingent upon your internet connection quality. Whether you’re watching YouTube, Twitch, or Netflix, your ISP could be the difference between watching in 240p, 720p, or 4K video.

If your internet goes down then there’s no Netflix. If people on your network are watching YouTube or playing games, and consequently hogging up your bandwidth, Netflix will stutter. And if your internet speed is bad, video quality will suffer. Remember, Netflix automatically decides stream quality based on the health of your connection.

Compare that to Blu-ray or DVD: you just pop the disc into the right player and you get the exact same quality all the time, and you can keep watching even if your internet connection goes out. The value of this reliability cannot be overstated.

4. Data Cap Consumption

While we’re on the topic of internet connections, let’s not forget that data caps are a very real nuisance to consider when streaming media—especially for videos, which can eat up more than 1GB/hour depending on how much quality you demand when watching movies and TV shows.

Indeed, data caps are a serious threat to services like Netflix. If you have trouble visualizing just how bad the problem is, consider this example:

  • 1,000 hours at Low quality.
  • 425 hours at Standard quality.
  • 100 hours at High quality.
  • 40 hours at Ultra HD quality.

(NB: These estimates are based on Netflix data usage details.)

And these figures assume that you do nothing else besides Netflix. With Ultra HD becoming the norm in home entertainment, these figures are simply unacceptable. If you have a capped internet connection, then beware: Netflix will consume your data faster than you think.

5. No Ownership of Media

Of all the reasons not to sell your CDs and DVDs, this one is the most relevant: even though you pay for Netflix, you don’t own anything on it. If you buy a DVD, it’s yours. With Netflix, your payments disappear into thin air.

This means that after one year you will have paid anywhere from $108 to $192 depending on which Netflix plan you choose. However, you’ll have nothing to show for it except the memories of whatever TV shows and films you watched during that time.

This is one of the big tragedies of joining the streaming generation. We’re seeing a decline in the ownership of entertainment media, and that puts you at the mercy of content publishers and streamers.

The worst example of this is that shows and films can be pulled from Netflix’s library at any time. Nothing is more irritating than binge-watching a show like Breaking Bad only to find that it has disappeared when you’re only halfway through.

6. Subscription Value

netflix cost in usa

Netflix encourages binge-watching. In fact, it’s such an integral aspect of the service that the word “Netflix” is pretty much synonymous with “binge-watching” these days. Once you start a show, it’s really hard to stop.

Television is also addictive, but it’s much easier to walk away when a show ends because you can’t control when a show can be marathoned or not.

And it’s not just because Netflix makes it really easy to move from one episode to the next, although that does play a big part. It’s because Netflix is a subscription service. You pay the same no matter how much you watch, so watching more in a month means wringing more value out of your subscription.

On the other hand, if you don’t watch much at all, then Netflix may not be worth the price tag. If you go a month without watching anything, then you’ve basically thrown away your money.

7. Loss of Channel Surfing

netflix popular usa

This last point is minor in the bigger picture, but still worth considering if you haven’t cut the cord yet: you can’t surf channels and just watch whatever’s playing. You always have to pick something, and sometimes this isn’t that easy.

Some workarounds to simulate channel surfing based on certain genres exist, but even those tend to be riddled with bugs and/or veer too far from the real thing. There’s a charm to knowing that a show is playing live, and Netflix doesn’t have that.

If you’re really stuck on what to watch, you can now see what’s popular on Netflix in your region.

So, Is Netflix Worth It?

Again, let us reiterate that we are huge fans of Netflix. Indeed, our appreciation of it far outweighs any gripes we might have. It has saved a lot of people a lot of money and has reimagined what it means to watch TV in the 21st century.

So, is Netflix worth the money? Well, if you’d like to hear some counterarguments, check out our other article explaining why you should be happy to pay more for Netflix.


Read the full article: 7 Reasons to Avoid Subscribing to Netflix


Read Full Article