Smart thermostats are fairly ubiquitous these days, but depending on which one you’re using, you could be getting a lot more from your home heating and cooling – with relatively simple DIY upgrades. The Flair Smart Vent system is one such upgrade, and though it costs a bit upfront to get going (each register is $79 to start depending on size), you won’t have to call an HVAC contractor or break down any walls to take advantage of what it offers.
The basics
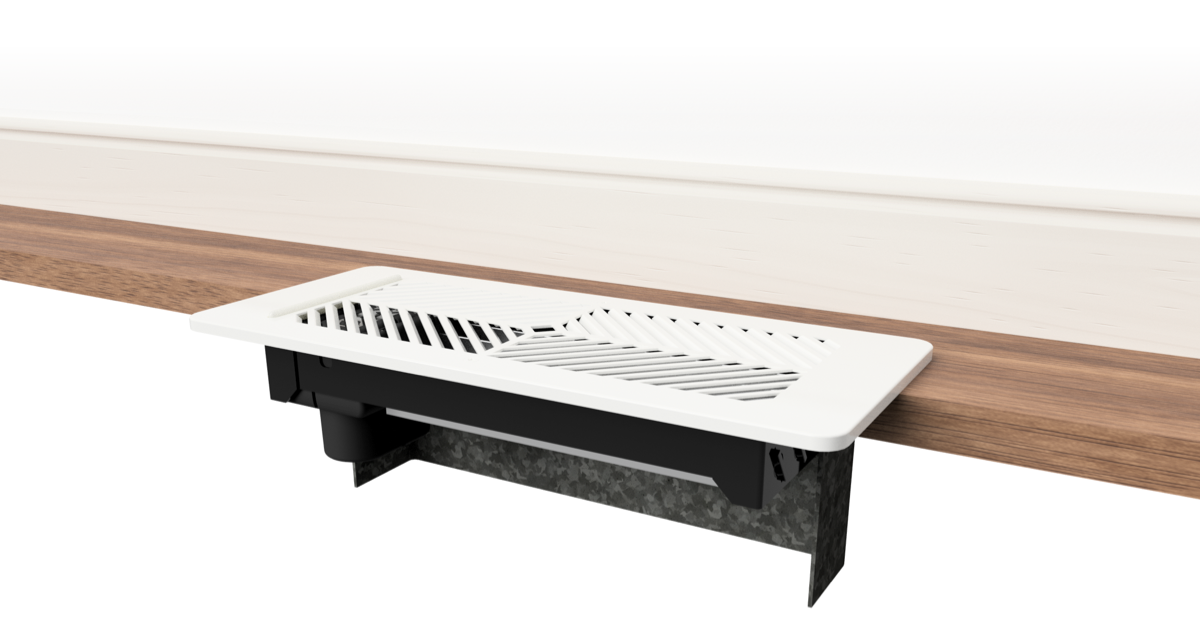
Flair’s system is designed around a simple idea: Controlling the airflow across individual rooms can help you be more efficient about where you direct your heating and cooling, and when. The basic ingredients Flair uses to make this happen are its Smart Vents, which fit into existing floor and wall register slots in standard sizes. The Flair designs are low profile, with all the electronics contained in casing that rests under floor level. They can be hardwired for power, but they also ship with two C batteries the provide “years” of power before they require replacement.
Flair advises three different approaches to determining how many Smart Vents you need to complement your existing system: If you have one room that’s too cold when cooling and too hot when heating, just get a Smart Vent and Flair Puck for that room. If you have just one room that gets too little cooling, and too little heating, equip all your other rooms with Smart Vents and Pucks (or Ecobee sensors if you have an Ecobee thermostat, but we’ll get to that later). If your HVAC is already pretty even, but you just want more control and efficiency gains, then equip the whole house as a third option.
Each room will require a Puck, which is a small round device that includes temperature control and monitoring. The first of these needs to be hardwired to power via the included USB cable, since it acts a bridge connecting the Flair system to your home network. All the others can be powered by included AAA batteries, and they’re very power efficient thanks in part to the e-Ink display.
Flair works in a number of modes, including one that’s compatible with any thermostat where you simply set the temperature for any room, and the associated vent(s) will open or close depending on whether the temperature in that room matches up. It can also work directly with Ecobee and Honeywell smart thermostats for a much more intelligent mode where they receive or send the temperature to the smart unit, and coordinate their open/shut status depending on that. Google has changed the Nest API, so Flair is working on supporting similar features on Nest systems through that in future, but for now it works with Nest installations the same way it would with ‘dumb’ thermostats.
Design and features

Image Credits: Flair
Flair’s Smart Vents themselves are attractive, well-made hardware. The vent covers themselves are made of metal, with an attractive grill design that will go with most decors. They’re exclusively white, which could be an issue for dark flooring, but they’re definitely a step up from your average registers. One one side, they have an LED light strip that is used during setup for identifying which is which, and underneath, the have the battery housing, louvres and the motors that control their open and shut status.
As mentioned, the Smart Vents can be associated with a Puck, which will provide them the ambient temp information, as well as target temp, in order to set them open or shut. They can also use an Ecobee sensor to get their marching orders when set up for software integration with an Ecobee system. I installed my review units and first tried them with the Flair app providing target temp info to the Ecobee, but then switched it around so that the Ecobee determined the desired temperature, and the Flair units all inherited that info and set their open/close status accordingly.
At first, I found the Flair app a bit intimidating just because with a multi-vent system it presents a lot of information, and some degree of logic to initially set up. But once I got the Ecobee integration working, the whole Flair system just worked – and worked like magic.
In this configuration, you never even have to think about the fact that the vents are Smart; they just do whatever they need to in order to equalize the temperature and keep heating and cooling routing intelligently. It made an impressive difference in the amount of airflow circulating around my nearly 100-year old house – and my setup isn’t necessarily ideal because there are a few non-standard, larger registers around that can’t yet be Flair-equipped.
The Pucks themselves are well designed, with magnetic, stick-up and screw-in installation options, and readible, power-efficient e-Ink displays. Their bezel turns for temperature control, and they can also be placed out of sight if you really just want to use them as remote sensors.
Bottom line
You might think that whether a register is open or closed wouldn’t make much difference to the efficacy of a house-wide HVAC system, but in my experience, the before-and-after of Flair was dramatically different. I started out with one problem spot primarily (the master bedroom) and afterwards it got to target temp much more quickly, both in heating and cooling modes.
Even if you find your central air and heating are already pretty effective, Flair seems like a wise upgrade that will provide lasting benefits in terms of consistency and power efficiency. Plus, if you use Flair as the controller, you can set different target temps for different rooms depending on individual occupant preferences.
True zoned HVAC systems can cost thousands – especially if you’re replacing existing ducting in walls. Flair’s solution is a lot more affordable by comparison, and provides effective results with DIY installation that takes just minutes to set up.
Read Full Article
No comments:
Post a Comment