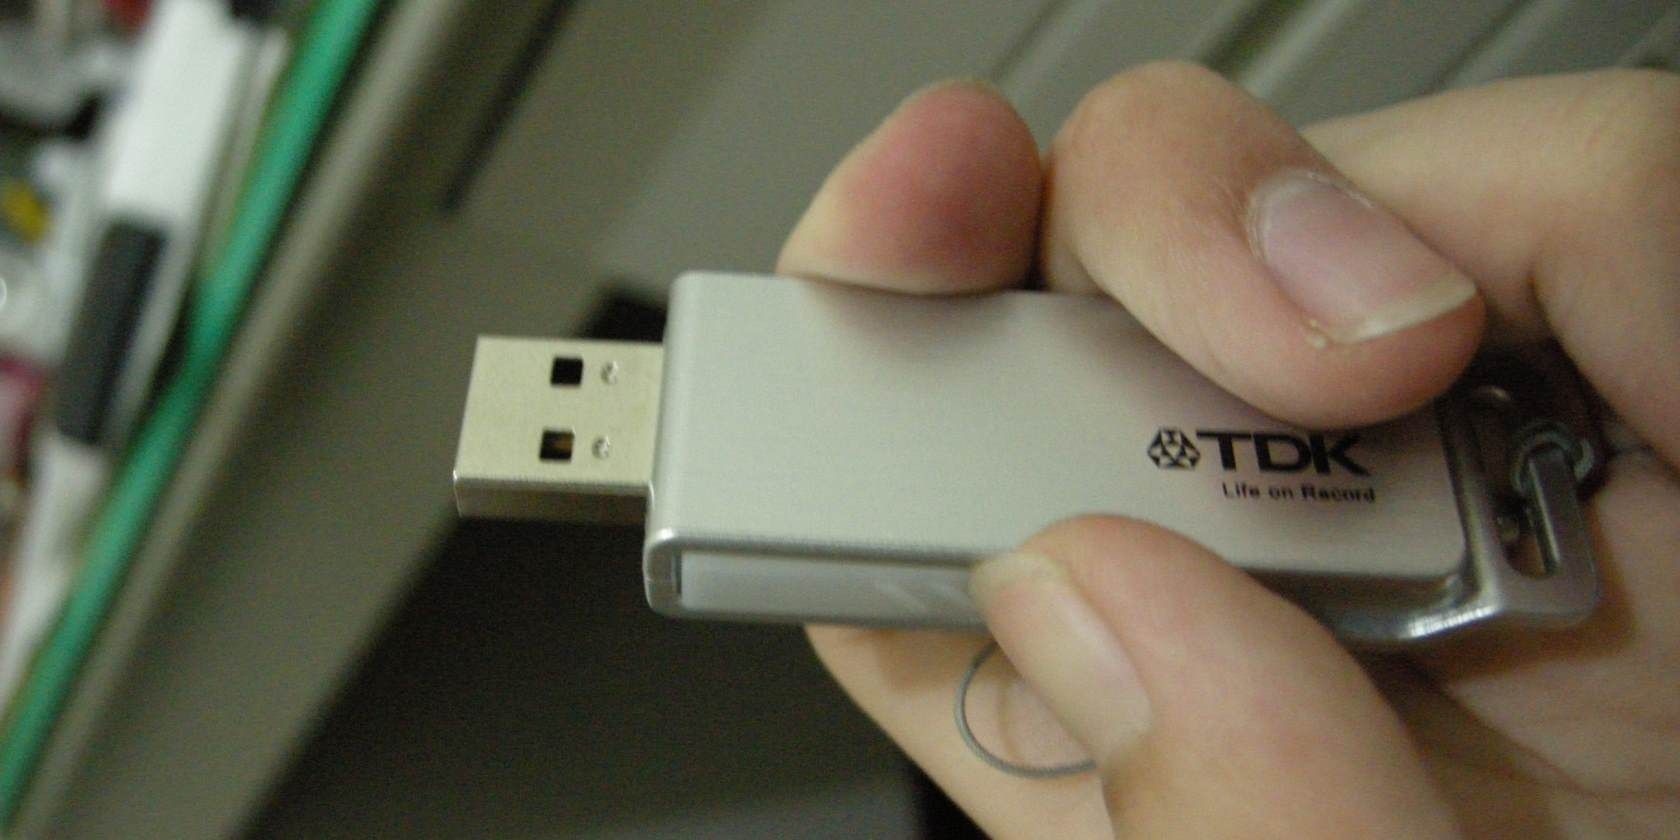
Removable disk drives—either USB flash drives or external hard drives—should be easy to use. But in some cases, you may connect your drive to a Windows PC or another device with a USB port and find the external hard drive isn’t showing up.
This problem has several possible causes: partition issues on the external drive, using the wrong file system, dead USB ports, or driver issues in Windows. In a worst-case scenario, the drive itself may be dead.
Let’s take a look at how to diagnose undetected external drives in Windows. Note that this guide is also available as a video:
Make Sure Your Drive Powers On
This is a preliminary step, but one worth checking. Nearly every flash drive and many external hard drives don’t require a separate power source—they receive power over USB. However, some desktop external drives do have dedicated power cables, or at least a physical power switch.
If this is the case for you and your external hard drive is not showing up, you could have an issue with the power cable. Try plugging it into another power outlet, or swap the cable if possible. Check for flashing lights on the unit that indicate activity before moving on.
External Hard Drive Still Not Showing Up?
When your hard drive is not showing up, try these points in order. First, we’ll check whether Windows detects the hard disk when you plug it in. Plug your removable drive into your computer if it isn’t already.
1. Check the Drive in Disk Management
Open the Disk Management tool. To do so, press Windows Key + X (or right-click the Start button) to open the Power User menu and select Disk Management from the list. You can also open the Run dialog with Windows + R and enter diskmgmt.msc to open this utility.
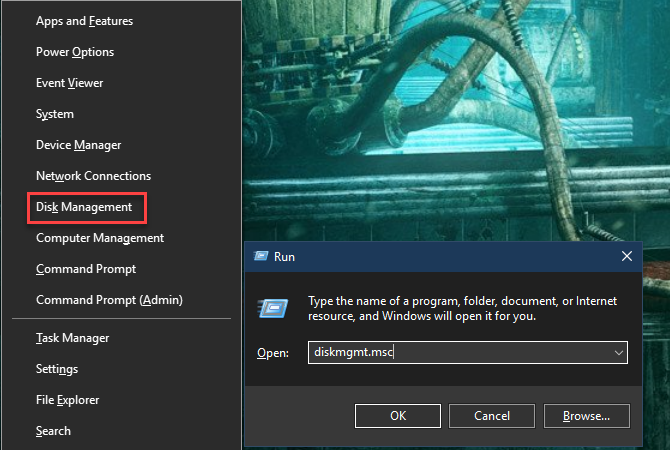
As the name suggests, Disk Management lets you see all the hard disks connected to your computer. You can review sizes, partitions, and other disk information.
You should see your external drive listed in the Disk Management window, likely below your primary and any secondary disks. Even if it doesn’t appear in the This PC window because it doesn’t contain any partitions, it should show up here as Removable.
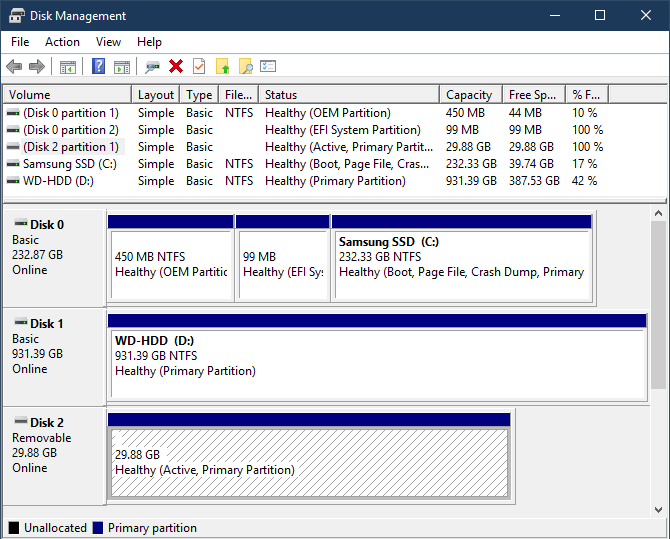
If you do see the drive here, jump down to section four, “Create a New Volume and Assign a Drive Letter.” There, you’ll partition and/or format it properly so Windows and other devices can access it.
If your external drive is still not showing up, continue on. You’ll need to determine why your drive isn’t recognized. It’s possible you have a hardware issue, driver problem, or a dead drive.
2. Try Another USB Port and Computer
The problem may not lie with your device, but the port you’re using to connect it to your computer.
Unplug the drive from its current USB port and try plugging it into another port on your computer. If it works in one USB port but not another, you may have a dead USB port.
If you’ve plugged the drive into a USB hub, try connecting it directly to the computer instead. Some USB hubs don’t provide enough power for your external drive to function.
What if the drive doesn’t show up in Disk Management even after trying both of these steps? It’s tough to know for certain whether the drive is bad or your computer is having a problem. If you have another computer nearby, try plugging the hard disk into it to check whether it’s detected.
If the drive doesn’t work on any computer you plug it into, the drive itself is likely dead and you’ll need to replace it. When you try another machine, be sure to check whether it appears in the computer’s Disk Management window, not just This PC, as discussed above.
3. Troubleshoot Driver Issues
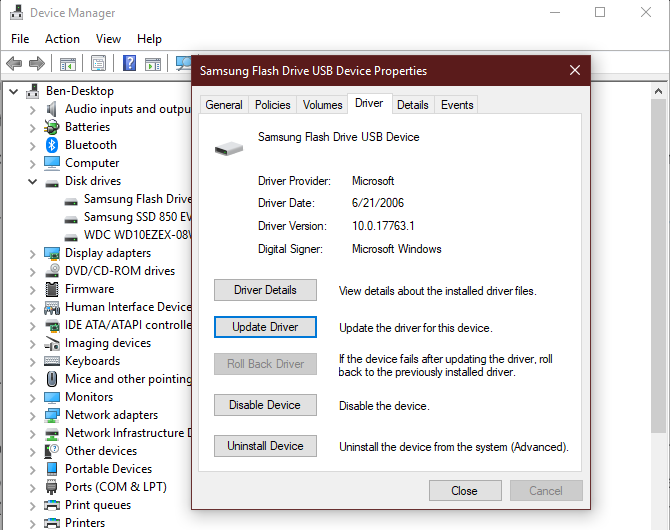
If the drive does show up on other computers—or you don’t have another computer around to check—Windows may have a driver problem with your device. You can check for this using the Device Manager.
You’ll find a shortcut to the Device Manager under the same Windows + X menu mentioned earlier. You can also enter devmgmt.msc into the Run dialog to open it.
Expand the Disk drives category and check for any devices with a yellow exclamation point next to them. If you see a this symbol, that device has a driver problem.
Right-click the device with the issue, select Properties, and look at the error message. This error message can help you fix the problem; you may want to perform a Google search for the error message you find.
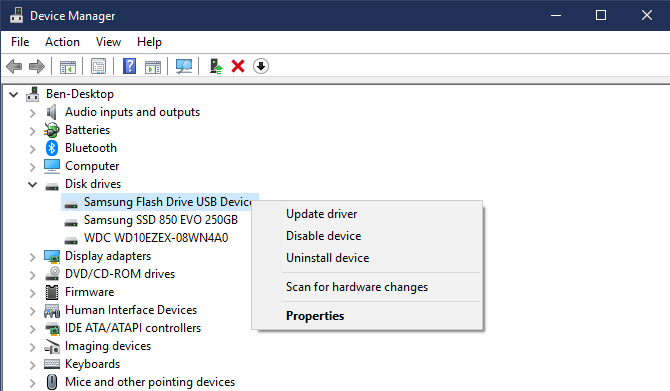
Driver problems are often tricky to fix. If the problem started recently, try running System Restore to roll back the changes.
If this doesn’t work, you can try the Update Driver button to install an updated driver. However, this rarely finds a new driver for generic devices like flash drives. Instead, you may want to check the manufacturer’s website for a specific driver for your external hard drive.
The Driver menu for your drive in the Device Manager has a few other options. Roll Back Driver button will revert any recent driver updates, which probably won’t have an effect if System Restore didn’t work.
As a final resort, use the Uninstall button to remove the device from your system. Hopefully, upon rebooting, Windows will reinstall the driver and configure it correctly when you reconnect the drive.
4. Create a New Drive Volume
If your device showed up in Disk Management in Step 1 or one of the above troubleshooting steps made it show up, you’re ready to initialize the drive so it’s usable. Aside from showing you basic information, the Disk Management tool can fix partition and file system issues with your drive.
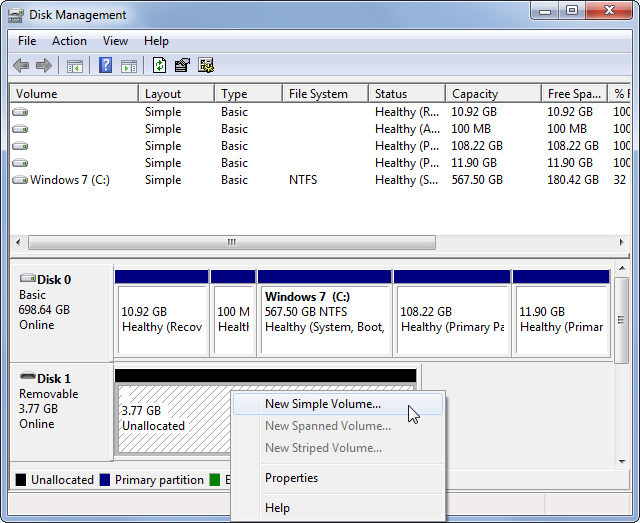
If your removable drive shows only Unallocated space, you’ll need to create a new partition on it. This allows Windows and other operating systems to use it. To do so, right-click anywhere on the Unallocated space, select New Simple Volume, and go through the wizard to create a new partition.
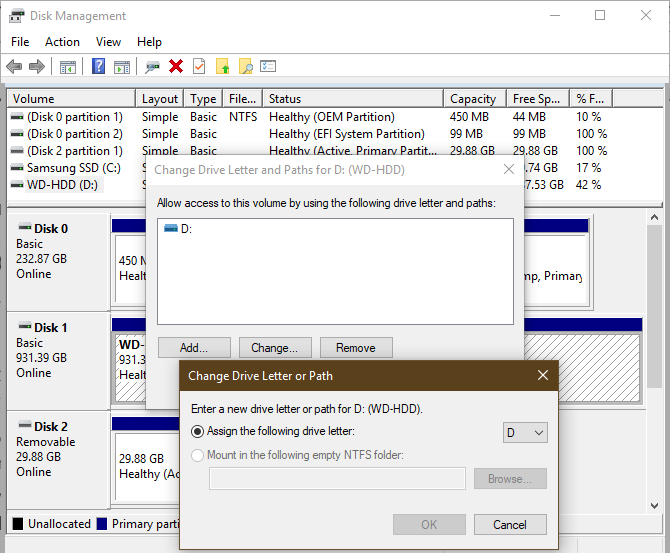
If your drive is partitioned (meaning it doesn’t have Unallocated space) and you still can’t see it, ensure it has a drive letter set. This should happen automatically, but if you’ve manually removed the drive letter, the drive may not be accessible in Windows.
To change the drive letter, right-click the removable drive’s partition and select Change Drive Letter and Paths. If the device doesn’t already have a letter, click Add and choose one. If it does, click Change and try another one.
Something later in the alphabet, like G or J, is standard for removable drives and will work fine.
5. Format the Drive
If the drive appears partitioned, but you still can’t access it, it’s probably partitioned with a different file system.
For instance, you may have formatted the drive with the XFS file system from Linux or APFS on a Mac. Windows can’t read these file systems. You’ll thus need to reformat the drive with the newer NTFS or older FAT32 file system so Windows will be able to recognize it.
To reformat a partition in the Disk Management utility, right-click it and select Format.
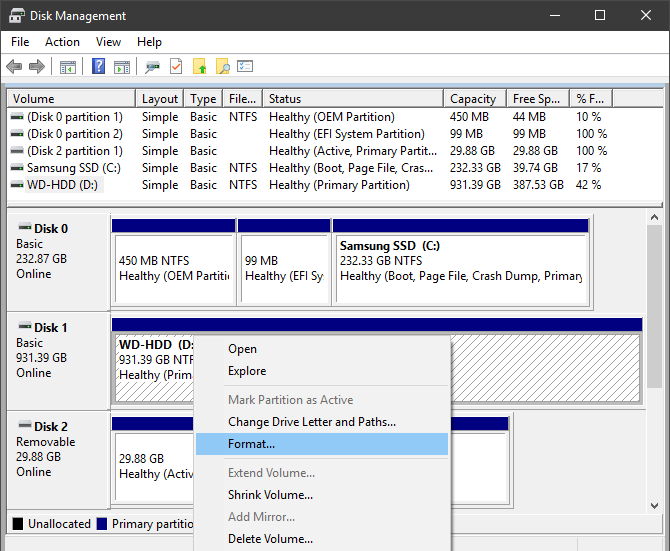
Note that formatting will erase all files on your drive, so you should copy any important files on it to another device before continuing. If you formatted the drive on a Linux or Mac machine, take it to a computer running that OS and back up the files before you format it.
When you format, you can give the drive a new name if you like. Leave Allocation unit size as Default; leaving Perform a quick format checked is fine too. More importantly, you’ll need to select a file system. Which one you should choose depends on the type of drive and what you use it for.
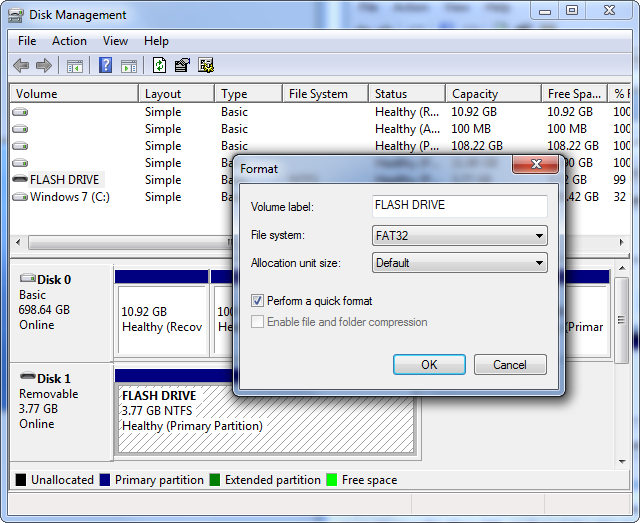
If you have a small flash drive, it likely came formatted as FAT32. In most cases, this is the best choice. While FAT32 can’t save files over 4GB and only supports volumes up to 2TB, it’s unlikely you’ll run into either of these issues using a flash drive. More importantly, FAT32 is compatible with all sorts of devices, such as cameras, media players, game consoles, and more.
NTFS is the modern standard for Windows, but there’s really nothing to gain by using it on a flash drive. Many older devices aren’t compatible with NTFS. Thus, we recommend formatting as FAT32 for flash drives and SD cards, and NTFS for large external hard drives.
You do have two other file system options. exFAT is a Microsoft file system that supports larger files that FAT32, but isn’t as widely compatible. We’ve compared FAT32 and exFAT if you’re interested. FAT is ancient, so you can ignore that one.
Your External Drive, Fixed and Recognized Again
Following this process when external hard drives don’t show up should solve most of the disk recognition issues you’ll encounter. If you’ve tried the drive with multiple computers and it never shows up in the Disk Management window after these steps, the drive is probably dead.
In that case, check out the best portable hard drives you can buy. Just make sure you know the important information about buying a hard drive.
Read the full article: External Drive Not Showing Up or Recognized? 5 Potential Fixes to Try
Read Full Article
No comments:
Post a Comment