Virtual reality gaming is on the rise. Mobile gaming is increasingly popular. Playing MMOs with headsets for voice chat and streaming the experience is all the rage.
Experts predicted all this years ago.
But who could have foreseen the rise of retro gaming? What sane person could have guessed that a credit card-sized single-board computer would become instrumental in the retro gaming explosion?
The versatile Raspberry Pi can emulate a vast collection of gaming platforms. Interested in building a retro gaming machine with a Raspberry Pi? Here’s what you need to know about RetroPie ROMs, downloads, and more.
What You Need for a Raspberry Pi Gaming Center
You’ll need several elements for a robust and reliable Raspberry Pi retro gaming center. Before looking at the software, let’s first look at the hardware.

The Raspberry Pi
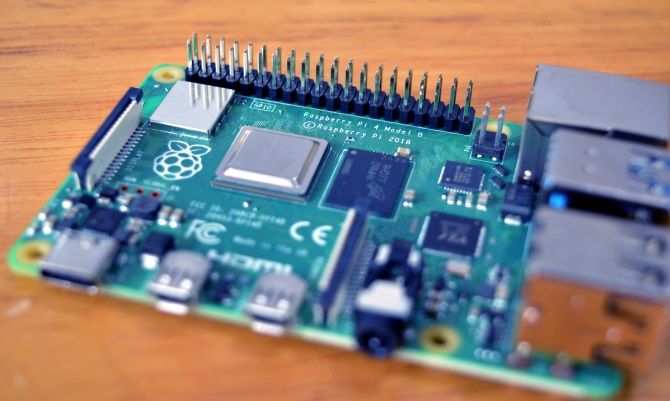
Since its 2012 release, the Raspberry Pi has had several iterations, each more powerful than the one before. These days, you have two reliable options.
- Raspberry Pi 4 (our coverage): Features a 1.5GHz 64-bit quad-core ARM Cortex-A72 system-on-a-chip (SOC) with up to 4GB LPDDR RAM (shared with the GPU). Measures 3.370 × 2.224 inches (85.60 × 56.5 mm). Has 802.11b/g/n/ac wireless networking and Bluetooth built in.
- Raspberry Pi Zero (our guide): uses a 1GHz single-core ARM1176JZF-S SOC with 512MB (shared with the GPU). This more compact device is 2.56 × 1.18 inches (65 × 30 mm), and has a wireless variant, the Zero W.
Although you can get good results using a Raspberry Pi 3B+, the increased performance on offer with the Raspberry Pi 4 means you should take that option.
Other Hardware and Cables
In addition to the Raspberry Pi, you’ll also need an HDMI cable, reliable microSD card, a keyboard/mouse combo for initial setup, and game controllers. While a 1GB Raspberry Pi 4 costs under $40, if you’re starting from scratch, you should be able to buy the complete kit for under $100.
However, if you’re opting for the enhanced RAM of the 4GB Raspberry Pi 4, you’ll find your budget stretched.
You might also opt for a starter kit, which includes most of what you need (save the keyboard and mouse).
The Best Raspberry Pi Retro Gaming Emulators
Once you’ve got your Raspberry Pi and associated hardware, it’s time to find the right emulators. While you can install these individually, it’s far preferable to install an emulation suite. This is a package—usually ready to be written to the microSD card—consisting of many top emulators. Any that aren’t included you can often add alongside the pre-installed emulators.
Six current projects are available to choose from. Before downloading, ensure they support the platforms you wish to emulate.
1. RetroPie
Probably the most famous of the retro gaming software options for the Raspberry Pi, RetroPie gives access to a vast collection of emulators, via the EmulationStation user interface. Emulators are presented via the RetroArch front end, while various ported games (several PC games run natively on the Pi) are bundled.
RetroPie also includes the MAME arcade machine emulator and supports numerous controllers.
Download: RetroPie
2. RecalBox
RecalBox supports over 40 emulators, including MAME, and in excess of 30,000 titles. Again, using the EmulationStation UI, and with emulation support from RetroArch/libretro.
Gaming is enhanced on RecalBox with the cheat codes, a Rewind tool (to help you undo in-game mistakes) and screenshot functionality.
RecalBox is quite like RetroPie but comes solely as a writable microSD card image and cannot be manually installed.
RecalBox and RetroPie both include the option to install Kodi.
Download: RecalBox
3. PiPlay
Featuring 12 emulated machines plus the ScummVM point-and-click adventure game platform, PiPlay is the compact alternative to RetroPie and RecalBox. You can download PiPlay and write it to a microSD card, or install directly to your Raspberry Pi via GitHub.
Without the slick UI of the EmulationStation, PiPlay has a more traditional, text-based user interface. It’s a stable emulation solution, however, with good support for popular controllers.
Download: PiPlay
4. Lakka
Describing itself as “a lightweight Linux distribution that transforms a small computer into a full-blown emulation console,” Lakka also uses RetroArch. Supporting around 40 emulators with thousands of games, Lakka is a strong alternative to RetroPie and RecalBox.
Game ROMs can be uploaded to Lakka from a separate PC over your network. By booting with BerryBoot or NOOBS, you can dual-boot Lakka alongside other Raspberry Pi operating systems.
Download: Lakka
5. Pi Entertainment System (PES)
An ArchLinux-based collection of emulators bundled with RetroArch, PES offers 18 hardware platforms plus MAME. There’s also Kodi and support for several game controllers (including the perennially popular PS3 and PS4 control pads).
PES also adds wireless networking and network gaming to retro platforms (except the N64), and can be dual-booted using BerryBoot.
Download: Pi Entertainment System
6. Batocera
An out-of-the-box retro gaming solution, Batocera is available for all Raspberry Pi models. It supports a wide number of gaming platforms; all you need to do is plug in a controller and play.
Minimal configuration is required with Batocera. Everything is pre-installed and enabled, although you’ll find that some platforms are unavailable on the Raspberry Pi. Versions of Batocera are available for x86 devices with a wider selection of supported emulators.
Download: Batocera
Which Emulation Suite Should You Choose?
With so many emulation systems to choose from, you might find your options a little overwhelming. Generally, if you want a system that will emulate almost anything, choose RecalBox or RetroPie. There’s very little difference between them.
For a more specific experience (featuring emulators you’re actually going to use), meanwhile, try Batocera, PiPlay, Lakka, or PES.
Where to Get RetroPie ROM Downloads
To enjoy games (or even applications) on an emulator, you’ll need to acquire ROMs. Both game ROMs and BIOS ROMs are required. It’s easy to overlook the requirement for the BIOS ROMs, but without these, the emulators cannot launch the games.

The legality of this is a bit muddy. It was once the case that if you owned the original, you were safe to use the ROM. These days, with peer-to-peer networking common even on apparently standard download sites, the practice is a bit risky.
Alternatives are available: the main solution is to create your own ROMs. Specialist hardware is available to do this, although it differs depending on the specifics of the platform. For example, you can purchase a USB device that connects a Commodore 64 Datasette (cassette player) to a PC.
This information is given, of course, strictly in the understanding that you retain the ROMs for your own use. A search of eBay may yield the results you’re looking for.
How to Add ROMs to RetroPie and Other Suites
ROMs must be copied to the correct directory on your Raspberry Pi. An FTP solution that supports SSH, such as FileZilla, is the best option here. However, some emulation suites offer a browsable interface for uploading ROMs from your main PC.
When it comes to playing the games, meanwhile, your chosen retro gaming suite will feature a user-friendly game library browser. All it takes is for you to navigate to the game you want (using the game controller) and launch it.
Retro Controller Options: What Can You Use?
Various controllers are compatible with your Raspberry Pi retro gaming rig. Wired controllers typically provide the best results, but some high-profile Bluetooth controllers should work.

These include Xbox One, Xbox 360, and PlayStation 3 and 4 controllers. So, you can realistically use a PS4 controller on a Raspberry Pi with an N64 emulator. Mix and match!
Meanwhile, a large selection of USB controllers should work with your Raspberry Pi and chosen gaming suite. Configuration of controllers takes place when the Pi boots into RetroPie, RecalBox, etc., so you’ll quickly get an idea of what works and what doesn’t.
For improved retro feels, meanwhile, old-style joysticks and console controllers with USB connectors are available.
See our list of the best RetroPie controllers for some ideas.
Consider a Retro-Themed Case
Case options are considerable. My own preference is to use a standard Raspberry Pi 3 case and keep it out of sight. You might prefer a prouder approach and display your Pi in a retro console-themed case. Plenty are available online, resembling mini SNES consoles, among many other retro device designs.
There’s also 3D printing. A ton of retro-styled cases can be bought as digital files, ready for production in a 3D printer. If you don’t have your own 3D printer, don’t worry. Many services are available that will produce 3D projects on your behalf. Simply select the case design you want and find a 3D printing service to produce it. They’ll require you to upload the design and pay up front, then ship it to you once complete.
Meanwhile, if you want to take a more hands-on approach to building a case, why not use a slick game station build as inspiration?
Retro Gaming on the Raspberry Pi: Easy Win!
You can accomplish a lot with a Raspberry Pi. It can be used as a media center, a desktop computer, or a music streaming device.
But perhaps the real killer application for a Raspberry Pi is as a retro gaming machine. As you’ve seen, it’s straightforward to set up and a library of ROMs will ensure you have games to play.
Want more gaming options or the Raspberry Pi? Here’s how to stream PC games to your Raspberry Pi.
Read the full article: Retro Gaming on Raspberry Pi: Understanding ROMs, RetroPie, Recalbox, and More
Read Full Article
No comments:
Post a Comment