Running Linux alongside Windows has proven to be increasingly useful over the years. But dual-booting can be difficult to manage while setting up a virtual machine comes some stability issues.
One solution is to use the Windows Subsystem for Linux, but this comes without a desktop environment. So, why not just install the Linux distribution you own?
Here’s how to run a Linux desktop within Windows using the Windows Subsystem for Linux.
What Is the Windows Subsystem for Linux?
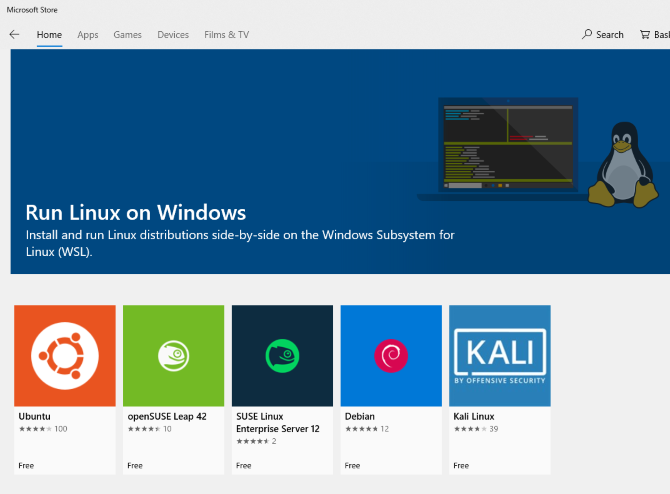
In case you were unaware, with the 2018 Fall Creators Update Windows 10 shipped with the Windows Subsystem for Linux. This is an optional feature that can be easily installed, which supports the installation of the Linux operating systems available in the Windows Store.

It basically means that you can open a Linux terminal in Windows and install and run Linux software.
No virtual machine is required and there is no dual booting.
The problem with Windows Subsystem for Linux, however, is that it is purely a command line experience. There is no desktop. For power users, this probably won’t be a problem, but as Linux has a wide selection of desktop environments, it does seem a bit of an oversight.
Fortunately, you can now install a Linux desktop in Windows, as long as you have first set up the Windows Subsystem for Linux.
Make Sure Windows 10 Is Compatible
Before proceeding, here’s the important bit: you need to be running a 64-bit version of Windows.
You can check this in Settings > System > About, where you’ll find the System type entry. To proceed, this should read “64-bit operating system”. If not, and you’re running 64-bit hardware, you’ll need to upgrade Windows 10 from 32-bit to 64-bit.

Another prerequisite is that you need to be running Windows 10 build 14393 or later. You can check this in the same About screen, listed under Windows specifications. Look for the OS build—if it is higher than 14393, you can use the Windows Subsystem for Linux. If not, simply run a Windows Update.
Once Windows 10 is compatible, it’s time to follow our guide to installing the Windows Subsystem for Linux.
With that set up, it’s time to add a desktop.
Install a Linux Desktop in Windows
If you have set up the Windows Subsystem for Linux already, click Start and enter bash. Click the first option (the bash run command) to start using Linux. The following steps assume you installed Ubuntu as your preferred Linux operating system.
Start by running an update and upgrading Ubuntu:
sudo apt update
sudo apt upgrade
While this upgrade is running, head to Sourceforge to download and install the VcXsrv Windows X Server utility. (Other X Servers are available for Windows, including Xming and MobaXterm. For the remainder of this guide, we’ll be using VcXsrv.)
An X server lets you access a Linux application or desktop environment’s graphic user interface (GUI). Linux systems rely on X for displaying the desktop, but it can also be used across a network.
Ensure your X window server is installed before proceeding. The next step is to install your Linux desktop.
Many Linux desktop environments (LDEs) are available. We’re going to keep things simple and install a lightweight environment called LXDE. To install, input:
sudo apt install lxde
Following installation of LXDE, input this command
export DISPLAY=:0
export LIBGL_ALWAYS_INDIRECT=1
This instructs Linux to display the desktop through the X server. So, when you run the X Server program you downloaded above, you’ll see the Linux desktop environment.
We used VcXsrv which features the XLaunch tool. Click this to view the X Display Settings window and select One large window or One large window without titlebar. Look for the Display number while you’re there and set it to 0.

Click Next, then select Start no client to ensure the XLaunch starts only the server, allowing you to start the Linux desktop later. Click Next again, then Finish. You might first like to click Save configuration to save it.

Ready to launch your Linux desktop? In the command line, enter the command to start your preferred LDE. For LXDE, for example, use:
startlxde
The Linux desktop environment should then appear!

You can now run any of the preinstalled Linux software and even install new apps and utilities.
Don’t Want a Linux Desktop? Just Install an App
In addition to installing a Linux desktop, you can simply install a Linux desktop app from Windows 10. This is useful if you consider installing a full desktop for one to be overkill.
For example, to install the Rhythmbox media player and run it in Linux on Windows, use:
sudo apt install rhythmbox
Ensure that you have set the export command:
export DISPLAY=:0
Then simply run the app from the Bash prompt:
rhythmbox
The media player will launch, ready for you to browse for a library.

Now, in this case, you would obviously need to add some media files into the Linux environment on your computer. You might do this by installing a browser and downloading files, or simply by hooking up a USB drive with media files on.
After connecting the USB drive, remember to mount it (this example uses D: as the drive letter):
sudo mount -t drvfs D: /mnt/d
When you’re done, you’ll need to unmount the drive before removal. This ensures the integrity of the data on the drive.
sudo umount /mnt/d
While it’s possible to browse your Windows folders from within the Linux apps, no actual files can be opened. This is a shortcoming of the Windows Subsystem for Linux, albeit one that protects both the Windows and Linux environments from damage.
Linux in Windows: The Ultimate Convergence!
The Windows Subsystem for Linux makes it simple to run Linux software on a Windows PC. There’s no need to worry about virtual machines or the pain of dual booting.
With a Linux desktop installed, the convergence is almost complete. It’s a great way to get to grips with Linux from the comfort of the Windows desktop.
Want to learn more? Here’s how to get started with Linux.
Read the full article: How to Run a Linux Desktop Using the Windows Subsystem for Linux
Read Full Article
No comments:
Post a Comment