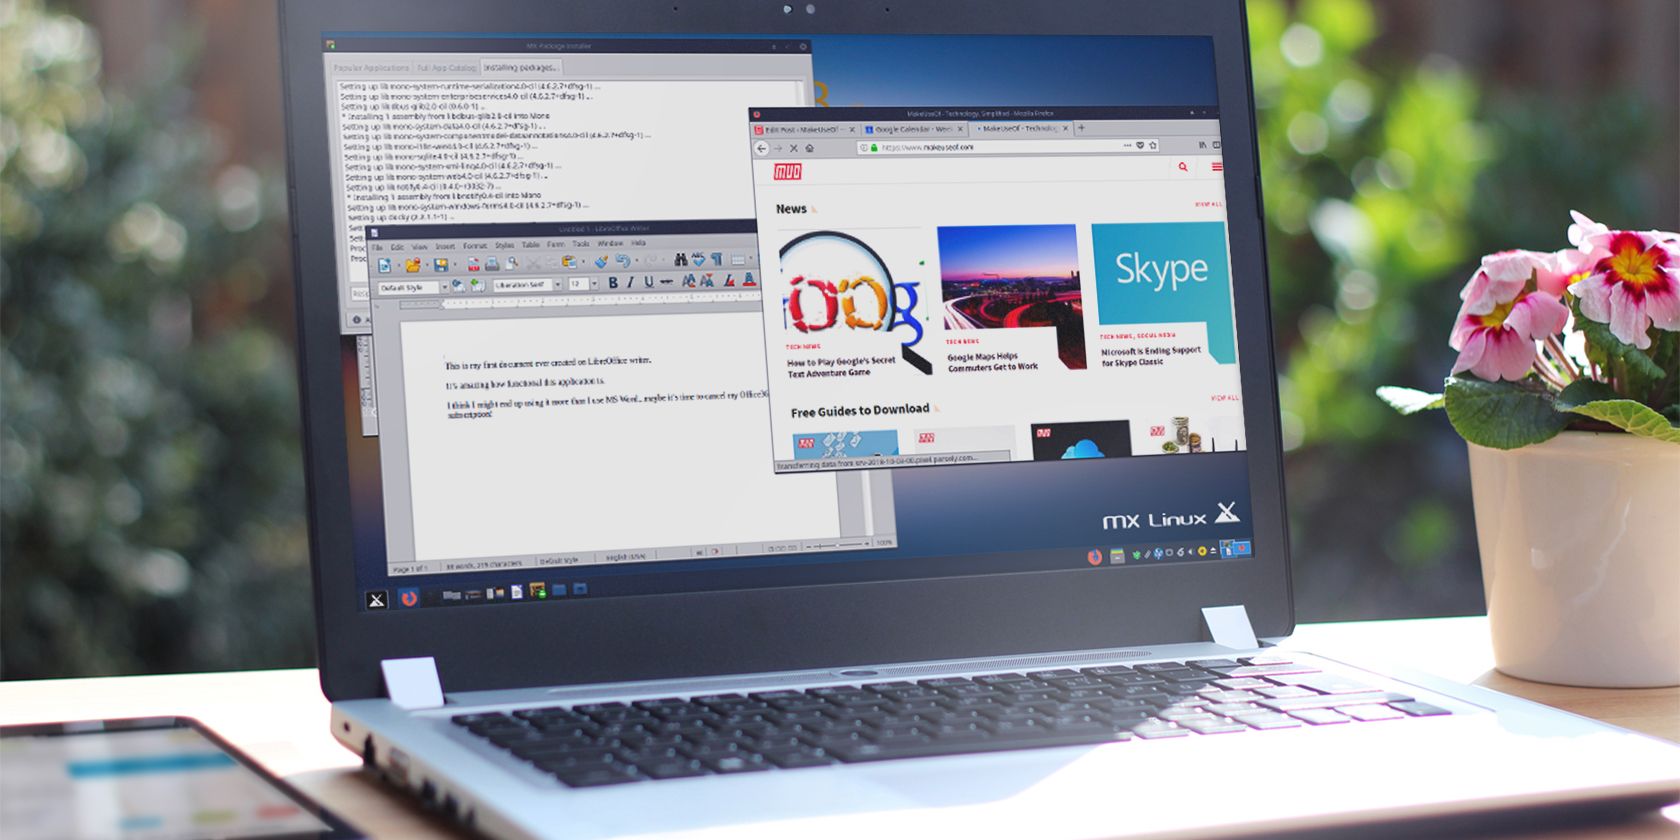
If you’re looking for a Windows alternative but have shied away from Linux, MX Linux may be the solution you’ve been waiting for.
Linux distributions have always held promise for Windows users to migrate away from an expensive OS. Even Windows 10 has enough quirks and issues that a truly robust and functional Linux alternative could easily entice longtime Windows users to switch.
Let’s take a closer look at MX Linux from the perspective of a longtime Windows user.
Installing MX Linux
MX Linux comes in 32-bit and 64-bit options, so even if you’re looking at installing it on an older machine, you won’t have any problems.
This test installation was done on a 2005 Dell Optiplex GX620.
If you’re unfamiliar with the process of installing a Linux distro, just download the MX Linux ISO and follow our guide for creating a bootable ISO USB or disk. Installing the USB ISO to complete installation took less than 15 minutes.
The installation options chosen for our testing included:
- Selecting the full, single-partition installation on a 32-bit machine
- Installing GRUB bootloader for MX Linux and Windows on the master boot record (MBR)
- Chosing option to install Samba server for MS networking
- Enabling Autologin and Save live desktop changes
The MX Linux Bootup Experience
The boot process after initial setup should be quick. On our machine, it took less than 30 seconds. This is roughly a quarter of the time it took for the previous Windows 7 installation that was running on this same machine.
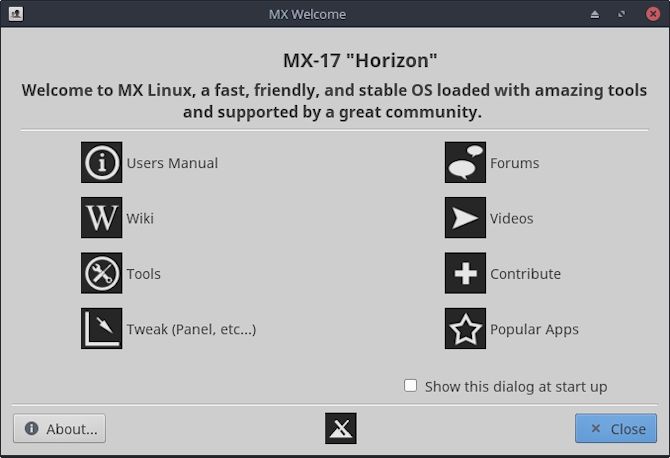
Take advantage of the initial Welcome window that pops up upon initial boot. It includes a Users Manual that will walk you through how to run Windows applications inside a wrapper or any compatibility layer like Wine.
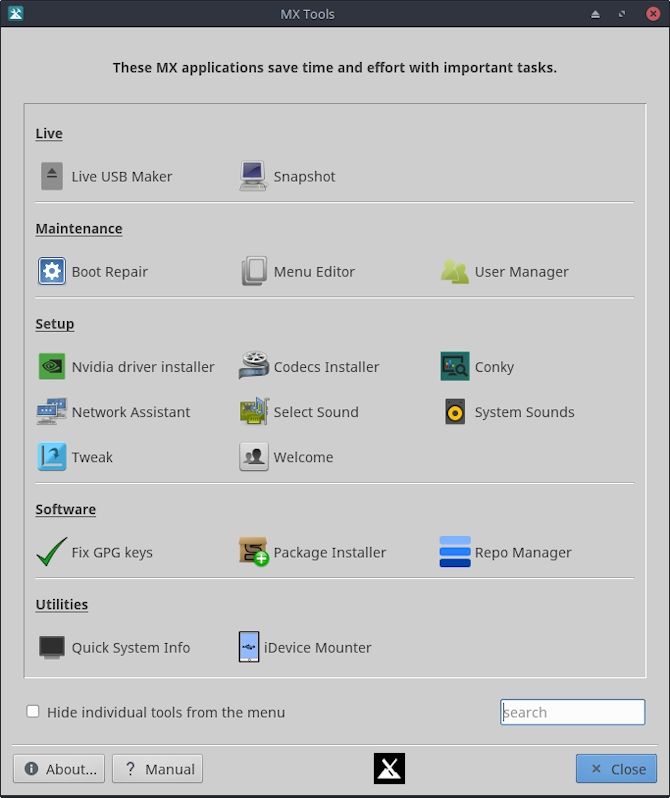
If you click Tools on the Welcome menu, you’ll see a window that looks not unlike the Windows Control Panel.
The first thing I did was install Wine so that I could run any Windows apps that I needed. This also confirmed to me that the internet connection worked.
The Windows Experience on MX Linux
When the OS first boots, things may not look quite right. Don’t worry, with just a few tweaks things will be looking very familiar.
Setting Up the Desktop
Just like in Windows, you can change the desktop background settings by right clicking on the desktop.
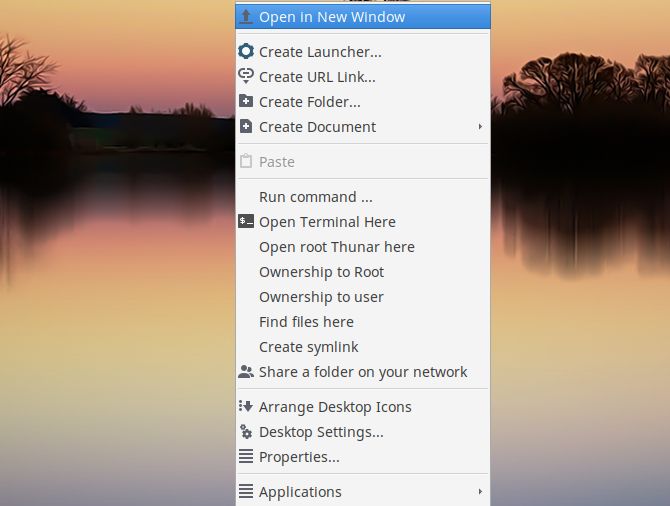
If you’re accustomed to Windows, a lot of this will look familiar. Of course, much will also look unusual. (The extras are features you don’t normally have available in Windows.)
For now, click Desktop Settings.
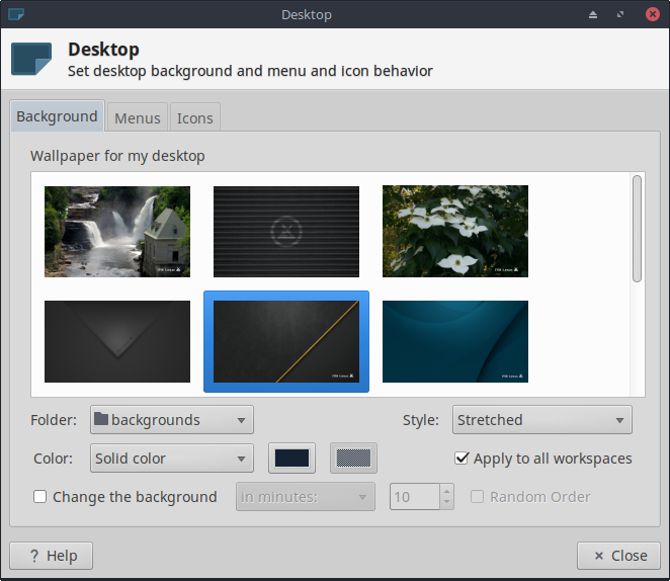
Just like in Windows, you can adjust the appearance of your desktop and menu system using these settings. Pretty straightforward.
Setting Up the Taskbar
By default, the taskbar (known here as the “Panel”) is set along the left, vertical side of the screen.
You can quickly change this by right clicking on the taskbar and selecting Panel > Panel Preferences.
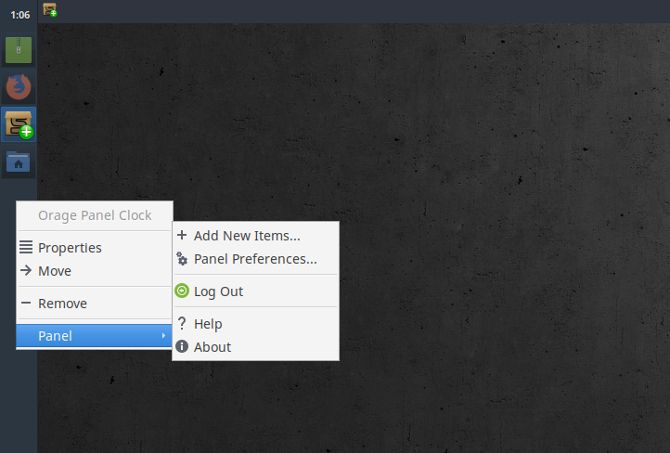
Here, you can change whether the taskbar is vertical or horizontal by changing the Mode selection.
If you want to change the location of the taskbar, make sure to deselect Lock panel.
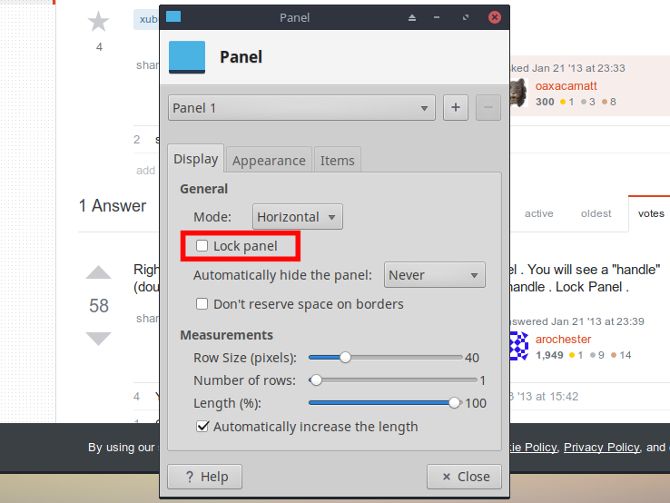
Once it’s unlocked, you can grab and move the taskbar to the edge of the screen you prefer. I’m a bit old school when it comes to the Windows taskbar so I moved it back to the bottom.
The arrangement of taskbar items by default is also the reverse of Windows, with the “Start” menu on the right and the time on the left. You can change this by right clicking each icon and selecting Move.
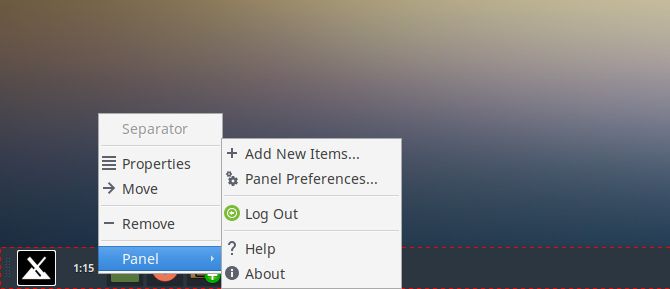
Then just drag it to the location where you want the taskbar to go.
Using Your Brand New Linux OS
Once you’re all set up and things are looking about as close to a Windows desktop as you can get, it’s time to start exploring.
When you click on the Start menu you’ll notice that it looks a bit like an advanced version of how the Windows 7 start menu used to look.
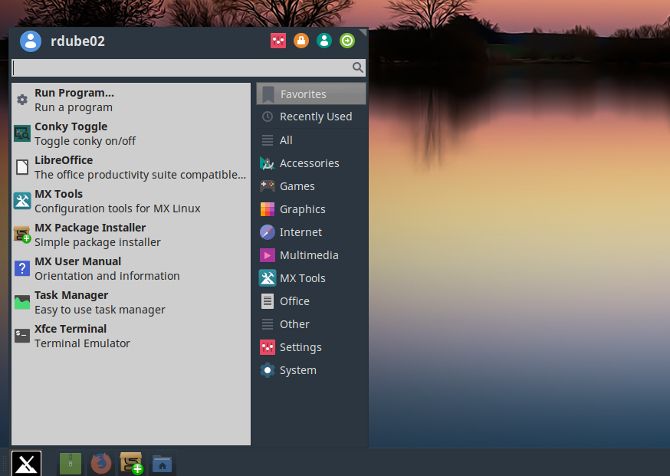
Applications are easy to find, grouped into important categories like Favorites, Recently Used, Look out, too, for the Settings or System options, as you’ll need these for configuring things.
When you click on Settings and scroll, you’ll see options for your network cards, Bluetooth connections, new hard disks, or any other hardware you’d like to set up or configure.
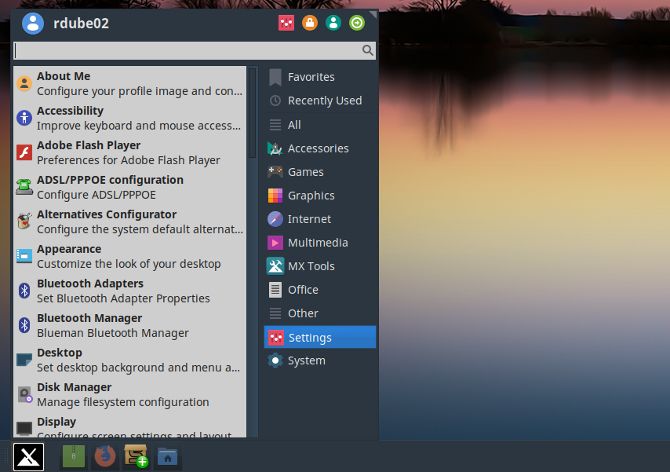
If the complexity of having to run all sorts of “sudo” commands to do anything useful has been keeping you away from trying Linux, you don’t have to worry about that here.
What’s also wonderful about using MX Linux as a Windows user, is that there’s almost no learning curve.
If you’ve ever tried different Linux distros over the years, then you know that often the window controls are slightly different. That’s really irritating when you’ve adapted for years to the way Microsoft sets up windows controls.
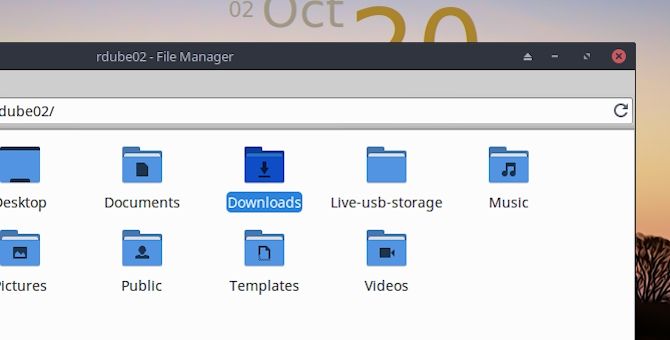
MX Linux’s designers have made the effort to mimic the window controls familiar from Windows. Better still, the native File Manager itself is configured to look almost exactly like you’re used to seeing in Windows.
In the left navigation menu you’ve got the root file system, and below it your home (what you might consider your User directory in Windows), as well as the Trash bin and the network browser.
Your Home directory is also configured as you’d expect in Windows, with the Documents, Pictures, Videos, and Music folders.
One slight difference to get used to is the single-click opening of folders, but that’s an easy adjustment to make.
Digging Deeper Into MX Linux
Once you’ve adjusted to this new (but familiar) environment, you’re ready to start digging in.
You’re going to be surprised at the power that’s available at your fingertips, without spending a dime or subscribing to any monthly service plans.
It’s time to install the suite of software you’d like to use on your new OS. Click the Start menu, and search for MX Package Installer.
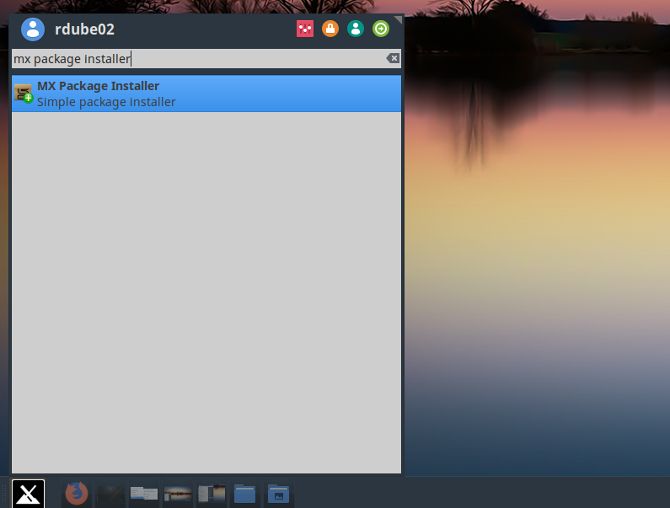
Scroll down through the MX Package Installer and expand each folder to search for applications you’re used to using.
You’ll find lots of categories that include a long list of applications that’ll look very familiar to you.
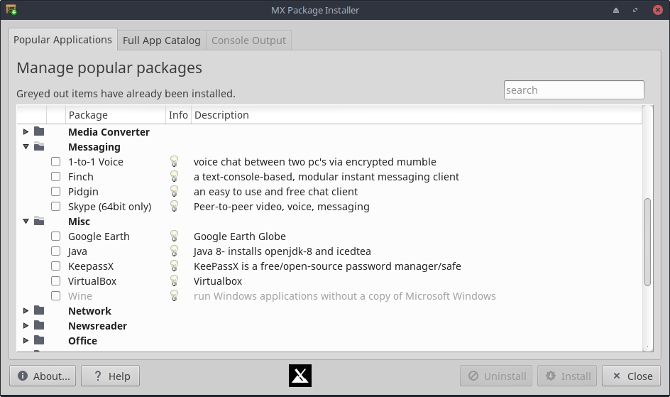
As a starter package, I recommend installing the applications you’re used to using on Windows. This will help make your new OS as familiar and feature-filled as possible.
- Audacity: Audio editing
- Chrome or Firefox: Web browsing
- Filezilla: FTP client
- GIMP Full: Advanced image editing
- Kodi or Plex: Media server
- Skype: Video messaging
- KeepassX: Password manager
- Dropbox: File sync for your Dropbox account
- Adobe Reader: Reading PDF files
- HP Printing: Managing printing to HP printers
- Shutter: Taking screenshots
By default, MX Linux comes with LibreOffice preinstalled, so you don’t have to worry about installing any Office apps. You also get FeatherPad as a great Notepad replacement.
Additionally, if you like having a stylish dock, make sure to review our guide of the most powerful Linux docks to install.
Enjoy Your “New” PC With MX Linux
There is nothing quite like breathing new life into a desktop or laptop that’s been sitting in the closet or basement, collecting dust.
Linux has always had the potential to do this. But MX Linux takes it a step further and brings a brand new OS about as close to a Windows environment as you could ask for, at zero cost.
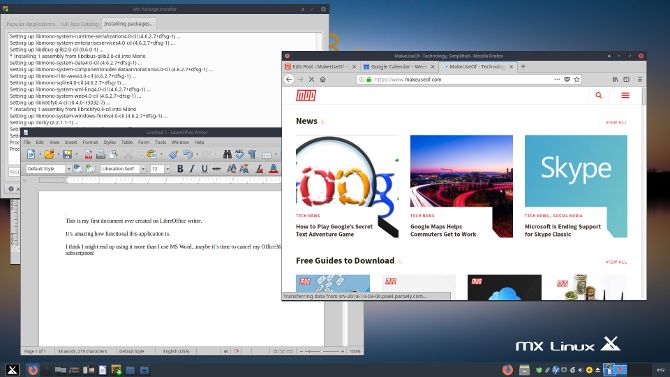
In fact, if you’re looking at buying a new computer, you could save a small fortune by buying one without any OS installed. Simply install MX Linux to get a lightning-fast computer without the learning curve of taking on an entirely new OS.
You don’t have to take my word for it. Try out a few others from our list of the best Linux distros of 2018. I guarantee that you’ll be right back here, downloading your own ISO of MX Linux.
Read the full article: Why MX Linux Is the Windows Alternative You’ve Been Waiting For
Read Full Article
No comments:
Post a Comment