Today, we’re announcing that Microsoft 365 apps and services will no longer support Internet Explorer 11 (IE 11) by this time next year.
Beginning November 30, 2020, the Microsoft Teams web app will no longer support IE 11.
Beginning August 17, 2021, the remaining Microsoft 365 apps and services will no longer support IE 11.
The company goes on to explain that, after these dates, Microsoft 365 won’t work correctly with these browsers. Microsoft 365 will either have diminished capabilities, or it will stop working altogether.
Either way, it’s a sign that Microsoft no longer wants to keep its older browsers alive.
Why Microsoft Is Axing Internet Explorer
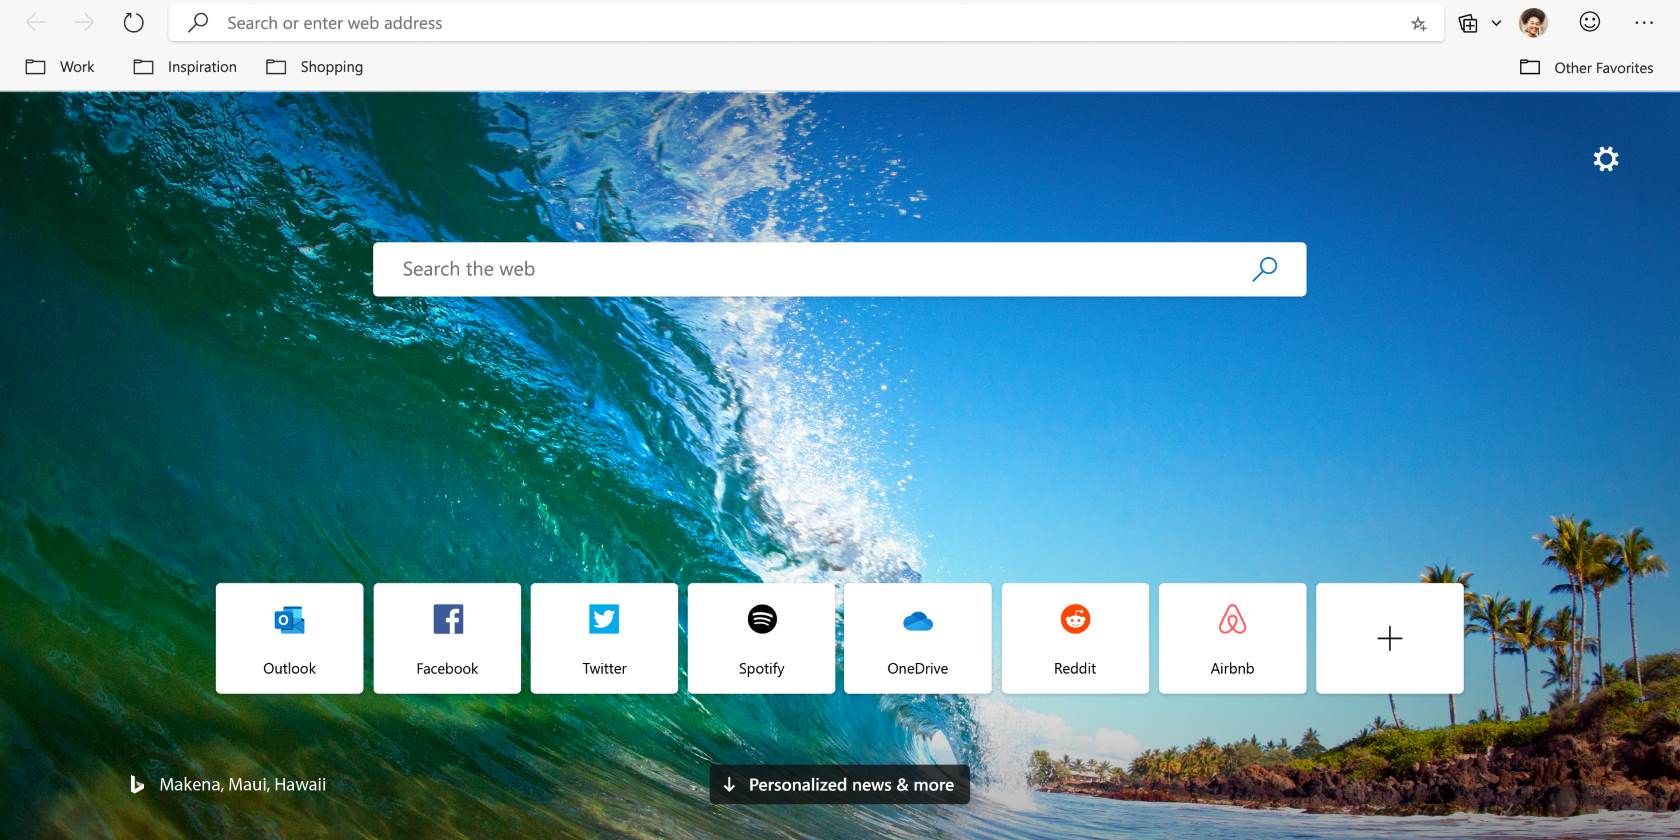
If you’ve been keeping tabs on Microsoft Edge, this news shouldn’t come as a surprise to you. After all, Microsoft has been hard at work revamping Microsoft Edge to be a strong competitor for Chrome and Firefox.
Because of this, there’s very little reason to continue using Internet Explorer 11 or legacy Edge. As a result, Microsoft is cutting support for these browsers to focus on the Chromium version of Edge.
A New Browser for Windows 10
There’s a good chance that Internet Explorer 11 and the legacy version of Edge no longer has avid supporters. However, if you are one of the rare breed who still uses one or the other, we recommend jumping over to the new Chromium Edge now.
Not only is it a lot better, but Microsoft will continue to support it for the longterm.
Learning a new language is one of the best skills to acquire. Here are a few creative ways to pick up a new tongue, whether by reading, writing, or watching.
There are two popular ways to learn a language. You can use Duolingo or some of the other best free language learning apps, or you can try the language immersion methodology.
The right path is up to you, depending on your skill level in the new language. These websites and apps will help you learn or practice a language based on the way you prefer to learn.
1. Parallel Text (Web): Read a Book in Two Languages Side-by-Side
Parallel Text believes the best way to get better at a language is to read a favorite book in that language. So it offers a split-view reading experience, where a book is presented in the language you know, alongside the language you want to learn.
Start by choosing a language you already know (like English) and a language you want to learn or practice. Current options include Dutch, Finnish, French, German, Greek, Hungarian, Italian, Polish, Portuguese, Russian, Spanish, and Swedish.
Parallel Text will then show a list of book options available in both languages. All the books are classics whose copyrights have expired, so you can legally read it for free.
Make your selection to start reading. You can choose a Compact View to only see the translated language, or a Split View to see both languages side-by-side. It’s an excellent way to practice reading with a full translation readily available when you need it. You can also click any sentence to have it read out loud by the browser so that you aren’t guessing pronunciations.
2. Fluency Pending (Web): How to Set Up a Language Learning Notebook
Productivity experts, memory experts, and teachers all say that writing things down helps you remember them better. You actually need to put pen to paper, and that act ingrains what you learned. To that end, here’s how to set up a language learning notebook.
Writer and language-learner Elzette Wilkinson shares how she set up and organizes her own notebook to learn and practice a new tongue. You can use any type of notebook in this method, and you’ll need a few highlighters and tabs. She says you can also use it in a digital notebook app, but use something with a stylus so that you’re physically writing, not typing.
Broadly, Wilkinson breaks down the notebook into a schedule, habit, and goals to set your patterns, and worksheets for practice. For example, a vocabulary worksheet will have spaces for a new word, its meaning, its memory prompt, synonyms and antonyms, and how to use it in a sentence. Fill everything in diligently to commit it to memory.
The whole article on Fluency Pending will explain how to set up other spaces, like diary entry or journaling, themed pages, resources, etc. You might also want to add in tips from other language notebook guides like Not So Translation’s language hacks and Michael Sunderland’s notebook.
Simply Learn Languages is a fantastic app to learn the basic words and phrases that a traveler will need in a foreign country. Download the language to use it offline, and start learning it through flashcards and quizzes.
Start with beginner phrases and basic sentences for travelers, across categories like numbers, directions, emergencies, accommodation, etc. You can unlock further phrases (advanced traveler and expat) for a price. At any point, you can review what you learned through quizzes.
Each Simply Learn Language category depicts the phrase in English script as well as the language’s original script. It also pronounces the phrase in a local person’s accent, so you can hear what it’ll sound like. Of course, a smart traveler could also use the app to quickly communicate with a foreigner.
Right now, the iOS version isn’t available, but you can download the Simply Learn app for any specific language for free. This will give you the same features (albeit with ads), and you can unlock more phrases and remove ads by paying.
Download: Simply Learn Languages for Android | iOS (Free)
4. Fluent (Chrome): Learn Languages While Browsing the Web
Fluent is a Chrome extension that changes a few words on each page to help you learn a new language. Most of the page stays in English, but you’ll find a few highlighted words in French. Hover over them to learn the English meaning, and click to hear the pronunciation. You can even save words to your favorites.
At any point, you can toggle Fluent to pause or resume it, including a timed pause. You can also tweak settings so that the extension doesn’t activate on important websites like Google Docs or your online banking account. You can also manually whitelist some websites. Choose a difficulty level to tell Fluent how aggressively it should translate words.
At the moment, Fluent only teaches English users how to read and write French. But the team is looking to add new languages, and you can vote to choose the next language. It’s a fantastic app that teaches you to read through language immersion on the web.
If you don’t want to learn French, there are a few other similar apps. Kypsis Language Immersion supports the widest variety of languages. Its settings also let you choose the difficulty level, and how many websites to apply it to. The interface isn’t as nice as Fluent, but it gets the job done.
Download: Kypsis Language Immersion for Chrome (Free)
5. Most Common Words (Web): Learn the 1,000 Most Common Words of Any Language
Most Common Words (MCW) reckons that instead of learning a new language start to finish, you should learn its most common words. It’s actually not a bad idea if you club MCW with other language-learning apps or practices.
In a flashcard format, the site teaches English language speakers the 1,000 most common words from Spanish, German, Italian, French, Japanese, Korean, Russian, and Business Chinese. “Business Chinese” is, as the name suggests, the most common words and terms used in the corporate world. Similarly, for Chinese speakers, it also teaches Business English.
Watch a Movie You Like, in a New Language
One of the best ways to learn or practice a new language is to watch movies in it. But there’s a trick to that. Pick a film or TV series that you’ve already seen, not something you’re watching for the first time. When your brain is trying to learn a new language, don’t task it with other things like following the plot, figuring out the characters, and so on. Reruns help you enjoy something you are familiar with, while also learning something.
To that end, Netflix is the best service to learn a language while you binge-watch TV. There are a bunch of apps and extensions to watch Netflix and learn a language, and it’s not just reading subtitles.
One of the biggest issues anyone faces when choosing an Android phone is the number of updates their device will receive. Will they get one generation of major versions of the OS? Will they receive two or even three generations?
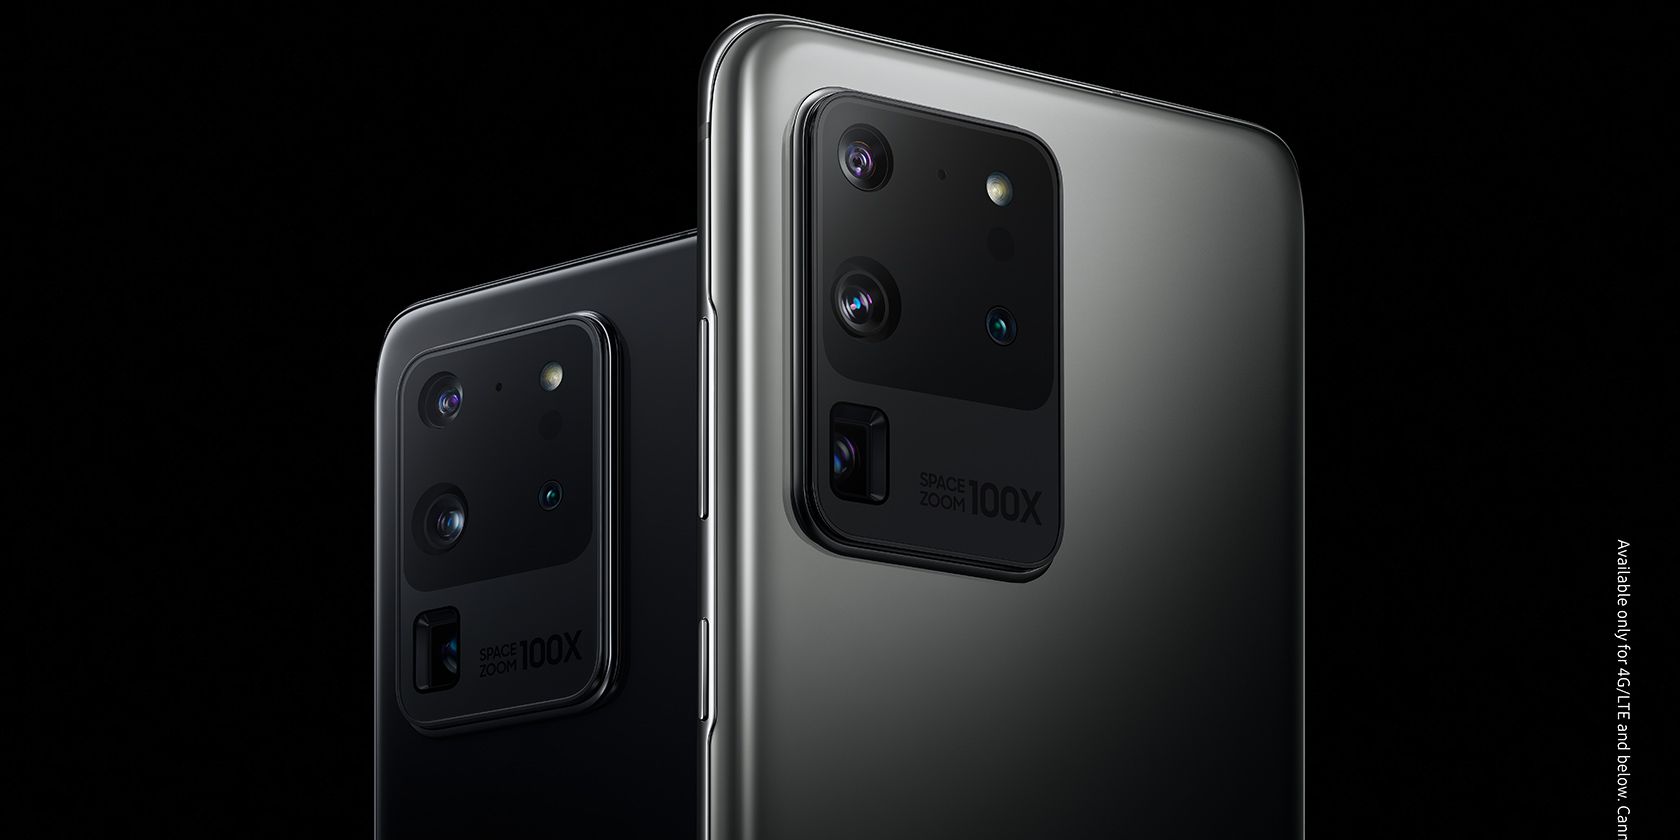
Samsung recently had its Galaxy Unpacked event, and the company announced that many of its new devices will get three generations of updates. However, it was a bit confusing which devices would get three years and which wouldn’t. Fortunately, Samsung posted on its newsroom clearing up the issue.
Which Phones Will Get 3 Generations of Updates?
If you buy a new Samsung phone in 2020, you should be good to go as far as updates are concerned.
If you own one of those devices, or you plan to, then you’re all set for three major Android updates. That applies to tablets and phones.
If you’re in the market for an affordable phone, make sure to do some research before you purchase an A series phone, as some of them won’t get three generations of updates.
Not a Fan of Bixby on Your Samsung Device?
Samsung’s personal assistant is rather divisive. Some people love it, and some hate it. If you’re not a fan of Bixby on your Samsung device, check out this handy guide that’ll show you how to disable Bixby.
A few months ago, Google requested submissions for the annual K-12 contest to create a Doodle that will be featured on the search engine’s home page in 2020. Now, the company has combed through all of the submissions and opened Doodle for Google 2020 voting.
While it’s too late to enter your own drawings into the contest, you can still participate by voting for the national finalists.
Doodle for Google 2020
Every year, the Doodle for Google contest comes along as one of the coolest ways for young artists to get their work in front of the entire internet. Google applies a theme to each contest, and for 2020, the company has chosen kindness.
Google originally accepted submission for Doodles until March 20th. From there, the company lumped submissions into five grade groups: K-3, 4-5, 6-7, 8-9, and 10-12.
Once the company took the submissions, it picked 54 state and territory winners. Now, with the help of Google users, the company will narrow it down to five National Finalists. Of those, one will go on to become the winner of the Doodle for Google 2020 contest.
Congratulations to our 54 State and Territory Winners who shared the special ways they show kindness in their families, schools, and communities.
Vote for your favorite Doodle to determine who will go on to become one of our five National Finalists, one of which will go on to become the National Winner.
It’s a Doodle Party!
Everyone loves the Google Doodle. Outside of the annual contest, Google has all sorts of fun Doodles that pop up all the time. It makes visiting the popular search engine an exciting surprise every single day.
Not only are there actual pieces of art, but there are some amazing Google Doodle games that you can play. Some of these have been truly impressive!
After several years operating as a secure text messaging and voice-only calling app, Telegram has finally added video calling to its roster. This feature is now available to both iOS and Android users, albeit in its alpha stage.
Telegram Rolls Out Secure Video Calling
In a Telegram Blog post, the Telegram team explains that all video calls are secured with end-to-end encryption. This ensures that your video calls are private.
You can check if your call is secure by matching the four emojis that Telegram displays for you and your conversation partner. If the emojis match, your call is protected.
Telegram also notes that you can take extra steps to verify that your app is using encryption:
Our apps for Android and iOS have reproducible builds, so anyone can verify encryption and confirm that their app uses the exact same open-source code that we publish with each update.
And because the video calling feature comes with picture-in-picture mode, you can talk on camera, as well as read and reply to messages at the same time. You can only engage in one-on-one video calls right now, but Telegram plans on adding group video calls in the future.
How to Make a Video Call on Telegram
It’s easy to make a video call on Telegram. To get started, open Telegram, and tap on your contact’s photo to access their profile.
If your contact has Telegram’s 7.0 update installed, you should see a video icon on the person’s profile. Select that icon to start a video call.
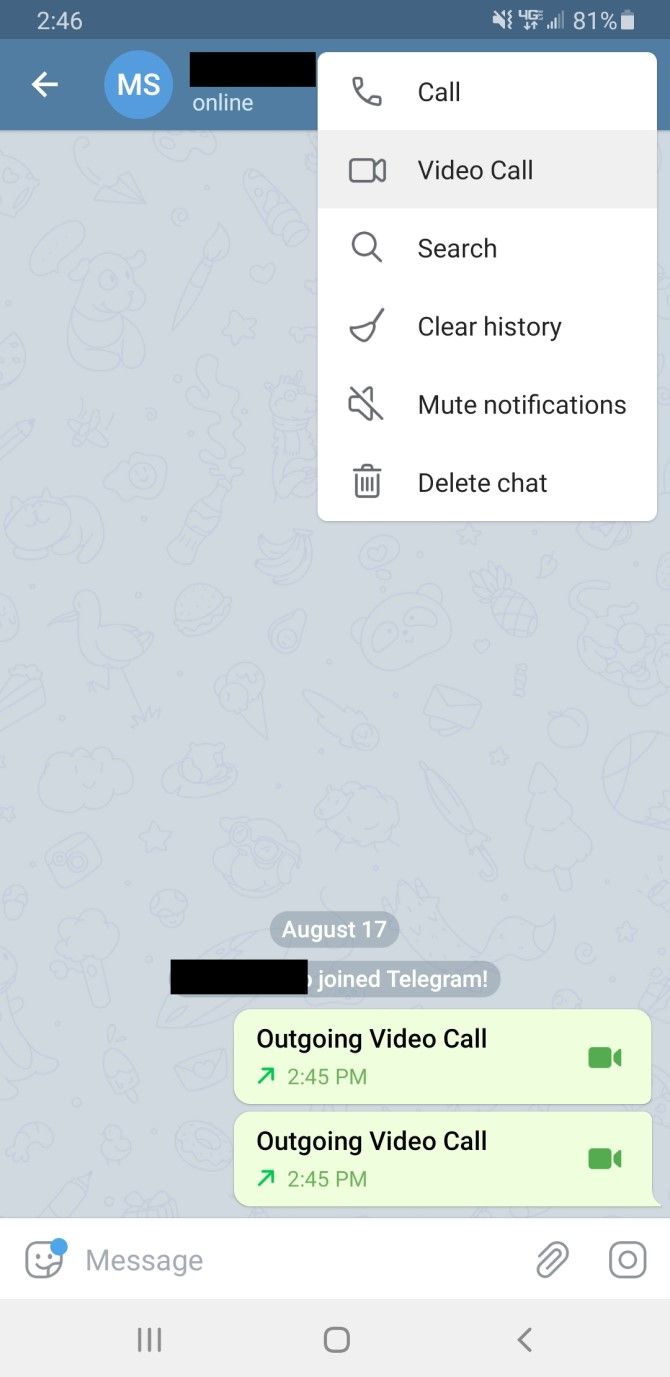
Alternatively, you can also start a video call by going to one of your chats, hitting the three dots in the top-right corner of the screen, and tapping Video Call.
During your conversation, you can quickly switch between voice and video, flip your camera, and mute the call.
Telegram Hops on the Video Calling Bandwagon
Now that Telegram has added video calling to its arsenal of fantastic features, conversations on the app can become even more engaging.
And now, 18 months on, it looks like Facebook is finally putting those plans into action. A small number of users have the option to update Instagram Direct, a sign that a Messenger takeover is coming.
Instagram Introduces Integrated Chat Features
Most users have mixed feelings about the ambitious idea of a cross-platform chat integration between Facebook’s three platforms. Despite this, it looks like Facebook has already begun the Instagram-Messenger merge.
As reported by The Verge, some Instagram users have been receiving a notification when accessing their direct messages (DMs). The prompt reads, “There’s a New Way to Message on Instagram.”
The top of the notification shows both the Instagram and Messenger logos, an obvious sign of the upcoming merge.
The prompt then goes on to describe all of the new features coming to Instagram Direct. According to the note, you can update the app to get a colorful chat interface, more emoji reactions, and a swipe-to-reply touch gesture. And while the notification mentions that you can message users from Facebook, you can’t use that feature just yet.
You can opt to install the new chat system by hitting Update at the bottom of the screen, or you can save it for another day by pressing Not Now. Once installed, you’ll get the new features listed above, and the familiar DM paper airplane icon will get replaced by Messenger’s logo.
When Will the Instagram/Messenger Merge Happen?
Facebook CEO Mark Zuckerberg hopes that Instagram, Messenger, and WhatsApp can eventually operate off of a universal chat platform with end-to-end encryption. However, there’s still no official date on when this will happen.
Over time, more Instagram users will likely see the Instagram update pop up on their phone as well. But in the meantime, you can check out these hidden Facebook Messenger tricks.
Today, we’re announcing that Microsoft 365 apps and services will no longer support Internet Explorer 11 (IE 11) by this time next year.
Beginning November 30, 2020, the Microsoft Teams web app will no longer support IE 11.
Beginning August 17, 2021, the remaining Microsoft 365 apps and services will no longer support IE 11.
The company goes on to explain that, after these dates, Microsoft 365 won’t work correctly with these browsers. Microsoft 365 will either have diminished capabilities, or it will stop working altogether.
Either way, it’s a sign that Microsoft no longer wants to keep its older browsers alive.
Why Microsoft Is Axing Internet Explorer
If you’ve been keeping tabs on Microsoft Edge, this news shouldn’t come as a surprise to you. After all, Microsoft has been hard at work revamping Microsoft Edge to be a strong competitor for Chrome and Firefox.
Because of this, there’s very little reason to continue using Internet Explorer 11 or legacy Edge. As a result, Microsoft is cutting support for these browsers to focus on the Chromium version of Edge.
A New Browser for Windows 10
There’s a good chance that Internet Explorer 11 and the legacy version of Edge no longer has avid supporters. However, if you are one of the rare breed who still uses one or the other, we recommend jumping over to the new Chromium Edge now.
Not only is it a lot better, but Microsoft will continue to support it for the longterm.
Today, we’re announcing that Microsoft 365 apps and services will no longer support Internet Explorer 11 (IE 11) by this time next year.
Beginning November 30, 2020, the Microsoft Teams web app will no longer support IE 11.
Beginning August 17, 2021, the remaining Microsoft 365 apps and services will no longer support IE 11.
The company goes on to explain that, after these dates, Microsoft 365 won’t work correctly with these browsers. Microsoft 365 will either have diminished capabilities, or it will stop working altogether.
Either way, it’s a sign that Microsoft no longer wants to keep its older browsers alive.
Why Microsoft Is Axing Internet Explorer
If you’ve been keeping tabs on Microsoft Edge, this news shouldn’t come as a surprise to you. After all, Microsoft has been hard at work revamping Microsoft Edge to be a strong competitor for Chrome and Firefox.
Because of this, there’s very little reason to continue using Internet Explorer 11 or legacy Edge. As a result, Microsoft is cutting support for these browsers to focus on the Chromium version of Edge.
A New Browser for Windows 10
There’s a good chance that Internet Explorer 11 and the legacy version of Edge no longer has avid supporters. However, if you are one of the rare breed who still uses one or the other, we recommend jumping over to the new Chromium Edge now.
Not only is it a lot better, but Microsoft will continue to support it for the longterm.
Microsoft’s new Flight Simulator is a technological marvel that sets a new standard for the genre. But to recreate a world that feels real and alive and contains billions of buildings all in the right spots, Microsoft and Asobo Studios relied on the work of multiple partners.
One of those is the small Austrian startup blackshark.ai from Graz that, with a team of only about 50 people, recreated every city and town around the world with the help of AI and massive computing resources in the cloud.
Ahead of the launch of the new Flight Simulator, we sat down with Blackshark co-founder and CEO Michael Putz to talk about working with Microsoft and the company’s broader vision.
Image Credits: Microsoft
Blackshark is actually a spin-off of game studio Bongfish, the maker of World of Tanks: Frontline, Motocross Madness and the Stoked snowboarding game series. As Putz told me, it was actually Stoked that set the company on the way to what would become Blackshark.
“One of the first games we did in 2007 was a snowboarding game called Stoked and S Stoked Bigger Edition, which was one of the first games having a full 360-degree mountain where you could use a helicopter to fly around and drop out, land everywhere and go down,” he explained. “The mountain itself was procedurally constructed and described — and also the placement of obstacles of vegetation, of other snowboarders and small animals had been done procedurally. Then we went more into the racing, shooting, driving genre, but we still had this idea of positional placement and descriptions in the back of our minds.”
Bongfish returned to this idea when it worked on World of Tanks, simply because of how time-consuming it is to build such a huge map where every rock is placed by hand.
Based on this experience, Bongfish started building an in-house AI team. That team used a number of machine-learning techniques to build a system that could learn from how designers build maps and then, at some point, build its own AI-created maps. The team actually ended up using this for some of its projects before Microsoft came into the picture.
“By random chance, I met someone from Microsoft who was looking for a studio to help them out on the new Flight Simulator. The core idea of the new Flight Simulator simulator was to use Bing Maps as a playing field, as a map, as a background,” Putz explained.
But Bing Maps’ photogrammetry data only yielded exact 1:1 replicas of 400 cities — for the vast majority of the planet, though, that data doesn’t exist. Microsoft and Asobo Studios needed a system for building the rest.
This is where Blackshark comes in. For Flight Simulator, the studio reconstructed 1.5 billion buildings from 2D satellite images.
Now, while Putz says he met the Microsoft team by chance, there’s a bit more to this. Back in the day, there was a Bing Maps team in Graz, which developed the first cameras and 3D versions of Bing Maps. And while Google Maps won the market, Bing Maps actually beat Google with its 3D maps. Microsoft then launched a research center in Graz and when that closed, Amazon and others came in to snap up the local talent.
“So it was easy for us to fill positions like a Ph.D. in rooftop reconstruction,” Putz said. “I didn’t even know this existed, but this was exactly what we needed — and we found two of them.
“It’s easy to see why reconstructing a 3D building from a 2D map would be hard. Even figuring out a building’s exact outline isn’t easy.
Image Credits: Blackshark.ai
“What we do basically in Flight Simulators is we looking at areas, 2D areas and then finding out footprints of buildings, which is actually a computer vision task,” said Putz. “But if a building is obstructed by a shadow of a tree, we actually need machine learning because then it’s not clear anymore what is part of the building and what is not because of the overlap of the shadow — but then machine learning completes the remaining part of the building. That’s a super simple example.”
While Blackshark was able to rely on some other data, too, including photos, sensor data and existing map data, it has to make a determination about the height of the building and some of its characteristics based on very little information.
The obvious next problem is figuring out the height of a building. If there is existing GIS data, then that problem is easy to solve, but for most areas of the world, that data simply doesn’t exist or isn’t readily available. For those areas, the team takes the 2D image and looks for hints in the image, like shadows. To determine the height of a building based on a shadow, you need the time of day, though, and the Bing Maps images aren’t actually timestamped. For other use cases the company is working on, Blackshark has that and that makes things a lot easier. And that’s where machine learning comes in again.
Image Credits: Blackshark.ai
“Machine learning takes a slightly different road,” noted Putz. “It also looks at the shadow, we think — because it’s a black box, we don’t really know what it’s doing. But also, if you look at a flat rooftop, like a skyscraper versus a shopping mall. Both have mostly flat rooftops, but the rooftop furniture is different on a skyscraper than on a shopping mall. This helps the AI to learn when you label it the right way.”
And then, if the system knows that the average height of a shopping mall in a given area is usually three floors, it can work with that.
One thing Blackshark is very open about is that its system will make mistakes — and if you buy Flight Simulator, you will see that there are obvious mistakes in how some of the buildings are placed. Indeed, Putz told me that he believes one of the hardest challenges in the project was to convince the company’s development partners and Microsoft to let them use this approach.
“You’re talking 1.5 billion buildings. At these numbers, you cannot do traditional Q&A anymore. And the traditional finger-pointing in like a level of Halo or something where you say ‘this pixel is not good, fix it,’ does not really work if you develop on a statistical basis like you do with AI. So it might be that 20% of the buildings are off — and it actually is the case I guess in the Flight Simulator — but there’s no other way to tackle this challenge because outsourcing to hand-model 1.5 billion buildings is, just from a logistical level and also budget level, not doable.”
Over time, that system will also improve and since Microsoft streams a lot of the data to the game from Azure, users will surely see changes over time.
Image Credits: Blackshark.ai
Labeling, though, is still something the team has to do simply to train the model, and that’s actually an area where Blackshark has made a lot of progress, though Putz wouldn’t say too much about it because it’s part of the company’s secret sauce and one of the main reasons why it can do all of this with just about 50 people.
“Data labels had not been a priority for our partners,” he said. “And so we used our own live labeling to basically label the entire planet by two or three guys […] It puts a very powerful tool and user interface in the hands of the data analysts. And basically, if the data analyst wants to detect a ship, he tells the learning algorithm what the ship is and then he gets immediate output of detected ships in a sample image.”
From there, the analyst can then train the algorithm to get even better at detecting a specific object like a ship, in this example, or a mall in Flight Simulator. Other geospatial analysis companies tend to focus on specific niches, Putz also noted, while the company’s tools are agnostic to the type of content being analyzed.
Image Credits: Blackshark.ai
And that’s where Blackshark’s bigger vision comes in. Because while the company is now getting acclaim for its work with Microsoft, Blackshark also works with other companies around reconstructing city scenes for autonomous driving simulations, for example.
“Our bigger vision is a near-real-time digital twin of our planet, particularly the planet’s surface, which opens up a trillion use cases where traditional photogrammetry like a Google Earth or Apple Maps is doing is not helping because those are just simplified for photos clued on simple geometrical structures. For this we have our cycle where we have been extracting intelligence from aerial data, which might be 2D images, but it also could be 3Dpoint counts, which are already doing another project. And then we are visualizing the semantics.”
Those semantics, which describe the building in very precise detail, have one major advantage over photogrammetry: Shadow and light information is essentially baked into the images, making it hard to relight a scene realistically. Since Blackshark knows everything about that building it is constructing, it can then also place windows and lights in those buildings, which creates the surprisingly realistic night scenes in Flight Simulator.
Point clouds, which aren’t being used in Flight Simulator, are another area Blackshark is focusing on right now. Point clouds are very hard to read for humans, especially once you get very close. Blackshark uses its AI systems to analyze point clouds to find out how many stories a building has.
“The whole company was founded on the idea that we need to have a huge advantage in technology in order to get there, and especially coming from video games, where huge productions like in Assassin’s Creed or GTA are now hitting capacity limits by having thousands of people working on it, which is very hard to scale, very hard to manage over continents and into a timely delivered product. For us, it was clear that there need to be more automated or semi-automated steps in order to do that.”
And though Blackshark found its start in the gaming field — and while it is working on this with Microsoft and Asobo Studios — it’s actually not focused on gaming but instead on things like autonomous driving and geographical analysis. Putz noted that another good example for this is Unreal Engine, which started as a game engine and is now everywhere.
“For me, having been in games industry for a long time, it’s so encouraging to see, because when you develop games, you know how groundbreaking the technology is compared to other industries,” said Putz. “And when you look at simulators, from military simulators or industrial simulators, they always kind of look like shit compared to what we have in driving games. And the time has come that the game technologies are spreading out of the game stack and helping all those other industries. I think Blackshark is one of those examples for making this possible.”
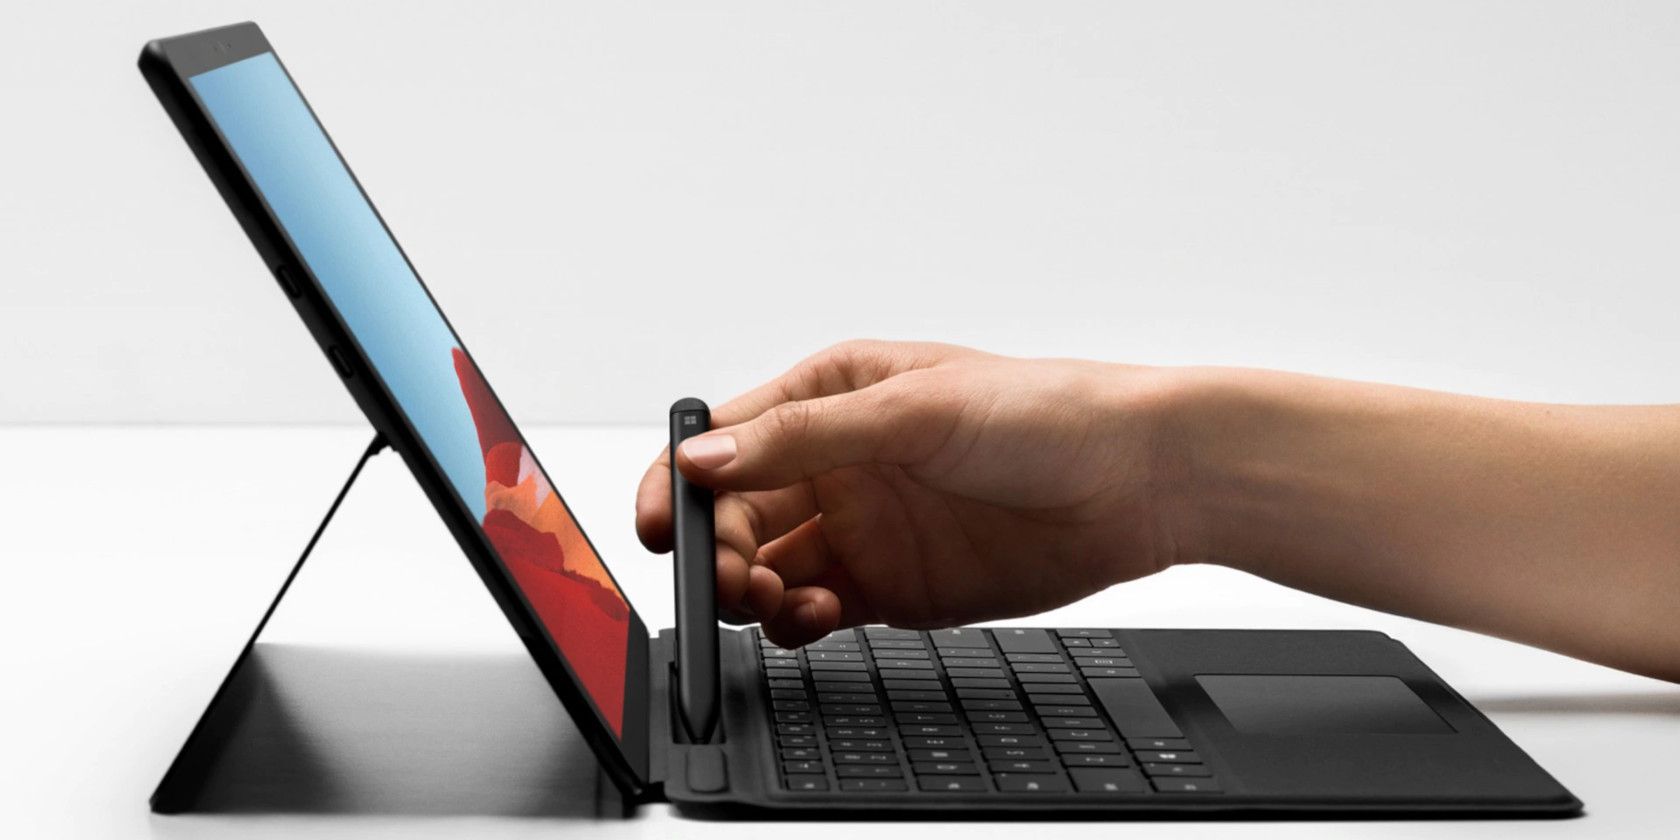
With companies around the world increasingly adopting a work-from-home model, webcam etiquette has never been more important. If you never know where to look during a video conference, Microsoft is aiming to fix this with its new Eye Contact feature for the Surface Pro X.
What Is the Eye Contact Feature?
The Eye Contact feature solves a minor dilemma with webcam etiquette. Ideally, you should look directly into your webcam so that you maintain “digital eye contact” with everyone in the call; however, doing so means you can’t see what’s on your screen.
Microsoft aims to remove this problem with Eye Contact for the Surface Pro X. Eye Contact was previously under testing on the Windows Insiders program, but Microsoft has now released it to the public.
You can see its release via the Microsoft Support page for the Surface Pro X’s update history. Under the August 2020 updates category, you can find a lot of patches mentioning, “Enables the Eye Contact feature.”
Eye Contact was first announced on the Windows Blog on July 22, 2020. In the post, Microsoft discusses how the feature works:
Powered by artificial intelligence capabilities of the Microsoft SQ1(TM) processor, Eye Contact helps to adjust your gaze on video calls so you appear to be looking directly in the camera on your Surface Pro X.
Therefore, if you own a Surface Pro X, you can now watch other people on your video call without looking like you’re not paying attention.
This feature appears to modify the webcam feed on an operating system level. As a result, you don’t need to set up Eye Contact for each app you use manually. As long as you tell your Surface Pro X to enable it, it should work on all voice calls regardless of what app you use.
Making Video Conferencing Easier
As businesses begin to work from home, workers are learning of the awkward etiquette of video conferencing; however, Microsoft aims to help out with its new Eye Contact feature.
This means that, now, anyone with a Surface Pro X can use the power of AI to make it appear as if they’re looking into their webcam.
As the 2020 United States presidential election approaches, Facebook has imposed new restrictions on politically-connected news outlets. Facebook now requires these publications to go through a disclaimer process before they post politically-driven ads.
Facebook Moves Towards Political Neutrality
Facebook is taking steps to make the platform more politically neutral. It already lets you turn off all political ads, and it’s now putting more restrictions on political news outlets.
In the past, some political outlets were able to bypass Facebook’s ad authorization process by claiming the news exemption. This exemption allowed certain publications to post ads without having to provide a disclaimer. By skirting around the disclaimer process, political publications could unfairly influence elections.
The social media giant is finally closing this loophole for political outlets. Any news source that Facebook considers “political” will have to take extra steps to publish ads.
Facebook’s Business Help Center defines a political publication as “an organization, company, or other group whose primary purpose is to influence politics, public policy, and/or elections.”
This includes any outlets that have ties to political parties, politicians, PACs, and other political organizations. Not only do all political publications now have to go through the ad authorization process, but their ads need to have a “Paid for by” disclaimer attached.
Identifying politically connected publishers is a new process for us, and we will learn and adapt as needed, while continuing to make ads on Facebook more transparent and protect the integrity of elections.
And while political news organizations can still register as a news Page, they’re now barred from appearing on the Facebook News feed. Facebook’s new rules also prevent political publications from using news messaging on the WhatsApp Business API and the Messenger Business Platform.
How Facebook Still Poses a Threat to Elections
Despite the fact that Facebook has put new restrictions on political outlets, the social network can still influence politics. To find out more, read our article explaining how your data on Facebook is used to win elections.
With companies around the world increasingly adopting a work-from-home model, webcam etiquette has never been more important. If you never know where to look during a video conference, Microsoft is aiming to fix this with its new Eye Contact feature for the Surface Pro X.
What Is the Eye Contact Feature?
The Eye Contact feature solves a minor dilemma with webcam etiquette. Ideally, you should look directly into your webcam so that you maintain “digital eye contact” with everyone in the call; however, doing so means you can’t see what’s on your screen.
Microsoft aims to remove this problem with Eye Contact for the Surface Pro X. Eye Contact was previously under testing on the Windows Insiders program, but Microsoft has now released it to the public.
You can see its release via the Microsoft Support page for the Surface Pro X’s update history. Under the August 2020 updates category, you can find a lot of patches mentioning, “Enables the Eye Contact feature.”
Eye Contact was first announced on the Windows Blog on July 22, 2020. In the post, Microsoft discusses how the feature works:
Powered by artificial intelligence capabilities of the Microsoft SQ1(TM) processor, Eye Contact helps to adjust your gaze on video calls so you appear to be looking directly in the camera on your Surface Pro X.
Therefore, if you own a Surface Pro X, you can now watch other people on your video call without looking like you’re not paying attention.
This feature appears to modify the webcam feed on an operating system level. As a result, you don’t need to set up Eye Contact for each app you use manually. As long as you tell your Surface Pro X to enable it, it should work on all voice calls regardless of what app you use.
Making Video Conferencing Easier
As businesses begin to work from home, workers are learning of the awkward etiquette of video conferencing; however, Microsoft aims to help out with its new Eye Contact feature.
This means that, now, anyone with a Surface Pro X can use the power of AI to make it appear as if they’re looking into their webcam.
Even as far back as the mid-1980s, people have dreamed about wearable technology. Instead of taking your time and finding space to use your gadgets, they can travel with you. In this sense, the technology integrates into your life, rather than working around it.
As we’ve grown more aware of the impact, both physical and mental, of focusing on our phones, smartwatches help us stay present and remain connected.
If you’ve been considering investing in a wrist-worn device, let’s take a look at the reasons why you should get a smartwatch.
When it’s time to buy a new phone, you have to choose between a device running Google’s Android operating system and an Apple iPhone running iOS. You have a similar decision to make when it comes to smartwatches, although your best option will depend on which smartphone you use.
As you’d expect, the Apple Watch, running watchOS, integrates tightly with other Apple products. As a result, it is often the best choice for iPhone users. You’ll likely opt for a smartwatch running Google’s Wear OS operating system for anyone using an Android smartphone. Although you can use a Wear OS device with your iPhone, there is an excellent reason to stay in line with your smartphone—notifications.
Both styles of smartwatch integrate with their related smartphone, enabling you to receive notifications on your wrist. On a basic level, you’re able to screen incoming calls, view new messages (and potentially respond to them), and interact with persistent notifications like music controls.
So, rather than always being alert for the sound of your phone ringing, or vibrations signaling incoming messages, you can leave your phone in your bag or pocket. To view your notifications, you just need a gentle flick of the wrist, and you’ll be able to decide whether you need to deal with an item right away or wait until later.
2. Enhanced Fitness Tracking
Fitness trackers are affordable wrist-worn devices that allow you to track information about your daily physical activity. There are Fitbit trackers with features designed to help you keep healthy throughout the day. These units are so effective that, for many people, they are the first wearable device. If that’s on the cards for you, take a look at our Fitbit tracker comparison.
Smartwatches come with all of the same features built-in. You’ll be able to track your steps, monitor your heart rate, and analyze your sleep. Unlike fitness trackers, you can also make use of the apps installed on your smartphone and smartwatch. So, while you can purchase a Fitbit, it’ll only work with Fitbit’s app and services.
On the other hand, a smartwatch can run a range of apps, including popular fitness tracking services like Strava. If you appreciate cross-platform and multi-device support, then a smartwatch is often the better choice, even if it is sometimes more expensive.
The wrist-based fitness experience is often more interactive on a smartwatch, too, as the larger color screen enables some degree of personalization. If you aren’t sure which device is best for you, check out our smartwatch and fitness tracker comparison guide.
3. Improved Navigation with GPS
An increasing number of smartwatches are available with a GPS sensor built-in. For a long time, the only way to get the benefits of fitness tracking apps was to keep your phone with you and your smartwatch connected via Bluetooth. If you opt for a watch with GPS, you can install your preferred fitness tracking app, leave your phone at home, and still get accurate distance and location recordings.
The inclusion of GPS also allows you to view, and interact with, turn-by-turn navigation. Like most people, you probably use Google Maps or Apple Maps to make your way to your destination. While this is acceptable when driving, it can be challenging when walking, running, or cycling.
In those situations, continuously looking at your phone is a distraction and means you may miss physical obstacles or dangers. Smartwatches with GPS often cost more than those without, so you may prefer to forgo that feature. However, you can still get some of the same benefits.
Both Apple and Google have developed smartwatch editions of their navigation apps. If your smartwatch is connected via Bluetooth, your phone can load the route and send it to your watch to keep your eyes on the path ahead. This is also one of the major factors when considering whether the Apple Watch is suitable for kids.
4. Easy Contactless Payments
One of the primary reasons you should buy a smartwatch is to make your life more convenient and reduce your smartphone reliance. That’s why many wrist-worn wearables support contactless payment systems. Services like Google Pay and Apple Pay rely on Near Field Communication (NFC) chips.
Most smartphones come with NFC, and, increasingly, so do smartwatches. While NFC is great for contactless payments, there are plenty of other uses for NFC that you may want to consider. Opting for a watch with NFC means you can enable Google Pay or Apple Pay (depending on your smartphone operating system) on your smartwatch too.
This functionality resides on the watch directly, so you can use contactless payment by presenting your watch to the terminal, whether you have your smartphone with you or not. Consequently, leaving your smartphone at home is even more practical and convenient, especially when out exercising.
Should You Buy a Smartwatch?
Smartwatches are a great way to reduce your screen time and be more present. However, they also help you stay connected and up to date, even allowing you to respond to messages, access turn-by-turn navigation, and track workouts directly from your wrist. As a result, you can put down your phone and enjoy the world around you.
In most cases, the Apple Watch is the best option for iPhone users. However, since Google smartwatches also support iPhones, you have a range of smartwatches to choose from. That said, if you use an Android smartphone, consider one of the best smartwatches for all budgets.
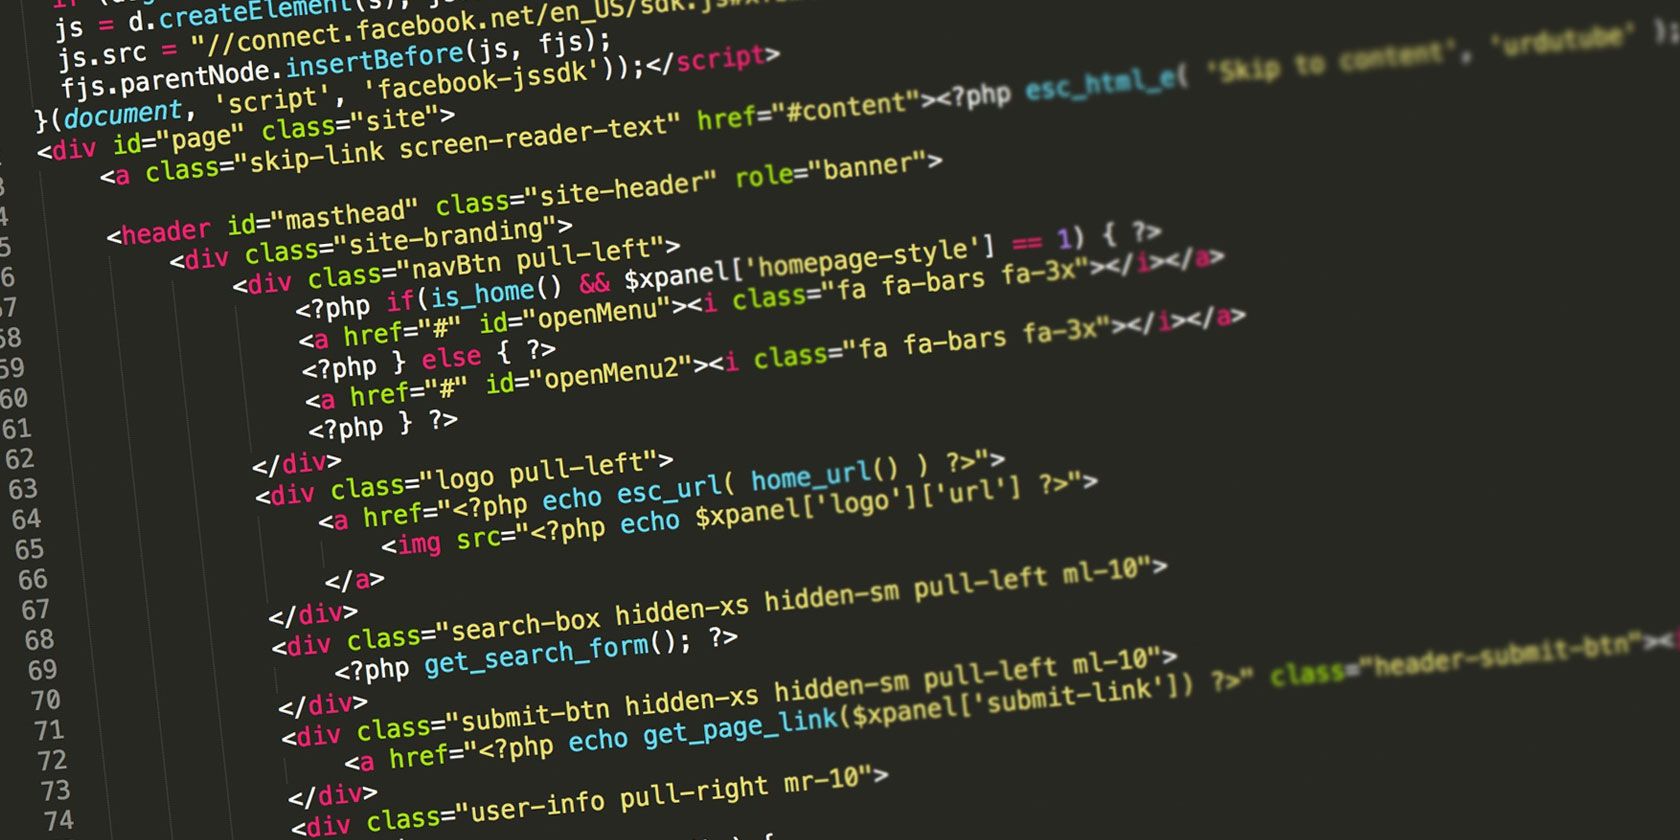
Every website you use relies on HTML. While web developers need skills in JavaScript, Python, CSS, and server-side scripting, HTML holds it all together.
Without HTML, there is no web, so you need to know how to create and edit it. Rather than set up a HTML code testing system on your computer, it’s simpler to test code in a browser.
Whether fiddling with small HTML snippets or full website projects, an online HTML editor is ideal.
Why You Should Use an Online HTML Editor
Using a browser-based HTML editor makes good sense over something like Notepad++ for the following reasons:
Online HTML editors run directly in your web browser
Test your HTML code online—see if the code runs as expected
See real-time web previews—the preview updates as you edit
Streamline your workflow—no more saving, loading in the browser, switching back to the editor, and repeat
Platform agnostic—they run on any device with a web connection.
This last point is very important. It means that you can conceivably develop a web page as easily on a PC as a Chromebook. You might even use an Android tablet, or a $50 computer like the Raspberry Pi.
HTML coding is an accessible, straightforward gateway to understanding programming and development. You constantly need to test your HTML code—what better than live results in your browser window?
Let’s look at some of the best online HTML editors currently available.
CodePen is a “social development environment” for web developers, which basically means it’s an online editor with collaboration features. It offers a simple layout. You’ll find a panel for HTML, a panel for CSS, and a panel for JavaScript, plus one for real-time preview. All panel sizes can be adjusted by dragging the edges around.
You can create “Pens,” which are like individual playgrounds for tweaking web code. Multiple Pens can be grouped together into Collections.
While signup for basic use is free, Private Pens and Collections require a Pro account. This starts at $8/mo and includes asset hosting, embeddable themes, real-time collaboration, and access to CodePen’s full web development IDE.
Many people consider CodePen the best online HTML editor. Try it out to see if it suits your needs.
JSFiddle is pretty much what it sounds like: a sandbox where you can fiddle around with JavaScript. You probably know that JavaScript goes hand in hand with HTML and CSS. This means that with JSFiddle, you can edit all three at once with JSFiddle’s editing interface.
If you want, you can skip the JavaScript altogether.
What’s nice about JSFiddle is that you can add External Requests in the sidebar. This lets you include off-site JavaScript and CSS files for enhancing your HTML. Also useful is the Tidy button, which automatically cleans up your code’s indentation, while clicking Collaborate allows real-time online collaboration.
The only downside is that you must click the Run button to update the preview panel.
Consider JSBin as a simpler and cleaner alternative to JSFiddle. You can edit any combination of HTML, CSS, and JavaScript just by toggling the panels with the top toolbar. For maximum flexibility you can also toggle the preview panel and a console panel as required.
But whereas JSFiddle allows you to link external CSS and JavaScript resources, JSBin limits you to predefined JavaScript libraries. The selection is good though, ranging from jQuery to React to Angular and more.
While JSBin is free and doesn’t require an account, you’ll need a Pro account for advanced features. These include private bins, custom embeds, asset hosting, Dropbox sync, and vanity URLs for pages published through JSBin.
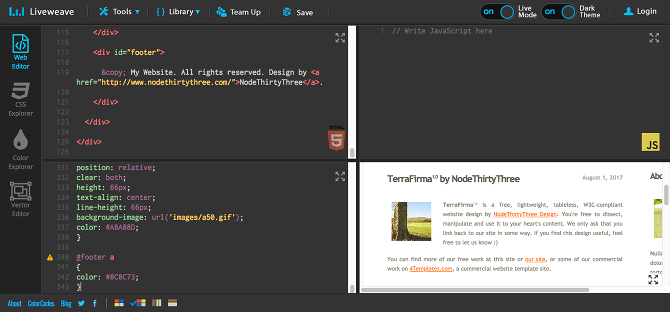
Liveweave is visually similar to the previous editors, with a pleasing user interface. Like JSFiddle, Liveweave allows for real-time collaboration, and like JSBin, it lets you link in predefined third-party resources like jQuery.
But it has a few unique features too. The Lorem Ipsum Generator creates placeholder text at your current cursor position. The CSS Explorer provides a WYSIWYG tool for creating CSS styles and the Color Explorer helps you select perfect colors. Meanwhile, the Vector Editor enables you to create vector graphics for your site.
HTMLhouse is a good option if you only care about HTML (i.e. no CSS or JavaScript). Clean and minimal, it’s split vertically with editing on the left and real-time preview on the right.
Useful is the ability to publish your HTML and share it privately (via private URL) or publicly (added to HTMLhouse’s Browse page). It’s simple but effective, which is exactly where an online HTML editor comes into play and excels.
Note that HTMLhouse was created and is maintained by the folks at Write.as, a distraction-free online writing tool. Keep this in mind if you plan to write your own site content.
Another option HTMLG follows the same pattern of using code and preview panes for HTML. However, this tool doesn’t include CSS and JavaScript within the same unified project. Rather, if you want to edit those, you’ll need to open a new tab and edit them as separate projects.
This makes it ideal for pure HTML tweaks and testing code in your browser; less so if you want to incorporate CSS edits.
Note that there is a 300-word limit if you’re testing full web pages with HTMLG. To increase this, you can sign up to the ad-free premium version, starting from as little as $5.80 a month.
Offering a slightly different take on online HTML editors, Dabblet splits the screen in two, rather than three/four panes. So, you have a view for HTML & Result, and a separate (but linked) view for CSS & Result.
This offers more space, giving a clearer view of the code and the preview. Further, the built-in w3.org HTML and CSS validator highlights any issues.
If you need a clear desktop space to test your site code, this might be the best HTML editor for you.
Use the Best Online HTML Editors to Improve Your Skills
If your only exposure to HTML is what you learned a decade ago, now is the time to catch up. HTML5 released back in 2014 and introduced a handful of new standards and features. Not sure where to start? Check out these essential new HTML5 elements.
If you have an extensive collection of locally-saved media, you’ve probably heard of Plex. Along with Kodi, it’s one of the best apps for managing, watching, casting, and exploring all of your content.
The Plex app can support video, music, and pictures, and works with a dizzying array of formats within each category. It also lets you access your media remotely, even on the free tier.
However, unlike Kodi, Plex is easy to set up and use. While customizing Kodi is a minefield of add-ons, repos, and settings, Plex works straight out of the box. But that doesn’t mean there aren’t some options you should tweak.
Here are the most important Plex settings you need to know about if you want to stream media in the best way possible.
1. Organize Your Plex Agents
Plex can automatically pull in metadata for your content. Although you need to format your Plex media files in a very precise way for it to work, it’s well worth doing.
Of course, Plex can add movie posters and TV episode names, but the metadata goes much deeper. It will know which actors were in a show, which TV channel the program aired on, who directed each movie, and what the various critics on the big-name review sites thought of the content. Once the metadata is added, you can even use it to find related shows, other movies certain actors starred in, and so on.
But none of this will work if you don’t set up your agents correctly. You need to make sure Local Media Assets is set below other metadata sources. Failure to do so will result in Plex using existing local metadata on the file as its primary source. In many cases, this metadata will be incorrect.
To change the order, go to Settings > Settings > Agents. Using the tabs at the top of the screen, head to Movies > The Movie Database. Drag Local Media Assets (Movies) below The Movie Database. Then go to Programmes > TheTVDB and move Local Media Assets (TV) below TheTVDB.
2. Restrict the Upload Speed
One of the best features of Plex is its ability to stream content outside of your network. It has two primary uses: Letting you watch your Plex videos when you’re away from home, and giving server access to friends and family so they can enjoy your library.
Setting up remote access itself is easy. Just head to Settings > Settings > Remote Access and click Enable Remote Access.
However, you might also want to adjust the upload speed. This is especially true if you don’t have a fast upload speed from your ISP, or several people are going to be streaming content at the same time. Restricting the speed will prevent your home network from slowing to a crawl when remote users are tuning in.
Go back to Settings > Settings > Remote Access and scroll down until you get to Internet upload speed. You can set your internet’s maximum speed by populating the next box. Underneath, you can set how much of the maximum capacity Plex is allowed to use. Expand the drop-down menu to make your choice.
3. Manage Plex Transcoding
Plex can transcode your videos so that they are playable on other devices. For example, desktop PCs and laptops normally have powerful processors that can handle most file formats, codecs, resolutions, and subtitles. However, mobile devices and set-top streaming devices may struggle. Therefore, Plex can alter your videos on-the-fly to ensure they are compatible with other gadgets.
The drawback of transcoding is that it’s very CPU-intensive. If your Plex server is running on a non-dedicated computer, you probably don’t want all your CPU’s power to be eaten up. Even if you’ve got a dedicated server, you’ll eventually reach its limits if many items are transcoding at the same time.
The solution is to tweak your transcoder’s settings (Settings > Settings > Transcoder). There are three values you need to know about (click on Show Advanced to see them all):
Transcoder Quality: You can determine the quality of the transcodes using the drop-down menu. The higher the quality, the slower the transcode will be.
Background Transcoding x264 Preset: This setting determines the speed of background transcoding, for example when you’re using Mobile Sync, Cloud Sync, or the Media Optimizer. The slower the transcode, the smaller the file size, and the higher the quality, but the slower the time.
Maximum number of simultaneous transcode sessions: This is the most important setting for the majority of users. Logic dictates that the more simultaneous transcodes you allow, the bigger the strain on your CPU. Consider the power of your CPU, whether it’s a dedicated server, and how many people will be streaming at the same time, and set a number accordingly. It might require some trial and error on your part.
4. Optimize Your Plex Videos
The Optimize feature is best thought of as a “pre-transcoder.” It lets you select certain videos and convert them to another format.
For example, if you know you want to watch Toy Story, Beauty and the Beast, and Batman on your iPad while you’re traveling next week, you can optimize the video files in advance. It means they’ll be instantly ready to play on your chosen device. No further transcoding will be necessary.
Media optimization is also useful if you know lots of people will be watching a video remotely at the same time, as it will ease the pressure on your CPU.
You can optimize an individual show, a series, or even your entire library. To get started, navigate to the content you want to adjust, click on the three horizontal dots, and choose Optimize.
In the new window, you can select whether you want to optimize a certain number of videos or just the unwatched videos. More importantly, you can set the quality of the optimization. You can choose from Optimize for Mobile, Optimize for TV, Original Quality, or Custom. The Custom setting lets you specify a specific device, the resolution, and the bitrate.
If you set up a long list of items to optimize, you can manage the queue by heading to Settings > Status > Conversion. You can manage your already-optimized files in Settings > Manage > Optimized Versions.
5. Set Your Streaming Quality
Each Plex app has its own streaming quality settings. As such, you can choose different setups for your computers, mobile devices, streaming boxes, and so on.
The settings you choose determine the quality and resolution of any video played on the device. The lower the setting, the lower the video quality. However, it will load faster and use less bandwidth. Therefore, it’s worth taking the time to adjust these settings on every Plex client you use.
You have three settings to adjust: Local Quality, Remote Quality, and Online Quality.
Local Quality: Affects any videos watch over your local area network.
Remote Quality: Affects videos you stream from your server when you’re outside your LAN.
Online Quality: Affects the quality of video streamed from online channels and private Plex channels.
Mobile users can also adjust remote network streaming and remote Wi-Fi streaming individually.
6. Optimize the Plex Database
Confusingly, Plex offers two forms of optimization. In addition to optimizing specific titles as discussed earlier, you can also optimize the entire database.
These two processes are not the same thing. By optimizing the Plex database, you can force Plex to clean up unused and fragmented data. It’s important to run the tool every time you make mass edits or change entire libraries—doing so will help the Plex server to run much more smoothly.
You can optimize the Plex database by heading to Settings > Manage > Troubleshooting > Optimize Database. Click the button to begin, and you’ll see an on-screen confirmation once the process is complete.
7. Delete Old Artwork
Downloading artwork is an important part of fine-tuning your Plex experience. Having all of the correct movie posters and series covers makes it much easier to find what you’re looking for.
Plex can download artwork automatically. If you later decide to change the artwork (perhaps because the studio released a new version or because Plex downloaded the wrong one), the old artwork will remain on your server, taking up space.
To get rid of old, unused artwork, head to Settings > Manage > Troubleshooting > Clean Bundles.
More Plex Settings to Tweak
We’ve introduced you to some of the most important Plex settings to adjust if you want to enjoy a smooth Plex experience, as well as offering some case studies for when it’s appropriate to change each setting.
A printer is an essential Mac accessory for work, play, or anything else. But when starting your search, the number of choices can sometimes be overwhelming.
We’re here to help. Here are some of the best printers compatible with your Mac.
The HP Color LaserJet Pro M479fdw is perfect for a small businesses that can print, scan, copy, and fax. Along with Mac compatibility, the printer is perfect for a diverse environment as it can also be used with Linux, Windows, iOS, and Android.
Even without a wireless network, you can connect directly to the printer using Wi-Fi Direct technology. The input tray holds up to 300 sheets of paper. There is also a 50-sheet document feeder that can scan two sides of the page with just a single pass.
The top print speed of both color or black-and-white documents is 28 pages per minute. Using the printer’s 4.3-inch color, you can activate customizable shortcuts to make simplify complicated tasks.
The Epson Expression Photo HD XP-15000 is perfect for photographers who want to print out borderless images from their Mac. The wide-format printer can handle borderless prints from 4 x 6 inches to 13 x 19 inches. The printer can complete a 4×6-inch print in 27 seconds.
Six individual ink tanks help provide color prints with an ultra-wide color gamut and even better black-and-white prints. A 200-sheet front tray automatically supports double-sided printing to help conserve ink. The rear 50-sheet tray holds specialty media like cardstock and photo paper of various sizes. The printer is also compatible with Windows, Android, and iOS devices.
And you’ll never have to worry about running out of ink. The printer is compatible with the Amazon Dash service that will automatically detect low ink levels and generate an Amazon order for a replacement. There’s no subscription charge or cancellation fee for the service.
If you’re on a budget but still want to enjoy the advantages of a laser printer for a Mac, take a look at the Brother Compact Monochrome Laster Printer HL-L2350DW. Made for small spaces, the printer holds up to 250 sheets of paper and can print at up to 32 pages per minute.
For other types of documents, like card stock or envelopes, there is a manual feed slot. Along with wireless connectivity, you can connect the printer to a single computer using a USB cable.
To help save on toner cost, you can select the Toner Save mode and automatic two-sided printing. The printer can also be used with a Linux or Mac computer and iOS device. Similarly, this product also supports the Amazon Dash service, so you’ll always have ink ready to go.
That’s equivalent to 30 ink cartridge sets and lasts up to two years with normal use. The paper tray holds up to 100 sheets, while a dedicated photo paper tray fits 20 sheets of photo paper. Along with printing, the device can scan and copy.
The printer is compatible with Windows, Android, and iOS devices. Even without a computer, you can print directly using the built-in USB and memory card slots.
The Canon Color Image CLASS MF743cdw zips through both printing and scanning documents. The color laser printer can print up to 28 pages per minute and scan 27 pages in 60 seconds.
The large, 5-inch color touchscreen can also help you fax and copy along with many other tasks. Canon’s standard toner cartridges last up to 2,100 pages of color documents and 2,300 pages of black-and-white material.
There is a 250-sheet paper cassette and a 50-sheet multipurpose tray/stack bypass. Both of those fit up to 8.5 x 14-inch legal paper. The printer is compatible with the Amazon Dash service. You can also use a Windows, Android, or iOS device to print.
The HP Tango X is made for anyone who uses their mobile device as much as their Mac. When away from home, you can still print using the HP Smart app for iOS or Android devices. With the app, you can even scan a document and print it from anywhere.
And when you’re done, just cover the small printer with the included linen cover that also doubles as an output tray. Instead of worrying about running out ink, you can subscribe to the HP Instant Ink Delivery Service for a monthly fee.
Whenever the printer is low on ink, you’ll automatically receive a replacement. And, as a nice touch, subscribers can print free photos as large as 5 x 7-inches from their mobile device. The printer is also compatible with Windows.
The Epson Workforce WF-2860 is a small and compact, budget-friendly inkjet option for a Mac. The printer can also copy, scan, and fax documents. Along with a 150-sheet paper tray with automatic double-sided printing, there is a 30-page auto-document feeder to use when copying or scanning documents.
The printer can also be used with Windows, iOS, and Android devices. Alongside your computing device, you can interact with the printer using its built-in 2.4-inch touchscreen. The printer is also compatible with the Amazon Dash ink replenishment service.
Everyone knows Xerox for its copiers, but the company is also well-versed in printers. The Mac-compatible Xerox B210DNI is a compact and wireless black-and-white laser printer. You can expect to see the first page in as fast as 8.5 seconds with a print speed of up to 30 pages per minute.
The budget-friendly printer sports a 250-sheet input tray and a manual feed slot that can handle one sheet of material. You can also use the printer with Windows, iOS, and Android devices.
The Best Printer for Your Mac
As you can see, there is a wide variety of Mac-compatible printers in all price ranges that can help print a treasured photo, school assignment, or pretty much anything else you can imagine.
And if you’re looking to power up Apple’s popular desktop model, we’ve rounded up some of the best iMac accessories.