19 May 2020

Europe to Facebook: Pay taxes and respect our values — or we’ll regulate


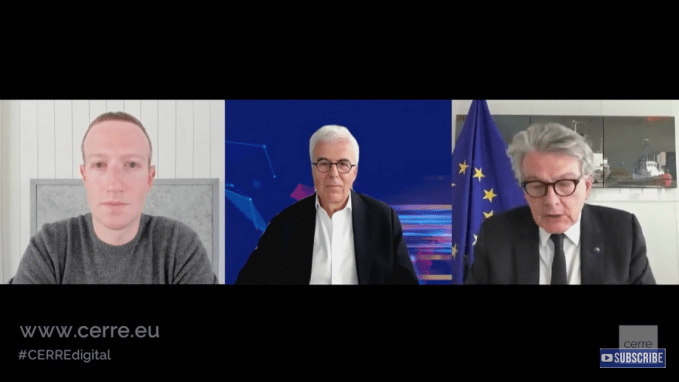
A livestreamed “debate” yesterday between Facebook CEO Mark Zuckerberg and a European commissioner shaping digital policy for the internal market, Thierry Breton, sounded cordial enough on the surface, with Breton making several chummy references to “Mark” — and talking about “having dialogue to establish the right governance” for digital platforms — while Zuckerberg kept it respectful sounding by indirectly addressing “the commissioner”.

But the underlying message from Europe to Facebook remained steely: Comply with our rules or expect regulation to make that happen.

If Facebook chooses to invest in ‘smart’ workarounds — whether for ‘creatively’ shrinking its regional tax bill or circumventing democratic values and processes — the company should expect lawmakers to respond in kind, Breton told Zuckerberg.

“In Europe we have [clear and strong] values. They are clear. And if you understand extremely well the set of our values on which we are building our continent, year after year, you understand how you need to behave,” said the commissioner. “And I think that when you are running a systemic platform it’s extremely important to understand these values so that we will be able to anticipate — and even better — to work together with us, to build, year after year, the new governance.

“We will not do this overnight. We will have to build it year after year. But I think it’s extremely important to anticipate what could create some “bad reaction” which will force us to regulate.”

“Let’s think about taxes,” Breton added. “I have been a CEO myself and I always talk to my team, don’t try to be too smart. Pay taxes where you have to pay taxes. Don’t got to a haven. Pay taxes. Don’t be too smart with taxes. It’s an important issue for countries where you operate — so don’t be too smart.

“‘Don’t be too smart’ it may be something that we need to learn in the days to come.”

Work with us, not against us

The core message that platforms need to fit in with European rules, not vice versa, is one Breton has been sounding ever since taking up a senior post in the Commission late last year.

Although yesterday he was careful to throw his customary bone alongside it too, saying he doesn’t want to have to regulate; his preference remains for cooperation and ‘partnership’ between platforms and regulators in service of citizens — unless of course he has no other choice. So the message from Brussels to big tech remains: ‘Do what we ask or we’ll make laws you can’t ignore’.

This Commission, of which Breton is a part, took up its five-year mandate at the end of last year — and has unveiled several pieces of a major digital policy reform plan this year, including around sharing industrial data for business and research; and proposing rules for certain ‘high risk’ AI applications.

But a major rethink of platform liabilities remains in the works. Though yesterday Breton declined to give any fresh details on the forthcoming legislation, saying only that it would arrive by the end of the year.

The Digital Services Act could have serious ramifications for Facebook’s business which explains why Zuckerberg made time to dial into a video chat with the Brussels lawmaker. Something the Facebook CEO has consistently refused the British parliament — and denied multiple international parliaments when parliamentarians joined forced to try to question him about political disinformation.

The hour-long online discussion between the tech giant CEO and a Brussels lawmaker intimately involved in shaping the future of regional platform regulation was organized by Cerre, a Brussels-based think tank which is focused on the regulation of network and digital industries.

It was moderated by Cerre, with DG Bruno Liebhaberg posing and choosing the questions, with a couple selected from audience submissions.

Zuckerberg had brought his usual laundry list of talking points whenever regulation that might limit the scope and scale of his global empire is discussed — seeking, for example, to frame the only available options vis-a-vis digital rules as a choice between the US way or China.

That’s a framing that does not go down well in Europe, however.

The Commission has long talked up the idea of championing a third, uniquely European way for tech regulation — saying it will put guardrails on digital platforms in order to ensure they operate in service of European values and so that citizens’ rights and freedoms are not only not eroded by technology but actively supported. Hence its talk of ‘trustworthy AI’.

(That’s the Commission rhetoric at least; however its first draft for regulating AI was far lighter touch than rights advocates had hoped, with a narrow focus on so-called ‘high risk’ applications of AI — glossing over the full spectrum of rights risks which automation can engender.)

Zuckerberg’s simplistic dichotomy of ‘my way or the China highway’ seems unlikely to win him friends or influence among European lawmakers. It implies he simply hasn’t noticed — or is actively ignoring — regional ambitions to champion a digital regulation standard of its own. Neither of which will impress in Brussels.

The Facebook CEO also sought to leverage the Cambridge Analytica data misuse scandal — claiming the episode is an example of the risks should dominant platforms be required to share data with rivals, such as if regulation bakes in portability requirements to try to level the competitive playing field.

It was too much openness in the past that led to Facebook users’ data being nefariously harvested by the app developer that was working for Cambridge Analytica, was his claim.

That claim is also unlikely to go down well in Europe where Zuckerberg faced hostile questions from EU parliamentarians back in 2018, after the scandal broke — including calls for European citizens to be compensated for misuse of their Facebook data.

Facebook’s business, meanwhile, remains subject to multiple, ongoing investigations related to its handling of EU citizens’ personal data. Yet Zuckerberg’s only mention of Europe’s GDPR during the conversation was a claim of “compliance” with the pan-EU data protection framework which he also suggested means it’s raised the standards it offers users elsewhere.

Another area where the Facebook CEO sought to muddy the water — and so lobby to narrow the scope of any future pan-EU platform regulations — was around which bits of data should be considered to belong to a particular user. And whether, therefore, the user should have the right to port them elsewhere.

“In general I’ve been very in favor of data portability and I think that having the right regulation to enforce this would be very helpful. In general I don’t think anyone is against the idea that you should be able to take your data from one service to another — I think all of the hard questions are in how you define what is your data and, especially in the context of social services, what is another person’s data?” he said.

He gave the example of friends birthdays — which Facebook can display to users — questioning whether a user should therefore be able to port that data into a calendar app.

“Do your friends need to now sign off and every single person agree that they’re okay with you exporting that data to your calendar because if that needs to happen because in practice it’s just going to be too difficult and no developer’s going to bother building that integration,” he suggested. “And it might be kind of annoying to request that from all of your friends. So where would we draw the line on what is your data and what is your friends is I think a very critical question here.

“This isn’t just an abstract thing. Our platform started off more open and on the side of data portability — and to be clear that’s exactly one of the reasons why we got into the issues around Cambridge Analytica that we got into because our platform used to work in the way where a person could more easily sign into an app and bring data that their friends had shared with them, under the idea that if their friend had shared something with you, for you to be able to see and use that, you should be able to use that in a different app.

“But obviously we’ve seen the downsides of that — which is that if you bring data that a friend has shared with you to another app and that app ends up being malicious then now a lot of people’s data can be used in a way they didn’t expect. So getting the nuance right on data portability I think is extremely important. And we have to recognize that there are direct trade-offs about openness and privacy. And if our directive is we want to lock everything down from a privacy perspective as much of possible then it won’t be as possible to have an open ecosystem as we want. And that’s going to mean making compromises on innovation and competition and academic research, and things like that.”

Regulation that helps industry “balance these two important values around openness and privacy”, as Zuckerberg put it, would thus be welcomed at 1 Hacker Way.

Breton followed this monologue by raising what he called “the stickiness” of data, and pointing out that “access to data is the number one asset for the platform economy”.

“It’s important in this platform economy but — but! — competition will come. And you will have some platforms allowing this portability probably faster than you think,” he said. “So I think it’s already important to anticipate at the end of the day what your customers are willing to have.”

“Portability will happen,” Breton added. “It’s not easy, it’s not an easy way to find an easy pass but… what we are talking about is how to frame this fourth dimension — the data space… We are still at the very beginning. It will take probably one generation. And it will take time. But let me tell you something but in terms of personal data, more and more the customers will understand and will requests that the personal data belongs to them. They will ask for portability one way or the other.”

On “misinformation”, which was the first topic Zuckerberg chose to highlight — referring to it as misinformation (rather than ‘disinformation’ or indeed ‘fakes’) — he had come prepared with a couple of stats to back up a claim that Facebook has “stepped up efforts” to fight fakes related to the coronavirus crisis.

“In general we’ve been able to really step up the efforts to fight misinformation. We’ve taken down hundreds of thousands of pieces of harmful misinformation. And our independent fact-checking program has yielded more than 50M warnings being shown on pieces of content that are false related to COVID,” he said, claiming 95% of the time people are shown such labelled content “they don’t end up clicking through” — further suggesting “this is a really good collaboration”.

(Albeit, back of an envelop math says 5% of 50M is still 2.5 million clicks in just that one narrow example… )

Breton came in later in the conversation with another deflator, after he was asked whether the current EU code of practice on disinformation — a self-regulatory initiative which several tech platforms have signed up for — is “sufficient” governance.

“We will never do enough,” he rejoined. “Let’s be clear. In terms of disinformation we will never do enough, This is a disease of the center. So everything we have done has to be followed.”

“It’s a huge issue,” Breton went on, saying his preference as a former CEO is for KPIs that “demonstrate we’re progressing”. “So of course we need to follow the progress and if I’m not able to report [to other EU institutions and commissioners] with strong KPIs we will have to regulate — stronger.”

He added that platforms cooperating on self regulation in this area gave him reason to be optimistic that further progress could be made — but emphasized: “This issue is extremely important for our democracy. Extremely… So we will be extremely attentive.”

The commissioner also made a point of instructing Zuckerberg that the buck stops with him — as CEO — lightly dismissing the prospect of Facebook’s newly minted ‘oversight board‘ providing any camouflage at all on the decision-making front, after Zuckerberg had raised it earlier in the conversation.

“When you’re a CEO at the end of the day you are the only one to be responsible, no one else… You have an obligation to do your due diligence when you take decisions,” said Breton, after scattering a little polite praise for the oversight board as “a very good idea”.

“Understand what I’m trying to tell you — when you are the CEO of an important platform you have to deal with a lot of stakeholders. So it’s important of course that you have bodies, could be advisory bodies, could be a board of director, it could be any kind of things, to help you to understand what these stakeholders have to tell you because at the end of the day the mission of a CEO is to be able to listen to everyone and then to take the decision. But at the end of the day it will be Mark that will be responsible.”

In another direct instruction, Breton warned the Facebook CEO against playing “a gatekeeper role”.

“Be careful to help our internal market, don’t play a role where you will be a systemic player, the gatekeeper controlling others to play with. Be careful with the democracy. Anticipate what’s going to happen. Be careful with disinformation. It could have a bad impact on what is extremely important for us — including our values,” he said, appealing to Zuckerberg “to work together, to design together the right governance tools and behavior” — and ending with a Silicon Valley-style appeal to ‘build the future together’.

The inescapable point Breton was working towards was just “because something is not prohibited it doesn’t mean that it’s authorized”. So, in other words, platforms must learn to ask regulators for permission — and should not expect any forgiveness if they fail to do this. This principle is especially important for the digital market and the information society at large, Breton concluded.

A particular low point for Zuckerberg during the conversation came earlier, when Liebhaberg had asked for his assessment of the effectiveness of content moderation measures Facebook has taken so far — and specifically in terms of how swiftly it’s removing illegal and/or harmful content. (Related: Last week France became the latest EU country to pass a law requiring platforms quickly remove illegal content such as hate speech.)

Zuckerberg made a nod to his usual “free expression vs content moderation” talking point — before segwaying into a claim of progress on “increasingly proactive” content moderation via the use of artificial intelligence (“AI”) and what he referred to as “human systems”.

“Over the last few years… we’ve upgraded all of our content review systems to now… our primary goal at this point is what percent of the content that’s going to be harmful can our systems proactively identify and take down before anyone even sees that? Some of that is AI and some of that is human systems,” he said, referring to the up to 30,000 people Facebook pays to use their brain and eyes for content moderation as “human systems”.

“If a person has to see it and report it to us we’re not going to catch everything ourselves but in general if someone has to report it to us then that means that we should be doing a bit better in future. So there’s still a lot of innovation to happen here,” Zuckerberg went on, adding: “We’re getting a lot better at this. I think our systems are continually improving.”

His use of the plural of “systems” at this point suggests he was including human beings in his calculus.

Yet he made no mention of the mental health toll that the moderation work entails for the thousands of people Facebook’s business depends upon to pick up the circa 20% of hate speech be conceded its AI systems still cannot identify. (He did not offer any performance metrics for how (in)effective AI systems are at proactively identifying other types of content which human moderates are routinely exposed to so Facebook users don’t have to — such as images of rape, murder and violence.)

Just last week Facebook paid $52M to settle a lawsuit brought by 11,000 current and former content moderators who developed mental health issues including PTSD on the job.

The Verge reported that under the terms of the settlement, every moderator will receive $1,000 which can be spent how they like but which Facebook intends to partly fund medical treatment, such as for seeking a diagnosis related to any mental health issues a moderator may be suffering.


Read Full Article

5 Best Gardening Websites & Apps for Beginners to Garden Anywhere


Gardening apps and websites

Whether you have a house or an apartment, these are some of the best gardening websites, ebooks, and apps to cultivate your own little green patch.

When you have some extra time at home, seize the opportunity to add a little greenery. If you have a garden, you can use it to grow vegetables and herbs, or beautify it with flowers. Growing plants in apartments has been shown to improve mood and mental stability.

These gardening websites and apps have something in them for both beginners and experienced gardeners to reap what they sow.

1. A Way to Garden (Web): One of the Best Gardening Blogs for All Stages

Margaret Roach's A Way to Garden is one of the best gardening websites and blogs on the internet, with plenty of free tools and a podcast too

Margaret Roach, the former editorial director of the Martha Stewart empire, set up a blog and wrote a book to share her gardening secrets. A Way to Garden is one of the most recommended must-read gardening resources on the internet.

The Garden Planting Calculator is a particular favorite on the web. It tells you when to lay seeds for different vegetables, herbs, and flowers. If you need to have a few weeks indoors with them first, you’ll get that calculation too.

A Way to Garden’s “chores by month” is also a popular guide to essential activities based on the season. Roach’s tips apply for the north-eastern USA, so consult the provided regional calendar and adjust accordingly. You’ll also want to take a look at the garden FAQs, where she answers beginner queries on various topics.

Apart from these three resources, A Way to Garden is a treasure-trove of information for gardeners both new and experienced. There’s also a podcast that you can listen to while you’re tending to your little patch.

2. GardenBeast (Ebooks): 7 Free Gardening Ebooks

GardenBeast offers seven free ebooks on gardening, tackling different topics and sharing tips and tricks

Beginners can download seven ebooks for free from GardenBeast in PDF format. You can download one or all, it’s up to you. And you can print these out, load them up on your kindle, or use them for offline reading whenever you want. All it takes is to sign up for the newsletter, but you can always use a disposable email address for that.

The seven books are:

  1. Ultimate Organic Gardening for Beginners
  2. 51 Tips for Green House Gardening
  3. 100 Hints and Tips to Level Up Your Gardening
  4. Herbs 101: Ultimate Guide to Herbs for Beginners
  5. Vegetable Gardening for Beginners
  6. How to Attract Butterflies Into Your Garden
  7. Greener Living for a Greener World

The ebooks range from 16-52 pages, each tackling a different topic as you can see. The 100 Hints and Tips is especially useful for anyone, so download that no matter what. GardenBeast is also a full-fledged online magazine that you can check out for gardening news, resources, and guides.

3. Candide (Android, iOS): The Only Gardening App You’ll Need

Candide is a helpful gardening app to find inspiration and knowledge. In the app, you’ll find places to visit, knowledge of what to plant in your garden, and pictures from the community sharing what’s going on in their gardens.

The app is like a social network for gardening enthusiasts. The main options are share, ask a question, identify a plant, follow, trending, weather, and discover. Ask and Identify are the big winners here. Take a photo of a plant in your garden and the app will answer it. Similarly, ask a question and the community will chip in with their thoughts.

Scrolling the feed, you’ll find inspiration for different gardening projects, as well as tips and tricks. Check Candide’s content for various articles and guides, and along the way, make some friends with a green thumb.

Candide is available in the USA, UK, Ireland, and South Africa. You could download the APK and use it anywhere in the world too, but the information is localized to the above four regions.

Download: Candide for Android | iOS (Free)

4. Apartment Gardening (Ebook): Practical Guide to Gardening in Small Spaces

Apartment Gardening offers practical advice on how to grow a vegetable garden in an apartment or small space

Jami Leigh of YoungWifesGuide.com wrote the go-to ebook for beginners who want to garden in an apartment or any small space. The ebook, titled “Apartment Gardening: A practical guide to growing vegetables in small spaces,” is widely cited and recommended across the internet.

The guide is for those just starting out, so it sticks to what matters: staying on budget, keeping it simple and practical for newcomers, and being mindful of space. You will learn how to pick the right area, soil, and seed for your apartment, sowing and harvesting patterns, and how to take care of the plants.

The guide is all about growing vegetables that you can eat. Once you’ve mastered that, look around the internet for other plants to grow in your apartment.

The 94-page book is available as a free PDF on her website, which you can download through the link below. You can also pay a small fee to get the book and additional worksheets.

Download: Apartment Gardening from YoungWifesGuide (PDF)

5. Charles Dowding (Web, YouTube): Learn the ‘No Dig’ Method of Gardening

Charles Dowding has been writing about gardening since the 1980s. He pioneered the “No Dig” method, which is all about disturbing the soil as little as possible. Dowding’s philosophy is that organisms in the soil will allow for natural aeration and drainage if you let them do what they do best. So by disturbing the soil less and feeding the organisms, you can adopt more sustainable and ecological gardening methods.

Dowding’s YouTube channel is full of fantastic videos about the concept and other gardening tips. Check out the short video above to get a 3-minute explanation of the technique from the man himself. If the No Dig method sounds interesting and you have questions, he probably answered it in the FAQs.

Start with Dowding’s beginner’s guide to the no dig method. While he is based in the UK, he offers advice on how to adapt the practices in any conditions. Dowding has a relaxing style in his YouTube videos, making gardening feel more accessible.

The Best Landscape and Garden Design Tools

The best gardening websites and apps will give you all the information you need, but when it comes time to implement it, you still need to do a lot of calculations. For planning your garden patch, calculating the sow patterns, and other estimates, turn to technology.

Try these best free online landscape and garden design tools to get started.

Read the full article: 5 Best Gardening Websites & Apps for Beginners to Garden Anywhere


Live Intraday Trading on 19-May-2020 (Profit 5200)

Live Intraday Trading on 19-May-2020 (Profit 5200)

Please click on the following link to view full post.

https://intradayguruji.blogspot.com/2020/05/live-intraday-trading-on-19-may-2020.html

Via http://intradayguruji.blogspot.com

You Can Now Make Your Own Facebook Avatar


Facebook has launched Avatars in the US. This feature has been available in other parts of the world for several months, but if you’re American you can also now make your own Facebook Avatar. And in this short article, we explain how to do just that.

What Are Facebook Avatars?

Avatars are graphical representations of users, and an alternative to real-life photographs. Avatars have been a thing for as long as the internet existed, with people choosing an image they want to represent themselves online.

Facebook Avatars are the latest manifestation of this craze. And they are essentially a cartoon version of yourself you can use on Facebook. Once you have created your Facebook Avatar you can use one of the many Avatar stickers to comment on posts.

How to Make Your Facebook Avatar

To make your own Facebook Avatar, just do the following:

  1. Open the Facebook app on Android or iOS.
  2. Tap on the three horizontal lines in the corner of the screen.
  3. Scroll down to “See More” and tap on it.
  4. Tap on “Avatars” (if you can’t see it, you haven’t got access yet).
  5. Tap “Next” and then “Get Started”.
  6. Create your avatar by tapping on each section in turn.
  7. You can click back on any section at any time.
  8. When you’re happy with your choices, tap the check mark in the top-right.
  9. Tap “Next” and then “Done”.
  10. Tap the arrow sign in the top-right to show your Facebook Avatar off.

You can use your Facebook Avatar as your profile picture, share it to your feed, or use it when commenting on other people’s posts. To do that, tap the smiley face next to the GIF icon and then the avatar icon. You can then choose the perfect avatar sticker.

You can modify your Facebook Avatar at any time by tapping on the “Avatars” section in the menu. This time, Facebook will load up your existing avatar, so just click on the pencil icon to edit your avatar. You can also delete your avatar by clicking the trash icon.

Facebook Avatars Are the New Bitmoji

Facebook’s Avatars aren’t exactly an original idea. People were making Yahoo avatars over a decade ago, and then there’s Snap’s Bitmoji. So, once you have made your own Facebook Avatar, you should learn all about Bitmoji, and how to make your own.

Read the full article: You Can Now Make Your Own Facebook Avatar


Read Full Article

How to Optimize Windows 10 for Gaming and Performance


optimize-windows-10-gaming

Windows 10 is a great OS for gamers, mixing native games, support for retro titles, and even Xbox One streaming. But it isn’t perfect straight out of the box.

Some tweaks are required to enjoy the best gaming experience Windows 10 has to offer. Here are several ways to optimize your Windows 10 PC for gaming.

Unlock the "Windows Keyboard Shortcuts 101" cheat sheet now!

This will sign you up to our newsletter

Enter your Email

1. Optimize Windows 10 With Gaming Mode

Optimize Windows 10 for better gaming performance

Looking for another option to squeeze the best gaming performance out of Windows 10?

Later releases of the operating system feature a gaming mode, built-in optimizations for Windows 10 gamers. To find out more:

  1. Press Windows key + I
  2. Type game mode
  3. Click Game Mode settings or Turn on Game Mode
  4. On the Gaming screen, click Game Mode
  5. Switch to On to use Game Mode

If your PC supports Game Mode, resources will be managed to achieve the optimum frame rate. Additionally, Windows Update will be suspended.

While this is one way to improve gaming performance on Windows 10, Game Mode is not perfect. Keep reading for more Windows 10 gaming tweaks.

2. Disable Nagle’s Algorithm

Nagle’s algorithm essentially bundles data packets at the cost of a smoother internet connection. It’s useful but having Nagle’s algorithm enabled on your computer may contribute to latency issues when playing games online.

To disable this and improve gaming performance on Windows 10, start by checking your IP address:

  1. Hit Windows key + X
  2. Select Windows PowerShell
  3. Enter ipconfig
  4. Look for “IPv4 address” to identify your PC’s IP address

With the IP address noted, edit the Windows Registry:

  1. Click Start
  2. Type regedit
  3. Select Registry Editor (Tread carefully when fiddling with the Windows Registry)

In the address bar, copy and paste the following path:

HKEY_LOCAL_MACHINE\SYSTEM\CurrentControlSet\Services\Tcpip\Parameters\Interfaces

In the left-hand pane, you’ll see a collection of folders, with filenames comprised of letters and numbers. To access the correct file, match your IP address with the one listed against DhcpIPAddress in one of these folders.

Disable Nagle's Algorithm for better online gaming network speeds

When you find your matching folder:

  1. Right-click on the folder
  2. Select New > DWORD (32-bit) Value
  3. Name this TcpAckFrequency
  4. Click OK
  5. Select New > DWORD (32-bit) Value again
  6. Name this one TCPNoDelay.
  7. Double-click on each and set their parameters to 1

Doing so disables Nagle’s Algorithm. If you run into any problems, reset their parameter values to 0 and they will be disabled.

3. Optimize Windows 10 Online Gaming With Faster DNS

If you’re playing online multiplayer or relying on a remote server for Windows 10 gaming, network traffic can cause problems.

While upgrading to faster internet can help, it’s quicker and cheaper to just make some networking tweaks.

  1. Hit Windows + I to open Settings
  2. Find Network and Internet > Change Adapter Settings.
  3. Right-click on your wireless network
  4. Select Properties
  5. Highlight Internet Protocol Version 4.
  6. Make a note of the two DNS entries for future reference
  7. Replace them with 1.1.1 and 1.0.0.1.
  8. Click OK, then Close.
  9. Restart your default browser

Your internet should now be faster, which will help with online gaming.

4. Disable Automatic Updates for Better Windows 10 Gaming

Windows 10 will automatically update your OS and schedule a restart without your permission. While this feature doesn’t activate often, you never want to be caught unaware and risk your game save.

Not only can automatic updates restart Windows without warning, downloading updates in the background will limit your network connectivity.

While you cannot disable automatic restart, it can be delayed. To reduce the chance of Windows Update downloads interrupting your gaming performance:

  1. Open Settings with Windows key + I
  2. Click Update and Security > Windows Update
  3. Look for Advanced options then click Update Options
  4. Disable Restart this device as soon as possible when a restart is required to install an update.
  5. Enable Show a notification (Windows will give plenty of warning when the system is going to restart following an update)
  6. Use Pause updates to delay installation of updates for up to 35 days

Limit Windows Update to improve game performance

By specifying when you’ll be using Windows 10, you can prevent Windows Updates downloading and installing during active hours.

5. Disable Notifications in Windows 10

The Focus Assist feature in Windows 10 lets you specify how and when you receive notifications.

Popups and chimes usually accompany notifications, but these can interrupt games. The solution is to minimize the impact of notifications, using Focus Assist. It’s basically a feature that lets you manage what level of focus you devote to your work.

  1. Hit Windows + I to open Settings
  2. Click System > Focus Assist
  3. Select Alarms Only to hide all other notifications
  4. Close the Settings screen

Disable notifications to improve Windows 10 gaming

6. Prevent Steam Auto-Updating Games

If you use Windows to play games, you’re probably buying and installing games via Steam.

One of the largest annoyances with Steam is its update feature. This blocks you from preventing automatic updates across all your games. This may eat up memory by updating games you don’t play or limit your network connectivity with background updates.

To prevent Steam from updating games in the background:

  1. Launch the Steam client
  2. Open Steam > Settings > Downloads
  3. Uncheck Allow downloads during gameplay

Tweak Steam for Windows 10 gaming optimizations

You can also prevent Steam from downloading updates for largely unused games:

  1. Open the Steam Library
  2. Right-click an underused but installed game
  3. Select Properties and find Automatic Updates
  4. Change Always keep this game up to date to Only update this game when I launch it

Disable automatic updates in Steam for optimized Windows 10 gaming

With Steam correctly optimized, Windows 10 will be ready for AAA gaming.

7. Tweak Windows 10 Visual Effects for Game Improvements

Your graphical user interfaces (GUI) can be a hindrance to your processing power. By default, your Windows 10 appearance settings are set to impress.

Games running in the foreground may conflict with a shiny GUI running in the background. Adjust these settings to optimize Windows 10 for gaming performance.

  1. Open Settings with Windows key + I
  2. Type performance
  3. Select Adjust the appearance and performance of Windows.
  4. In the settings box, select Adjust for best performance
  5. Click Apply
  6. Click the Advanced tab
  7. Ensure that Adjust the best performance of is set to Programs
  8. Apply again, then OK to confirm

8. Tweak Your Mouse Settings for Windows 10 Gaming

Could you mouse be impacting gaming performance on Windows 10? To find out, it’s a smart idea to optimize your mouse settings. A feature called pointer precision (AKA mouse acceleration) can impact how your mouse performs in games. Disabling this can help to optimize gaming in Windows 10.

  1. Open Settings
  2. Click Devices > Mouse
  3. View the Pointer Options tab
  4. Clear the Enhance pointer precision checkmark
  5. Click Apply
  6. Click OK to exit—you might also adjust the pointer speed to suit

Disable mouse enhancements to optimize Windows 10 gaming

If gaming has improved, your mouse was almost certainly slowing things down.

9. Max Power Plan to Improve Windows 10 Gaming Performance

Power options are often ignored due to their supposedly negligible effect. Some gamers claim adjusting for higher performance works, while others fail to notice any difference changing their PC power settings.

The only way to know for sure is to test it out on your PC. To change your power settings:

  1. Open Settings
  2. Type power
  3. Click > Power & sleep settings > Additional power settings
  4. Select the high-performance option
  5. If none is available, use Create a power plan to configure a new, custom power plan

This option will allow your PC to perform better at the cost of higher energy consumption and temperature levels. For this reason, it’s better to activate this Windows 10 optimization on the desktop rather than laptop PCs.

10. Keep Your Windows 10 Drivers Updated for Improved Gaming Performance

Your GPU (Graphics Processing Unit) is the core of your PC gaming experience. However, the GPU requires the latest Windows driver to keep it working faster and better.

All graphics cards, no matter how old or new, benefit from continually updated drivers.

To check your GPU name and specs:

  1. Right-click Desktop
  2. Select Display settings > Advanced display settings
  3. At the bottom, find Display adapter properties

Optimize Windows 10 display settings for improved gaming

You can download driver updates through this window under Properties > Driver > Update Driver. Alternatively, visit the manufacturer’s website to ensure the driver is up to date.

Manufacturers will often provide free gaming and update software to keep your drivers up to date automatically. An example is AMD’s Gaming Evolved client.

For optimal performance, it is highly recommended that you install the chipset and LAN drivers for your motherboard as well. Since these are crucial for optimal gaming performance, this makes sense.

The easiest method to check chipset drivers is to open Windows PowerShell (right-click Start to find it) and enter:

wmic baseboard get product,Manufacturer,version,serialnumber

Your motherboard’s manufacturer and the product name will appear in the command prompt.

List your manufacturer and product name to search for your drivers online. You should find the necessary software on the Support page of the manufacturer’s website.

Along with the chipset drivers, you will also find your on-board LAN drivers for an optimal internet connection.

11. Install DirectX 12 to Optimize for Gaming

DirectX 12, the latest version of Microsoft’s popular API tool, is a key element of Windows 10 gaming.

It delivers support for multiple GPU and CPU cores, better frame rates, lowered power consumption and enhanced graphical effects.

To check if you have the latest version of DirectX:

  1. Open Windows PowerShell
  2. Type dxdiag
  3. Tap Enter

Moments later, you’ll see the DirectX Diagnostic Tool.

Ensure DirectX 12 is installed to ensure game optimizations for Windows 10

Don’t have DirectX 12 installed? There’s a small chance this can happen if you have upgraded from Windows 8.1. Fix this by:

  1. Opening Settings with Windows key + I
  2. Select Update and security
  3. Find Windows Update > Check for updates
  4. Wait while the updates install

DirectX12 will automatically optimize many gaming settings in Windows 10.

Optimize Windows 10 for Gaming With These 11 Tweaks

Windows 10 is a legitimate delight for the modern gamer (and now, so is Linux, thanks to these technologies and services that have saved gaming on Linux.)

With a towering game selection, Xbox One compatibility and software specifically designed for gaming, it’s clear the gamer community has a special place in Windows 10’s future. However, nothing’s perfect. Reach closer to gaming perfection with these Windows 10 gaming optimizations:

  1. Windows 10 Gaming Mode
  2. Disable Nagle’s Algorithm
  3. Use faster DNS servers
  4. Disable automatic updates
  5. Disable Notifications in Windows 10
  6. Prevent automatic updates from Steam
  7. Tweak visual effects for performance
  8. Adjust mouse settings to improve gaming speeds
  9. Use maximum power settings
  10. Keep drivers up to date
  11. Install DirectX 12

Gaming on your laptop? You’ll benefit from these extra tips to improve gaming performance on your Windows 10 laptop. Do you also need a special router for a better gaming experience? Let’s see if gaming routers are worth it.

Read the full article: How to Optimize Windows 10 for Gaming and Performance


Read Full Article

How to Use and Customize a Third-Party Keyboard on Your Mac


third-party-keyboard-mac

Apple offers two flavors of external keyboard to use with your Mac: the Magic Keyboard and the Magic Keyboard with Numeric Keypad. Despite their names, neither is particularly exciting. So you may want to set up a third-party keyboard to use instead.

There are a lot of excellent third-party keyboards available and all of them should connect to your Mac over USB or Bluetooth. But even if your external keyboard connects without any problems, you still need to customize and remap the layout to make sure all the keys work how you want them to.

Here’s all you need to know about using third-party keyboards on Mac, including how to set them up for maximum productivity.

Using a Third-Party Keyboard With Your Mac

Modern Macs support nearly all USB and Bluetooth devices. So any USB or Bluetooth keyboard should be compatible—at least for basic features like typing standard keys. Special media keys may not work, but we’ll show you some apps you can use to fix them later.

Advanced features on more technical keyboards are also less likely to work with your Mac. That said, the situation is improving with popular manufacturers. For example, the Razer Synapse software that allows for macro recording on Razer keyboards is available for Mac these days.

For the most part, you can use any third-party keyboard you find around the house and there’s a good chance it’ll work with your Mac. If you’re planning to buy a new keyboard instead, take a look at the best alternatives to the Magic Keyboard for macOS-focused options.

Connecting a Third-Party Keyboard to Your Mac

To connect a USB keyboard, simply plug it in and macOS will detect it. If it doesn’t work, visit the manufacturer’s website to check for any special drivers you need to install. Make sure you get the Mac driver and restart your computer after installing it.

For Bluetooth keyboards, navigate to System Preferences > Bluetooth on your Mac. Then turn on the keyboard and follow the manufacturer’s instructions to put it in discovery mode. Once it appears on your Mac, click the Pair button to connect it. Again, you may need to download special drivers from the manufacturer if it doesn’t work right away.

Mac Connect Bluetooth keyboard

Customize Basic Keyboard Settings on Your Mac

You can customize your external keyboard and remap certain keys by going to System Preferences > Keyboard on your Mac. It’s especially important to do this if you’re using a Windows keyboard to make sure the keys behave how you want them to.

Click Change Keyboard Type to help your Mac detect what kind of keyboard you’re using: Razer, Steelseries, Logitech, and so on. Follow the keyboard wizard that appears, asking you to press various keys. Based on these results, you Mac will set up the default settings for your keyboard layout.

Mac Keyboard preferences

Click Modifier Keys to rearrange the keys that combine with others to perform certain actions. From left to right, the modifier keys on an Apple keyboard read Control, Option, Cmd whereas non-Apple keyboards usually read Control, Windows, Alt.

By default, macOS registers the Windows key as Cmd and the Alt key as Option. So you may want to remap the modifier keys for your external keyboard to match Apple’s keyboard layout and keep the order of these modifier keys the same. This is especially useful if you get confused switching between Apple and third-party keyboards.

Mac change modifier keys

Consider enabling the checkbox for Use F1, F2, etc. keys as standard function keys if you have a third-party keyboard that shares media keys with function keys.

You may also want to alter the Key Repeat (how quickly a key repeats when held down) and the Delay Until Repeat (how long before the key repeating kicks in) settings. The default setting is fine for most users, however.

Customize Your Keyboard Layout on a Mac

If you use a non-traditional keyboard layout, such as Dvorak or Colemak, or if you have a foreign language keyboard, then you can set that up in the Input Sources section. Click the plus Add (+) button to add as many layouts as you want. You can’t define your own layouts, but Apple provides many layouts across dozens of languages.

Mac Input Sources Colemak

If you frequently switch between keyboard layouts, enable the Show Input menu in menu bar checkbox. This creates a menu bar icon that shows the layout you’re currently using. You can also click on it to quickly switch to other layouts you’ve set up.

Use Karabiner for More Keyboard Customization on Mac

If you need to tweak your keyboard even further than System Preferences allows, you may want to install Karabiner. Since Karabiner is open-source software released under the Public Domain license, it’s absolutely free to use.

With Karabiner, you can remap any keys on your external keyboard so your Mac sees them as other keys. For example, if you don’t use Caps Lock, you could use Karabiner to turn it into a second Delete key to use with your left hand. You can remap any key to any other key with Karabiner, including modifiers, arrows, and media buttons.

Mac Karabiner Preferences

Most third-party keyboards—except Razer keyboards—don’t have the Fn key you usually find on a Mac. But with Karabiner, you can remap another key to use as Fn. It also lets you remap your function keys to use as media keys, just like a standard Apple keyboard.

Download: Karabiner for macOS (Free)

Use BetterTouchTool to Create Keypress Sequences

If Karabiner isn’t enough for your customization needs, check out the excellent Mac productivity app BetterTouchTool instead. Although this app is best known for creating custom trackpad gestures, BetterTouchTool has a lot of keyboard customization options as well.

With BetterTouchTool, you can trigger system-level actions using keyboard shortcuts or keypress sequences. These actions include toggling Do Not Disturb, centering windows, changing brightness, sleeping the display, and more.

You can also set up new keyboard shortcuts or keypress sequences to trigger other shortcuts and sequences. For example, if you’d rather double-tap the Cmd button to copy text, you could set up that sequence to trigger the Cmd + C shortcut.

BetterTouchTool Mac

Best of all, you can create keyboard shortcuts and keypress sequences either for global use across all apps or only when specific apps are in focus.

BetterTouchTool is available as a 45-day free trial. If you like it, buy a two-year license for $8.50 or a lifetime license for $20.50.

Download: BetterTouchTool for macOS ($8.50, free trial available)

Make the Most of Your Keyboard With Custom Shortcuts

Apple’s official keyboard has plenty of supporters. But you can get many more features and better mechanical keys from a third-party alternative, like Razer. Since you can use the tools above to customize a third-party keyboard for your Mac, there’s no reason to spend a lot of money on a Magic Keyboard unless you really like the design.

Whatever external keyboard you settle on, you don’t need to settle with the standard keyboard shortcuts on your Mac. Find out how to create custom Mac keyboard shortcuts to boost your productivity, no matter what keyboard you use.

Read the full article: How to Use and Customize a Third-Party Keyboard on Your Mac


Read Full Article

How to Use Google Calendar for School: Organize Your Class Schedule


free-calendars-google

One of the most difficult parts of college, besides the homework, of course, is managing a complex and ever-changing schedule. Between classes, extracurricular activities, and a part-time job, you are extremely busy.

An excellent way to start your semester off or even organize it partway is to leverage free tools to help you manage everything on your plate. In this article, you’ll see how to manage your class schedule and get organized for the semester with Google Calendar.

Get Your Schedules and Mark Important Dates

Before you can get organized with Google Calendar, you need to get all your schedules together. Start by locating an official copy of your semester course schedule. You also want schedules for any extracurricular activities, work, or events you plan to participate in during the term.

Get as much information as you can for each of your events to make your schedule as robust as possible. This includes dates, durations, locations, required textbooks, and even teachers. Don’t be afraid to include too much information in this step because you can always remove it later.

And for additional tools, check out these checklist and planner templates just for students.

How to Make a Class Schedule Calendar

Head to Google Calendar, sign in, and start by creating a specific calendar to hold your class schedule. Using an individual calendar gives you the option of toggling it on or off, which can be handy if you have a lot of events.

  1. Click the Main Menu button on the top left if your sidebar is hidden.
  2. Go to Other calendars, click the plus sign, and select Create New Calendar.
  3. Give your calendar a Name, Description, and optionally choose a different Time Zone if needed.
  4. Click Create Calendar.

Google Calendar Create Calendar

When you click the arrow on the top left, you’ll be back on your main calendar page and should see your new calendar in the sidebar. If you want to change the color, click the Options button (three-dots) that appears when you move your cursor over the calendar. Then pick a new color from the palette.

Google Calendar Change Color

How to Add Classes to Google Calendar

The next step is to add your classes to Google Calendar. Head to a date on the calendar when your first class begins and click. This will open the new event window.

Start from the top and add the course Title, choose Event, and then add the start and end times with the Add Time button.

You likely won’t use the Add guests or Add Google Meet options, but you may want to include your school’s Location and add a Description to contain your instructor’s name, the room number, and other pertinent details for the class.

Be sure to choose your class schedule calendar from the dropdown list and then click Save.

Google Calendar New Class Event

Alternatively, you can choose More Options to customize your class event further with the options below. Or you can hit Save now and customize it later by clicking the event on your calendar and selecting Edit Event.

Make Your Classes Repeat

Since your classes will occur regularly, you’ll want to make this a repeating event.

At the top, below the class title, you’ll see Does not repeat. Click that dropdown box and you’ll see some quick options you can pick from like Daily and Weekly on [specific day]. If one of these applies, go ahead and select it but if not, click Custom.

Now you can pick the exact days that this class repeats each week. And at the bottom, you can enter an end date, so the class will stop showing up on your calendar when that day comes.

Google Calendar Repeat Class Event

Click Save when you finish.

Keep adding calendar events and customizing them until your schedule is complete. Don’t forget to include things like your extracurricular activities or work schedule.

Set Up Google Calendar Notifications

A terrific feature of Google Calendar is its notifications. This helps you remember you have a class at a certain time, so you won’t forget, and you won’t (or shouldn’t) be late. You can create notifications for individual class events or for the entire school calendar.

Set Up Event Notifications

If you want to set up different notifications depending on when the class occurs, you can create individual event notifications. Select the event on your calendar and click Edit Event.

On the event detail page, click Add Notification. Select either Notification or Email in the first dropdown box, depending on how you want to receive your alert. Then choose how far in advance of your class you’d like to be notified.

You can add more than one notification too. For example, you can receive an alert one hour before your class starts and another 10 minutes before the start time. Just click Add Notification for each additional alert you’d like to create.

Google Calendar Event Notification

Click Save if you’re finished. You’ll see a popup message asking if you want to change only that event or the others you created for that repeating class. You’ll likely choose the second option for This and following events so that you’ll receive the notification for that class each time. Click OK.

Set Up Calendar Notifications

If you would rather create notifications for your entire school calendar, this is just as simple. And this way, you’ll receive a notification for any event on your calendar, whether a class, activity, or work shift.

Click the Options button next to the calendar and pick Settings and Sharing. Scroll down and you’ll see a few sections for Event Notifications, All-Day Event Notifications, and Other Notifications.

For Event and All-Day Notifications, click Add Notification, choose Notification or Email, and enter the timing for the alert. You can add more than one by clicking Add Notification.

Google Calendar Event and All Day Notifications

For Other Notifications, you can simply choose to receive an email to your connected Gmail account for each of the items listed such as new events, canceled events, or your daily agenda.

Google Calendar Other Notifications

Access Google Calendar On-The-Go

You can always access your calendar from any web browser. But if you’re out and about, you can check out your class schedule in the Google Calendar app on your mobile device.

The Google Calendar app on Android and iOS lets you view and edit your schedule and classes easily. And best of all, it’s available for free.

In addition, you can add attachments. So if you need a paper you wrote for a class, you can attach it to that class event in the app.

Download: Google Calendar for Android | iOS (Free)

Organize Your Semester With a Google Calendar Class Schedule

Although it takes a little time to put it all together, having your school schedule online and on your devices can be a great asset throughout your semester.

For more, here are several free calendars you can add to your Google Calendar and various ways to make Google Calendar your Windows desktop calendar.

Image Credit: Evan Wondrasek/Flickr

Read the full article: How to Use Google Calendar for School: Organize Your Class Schedule


Read Full Article

How to Optimize Windows 10 for Gaming and Performance


optimize-windows-10-gaming

Windows 10 is a great OS for gamers, mixing native games, support for retro titles, and even Xbox One streaming. But it isn’t perfect straight out of the box.

Some tweaks are required to enjoy the best gaming experience Windows 10 has to offer. Here are several ways to optimize your Windows 10 PC for gaming.

Unlock the "Windows Keyboard Shortcuts 101" cheat sheet now!

This will sign you up to our newsletter

Enter your Email

1. Optimize Windows 10 With Gaming Mode

Optimize Windows 10 for better gaming performance

Looking for another option to squeeze the best gaming performance out of Windows 10?

Later releases of the operating system feature a gaming mode, built-in optimizations for Windows 10 gamers. To find out more:

  1. Press Windows key + I
  2. Type game mode
  3. Click Game Mode settings or Turn on Game Mode
  4. On the Gaming screen, click Game Mode
  5. Switch to On to use Game Mode

If your PC supports Game Mode, resources will be managed to achieve the optimum frame rate. Additionally, Windows Update will be suspended.

While this is one way to improve gaming performance on Windows 10, Game Mode is not perfect. Keep reading for more Windows 10 gaming tweaks.

2. Disable Nagle’s Algorithm

Nagle’s algorithm essentially bundles data packets at the cost of a smoother internet connection. It’s useful but having Nagle’s algorithm enabled on your computer may contribute to latency issues when playing games online.

To disable this and improve gaming performance on Windows 10, start by checking your IP address:

  1. Hit Windows key + X
  2. Select Windows PowerShell
  3. Enter ipconfig
  4. Look for “IPv4 address” to identify your PC’s IP address

With the IP address noted, edit the Windows Registry:

  1. Click Start
  2. Type regedit
  3. Select Registry Editor (Tread carefully when fiddling with the Windows Registry)

In the address bar, copy and paste the following path:

HKEY_LOCAL_MACHINE\SYSTEM\CurrentControlSet\Services\Tcpip\Parameters\Interfaces

In the left-hand pane, you’ll see a collection of folders, with filenames comprised of letters and numbers. To access the correct file, match your IP address with the one listed against DhcpIPAddress in one of these folders.

Disable Nagle's Algorithm for better online gaming network speeds

When you find your matching folder:

  1. Right-click on the folder
  2. Select New > DWORD (32-bit) Value
  3. Name this TcpAckFrequency
  4. Click OK
  5. Select New > DWORD (32-bit) Value again
  6. Name this one TCPNoDelay.
  7. Double-click on each and set their parameters to 1

Doing so disables Nagle’s Algorithm. If you run into any problems, reset their parameter values to 0 and they will be disabled.

3. Optimize Windows 10 Online Gaming With Faster DNS

If you’re playing online multiplayer or relying on a remote server for Windows 10 gaming, network traffic can cause problems.

While upgrading to faster internet can help, it’s quicker and cheaper to just make some networking tweaks.

  1. Hit Windows + I to open Settings
  2. Find Network and Internet > Change Adapter Settings.
  3. Right-click on your wireless network
  4. Select Properties
  5. Highlight Internet Protocol Version 4.
  6. Make a note of the two DNS entries for future reference
  7. Replace them with 1.1.1 and 1.0.0.1.
  8. Click OK, then Close.
  9. Restart your default browser

Your internet should now be faster, which will help with online gaming.

4. Disable Automatic Updates for Better Windows 10 Gaming

Windows 10 will automatically update your OS and schedule a restart without your permission. While this feature doesn’t activate often, you never want to be caught unaware and risk your game save.

Not only can automatic updates restart Windows without warning, downloading updates in the background will limit your network connectivity.

While you cannot disable automatic restart, it can be delayed. To reduce the chance of Windows Update downloads interrupting your gaming performance:

  1. Open Settings with Windows key + I
  2. Click Update and Security > Windows Update
  3. Look for Advanced options then click Update Options
  4. Disable Restart this device as soon as possible when a restart is required to install an update.
  5. Enable Show a notification (Windows will give plenty of warning when the system is going to restart following an update)
  6. Use Pause updates to delay installation of updates for up to 35 days

Limit Windows Update to improve game performance

By specifying when you’ll be using Windows 10, you can prevent Windows Updates downloading and installing during active hours.

5. Disable Notifications in Windows 10

The Focus Assist feature in Windows 10 lets you specify how and when you receive notifications.

Popups and chimes usually accompany notifications, but these can interrupt games. The solution is to minimize the impact of notifications, using Focus Assist. It’s basically a feature that lets you manage what level of focus you devote to your work.

  1. Hit Windows + I to open Settings
  2. Click System > Focus Assist
  3. Select Alarms Only to hide all other notifications
  4. Close the Settings screen

Disable notifications to improve Windows 10 gaming

6. Prevent Steam Auto-Updating Games

If you use Windows to play games, you’re probably buying and installing games via Steam.

One of the largest annoyances with Steam is its update feature. This blocks you from preventing automatic updates across all your games. This may eat up memory by updating games you don’t play or limit your network connectivity with background updates.

To prevent Steam from updating games in the background:

  1. Launch the Steam client
  2. Open Steam > Settings > Downloads
  3. Uncheck Allow downloads during gameplay

Tweak Steam for Windows 10 gaming optimizations

You can also prevent Steam from downloading updates for largely unused games:

  1. Open the Steam Library
  2. Right-click an underused but installed game
  3. Select Properties and find Automatic Updates
  4. Change Always keep this game up to date to Only update this game when I launch it

Disable automatic updates in Steam for optimized Windows 10 gaming

With Steam correctly optimized, Windows 10 will be ready for AAA gaming.

7. Tweak Windows 10 Visual Effects for Game Improvements

Your graphical user interfaces (GUI) can be a hindrance to your processing power. By default, your Windows 10 appearance settings are set to impress.

Games running in the foreground may conflict with a shiny GUI running in the background. Adjust these settings to optimize Windows 10 for gaming performance.

  1. Open Settings with Windows key + I
  2. Type performance
  3. Select Adjust the appearance and performance of Windows.
  4. In the settings box, select Adjust for best performance
  5. Click Apply
  6. Click the Advanced tab
  7. Ensure that Adjust the best performance of is set to Programs
  8. Apply again, then OK to confirm

8. Tweak Your Mouse Settings for Windows 10 Gaming

Could you mouse be impacting gaming performance on Windows 10? To find out, it’s a smart idea to optimize your mouse settings. A feature called pointer precision (AKA mouse acceleration) can impact how your mouse performs in games. Disabling this can help to optimize gaming in Windows 10.

  1. Open Settings
  2. Click Devices > Mouse
  3. View the Pointer Options tab
  4. Clear the Enhance pointer precision checkmark
  5. Click Apply
  6. Click OK to exit—you might also adjust the pointer speed to suit

Disable mouse enhancements to optimize Windows 10 gaming

If gaming has improved, your mouse was almost certainly slowing things down.

9. Max Power Plan to Improve Windows 10 Gaming Performance

Power options are often ignored due to their supposedly negligible effect. Some gamers claim adjusting for higher performance works, while others fail to notice any difference changing their PC power settings.

The only way to know for sure is to test it out on your PC. To change your power settings:

  1. Open Settings
  2. Type power
  3. Click > Power & sleep settings > Additional power settings
  4. Select the high-performance option
  5. If none is available, use Create a power plan to configure a new, custom power plan

This option will allow your PC to perform better at the cost of higher energy consumption and temperature levels. For this reason, it’s better to activate this Windows 10 optimization on the desktop rather than laptop PCs.

10. Keep Your Windows 10 Drivers Updated for Improved Gaming Performance

Your GPU (Graphics Processing Unit) is the core of your PC gaming experience. However, the GPU requires the latest Windows driver to keep it working faster and better.

All graphics cards, no matter how old or new, benefit from continually updated drivers.

To check your GPU name and specs:

  1. Right-click Desktop
  2. Select Display settings > Advanced display settings
  3. At the bottom, find Display adapter properties

Optimize Windows 10 display settings for improved gaming

You can download driver updates through this window under Properties > Driver > Update Driver. Alternatively, visit the manufacturer’s website to ensure the driver is up to date.

Manufacturers will often provide free gaming and update software to keep your drivers up to date automatically. An example is AMD’s Gaming Evolved client.

For optimal performance, it is highly recommended that you install the chipset and LAN drivers for your motherboard as well. Since these are crucial for optimal gaming performance, this makes sense.

The easiest method to check chipset drivers is to open Windows PowerShell (right-click Start to find it) and enter:

wmic baseboard get product,Manufacturer,version,serialnumber

Your motherboard’s manufacturer and the product name will appear in the command prompt.

List your manufacturer and product name to search for your drivers online. You should find the necessary software on the Support page of the manufacturer’s website.

Along with the chipset drivers, you will also find your on-board LAN drivers for an optimal internet connection.

11. Install DirectX 12 to Optimize for Gaming

DirectX 12, the latest version of Microsoft’s popular API tool, is a key element of Windows 10 gaming.

It delivers support for multiple GPU and CPU cores, better frame rates, lowered power consumption and enhanced graphical effects.

To check if you have the latest version of DirectX:

  1. Open Windows PowerShell
  2. Type dxdiag
  3. Tap Enter

Moments later, you’ll see the DirectX Diagnostic Tool.

Ensure DirectX 12 is installed to ensure game optimizations for Windows 10

Don’t have DirectX 12 installed? There’s a small chance this can happen if you have upgraded from Windows 8.1. Fix this by:

  1. Opening Settings with Windows key + I
  2. Select Update and security
  3. Find Windows Update > Check for updates
  4. Wait while the updates install

DirectX12 will automatically optimize many gaming settings in Windows 10.

Optimize Windows 10 for Gaming With These 11 Tweaks

Windows 10 is a legitimate delight for the modern gamer (and now, so is Linux, thanks to these technologies and services that have saved gaming on Linux.)

With a towering game selection, Xbox One compatibility and software specifically designed for gaming, it’s clear the gamer community has a special place in Windows 10’s future. However, nothing’s perfect. Reach closer to gaming perfection with these Windows 10 gaming optimizations:

  1. Windows 10 Gaming Mode
  2. Disable Nagle’s Algorithm
  3. Use faster DNS servers
  4. Disable automatic updates
  5. Disable Notifications in Windows 10
  6. Prevent automatic updates from Steam
  7. Tweak visual effects for performance
  8. Adjust mouse settings to improve gaming speeds
  9. Use maximum power settings
  10. Keep drivers up to date
  11. Install DirectX 12

Gaming on your laptop? You’ll benefit from these extra tips to improve gaming performance on your Windows 10 laptop. Do you also need a special router for a better gaming experience? Let’s see if gaming routers are worth it.

Read the full article: How to Optimize Windows 10 for Gaming and Performance


How to Use Google Calendar for School: Organize Your Class Schedule


free-calendars-google

One of the most difficult parts of college, besides the homework, of course, is managing a complex and ever-changing schedule. Between classes, extracurricular activities, and a part-time job, you are extremely busy.

An excellent way to start your semester off or even organize it partway is to leverage free tools to help you manage everything on your plate. In this article, you’ll see how to manage your class schedule and get organized for the semester with Google Calendar.

Get Your Schedules and Mark Important Dates

Before you can get organized with Google Calendar, you need to get all your schedules together. Start by locating an official copy of your semester course schedule. You also want schedules for any extracurricular activities, work, or events you plan to participate in during the term.

Get as much information as you can for each of your events to make your schedule as robust as possible. This includes dates, durations, locations, required textbooks, and even teachers. Don’t be afraid to include too much information in this step because you can always remove it later.

And for additional tools, check out these checklist and planner templates just for students.

How to Make a Class Schedule Calendar

Head to Google Calendar, sign in, and start by creating a specific calendar to hold your class schedule. Using an individual calendar gives you the option of toggling it on or off, which can be handy if you have a lot of events.

  1. Click the Main Menu button on the top left if your sidebar is hidden.
  2. Go to Other calendars, click the plus sign, and select Create New Calendar.
  3. Give your calendar a Name, Description, and optionally choose a different Time Zone if needed.
  4. Click Create Calendar.

Google Calendar Create Calendar

When you click the arrow on the top left, you’ll be back on your main calendar page and should see your new calendar in the sidebar. If you want to change the color, click the Options button (three-dots) that appears when you move your cursor over the calendar. Then pick a new color from the palette.

Google Calendar Change Color

How to Add Classes to Google Calendar

The next step is to add your classes to Google Calendar. Head to a date on the calendar when your first class begins and click. This will open the new event window.

Start from the top and add the course Title, choose Event, and then add the start and end times with the Add Time button.

You likely won’t use the Add guests or Add Google Meet options, but you may want to include your school’s Location and add a Description to contain your instructor’s name, the room number, and other pertinent details for the class.

Be sure to choose your class schedule calendar from the dropdown list and then click Save.

Google Calendar New Class Event

Alternatively, you can choose More Options to customize your class event further with the options below. Or you can hit Save now and customize it later by clicking the event on your calendar and selecting Edit Event.

Make Your Classes Repeat

Since your classes will occur regularly, you’ll want to make this a repeating event.

At the top, below the class title, you’ll see Does not repeat. Click that dropdown box and you’ll see some quick options you can pick from like Daily and Weekly on [specific day]. If one of these applies, go ahead and select it but if not, click Custom.

Now you can pick the exact days that this class repeats each week. And at the bottom, you can enter an end date, so the class will stop showing up on your calendar when that day comes.

Google Calendar Repeat Class Event

Click Save when you finish.

Keep adding calendar events and customizing them until your schedule is complete. Don’t forget to include things like your extracurricular activities or work schedule.

Set Up Google Calendar Notifications

A terrific feature of Google Calendar is its notifications. This helps you remember you have a class at a certain time, so you won’t forget, and you won’t (or shouldn’t) be late. You can create notifications for individual class events or for the entire school calendar.

Set Up Event Notifications

If you want to set up different notifications depending on when the class occurs, you can create individual event notifications. Select the event on your calendar and click Edit Event.

On the event detail page, click Add Notification. Select either Notification or Email in the first dropdown box, depending on how you want to receive your alert. Then choose how far in advance of your class you’d like to be notified.

You can add more than one notification too. For example, you can receive an alert one hour before your class starts and another 10 minutes before the start time. Just click Add Notification for each additional alert you’d like to create.

Google Calendar Event Notification

Click Save if you’re finished. You’ll see a popup message asking if you want to change only that event or the others you created for that repeating class. You’ll likely choose the second option for This and following events so that you’ll receive the notification for that class each time. Click OK.

Set Up Calendar Notifications

If you would rather create notifications for your entire school calendar, this is just as simple. And this way, you’ll receive a notification for any event on your calendar, whether a class, activity, or work shift.

Click the Options button next to the calendar and pick Settings and Sharing. Scroll down and you’ll see a few sections for Event Notifications, All-Day Event Notifications, and Other Notifications.

For Event and All-Day Notifications, click Add Notification, choose Notification or Email, and enter the timing for the alert. You can add more than one by clicking Add Notification.

Google Calendar Event and All Day Notifications

For Other Notifications, you can simply choose to receive an email to your connected Gmail account for each of the items listed such as new events, canceled events, or your daily agenda.

Google Calendar Other Notifications

Access Google Calendar On-The-Go

You can always access your calendar from any web browser. But if you’re out and about, you can check out your class schedule in the Google Calendar app on your mobile device.

The Google Calendar app on Android and iOS lets you view and edit your schedule and classes easily. And best of all, it’s available for free.

In addition, you can add attachments. So if you need a paper you wrote for a class, you can attach it to that class event in the app.

Download: Google Calendar for Android | iOS (Free)

Organize Your Semester With a Google Calendar Class Schedule

Although it takes a little time to put it all together, having your school schedule online and on your devices can be a great asset throughout your semester.

For more, here are several free calendars you can add to your Google Calendar and various ways to make Google Calendar your Windows desktop calendar.

Image Credit: Evan Wondrasek/Flickr

Read the full article: How to Use Google Calendar for School: Organize Your Class Schedule