Twitter CEO Jack Dorsey might not spend six months a year in Africa, claims the real product development is under the hood, and gives an excuse for deleting Vine before it could become TikTok. Today he tweeted, via Twitter’s investor relations account, a multi-pronged defense of his leadership and the company’s progress.
The proclamations come as notorious activist investor Elliott Management prepares to pressure Twitter into a slew of reforms, potentially including replacing Dorsey with a new CEO, Bloomberg reported last week. Sources confirmed to TechCrunch that Elliott has taken a 4% to 5% stake in Twitter. Elliott has previously bullied eBay, AT&T, and other major corporations into making changes and triggered CEO departures.
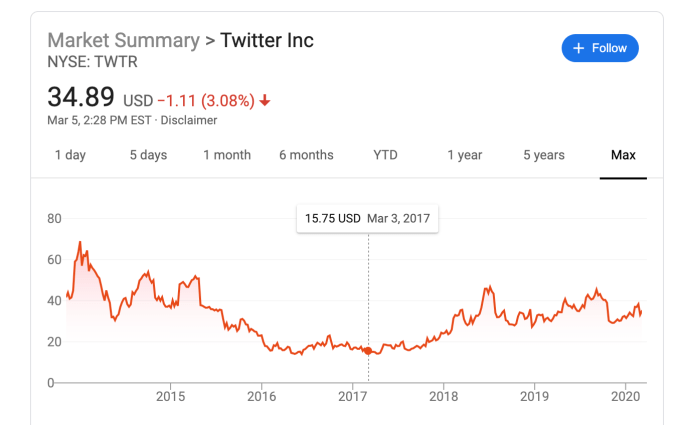
Specifically, Elliott is seeking change because of Twitter’s weak market performance, which as of last month had fallen 6.2% since July 2015 while Facebook had grown 121%. The corporate raider reportedly takes issue with Dorsey also running fintech giant Square, and having planned to spend up to six months a year in Africa. Dorsey tweeted that “Africa will define the future (especially the bitcoin one!)”, despite cryptocurrency having little to do with Twitter.
Rapid executive turnover is another sore spot. Finally, Twitter is seen as moving glacially slow on product development, with little about its core service changing in the past five years beyond a move from 140 to 280 characters per tweet. Competing social apps like Facebook and Snapchat have made landmark acquisitions and launched significant new products like Marketplace, Stories, and Discover.
Dorsey spoke today at the Morgan Stanley investor conference, though apparently didn’t field questions about Elliott’s incursion. The CEO did take to his platform to lay out an argument for why Twitter is doing better than it looks, though without mentioning the activist investor directly. That type of response without mentioning to whom it’s directed, is popularly known as a subtweet. Here’s what he outlined:
On democracy: Twitter has prioritized healthy conversation and now “the #1 initiative is the integrity of the conversation around the elections” around the world, which it’s learning from. It’s now using humans and machine learning to weed out misinformation, yet Twitter still hasn’t rolled out labels on false news despite Facebook launching them in late 2016.
On revenue: Twitter expects to complete a rebuild of its core ad server in the first half of 2020, and it’s improving the experience of mobile app install ads so it can court more performance ad dollars. This comes seven years late to Facebook’s big push around app install ads.
On shutting down products: Dorsey claims that “5 years ago we had to do a really hard reset and that takes time to build from… we had been a company that was trying to do too many things…” But was it? Other than Moments, which largely flopped, and the move to the algorithmic feed ranking, Twitter sure didn’t seem to be doing too much and was already being criticized for slow product evolution as it tried to avoid disturbing its most hardcore users.

On stagnation: “Some people talk about the slow pace of development at Twitter. The expectation is to see surface level changes, but the most impactful changes are happening below the surface” Dorsey claims, citing using machine learning to improve feed and notification relevance
Yet it seems telling that Twitter suddenly announced yesterday that it was testing Instagram Stories-esque feature Fleets in Brazil. No launch event. No US beta. No indication of when it might roll out elsewhere. It seems like hasty and suspiciously convenient timing for a reveal that might convince investors it is actually building new things.
On talent: Twitter is apparently hiring top engineers “that maybe we couldn’t get 3 years ago”. 2017 was also Twitter’s share price low point of $14 compared to $34 today, so it’s not much of an accomplishment that hiring is easier now. Dorsey claims that “Engineering is my main focus. Everything else follows from that.” Yet it’s been years since fail whales were prevalent, and the core concern now is that there’s not enough to do on Twitter, rather than what it does offer doesn’t function well.
On Jack himself: Dorsey says he should have added more context “about my intention to spend a few months in Africa this year”, including its growing population that’s still getting online. Yet the “Huge opportunity especially for young people to join Twitter” seemed far from his mind as he focused on how crypto trading was driving adoption of Square’s Cash App
“I need to reevaluate” the plan to work from Africa “in light of COVID-19 and everything else going on”. That makes coronavirus a nice scapegoat for the decision while the phrase “everything else” is doing some very heavy lifting in the face of Elliott’s activist investing.
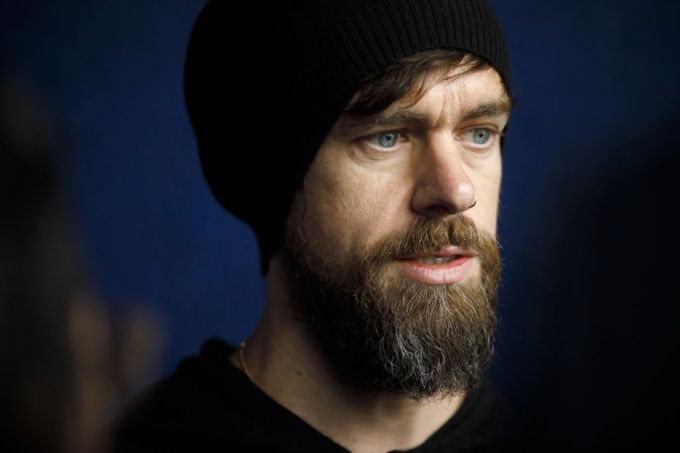
Photographer: Cole Burston/Bloomberg via Getty Images
On fighting harassment: Nothing. The fact that Twitter’s most severe ongoing problem doesn’t even get a mention should clue you in to how many troubles have stacked up in front of Dorsey
Running Twitter is a big job. So big it’s seen a slew of leaders ranging from founders like Ev Williams to hired guns like Dick Costolo peel off after mediocre performance. If Dorsey wants to stay CEO, that should be his full-time, work-from-headquarters gig.
This isn’t just another business. Twitter is a crucial communications utility for the world. Its absence of innovation, failure to defend vulnerable users, and an inability to deliver financially has massive repercussions for society. It means Twitter hasn’t had the products or kept the users to earn the profits to be able to invest in solving its problems. Making Twitter live up to its potential is no sidehustle.


Read Full Article