29 March 2019

Are Mac Cleaning Apps Worthless? 7 Factors to Consider

Many third-party utilities for macOS claim to offer you a quick and easy way to perform a variety of maintenance tasks. These include freeing up disk space by removing caches, logs, and other unneeded files. They also supposedly remove remnants of uninstalled apps, fix startup issues, correct disk problems, and more.
Although maintenance apps are useful, they can also harm your Mac if used carelessly. You should exercise some skepticism and caution when dealing with these. We’ll show you what factors you should keep in mind before considering them.
1. Free Disk Space Is Not a Cure-All
macOS requires a certain amount of breathing room for temporary files, virtual memory, application support-related data, and more. When your disk gets nearly full, your system performance may deteriorate sharply. You’ll also notice symptoms like application hangs, crashes, and even kernel panics.
A good rule of thumb is to keep free space of at least 10-15 percent of your startup drive or twice the amount of RAM installed; whichever is larger. To check your remaining disk space, open Apple menu > About This Mac and click Storage. You’ll see an overview of your space used by different type of files.

Many people will look for a utility cleaner app to free up disk space. But this is the wrong approach. When disk space gets critically low, it’s true that you can gain some space with a thorough cleaning. But this gain is temporary as system processes and apps recreate those files again.
Instead of relying on these tools, use the Optimize Storage utility built into macOS and our tips to free up disk space.

Once your free disk space is above a certain threshold, there’s no direct correlation between unused space and performance. For example, with a 2TB drive, there’s no noticeable performance difference whether you have 500GB or 750GB occupied.
There’s no point in using a cleaning utility, and you won’t notice a performance improvement at all. Any issues with your Mac requires a different troubleshooting technique and approach.
2. Watch Out for Useless Features
All cleaning utilities use carefully designed marketing tactics to sell you their paid apps. They make the app seem amazing with an impressive set of features to attract you. But you should not judge an app based on these attributes. Some features are useless and have no benefit at all.
Memory Cleaner
This is the most frustrating and persistent myth about how memory works: memory cleaners are totally pointless. The developers take advantage of inexperienced users and make false promises about boosting memory performance. The truth is entirely different: macOS knows how to manage RAM and cache your frequently used data for faster access.
Even if your RAM is full, the OS knows when to discard or save the cached data for another application. Just keep a watch on apps that leak memory and if you notice any dip in performance, either quit that app or restart your Mac.
Defragmentation
Fragmentation isn’t a problem on macOS. The HFS+ and APFS file systems that Macs use automatically defrag files using two processes named Hot File Adaptive Clustering and on-the-fly-defragmentation.
These two mechanisms prevent data from becoming fragmented. Note that this only applies to older Macs with an HDD. Newer Macs use SSDs and thus don’t need to be defragmented.
Removing Language Files
Mac apps come with files for every language they support. Language files live in the package contents of applications and end with the LPROJ extension. Most cleaner utilities recommend you remove language files to gain a few gigabytes.

But remember, the amount of space you earn is not significant enough for the risks involved. You can’t predict which apps will crash, freeze, or stop working altogether.
3. Don’t Get Fooled by Redundant Features
macOS has a fantastic set of built-in tools. Because of this, for the most part, maintenance utility apps replicate features already included in your Mac. Let me give you some examples.
Startup Optimization
Login items are apps and services that launch automatically when you boot your Mac. The more apps you have running at once, the higher your RAM usage and CPU load. Every maintenance utility has a feature to let you disable startup items. But you don’t need a dedicated app to do this.
Go to System Preferences > Users & Groups. Select your account in the list on the left and click the Login Items button. Here, scan the list and click minus to remove anything you don’t want to run at startup.

Clearing Browser and App Caches
Cleaner utilities offer to scrub the cache of your browser and other apps. Every utility app has this feature and recommends you use it to periodically clean your Mac.
However, you can clear old data right from your browser itself. Many apps also have built-in options to clear the cache when it does not function properly.
Remove Large and Old Files
While this is a useful and convenient feature to have in a utility app, macOS easily lets you set up smart folders with a property or series of properties.
Press Cmd + F in Finder to bring up the search bar. Then click on Kind filter and select File Size or Date created from the attribute list. Enter the size of the file in the third space, either in MB or GB.
This will let you easily locate large or super-old files so you can remove them.

4. Don’t Unnecessarily Clean Cache and Log Files
It’s normal for macOS to use disk space for day-to-day operations. Your browser downloads new data, apps create cached content for optimal performance, and log files capture information to help you troubleshoot issues when they arise. All cleaning utilities lets you clean cache, logs, and unnecessary files.
The utility developers want you to believe that all this is nothing but clutter and you should delete them frequently. However, clearing cache and log files often makes your Mac run slower than normal. But apart from the performance issues, you’re losing vital information:
- A corrupt cache can cause strange effects in an app. Although macOS can delete the corrupted cache, sometimes this fails to work. If you have an app that often hangs or crashes, cleaning the cache will delete the information needed for troubleshooting. The utility app does not try to address the underlying problem.
- If your Mac is facing certain issues, then log files can be of great use. Unfortunately, utility apps see them as junk. This can hinder your ability to diagnose problems. If you can’t read log files, you can submit the file to a developer for support.
5. Maintenance Tasks Need a Human Touch
Every utility cleaner app has numerous options selected by default. Most people assume that the app will take the right action and solve all your Mac problems. You should not trust any app blindly, though. If you’re a novice user, start by turning off all the automatic options and then selectively turn on the features you need.
Ask yourself these questions when in doubt:
- Does this app launch automatically on startup?
- Does it have any settings that let you schedule automatic maintenance?
- How deep is the scan?
- Can I review the items before deleting them?
- Can you exclude any items from scan results?
CleanMyMac does a lot of different tasks. The interface offers you a complete suite of cleanup tools.
It’s worth taking your time to go through CleanMyMac’s Help so that you understand what each option does. For beginners, the Smart Scan recommendations are excessive. Instead, choose Deselect all and prefer to scan one category at a time.

OnyX is a free utility app available since the early days of OS X. The interface has four panes: Maintenance, Utilities, Files, and Parameters. Each option is subdivided into multiple views.
Because OnyX has many options, it makes the app somewhat difficult for newcomers. Help is also non-existent and has a few annoying quirks.

6. Look Into the App’s Reputation
Not all utility cleaner apps have a good reputation. There are some apps that can not only damage your Mac but also steal your browsing data, as the Malwarebytes Blog reports. You might have heard of two such utilities: MacKeeper and Advanced Mac Cleaner. Both of these tools use extensive and aggressive marketing to scare you into thinking that your Mac has lots of issues.
After running a scan, the app will highlight an alarming number of problems on your Mac. These tools don’t create a good impression, as the very first screen you see is designed to scare you into paying up. Indeed, we’ve looked at why you should stay far away from MacKeeper.
If you’re unsure about an app, search for it on Google and see what people say about it. You can also browse the Mac forums and ask other users about the app.
However, don’t trust the reviews on the app’s website. They’re often sponsored, as they pay people money in exchange for a good review. They could also be outright fake.
7. Pricing and Long-Term Benefits
Most Mac cleaner apps are rather expensive. For example, CleanMyMac offers a year-long subscription for $35. If you don’t like subscriptions, then you have to pay $90 as a one-time purchase. Ask yourself these questions to find out if you need such apps:
- Do you maintain a healthy amount of free disk space?
- Are you an enthusiast Mac user?
- Are you willing to learn and accept macOS’s strength and weakness?
- How much are you actually going to use the app?
If you’re a novice user, these type of apps can help you to understand how macOS works and also save your time. But after a few months, chance are you’re not going to use the app frequently.
Be Suspicious of Mac Cleaner Apps
Just like any machine, your Mac can and will have issues from time to time. Apple provides plenty of system utilities for security, anti-theft, backups, and diagnostics. One common aspect in all utility cleaner apps is they give you a one-step approach to fix your Mac problems.
But you should remember that these tools do not address all the possible Mac issues you can have. They add convenience, but you have to pay a premium price every year to get few benefits. Instead, why not learn more about your Mac and utilize free tools when your Mac doesn’t work properly?
Read the full article: Are Mac Cleaning Apps Worthless? 7 Factors to Consider
Read Full Article
Sidewalk Labs launches an app to crowdsource public space surveys
Alphabet’s urban planning subsidiary announced today the launch of CommonSpaces. The new app was created to give park operators and community members a place to enter and organize observations about parks and other publics spaces.
Interested parties can create a web portal for a space. The organizer defines the parameters of a study, outlining what sort of data they’re looking to collect, and users are then given shifts to go about recording data. The goal is discover how people utilize various public spaces, information that can be used to determine future changes.
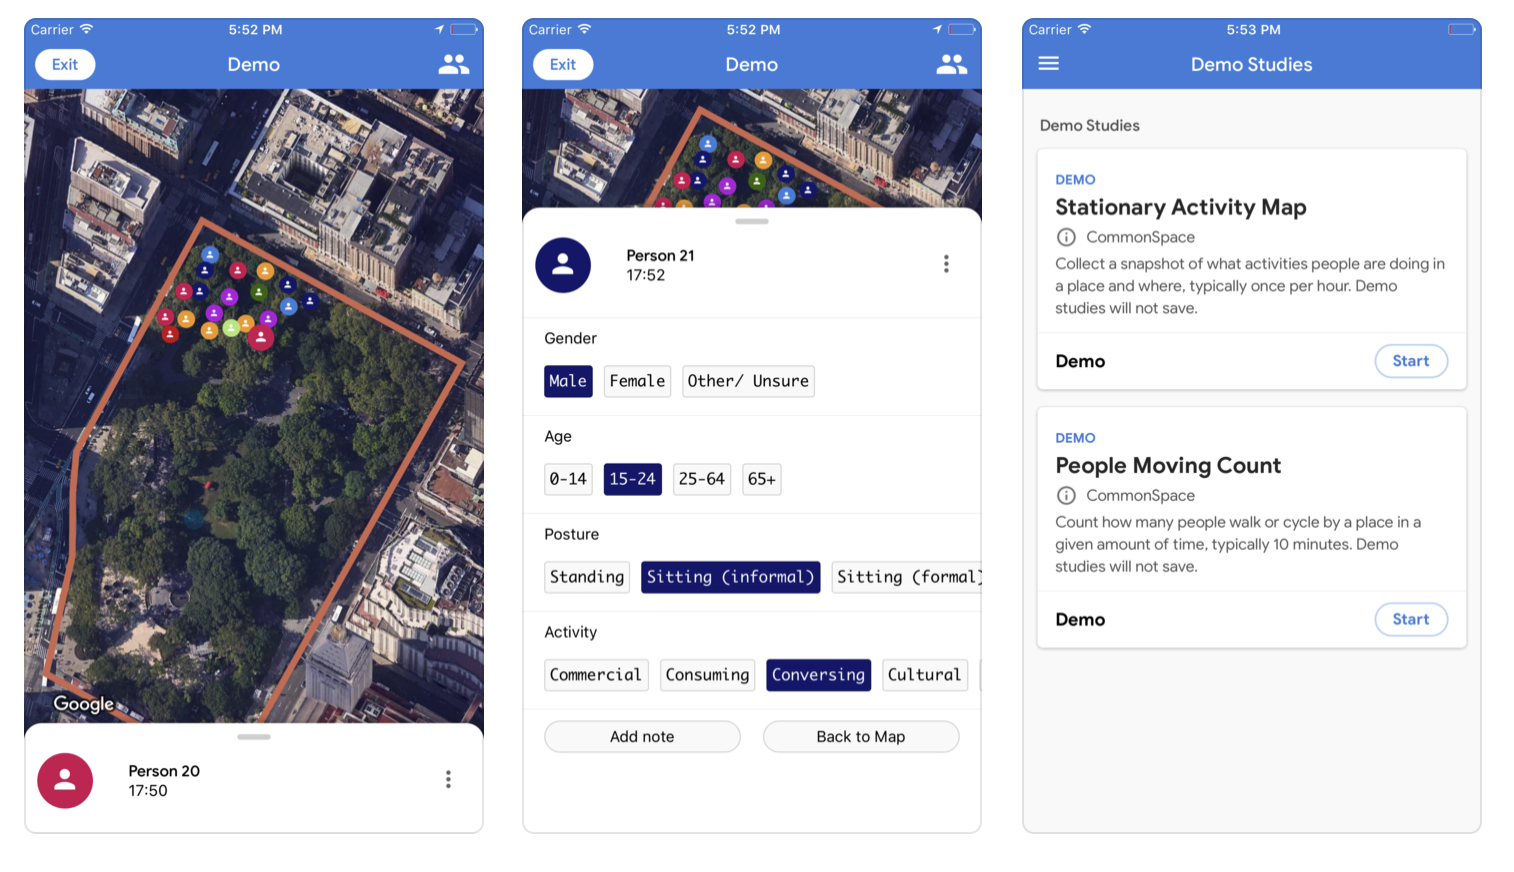
“The app records data in accordance with the Public Life Data Protocol, an open data standard (published by the Gehl Institute and founding municipal and private partners) that makes it possible to compare data from public spaces,” Sidewalk senior engineer Ananta Pandey says in a blog post. “The data collected with CommonSpace can be easily exported into visualization and analysis tools that communities and space managers alike can use to see patterns, generate insights, and develop evidence-based approaches to advocating for change.”
For obvious reasons, Sidewalk is quick to note the privacy parameters it set up for the app. The company says it’s adhering to Privacy by Design, and won’t be collecting any personal information about bystanders who are observed for CommonSpaces.
After being piloted at a Toronto park in Fall of last year, the app is now available for both Android and iOS.

Read Full Article
Focaldata thinks it has some answers for campaigners in the age of Trump and Brexit
Political parties, campaigns, and brands can’t get an accurate and cost-effective understanding of opinion in small geographic areas, like the constituencies of lawmakers. This is a big problem in political campaigning. And all political campaigning now has a huge online element, as we know. We also know political turbulence is one of the defining themes of our age.
But one thing is clear. All the players want faster, cheaper, more accurate and a more granular understanding of consumers and voters. In the age of AI, survey predictions are influenced as much as so many other machine-learning technology products.
Focaldata is a UK-startup that thinks it has some of the answers to these quandaries. Their integrated consumer analytics and survey workflow application claims to give customers a more accurate and granular picture of consumers than traditional polling using machine learning. At the same time, they say their workflow software cuts down on the cost and time market research takes.
The idea is that they employ a new machine learning based technique (MRP) to generate survey ‘results’. This new methodology can use more information (such as old survey data or public statistics) than conventional methods, which lets them get accurate predictions in small geographic areas from the same sample sizes.
Founder Justin Ibbett had done MRP manually on his laptop a few times for some existing market research firms and realized how fiddly it was. “I felt a dedicated software application would reduce the complexity whilst making the results more accessible and useful- our early incarnations just delivered a spreadsheet!” he told me.
Much of Focaldata’s business has been in politics. They have worked with the pro-Remain group Best for Britain and the anti-Racism charity Hope not Hate on combating Far Right sentiment. However, most demand is now from large brand owners, such as ABInBev, a recent client.
They now have over 10 paying clients including big brands like M&C Saatchi.
Competitors include YouGov, Survation, Dalia Research (a Balderton-backed company), and standard market research agencies like Kantar, Ipsos Mori.
But against traditional agencies, Ibbett says their ML-based data processing engine sets them apart, allowing them to go very granular and get more accurate over time.
The market research market is £5bn in the UK alone (PwC report, 2016) and global market research is a $40bn market.
The startup has raised a £1.1m seed round from notable UK angels including Alex Chesterman, founder of Zoopla and Martin Bolland, founder of Alchemy Partners. Previously they had raised a small pre-seed round from 3 other angels, including Xen Lategan (backer of Magic Pony and ex-Google, former CTO of News International)
CTO and co-founder Calvin Dudek was at Google for 5 years as a product manager, and ran Data Science Innovation at the DWP. Chief Data Scientist Takao Noguchi is a cognitive scientist.

Read Full Article
Google pulls controversial anti-gay religious app from the Play Store
The same day the Human Rights Campaign downranked the company in its index of the best LGBTQ-friendly employers, Google decided to yank from the Play Store a controversial app accused of promoting conversion therapy.
On that list, known as the Corporate Equality Index, the HRC, a prominent LGBTQ rights organization, included a footnote that it was aware of the conversion therapy-style app by Living Hope Ministries in the Google Play Store. The app’s removal was first reported by Axios. TechCrunch confirmed that links to the Living Hope Ministries app are no longer functional.
“… Conversion therapy can lead to depression, anxiety, drug use, homelessness, and suicide,” the HRC wrote in its index. “Pending remedial steps by the company to address this app that can cause harm to the LGBTQ community, the [Corporate Equality Index] rating is suspended.”
TechCrunch has reached out to Google for details about its decision and what specific rules the Living Hope Ministries app was found to violate.
Living Hope Ministries, based in Arlington, Texas, denies that it promotes conversion therapy, an institutionally denounced practice in which a usually religious group tries to “correct” an individual’s same-sex attraction. Living Hope Ministry’s website states that it “speaks to thousands of people each year about how they, as Christ-followers, might respond redemptively to those who are struggling with same gender attraction.” The group also notes that it specializes in supporting the “wives of men who struggle with same gender attractions.”
Apple pulled the Living Hope Ministries app in December after facing public pressure and a campaign against the app by the organization Truth Wins Out. Amazon soon followed suit, but the app remained live in Google Play until today.

Read Full Article

Snap CEO’s sister Caroline Spiegel starts a no-visuals porn site
If you took the photos and videos out of pornography, could it appeal to a new audience? Caroline Spiegel’s first startup Quinn aims to bring some imagination to adult entertainment. Her older brother, Snapchat CEO Evan Spiegel, spent years trying to convince people his app wasn’t just for sexy texting. Now Caroline is building a website dedicated to sexy text and audio. The 22-year-old college senior tells TechCrunch that on April 13th she’ll launch Quinn, which she describes as “a much less gross, more fun Pornhub for women”.
TechCrunch checked out Quinn’s private beta site, which is pretty bare bones right now. Caroline tells us she’s already raised under a million dollars for the project. But given her brother’s success spotting the next generation’s behavior patterns and turning them into beloved products, Caroline might find investors are eager to throw cash at Quinn. That’s especially true given she’s taking a contrarian approach. There will be no imagery on Quinn.
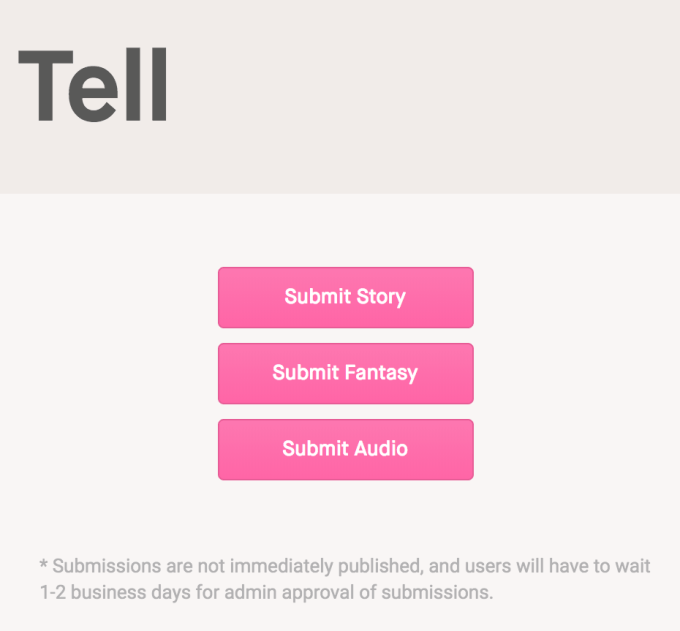
Caroline explains that “There’s no visual content on the site– just audio and written stories. And the whole thing is open source, so people can submit content and fantasies, etc. Everything is vetted by us before it goes on the site.” Caroline is building Quinn with a three-woman team of her best friends she met while at college at Stanford including Greta Meyer, though they plan to relocate to LA after graduation.
“His dream girl was named ‘Quinn'”
The idea for Quinn sprung from a deeply personal need. “I came up with it because I had to leave Stanford my junior year because i was struggling with anorexia and sexual dysfunction that came along with that” Caroline tells me. “I started to do a lot of research into sexual dysfunction cures. There are about 30 FDA-approved drugs for sexual dysfunction for men but zero for women and that’s a big bummer.”
She believes there’s still a stigma around women pleasuring themselves, leading to a lack of products offering assistance. Sure, there are plenty of porn sites but few are explicitly designed for women, and fewer stray outside of visual content. Caroline says photos and videos can create body image pressure, but with text and audio, anyone can imagine themselves in a scene. “Most visual media perpetuates the male gaze . . . all mainstream porn tells one story . . . You don’t have to fit one idea of what a woman should look like.”
That concept fits with the startup’s name “Quinn”, which Caroline says one of her best guy friends thought up. “He said this girl he met — his dream girl — was named ‘Quinn.'”
Caroline took to Reddit and Tumblr to find Quinn’s first creators. Reddit stuck to text and links for much of its history, fostering the kinky literature and audio communities. And when Tumblr banned porn in December, it left a legion of adult content makers looking for a new home. “Our audio ranges from guided masturbation to overheard sex, and there’s also married stories. It’s literally everything. Different strokes for different for folks, know what I mean?” Caroline says with a cheeky laugh.
To establish its brand, Quinn is running social media influencer campaigns where “The basic idea is to make people feel like it’s okay to experience pleasure. It’s hard to make something like masturbation cool, so that’s a little bit of a lofty goal. We’re just trying to make it feel okay, and even more okay than it is for men.”
As for the business model, Caroline’s research found younger women were embarrassed to pay for porn. Instead Quinn plans to run ads, though there could be commerce opportunities too. And since the site doesn’t bombard users with nude photos or hardcore videos, it might be able to attract sponsors that most porn sites can’t.
Evan is “very supportive”
Until monetization spins up, Quinn has the sub-$1 million in funding that Caroline won’t reveal the source of, though she confirms it’s not from her brother. “I wouldn’t say that he’s particularly involved other than he’s one of the most important people in my life and I talk to him all the time. He gives me the best advice I can imagine” the younger sibling says. “He doesn’t have any qualms, He’s very supportive.”
Quinn will need all the morale it can get, as Caroline bluntly admits “we have a lot of competitors”. There’s the traditional stuff like Pornhub, user generated content sites like Make Love Not Porn, and spontaneous communities like on Reddit. She calls $5 million-funded audio porn startup Dipsea “an exciting competitor” though she notes that “we sway a little more erotic than they do, but we’re so supportive of their mission.” How friendly.
Quinn’s biggest rival will likely be outdated but institutionalized site Literotica, which SimilarWeb ranks as the 60th most popular adult website, 631st most visited site overall, showing it gets 53 million hits per month. But the fact that Literotica looks like a web 1.0 forum yet has so much traffic signals a massive opportunity for Quinn. With rules prohibiting Quinn from launching native mobile apps, it will have to put all its effort into making its website stand out if it’s going to survive.
But more than competition, Caroline fears that Quinn will have to convince women to give its style of porn a try. “Basically, there’s this idea that for men, masturbation is an innate drive and for women it’s a ‘could do without it, could do with it’. Quinn is going to have to make a market alongside a product and that terrifies me” Caroline says, her voice building with enthusiasm. “But that’s what excites me the most about it, because what I’m banking on is if you’ve never had chocolate before, you don’t know. But once you have it, you start craving it. A lot of women haven’t experienced raw, visceral pleasure before, [but once we help them find it] we’ll have momentum.”
Most importantly, Quinn wants all women to feel they have rightful access to whatever they fancy. “It’s not about deserving to feel great, You don’t have to do Pilates to use this. You don’t have to always eat right. There’s no deserving with our product. Our mission is for women to be more in touch with themselves and feel fucking great. It’s all about pleasure and good vibes.”

Read Full Article
Snap CEO’s sister Caroline Spiegel starts a no-visuals porn site
If you took the photos and videos out of pornography, could it appeal to a new audience? Caroline Spiegel’s first startup Quinn aims to bring some imagination to adult entertainment. Her older brother, Snapchat CEO Evan Spiegel, spent years trying to convince people his app wasn’t just for sexy texting. Now Caroline is building a website dedicated to sexy text and audio. The 22-year-old college senior tells TechCrunch that on April 13th she’ll launch Quinn, which she describes as “a much less gross, more fun Pornhub for women”.
TechCrunch checked out Quinn’s private beta site, which is pretty bare bones right now. Caroline tells us she’s already raised under a million dollars for the project. But given her brother’s success spotting the next generation’s behavior patterns and turning them into beloved products, Caroline might find investors are eager to throw cash at Quinn. That’s especially true given she’s taking a contrarian approach. There will be no imagery on Quinn.
Caroline explains that “There’s no visual content on the site– just audio and written stories. And the whole thing is open source, so people can submit content and fantasies, etc. Everything is vetted by us before it goes on the site.” Caroline is building Quinn with a three-woman team of her best friends she met while at college at Stanford including Greta Meyer, though they plan to relocate to LA after graduation.
“His dream girl was named ‘Quinn'”
The idea for Quinn sprung from a deeply personal need. “I came up with it because I had to leave Stanford my junior year because i was struggling with anorexia and sexual dysfunction that came along with that” Caroline tells me. “I started to do a lot of research into sexual dysfunction cures. There are about 30 FDA-approved drugs for sexual dysfunction for men but zero for women and that’s a big bummer.”
She believes there’s still a stigma around women pleasuring themselves, leading to a lack of products offering assistance. Sure, there are plenty of porn sites but few are explicitly designed for women, and fewer stray outside of visual content. Caroline says photos and videos can create body image pressure, but with text and audio, anyone can imagine themselves in a scene. “Most visual media perpetuates the male gaze . . . all mainstream porn tells one story . . . You don’t have to fit one idea of what a woman should look like.”
That concept fits with the startup’s name “Quinn”, which Caroline says one of her best guy friends thought up. “He said this girl he met — his dream girl — was named ‘Quinn.'”
Caroline took to Reddit and Tumblr to find Quinn’s first creators. Reddit stuck to text and links for much of its history, fostering the kinky literature and audio communities. And when Tumblr banned porn in December, it left a legion of adult content makers looking for a new home. “Our audio ranges from guided masturbation to overheard sex, and there’s also married stories. It’s literally everything. Different strokes for different for folks, know what I mean?” Caroline says with a cheeky laugh.
To establish its brand, Quinn is running social media influencer campaigns where “The basic idea is to make people feel like it’s okay to experience pleasure. It’s hard to make something like masturbation cool, so that’s a little bit of a lofty goal. We’re just trying to make it feel okay, and even more okay than it is for men.”
As for the business model, Caroline’s research found younger women were embarrassed to pay for porn. Instead Quinn plans to run ads, though there could be commerce opportunities too. And since the site doesn’t bombard users with nude photos or hardcore videos, it might be able to attract sponsors that most porn sites can’t.
Evan is “very supportive”
Until monetization spins up, Quinn has the sub-$1 million in funding that Caroline won’t reveal the source of, though she confirms it’s not from her brother. “I wouldn’t say that he’s particularly involved other than he’s one of the most important people in my life and I talk to him all the time. He gives me the best advice I can imagine” the younger sibling says. “He doesn’t have any qualms, He’s very supportive.”
Quinn will need all the morale it can get, as Caroline bluntly admits “we have a lot of competitors”. There’s the traditional stuff like Pornhub, user generated content sites like Make Love Not Porn, and spontaneous communities like on Reddit. She calls $5 million-funded audio porn startup Dipsea “an exciting competitor” though she notes that “we sway a little more erotic than they do, but we’re so supportive of their mission.” How friendly.
Quinn’s biggest rival will likely be outdated but institutionalized site Literotica, which SimilarWeb ranks as the 60th most popular adult website, 631st most visited site overall, showing it gets 53 million hits per month. But the fact that Literotica looks like a web 1.0 forum yet has so much traffic signals a massive opportunity for Quinn. With rules prohibiting Quinn from launching native mobile apps, it will have to put all its effort into making its website stand out if it’s going to survive.
But more than competition, Caroline fears that Quinn will have to convince women to give its style of porn a try. “Basically, there’s this idea that for men, masturbation is an innate drive and for women it’s a ‘could do without it, could do with it’. Quinn is going to have to make a market alongside a product and that terrifies me” Caroline says, her voice building with enthusiasm. “But that’s what excites me the most about it, because what I’m banking on is if you’ve never had chocolate before, you don’t know. But once you have it, you start craving it. A lot of women haven’t experienced raw, visceral pleasure before, [but once we help them find it] we’ll have momentum.”
Most importantly, Quinn wants all women to feel they have rightful access to whatever they fancy. “It’s not about deserving to feel great, You don’t have to do Pilates to use this. You don’t have to always eat right. There’s no deserving with our product. Our mission is for women to be more in touch with themselves and feel fucking great. It’s all about pleasure and good vibes.”


Read Full Article
5 Personal Finance YouTube Channels to Help You Manage Your Money
Sound financial advice is important regardless of your financial situation. Unless you’re so rich that you don’t even have to think about money, there are always ways to cut back on spending, to spend your money more wisely, or to make extra cash.
While you’ll find a wealth of financial advice on the web, a lot of it can be confusing, frustrating, or unapproachable. By contrast, these personal finance YouTube channels will help you manage your money in a sensible manner.
1. The Dave Ramsey Show
Dave Ramsey is a well-known financial guru. He focuses on helping families become more financially disciplined in order to get out of debt. In addition to writing several books, he also has a daily financial radio show that you can watch live on YouTube.
While he can come off as a bit brash at times, there’s a lot of great financial advice here. And it will be especially useful for those really struggling to get their finances under control.
If you don’t have time to watch or listen to the full three-hour shows, the channel regularly posts short clips from the episodes that cover certain topics. Dave takes calls from listeners, addresses interpersonal money issues, and more.
In the clip above, Dave talks to a caller whose girlfriend is hesitant to discuss money matters with him. He looks into how this could become a real issue for a couple, and discusses how vital good money management is in a marriage.
Another caller asks Dave what she should do with a $10,000 tax refund. It’s a good illustration of Ramsey’s “Baby Steps” plan, as he looks at the best things she can do with that extra cash flow.
For more advice on personal money matters, why not listen to these podcasts that will help you get out of debt.
2. The Financial Diet
This channel doesn’t feature the deepest financial advice you’ll ever find, but it does offer some practical tips for people looking to take a more proactive approach to their finances. It hosts three shows per week:
- Making It Work on Thursdays features video essays of success stories from real people.
- The Lifestyle Fix on Fridays looks at how to make your life better on a budget.
- The Financial Diet on Tuesdays covers general financial topics.
While you might think about personal finance as an unapproachable topic, you can break it down into smaller segments, helping you to get started. This video in The Financial Diet series discusses six ways you can make financially smart decisions before you even wake up.
We’re all familiar with shopping on Amazon for the convenience and selection. But this Lifestyle Fix video points out some products that you should never buy on Amazon because you can save money by shopping elsewhere.
3. The Money Guy Show
The Money Guy Show is another money-focused show that offers live episodes as well as clips on all sorts of topics. You’ll find everything from rates of return to tax penalties to 401(k)s and more covered. The channel has a huge archive of videos to browse through, so you can pick up the basics of many different spheres of finance.
Don’t let the low subscriber count fool you. If you don’t mind the two-host show format, there’s a wealth of valuable content to mull over here.
The above clip looks at some common financial activities that you may have been fooled into thinking are smart investments, but which are actually gambling with your money.
Have you ever been confused by the world of retirement plans? This full video breaks down the different types of 401(k) plans so you can make an informed decision.
4. TruFinancials
Speaking of low subscriber counts, TruFinancials is a criminally underrated channel. Denis does an excellent job of explaining financial topics in an approachable manner. The advice here is well beyond what you’d expect from a smaller channel.
TruFinancials covers living frugally, credit cards, bank accounts, and more.
In this clip, Denis looks at how paying just an extra $100/month on a student loan can drastically reduce the amount of money you’ll pay over the life of the loan.
Budgeting is vital for making a plan for your money and knowing where it’s going. If you struggle with creating a budget, check out the channel’s monthly budget planning and reports videos. This one looks at his budget plan for April 2019.
5. BeatTheBush
Our final channel is another smaller but high-quality channel full of relevant financial topics. The owner is an ex-engineer who strives to save as much money as he can and then share what’s he’s learned with other people.
This video looks at how you don’t need fancy clothes to impress people. Instead, a budget wardrobe and good reputation can speak for itself.
A somewhat meta topic is covered in this clip. BeatTheBush asks how much is really enough, and how this ties into your financial life.
YouTube Is Just One Way to Manage Your Money Better
Of course, while there’s a ton of good advice here, you should weigh up opinions from trusted sources before making any major money-related decisions. But these will at least help you start thinking about your finances in a more critical way, and make decisions to set yourself up for longterm financial success.
For more help with personal finance, check out these tools for people who hate managing their finances.
Read the full article: 5 Personal Finance YouTube Channels to Help You Manage Your Money
Read Full Article
Netflix’s You vs. Wild Lets You Kill Bear Grylls

After the success of Black Mirror: Bandersnatch, Netflix is launching its second interactive series. This one, called You vs. Wild, will see you choosing between two courses of action for Bear Grylls to take. Some of which may land him in physical danger.
From Man vs. Wild to You vs. Wild
Bear Grylls made his name—and what a name it is—as the star of Man vs. Wild. That show, which ran for seven seasons on the Discovery Channel, saw Grylls (and his production team) dropped into the wild and charged with finding a way back to civilization.
Grylls obviously always made it through, taming the hostile environment in the process. However, in doing so, he often faced some difficult decisions. And making the wrong decision could have led to something bad happening. Which is where You vs. Wild enters.
Decide Bear Grylls’ Fate in You vs. Wild
You vs. Wild is essentially Man vs. Wild, but with you, the viewer, in charge of Bear Grylls’ fate. Through the series, Grylls will find himself facing some difficult decisions. But it’s up to you to choose the right course of action. And if you don’t, it could be Game Over.
As you can see in the trailer above, You vs. Wild will place Grylls in a variety of survival scenarios. There will be a clear choice between two different courses of action, and, as Grylls clearly likes shouting at camera, “You decide!”
Just like Bandersnatch, viewers will have to decide how the story plays out. And while we very much doubt Netflix will depict Grylls getting ripped apart by a mountain lion or fall to his death down a rocky ravine, there will be good and bad outcomes.
Watch Black Mirror: Bandersnatch First
You vs. Wild is set to debut on Netflix on April 10. Which gives you time to work your way through Black Mirror: Bandersnatch. And when that has whetted your appetite, you should check out the Black Mirror episodes guaranteed to mess with your head.
Read the full article: Netflix’s You vs. Wild Lets You Kill Bear Grylls
Read Full Article
Set Up Your Blog With WordPress: The Ultimate Guide
WordPress is the most powerful blogging platform in the world; nearly one out of every three sites on the internet is powered by WordPress. WordPress separates the content of a site from the back-end code that drives the site. This means you can run a fully functional website without any web programming experience.
If you’ve never run a website before, we HIGHLY recommend saving yourself the headache and paying for a managed WordPress host who handles the administrative side for you. And for that, it doesn’t get any better than WP Engine.
But if you want to try your hand at setting up WordPress on your own, this guide will walk you through everything you need to know from ground zero.
Jump ahead: Intro to WordPress | Key Concepts | Basic Operations | Search Engine Optimization | Image Management | Blog Promotion | Making Money | Backup and Recovery | Optimizing WordPress
1. Intro to WordPress
By separating out the content of your pages from the layout, WordPress can then dynamically generate new HTML files every time someone visits your site. WordPress also takes care of automatically linking your posts together, creating the sidebar with links to your latest content items, and managing the archives. In fact, because WordPress works from HTML theme templates that you can download, you don’t ever need to write a single line of HTML code—all you need to worry about is writing the actual content and uploading your pictures. WordPress takes care of the website coding, you just supply the content. It’s this separation of template and content that opened the world of running a website—a blog—to the world.
Why WordPress?
Although WordPress is most commonly used to create a blog-style site—which is technically just a series of posts with a specific date and time that they were posted—it can also be easily adapted to suit static websites, such as for your local business, artist portfolio, or even a complete online shopping site. As you delve into WordPress, you’ll find that there’s a WordPress plugin to create literally any kind of website you could possibly think of.
WordPress isn’t the only CMS around though, so why choose WordPress? Simple:
- It’s feature rich, so with the basic installation you should be able to everything you want to. If something is missing for your particular requirements, it’s highly likely there is a plugin already made to handle it for you. The upshot is, you don’t need to code anything.
- It’s mature—created in 2003, it’s had a very long life so far and continues to be in active development. This isn’t buggy new beta-release software—it’s incredibly stable.
- It’s secure. As with any piece of software or operating system, there have been a few serious hacks over the years but the developers have been on top of them quickly. The latest versions include prominent warnings when a new version is available, and so long as you regularly check your blog and update when needed, there’s very little chance of your blog being hacked.
Still not convinced?
- It’s incredibly easy to install
- There are literally thousands of plugins to add functionality
- Image and media management out of the box for instant portfolio and photo driven sites
- Simple coding for core functionality makes it easy for novice programmers to customize their blog at a code level—however I won’t be addressing any coding in this guide.
The Difference Between WordPress.org and WordPress.com

Many people are understandably confused about the difference between WordPress.com and WordPress.org, so let’s take a moment to go over this before we begin.
WordPress.com will give you a free blog, hosted on WordPress’ own servers. It’s most suitable for absolute beginners—you don’t need to worry about configuring files or databases and everything is taken care of for you. A WordPress. com blog is similar to any other online blog service like Blogspot or Tumblr. It’s the absolute easiest way to begin with WordPress, but it’s very restrictive in the plugins and themes you can use—essentially you get to choose from a limited catalogue of pre-chosen styles and approved plugins.
WordPress.org, on the other hand, is the site from which you can download the self-hosted WordPress system and upload it to your own server. You’ll need a server capable of running PHP, and a MySQL based database. Setting up a self-hosted blog is a little more difficult (think 5 minutes instead of 1), but you get a lot more freedom to do as you wish, customize how you like, and it’s easy to have your own domain from the start. The majority of this guide will refer to the self-hosted wordpress.org version.
To add further confusion, many web hosts will offer one-click WordPress.org installs which will install the files and set up the database for you—so you don’t need to configure anything! If you choose to host with a shared server, this is the recommended option.
Need web hosting? Use this link to get a special discounted rate on InMotion Hosting’s WordPress hosting service!
Domain Considerations
If you do choose to use the free wordpress.com blog option, your blog address will be something.wordpress.com (known as a “sub domain”)—you can use your own domain, but it’s a paid upgrade—at which point you may as well just buy your own hosting.
It’s also worth considering the future—a free sub domain of wordpress.com may sound fine now to get started, but if your blog ever becomes popular—or you’d like it to—having your own personal domain is of paramount importance.
We’ll cover that later in this guide in the section on basic “search engine optimization”, but if you’re concerned and want to know more about why you should have your own domain, skip forward now.
Hosting Options for Self-Hosted WordPress
Budget web hosting is a really competitive area and the options vary enormously, so I would be very careful when choosing your host.
Let me explain a few key terms you need to know and consider first, before going on to suggest providers I’ve personally used over the years and can heartily recommend.
CPanel: This is an industry standard piece of software that controls your hosting, such as setting up mail accounts or databases. It may take a while to learn, but it’s the default with most hosts so when you’ve used it once you will know it all. It also usually contains a module called Fantastico, which is a one-stop installer for WordPress and other web apps: just enter the site name, password, etc and it will perform the complicated bits of the installation process for you.
Bandwidth vs. Speed: Most budget hosts will lure you with promises of “unlimited” storage and bandwidth, meaning your users can download or browse your blog as much as they like without incurring additional costs on your hosting bills. In reality, this is completely offset by the speed that your site will run at—so even if you were to have constant downloads from your site, it would be so slow that over the course of the month the actual bandwidth used is minimal. So don’t be fooled by these empty promises.
There are also strict Terms and Conditions for usage of your hosting storage—you might be tempted to think that with unlimited storage, you could backup your entire computer there too, right? But this is generally forbidden, and the storage may only be used for “files specifically related to the website”. In short, unlimited bandwidth is misleading, so replace the words “unlimited bandwidth” with “slow speed” whenever you see it within a hosts marketing spiel.
Free Domain: Budget hosts will charge a premium every month but offer you a “free domain” when you open your account. That free domain might only cost you $8 if you were to purchase it somewhere else though, so be sure to factor that it into your cost calculation. Basically: a free domain isn’t worth shouting about.
Additional Domains: You would be forgiven for thinking that with unlimited hosting you could add as many domains as you like, but this isn’t always the case. For one host I mention below, additional domains requires a yearly $30/domain on top of the actual domain registration fee.
Databases: Some hosts will give you access to standard databases, while some will give you a separate “hosted database” instead, which means it’s held on a separate remote server. Hosted databases are more difficult to set up manually with WordPress, and it took me hours to figure out why my fresh WordPress wouldn’t install the first time I tried. Of course, you can get around this by using the host’s special application installer (Fantastico or similar), but I prefer to roll my own clean copy of WordPress.
CPU cycles: With budget shared hosts, there are a large number of users on any one server. This means that while your bandwidth or storage may be unlimited, your CPU cycles are most certainly not. A number of times I’ve tried to run some new WordPress plugin on a shared host only to be promptly sent a warning letter saying the CPU cycles have jumped and that my account will be terminated within days if I don’t do something about it.
WordPress Hosting Recommendations
At this point, if you don’t have a hosting service yet, you should look into one. You can’t run a WordPress site without a server, and it’s a lot easier to pay for a hosting service than to host your own web server.
Instead of making recommendations in this article, we’ll point you to our dedicated roundup of the best WordPress hosting providers. Go with one of these WordPress hosts to get the best bang for your buck.
How to Install WordPress
As I mentioned, you can either use the standard Fantastico installer that came with your hosting to set up your new WordPress for you, or download and attempt to install it yourself. I suggest you try both, to be honest, as downloading and FTPing the files yourself is good practice and you have a chance to look at the directory and file structure behind WordPress. You’ll also need to set up a fresh database for WordPress to use, so it’s a good way to learn the ins-and outs of CPanel.
Rather than repeat the great information already out there, I’ll point you in the direction of the WordPress codex which contains full instructions for setting up WordPress using the industry standard Cpanel.
For the faint of heart or impatient, hit the Fantastico installer button, and choose a username and password. GoDaddy’s own brand software centre is much the same.
The admin panel for your WordPress installation can always be accessed at your domain.com/wp-admin, but if you’re already logged in you should see an admin bar at the top of the screen when viewing any non-admin part of your blog.
2. Key Concepts
WordPress has grown up over the years to encompass a variety of content types, and has developed its own terminology, so it would be beneficial to learn that before jumping it.
Here’s what you need to know before continuing with the guide:
Post: This is the most fundamental type of content that will form the majority of your blog. A post consists of a title, the content text itself, a publish date, a category, tags, and associated attachments (such as pictures). Blog posts are generally intended to be displayed chronologically with the newest appearing first. Monthly archives are automatically generated, as well as an RSS feed of your latest posts.
Page: These were created to house static content for your site that shouldn’t have a publish date—such as About Me, or a Contact form. They also don’t need to be tagged or categorized, and aren’t included when users browse your blog archives. Generally you would use pages for content you want to link to from the front page at all times. Pages can also be hierarchical.
Categories: Generic terms to classify posts. Posts can have one or more categories, and when users browse a category archive, they will be shown a list of all posts in that particular category. You can also assign sub-categories to create a hierarchy if your blog needs it. Categories aren’t really optional, though the system itself won’t force you—if you fail to categorize something, it will assigned a default category of “uncategorized”.
Tags: Tags should describe the post more specifically than categories, and may be used by search engines to consider page relevancy. They allow you to create “tag cloud” widgets, and also have archive pages similar to categories. They’re not essential, but recommended. Not sure how to tag your posts? A good example would be a recipe blog, with categories for breads, main dishes, starters, desserts etc. Each recipe might then be tagged with the ingredients, so that users could for example, view all bread recipes, or view all recipes made (tagged) with flour.
Widgets: Little blocks of functionality that you can add to your blog in various places, depending on whether your theme supports them—generally they go in the sidebar though. They really can do anything and I’ll explain more about them later.
Permalinks: This means the URL from which your page is accessed. By default, the permalink to a certain blog post may look like yourdomain.com/?id=12345, which obviously doesn’t look that great. Later, I’ll explain how you can change this to be “pretty permalinks” of the form yourdomain.com/deliciousbread-recipe.
Comments: Standard fare for blogs nowadays, but you can turn them off. Pages cannot be commented on by default, only blog posts.
Theme: How your blog is displayed, and WordPress has the most free themes of any system—literally hundreds of thousands to choose from. Choosing one can be easy or a nightmare—so that’s why a whole section of this book is dedicated to it. See the key elements of most themes at right.
Menus: A new addition to WordPress version 3 and they allow you to create custom menus throughout your theme (assuming it supports them). We’ll look at this functionality in more detail later, but be aware that many themes have not been updated to include this functionality yet.
Featured Images: Allows you to simply and easily specify an associated image for a post. Once set, themes that support featured images will automatically display the image next to the post excerpt or in various places throughout the theme. Adding the visual cue next to a post title dramatically increases the likelihood of readers clicking-through to read the article. Don’t worry if your theme doesn’t support featured images straight off though—I’ll show you later in the book how you can add this functionality in yourself when we dabble in a little theme editing.
Essential First Steps in WordPress
Though the famous 5 minute installation gives you a fully working WordPress system from the get-go, there are a few steps I recommend you take before doing anything else.
Enable Akismet Spam Control: You’ll be amazed at how quickly the spammers can find your blog and start comment spamming. I left a blog in a basic installation state once, and within a week it acquired 100 comment notifications for the sample “Hello World!” post. Head over to sign up for an Akismet API key first, then activate the Akismet plugin and configure your API key. This will automatically catch most spam comments which can quickly overwhelm you.
Edit the site tagline. After the initial installation, your homepage will be displaying a tagline of “Just another WordPress Site”. Head to the general settings screen to change this, and don’t forget to save.
Enable pretty permalinks. From the Settings > Permalinks page you can choose a new URL style so that your URL’s have meaning to them. You can customize this however you like.
Choosing a WordPress Theme
As with any system that becomes the most popular, people will attempt to exploit unwitting users. For WordPress, this has been in the form of hidden links in theme codes—often to sites of dubious content and encoded in such a way that the theme will break if you attempt to remove them.
Be wary of downloading free themes from random websites. This is a grey area morally—some theme designers make a living from selling these links for advertising fees, and are able to therefore give the theme to you for free. If the theme is from a reputable designer—generally you would download these from the designer’s site rather than a theme collection site—then I’d suggest you leave the link there or pay the designer to have it removed (they usually offer this as a premium service). Otherwise, I would say stick to the WordPress hosted theme archive at wordpress.org, as the themes have been vetted and there’s a strong community behind them. Just be careful about Googling “free WordPress themes”.
More recently, some themes even have malware embedded within them that will turn your website into a spamming machine, and I’ve seen the effects of this first hand—in the worst case resulting in a $1,000 bandwidth overage charge because the compromised server was sending out spam emails at an alarming rate. So I repeat now, never ever download from a non-reputable site—especially something you found after googling “free wordpress themes”.
Where to Safely Download WordPress Themes
Official WordPress Theme Archive: In case you didn’t know, you can access this using the WordPress admin screen itself rather than visiting the actual site. Just select Appearance > Themes > Install Themes, and either search for keywords or filter by the theme’s tags.

WPShower: A selection of both premium and free themes, some of which are featured in the Photoblog / Portfolio selection below.
Smashing Magazine: Though primarily a design blog that covers a variety of topics, they like to round up the best of the new free themes and regularly sponsor a new theme release of their own, so it’s definitely worth subscribing to their feed.
Site5: Premium (or paid) themes are of course another option, so if you’re willing to spend up to $50 on a unique theme or going to a theme “club” then these are some of the best places to start looking:
- WooThemes: The priciest of the lot at $15 a month for unlimited theme access, but great quality.
- ThemeForest: The largest collection of premium themes, all individually priced.
- ElegantThemes: A very comprehensive selection and you get unlimited access to them all for $39.
If you’re looking for themes specifically for photo-blogs, skip forward to the chapter on Galleries and Photo Management.
I’ll be introducing some more great WordPress resource sites at the end of the book, but for now you can either begin work on your new blog using the default theme, covered in the next chapter, or go ahead and choose a different theme from the sources we listed above.
3. Basic Operations: Writing Your First Post
This is going to be the shortest section of this article, because WordPress is so user friendly you really don’t need any instruction to get you started on the writing front.
In fact, most of the functionality available to you within WordPress is one click away now with the helpful admin toolbar. Once you’re logged into the site, you should see this on any page you view on your site. Don’t worry: only you can see it, not your regular visitors.

To write a new blog post, hover over Add New > Post on the left sidebar. It’s that simple. In the admin area, there’s also a button to write a new post in the top right, and a link in the Post section on the sidebar at all times. Things should be self explanatory from there.
Hint: If you find yourself having a sudden burst of inspiration, but don’t want to publish everything at once—you can set the publish date in the future. The Publish button will become Schedule, and at your set time the post will be published automatically. Very useful if you’re taking a long holiday.

There are two edit modes when writing a post—the Visual tab will give you a preview of the post—a WYSIWYG view if you like—showing pictures and text formatting you’ve applied. The final article will depend on your theme template of course, which is why there’s also a preview button to see your finished piece in context and make adjustments.
How to Upload an Image to WordPress
On the post edit screen, click the Add Media button to open the picture upload dialog.

After choosing a file on your local machine and hitting upload, you’ll be presented with the following somewhat confusing screen, so let’s look at that in a little detail.

First off, the Edit Image link is quite useful, allowing you to crop, rotate, and resize the image. It’s easy to overlook though, and for the most part you probably won’t need it. Following on down the screen are some text fields you can enter. If you add a caption, it’s going to be displayed on your page underneath the picture. The title, alternate text, and description however are hidden. They will be used for either browsers that can’t display images or users with vision impairment, or by Google when people perform an image search. Setting them is not required other than a title, but if you have a photograph you’re particular proud of or perhaps a picture you created (like an infographic), then it’s well worth setting them.
Next, the link URL. This determines if users can click on the picture for a larger version or not. If you want nothing to happen, choose none. If you’d like them to be able to open the full version of the picture, choose file URL. The Post URL will link the image to its own page (the “attachment” page), which looks just like a regular post but only contains that picture. Since you’ll generally be inserting images at a good size fit for the theme, linking to a separate attachment page is somewhat redundant—best to link to the full file URL if you do actually want users to be able to view the full image at all.

Alignment determines whether the text flows around the image (left or right), or it sits alone, either with the default none or in the centre of your page. Again, if you’ve set up image sizes to fit your page perfectly, you shouldn’t really need this. If an image is just half the width of your full content column though, it often looks better left or right aligned with the text flowing, and helps to avoid dead whitespace.
The size is an important option. These sizes are either set by your theme, or set by you from the Settings > Media page. Though it’s a matter of personal preference, I prefer to set the Medium size as the perfect fit for my content column, with large size left at the default high resolution—this gives me the option of creating a gallery-like view of photos should I wish to at some point.
Finally, Featured Image is the image you have chosen to represent that post. Depending on your theme, it may or may not be used as a thumbnail throughout. Even if your current theme doesn’t make use of it, it’s good practice to set the featured image in case you upgrade at a later date to one that does, or decide to hack in the functionality in your existing theme yourself. For a shining example of featured images in use, check out the MakeUseOf homepage—those thumbnails you see are all functioning as a featured image.
When you’ve set all the appropriate options, you can go ahead and insert the image to place it wherever your cursor was last in the text. I know the process of image uploading can seem a little unwieldy, but your settings are remembered so most of the time you actually just need to hit upload > insert. If that still gets you down, consider using an external software package to post from (see the chapter on Random Cool Tips for how to do this).
That’s all I’m going to write about with regards to basic operation, because beyond that everything is so intuitive—you simply don’t need a guide. To add a plugin, you’ll find the Add > Plugin option on the admin toolbar, or the Plugins > Add New menu option on the sidebar.

Themes can be managed and installed from the Appearance > Themes menu, and widget set up from Appearance > Widgets. See what I mean about how intuitive this is?
As you install more plugins, you’ll find more menu items appearing on that left sidebar. Unfortunately, it’s up to the individual plugin creator to choose exactly where or which section they are placed in, so if you’re unable to find the options screen for the plugin you just installed, try expanding all the sections and checking each link—it’ll be there somewhere. I’d also encourage you to explore all of the option menu items too, just so know you get an idea of some of the capabilities of WordPress.
How to Embed YouTube Videos in WordPress
WordPress has a little magic for you in this area. Rather than laboriously heading to YouTube, expanding the share tab and finally copying and pasting the object embed codes—just paste the URL of the the video directly into the Post Edit screen instead. When previewed or published, WordPress will automatically embed the video. No messy code, no complicated embeds, just paste the URL and let WordPress do the hard work.
Understanding Widgets in WordPress
Since the user community and the number of developers working on enhancing WordPress are so numerous, there are literally millions of plugins and widgets that you can add to your site. But what are widgets?
Widgets are little blocks of functionality and can range from anything as simple as showing a list of your latest 5 blog posts or your latest tweets, to a Facebook Connect widget that displays the avatars of your Facebook fans.
To manage your widgets, go to the Appearance > Widgets menu item on either your admin dashboard’s sidebar, or the admin bar that appears throughout the site. On the right side of the screen are the various widget areas that are available to you on your current theme. However, if nothing is shown here, then your chosen theme doesn’t support widgets. Find one that does. Some themes support multiple widgets—for example in both the sidebar and footer.

Drag and drop widgets from the “Available Widgets” box to your sidebar or other widget box on the right. You can also rearrange the order of any widgets already on there. Once placed, most widgets can be customized somehow. Show the options by clicking the downward arrow to open that widgets options screen, and don’t forget to click save if you range something. Some widgets will just work as is, or don’t need customizing.
WordPress comes with a set of built-in widgets that perform a variety of functions, so read the descriptions and try them out on your site—most are self explanatory. Personally, I suggest you use at least:
- Search
- Recent Posts, showing the 5 latest posts.
- Categories list
- Links, to show your favorite blogs
To show the latest posts from a different blog (that isn’t necessarily yours), use the RSS widget. This will dynamically pull the latest posts from the site’s RSS feed, though you will need to enter the correct feed address. For another WordPress blog, just adding /feed to the end of the homepage URL should work fine.
You might have noticed that your site already has widgets working on the sidebar by default—but the widgets screen shows none as active. This is because most themes have a default set that they show when the user hasn’t customized anything. If you begin to customize the widget area by dragging and dropping even just one widget, the defaults will all disappear to show your customized area instead. If you remove it again, the default will kick in.
You’ll notice there’s also another box called “Inactive Widgets”. By dragging one of your existing widgets to here, you can “save” it—keeping the settings. You can drag multiple copies of the same widget to here and each one will be saved for later use.
How do you get more widgets?
Widgets are just another kind of plugin, and many kinds of functionality-adding plugins have widgets included. If you want to browse the plugins that were specifically tagged as being widgets or having widgets, you can browse through them from the Plugins > Add New screen, where “widgets” is one of the main tags. A far better ways of doing it is just to search for the kind of widget you want. Type in “twitter” (for example) and you’ll find thousands!
4. WordPress and Search Engine Optimization (SEO)
I’m going to cover SEO briefly because good content alone is not enough to get your blog noticed, and most bloggers give up pretty soon if they don’t see a good number of visitors or feedback from them. Making sure your blog is optimized for search engines is only one part of the story though—check out the next chapter for various strategies to promote your blog.
What Is SEO?
Basically, SEO means making sure the content can be found—so your authoritative blog post on “how to feed chickens” hopefully appears somewhere in the top 10 results when a user searches Google for that particular phrase. Of course, no one can guarantee you’ll ever rank well, and ultimately it is the *quality* of your content that will keep you up there as a reliable source of information, but SEO is the launchpad from which you start and give yourself the best possible chance.

Why You Should Care About SEO
To many people, search engine optimization is some kind of black art that simply doesn’t apply to blogs—some even think of it as some kind of “illegal hacking” to make your website more attractive to the Googlebot. While that side of the subject certainly does exist, the majority of SEO techniques are simple common sense that should be applied to every website on the internet. There are also some practices you need to be careful of, as they can really hurt your standing with Google.
Let me tell you from experience that SEO is something you really have to consider from the start—it’s very difficult to change things once you’ve built up a backlog of blog posts indexed, and you’ve already got visitors and links coming in from other blogs—and you’ll be stuck in the land of blog mediocrity until finally you give up posting one day. Believe me, I’ve been there.

Disclaimer: No one can really know how the Google ranking algorithm works, and it’s for that reason that attempting to game the system is foolhardy at best. What you can do is follow a set of best practices published by Google themselves, listen to advice from those with experience, and make your own decisions. In the end, much of SEO is simple commonsense, and as long as you write quality content for which the content is easily identifiable—by humans—then you should do just fine.
First Steps for SEO
Choose a set of keywords and if possible, focus your blog on a single topic. If you write lots of high quality articles on a single subject, and the subject is in your blog title and domain, then you will rank well for that keyword. It’s as simple as that. My own site, ipadboardgames.org is currently ranking on the first page in Google for the keywords “iPad board game(s)” precisely because it is focused on one topic only, and has quality, trusted reviews that are linked to around the web.

But what if your site is not about a single topic—such as a general “about me” or personal blog? This is the most difficult to consider for SEO so you can expect to not rank particularly well for anything other than your own name. Try to write about a few unique, niche topics that you have expert knowledge on and you’ll find you get a lot of traffic from those which will convert to regular visitors. For example, I once owned a blog that was a mix of mediocre tech tutorials, but one article was about how to install Windows using Bootcamp on a Macbook when the superdrive was broken—at the time it was one of only a few pages around detailing the process, and was even linked to from piratebay.org, which literally rocketed the blog to around 500 visitors a day.
A third type of blog you may be interesting in creating is about you, but also offering your professional services. In this case you still need to target some particular keywords “tree cutting Wisconsin”, but it’s important you also regularly publish and share your specialized knowledge on the topic, thereby establishing yourself as an expert. Simply putting up a “business card” site just isn’t enough anymore—you need to produce fresh content on a regular basis.
General SEO Advice for Any Site
The first thing you should do if launching a new site is to get a personalized, unique, relevant domain name like yourdomain.com.
Depending on the type of blog you’re planning on making, the domain name is a good way to get a head-start with your Google rank. Basically, “exact match domains” are a key sign to Google that your site is relevant to a particular topic. All things being equal—an exact match of the domain will always win out against something generic. Subdomains don’t count, by the way.
Set Correct Meta-Tags For Title and Description:
The page title is what appears in the user’s browser at the top of the screen—as well as the title shown in Google search results. WordPress does quite well by default on titles, but you should avoid any that are too long or you may want to adjust the structure slightly. The meta-description is not human-readable on your blog itself, but it is used by Google in the search results page if you have one. If the description isn’t set, Google will attempt to extract some part of your page that it deems relevant to the search query (in fact, it may do this anyway and just ignore your perfectly crafted description if it thinks it isn’t relevant to the user at hand), so make sure you set one.

By default, WordPress doesn’t set a description, so you’ll need a plugin for this which I will describe later.
Use Images to Your Advantage:
One easily overlooked area of incoming search traffic is from Google Image Search. In one site I’ve managed, the traffic shot up 100-fold overnight because of a single image related to recent news—with that in mind, you can leverage images as an untapped source of traffic. Specifically, the image ALT and TITLE tags need to be set so they are relevant to your keywords. If you page is about “feeding chickens”, and you have a photo of a feed mix you made, with the filename “DSC1001.jpg”, and no ALT or TITLE tags set, you are throwing away a big traffic opportunity.
An easy way to make sure you leverage this is to fix the relevant fields when you upload images using the WordPress image uploader (see the screenshot), but what if you’ve forgotten to do it for all your existing posts? In the case, install the helpful SEO Friendly Images plugin. It will automatically add relevant tags to all your images, according to the title of the post they’re attached to—it’s not ideal, but certainly better than nothing.
Avoid duplicate or “low quality” content:
It should go without saying that copying someone else’s content is bad, but many websites would previously do this automatically by simply “scraping” RSS feeds—there are even WordPress plugins that will do this for you. Make no mistake though, this practice is now easily recognizable by Google and results in a swift de-indexing of the offending site. It is therefore absolutely crucial that you don’t copy and paste content from another source—make sure your blog posts are original! This doesn’t mean you can’t embed YouTube videos or quote another page, but make sure you do something else on top of that.
You should also make sure that each page of your site has a significant amount of good content—Google will penalize you for “low quality” content if you publish a post with just two or three sentences on it. So does this mean you can’t post little thoughts or links you find? No, but it does mean they shouldn’t be a blog post. Consider using the “asides” post type of the default twenty-eleven theme which shows the posts on the blog without giving them a whole separate page—or post them on Twitter. A good rule of thumb is that a blog post should be at least 300 words.
Easy SEO in WordPress With a Plugin
Yoast SEO is a fantastic free plugin that I always install on any new site.

There’s too much functionality to cover it all here, but here’s some highlights of what it does:
- Rewrites title tags so post titles come at the beginning, and allows you to write custom title tags for any archives or specific pages.
- Meta description editor, to easily add relevant meta descriptions site-wide and customize for individual pages and posts.
- Avoids duplicate content by setting the rel=canonical tag for you (if you don’t understand what this means, it’s a way of telling search engines what the original page was, since WordPress is capable of presenting the same post at multiple different URLs)
- 404 monitor to make sure your site remains error free.
- Slug-optimizer is perhaps the most curious sounding feature ever, the slug-optimizer removes useless short words from your pretty permalink URLs thereby making them shorter and more relevant.
- Social lets search engines know which social profiles are associated with the site.
- XML Sitemap handles XML sitemap generation for you.
- Advanced SEO takes care of advanced issues like breadcrumbs, custom permalinks, and RSS feed settings to identify your site as the original source of content.
Basically, it handles every aspect of SEO you will ever want, but you can disable any parts of it you don’t need. Some are quite advanced and certainly not topics we can cover in this guide, but as you learn more about SEO, you can be sure you won’t need to change plugins to get that extra functionality.
5. Galleries and Photo Management
If you only need to embed galleries of pictures into your posts occasionally, WordPress has built-in gallery functionality so you don’t need extra plugins. Just upload the images on the appropriate post—you don’t need to insert them, just upload (we call this “attaching” them to the post), then insert the shortcode wherever you want the attached images to appear.
Gallery and Photoblog Themes
- Revolt Theme: Check it out for yourself to get the full effect.
- Portfolio: straight up square grid portfolio, minimalist but professional.
- Imbalance: From the makers of the Portfolio theme, this is a brighter, more modern theme.
- Mansion: Removes any whitespace between photo previews and focuses on what matters.
- Square: Rather than trying to jam 20 photos on one screen, BigSquare simplifies things down to one photo after another complete with a quick information section on the side.
Photo Gallery Plugin
By default, WordPresss will attach images to a post. For most cases this is fine, but you may find yourself wanting something more powerful, with the ability to manage separate albums or galleries. In that case, I recommend a plugin called NextGen Gallery.
There’s also quite a few plugins for the NextGen Gallery plugin itself, which might hint at how powerful it is.

With this installed, photo management is entirely separated from blog posts. You have Galleries which consist of one or more photos (one of which can be specified as the preview image for that gallery), and albums which consist of one or more galleries. You can still easily embed an entire gallery or album within a blog post if you need to (“hey, posted these to the gallery from Sam’s wedding”), but you can also have a “photos” section, with all the galleries you have listed.
Photo uploads are also more powerful, with the option of either a zip, batch or individual uploads, and you can choose which gallery they go in (or automatically make a new one) when you upload. To embed you can either use the shortcodes provided [nggallery id=?] or use the new button on your visual editor bar. Read more about the plugin, or simply install using the Plugins > Add New and searching for it.
6. WordPress Blog Promotion
In this short section, I’ll take a look at some proven strategies to promote your blogs, including practical methods you can put into practice, some warnings, and plugins you can make use of.
To simply write your blog isn’t enough—you need to put yourself out there in the “blogosphere”—get in contact with other blog owners about possible link exchanges, and comment on other blogs that interest you or are related to yours.
A word of warning about commenting. Comment forms allow you to enter your name and website URL as a thank you link for giving feedback, but some users choose to take advantage of this by typing in their target keywords instead of a name—so that insightful comment might be written by “Best Dating Site”.

Opinions vary in the blog community over the legitimacy of this, but at MakeUseOf we take a strong stance against it—if you enter your name as a set of keywords, rest assured you will be deleted and banned from commenting. Also, make sure your comment is actually adding something to the conversation—it’s easy to just write “hey, great blog post” and suddenly get your link in the comments, but again it’s a morally grey area. Please, don’t contribute to the mountains of web spam already out there.
Guest Blogging
Guest blogging is also a great opportunity, whereby you write a guest post on someone else’s blog in exchange for a link in the article somewhere. MyBlogGuest (http://myblogguest.com/) is created by our own ex-writer Ann Smarty, and it’s a great system to find suitable blogs or even guests to post content on your blog (and give you a well needed holiday).
Participate in a Blog Carnival
A blog carnival is when a topic is given, and writers from various blogs will write about that topic hoping to be included in the round-up. When the carnival submission process is over, the leader will write a round-up post highlighting all the best entries and linking to them. These can be very productive in terms of getting new traffic, as the lead blog usually has high numbers of readers to nudge in your direction.
As with commenting, try not to be too spammy and make sure the carnival you’re participating in is actually related to your website—it’s no good promoting your Asian dating site on a gardening carnival. The best way to find them is to search google for “blog carnival” followed by the topic of your choice.
Encourage Social Sharing
Some people are really getting sick of seeing a “Like” button plastered on everything these days, but there is absolutely no denying the power of social sharing for websites.

Adding some social share buttons to your blog posts couldn’t be easier with these plugins:
- ShareThis: My recommended method as it produces very attractive share button strips with or without share counts, and includes a recognizable all-in-one share button, used by thousands of websites.
- ShareDaddy: Creates an individual button as well as an all-in-one share/email button.
- AddToAny: Creates a single share button that expands to show sharing links on various social networks.
If you’re comfortable editing the theme files, you can also grab the codes directly from the relevant sites. See these links to generate the codes for the most popular social services:
7. Making Money With Your Blog
A lot of people start blogging believing that it’s an easy way to make money—just write something interesting, throw some ads on the page and you’ll be rolling in free cash in no time. Like all get-rich-quick schemes, the reality is quite different. I don’t want to put you off creating a blog to make money—if that’s your intention then fair enough.
But you ought to know that’s it’s going to be a lot of hard work, the payback will be very little for a long time, and even after a few years you may just be making pocket change. Having said that, I’d like to introduce you to just a few of the ways in which you can monetize your blog.
Personally, I’ve been writing websites and blogging on various topics for close to 10 years now. It’s only in the last year or so that I actually began to earn a living doing what I love.
Google Adsense
The classic way to monetize your blog is with Google Adsense advertising revenue. Head on over to adsense.google.com to apply, and use the easy tools to design your own blocks of advertising. There’s a variety of shapes and sizes on offer, but stick to the Responsive size, which tends to produce the best results.
The easiest way to add these ads to your page is to open up the relevant template, then copy and paste the code in where you want it, but if you’re uncomfortable editing theme code, use the plugin “All in One Adsense and YPN” to do this for you. Be warned, the plugin is set to donate a proportion of your ads displayed by default to the plugin creator, so if you don’t want to do this then add 0 to the Donation setting.
Affiliate Links
The concept of an affiliate link is that you encourage your readers to purchase either in a particular store or a particular product, and in return you get a percentage of the sale. Amazon is perhaps the most famous and easiest to start with, primarily because no matter what you’re promoting you’re bound to find it for sale on Amazon.

You don’t have to specifically recommend something though, even the Amazon widgets you can place on your sidebar are quite good performers—they’ve been programmed by Amazon to automatically tempt the reader with whatever they viewed lately on Amazon, or if there’s no data they’ll grab keywords from your page and automatically pull relevant products.
Sign up at Amazon Affiliates, and there are full instructions on either creating individual links or widgets, though explaining the process is out of the scope of this book. Unfortunately, you need to add affiliate links directly to your individual posts—there is no magical plugin I’m afraid.
If you’re not comfortable doing this, then just copy the code for what Amazon calls the “Omakase” widget and paste it on your sidebar.
Amazon isn’t the only affiliate program though. ClickBank offers downloadable ebooks and software packages on a huge variety of products, and pays better than Amazon due to the direct marketing approach on high markup download-only products.
8. WordPress Backup and Recovery
There are two main elements that need to be backed up in WordPress—the database, and the uploaded content. Let’s take a look at the various methods available to you.
Via an SSH Command Line
If you have access to your server via SSH (a command line) then backing up and restoring your site is incredibly easy with a few simple commands. Unfortunately, shared hosts generally don’t have SSH access—it’s another of the privileges of having your own VPS. Here’s a quick overview of the process in the event that you do have it though:
1. Login through SSH and change to your public_html or httpdocs directory (assuming you installed WordPress in the root).
2. Export the database by typing:
mysqldump –add-drop-table -u Username -p DatabaseName > BackupFilename.sql
Replace Username and DatabaseName with the appropriate details, and change the BackupFilename if you wish. Hit enter and type in your password. If you don’t know the usernames or passwords, check your wp-config.php as they will be defined there towards the start.
3. Confirm you have your exported database file with the command.
ls
You should see your BackupFilename.sql somewhere.
4. Compress all your files and the database export using TAR command:
tar -vcf FullBackup.tar
-vcf is going to compress and give you a visual output of what is going on, I like it to show it’s working. Make absolutely sure you have that final . , or the command will fail. This will give you a full backup file named FullBackup.tar which you can then download via FTP or remotely send to a secure backup location.
To restore from the FullBackup.tar, these are the steps you would take.
1. Assuming the FullBackup.tar in stored in the httpdocs or web root of the host, unpack it first:
tar -vxf FullBackup.tar
2. Restore your database using:
mysql -u Username -p DatabaseName < BackupFilename.sql
That’s it, you site should now be accessible and working again. The backup process can also be automated to perform every day or every week without needing to login and type the commands again—just follow our automated WordPress backup tutorial.
Via Plugins
WP-DB-Manager: Mentioned elsewhere as a useful tool to optimize your database, WP-DB-Manager also handles backups too. It’ll give you a database backup file in the wp-content/ backup-db directory. This is a semi-manual method—so you’ll still need to download your entire site using FTP (but this plugin will have handled the database side of things for you.
UpdraftPlus: This plug completely automates the regular backups of all of your blog files as well as your entire database. You can schedule the plugin to run at any interval. It supports storing your backups to Google Drive.

VaultPress: This is a premium support service from the creators of WordPress themselves—so you can be assured it’s rock solid and reliable. The service costs $15/month per site, but you’re paying for the convenience, reliability and ease of use.
Backup Buddy: Another premium plugin I’ve heard fantastic things about. The cost is $75 one-off payment for use on up to 2 websites, and the features are really incredible.
Manual Backup and Recovery
Your written content is contained entirely within the database—but any media, plugins and themes you upload are stored in the wp-content directory. The other important file you need to backup is wp-config.php in the root—the rest of the files are standard WordPress system files that could be replaced by re-downloading WordPress.
Having said that, simply downloading your entire WordPress directory over FTP is the easiest way to backup files, but depending on the number and size of files you’ve uploaded, this could take a few hours.
On the database side, the only way to manually back it up is by using PHPMyAdmin through your web hosting control panel. The WordPress codex details this process in detail —but if you used the WP-DB-Manager plugin you will have a database file exported for you already, without needing to access PHPMyAdmin
In the event of a catastrophic failure, you need at least two things to restore your site:
- A full backup of all the files—At the very least, your wp-content directory and wp-config.php configuration file from the root.
- A full database backup of all tables—This will be either a .SQL, .GZ, or .BZ2 file.
Uploading your file backups is a simple process through FTP, just make sure you place everything in the same location again—so if your blog was originally installed into the /blog directory, make sure it goes there again (you can “migrate” your site to a different domain or directory, but that’s another topic entirely).
Restoring your database must again be done through the PHPMyAdmin interface.
9. Optimizing and Scaling for High Traffic
This is a topic big enough to become an eBook all of its own, but I’m going to try and give a broad overview of the various methods available to you once your site becomes sluggish and needs to be scaled. A lot of people are under the impression that WordPress can only work for small scale blogs, but that simply isn’t true.
Using a combination of various techniques, WordPress can scale to handle millions of requests a day. As I mentioned, MakeUseOf runs entirely on WordPress, accompanied by a number of key technologies. Once you reach about 1,000 unique visitors a day, it’s time to start thinking about scaling your website or some form of optimizing, so read on.
Server Upgrades
The obvious solution to initially scale your website is to migrate from shared hosting to your own private virtual server. This should be your first step if you’re still on shared hosting, as there’s simply no other miracle cure that’s going to help—it only delays the inevitable.
My personal recommendation for a VPS hosting plan is the DV4 series from MediaTemple, and I personally have around 30 sites on a single $100/month plan there with amazing performance.

When the need arises, a VPS hosting plan will allow you to upgrade instantly by adding more RAM or additional CPU power.
Another benefit to having a VPS is that you’re free to switch over to the much faster backend server software called NGINX. This is a high performance replacement for Apache, but still free. Setting it up is absolutely out of the scope this book though.
External Image Hosting on Content Delivery Networks
One key speed factor on your page is the time it takes to load images from your server. The page itself—the textual HTML content—is fairly fast, but the images will always be slow to load.
If you have a blog which makes heavy use of images on the front page for example, you may find the user experiences sever “sequential loading” where they’re sitting there waiting for image after image to load, line by line in extreme cases. This is where the idea of external image hosting or CDNs comes in.
CDNs are high speed data centers situated around the world that mirror your image (and Javascript) content, serving them up to visitors as required from locations as near to the user as possible. The effect is instantaneous loading of images, and this technology is absolutely key to nearly every high-traffic site on the internet.

Although they are an additional cost, it’s actually going to cost you a lot less than if you used the same amount of additional bandwidth on your hosting plan. The costs are very low—super fast MaxCDN.com offers a 1TB of transfer for $40 (expires after 12 months), while Amazon s3 storage is a little slower but significantly cheaper.
To make use of this kind of service you’ll need the w3 Total Cache plugin described later in this chapter. An alternative to paid high speed data networks is simply to host your images with an external free service such as Flickr.com or Loadtr.com (check out the plugins list for how to do this).
CloudFlare to Reduce Unneeded Requests
Shockingly, up to a third of requests made to a website can be either malicious robots, automated scans or otherwise unfriendly. By cutting these out before reaching your site, you can ensure you only serve content to real users. This can be achieved for free with CloudFlare.com.
Once you switch your name servers to CloudFlare’s, it essentially acts as a proxy and filter to keep out the bad guys and often results in significant speed increases on your page time. One minor point is that your site will see all visitors as coming from CloudFlare, so you’ll need to install their WordPress plugin in order to correctly report the IP addresses etc.
Owned by MediaTemple hosting, CloudFlare is also a one-click install if you host your website on any of MediaTemple’s plans, or you can follow our published tutorial.
W3 Total Cache Plugin
This is the big-daddy of caching plugins and has so much functionality you may find it a little overwhelming. I’ll break down each feature it offers, but please remember that your mileage will vary—some users report very little improvement on using shared hosting for instance. I can tell you now that MakeUseOf wouldn’t be able to run without this plugin:
- Page Cache: This is the core functionality, in that it creates a static copy of your site’s posts and pages and can serve them rapidly to users.
- CDN: This enables you to host not only your media files (pictures etc) but also any theme files, graphics and javascript.
- Object and Database Cache: Particularly useful for slow database servers, this prevents the same query being made over and over.
- Minification: The art of making things tiny! This means removing any unnecessary spaces, line breaks and comments from HTML and Javascript. Generally, automatic mode works fine, but if your theme makes use of Cufon custom font Javascripts you’ll need to tweak it manually.
- Browser cache and control headers: Although a lot of the internet is cacheable, many sites simply aren’t set up by default to enable this. This feature makes sure your site’s pages are sending the right headers to say to the user’s browser “yes, you can cache this page for X days”.
Database Optimizations
Databases can often get messy. With constantly writing and updating entries, they accumulate temporary bits, referred to as overhead. This can grow the size of your database astronomically, and can often result in critically slow performance or a complete shutdown.
Keeping the database tables optimized is therefore very much recommended. WP-DB-Manager can handle this for you as well as giving a good graphical interface for database backups.
9.6 Maintenance
The latest WordPress includes a helpful UPDATES link in the Dashboard section of the Sidebar, and on that screen you’ll find a complete summary as well as buttons to update all of your plugins as well as core WordPress files. Don’t just hit update without some preparation first though:
1. Backup. As WordPress becomes more sophisticated and has ever more stringent beta testing, it’s rare that an update procedure will actually break your blog—but it has been known to happen. Re-read the steps outlined in the backup chapter, and be sure you have those backups in place before proceeding.
2. Bear in mind that some plugins will break. As WordPress evolves, some functions made use of by plugins are deprecated, sometimes removed altogether. Again, it’s rare but some plugins will break after upgrading to the latest WordPress. If this happens and your WordPress blows up somehow, go back to the chapter on Recovery again, and follow the steps there to fix your blog—but you may have to find an alternative plugin or keep the offending incompatible plugin deactivated until it’s updated itself (so again, keep an eye on your updates screen!)
3. Don’t panic. WordPress is for the most part quite a robust system, but things do go wrong. Unless you’ve catastrophically wiped your database through human error, no matter how bad things seem your blogs posts are usually never lost.
Get Blogging With WordPress!
As you can see, blogging with WordPress isn’t as simple as running a quick installation package and then writing. There are a lot of things to think about. Everything from themes, plugins, backups, spam and more.
If all of this has your head spinning, we HIGHLY recommend forking over the extra cash to pay for managed WordPress hosting.
A managed WordPress host handles all of the administrative issues for you, allowing you to focus entirely on your site itself. The best managed WordPress host is WP Engine, which we use for our sister sites. It really doesn’t get any easier than this!
Read the full article: Set Up Your Blog With WordPress: The Ultimate Guide
Read Full Article