22 January 2020

How to Customize Your LinkedIn Feed


linkedin-customize-feed

A large percentage of the LinkedIn userbase use LinkedIn as an online resume. And that’s it. Despite its social media capabilities, people don’t always make full use of its tools.

One of these tools is the LinkedIn Feed, which is a robust way of keeping track of posts from people in your industry. If you want to make full use of LinkedIn, here’s how to customize your LinkedIn feed to its maximum potential.

NB: We will be focusing on LinkedIn as viewed through a web browser rather than the mobile app. However, most of the tips will still apply.

Step 1: Find Your LinkedIn Feed Controls

There are two crucial controls related to your LinkedIn Feed that you need to know about before we get started.

The first one is your Quick Help menu, located in a dropdown menu at the top of your home page.

You can find it by clicking on the small white arrow next to the Me icon where you see a small replica of your profile picture, then scrolling down to the link Quick Help.

Here, you can ask questions and find easy answers with a click of the mouse. Within this menu, you’ll also find a link that says LinkedIn Feed – Overview. This page will break down what goes on through your feed and its specific controls more thoroughly.

LinkedIn Quick Help Menu

The second set of controls that you’ll need to deal with relates to the customization of your LinkedIn Feed. At the top of your feed—where you see the latest post—you’ll also see three little dots on the right-hand corner of that post.

Click on them.

LinkedIn Feed

A dropdown menu will emerge. There, you will see multiple options for this post. At the bottom, there is also a general option called Improve my feed. This will allow you to manage your feed as a whole.

Click on Improve my feed now.

Step 2: Learn How to Use Feed Controls

Once you click on Improve my feed, you’ll be taken to a place where you can control what shows up in your feed. Under Manage my network on the left-hand side of the desktop app, you’ll find four links:

  • People I Follow
  • Groups
  • Pages
  • Hashtags

These are your top-level controls for deciding what you want to see on your feed, and from whom.

LinkedIn Feed Manage My Network

To the right of this box, you’ll also see a section devoted to recommended people, pages, and companies that you can follow. Let’s go through some of those subsections now.

Step 3: Add LinkedIn Feed Recommendations

As part of this list of recommendations, you’ll see a section called Popular pages across LinkedIn.

These recommendations are from pages that are popular across the website. The pages might also align with your interests or the interests of your LinkedIn followers.

If you’re looking for a list of guaranteed hits, here’s a handful of companies that everyone should follow on LinkedIn.

Additionally, you will also find a section called Popular people to follow across LinkedIn.

Once again, the recommendations being offered are a combination of your interests, your industry, people who are popular on LinkedIn, and those people that your followers are interested in.

Popular People on LinkedIn

Alongside popular pages and people, you also have:

  • Popular hashtags across LinkedIn.
  • People who are in the (named) industry also follow these hashtags.

These two sections are my personal favorites, as LinkedIn will take a look at your job experience and what you’re skilled at, and then say “OK, most of the people who have your skills follow these hashtags. Would you like to follow these hashtags, too?”

Because of this, each person’s list of recommended hashtags will be very specific to them and their skillset. To follow one of these hashtags, click on the Follow button beneath it. It will change to Following.

Follow Hashtags on LinkedIn

To unfollow a hashtag, click on the Follow button again.

Lastly, you’ll find a People in your network also follow these people section. It is here that you’ll see recommendations based upon who your connections are interested in.

While this section can get a bit unpredictable—who your colleagues follow might not be the sort of people you need to follow—you can definitely find some useful information.

Step 4: Manage Your LinkedIn Groups

Now that we’ve gone over how to add new interests to your LinkedIn Feed, we can talk about the maintenance of that feed.

Let’s say—for example—that you’re following too many groups, or people within those groups. How do you clear those extra groups out?

Well, the best way to do this is by scrolling back up to your Manage my network section. Click on Group or Groups.

Manage LinkedIn Groups

I personally don’t follow a lot of groups, but let’s say I did and I wanted to get rid of one of these groups entirely.

To leave a group, click on the three dots located to the right-hand side of the group’s name in the Your groups list. Click Leave this group.

Leave a LinkedIn Group

If you go over to your Requested section—and you currently have no pending requests for groups that you want to join—you may see a sign that says Discover groups.

Discover LinkedIn Groups

If you click on this sign, LinkedIn will take you to a new page where you can browse groups related to your interests. This will contribute to your LinkedIn Feed and give you a more enhanced experience on the website.

Step 5: Manage Your Hashtags

Under Manage my network, you can also manage Hashtags. This is especially useful, as hashtags can easily get out of hand if you follow too many.

I personally follow over 30 hashtags. This is not a super high number, but also more than I need. So let’s click on the Hashtags link to adjust this.

Delete Hashtags on LinkedIn

In this section, you’ll see all of the hashtags you follow displayed in a grid. To unfollow a hashtag, click on the Following button beneath each one. This will unfollow the hashtag for you.

LinkedIn Hashtags

Once you’ve trimmed out some of these hashtags, click Done in the top right-hand corner.

Step 6: Manage Your LinkedIn Followers

There is one more way that you can manage your network. Under People I Follow, you can click on the button outlined here in red to do just that:

Find People I Follow LinkedIn

Once you’re under this section, you’ll see three more sections.

  • Follow fresh perspectives
  • Following
  • Followers

Follow fresh perspectives introduces you to a whole new group of people you wouldn’t normally think to follow. By clicking on that button, you’ll find a bunch of active accounts, companies, and hashtags that might be relative to your interests, with some overlap from previous sections.

Follow Fresh Perspectives LinkedIn

You can try scrolling through them now to see if you can find something you like.

Step 7: Customize Your LinkedIn Feed on a Granular Level

After you’ve customized the content you follow, you can go back to your LinkedIn Feed to see new posts. If you’ve made changes there should be a noticeable difference. But what if some of these changes include posts that aren’t the greatest?

Well, you can hide individual posts that don’t relate to your interests.

To hide a post, click on the three dots in the top-right hand corner of the post in question. Instead of clicking on Improve my feed, click on Hide this post instead. This will hide the individual post.

Hide Post LinkedIn Feed

The final adjustment you can make is how the posts show up on your feed: most popular posts versus chronological.

To change your viewing order, go to the very top of your feed. Beneath the box that says Write an article on LinkedIn, you’ll see a dropdown menu that says Sort by on the right-hand side. Click on it.

LinkedIn Feed Chronological

From there, you can choose your preferred viewing method: top versus recent. After you choose an option, LinkedIn will rearrange your feed for you.

Customize Your LinkedIn Feed

LinkedIn is a great social networking site made more interesting when you know how to utilize it properly. By following our guide you can customize your LinkedIn feed to suit your own needs.

However, customizing your feed isn’t the only way you can get the most out of LinkedIn. Here’s how to use LinkedIn Skill Assessments to stand out.

Read the full article: How to Customize Your LinkedIn Feed


Read Full Article

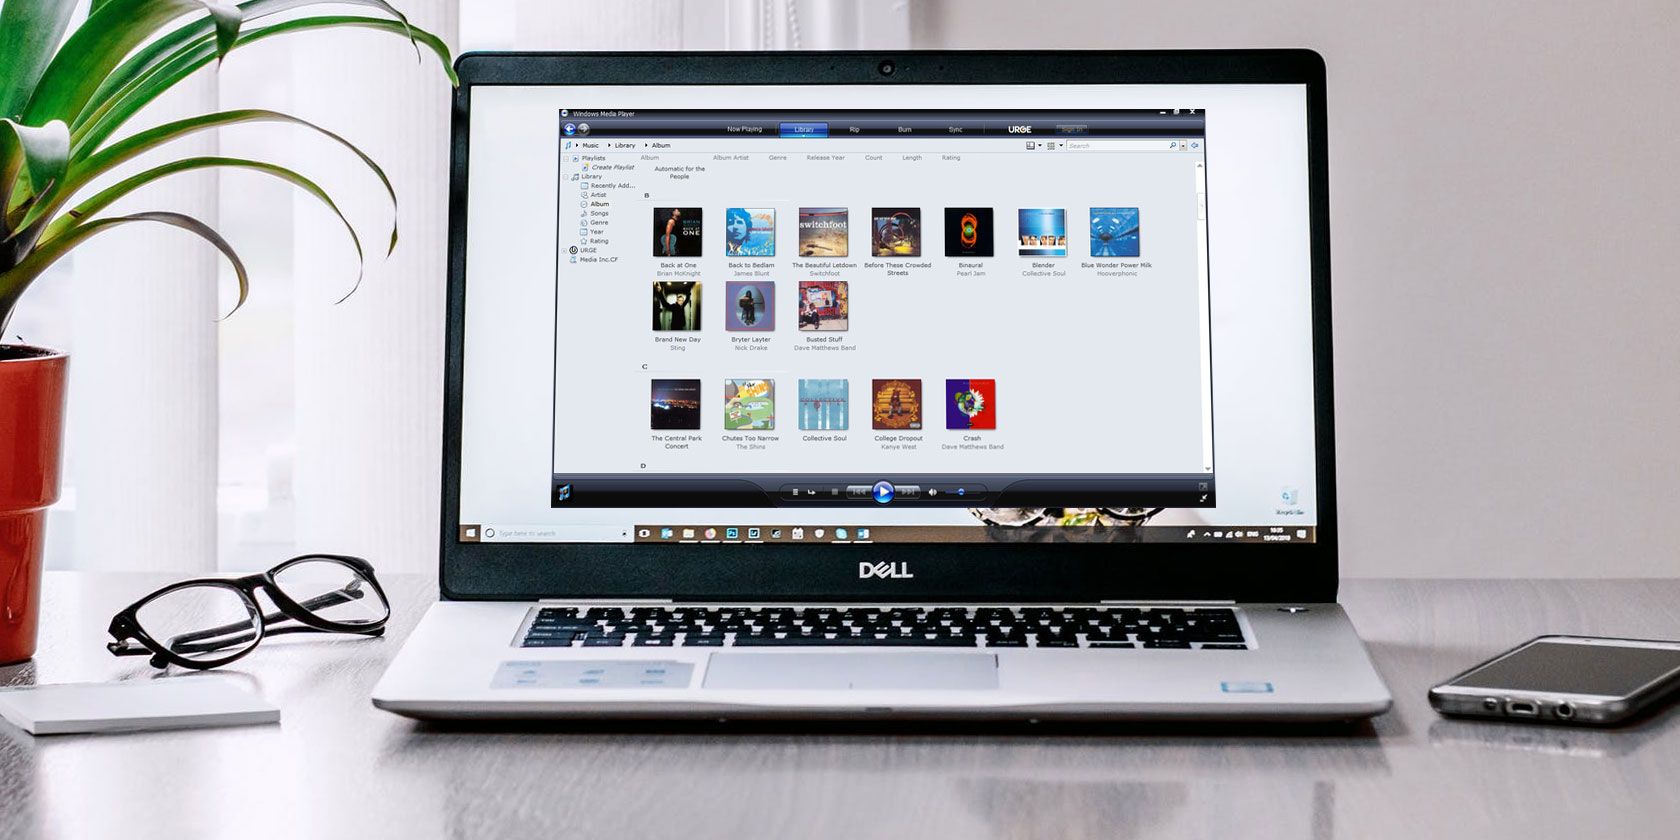
How to Rotate a Video in Windows Media Player


rotate-media-player

Wonky videos can be a pain in the neck—literally! Videos recorded in landscape mode often look as though they’ve been made with the phone in portrait mode. The result is a video that needs rotating before it can be viewed.

While some mobile apps can’t rotate videos, what if the video has already been synced to your PC? Alternatively, it might have been shared with you without the sender realizing it was wonky.

So, how can you rotate a video in Windows Media Player?

Windows Media Player? Really?

First introduced in Windows 3.0, Windows Media Player has been a fixture of Microsoft’s desktop operating system for 30 years. It’s still available—you’ll find it in Windows 10 by tapping Start and searching for “windows media”. Otherwise, you can download Windows Media Player 12.

Windows Media Player 12 has support for H.264 and MPEG-4 Part 2 video formats, MP4 and MOV container formats, AVCHD, and several others.

So, there’s a good chance that you’re using Windows Media Player to view your videos. But what happens when the video has been recorded in the wrong orientation?

You Can’t Rotate a Video in Windows Media Player

Sadly, Windows Media Player does not support video rotation. In fairness, this should not come as much of a surprise. Other tools have been released over the years that offer a far superior media player experience.

Windows Media Player is good for playback of video files, including HD/Blu-ray standard. However, rotation and advanced filters are not options with this tool.

As a result, you will have to use a third-party tool to flip your video.

Rotating a Video for Windows Media Player

If you want to continue using Windows Media Player, you’ll need another app to handle things like fixing and rotating videos.

Three key options are available for rotating a video for playback in Windows Media Player:

  • Free Video Flip and Rotate from DVDVideoSoft
  • RotateMyVideo at rotatemyvideo.net
  • VLC media player from Videolan

Each solution rotates your video with the minimum of fuss, saving it in a format Windows Media Player can play.

(Windows Movie Maker can also rotate videos, but as this is no longer supported, it is not recommended.)

Free Video Flip and Rotate

The first way to rotate a video for Windows Media Player playback is with Free Video Flip and Rotate.

Start by downloading Free Video Flip and Rotate from DVD Videosoft. This is a free Windows video rotation tool, compatible with Windows XP Service Pack 3 and later. It is particularly suited to Windows 10.

  1. Install and click Add file (or drag your video file into the app window).
  2. With the video selected, check the previews in the main app window. On the left is the default view of the video in its current state. On the right, you’ll see a preview of how the video looks once rotated.

    Free Video Flip and Rotate interface

  3. Below the video, you will find a row of arrows. The first three are for rotation (the others are for flipping video clips). Click one of the arrows to rotate the video.
  4. Select the correct conversion format in the drop-down in the bottom left corner. For Windows Media Player, use MP4. When you’re ready, click Save. The finished video will be set to the desired orientation.

How to Rotate a Video Online With RotateMyVideo

If you don’t want to install another tool, but want to stick with Windows Media Player (despite it being no good for rotating videos) why not use an online utility?

RotateMyVideo rotates and flips your videos, letting you download the results to your PC. You might also share it on Facebook or YouTube or download it to your phone.

Windows users should visit the site and click the Pick Video button. Select the video you wish to rotate, then wait as it is uploaded to the site. Then follow the simple steps below.

Rotate your video in Windows with RotateMyVideo

  1. Use the Rotation arrows to rotate the video left or right, in 90-degree steps.
  2. Change the ratio if necessary and when done click Rotate Video.
  3. Once done, click Download to save the rotated video to Windows. You can then view it in Windows Media Player.

Permanently Rotate a Video With VLC Media Player

To rotate a video with VLC media player, start by visiting www.videolan.org and downloading the app.

  1. Open the video via Media > Open File.
  2. To rotate the video, use Tools > Effects and Filters then Video Effects > Geometry.
  3. Look for Transform, check the box, and set the drop-down box to rotate as required. You can rotate videos by 90, 180, or 270 degrees.
  4. Click Save, then Close to finish, and Play to view the fixed video.

Rotate a video for playback in Windows

Unfortunately, this is isn’t temporary; it will also rotate all subsequent videos played in VLC media player. As such, remember to disable rotation by clearing the Transform checkbox.

To save the rotation and view the rotated video in a different app such as Windows Media Player, use the Convert/Save tool.

  1. First, complete the steps above, then open Media > Convert/Save and click Add.
  2. Find the file you wish to rotate, then Convert/Save.
  3. In the subsequent screen, find the conversion Profile and click Settings (spanner icon).
  4. In Profile Edition, click Video Codec > Filters and check the Video transformation filter.

    Rotate videos in Windows with VLC

  5. Click Save, then Start to begin the conversion.

VLC media player will display a bar to denote progress. Once this has completed, click Play to enjoy the rotated video.

With the file saved, view the rotated video in Windows Media Player or any other player of your choice.

Don’t Get a Crick in Your Neck—Rotate Your Videos in Windows!

Incorrectly oriented videos are a massive inconvenience. Rather than rotate your screen, or living with a bad neck, the best solution is to use software. We’ve offered three suggestions to rotate your videos for subsequent viewing in Windows Media Player.

Free Video Flip and Rotate is a useful downloadable utility, while RotateMyVideo is a handy web app. Both effortlessly rotate videos recorded at the wrong orientation.

Finally, VLC media player can also rotate videos in Windows (and other operating systems). However, it is also an accomplished media player, and can effortlessly replace Windows Media Player.

VLC media player is jam-packed with useful tricks. Check our guide to some of the top free VLC media player features.

Read the full article: How to Rotate a Video in Windows Media Player


Read Full Article
How to Download Movies on Your iPad or iPhone


download-movies-ipad

Streaming a movie without Wi-Fi leads to buffering, pixelation, and expensive data charges. You should find out how to download movies to your iPad or iPhone instead. That way, you can watch movies whenever and wherever you want.

When you download a movie to your device, it’s available offline and in the highest quality: perfect for a long flight or a trip to the boonies.

Here are all the ways to download movies to your iPhone or iPad to watch offline.

Download Movies That You Bought or Rented Digitally

There’s no shortage of excellent options to buy or rent a movie online. You can get films from Apple, Google, Amazon, and even YouTube. But just because you paid for a new movie doesn’t mean you’ve automatically downloaded it to your device.

Most of these services let you stream your purchased movies without downloading them first. This gives you instant access since you don’t need to wait for the download to finish first. However, you can’t watch your latest purchases if you find yourself without an internet connection.

To watch movies offline on your iPhone or iPad, you need to download it using the app you bought or rented it from. Most of these apps work in roughly the same way.

Let’s look at how to buy and download a movie in the Apple TV app as an example.

How to Download Movies From the Apple TV App

Apple TV on the App Store

The Apple TV app replaces the Videos and iTunes Store apps on your iPad or iPhone. You can use it to find out what’s popular at the moment, buy or rent movies, and watch your purchased content.

You should already have the Apple TV app on your device. If you don’t, download it from the App Store.

Download: Apple TV for iPadOS and iOS (Free)

Here’s how to buy and download movies on your iPad or iPhone using the Apple TV app:

  1. Open the Apple TV app on your iPad or iPhone.
  2. Go to Watch Now or Search to find a movie you want to purchase.Apple TV app showing latest movies
  3. Tap Buy or Rent to purchase the movie. (Rented movies are available for 30 days or 48 hours after you start watching them.)Apple TV movie Buy and Rent buttons
  4. Enter your Apple ID details or use Face ID or Touch ID to confirm your purchase.
  5. Tap Download to begin downloading your movie, or go to the Library and tap the Cloud icon to download previously purchased movies.Apple TV app Play and Download buttons
  6. Keep your device connected to the internet while the progress circle fills up.
  7. Go to Library > Downloaded to view all your downloaded movies.Apple TV downloaded movie with device icon

After watching a downloaded movie in the Apple TV app, find it in your library and tap the device icon to see the Remove Download option. It’s a good idea to erase downloaded movies after you watch them to keep some free space on your device.

Download Movies From a Streaming Service

While you can buy movies one-off, most people have fully embraced the age of subscription services. This is largely thanks to the rise of Netflix, although there are plenty of other great subscription streaming services as well: Amazon Prime, Hulu, Disney+, and many more.

Almost all these services, Netflix included, give you the option to download movies to your iPad or iPhone so you can watch them offline. Of course, you need to have an active subscription to do so.

The process is very similar to buying a movie from the Apple TV app. The main difference is that you don’t need to “buy” anything because you already pay for the subscription service.

As another example, here’s how to download Netflix movies to your iPad or iPhone. The process is largely the same for whichever streaming service you use.

How to Download Movies From Netflix

Netflix on the App Store

If you haven’t already, you need to download the Netflix app on your iPad or iPhone from the App Store. You also need an active Netflix subscription to watch and download movies.

It’s also important to note that not all movies and TV shows are available to download from Netflix. If you don’t see a download button, then that title isn’t available for download.

Download: Netflix for iPadOS and iOS (Free, subscription required)

Follow these instructions to download Netflix movies to your iPad or iPhone:

  1. Open Netflix on your iPad or iPhone.
  2. Tap Home or Search to find the movie you want to download.Netflix latest movies
  3. Select the movie, then tap the Download icon (a downward facing arrow). If you don’t see a Download icon, it means that movie isn’t available to download.Netflix download button
  4. Keep your device connected to the internet while the progress circle fills up.
  5. Tap Downloads to view and watch all your downloaded movies and TV shows.Netflix downloaded movie

After watching a downloaded movie on Netflix, go to the Downloads page and swipe left to reveal an X button. Tap it to delete your movie download. Make sure to do this occasionally, as you can’t have more than 100 titles downloaded at once from Netflix.

How to Download YouTube Videos on iPad and iPhone

YouTube on the App Store

If you spend a lot of time watching YouTube videos, you probably want to know how to download them to your iPad or iPhone. As it turns out, the process is a lot like downloading movies from most streaming services. It’s even more so the case since you need to pay for a YouTube Premium subscription to do so.

YouTube Premium is a monthly subscription service that eliminates YouTube ads, unlocks original content, and allows you to download YouTube videos to your computer or mobile devices.

Download: YouTube for iPadOS and iOS (Free, subscription available)

If you have YouTube Premium, here’s how to download videos to your iPad or iPhone:

  1. Open YouTube on your iPad or iPhone.
  2. Go to Trending, Subscriptions, or Search to find a video you want to download.YouTube Original movies
  3. Start playing the video, then tap the Download button beneath the player.YouTube Download button
  4. Choose the download quality you want, then keep your device connected to the internet until the download is complete.
  5. Go to Library > Downloads to see all your downloaded videos.YouTube downloaded movie

Tap the Downloaded button beneath the video player to delete your downloads. Or go to Library > Downloads and tap the Ellipsis (…) button to delete other downloaded videos.

Create Plenty of Free Space for Downloaded Movies

Now you know how to download movies to your iPad or iPhone. You can do so from a range of online stores or streaming subscription services. But simply knowing how to download movies doesn’t necessarily mean you have enough space for them.

Movies are some of the biggest files you’re likely to have on your devices. If you want to download some movies before a long flight or a weekend away, make sure you create free space on your iPhone or iPad to make plenty of room for them all.

Read the full article: How to Download Movies on Your iPad or iPhone


Read Full Article

Octi launches a social network built around augmented reality


Octi has created a new social network that uses augmented reality to connect the act of seeing your friends in real life with viewing digital content like their favorite YouTube videos and Spotify songs.

When I wrote about the startup in 2018, it was building AR technology that could do a better job of recognizing the human body and movement. Last week, co-founder and CEO Justin Fuisz (pictured above) told me that this was “a really cool feature,” but that Octi’s investors pushed him “to do more, go deeper.”

Speaking of those investors, the startup says it’s now raised $12 million in funding (including a previously announced seed round of $7.5 million) from Live Nation, Anheuser-Busch InBev, Peter Diamandis’ Bold Capital Partners, Human Ventures, I2BF, Tom Conrad, Scott Belsky and Josh Kushner.

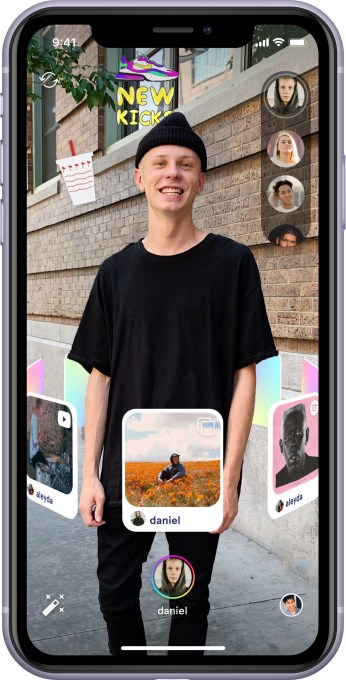
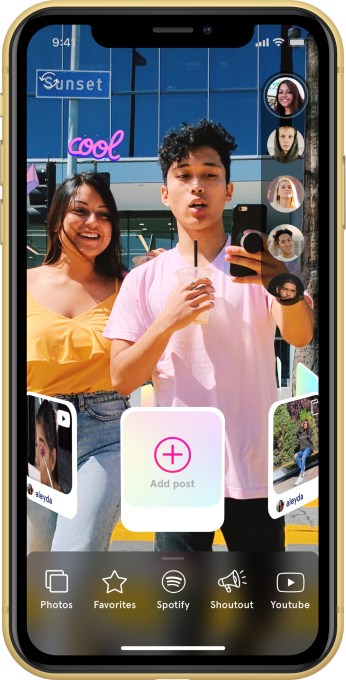
Last week, Fuisz demonstrated what he now sees as Octi’s “mic drop” moment — opening the new app and pointing his iPhone camera at a colleague. The app quickly recognized her, allowing Fuisz to send her a friend request. And once the request was accepted, could Fuisz look at her through the camera again, where she was surrounded by a floating “belt” of virtual items that she’d created with videos, songs and photos.

Octi app

Octi also allows you to include fun effects and stickers. Your friends can change your profile too, making you wear a funny hat or giving you a rousing theme song for the day.

To create a facial recognition experience that’s fast and simple, Fuisz said that Octi’s powered by a “neural network on the edge,” allowing the app to process images on the device (rather than uploading them to the cloud) in a privacy-friendly way.

He said the company has taken other steps to optimize the process, like prioritizing friends-of-friends rather than searching through the faces of everyone in the network, resulting in an app that can identify a friend in as little as 20 milliseconds.

While Octi allows you to view friends’ profiles remotely, it’s worth emphasizing that the core experience is meant to be in-person. In fact, the company provided a statement from analyst Rich Greenfield in which he described the app as “an impressive technology that gives teens a compelling reason to be present and communicate with their phones, while gathered with their closest friends.”

Octi app

I wondered whether a new social dynamic also provides new opportunities for harassment and bullying, but Fuisz noted that for now, Octi profiles and belts are only visible to friends that you’ve approved. So if one of your connections is doing something you don’t like, “You just say goodbye. That’s it. That’s a simple way of dealing with it.”

Fuisz added that this initial version provides a foundation for many more experiences: “There’s endless opportunity for games and other fun things you can do.”

Ultimately, he’s hoping to turn this into a WeChat-style platform for outside developers to build social tools and content. And since Octi works on iPhone 7 and above (with plans for an Android version later this year), it can potentially reach an enormous audience out of the gate, rather than facing the scale issues of a more specialized AR or VR hardware platform.


Read Full Article

Octi launches a social network built around augmented reality


Octi has created a new social network that uses augmented reality to connect the act of seeing your friends in real life with viewing digital content like their favorite YouTube videos and Spotify songs.

When I wrote about the startup in 2018, it was building AR technology that could do a better job of recognizing the human body and movement. Last week, co-founder and CEO Justin Fuisz (pictured above) told me that this was “a really cool feature,” but that Octi’s investors pushed him “to do more, go deeper.”

Speaking of those investors, the startup says it’s now raised $12 million in funding (including a previously announced seed round of $7.5 million) from Live Nation, Anheuser-Busch InBev, Peter Diamandis’ Bold Capital Partners, Human Ventures, I2BF, Tom Conrad, Scott Belsky and Josh Kushner.

Last week, Fuisz demonstrated what he now sees as Octi’s “mic drop” moment — opening the new app and pointing his iPhone camera at a colleague. The app quickly recognized her, allowing Fuisz to send her a friend request. And once the request was accepted, could Fuisz look at her through the camera again, where she was surrounded by a floating “belt” of virtual items that she’d created with videos, songs and photos.

Octi app

Octi also allows you to include fun effects and stickers. Your friends can change your profile too, making you wear a funny hat or giving you a rousing theme song for the day.

To create a facial recognition experience that’s fast and simple, Fuisz said that Octi’s powered by a “neural network on the edge,” allowing the app to process images on the device (rather than uploading them to the cloud) in a privacy-friendly way.

He said the company has taken other steps to optimize the process, like prioritizing friends-of-friends rather than searching through the faces of everyone in the network, resulting in an app that can identify a friend in as little as 20 milliseconds.

While Octi allows you to view friends’ profiles remotely, it’s worth emphasizing that the core experience is meant to be in-person. In fact, the company provided a statement from analyst Rich Greenfield in which he described the app as “an impressive technology that gives teens a compelling reason to be present and communicate with their phones, while gathered with their closest friends.”

Octi app

I wondered whether a new social dynamic also provides new opportunities for harassment and bullying, but Fuisz noted that for now, Octi profiles and belts are only visible to friends that you’ve approved. So if one of your connections is doing something you don’t like, “You just say goodbye. That’s it. That’s a simple way of dealing with it.”

Fuisz added that this initial version provides a foundation for many more experiences: “There’s endless opportunity for games and other fun things you can do.”

Ultimately, he’s hoping to turn this into a WeChat-style platform for outside developers to build social tools and content. And since Octi works on iPhone 7 and above (with plans for an Android version later this year), it can potentially reach an enormous audience out of the gate, rather than facing the scale issues of a more specialized AR or VR hardware platform.


Read Full Article

Your Sonos system will stop receiving updates if you have an old device


Smart speaker manufacturer Sonos has announced that the company is going to drop support for some of its products. Sonos stopped selling these devices a few years ago. While nothing lasts forever, dropping support is going to have a lot of implications and shows once again that the connected home isn’t as future-proof as expected.

Sonos points out that 92% of the products that it has ever sold are still in use today. It means that some people are still happily using old Sonos devices even though production has stopped since then.

“However, we’ve now come to a point where some of the oldest products have been stretched to their technical limits in terms of memory and processing power,” the company writes.

If you use a Zone Player, Connect, first-generation Play:5, CR200, Bridge or pre-2015 Connect:Amp, Sonos is basically going to make your Sonos experience worse across the board.

The company is going to stop shipping updates to those devices. If Spotify and Apple Music update their application programming interface in the future, your devices could stop working with those services altogether.

But Sonos has decided that your entire ecosystem of Sonos devices is going to stop receiving updates so that all your devices are on the same firmware version. For instance, if you just bought a Sonos One but you’re still using an old Sonos Play:5, your Sonos One isn’t going to receive updates either.

The company says that you can get a discount if you replace your old device. But it will still cost you some money. It’s also ironic as the company promises a seamless music experience but then requires you to swap out speakers altogether.

Sonos should use this opportunity to rethink its product lineup. Planned obsolescence due to end-of-life is a great business model for sure. But it’s time to think about ways to keep your speakers for 10, 20 or even 30 years.

People in the 1980s would buy beautiful speakers and keep them for decades. Sure, they’d have to add a CD player in their system at some point. But modularity is a great feature.

Sonos should add a computing card slot to its devices. As systems on a chip, Wi-Fi and Bluetooth get faster and more efficient, users should be able to swap out the computing card for a new one without replacing the speaker altogether.

That would be a more environmental-friendly process than bricking old devices with their questionable recycle mode.


Read Full Article

The Half-Life Games Are Now Free on Steam


You can now play the Half-Life games for free on Steam. However, the offer stands for a limited time only. Essentially, Valve is offering the previous games in the series for free before the release of the next game in the series, titled Half-Life: Alyx.

Preparing for the Release of Half-Life: Alyx

Half-Life: Alyx, a virtual reality first-person shooter, is due to be released in March 2020. The game is set between the original Half-Life and Half-Life 2, as players take control of Alyx Vance as she fights Combine using gravity gloves similar to the gravity gun.

So, to prepare gamers for the subsequent release of Half-Life: Alyx, Valve is giving away the previous games in the series. Which means Half-Life, Half-Life 2, Half-Life 2: Episode 1 and 2, and Opposing Force and Blue Shift are all available to play for free.

How to Play Half-Life 1 and 2 for Free on Steam

In a surprise announcement on Steam, Valve says that “the Half-Life: Alyx team believes that the best way to enjoy the new game is to play through the old ones, especially Half-Life 2 and the episodes, so we want to make that as easy as possible.”

You can play the free Half-Life games for free by following the links on Valve’s list of Half-Life games. The eligible games have a “Play for free! Ends in 2 months” banner under them, along with “Play now” links. You will, however, need to have Steam installed.

The Perfect Time to Play the Half-Life Games

There’s a good chance you already own the Half-Life games. Because not only have they been around for a long time, Valve has also discounted them massively in the past. Still, if you have never played the Half-Life games, this is the perfect opportunity to do so.

If you’re a fan of virtual reality and are keen to play Half-Life: Alyx, here are the best free VR games for Oculus to keep you going. Meanwhile, if you’re wondering which digital games store is best, we have pitted Steam vs. the Epic Games Store to find out.

Read the full article: The Half-Life Games Are Now Free on Steam


Read Full Article

8 CMD Commands to Manage Wireless Networks in Windows


windows-cmd-wifi

As a Windows user, the Control Panel and the Settings app can feel quite limiting in what they can do. If you want full and absolute control over your network, meaning access to everything the operating system has to offer, then you’ll have to start using Command Prompt.

Unlock the free "100+ Essential Windows CMD Commands" cheat sheet now!

This will sign you up to our newsletter

Enter your Email

Never used Command Prompt before? Don’t worry. Using it is as simple as typing out the commands you’ll see below.

If you’re ready to continue, here are some of the most useful networking commands to know for managing and troubleshooting your home network.

1. PING

ping is one of the most basic yet useful network commands to utilize in the command prompt application. It tells you whether your computer can reach some destination IP address or domain name, and if it can, how long it takes data to travel there and back again.

Sample usage and output:

windows-command-ping

The command works by sending out multiple data packets and seeing how many of them return. If some of them don’t return, it’ll tell you (“lost”). Packet loss leads to poor performance in games and streaming, and this is a nifty way to test.

By default, it sends 4 packets, each one waiting 4 seconds before timing out. You can increase the number of packets like this:

ping www.google.com -n 10

And you can increase the timeout duration like this (value is in milliseconds):

ping www.google.com -w 6000

2. TRACERT

tracert stands for Trace Route. Like ping, it sends out a data packet as a way to troubleshoot any network issues you might have, but it instead tracks the route of the packet as it hops from server to server.

Sample usage:

windows-command-tracert

The command outputs a line-by-line summary of each hop, including the latency between you and that particular hop and the IP address of that hop (plus domain name if available).

Why do you see three latency readings per-hop?

The tracert network command sends out three packets per hop to cover packet loss or slowdowns. Just remember that it doesn’t represent your true latency. It’s best practice to average the three.

3. PATHPING

pathping is similar to tracert except more informative, which means it takes a lot longer to execute. After sending out packets from you to a given destination, it analyzes the route taken and computes packet loss on a per-hop basis.

Sample usage and output:

windows-command-pathping

4. IPCONFIG

ipconfig often comes up as the most-used networking command on Windows. Not only is it useful for the information it provides, but you can combine it with a couple of switches to execute certain tasks.

Sample usage and output:

windows-command-ipconfig

The default output shows every network adapter on your system and how they resolve. The IPv4 Address and Default Gateway details under the Wireless LAN Adapter and Ethernet Adapter sections are the most important to know.

Use this switch to flush your DNS cache:

ipconfig /flushdns

Flushing the DNS cache can help when your internet is working, but a specific website or server is unreachable for some reason (e.g. a website times out and won’t load). If flushing the DNS cache doesn’t solve your connectivity issues, try these quick troubleshooting tips to fix your Internet connection.

5. GETMAC

Every device that’s compliant with IEEE 802 standards has a unique MAC address (Media Access Control). The manufacturer assigns MAC addresses and stores them in the device’s hardware. Some people use MAC addresses to limit which devices can connect to the network.

Sample usage and output:

windows-command-getmac

You may see more than one MAC address depending on how many network-related adapters are on your system. For example, Wi-Fi and Ethernet connections would have separate MAC addresses. If you would like to know more, check out what your IP and MAC address are good for.

6. NSLOOKUP

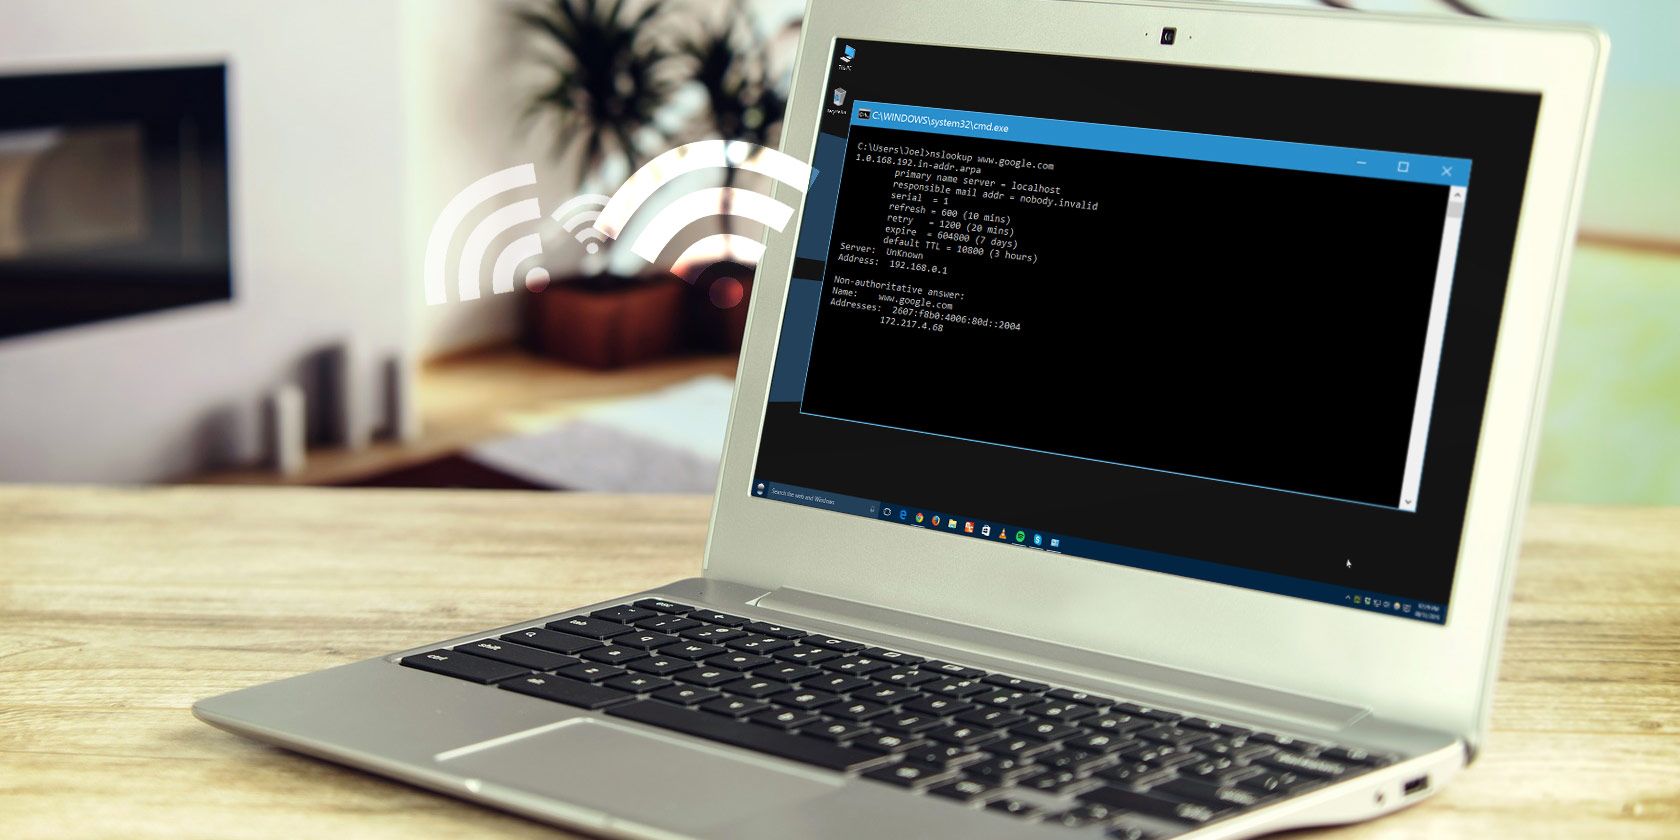
nslookup stands for Name Server Lookup. It packs a lot of power, but most users won’t need that power. For regular folks like you and me, its main use is finding out the IP address behind a certain domain name.

Sample usage and output:

windows-command-nslookup

Note that certain domain names aren’t tied to a dedicated IP address, which means that you may get different IP addresses every time you run the command. This is normal for bigger websites because they spread their workload across many different machines.

If you want to convert an IP address into a domain name, just type it into your browser and see where it leads. Not all IP addresses lead to domain names though, and many IP addresses aren’t reachable over the web.

7. NETSTAT

netstat is a tool for network statistics, diagnostics, and analysis. It’s powerful and complex but can be simple enough if you ignore the advanced aspects that you don’t need to know about (assuming you aren’t managing a massive business or campus network, for example).

Sample usage and output:

windows-command-netstat

By default, the command shows all “active connections” on your system whether those connections are on LAN or across the internet. An active connection doesn’t mean data moving occurs — it could just mean a port that’s open and ready to accept a connection.

Indeed, netstat is mostly useful to regular users for its ability to show port information, and that can come in handy when you need to forward ports.

But the command also has about a dozen switches that change what kind of information is displayed, such as the -r switch which shows a routing table instead.

8. NETSH

netsh stands for Network Shell. It’s a cmd command for networking that lets you view and configure pretty much every network adapter on your system in more detail and granularity than any of the preceding commands.

Running the netsh command on its own will shift the Command Prompt into network shell mode. There are several different “contexts” within this shell, including one for routing-related commands, one for DHCP-related commands, and one for diagnostics, among others. But you can use it to run individual commands, too.

To see all network shell contexts:

windows-command-netsh-help

And to see all commands within a context:

windows-command-netsh-command

You can drill down one more layer to find all of the subcommands within those commands:

windows-command-netsh-subcommands

So for example, you can run this command to view all of the wireless network drivers on your system and their properties:

netsh wlan show drivers

Network Shell’s complex enough to deserve an entire article of its own. Just know that if you want to get real technical with your network configuration, you’ll probably need to use this command-line utility.

If Network Shell left you wanting to explore more than cmd network commands for your system, try these basic cmd commands every user should know.

Network Commands and Other Networking Solutions

For anyone new to Windows networking commands, a cheat sheet comes in handy. With some reference, you can use a variety of cmd commands for gleaning information on your network, wi-fi, and the Internet. Still, while it’s useful to always know your options, you might want an alternative.

Maybe using cmd commands for your networking aren’t necessary for the specific problem you’re having. You should check out these diagnostic tricks and simple fixes for network problems to see if there’s a solution for you in there.

Read the full article: 8 CMD Commands to Manage Wireless Networks in Windows


Read Full Article