08 October 2019

How to Boot in Safe Mode on Windows 10


windows-10-safe-mode

Ever attempted to troubleshoot your own computer? Then you’ve encountered Safe Mode. Safe Mode is an inbuilt troubleshooting feature which disables unnecessary drivers and programs during the startup process. It allows us to isolate any setting or system errors and fix them at the root, without non-essential applications interfering.

For example, you can use Safe Mode to run System Restore when troubleshooting your computer or to delete a file in use by another program. Here we’ll take a quick look at booting into Safe Mode with Windows 10, and what to do if you cannot boot into Safe Mode.

Method 1: System Configuration

To open the System Configuration screen, type msconfig in your Start Menu search bar and select the Best Match. Open the Boot tab and note the Boot Options. Selecting the Safe Boot option will force your system to boot into Safe Mode following its next restart.

windows 10 system config

You can choose from additional options. Here’s what they do:

  • Minimal: Starts Safe Mode with the absolute minimal amount of drivers and services, but with the standard Windows GUI (Graphical User Interface).
  • Alternate Shell: Starts Safe Mode with a Command Prompt, without the Windows GUI. Requires knowledge of advanced text commands, as well as navigating the operating system without a mouse.
  • Active Directory Repair: Starts Safe Mode with access to machine-specific information, such as hardware models. If we unsuccessfully install new hardware, corrupting the Active Directory, Safe Mode can be used to restore system stability by repairing corrupted data or adding new data to the directory.
  • Network: Starts Safe Mode with the necessary services and drivers for networking, with the standard Windows GUI.

Select Minimal > Apply > OK. System Configuration will now ask if you want to restart your system. Selecting Restart will immediately initiate the restart process, so be sure to save any active documents or projects.

Method 2: Advanced Startup

Your next option is Windows 10 Advanced Startup. It isn’t that advanced, but it is really useful to know.

Windows 10 Advanced Startup

Type advanced start up in your Start Menu search bar and select the Best Match. Now, under Advanced start-up, select Restart Now.

Clicking Restart Now will restart your system in recovery mode where you will encounter three options: Continue, Troubleshoot, or Turn Off Your PC.

Select Troubleshoot > Advanced Options. You now have a new range of options to choose from.

Select Start-up Settings > Restart. Your system will restart. The Startup Settings screen will load after you reboot. From here, choose the requisite option for Safe Mode.

windows 10 advanced startup settings

Advanced Startup Shortcut

You can skip the somewhat lengthy clicking process by holding down Shift and clicking Restart under Power, found in the Windows 10 Start Menu. This reboot takes you straight to the Recovery options, where you can select Troubleshoot > Advanced Options > Startup Settings.

Windows 10 Restart

Method 3: Tapping

Until the introduction of Windows 8, the most common method for entering Safe Mode was tapping F8 on your keyboard during startup. Tapping F8 brings up the Safe Mode options screen, listing the options found under Method One (above) and several alternatives.

Windows 10 (and Windows 8/8.1) has F8 Safe Mode disabled by default. However, you can sacrifice a couple of seconds during startup by enabling the F8 menu using the Command Prompt.

Begin by opening an elevated Command Prompt. Right-click the Start menu and select Command Prompt (Admin). Select Yes in the User Account Control dialogue, if it appears. Command Prompt should now be open.

Windows 10 Start Option

Input (or copy/paste) the following command:

bcdedit /set {default} bootmenupolicy legacy

Job done!

Windows 10 Command Prompt BCDEdit

To undo this legacy command at any time, reopen the elevated Command Prompt as per the above instructions and type:

bcdedit /set {default} bootmenupolicy standard

This returns startup to its original state, so to reach Safe Mode you’ll have to use one of the alternate options in this article.

What If Nothing Works?

Even if none of the above works, you still have two aces up your sleeve.

If you installed Windows 10 via a disc or USB flash drive, you can boot straight into recovery mode by inserting the said installation media before turning your system on.

Choose your keyboard layout, followed by Repair Your Computer, in the bottom-left of the screen. From here you can head to Troubleshoot > Advanced Options where you’ll find System Restore, System Image Recovery, Startup Repair, Command Prompt, and Go Back to the Previous Build.

windows 10 repair your computer

For System Image Recovery to work, you’ll have to have made a backup image before your system error, something we would absolutely advise you to do. You can create a System Image by typing recovery into the Start Menu search bar and selecting the Best Match. The Advanced Recovery Tools will open. Select Create a Recovery Drive and follow the steps.

System Repair Disc

Another helpful tool at your disposal is the System Repair Disc. Unlike the System Image, these aren’t machine-specific, so you can acquire one via a friend if all goes completely pear-shaped.

Windows 10 System Repair

Head to Control Panel > System and Security > Back-up and Restore (Windows 7).

Don’t let the Windows 7 tag put you off: you’re in the right place. Select Create a System Repair Disc from the left-hand column, and follow the instructions.

How Do I Get Out of Safe Mode?

Once you fix your Windows 10 issue, you can leave Safe Mode. But how do you get out of Safe Mode once you’re in there?

There are two options, depending on how you booted into Safe Mode.

If you entered Safe Mode using Method 1 (via System Configuration), you must turn the Safe Mode option off in the configuration window. Otherwise, Windows 10 will boot back into Safe Mode after each restart.

If you entered Safe Mode using Method 2 (via Advanced Startup) or Method 3 (via Tapping Your Keyboard), shut down or restart your system to leave Safe Mode.

Accessing Safe Mode on Windows 10 Is Simple

You now know the three easiest methods to access Windows 10 Safe Mode. Make sure to take note of the final section on System Image Recovery and System Repair Discs. Do always remember the former only works if you’ve set the recovery location before your world began collapsing in a BSOD-induced nightmare.

If you’re truly in a terrible state of affairs, with no Image Recovery and no repair disc, you could always try tech-support savior Hirens BootCD. It has saved many people, many times, and it’ll save you too!

Read the full article: How to Boot in Safe Mode on Windows 10


Read Full Article

8 Ways Ubuntu Has Changed and Improved Linux


ubuntu-improved-linux

Ubuntu is the world’s most prominent Linux distribution. Ubuntu and its developer, Canonical, has caught a lot of flack over the years, but the Linux world is much better off thanks to both.

So let’s stop and take a moment to appreciate some of what Canonical and Ubuntu have given the Linux community.

1. Ubuntu Placed a Focus on the Desktop

Ubuntu version 9.10 Karmic Koala
Image Credit: Wikipedia

At the time Ubuntu launched in 2004, Linux was usable on desktop computers and laptops, but it wasn’t exactly a great experience. Canonical pushed Ubuntu as “Linux for human beings” and added features that made Linux easier use as a primary operating system. Such features included easily installed hardware drivers and multimedia codecs.

You could also ask to have an Ubuntu CD shipped to your door.

Canonical went on to create many desktop-oriented initiatives. It tried integrating messaging directly into the desktop, created the Ubuntu One file syncing service and music store, and eventually designed its own Unity interface. Canonical has since pulled the plug on all of these projects, but that willingness to experiment pumped excitement into the Linux desktop.

Linux remains more prevalent on servers than laptops, and Ubuntu arguably isn’t even the easiest or most intuitive option anymore. Plus many developers outside of the Ubuntu community deserve much of the credit for making desktop Linux more stable and pleasant.

Yet the Linux desktop is in a much better place today than a decade and a half ago, and Canonical played a major role in making that happen.

2. Linux Is Now Available on More Hardware

Part of Canonical’s vision to provide a consumer-ready Linux desktop meant offering Ubuntu as an alternative option in stores. The company reached out to hardware manufacturers to make this happen. Over time options grew, both from small businesses such as System76 and multinationals like Dell.

Are you likely to find Ubuntu in a big box store today? No. But Dell isn’t alone among the big corporate supporters. HP also sells Ubuntu machines. There are now many Linux PCs you can buy from various companies.

Canonical has long flown the flag of consumer desktop Linux, even if the time has come for younger players, such as System76 with Pop!_OS and Purism with PureOS, to carry the torch.

3. Ubuntu Brought in Millions of Users

Person using a laptop
Image Credit: Christian Hume/Unsplash

Canonical’s focus on the desktop and consumer hardware has paid off. People flocked to Ubuntu, and it now has millions more users than other versions of Linux.

Ubuntu’s name recognition has gotten large enough that you can mention the distro to general computer enthusiasts and expect them to know what you’re talking about.

Many of us began as Ubuntu users but have moved on to other options. This is true for me. I may not use Ubuntu anymore, but I’m grateful Ubuntu gave me an easy place to learn Linux when I first made the switch. Many projects now have developers and contributors who probably wouldn’t be part of the community without Ubuntu.

4. Ubuntu Powers Many of the Most Popular Distros

Ubuntu is not only one of the most popular Linux-based desktops, it’s a critical cog in the infrastructure that powers many of the alternatives.

When you run Ubuntu, you download apps from a software repository, a server storing all the programs and components that power your on-screen experience. Developers create and maintain this code, which organizations or companies such as Canonical distribute via repositories.

Canonical doesn’t create most of the code in its repositories, but some components, such as the Linux kernel, undergo additional testing and receive added security patches.

Linux Mint, elementaryOS, and Pop!_OS are three prominent Ubuntu alternatives that all rely on Ubuntu’s repositories. Canonical doesn’t charge them or anyone else money for the service. Is the company alone or unique in this regard?

No. But that doesn’t diminish the time and money Canonical employees and the Ubuntu community contribute to the broader Linux ecosystem in this way.

5. Canonical Created a New Universal Package Format

The way developers distribute software on Linux is changing right this moment. Instead of turning to the software repository model, many new apps are coming to our desktops via universal package formats. One of them, the snap package format, comes from Canonical.

Before now, many developers created software for Ubuntu and didn’t go through the hassle of creating versions that also ran on other versions of Linux. If you used an RPM-based distro, rather than a DEB-based one like Ubuntu, then you couldn’t install a program unless you went through the effort of building the app using source files.

Snaps are distro agnostic. After you’ve followed the straightforward instructions to enable snap support, you can install the snap version of an app regardless of if you run Ubuntu.

Again, snaps are not the only universal package format for Linux. But Canonical has gone out of its way to attract developer interest and hold their hands through the process of bundling software. This outreach has increased snap adoption among people or companies who might not have bothered figuring out one of the alternatives on their own.

Speaking of which…

6. Ubuntu Attracts Third-Party Commercial Software

One of Ubuntu’s strengths, relative to other distros, is attracting third-party development. Specifically, Ubuntu brings in more cross-platform, commercial, proprietary software that already exists on Windows or macOS.

As I’ve mentioned, this hasn’t always benefited the broader Linux ecosystem. But in some cases, such as with Steam, programs that come to Ubuntu quickly spread to other distros. This changes the landscape for gamers or professionals who are tied into using particular apps. Now Linux is much more viable.

With the snap format, a program now rarely comes out just for Ubuntu. Apps available in the snap store are now more accessible to us all.

7. Canonical Adapted GNU/Linux to Phones

Android phones use the Linux kernel, but that’s about all that they have in common with the version of Linux that you can install on your computer. That’s because most of the components aside from the kernel are not the same.

With Ubuntu Touch, Canonical sought to bring a version of Linux comparable to the Ubuntu desktop to mobile devices. And the company succeeded! Sure, these devices had limitations. Updates were hard to distribute, and the handsets were only available in a few markets.

Ultimately, Canonical did not see enough success to continue investing in the project.

Nonetheless, the Ubuntu Touch interface continues to live on via the UBports project. Thanks to the open source nature of Ubuntu Touch, community members have been able to continue where Canonical left off. Ubuntu Touch is one of the options available for the PinePhone, and it may be possible to get it up and running on the Librem 5 as well.

It’s also an aftermarket option on a number of Android phones.

8. Launchpad Has Been Home to Many Projects

Canonical's Launchpad service for open source software

Launchpad is a software collaboration hub for thousands of free and open source apps. It’s like Github, without the ties to Microsoft.

Launchpad began as a proprietary project to make revenue for Canonical, which the company could then use to support further Ubuntu development. Following criticism, Canonical gradually released variants parts of the site under open source licenses until all of Launchpad became open source in 2009.

For the past decade, Launchpad has served as open source infrastructure projects can use to share source code, track bugs, engage in discussion, and send out communications related to their apps or other creations.

Linux Mint, elementaryOS, Inkscape, and Exaile have all found a home in Launchpad at some point over their lives.

How Has Ubuntu Put a Smile on Your Face?

Ubuntu is a great Linux-based operating system. Absent other options, I’d gladly use it over Windows and macOS. Canonical and the broader community have done such great work over the years. What are some contributions you love that I haven’t mentioned above?

As for why Canonical catches a lot of flack, well, if you’re new to the Linux landscape, here are some of the more common Ubuntu criticisms.

Read the full article: 8 Ways Ubuntu Has Changed and Improved Linux


Read Full Article
Carbon Offsetting Flights: How You Can Help Save the World


carbon-offsetting-flights

We fly more than ever. International holidays, business, sporting events, and family visits require us to jump on a flight. Scheduled airline passenger numbers increased from 1.9 billion in 2004 to 4.3 billion in 2018. This figure is expected to rise in coming years.

At the same time, many global travelers are taking an interest in their carbon footprint. One easy way of reducing your carbon footprint is through carbon offsetting schemes.

Sounds interesting? Here are three sites to help you offset your international flights.

What Is Carbon Offsetting?

Carbon offsetting is the process of compensating for carbon dioxide emissions arising from human activity. In this case, it is about how you can offset your carbon footprint when you take a flight.

The idea is that you pay a small amount extra to contribute to schemes that encourage or deliver emissions savings around the globe.

The premise of offsetting international flight emissions isn’t new. In 2009, travelers at San Francisco International Airport had the chance to visit a climate kiosk. The climate kiosk would inform travelers about the footprint of their flight and advise on projects that would offset the carbon emissions.

Unfortunately, it didn’t take off. The lack of clarity regarding the working of offsetting and difficulty figuring out which projects were “good” turned travelers away.

Carbon offsetting is now a lot easier. There are numerous websites advising travelers on offsetting schemes and projects. Carbon offsetting standards also help travelers understand if an offset project is worthwhile.

Here are five other projects you can use to fight climate change.

What Are Carbon Offsetting Standards?

There are different carbon offsetting standards and a lot of offsetting alphabet soup to go along with it. However, the key carbon offsetting standards to consider are the Gold Standard (GS, or GS VERs) and Plan Vivo.

The Gold Standard protects against the most common issues found with carbon offsetting, such as project verification, impermanence, and leakage (just shifting the emissions to another location). The Gold Standard certifies over 1,700 projects across 80 countries. It also requires projects to help the local population as well as reduce carbon. Gold Standard projects consistently help create value, too.

The Plan Vivo Standard is the official certification of the Plan Vivo Foundation. The certification confirms that the carbon offsetting project ensures mutual benefit for the ecosystem, biodiversity, and the local population. This framework allows each aspect to achieve growth. The Plan Vivo Standard covers a spectrum of land management and development projects and like the Gold Standard, helps create value for smaller communities.

1. C-Level Flight Carbon Calculator

c-level carbon calculator offset flight

The C-Level Flight Carbon Calculator is a very popular carbon offsite calculator. C-Level works closely with the Plan Vivo Foundation to give you a wide range of choice on the offset projects you fund.

Each project is chosen specifically for its benefits to both biodiversity and the local population, and you can track your carbon offset project using the IHS Markit.

Enter your flight details, number of passengers, and payment option, then select Offset Your CO2. You can then choose the project you want to offset your carbon with and complete the payment process.

2. MyClimatemyclimate carbon calculator offset flight

The MyClimate carbon offset calculator uses the highest independent quality standards for its carbon offset projects, including the Gold Standard and Plan Vivo. Using these two standards ensures that the carbon offset funds head to the best projects making the most impact, in locations where the difference will truly help.

One handy MyClimate feature is that you can offset carbon for alternative transport methods, and even events, your business, personal projects, cruises, and more.

Head to MyClimate, choose your transportation type or event and enter the requisite details. You can then select from a range of carbon offsetting projects or let MyClimate assign the funds on your behalf.

3. Atmosfair

atmosfair carbon calculator offset flight

All Atmosfair carbon offset projects must meet the Gold Standard. Furthermore, the Atmosfair carbon calculator is considered one of the best available, giving a detailed breakdown of your emissions.

Head to the site and select Offset Now. Choose between a flight, a fixed offset (for instance, offsetting your electricity bill), or an event. Enter the relevant information regarding your selection, confirm the payment amount, and continue.

You can select the carbon offsetting projects you want to contribute to on the final page.

Is Carbon Offsetting Flights Effective?

I’m not going to say that carbon offsetting is a magic cure-all. It isn’t. Carbon offsetting is, however, a useful tool to help balance your lifestyle. Offsetting your international flight carbon emissions helps to balance the CO2 books, but other lifestyle changes are important, too.

The important thing to remember is that carbon offsetting isn’t expensive. Offsetting a flight from London to Nairobi only costs an extra $20. In the grand scheme of things, that’s a drop in the ocean; 8 take-away coffees.

Positively, international airlines will begin offsetting carbon emissions automatically in the near future. By 2021, a UN agreement called the Carbon Offsetting and Reduction Scheme for International Aviation (CORSICA), will see airlines account for the carbon offsetting of their passengers. It switches the emphasis back to the airlines to take care of the carbon offsetting, making the entire process easier to manage and vastly more effective.

It isn’t just airlines and international passengers considering their impact on the globe.

In September 2018, Lyft announced it would become one of the largest voluntary carbon offset purchasers. It aims to make all rides using its cars carbon neutral.

Global shipping behemoth, Maersk, is introducing carbon-neutral biofuel, while the rest of the global shipping industry finally begins to catch up with the progress made in aviation.

Want to shift to a more ethical and eco-friendly way of using technology? Take a look at several ways you can recycle electronics and avoid e-waste.

Read the full article: Carbon Offsetting Flights: How You Can Help Save the World


Read Full Article
The NBA should learn from Google China


By now, you’ve probably heard about the tweet heard ‘round the world, or at least, the part of the world where Mandarin is spoken. The GM of the Houston Rockets basketball franchise wrote a tweet — since deleted — supporting the democracy protesters that have lit up Hong Kong these past few weeks.

As Eben Novy-Williams of Bloomberg wrote, “Through decades of painstaking deal-making, the NBA created a multibillion-dollar opportunity in China, the world’s second-largest economy. Now a single swiftly deleted tweet has put all that time and money in jeopardy.”

It’s a situation that’s becoming increasingly typical for American companies, technology or not. Apple pulled the Taiwanese flag emoji from keyboards in Hong Kong and Macau this weekend, lest it lose its lucrative, mostly-iPhone market that accounted for $10 billion in revenues in its last quarter. US-headquartered airliners had to change the pulldown options in their checkout flows to avoid mentioning Taiwan last year, lest they lose access to Chinese airspace.

One wonders what kind of a business empire can collapse with a single dropdown menu item?

Or a single emoji?

Or a single tweet?

Businesses are not supposed to be this brittle, but American companies continue to approach the mirage of the Chinese economy as if it is open for the taking, and that the American consumer (and their representatives in Washington) are going to continue to ignore the “authoritarian straddle” these companies have to undertake to appease Beijing while trying to not displease Washington.

Despite all evidence to the contrary that such a straddle is impossible though, they keep on coming.

Just this past week, PayPal announced that it was entering mainland China through its acquisition of GoPay, becoming the first foreign payments provider in the highly-digitalized economy. Over the past year, MSCI, the creator of some of the most important stock indices in the world, has increasingly shifted weight to Chinese stocks, sending billions of dollars to mainland companies.

What is surprising is that this whole rise-and-fall, can-we-get-in-and-stay-in story was already written by Google almost exactly a decade ago. Google worked hard for years to cement itself on the mainland, but following a series of hacks that targeted political dissidents using its Gmail service, Google announced that it was leaving the country in 2010, redirecting users to its Hong Kong search engine.

Since that decision, Google has had very little access to mainland China, nor have any other prominent American tech companies. The one notable exception has been LinkedIn, which has engaged in aggressive censoring of speech in China in order to keep the lights on (although, given the speech I read on LinkedIn, one wonders whether a complete blackout in America wouldn’t do us all a favor).

As much as Google’s executives (and its shareholders) may have wanted to re-enter China though, it seems obvious that the enforced lack of access has ultimately been a godsend for the company’s policy decisions. For a decade, it barely had to handle the authoritarian straddle, and could center itself on individual choice, open access to the internet, and freedom of speech with minor reservations.

Sure, the economic mirage of China continued, and even Google couldn’t maintain its patience, attempting to launch its Project Dragonfly censored Chinese search engine to much outcry, ultimately to shelve it, giving its leadership a bit of a black eye. But Google is now out of the authoritarian straddle once again — and out of harms way. That ultimately is the solution that the NBA needs.

Beijing has its rules. Google, United Airlines, the NBA, and even Apple has no sway over them. Not even tens of billions of dollars of threatened tariffs from the Trump administration have made a dent in any of the CCP’s policies.

Maybe it’s time to take the hint, pack the balls up, and walk home.


Read Full Article
Instagram is killing its creepy stalking feature, the Following tab


Instagram is removing its Following tab, a feature that became better known as a stalking tool than one to aid with new account discovery, as the company had intended. Today, Instagram says that its Explore tab is the go-to place to find new people, places and hashtags to follow. Meanwhile, the Following tab is now only used by a small number of people on a regular basis.

Combined, those factors were the key reasons behind its shutdown, we understand.

But the Following tab wasn’t just unhelpful and therefore ignored by Instagram users — a number of people forgot, or never even knew, it existed in the first place. There are numerous stories of people’s illicit or private activities being outed because of what they were liking and following on Instagram.

The tab was fairly notorious for the transparency it brought to our online lives. It was often a place where “micro-cheating” activity was caught, for example. That is, it could reveal when a person in a committed relationship was spending just a little too much time liking someone else’s posts, engaging with an ex’s content, or networking with series of potential “backup partners” on a regular basis.

iOS Before Following


It could also easily reveal when someone’s main use case for Instagram was to like and follow IG “models” — something that didn’t seem like the kind of activity most would want to be offered in a trackable format. (And information that was particularly awkward to see when the person in question was not a close friend, but rather a work colleague of some sort.)

The tab was known to have impacted or even ended friendships, too — like in the case where someone wouldn’t respond to their friend’s texts, or claim they were “busy.” Meanwhile, they were consistently active on Instagram, and very obviously lying.

Gossip followers also liked the tab, as it would reveal who celebs were following — sometimes an indication of a new relationship, either personal or professional in nature.

Overall, the tab generally became known as a creepy tool, and not one that offered any significant benefit to users in terms of being a legitimate discovery mechanism.

Android After Activity


Though Instagram is only announcing this change today, many users had already lost access to the tab. Back in August, for example, a big thread on Reddit saw users complaining their Following tab had disappeared. They assumed it was a bug, however.

After the tab’s removal, you’ll only see your own activity, as before, when you click the Heart button.

The company says the Following tab is being removed starting today, but it will take the rest of the week for the rollout to complete.


Read Full Article
07 October 2019

Waymo is creating 3D maps of Los Angeles to better understand traffic congestion


Waymo, the autonomous vehicle company under Alphabet, has started creating 3D maps in some heavily trafficked sections of Los Angeles to better understand congestion there and determine if its self-driving vehicles would be a good fit in the city.

For now, Waymo is bringing just three of its self-driving Chrysler Pacifica minivans to Los Angeles to map downtown and a section of Wilshire Boulevard known as Miracle Mile.

Waymo employees will initially drive the vehicles to create 3D maps of the city. These maps are unlike Google Maps or Waze. Instead, they include topographical features such as lane merges, shared turn lanes and curb heights as well as road types and the distance and dimensions of the road itself, according to Waymo. That data is combined with traffic control information like signs, the lengths of crosswalks and the locations of traffic lights.

Waymo does have a permit to test autonomous vehicles in California and could theoretically deploy its fleet in Los Angeles. But for now, the company is in mapping and assessment mode. Waymo’s foray into Los Angeles is designed to give the company insight into driving conditions there and how its AV technology might someday be used.

The company said it doesn’t plan to launch a rider program like its Waymo One one currently operating in suburbs of Phoenix. Waymo One allows individuals to hail a ride in one of the self-driving cars, which have a human safety driver behind the wheel.

The self-driving car company began testing its autonomous vehicles in and around Mountain View, Calif., before branching out to other cities and weather, including Novi, Mich., Kirkland, Wash., San Francisco and more recently in Florida. But the bulk of the company’s activities have been in suburbs of Phoenix  and around Mountain View — two places with lots of sun, and even blowing dust, in the case of Phoenix.


Read Full Article
Spotify gains Siri support on iOS 13, arrives on Apple TV


In a long-awaited move, Spotify announced this morning its iOS 13 app would now offer Siri support and its streaming music service would also become available on Apple TV. That means you can now request your favorite music or podcasts using Siri voice commands, by preferencing the command with “Hey Siri, play…,” followed by the audio you want, and concluding the command with “on Spotify.”

The Siri support had been spotted earlier while in beta testing, but the company hadn’t confirmed when it would be publicly available.

According to Spotify, the Siri support will also work over Apple AirPods, on CarPlay, and via AirPlay on Apple HomePod.

In addition, the Spotify iOS app update will include support for iPhone’s new data-saver mode, which aids when bandwidth is an issue.

Spotify is also today launching on Apple TV, joining other Spotify apps for TV platforms, including Roku, Android TV, Samsung Tizen, and Amazon Fire TV.

The app updates are still rolling out, so you may need to wait to take advantage of the Apple TV support and other new features.

The lack of Siri support for Spotify was not the streaming music service’s fault — it wasn’t until iOS 13 that such support even became an option. With the new mobile operating system launched in September, Apple finally opened up its SiriKit framework to third-party apps, allowing end-users to better control their apps using voice commands. That includes audio playback on music services like Spotify, as well as the ability to like and dislike tracks, skip or go to the next song, and get track information.

Pandora, Google Maps and Waze were among the first to adopt Siri integration when it became available in iOS 13 — a clear indication that some of Apple’s chief rivals have been ready and willing to launch Siri support as soon as it was possible.

Though the integration with Siri will be useful for end-users and beneficial to Spotify’s business, it may also weaken the streaming company’s antitrust claims against Apple.

Spotify has long stated that Apple engages in anti-competitive business practices when it comes to its app platform, which is designed to favor its own apps and services, like Apple Music, it says. Among its chief complaints was the inability of third-party apps to work with Siri, which gave Apple’s own apps a favored position. Spotify also strongly believes the 30% revenue share required by the App Store hampers its growth potential.

The streamer filed an antitrust complaint against Apple in the European Union in March. And now, U.S. lawmakers have reached out to Spotify to request information as a part of an antitrust probe here in the states, reports claim. 

Despite its new ability to integrate with Siri in iOS 13, Spotify could argue that it’s still not enough. Users will have to say “on Spotify” to take advantage of the new functionality, instead of being able to set their default music app to Spotify, which would be easier. It could also point out that the support is only available to iOS 13 devices, not the entire iOS market.

Along with the Apple-related news, Spotify today also announced support for Google Nest Home Max, Sonos Move, Sonos One SL, Samsung Galaxy Fold, and preinstallation on Michael Kors Acess, Diesel and Emporio Armani Wear OS smartwatches.


Read Full Article

An ancient rock suggests a new theory for how life started | Tara Djokic

An ancient rock suggests a new theory for how life started | Tara Djokic

Exactly when and where did life on Earth begin? Scientists have long thought that it emerged three billion years ago in the ocean -- until astrobiologist Tara Djokic and her team made an unexpected discovery in the western Australian desert. Learn how an ancient rock found near a hot volcanic pool is shifting our understanding of the origin-of-life puzzle.

Click the above link to download the TED talk.

The 7 Best Apps for Teachers to Use in the Classroom


apps-for-teachers

Using technology in the classroom has been the subject of many debates. When used in the right ways, tech has the power to transform a classroom. So instead of banning technology from schools, it’s time to embrace it.

As a teacher, you should take advantage of the many available education apps. With the right apps, you can schedule lesson plans, establish communication with parents and students, use in-classroom tools, and much more. Try out the following apps to get more control over your classroom.

1. ClassDojo

ClassDojo turns your classroom into a community. It allows you to interact with both parents and students with its secure messaging system. Not only can you send your students’ parents any classroom updates, photos, and videos, but parents get direct access to their child’s status right from their phone.

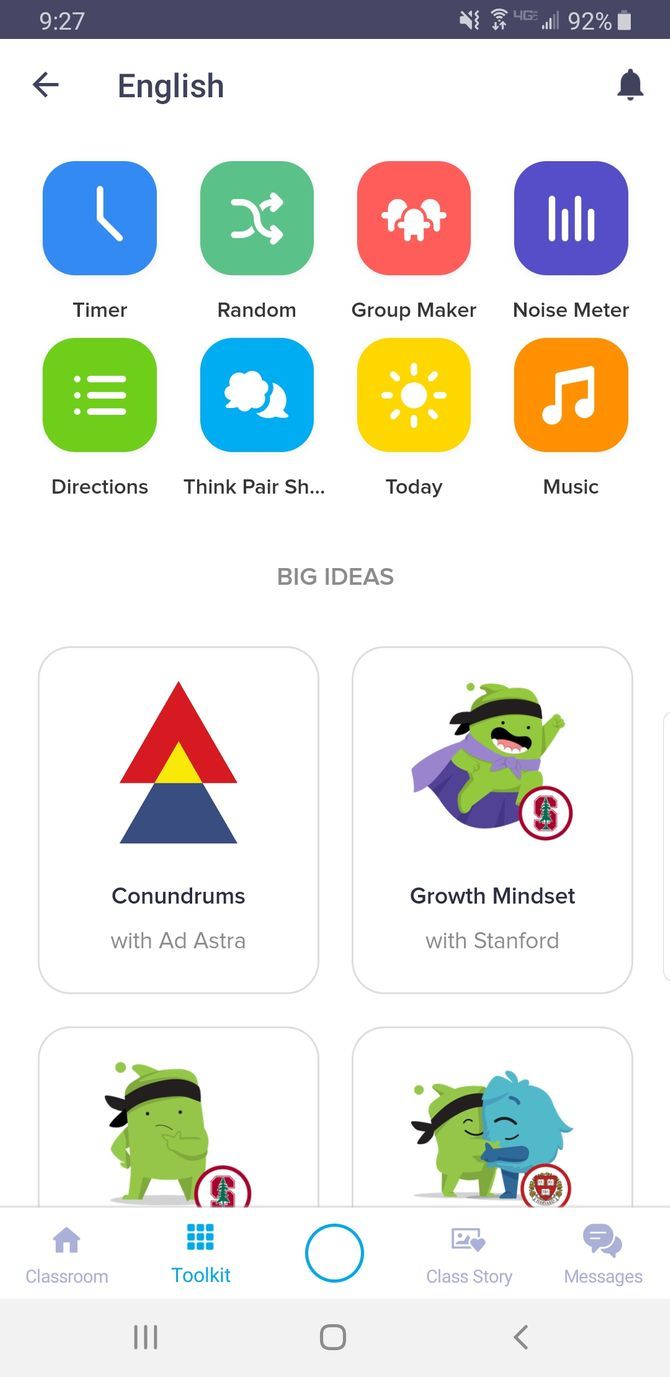
Once you create a class on the app, you can start using the class toolkit. Here, you have access to a convenient group maker, a noise meter, and a music player. You can also display discussion questions and add directions for students to view. This all-in-one teacher app can help you create a much more positive classroom environment.

Download: ClassDojo for Android | iOS (Free, in-app purchases available)

2. Edmodo

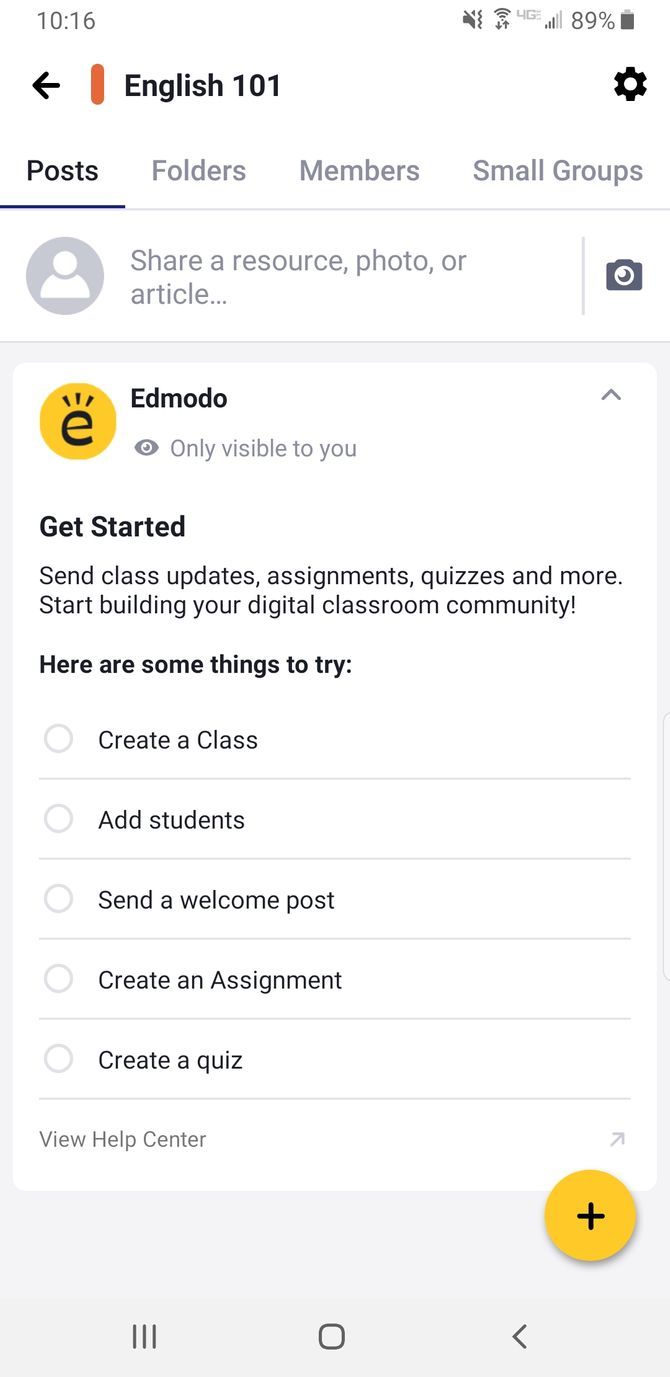
Edmodo is the perfect tool for any classroom level, and its clean interface lets you quickly set up classes. To get students and parents on board, simply share the classroom link with the members you want to add. Once you have your members, keep your classroom updated by adding announcements to your classroom feed.

Edmodo lets you send private messages to students and parents, as well as establish small groups for collaborative projects. When you want to send your students an assignment, simply upload it to the app, and it’ll automatically share with everyone in class.

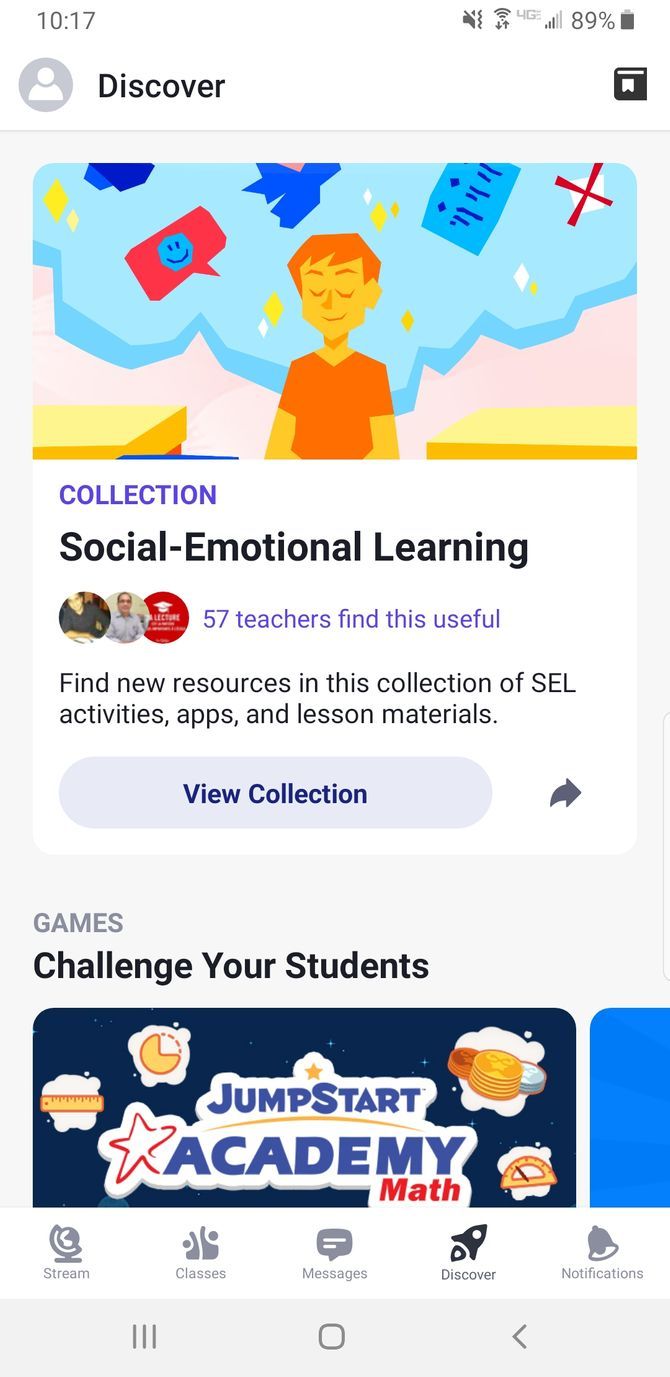
Want even more teaching inspiration? Head to the Discover tab to learn some helpful teaching tips, challenge your students to educational games, and get more activity ideas.

Download: Edmodo for Android | iOS (Free)

3. Google Classroom

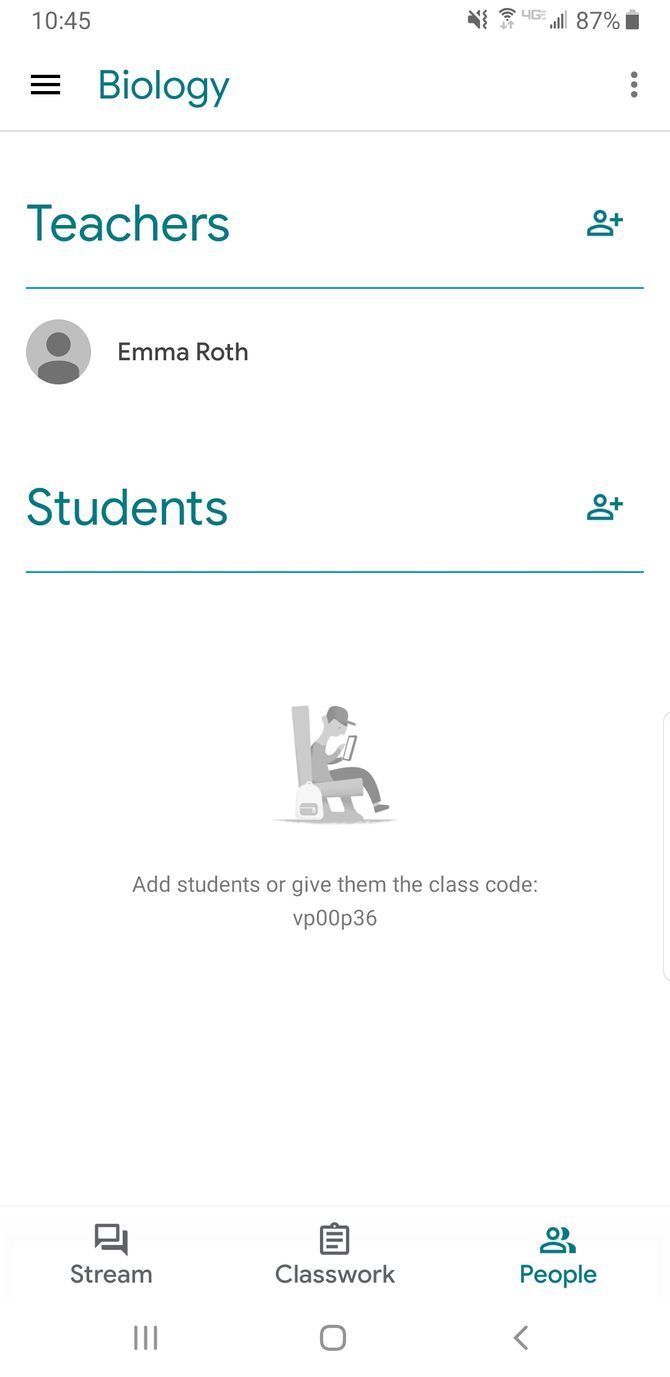
If you want to start using Google Classroom, your school must have an account with G Suite for Education. Once that’s settled, you can start adding students to your Google Classroom with their Gmail addresses.

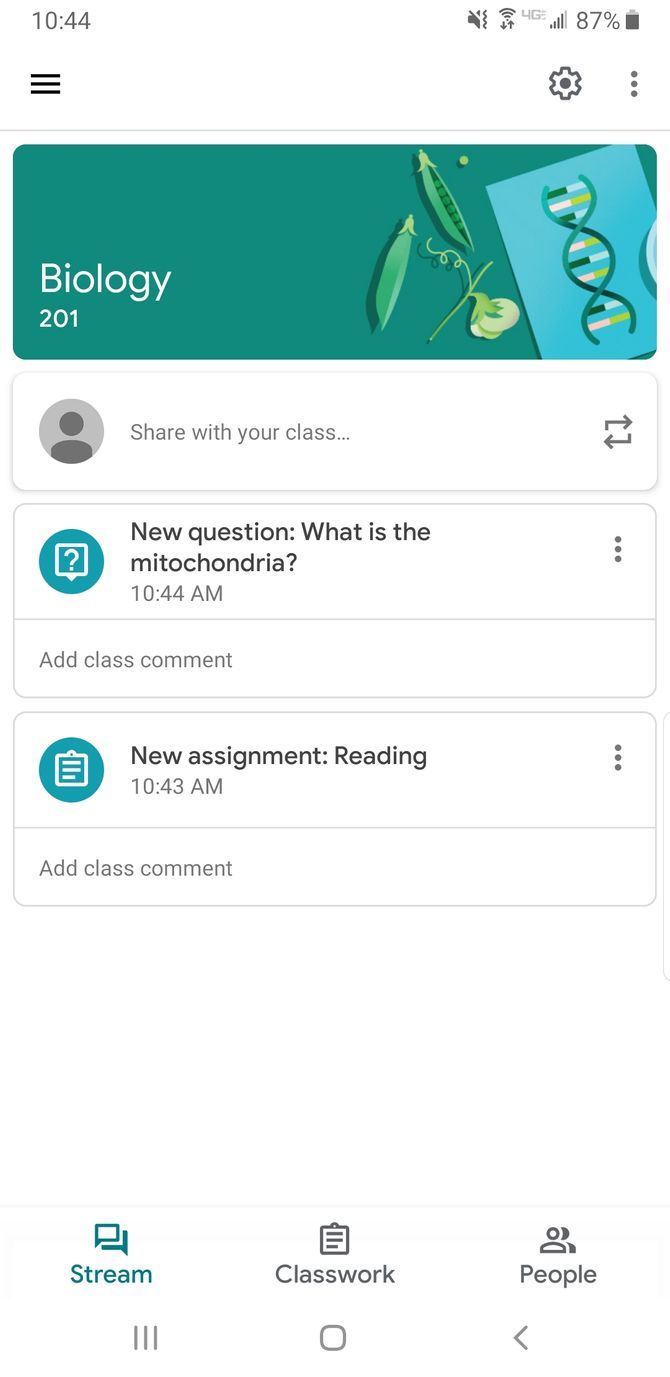
After creating a class, you can add specific assignments, questions, materials, and topics to it. All this content appears in a stream that your students can easily access. Google Classroom also integrates with Google Drive, so you can upload assignments, grades, and photos to the class folder.

Google Drive comes with several awesome features for students, making it pair well with Google Classroom.

Download: Google Classroom for Android | iOS (Free)

4. Planboard

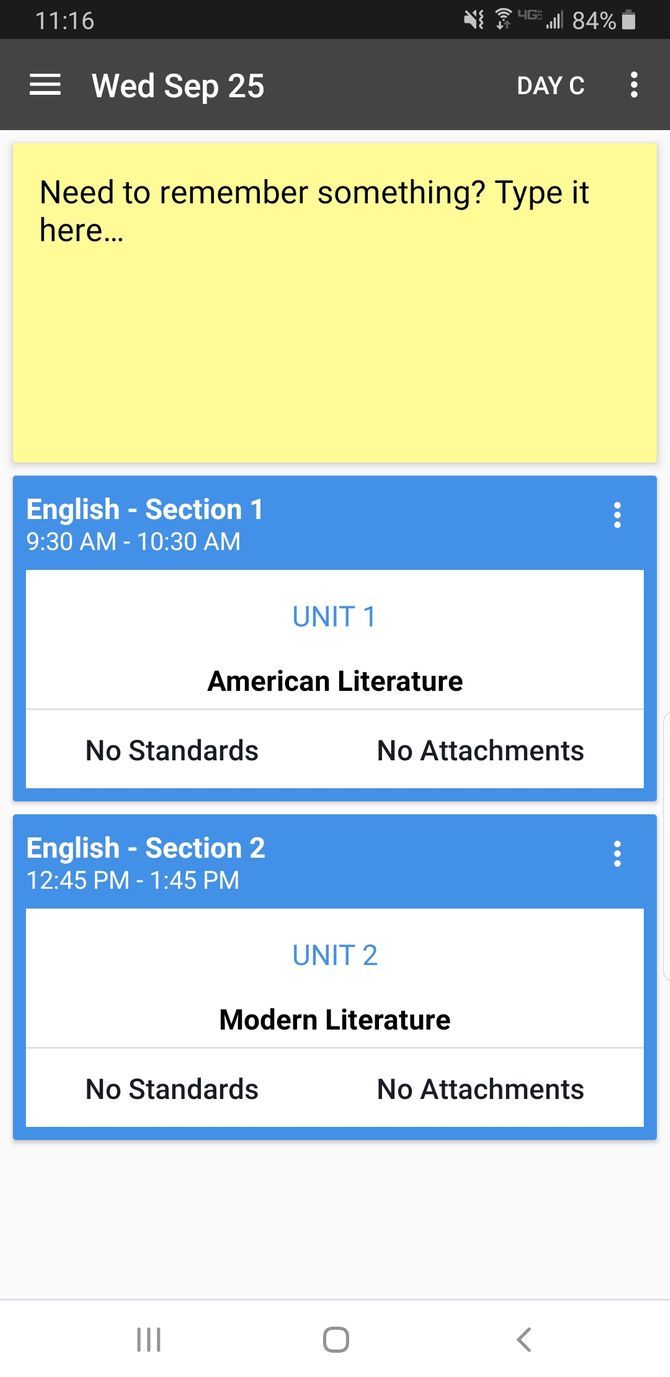
Looking for an easier way to plan lessons? Check out Planboard, the lesson planning app you can use on-the-go. Keep track of your class schedule by adding classes to your calendar, and set curriculum standards for each of your classes. If you want to save time and effort, you can search Planboard’s library of official standards instead.

The app also lets you upload files and photos to your lesson plans, as well as share those plans. Planboard syncs all your data to the web, so you can view your plans from your computer.

Download: Planboard for Android | iOS (Free)

5. Seesaw: The Learning Journal

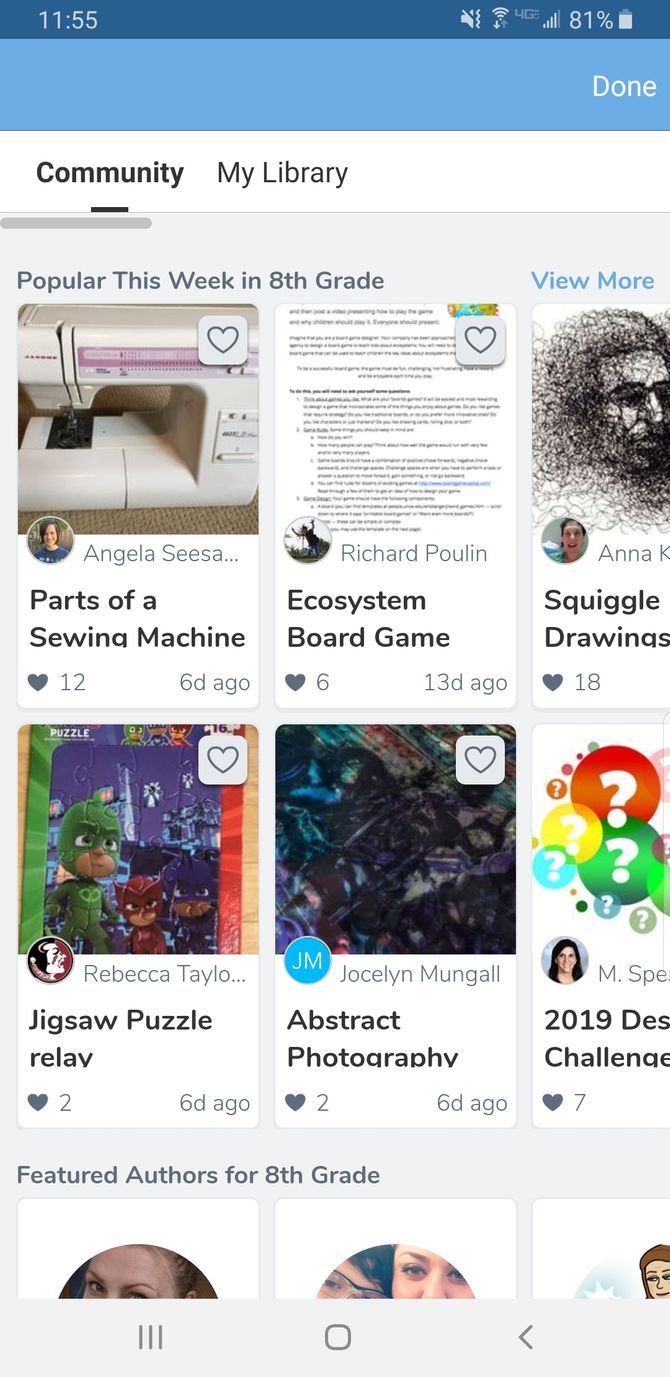
Seesaw is one of the most popular education apps, as it’s used in over 200,000 classrooms. It’s a great way to plan activities in any subject, for any age.

When you create a class, you can browse the app’s Activity Library. Enter your class’s subject and grade from the dropdown menu, and you’ll see activities that your fellow teachers created. If you want to create your own activities, you can share them with the Seesaw community as well.

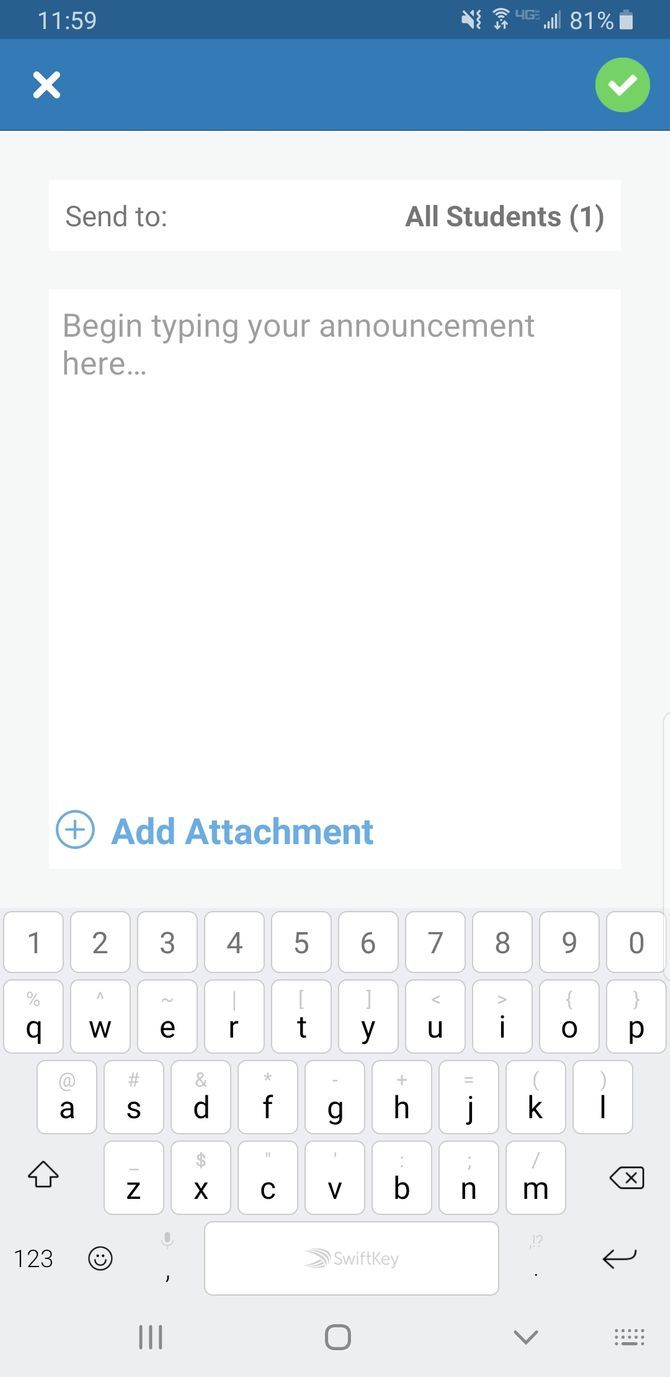
Seesaw allows you to send announcements to students and parents—that way, families can gain insight on their child’s education. While you could use team communication apps like Slack to send updates, keeping both your messages and student progress in one app will help you stay organized.

You can also use Seesaw to track students’ progress in specific areas, but that’s only available in the premium version.

Download: Seesaw for Android | iOS (Free, subscription available)

6. TrackCC

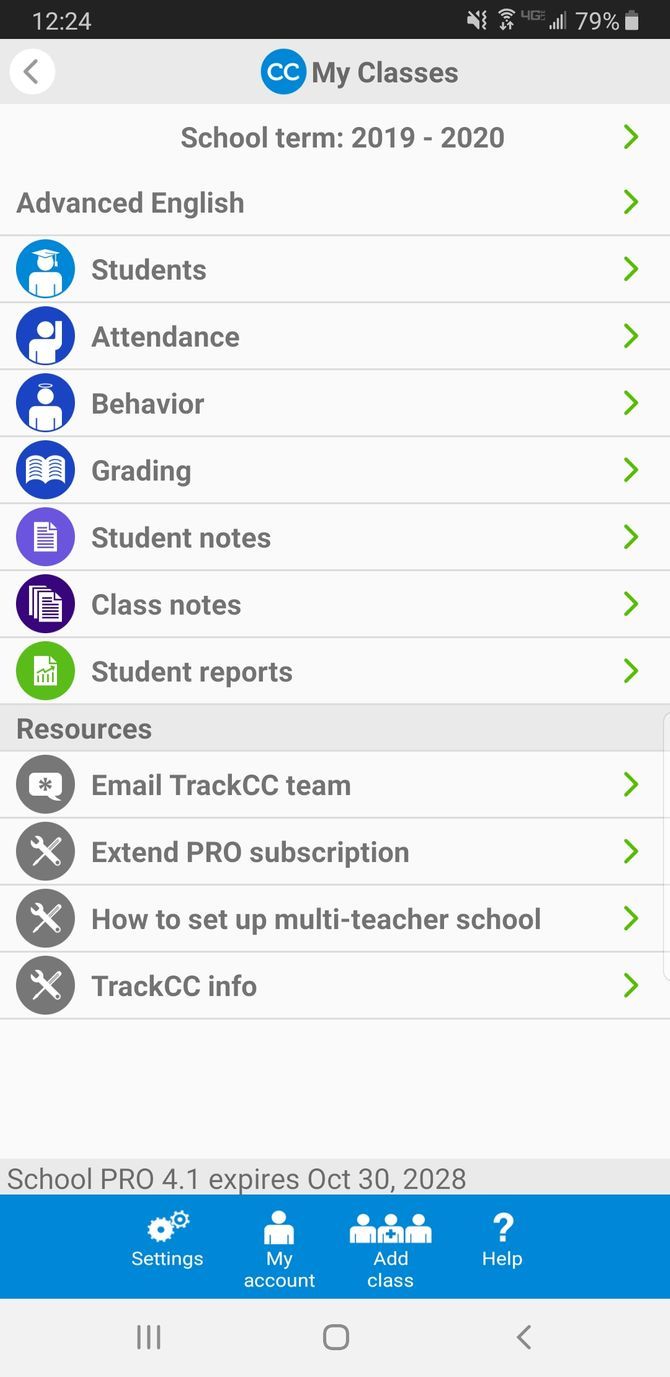
Keeping track of student attendance and grades on paper isn’t always the most reliable. The grid-style grade books aren’t easy on the eyes, and there’s always a chance that you might spill coffee all over your papers. Instead of penciling in grades and attendance records, you should try using the TrackCC app instead.

TrackCC lets you keep track of student attendance with the click of a button. You can check the students off if they’re present, input an excused or unexcused absence, mark tardiness, and note if a student left early. The app also calculates attendance statistics so you can get a better idea of each student’s attendance rate.

TrackCC supports grading as well. Add grades for homework assignments, quizzes, exams, or projects, and view the statistics and overall grade for each student from the app. In addition to all these helpful features, TrackCC lets you connect parents to send them attendance notifications.

Download: TrackCC for Android | iOS (Free)

7. Kahoot

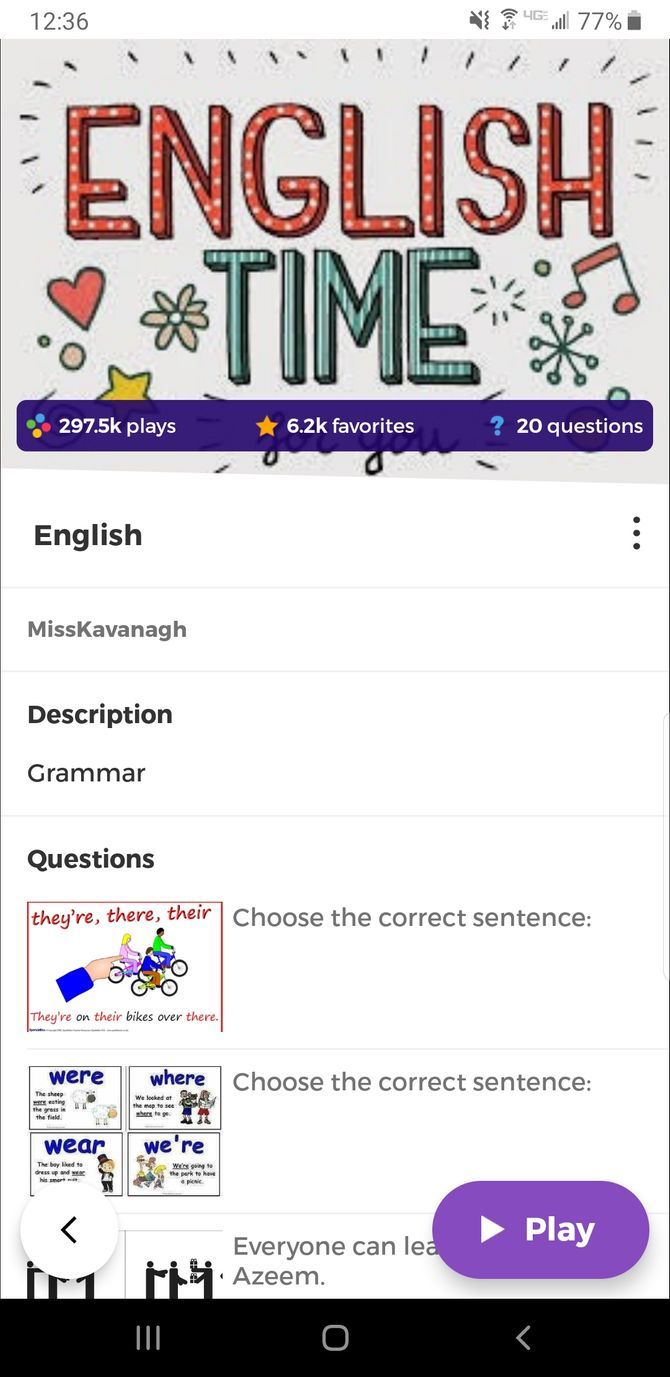
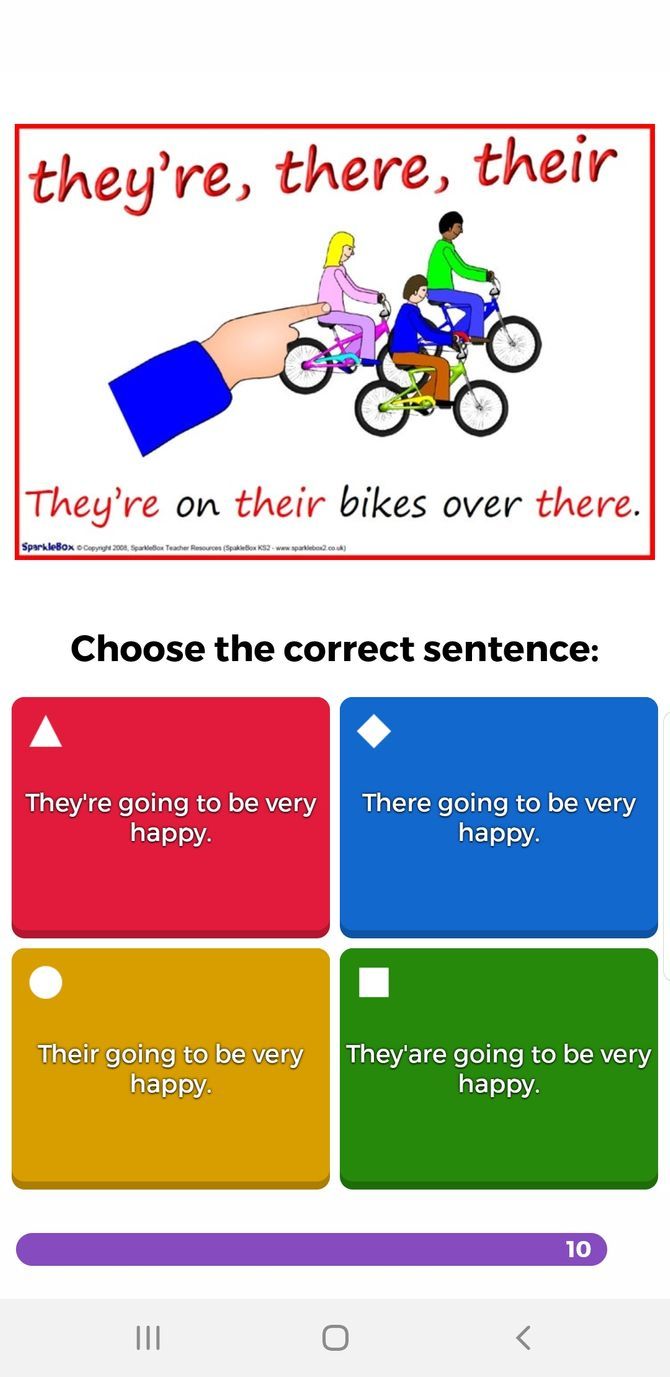
Kahoot engages your classroom with fun and educational games. You can create your own quizzes or “Kahoots” by developing your own questions and adding pictures. As soon as your quiz is ready, you’ll receive a custom game PIN that you give to your students. From there, students type the PIN into the app on their own device and can start playing.

If you’re short on time, search Kahoot for games made by other educators. You can also use Kahoot for homework—assign your students a Kahoot instead of having them fill out a quiz on paper. Whether you create your own games or not, Kahoot can help capture your students’ attention and make learning fun. Consider supplementing Kahoot with subject-specific educational apps for even better results.

Download: Kahoot for Android | iOS (Free, subscription available)

Technology Belongs in the Classroom

Since the new generation of students loves playing on smartphones and tablets, using teacher apps in the classroom can allow you to establish a better connection with your students. Technology can help you and your students stay organized, and also allows for quick communication with your students’ parents.

If you notice that your students are struggling to study effectively, you might suggest that they start taking advantage of study planner apps.

Read the full article: The 7 Best Apps for Teachers to Use in the Classroom


Read Full Article
What Is Microsoft Power Query for Excel? 5 Reasons to Start Using It


ms-power-query-excel

Microsoft Excel is powerful and popular spreadsheet software that makes working with data simple. Over time, Microsoft has developed some pretty innovative ways to work with your data.

If you’re looking for a powerful new way to manage data, Microsoft Excel for Windows now has powerful software built in to help: Microsoft Power Query is a new tool that gives you more control over your spreadsheets than ever before.

What Is Microsoft Power Query?

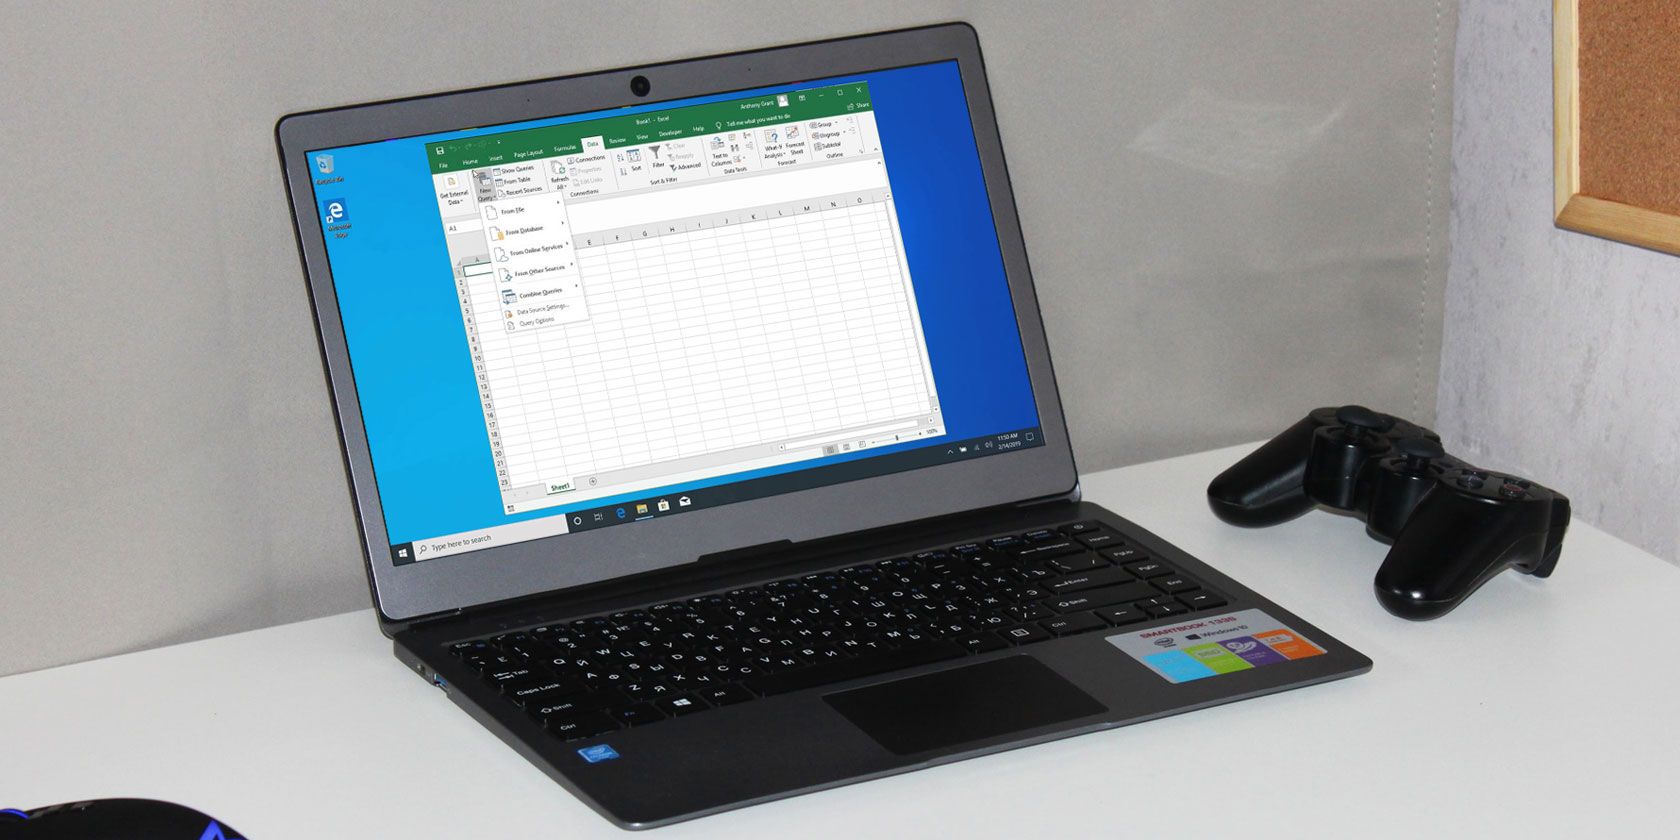
Power Query (known in Microsoft Excel 2016 as “Get & Transform”) is a data transformation tool built right into Microsoft Excel. It allows you to import data from many different sources, make changes, and load the data right into your Excel workbooks.

If you’re just starting out, it would be good to learn about the basics of Microsoft Excel.

When you import into Power Query it creates a connection to your data. Using this connection, you can work with your data in the editor and make all your changes before you save to a workbook.

Power Query will save your changes as steps in a file known as a “Query”, which can be used any time. Think of it just like macros in VBA programming, if you’re familiar.

Becoming comfortable with Power Query can take your Excel skills to the next level. If you regularly work with data, here are some great reasons to start using it.

1. Microsoft Power Query Is Built Into Excel

Power Query is simple. If you have Excel 2016 or later on your PC, you already have Power Query. You don’t need to download any additional software or have any programming knowledge to begin using it.

To work with Power Query, simply open your workbook, select the Data tab in the ribbon, and click on Get Data to choose one of many different places to grab data from. You’re now up and running in seconds with Power Query.

Note: For programmers, Microsoft did develop a new language for Power Query known as “M”. Advanced users can code scripts using “M”, which is a higher-level concept but provides extra power and value for expert users.

2. Easy to Use Editor

Power Query provides a simple interface for working with your data. Once you upload your data you can make changes inside of the editor, no programming required.

If you’re already familiar with Excel, it’s that much easier since the editor looks very similar to a window in Excel.

Power Query Editor Window

If you need to modify your data, you can do so right in the editor. Simple changes are made easy. Some examples you can do are:

  • Add or remove columns in your table
  • Filter your data by columns
  • Combine or join two tables together
  • Sort your data using Excel filters
  • Rename columns
  • Remove errors from your table

Once you’re done with changes, simply export the results right onto your Excel workbook. It’s very easy to work with multiple sheets, without having to open every single one and make changes.

3. Makes Repetitive Tasks Simple

A common chore when working with Excel workbooks is having to make the same set of changes to different worksheets.

For example, let’s say you are given a report that shows sales numbers for the month of July and you need to make changes. You open your table, make your changes, and save. Simple, right? Then a month later, you are given a new report for the month of August.

With Excel, you would have to open the workbook and make all those changes again just to get the same result. Depending on the number of changes, this can be a lot of time! Power Query solves this problem.

When you connect to a workbook using Power Query and make changes, those changes are saved as “steps”. Steps are just directions you give Excel to change data (i.e. “Delete this column” or “Sort this table by color”).

All your steps are saved together, creating a neat little package. You can apply this set of steps to a new worksheet in one click, instead of making your changes all over again.

4. You Don’t Need Programming Knowledge

Excel is programmable using Visual Basic for Applications (VBA), but that’s a lot to learn. You can also use other programming languages with Excel, but that requires a lot of set up.

Not everyone’s a programmer. Fortunately, you don’t have to be one to use Power Query. The editor is graphical and easy to use. Any change you want to make is as simple as clicking on the interface. The editor looks very similar to Excel, so you’ll feel right at home.

5. Collect Data From Different Sources

Selecting Data Source With Power Query For Excel

We’ve talked a lot about Excel workbooks, but Power Query can get your data from a lot of other places. If you want to work with data from a webpage, you can import just as easily. Power Query can also pull data from various sources such as:

  • CSV Files
  • Text Files
  • SQL Databases
  • XML Files
  • Mircosoft Access Databases

There are many more sources you can use, but don’t get overwhelmed. As you become more comfortable using Power Query you may have a use for some, or all, of these uses.

Why Not Just Use Microsoft Excel?

Excel is pretty powerful as is, no doubt about it. But if you’re an expert user working with many different sheets your workflow can be a lot to manage.

It’s important to think of Power Query not as a spreadsheet, but as a control panel through which you can work with data. The layout is similar to Excel to make it easier to work in. You can be very productive by combining the strengths of Excel and Power Query.

Empower Your Microsoft Excel Skills

There are a lot of great reasons to start using Power Query to manage your spreadsheets. If you master the basics of this program, you can create tables and work with data much easier.

Go further and build up your Microsoft Excel expertise with our articles on creating graphs from data in Microsoft Excel and analyzing data using Pivot Tables in Microsoft Excel.

Read the full article: What Is Microsoft Power Query for Excel? 5 Reasons to Start Using It


Read Full Article
Is Grammarly Premium Worth It? Here’s Everything You Need to Know


grammarly-premium-worthy

If you do a quick Google search for writing tools to improve your reports, articles, or essays, you are bound to come across Grammarly Premium.

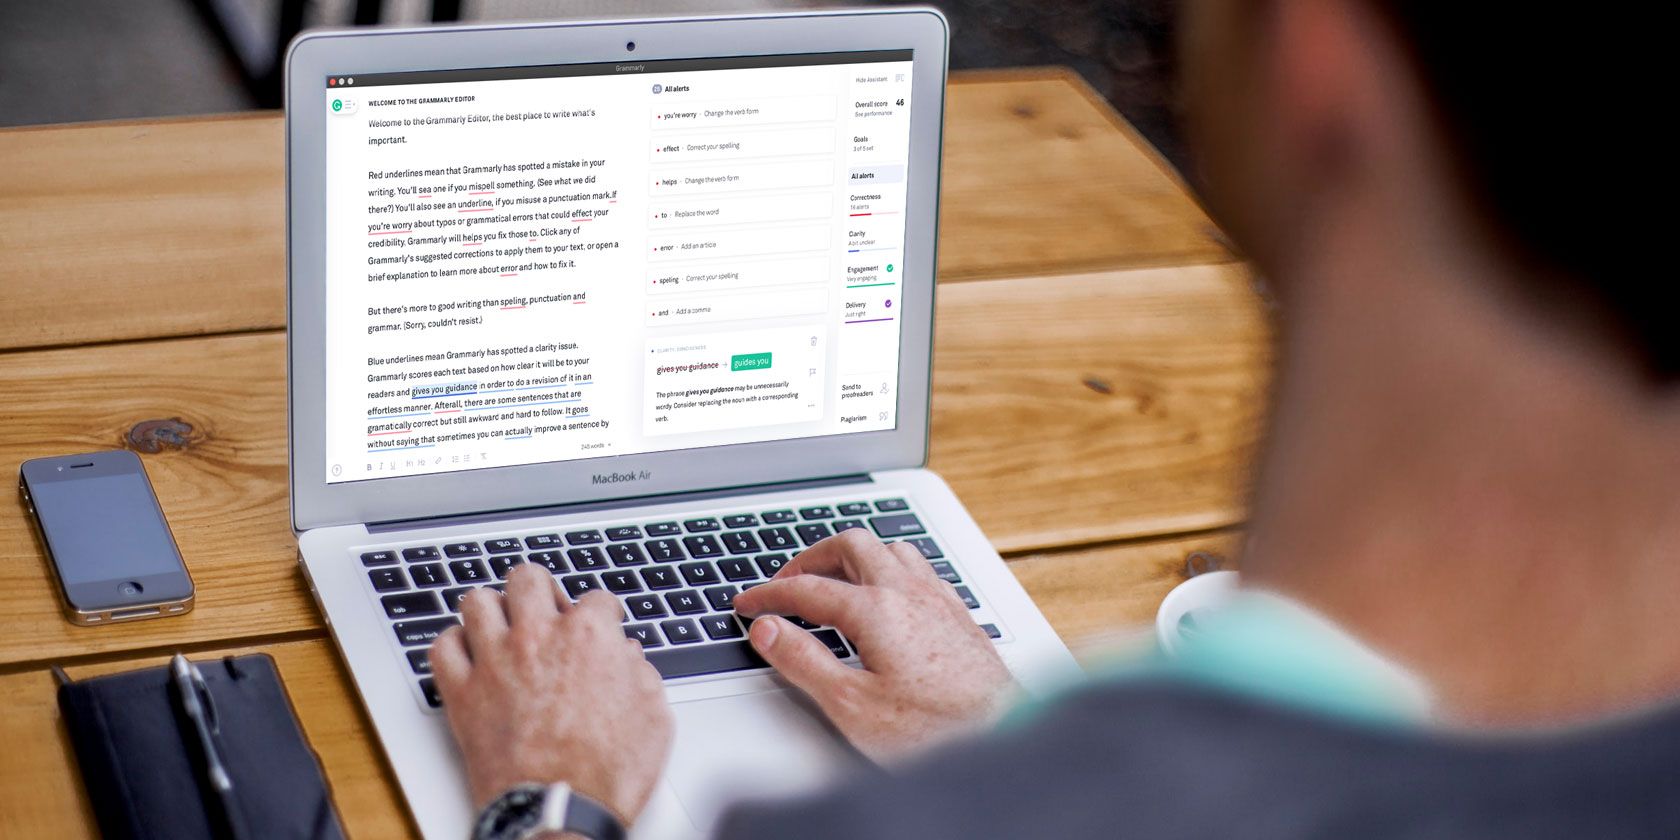
What is Grammarly? An online word checking tool that identifies spelling typos and grammar errors in a text. Grammarly comes in two flavors: Grammarly Free and Grammarly Premium, where the only difference is that Grammarly Premium contains additional features such as plagiarism detection for $29.95/mo.

How Easy Is It to Start Using Grammarly?

To use the Grammarly editor, follow these steps:

  1. Visit grammarly.com
  2. Click on Add to Chrome, or whichever web browser you use if not Chrome.
  3. Wait for the redirect to the Sign Up page
  4. After signing up, you get to see the Grammarly Menu.

Navigating the Grammarly Menu is simple:

My Grammarly

Another name for the Grammarly home page. It shows all existing documents previously edited on the app. It also offers a prompt to upload or start writing in new material.

Account

Here, you can customize your Grammarly page. It has the following subsections: Account Settings, Customize, Notifications, Subscription, and Security.

The Customize subsection allows for the inclusion of words into a personal dictionary. Such words may not be in a standard dictionary. You can also set your language preference between American English, British English, Canadian English, and Australian English.

Apps

Here, you can use platforms on which Grammarly is available for download.

Log Out

Option to sign out of the application.

Grammarly Premium

This menu item only shows when you’re on Grammarly Free, and leads to the page where you can upgrade to Grammarly Premium.

Grammarly Free vs. Grammarly Premium

The main difference between Grammarly Free and Grammarly Premium lies in the editor. Here, we’ll be using a short written essay to highlight the various features between the two options.

Grammarly Free Features

First thing, we did was upload the essay onto Grammarly.

Grammarly

After loading for a few seconds, the editor assistant popped up showing the score of the article and corrections needed.

Two things stood out: the two menus under Hide Assistant showing Overall score and Goals.

Goals

We felt that this option in the Grammarly tool was quite useful, in the sense that we were able to communicate with the software about the type of content written.

Here, you can choose the Audience you wish to address, the type of Language, the Tone of the article, and the Intent of the material. However, one option which is only available for Grammarly Premium is Domain where you choose the purpose of the article.

Performance

Grammarly

The overall performance score of the uploaded article was based upon the Word count, Readability, and Vocabulary Use.

The areas which affected the performance of the article were highlighted under alerts which were divided into Correctness, Clarity, Engagement, and Delivery.

Grammarly

We could only access the alerts for Correctness which were spelling, grammar, and punctuation checks. Gaining access to the other alerts requires upgrading to Grammarly Premium.

Grammarly Premium Features

After upgrading to Grammarly Premium, we had a blue flag appear with a new menu showing our Subscription billing period.

The layout of the premium version is pretty much the same as the free option. The significant difference lies in what you have access to.

Below is a picture of the alerts from the free option:

Grammarly Premium

We uploaded the same essay to the Premium editor, and the following happened:

Goals

The goals widget is the first thing to pop up. However, this time around, we were able to gain access to set the Domain.

The screenshot shows our selection for the article:

Grammarly

Grammarly Premium Tools

From the free option, we noted that there were 8 Premium alerts, and this is the breakdown of each:

Grammarly Premium

Correctness (4 alerts): All relating to the use of commas before the conjunction. This can be helpful for those who get confused as to where a comma or colon is needed or not needed.

Grammarly Premium

Clarity (1 alert): We were informed that our sentence might have been too wordy. That is, containing words that do not necessarily hamper the information being passed across.

Grammarly Premium

Engagement (3 alerts): Apparently, we made use of certain words a bit too much in the test article, and as such, the editor suggested replacing them with synonyms.

Plagiarism

Grammarly Premium

We decided to put the article through the plagiarism test and found out that the article had 3% plagiarism. However, when this same content was passed through Copyscape, another plagiarism checking tool, there were no results.

Human Proofreader

If the results displayed by the Grammarly editor were not to your satisfaction, Grammarly Premium also offers you the opportunity to get a human proofreader. However, this comes at an additional cost.

Grammarly Premium vs. Grammarly Free: Summary

On the one hand, you can use basic features in Grammarly Free, including:

  • Spelling edits
  • Grammar corrections
  • Punctuation suggestions

If you pay for Grammarly Premium, you unlock these features:

  • Contextual spelling correction
  • Grammar and punctuation edits
  • Sentence structure and style suggestions
  • Plagiarism detection
  • Alternative word phrasings

Is Grammarly Premium Worth It?

For any individual who works with words a lot (e.g. students, writers, professors, etc.), Grammarly is one of the best analytical writing tools to have. Why? Because political correctness in your grammar off the top of your head isn’t as easy as it seems.

With the Grammarly Premium tool, you can focus more on being creative while the app helps refine the outcome.

But every good thing has its downsides.

Although Grammarly is compatible with a lot of apps, it still has a long way to go in terms of integration with the likes of Google Docs. At the moment, only the Beta version can do that, so you can’t enjoy the Premium features while using Google Docs.

The monthly subscription price of Grammarly Premium ($29.95/mo) is a bit on the heavy side as well. For less than that, you can get 100 credits on Copyscape to run plagiarism tests on your articles. You can also make use of the free Hemingway app to check the readability of your essay, then use Grammarly Free to brush up the gaps.

The bottom line is there are other grammar and plagiarism checking tools that offer what Grammarly does at little to no cost.

Also, one thing we noticed was that the Grammarly tool missed out on some possible vocabulary enhancements. Therefore, the tool is not to be 100% relied on. But this should not be a significant problem as the creators believe Grammarly exists to make you a better writer. It’s expected that after a while, you can go on to create written content without needing Grammarly.

Proofreading Is Just as Important as Writing

The main reason why you should consider getting Grammarly Premium is to improve your writing. This ensures you can deliver the best information to your audience.

However, Grammarly is not the only editing tool you can rely upon. Check out our article on other clever writing tools to proofread your documents.

Read the full article: Is Grammarly Premium Worth It? Here’s Everything You Need to Know


Read Full Article
Cell Phone Functions


Cell Phone Functions